check engine DODGE HORNET 2023 User Guide
[x] Cancel search | Manufacturer: DODGE, Model Year: 2023, Model line: HORNET, Model: DODGE HORNET 2023Pages: 288, PDF Size: 14.2 MB
Page 77 of 288
GETTING TO KNOW YOUR INSTRUMENT PANEL75
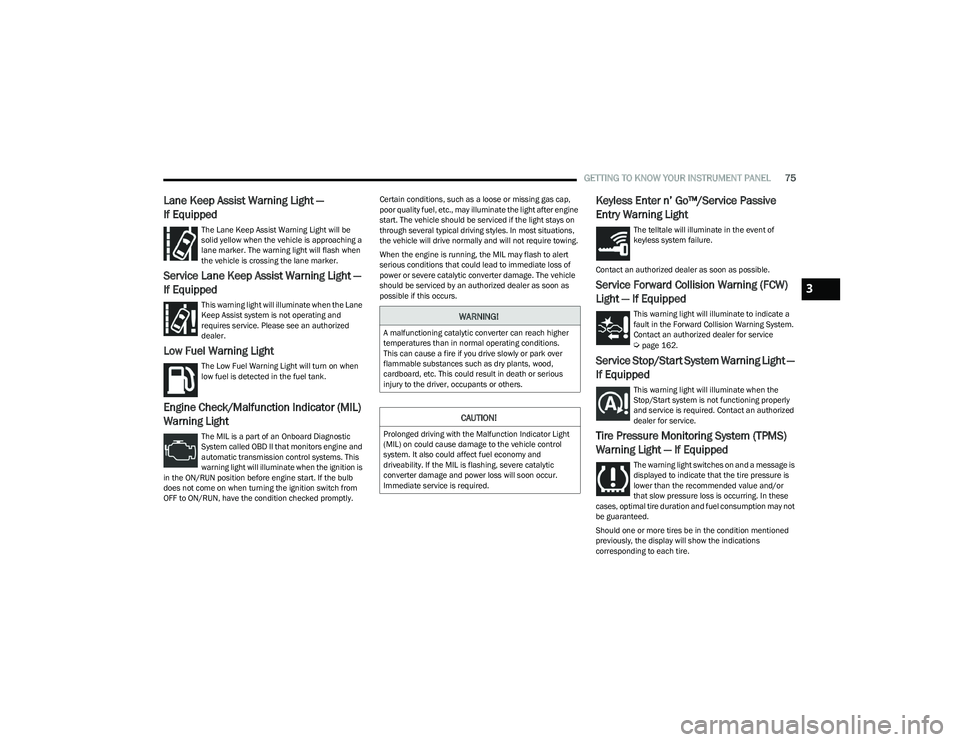
Lane Keep Assist Warning Light —
If Equipped
The Lane Keep Assist Warning Light will be
solid yellow when the vehicle is approaching a
lane marker. The warning light will flash when
the vehicle is crossing the lane marker.
Service Lane Keep Assist Warning Light —
If Equipped
This warning light will illuminate when the Lane
Keep Assist system is not operating and
requires service. Please see an authorized
dealer.
Low Fuel Warning Light
The Low Fuel Warning Light will turn on when
low fuel is detected in the fuel tank.
Engine Check/Malfunction Indicator (MIL)
Warning Light
The MIL is a part of an Onboard Diagnostic
System called OBD II that monitors engine and
automatic transmission control systems. This
warning light will illuminate when the ignition is
in the ON/RUN position before engine start. If the bulb
does not come on when turning the ignition switch from
OFF to ON/RUN, have the condition checked promptly. Certain conditions, such as a loose or missing gas cap,
poor quality fuel, etc., may illuminate the light after engine
start. The vehicle should be serviced if the light stays on
through several typical driving styles. In most situations,
the vehicle will drive normally and will not require towing.
When the engine is running, the MIL may flash to alert
serious conditions that could lead to immediate loss of
power or severe catalytic converter damage. The vehicle
should be serviced by an authorized dealer as soon as
possible if this occurs.
Keyless Enter n’ Go™/Service Passive
Entry Warning Light
The telltale will illuminate in the event of
keyless system failure.
Contact an authorized dealer as soon as possible.
Service Forward Collision Warning (FCW)
Light — If Equipped
This warning light will illuminate to indicate a
fault in the Forward Collision Warning System.
Contact an authorized dealer for service
Úpage 162.
Service Stop/Start System Warning Light —
If Equipped
This warning light will illuminate when the
Stop/Start system is not functioning properly
and service is required. Contact an authorized
dealer for service.
Tire Pressure Monitoring System (TPMS)
Warning Light — If Equipped
The warning light switches on and a message is
displayed to indicate that the tire pressure is
lower than the recommended value and/or
that slow pressure loss is occurring. In these
cases, optimal tire duration and fuel consumption may not
be guaranteed.
Should one or more tires be in the condition mentioned
previously, the display will show the indications
corresponding to each tire.
WARNING!
A malfunctioning catalytic converter can reach higher
temperatures than in normal operating conditions.
This can cause a fire if you drive slowly or park over
flammable substances such as dry plants, wood,
cardboard, etc. This could result in death or serious
injury to the driver, occupants or others.
CAUTION!
Prolonged driving with the Malfunction Indicator Light
(MIL) on could cause damage to the vehicle control
system. It also could affect fuel economy and
driveability. If the MIL is flashing, severe catalytic
converter damage and power loss will soon occur.
Immediate service is required.
3
23_GG_OM_EN_USC_t.book Page 75
Page 78 of 288
76GETTING TO KNOW YOUR INSTRUMENT PANEL
Each tire, including the spare (if provided), should be
checked monthly when cold and inflated to the inflation
pressure recommended by the vehicle manufacturer on
the vehicle placard or tire inflation pressure label. If your
vehicle has tires of a different size than the size indicated
on the vehicle placard or tire inflation pressure label, you
should determine the proper tire inflation pressure for
those tires.
As an added safety feature, your vehicle has been equipped
with a TPMS that illuminates a low tire pressure telltale
when one or more of your tires is significantly underinflated.
Accordingly, when the low tire pressure telltale illuminates,
you should stop and check your tires as soon as possible,
and inflate them to the proper pressure. Driving on a
significantly underinflated tire causes the tire to overheat
and can lead to tire failure. Underinflation also reduces fuel
efficiency and tire tread life, and may affect the vehicle’s
handling and stopping ability.
Please note that the TPMS is not a substitute for proper
tire maintenance, and it is the driver’s responsibility to
maintain correct tire pressure, even if underinflation has
not reached the level to trigger illumination of the TPMS
low tire pressure telltale. Your vehicle has also been equipped with a TPMS
malfunction indicator to indicate when the system is not
operating properly. The TPMS malfunction indicator is
combined with the low tire pressure telltale. When the
system detects a malfunction, the telltale will flash for
approximately one minute and then remain continuously
illuminated. This sequence will continue upon subsequent
vehicle start-ups as long as the malfunction exists. When
the malfunction indicator is illuminated, the system may
not be able to detect or signal low tire pressure as
intended. TPMS malfunctions may occur for a variety of
reasons, including the installation of replacement or
alternate tires or wheels on the vehicle that prevent the
TPMS from functioning properly. Always check the TPMS
malfunction telltale after replacing one or more tires or
wheels on your vehicle to ensure that the replacement or
alternate tires and wheels allow the TPMS to continue to
function properly.
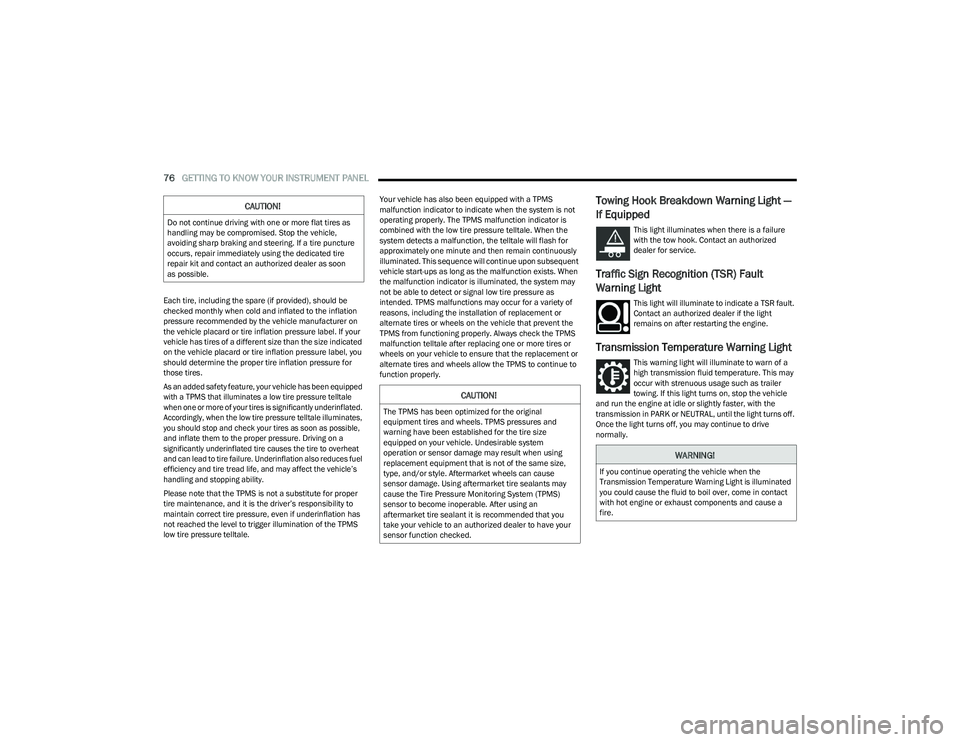
Towing Hook Breakdown Warning Light —
If Equipped
This light illuminates when there is a failure
with the tow hook. Contact an authorized
dealer for service.
Traffic Sign Recognition (TSR) Fault
Warning Light
This light will illuminate to indicate a TSR fault.
Contact an authorized dealer if the light
remains on after restarting the engine.
Transmission Temperature Warning Light
This warning light will illuminate to warn of a
high transmission fluid temperature. This may
occur with strenuous usage such as trailer
towing. If this light turns on, stop the vehicle
and run the engine at idle or slightly faster, with the
transmission in PARK or NEUTRAL, until the light turns off.
Once the light turns off, you may continue to drive
normally.
CAUTION!
Do not continue driving with one or more flat tires as
handling may be compromised. Stop the vehicle,
avoiding sharp braking and steering. If a tire puncture
occurs, repair immediately using the dedicated tire
repair kit and contact an authorized dealer as soon
as possible.
CAUTION!
The TPMS has been optimized for the original
equipment tires and wheels. TPMS pressures and
warning have been established for the tire size
equipped on your vehicle. Undesirable system
operation or sensor damage may result when using
replacement equipment that is not of the same size,
type, and/or style. Aftermarket wheels can cause
sensor damage. Using aftermarket tire sealants may
cause the Tire Pressure Monitoring System (TPMS)
sensor to become inoperable. After using an
aftermarket tire sealant it is recommended that you
take your vehicle to an authorized dealer to have your
sensor function checked.
WARNING!
If you continue operating the vehicle when the
Transmission Temperature Warning Light is illuminated
you could cause the fluid to boil over, come in contact
with hot engine or exhaust components and cause a
fire.
23_GG_OM_EN_USC_t.book Page 76
Page 79 of 288
GETTING TO KNOW YOUR INSTRUMENT PANEL77
YELLOW INDICATOR LIGHTS
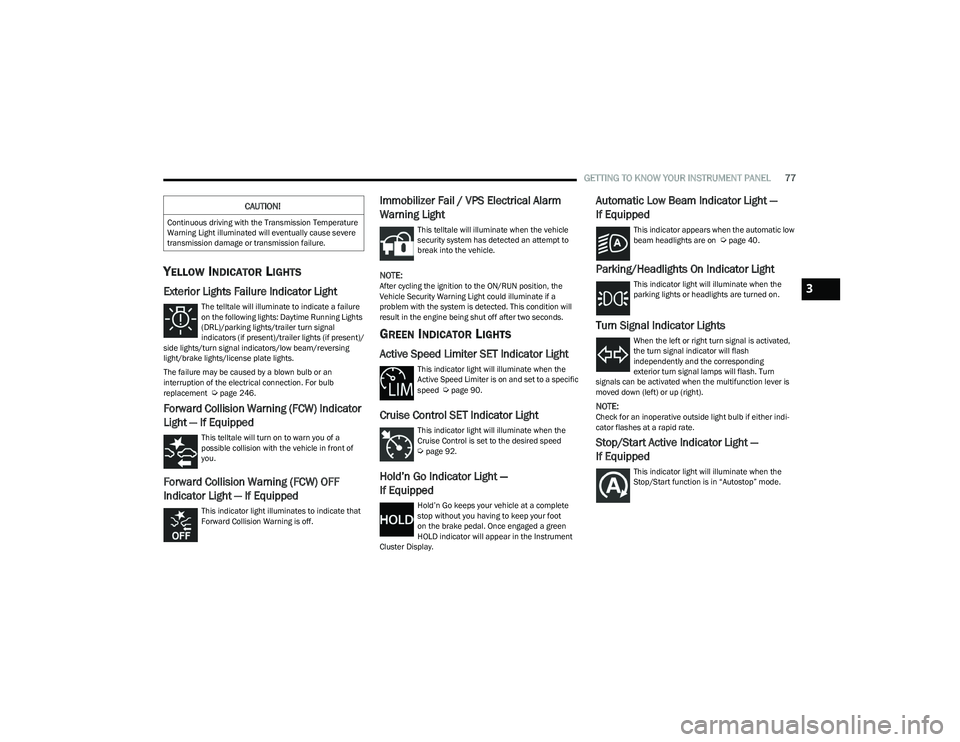
Exterior Lights Failure Indicator Light
The telltale will illuminate to indicate a failure
on the following lights: Daytime Running Lights
(DRL)/parking lights/trailer turn signal
indicators (if present)/trailer lights (if present)/
side lights/turn signal indicators/low beam/reversing
light/brake lights/license plate lights.
The failure may be caused by a blown bulb or an
interruption of the electrical connection. For bulb
replacement
Úpage 246.
Forward Collision Warning (FCW) Indicator
Light — If Equipped
This telltale will turn on to warn you of a
possible collision with the vehicle in front of
you.
Forward Collision Warning (FCW) OFF
Indicator Light — If Equipped
This indicator light illuminates to indicate that
Forward Collision Warning is off.
Immobilizer Fail / VPS Electrical Alarm
Warning Light
This telltale will illuminate when the vehicle
security system has detected an attempt to
break into the vehicle.
NOTE:After cycling the ignition to the ON/RUN position, the
Vehicle Security Warning Light could illuminate if a
problem with the system is detected. This condition will
result in the engine being shut off after two seconds.
GREEN INDICATOR LIGHTS
Active Speed Limiter SET Indicator Light
This indicator light will illuminate when the
Active Speed Limiter is on and set to a specific
speed
Úpage 90.
Cruise Control SET Indicator Light
This indicator light will illuminate when the
Cruise Control is set to the desired speed
Úpage 92.
Hold’n Go Indicator Light —
If Equipped
Hold’n Go keeps your vehicle at a complete
stop without you having to keep your foot
on the brake pedal. Once engaged a green
HOLD indicator will appear in the Instrument
Cluster Display.
Automatic Low Beam Indicator Light —
If Equipped
This indicator appears when the automatic low
beam headlights are on Úpage 40.
Parking/Headlights On Indicator Light
This indicator light will illuminate when the
parking lights or headlights are turned on.
Turn Signal Indicator Lights
When the left or right turn signal is activated,
the turn signal indicator will flash
independently and the corresponding
exterior turn signal lamps will flash. Turn
signals can be activated when the multifunction lever is
moved down (left) or up (right).
NOTE:Check for an inoperative outside light bulb if either indi -
cator flashes at a rapid rate.
Stop/Start Active Indicator Light —
If Equipped
This indicator light will illuminate when the
Stop/Start function is in “Autostop” mode.
CAUTION!
Continuous driving with the Transmission Temperature
Warning Light illuminated will eventually cause severe
transmission damage or transmission failure.
3
23_GG_OM_EN_USC_t.book Page 77
Page 81 of 288
GETTING TO KNOW YOUR INSTRUMENT PANEL79
ONBOARD DIAGNOSTIC SYSTEM (OBD II)
C
YBERSECURITY
Your vehicle is required to have an OBD II and a
connection port to allow access to information related to
the performance of your emissions controls. Authorized
service technicians may need to access this information to
assist with the diagnosis and service of your vehicle and
emissions system.
EMISSIONS INSPECTION AND
MAINTENANCE PROGRAMS
In some localities, it may be a legal requirement to pass an
inspection of your vehicle's emissions control system.
Failure to pass could prevent vehicle registration.
For states that require an Inspection and
Maintenance (I/M), this check verifies the
Malfunction Indicator Light (MIL) is functioning
and is not on when the engine is running, and
that the OBD II system is ready for testing.
Normally, the OBD II system will be ready. The OBD II
system may not be ready if your vehicle was recently
serviced, recently had a depleted battery or a battery
replacement. If the OBD II system should be determined
not ready for the I/M test, your vehicle may fail the test.
Your vehicle has a simple ignition actuated test, which you
can use prior to going to the test station. To check if your
vehicle's OBD II system is ready, you must do the following:
1. Cycle the ignition switch to the ON position, but do not crank or start the engine.
NOTE:If you crank or start the engine, you will have to start this
test over. 2. As soon as you cycle the ignition switch to the
ON position, you will see the Malfunction Indicator
Light (MIL) symbol come on as part of a normal
bulb check.
3. Approximately 15 seconds later, one of two things will happen:
The MIL will flash for about 10 seconds and then
return to being fully illuminated until you turn OFF
the ignition or start the engine. This means that
your vehicle's OBD II system is not ready and you
should not proceed to the I/M station.
The MIL will not flash at all and will remain fully illu -
minated until you place the ignition in the off posi -
tion or start the engine. This means that your
vehicle's OBD II system is ready and you can
proceed to the I/M station.
If your OBD II system is not ready, you should see an
authorized dealer or repair facility. If your vehicle was
recently serviced or had a battery failure or replacement,
you may need to do nothing more than drive your vehicle
as you normally would in order for your OBD II system to
update. A recheck with the previously mentioned test
routine may then indicate that the system is now ready.
Regardless of whether your vehicle's OBD II system is
ready or not, if the MIL is illuminated during normal vehicle
operation you should have your vehicle serviced before
going to the I/M station. The I/M station can fail your
vehicle because the MIL is on with the engine running.
WARNING!
ONLY an authorized service technician should
connect equipment to the OBD II connection port in
order to read the VIN, diagnose, or service your
vehicle.
If unauthorized equipment is connected to the OBD II
connection port, such as a driver-behavior tracking
device, it may:
Be possible that vehicle systems, including
safety related systems, could be impaired or a
loss of vehicle control could occur that may
result in an accident involving serious injury or
death.
Access, or allow others to access, information
stored in your vehicle systems, including
personal information.
3
23_GG_OM_EN_USC_t.book Page 79
Page 87 of 288
STARTING AND OPERATING85
(Continued)
(Continued)
When Brake Service Mode work is complete, the following
steps must be followed to reset the parking brake system
to normal operation:
Ensure the vehicle is at a standstill.
Press the brake pedal with moderate force.
Apply the EPB Switch.
NOTE:A dedicated message will appear in the instrument cluster
display if Brake Service Mode cannot be deactivated.
AUTOMATIC TRANSMISSION
You must press and hold the brake pedal while shifting out
of PARK.
WARNING!
You can be badly injured working on or around a motor
vehicle. Do only that service work for which you have
the knowledge and the right equipment. If you have any
doubt about your ability to perform a service job, take
your vehicle to a competent mechanic.
WARNING!
Never use the PARK (P) position as a substitute for
the parking brake. Always apply the parking brake
fully when exiting the vehicle to guard against vehicle
movement and possible injury or damage.
Your vehicle could move and injure you and others if
it is not in PARK. Check by trying to move the gear
selector out of PARK with the brake pedal released.
Make sure the transmission is in PARK before exiting
the vehicle.
It is dangerous to shift out of PARK or NEUTRAL (N) if
the engine speed is higher than idle speed. If your
foot is not firmly pressing the brake pedal, the
vehicle could accelerate quickly forward or in
reverse. You could lose control of the vehicle and hit
someone or something. Only shift into gear when the
engine is idling normally and your foot is firmly
pressing the brake pedal.
The vehicle may not engage a newly selected gear
when shifting between PARK, REVERSE (R), or
DRIVE (D) if the vehicle is moving while shifting.
Unintended movement of a vehicle could injure
those in or near the vehicle. As with all vehicles, you
should never exit a vehicle while the engine is
running. Before exiting a vehicle, always come to a
complete stop, then apply the parking brake, shift
the transmission into PARK, and turn the ignition
OFF. When the ignition is in the OFF position, the
transmission is locked in PARK, securing the vehicle
against unwanted movement.
When leaving the vehicle, always make sure the igni -
tion is in the OFF position, remove the key fob from
the vehicle, and lock the vehicle.
WARNING!
Never leave children alone in a vehicle, or with
access to an unlocked vehicle. Allowing children to
be in a vehicle unattended is dangerous for a
number of reasons. A child or others could be seri -
ously or fatally injured. Children should be warned
not to touch the parking brake, brake pedal or the
transmission gear selector.
Do not leave the key fob in or near the vehicle (or in
a location accessible to children), and do not leave
the ignition in the ON/RUN position. A child could
operate power windows, other controls, or move the
vehicle.
CAUTION!
Damage to the transmission may occur if the following
precautions are not observed:
Shift into or out of PARK or REVERSE only after the
vehicle has come to a complete stop.
Do not shift between PARK, REVERSE, NEUTRAL, or
DRIVE when the engine is above idle speed.
Before shifting into any gear, make sure your foot is
firmly pressing the brake pedal.
WARNING!
4
23_GG_OM_EN_USC_t.book Page 85
Page 91 of 288
STARTING AND OPERATING89
If the “POWER STEERING SYSTEM HOT -
PERFORMANCE MAY BE LIMITED” message
and a steering wheel icon display on the
instrument cluster, it indicates that extreme
steering maneuvers may have occurred, which caused an
over temperature condition in the electric power steering
system. You will lose power steering assistance
momentarily until the over temperature condition no
longer exists. Once driving conditions are safe, pull over
and let the vehicle idle for a few moments until the light
turns off
Úpage 66.
NOTE:
Even if the power steering system is no longer opera -
tional, it is still possible to steer the vehicle. Under
these conditions there will be a substantial increase in
steering effort, especially at low speeds and during
parking maneuvers.
If the condition persists, see an authorized dealer for
service.
STOP/START SYSTEM — IF EQUIPPED
The Stop/Start function is designed to reduce fuel
consumption. The system will stop the engine
automatically during a vehicle stop if the required
conditions are met. Releasing the brake pedal or pressing
the accelerator pedal will automatically restart the engine.
This vehicle has been upgraded with a heavy-duty starter,
enhanced battery, and other upgraded engine parts, to
handle the additional engine starts.
AUTOSTOP MODE
The Stop/Start feature is enabled after every normal
customer engine start. At that time, the system will go into
STOP/START READY.
To Activate The Autostop Mode, The Following Must Occur:
The system must be in STOP/START READY state. A
“STOP/START READY” message will be displayed in the
instrument cluster display within the Stop/Start
section
Úpage 66.
The vehicle must be completely stopped.
The gear selector must be in a forward gear and the
brake pedal pressed.
The engine will shut down, the tachometer will move to the
zero position, and the Stop/Start telltale will illuminate
indicating you are in Autostop. Customer settings will be
maintained upon return to an engine-running condition.
POSSIBLE REASONS THE ENGINE DOES
N
OT AUTOSTOP
Prior to engine shut down, the system will check many
safety and comfort conditions to see if they are fulfilled.
Detailed information about the operation of the Stop/Start
system may be viewed in the instrument cluster display
Stop/Start Screen. In the following situations the engine
will not stop:
Driver’s seat belt is not buckled.
Driver’s door is not closed.
Battery temperature is too warm or cold.
Battery charge is low.
The vehicle is on a steep grade.
Cabin heating or cooling is in process and an accept -
able cabin temperature has not been achieved.
HVAC is set to full defrost mode at a high blower speed.
HVAC is set to MAX A/C.
Engine has not reached normal operating temperature.
The transmission is not in a forward gear.
Hood is open.
Brake pedal is not pressed with sufficient pressure.
Accelerator pedal input.
Engine temperature is too high.
5 mph (8 km/h) threshold has not been achieved from
previous Autostop.
Steering angle beyond threshold.
Adaptive Cruise Control is on and speed is set.
It may be possible for the vehicle to be driven several
times without the Stop/Start system going into a STOP/
START READY state under more extreme conditions of the
items listed previously.
4
23_GG_OM_EN_USC_t.book Page 89
Page 92 of 288
90STARTING AND OPERATING
TO START THE ENGINE WHILE IN
A
UTOSTOP MODE
While in a forward gear, the engine will start when the
brake pedal is released or the accelerator pedal is
pressed. The transmission will automatically re-engage
upon engine restart.
Conditions That Will Cause The Engine To Start
Automatically While In Autostop Mode:
The transmission selector is moved out of DRIVE (D).
To maintain cabin temperature comfort.
HVAC is set to full defrost mode.
HVAC system temperature or fan speed is manually
adjusted.
Battery voltage drops too low.
Stop/Start OFF switch is pressed.
A Stop/Start system error occurs.
Steering wheel is turned beyond threshold.
Conditions That Force An Application Of The Electric Park
Brake While In Autostop Mode:
The driver’s door is open and brake pedal released.
The driver’s door is open and the driver’s seat belt is
unbuckled.
The engine hood has been opened.
A Stop/Start system error occurs.
If the Electric Park Brake (EPB) is applied with the engine
off, the engine may require a manual restart and the EPB
may require a manual release (press brake pedal and
press EPB switch)
Úpage 66.
TO MANUALLY TURN OFF THE STOP/
S
TART SYSTEM
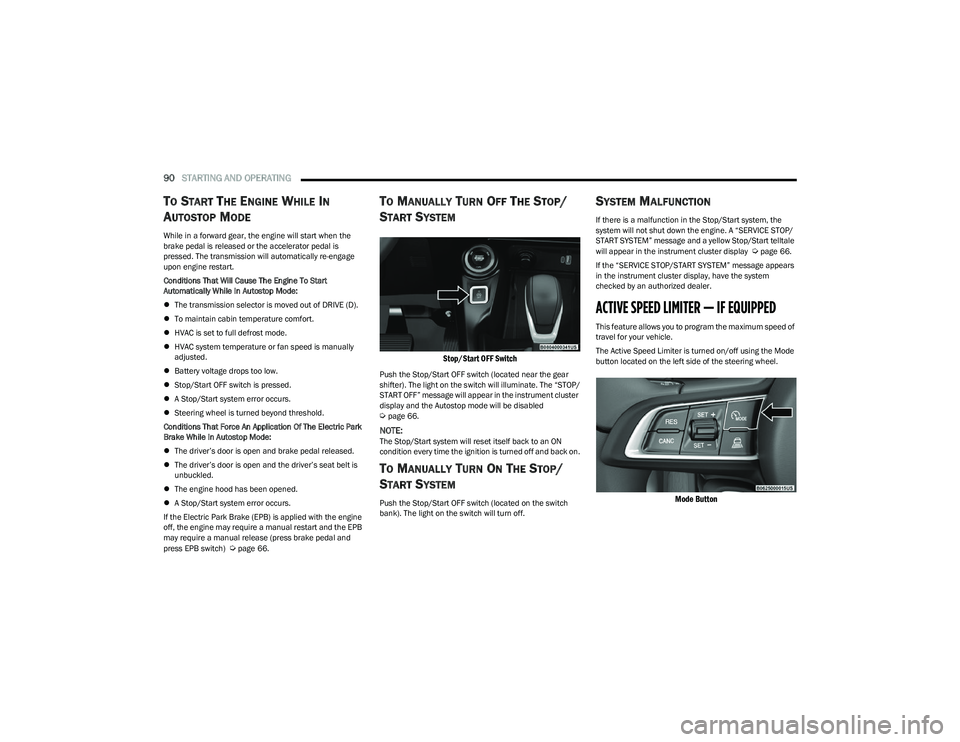
Stop/Start OFF Switch
Push the Stop/Start OFF switch (located near the gear
shifter). The light on the switch will illuminate. The “STOP/
START OFF” message will appear in the instrument cluster
display and the Autostop mode will be disabled
Úpage 66.
NOTE:The Stop/Start system will reset itself back to an ON
condition every time the ignition is turned off and back on.
TO MANUALLY TURN ON THE STOP/
S
TART SYSTEM
Push the Stop/Start OFF switch (located on the switch
bank). The light on the switch will turn off.
SYSTEM MALFUNCTION
If there is a malfunction in the Stop/Start system, the
system will not shut down the engine. A “SERVICE STOP/
START SYSTEM” message and a yellow Stop/Start telltale
will appear in the instrument cluster display
Úpage 66.
If the “SERVICE STOP/START SYSTEM” message appears
in the instrument cluster display, have the system
checked by an authorized dealer.
ACTIVE SPEED LIMITER — IF EQUIPPED
This feature allows you to program the maximum speed of
travel for your vehicle.
The Active Speed Limiter is turned on/off using the Mode
button located on the left side of the steering wheel.
Mode Button
23_GG_OM_EN_USC_t.book Page 90
Page 130 of 288
128STARTING AND OPERATING
(Continued)
DRIVING THROUGH WATER
Driving through water more than a few inches/
centimeters deep will require extra caution to ensure
safety and prevent damage to your vehicle.
Flowing/Rising Water
Shallow Standing Water
Although your vehicle is capable of driving through shallow
standing water, consider the following Cautions and
Warnings before doing so.
WARNING!
Do not drive on or across a road or path where water is
flowing and/or rising (as in storm run-off). Flowing water
can wear away the road or path's surface and cause
your vehicle to sink into deeper water. Furthermore,
flowing and/or rising water can carry your vehicle away
swiftly. Failure to follow this warning may result in
injuries that are serious or fatal to you, your
passengers, and others around you.
CAUTION!
Always check the depth of the standing water before
driving through it. Never drive through standing
water that is deeper than the bottom of the tire rims
mounted on the vehicle.
Determine the condition of the road or the path that
is under water and if there are any obstacles in the
way before driving through the standing water.
Do not exceed 5 mph (8 km/h) when driving through
standing water. This will minimize wave effects.
Driving through standing water may cause damage
to your vehicle’s drivetrain components. Always
inspect your vehicle’s fluids (i.e., engine oil, transmis -
sion, axle, etc.) for signs of contamination (i.e., fluid
that is milky or foamy in appearance) after driving
through standing water. Do not continue to operate
the vehicle if any fluid appears contaminated, as this
may result in further damage. Such damage is not
covered by the New Vehicle Limited Warranty.
Getting water inside your vehicle’s engine can cause
it to lock up and stall out, and cause serious internal
damage to the engine. Such damage is not covered
by the New Vehicle Limited Warranty.
CAUTION!
23_GG_OM_EN_USC_t.book Page 128
Page 138 of 288
136MULTIMEDIA
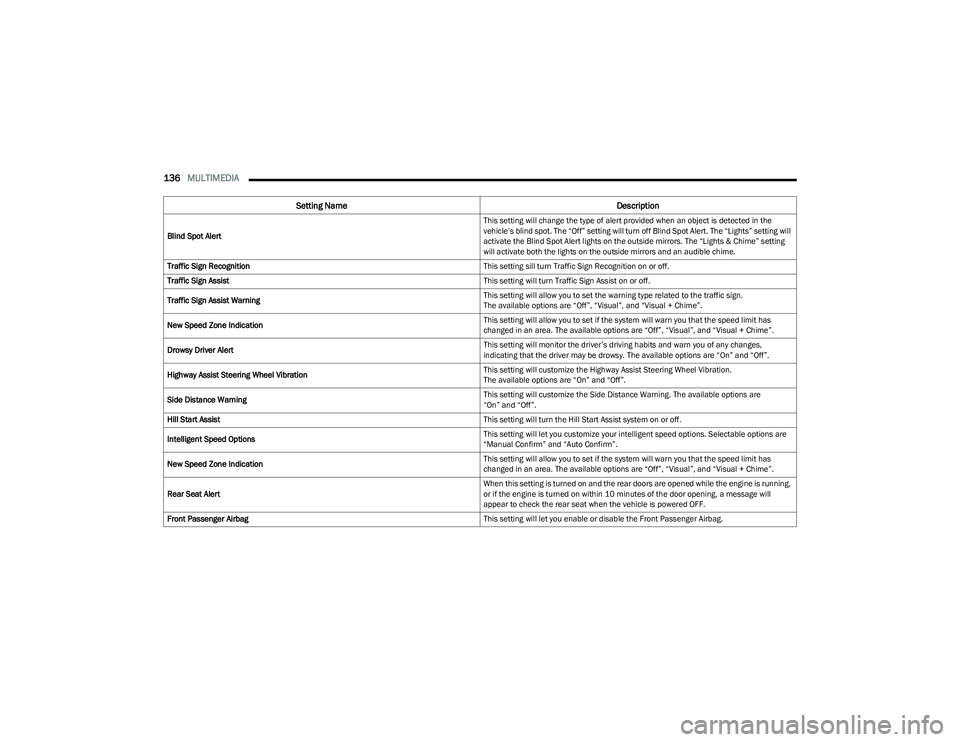
Blind Spot Alert This setting will change the type of alert provided when an object is detected in the
vehicle’s blind spot. The “Off” setting will turn off Blind Spot Alert. The “Lights” setting will
activate the Blind Spot Alert lights on the outside mirrors. The “Lights & Chime” setting
will activate both the lights on the outside mirrors and an audible chime.
Traffic Sign Recognition This setting sill turn Traffic Sign Recognition on or off.
Traffic Sign Assist This setting will turn Traffic Sign Assist on or off.
Traffic Sign Assist Warning This setting will allow you to set the warning type related to the traffic sign.
The available options are “Off”, “Visual”, and “Visual + Chime”.
New Speed Zone Indication This setting will allow you to set if the system will warn you that the speed limit has
changed in an area. The available options are “Off”, “Visual”, and “Visual + Chime”.
Drowsy Driver Alert This setting will monitor the driver’s driving habits and warn you of any changes,
indicating that the driver may be drowsy. The available options are “On” and “Off”.
Highway Assist Steering Wheel Vibration This setting will customize the Highway Assist Steering Wheel Vibration.
The available options are “On” and “Off”.
Side Distance Warning This setting will customize the Side Distance Warning. The available options are
“On” and “Off”.
Hill Start Assist This setting will turn the Hill Start Assist system on or off.
Intelligent Speed Options This setting will let you customize your intelligent speed options. Selectable options are
“Manual Confirm” and “Auto Confirm”.
New Speed Zone Indication This setting will allow you to set if the system will warn you that the speed limit has
changed in an area. The available options are “Off”, “Visual”, and “Visual + Chime”.
Rear Seat Alert When this setting is turned on and the rear doors are opened while the engine is running,
or if the engine is turned on within 10 minutes of the door opening, a message will
appear to check the rear seat when the vehicle is powered OFF.
Front Passenger Airbag This setting will let you enable or disable the Front Passenger Airbag.
Setting NameDescription
23_GG_OM_EN_USC_t.book Page 136
Page 178 of 288
176SAFETY
Air Bag Warning Light
The Occupant Restraint Controller (ORC)
monitors the readiness of the electronic parts
of the air bag system whenever the ignition
switch is in the START or ON/RUN position.
If the ignition switch is in the OFF position, the air bag
system is not on and the air bags will not inflate.
The ORC contains a backup power supply system that may
deploy the air bag system even if the battery loses power
or it becomes disconnected prior to deployment.
The ORC turns on the Air Bag Warning Light in the
instrument panel for approximately four to eight seconds
for a self-check when the ignition switch is first in the ON/
RUN position. After the self-check, the Air Bag Warning
Light will turn off. If the ORC detects a malfunction in any
part of the system, it turns on the Air Bag Warning Light,
either momentarily or continuously. A single chime will
sound to alert you if the light comes on again after initial
startup.
The ORC also includes diagnostics that will illuminate the
instrument panel Air Bag Warning Light if a malfunction is
detected that could affect the air bag system. The
diagnostics also record the nature of the malfunction.
While the air bag system is designed to be maintenance
free, if any of the following occurs, have an authorized
dealer service the air bag system immediately.
The Air Bag Warning Light does not come on during the
four to eight seconds when the ignition switch is first in
the ON/RUN position.
The Air Bag Warning Light remains on after the four to
eight-second interval.
The Air Bag Warning Light comes on intermittently or
remains on while driving.
NOTE:If the speedometer, tachometer, or any engine related
gauges are not working, the Occupant Restraint Controller
(ORC) may also be disabled. In this condition the air bags
may not be ready to inflate for your protection. Have an
authorized dealer service the air bag system immediately.
Redundant Air Bag Warning Light
If a fault with the Air Bag Warning Light is
detected, which could affect the Supplemental
Restraint System (SRS), the Redundant Air Bag
Warning Light will illuminate on the instrument
panel. The Redundant Air Bag Warning Light will stay on
until the fault is cleared. In addition, a single chime will
sound to alert you that the Redundant Air Bag Warning
Light has come on and a fault has been detected. If the Redundant Air Bag Warning Light comes on
intermittently or remains on while driving have an
authorized dealer service the vehicle immediately
Úpage 71.
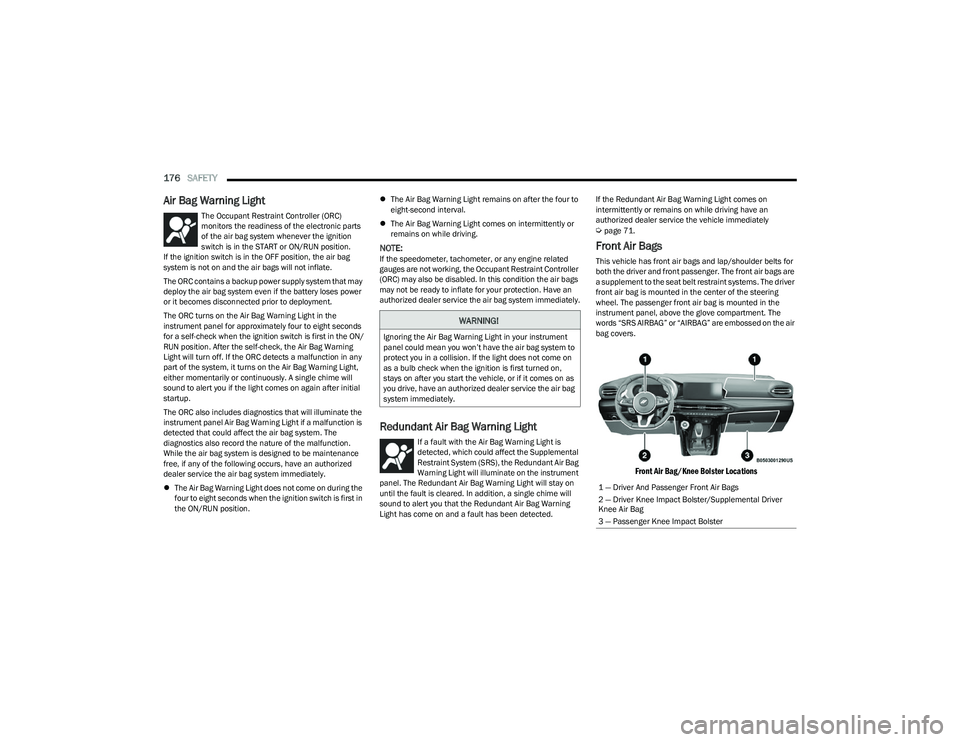
Front Air Bags
This vehicle has front air bags and lap/shoulder belts for
both the driver and front passenger. The front air bags are
a supplement to the seat belt restraint systems. The driver
front air bag is mounted in the center of the steering
wheel. The passenger front air bag is mounted in the
instrument panel, above the glove compartment. The
words “SRS AIRBAG” or “AIRBAG” are embossed on the air
bag covers.
Front Air Bag/Knee Bolster Locations
WARNING!
Ignoring the Air Bag Warning Light in your instrument
panel could mean you won’t have the air bag system to
protect you in a collision. If the light does not come on
as a bulb check when the ignition is first turned on,
stays on after you start the vehicle, or if it comes on as
you drive, have an authorized dealer service the air bag
system immediately.
1 — Driver And Passenger Front Air Bags
2 — Driver Knee Impact Bolster/Supplemental Driver
Knee Air Bag
3 — Passenger Knee Impact Bolster
23_GG_OM_EN_USC_t.book Page 176