DODGE INTREPID 2004 2.G Owners Manual
Manufacturer: DODGE, Model Year: 2004, Model line: INTREPID, Model: DODGE INTREPID 2004 2.GPages: 249, PDF Size: 4.87 MB
Page 131 of 249
WARNING!
Never use the Park position as a substitute for the
parking brake. Always apply the parking brake fully
when parked to guard against vehicle movement and
possible injury or damage.
“R” Reverse
Shift into this range only after the vehicle has come to a
complete stop.
“N” Neutral
The engine may be started in this range. Use this range
for starting your vehicle if it is moving or is being towed.
Overdrive
This range should be used for most city and highway
driving. It provides smoothest up shifts and down shifts
and best fuel economy.
When frequent transaxle shifting occurs when using the
Overdrive range, such as when operating the vehicleunder heavy loading conditions (in hilly terrain, travel-
ing into strong head winds, or while towing heavy
trailers, use the “3” range).
“3” Drive
This range eliminates shifts into Overdrive. The transaxle
will operate normally in first and second while in this
range.
A delayed shift from second to third will occur at speeds
of about 31 to 38 mph (50 to 60 km/h) and low levels of
accelerator pedal travel. An early down-shift from third
to second will occur at a speed of about 34 to 30 mph (54
to 48 km/h). This is done to provide second gear engine
braking at speeds less than 30 mph (48 km/h).
NOTE:Using the “3” range while operating the vehicle
under heavy operating conditions will improve perfor-
mance, fuel economy, and extend transaxle life by reduc-
ing excessive shifting and heat build up.
Use the “3” range when descending steep grades to
prevent brake system distress.
STARTING AND OPERATING 131
5
Page 132 of 249
“L” Low
This range should be used for maximum engine braking
when descending steep grades. In this range, up-shifts
will occur only to prevent engine over speed while down
shifts occur as early as possible.
PARKING BRAKE
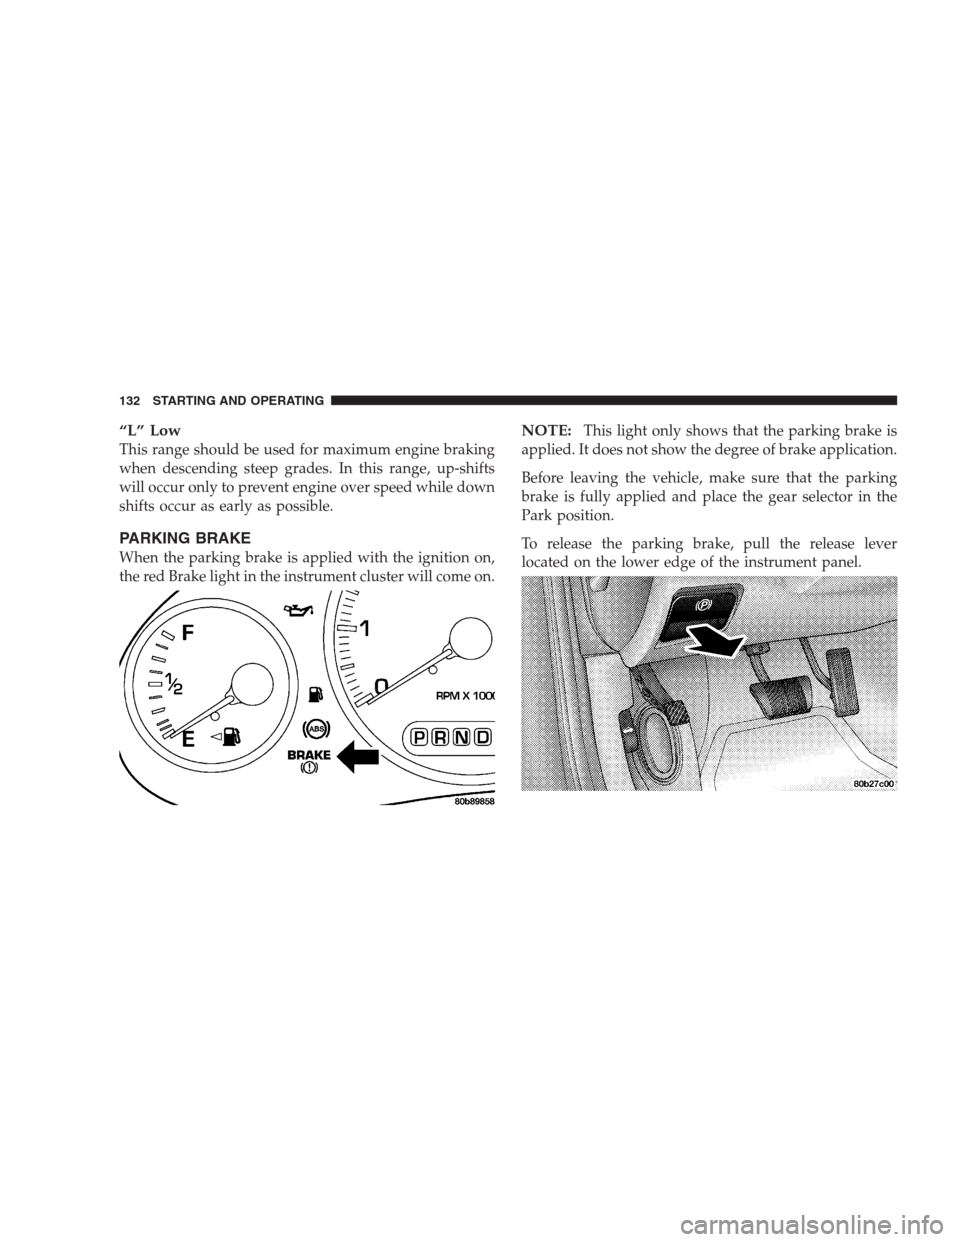
When the parking brake is applied with the ignition on,
the red Brake light in the instrument cluster will come on.
NOTE:This light only shows that the parking brake is
applied. It does not show the degree of brake application.
Before leaving the vehicle, make sure that the parking
brake is fully applied and place the gear selector in the
Park position.
To release the parking brake, pull the release lever
located on the lower edge of the instrument panel.
132 STARTING AND OPERATING
Page 133 of 249
When parking on a hill, you must set the parking brake
beforeplacing the gear selector in Park. If you don’t, the
load on the transmission locking mechanism may make it
difficult to move the selector out of Park. As an added
precaution, turn the front wheels toward the curb on a
downhill grade and away from the curb on an uphill
grade.
The parking brake should always be applied when the
driver is not in the vehicle.WARNING!
•Leaving children in a vehicle unattended is dan-
gerous for several reasons. A child or others could
be injured. Children should be warned not to
touch the parking brake or the gear selector. Don’t
leave the keys in the ignition. A child could
operate power windows, other controls, or move
the vehicle.
•Be sure the parking brake is fully disengaged
before driving; failure to do so can lead to brake
failure and an accident.
STARTING AND OPERATING 133
5
Page 134 of 249
BRAKE SYSTEM
Your vehicle is equipped with power brakes as standard
equipment. In the event you lose power assist for any
reason (for example, repeated brake applications with the
engine off), the brakes will still function. The effort
required to brake the vehicle will be substantially in-
creased over that required with the power system oper-
ating.
If either of the two hydraulic systems lose normal capa-
bility, the remaining system will still function with some
loss of overall braking effectiveness. This will be evident
by increased pedal travel during application, greater
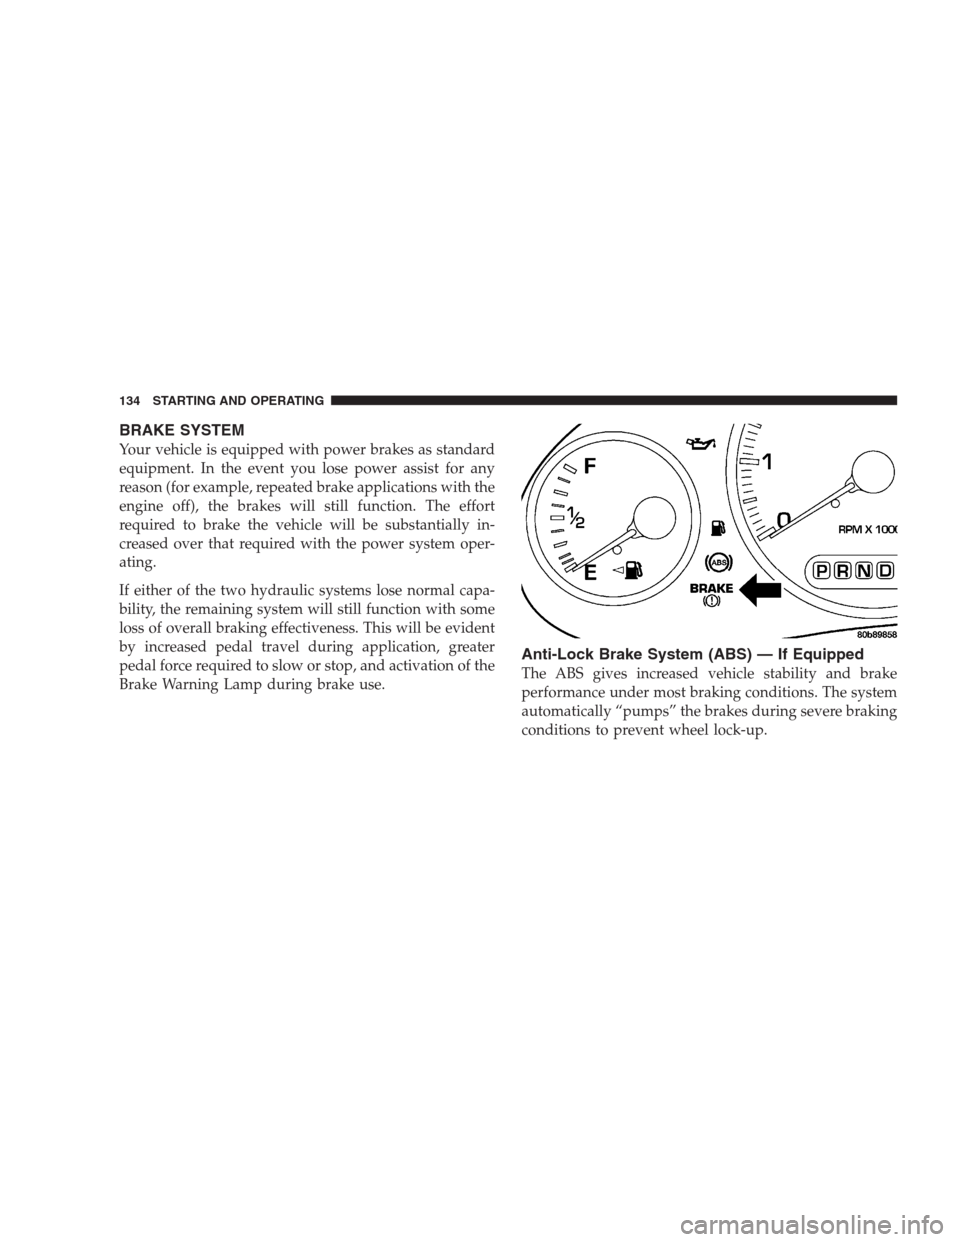
pedal force required to slow or stop, and activation of the
Brake Warning Lamp during brake use.
Anti-Lock Brake System (ABS) — If Equipped
The ABS gives increased vehicle stability and brake
performance under most braking conditions. The system
automatically “pumps” the brakes during severe braking
conditions to prevent wheel lock-up.
134 STARTING AND OPERATING
Page 135 of 249
All vehicle wheels and tires must be the same size and
tires must be properly inflated to produce accurate
signals for the ABS computer. However, the system will
compensate when the compact spare is in use.
During stops where ABS is activated, a vibration of the
brake pedal may be felt and associated system noises
may be heard.
WARNING!
Pumping of the brake pedal will diminish the effec-
tiveness of Anti-lock brakes and may lead to an
accident. Pumping makes the stopping distance
longer. Just press firmly on your brake pedal when
you need to slow down or stop.
POWER STEERING
Your vehicle is equipped with power assisted steering as
standard equipment. The power assisted steering system
of your vehicle provides mechanical steering capability
in the event power assist is lost.
If for some reason the hydraulic pressure is interrupted,
it will still be possible to steer your vehicle. Under these
conditions you will observe a substantial increase in
steering effort.
TRACTION CONTROL— IF EQUIPPED
The Traction Control System reduces wheel slip and
maintains traction at the driving (front) wheels. The
system reduces wheel slip by engaging the brake on the
wheel that is losing traction while spinning. The traction
system operates at speeds below 35 mph (56 km/h).
The system is always in the “stand by” mode unless:
•The Traction Control switch has been used to turn the
system off;
•There is a Anti-Lock Brake System malfunction;
•There is a Traction Control System malfunction;
STARTING AND OPERATING 135
5
Page 136 of 249
•The system has been deactivated to prevent damage to
the brake system due to overheated brake temperatures.
NOTE:Extended heavy use of Traction Control may
cause the system to deactivate and turn on the Traction
Control OFF Light, indicated byTRAC OFF, located in
the instrument cluster.
This is to prevent overheating of the brake system and is
a normal condition. After cooling, the system will auto-
matically reactivate and turn off theTRAC OFFLight.
If your vehicle becomes stuck in mud, ice, or snow, turn
the Traction Control System Off before attempting to
“rock” the vehicle free.
TIRES
Proper tire inflation pressure is essential to the safe and
satisfactory operation of your vehicle. Three primary
areas are affected by improper tire pressure:
1. Safety—
WARNING!
•Improperly inflated tires are dangerous and can
cause accidents.
•Under inflation increases tire flexing and can
result in tire failure.
•Over inflation reduces a tire’s ability to cushion
shock. Objects on the road and chuck holes can cause
damage that results in tire failure.
•Unequal tire pressures can cause steering prob-
lems. You could lose control of your vehicle.
•Overinflated or under inflated tires can affect
vehicle handling and can fail suddenly, resulting in
loss of vehicle control.
•Always drive with each tire inflated to the recom-
mended pressure.
136 STARTING AND OPERATING
Page 137 of 249
2. Economy—
Improper inflation pressures can cause uneven wear
patterns to develop across the tire tread. These abnormal
wear patterns will reduce tread life resulting in a need for
earlier tire replacement. Under inflation also increases
tire rolling resistance and results in higher fuel consump-
tion.
3. Ride Comfort and Vehicle Stability—
Proper tire inflation contributes to a comfortable ride.
Over inflation produces a jarring and uncomfortable ride.
Both under-inflation and over inflation affect the stability
of the vehicle and can produce a feeling of sluggish
response or over-responsiveness in the steering.
Unequal tire pressures can cause erratic and unpredict-
able steering response.
Unequal tire pressure from side to side may cause the
vehicle to drift left or right.
Tire Inflation Pressures
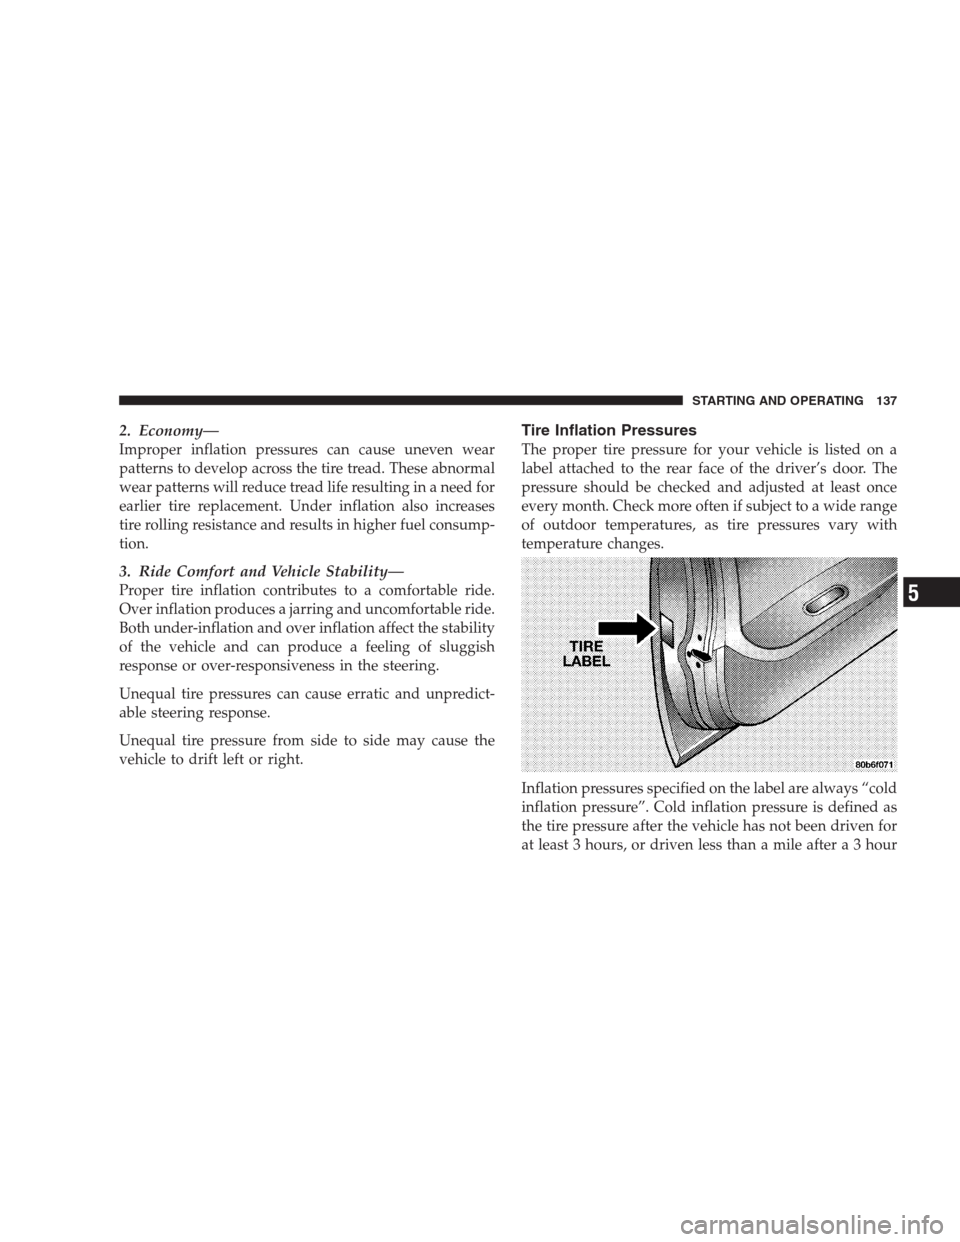
The proper tire pressure for your vehicle is listed on a
label attached to the rear face of the driver’s door. The
pressure should be checked and adjusted at least once
every month. Check more often if subject to a wide range
of outdoor temperatures, as tire pressures vary with
temperature changes.
Inflation pressures specified on the label are always “cold
inflation pressure”. Cold inflation pressure is defined as
the tire pressure after the vehicle has not been driven for
at least 3 hours, or driven less than a mile after a 3 hour
STARTING AND OPERATING 137
5
Page 138 of 249
 during operation. Do NO DODGE INTREPID 2004 2.G Owners Manual period. The cold inflation pressure must not exceed the
maximum values molded into the tire side wall.
Tire pressure may increase from 2 to 6 psi [.13 to.41
bars](14 to 41 kPa) during operation. Do NO](/img/12/5632/w960_5632-137.png)
period. The cold inflation pressure must not exceed the
maximum values molded into the tire side wall.
Tire pressure may increase from 2 to 6 psi [.13 to.41
bars](14 to 41 kPa) during operation. Do NOT reduce this
normal pressure build up or your tire pressure will be too
low.
The tire pressures shown on the tire label apply only to
the tire sizes listed on the label.
High Speed Operation
The manufacturer advocates driving at safe speeds
within posted speed limits. Where speed limits or condi-
tions are such that the vehicle can be driven at high
speeds, correct tire inflation pressure is very important.
WARNING!
High speed driving with your vehicle under load is
dangerous. The added strain on your tires could
cause them to fail. You could have a serious accident.
Don’t drive a vehicle loaded to the maximum capac-
ity at continuous speeds above 75 mph (120 km/h).
Radial-Ply Tires
WARNING!
Combining radial ply tires with other tires on your
vehicle will cause your vehicle to handle poorly. The
instability could cause an accident. Always use ra-
dial tires in sets of four. Never combine them with
other types of tires.
Cuts and punctures in radial tires are repairable only in
the tread area because of sidewall flexing. Consult your
tire dealer for radial tire repairs.
138 STARTING AND OPERATING
Page 139 of 249
. Do not exceed 50 mph (80 km/h)
while the compact spare is installed on the vehicle.
Do not install DODGE INTREPID 2004 2.G Owners Manual Compact Spare Tire
Maintain the compact spare tire inflation pressure at 60
psi [4.1 bars](414 kPa). Do not exceed 50 mph (80 km/h)
while the compact spare is installed on the vehicle.
Do not install](/img/12/5632/w960_5632-138.png)
Compact Spare Tire
Maintain the compact spare tire inflation pressure at 60
psi [4.1 bars](414 kPa). Do not exceed 50 mph (80 km/h)
while the compact spare is installed on the vehicle.
Do not install a wheel cover or attempt to mount a
conventional tire on the compact spare wheel, since the
wheel is designed specifically for the compact spare.
Because of the reduced ground clearance, do not take
your vehicle through an automatic car wash with the
compact spare installed.WARNING!
Temporary-use spare tires are for emergency use
only. With the compact spare tire assembly installed
on your vehicle, do not exceed 50 mph (80 km/h ).
Vehicle handling and braking performance will be
reduced. Also, do not drive more than 50 miles (80
km) with the compact spare installed. Failure to
follow compact spare tire warning may result in an
accident and/or fatal injury. Temporary-use spare
tires have a total tread life of 2,000 miles (3 200 km).
Be sure to follow the warnings, which apply to your
spare. Failure to do so could result in spare tire
failure and loss of vehicle control.
STARTING AND OPERATING 139
5
Page 140 of 249
Tire Spinning
When stuck in mud, sand, snow, or ice conditions, do not
spin your vehicle’s wheels above 30 mph. (48 km/h).
See the paragraph on Freeing A Stuck Vehicle in section 6
of this manual.
WARNING!
Fast spinning tires can be dangerous. Forces gener-
ated by excessive wheel speeds may cause tire dam-
age or failure. A tire could explode and injure
someone. Do not spin your vehicle’s wheels faster
than 30 mph (48 km/h) when you are stuck. And
don’t let anyone near a spinning wheel, no matter
what the speed.
Tire Chains
Due to limited clearance, tire chains are not recom-
mended.
CAUTION!
Damage to the vehicle may result if tire chains are
used.
Snow Tires
Some areas of the country require the use of snow tires
during winter. Standard tires are of the all season type
and satisfy this requirement as indicated by the M+S
designation on the tire sidewall.
If you need snow tires, see the tire pressure label for
size(s) and inflation pressure(s).
Snow tires may have a lower speed rating than factory
equipped tires and may not match the maximum vehicle
speed.
Snow tires should not be operated at sustained speeds
over 75 mph (120 km/h).
140 STARTING AND OPERATING