light DODGE INTREPID 2004 2.G Repair Manual
[x] Cancel search | Manufacturer: DODGE, Model Year: 2004, Model line: INTREPID, Model: DODGE INTREPID 2004 2.GPages: 249, PDF Size: 4.87 MB
Page 200 of 249
CAUTION!
The use of vinyl, leather or plastic protectants may
cause excessive gloss and/or discoloration of interior
trim parts.
Leather Seat Care and Cleaning
Leather is best preserved by regular cleaning with a
damp soft cloth. Small particles of dirt can act as an
abrasive and damage the leather surface and should be
removed immediately with a damp cloth. Stubborn soils
can be removed easily with a soft cloth and Mopar Total
Clean. Care should be taken to avoid soaking the leather
with any liquid. Please do not use polishes, oils, cleaning
fluids, solvents, detergents, or ammonia based cleaners
to clean the leather. Application of a leather conditioner is
not required to maintain the original condition.
Cleaning Headlights
Your vehicle has plastic headlights that are lighter and
less susceptible to stone breakage than glass headlights.
Plastic is not as scratch resistant as glass and therefore
different lens cleaning procedures must be followed.To minimize the possibility of scratching the lenses and
reducing light output, avoid wiping with a dry cloth. To
remove road dirt, wash with a mild soap solution fol-
lowed by rinsing.
Do not use abrasive cleaning components, solvents, steel
wool or other aggressive material to clean the lenses.
Glass Surfaces
All glass surfaces should be cleaned on a regular basis
with any commercial household-type glass cleaner.
Never use an abrasive type cleaner. Use caution when
cleaning inside rear windows equipped with electric
defrosters. Do not use scrapers or other sharp instru-
ments which may scratch the elements.
Instrument Panel Cover
The instrument panel cover has a low glare surface which
minimizes reflections in the windshield. Do not use
protectants or other products which may cause undesir-
able reflections. Use soap and warm water to restore the
low glare surface.
200 MAINTAINING YOUR VEHICLE
Page 202 of 249
Underhood Fuses
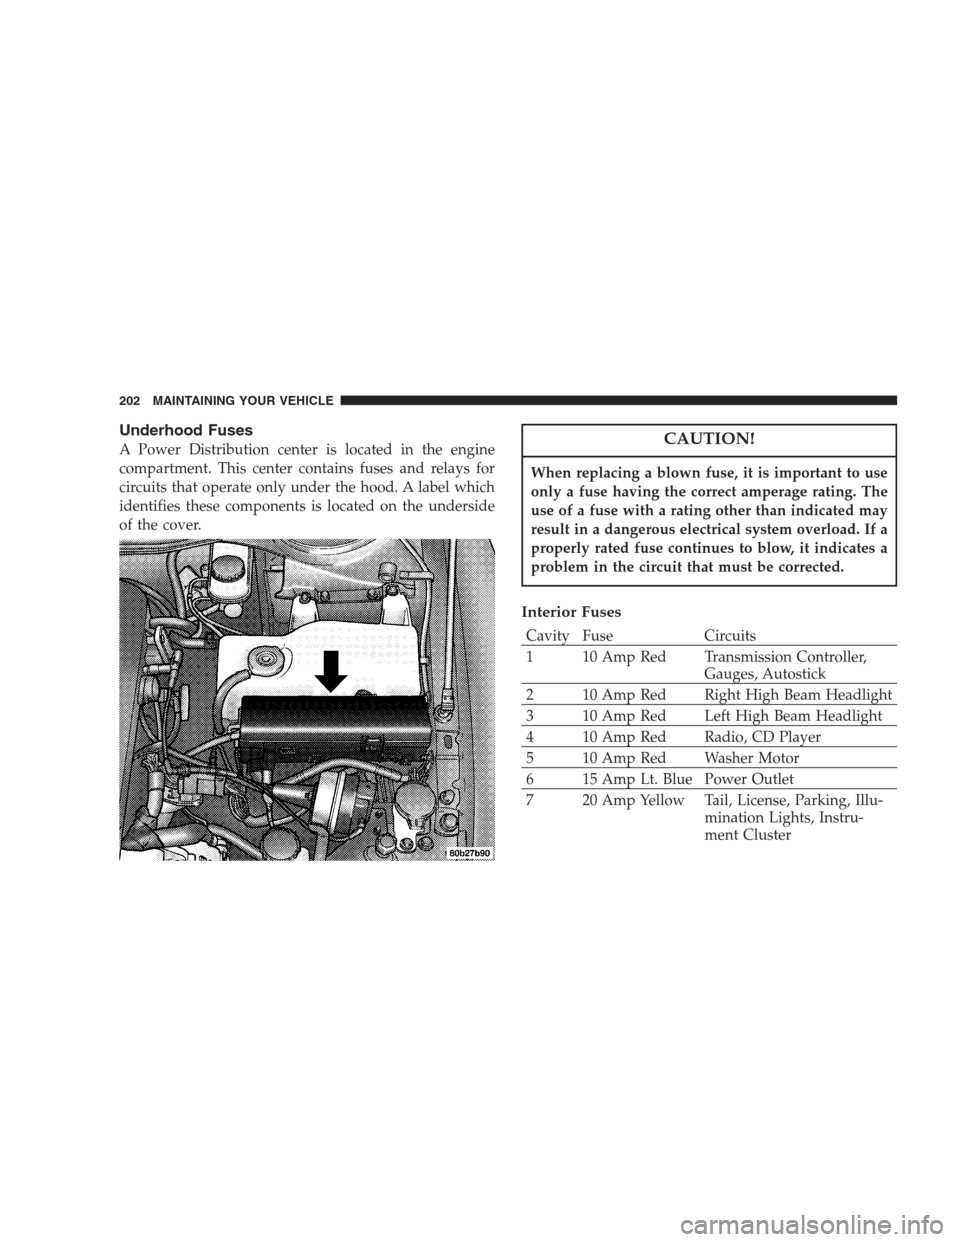
A Power Distribution center is located in the engine
compartment. This center contains fuses and relays for
circuits that operate only under the hood. A label which
identifies these components is located on the underside
of the cover.CAUTION!
When replacing a blown fuse, it is important to use
only a fuse having the correct amperage rating. The
use of a fuse with a rating other than indicated may
result in a dangerous electrical system overload. If a
properly rated fuse continues to blow, it indicates a
problem in the circuit that must be corrected.
Interior Fuses
Cavity Fuse Circuits
1 10 Amp Red Transmission Controller,
Gauges, Autostick
2 10 Amp Red Right High Beam Headlight
3 10 Amp Red Left High Beam Headlight
4 10 Amp Red Radio, CD Player
5 10 Amp Red Washer Motor
6 15 Amp Lt. Blue Power Outlet
7 20 Amp Yellow Tail, License, Parking, Illu-
mination Lights, Instru-
ment Cluster
202 MAINTAINING YOUR VEHICLE
Page 203 of 249
Cavity Fuse Circuits
8 10 Amp Red Airbag
9 10 Amp Red Turn Signal Lights, Turn
Signal/Hazard Indicator
10 15 Amp Lt. Blue Right Low Beam
11 20 Amp Yellow High Beam Relay, High
Beam Indicator, High Beam
Switch
12 15 Amp Lt. Blue Left Low Beam Headlight
13 10 Amp Red Fuel Pump Relay, Power
Train Control Module
14 10 Amp Red Cluster, Day/Night Mirror,
Sunroof, Overhead Console,
Garage Door Opener, Body
Control Module
15 10 Amp Red Daytime Running Light
Module (Canada)
16 20 Amp Yellow Fog Light Indicator
17 10 Amp Red ABS Control, Back Up
Lights, Daytime Running
Lights, A/C Heater Con-
trol,Cavity Fuse Circuits
18 20 Amp Yellow Power Amplifier, Horn
19 15 Amp Lt. Blue Overhead Console, Garage
Door Opener, Trunk, Over-
head, Rear Reading, and
Visor Vanity Lights, Trunk
Release Solenoid, Power
Mirrors, Power Door Locks,
Body Control Module, As-
pirator Motor
20 20 Amp Yellow Brake Lights
21 10 Amp Red Leak Detection Pump, Low
Rad Relay, High Rad Relay,
A/C Clutch Relay
22 10 Amp Red Airbag
23 30 Amp Green Blower Motor, ATC Power
Module
24 20 Amp
C/BRKRPower Window Motors
25 20 Amp
C/BRKRPower Door Lock Motors,
Power Seats
MAINTAINING YOUR VEHICLE 203
7
Page 204 of 249
REPLACEMENT BULBS
Interior Light Bulbs Bulb No.
Cluster Illumination.....................PC194
Turn Signal...........................PC194
Climate Control.......................... 330
Overhead Console, Front Reading, Courtesy, Grab
Handle................................ 192
Trunk................................. 906
Exterior Light Bulbs Bulb No.
Low Beam Headlights....................9006
High Beam Headlights....................9005
Park, Turn, & Side Marker................3157A
Fog Light.............................. H-3
Center Stop Light........................ 922
Tail, Stop, & Turn........................3157
Rear Side Marker........................ 168
Back-Up..............................3157
License................................ 168
EXTERIOR LIGHT BULB SERVICE
Headlight Replacement
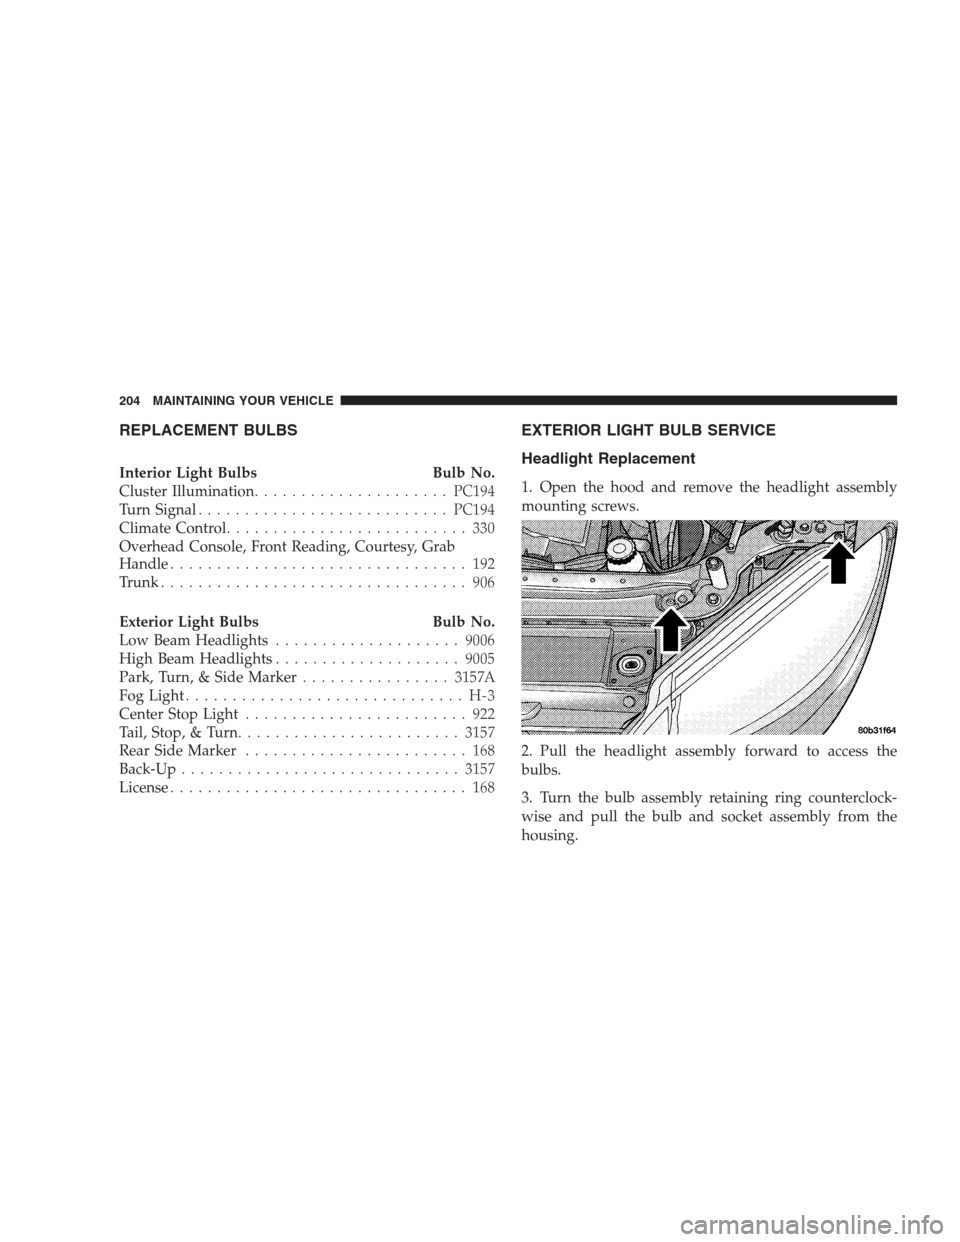
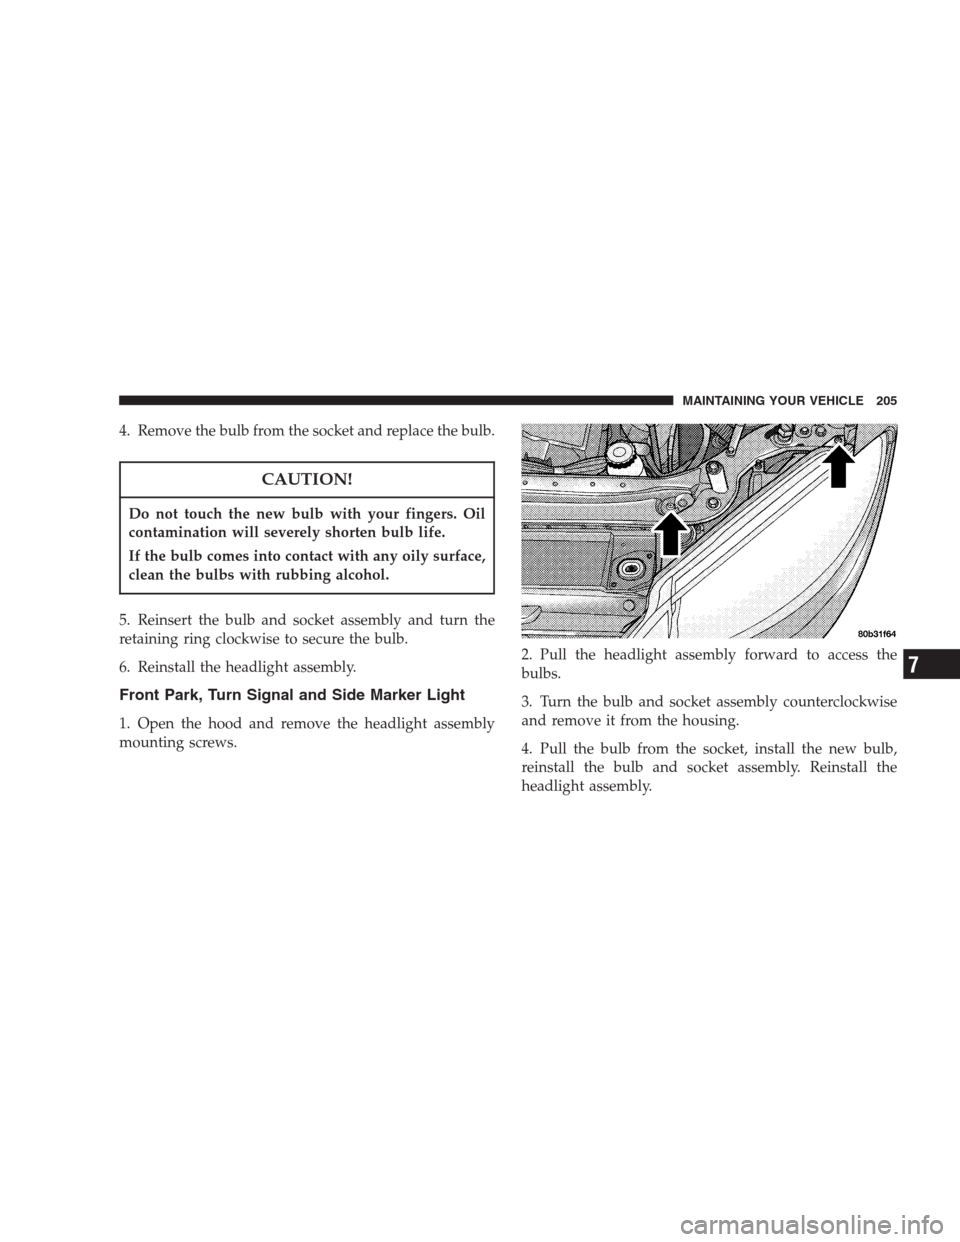
1. Open the hood and remove the headlight assembly
mounting screws.
2. Pull the headlight assembly forward to access the
bulbs.
3. Turn the bulb assembly retaining ring counterclock-
wise and pull the bulb and socket assembly from the
housing.
204 MAINTAINING YOUR VEHICLE
Page 205 of 249
4. Remove the bulb from the socket and replace the bulb.
CAUTION!
Do not touch the new bulb with your fingers. Oil
contamination will severely shorten bulb life.
If the bulb comes into contact with any oily surface,
clean the bulbs with rubbing alcohol.
5. Reinsert the bulb and socket assembly and turn the
retaining ring clockwise to secure the bulb.
6. Reinstall the headlight assembly.
Front Park, Turn Signal and Side Marker Light
1. Open the hood and remove the headlight assembly
mounting screws.2. Pull the headlight assembly forward to access the
bulbs.
3. Turn the bulb and socket assembly counterclockwise
and remove it from the housing.
4. Pull the bulb from the socket, install the new bulb,
reinstall the bulb and socket assembly. Reinstall the
headlight assembly.
MAINTAINING YOUR VEHICLE 205
7
Page 206 of 249
Fog Light
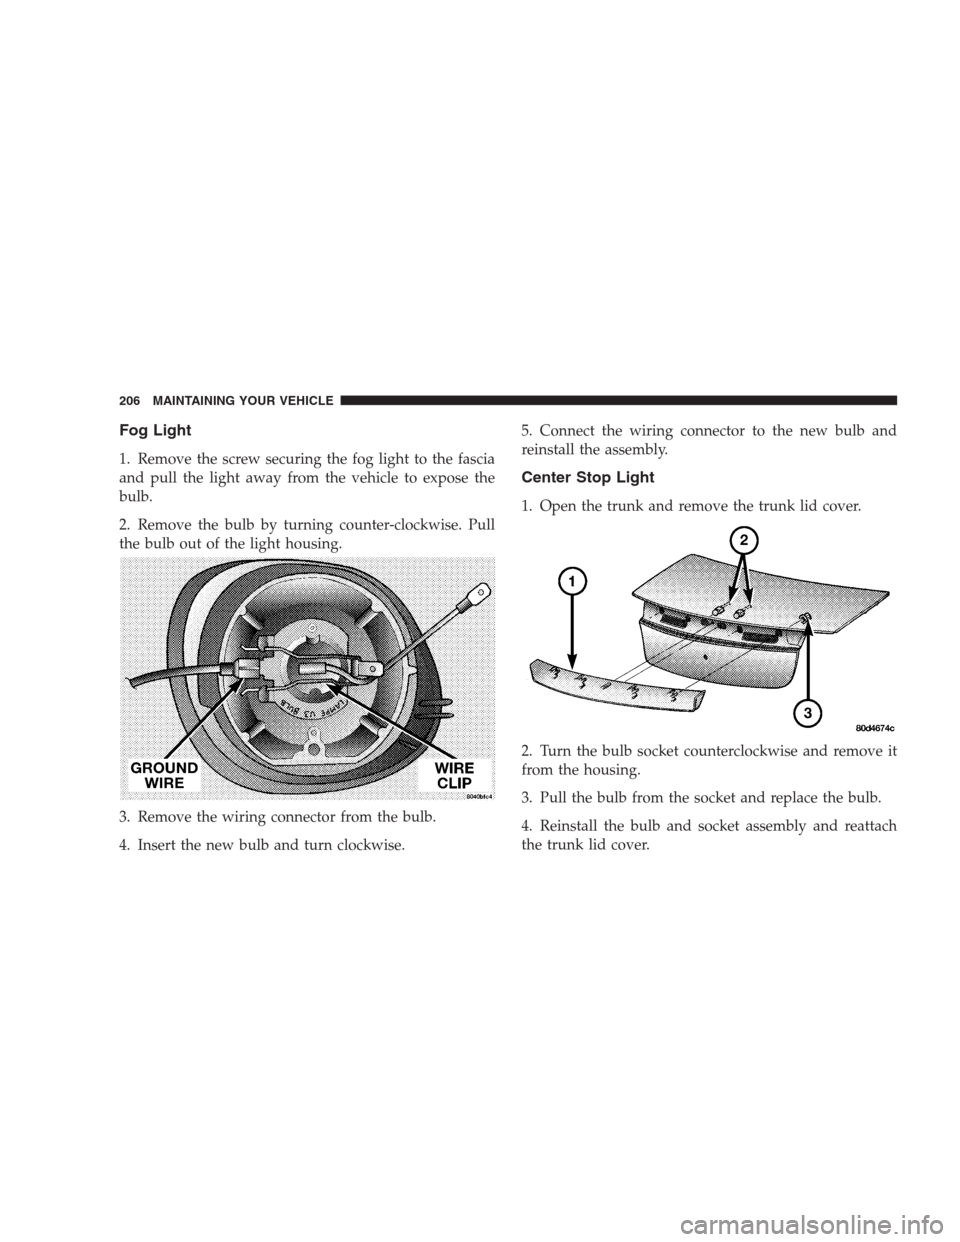
1. Remove the screw securing the fog light to the fascia
and pull the light away from the vehicle to expose the
bulb.
2. Remove the bulb by turning counter-clockwise. Pull
the bulb out of the light housing.
3. Remove the wiring connector from the bulb.
4. Insert the new bulb and turn clockwise.5. Connect the wiring connector to the new bulb and
reinstall the assembly.
Center Stop Light
1. Open the trunk and remove the trunk lid cover.
2. Turn the bulb socket counterclockwise and remove it
from the housing.
3. Pull the bulb from the socket and replace the bulb.
4. Reinstall the bulb and socket assembly and reattach
the trunk lid cover.
206 MAINTAINING YOUR VEHICLE
Page 207 of 249
Tail, Stop, Back Up, and Turn Signal Lights
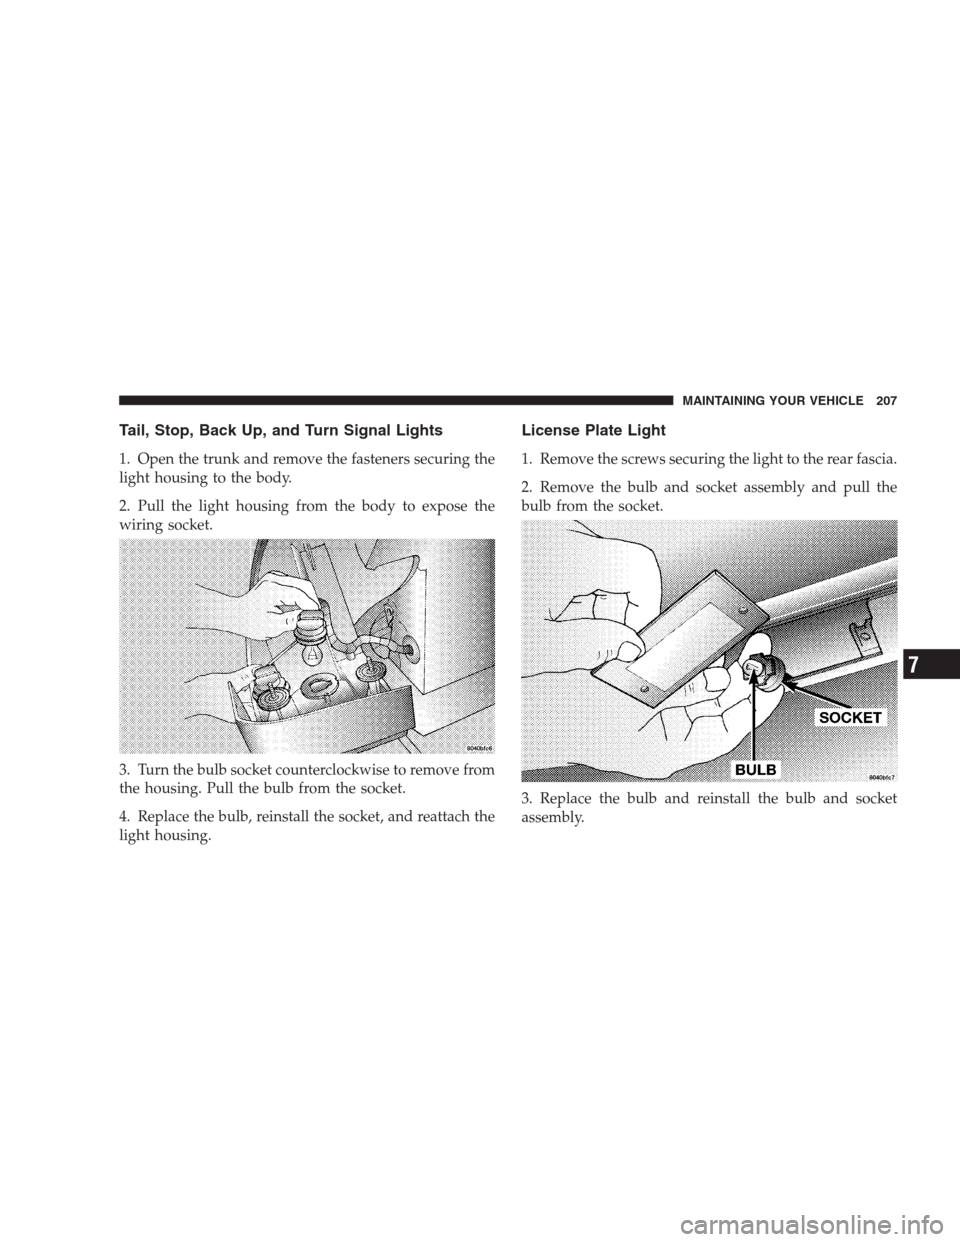
1. Open the trunk and remove the fasteners securing the
light housing to the body.
2. Pull the light housing from the body to expose the
wiring socket.
3. Turn the bulb socket counterclockwise to remove from
the housing. Pull the bulb from the socket.
4. Replace the bulb, reinstall the socket, and reattach the
light housing.
License Plate Light
1. Remove the screws securing the light to the rear fascia.
2. Remove the bulb and socket assembly and pull the
bulb from the socket.
3. Replace the bulb and reinstall the bulb and socket
assembly.
MAINTAINING YOUR VEHICLE 207
7
Page 214 of 249
Once a Month
•
Check tire pressure and look for unusual wear or
damage.
•Inspect the battery and clean and tighten the terminals
as required.
•Check the fluid levels of coolant reservoir, brake
master cylinder, power steering and transaxle and add
as needed.
•Check all lights and all other electrical items for correct
operation.
•Check rubber seals on each side of the radiator for
proper fit.
At Each Oil Change
•
Change the engine oil filter.
•Inspect the exhaust system.
•Inspect the brake hoses.
•Inspect the CV joints and front and rear suspension
components.
•Check the automatic transmission fluid level.
•Check the coolant level, hoses, and clamps.
•Rotate the tires at each oil change interval shown on
Schedule “A” 6,000 miles (10 000 km) or every other
interval shown on Schedule “B” 6,000 miles (10 000
km).
214 MAINTENANCE SCHEDULES
8
M
A
I
N
T
E
N
A
N
C
E
S
C
H
E
D
U
L
E
S
Page 230 of 249
Customer Assistance For The Hearing Or Speech
Impaired (TDD/TTY)
To assist customers who have hearing difficulties, the
manufacturer has installed special TDD (Telecommuni-
cation Devices for the Deaf) equipment at its Customer
Center. Any hearing or speech impaired customer who
has access to a TDD or a conventional teletypewriter
(TTY) in the United States can communicate with the
manufacturer by dialing 1–800–380–CHRY.
Service Contract
You may have purchased a service contract for your
vehicle to help protect you from the high cost of unex-
pected repairs after your manufacturer’s new vehicle
limited warranty expires. The manufacturer stands be-
hind only the manufacturer’s Service Contracts. If you
purchased a manufacturer’s Service Contract, you will
receive Plan Provisions and an Owner Identification Card
in the mail within three weeks of your vehicle delivery
date. If you have any questions about your service
contract, call the manufacturer’s Service Contract Na-
tional Customer Hotline at 1-800-521-9922.The manufacturer will not stand behind any service
contract that is not the manufacturer’s Service Contract. It
is not responsible for any service contract other than the
manufacturer’s Service Contract. If you purchased a
service contract that is not a manufacturer’s Service
Contract, and you require service after your manufactur-
er’s new vehicle limited warranty expires, please refer to
your contract documents, and contact the person listed in
those documents.
We appreciate that you have made a major investment
when you purchased your new vehicle. Your dealer has
also made a major investment in facilities, tools, and
training to assure that you are absolutely delighted with
your ownership experience. You’ll be pleased with their
sincere efforts to resolve any warranty issues or related
concerns.
230 IF YOU NEED CONSUMER ASSISTANCE
Page 238 of 249
About Your Brakes...................... 134
ABS (Anti-Lock Brake) System...........91,134
Accident Damage....................... 199
Adding Engine Coolant (Antifreeze)......... 189
Adding Fuel.......................... 146
Air Cleaner, Engine..................... 180
Air Conditioner Maintenance.............. 182
Air Conditioning.................... 114,117
Air Conditioning Controls............. 114,117
Air Conditioning, Operating Tips........... 123
Air Conditioning Refrigerant.............. 182
Air Conditioning System................. 182
Air Pressure, Tires...................136,137
Airbag................................ 33
Airbag Deployment....................36,37
Airbag Light.....................37,40,48,90
Airbag Maintenance...................... 39
Alarm System.......................... 23
Alignment and Balance.................. 143
Antifreeze Disposal..................... 188
Antifreeze (Engine Coolant)............... 189
Anti-Lock Brake System.................. 134
Anti-Lock Warning Light.................. 91Anti-Theft Security Alarm................. 23
Anti-Theft System....................... 23
Appearance Care....................... 197
Auto Down Power Windows............... 25
Automatic Door Locks.................... 16
Automatic Mirrors....................... 53
Automatic Off, Interior Lights.............. 60
Automatic Temperature Control............ 117
Automatic Transaxle..................129,194
Fluid and Filter Changes................ 197
Fluid Level Check..................... 195
Reset Mode......................... 130
Selection Of Lubricant................. 194
Shifting............................ 130
Special Additives..................... 197
Backfire, Engine........................ 180
Ball Joints............................ 184
Battery............................158,181
Emergency Starting.................... 158
Gas Caution......................158,181
Jump Starting........................ 158
Keyless Transmitter Replacement.......... 22
238 INDEX