ECO mode DODGE JOURNEY 2014 1.G User Guide
[x] Cancel search | Manufacturer: DODGE, Model Year: 2014, Model line: JOURNEY, Model: DODGE JOURNEY 2014 1.GPages: 124, PDF Size: 3.37 MB
Page 10 of 124
KEY FOB
Locking And Unlocking The
Doors/Liftgate
• Push the LOCK button once to lock all thedoors and the liftgate. Push the UNLOCK
button once to unlock the driver’s door
only and twice within five seconds to un-
lock all the doors and liftgate.
All doors can be programmed to unlock on
the first push of the UNLOCK button. Refer to
“Programmable Features” in the “Electron-
ics” section of this guide.
Panic Alarm
• Press the PANIC button once to turn the panic alarm on.
• Wait approximately three seconds and press the button a second time to turn the
panic alarm off.
Emergency Key
• Should the battery in the vehicle or theKey Fob transmitter go dead, there is an emergency key located in the Key Fob. To remove
the emergency key, slide the button at the back of the Key Fob sideways with your thumb
and then pull the key out with your other hand.
WARNING!
• When leaving the vehicle, always remove the Key Fob from the ignition and lock your
vehicle.
• Never leave children alone in a vehicle, or with access to an unlocked vehicle.
Allowing children to be in a vehicle unattended is dangerous for a number of reasons.
A child or others could be seriously or fatally injured. Children should be warned not
to touch the parking brake, brake pedal or the shift lever.
• Do not leave the Key Fob in or near the vehicle (or in a location accessible to children),
and do not leave the ignition of a vehicle equipped with Keyless Enter-N-Go™ in the
ACC or ON/RUN mode. A child could operate power windows, other controls, or move
the vehicle.
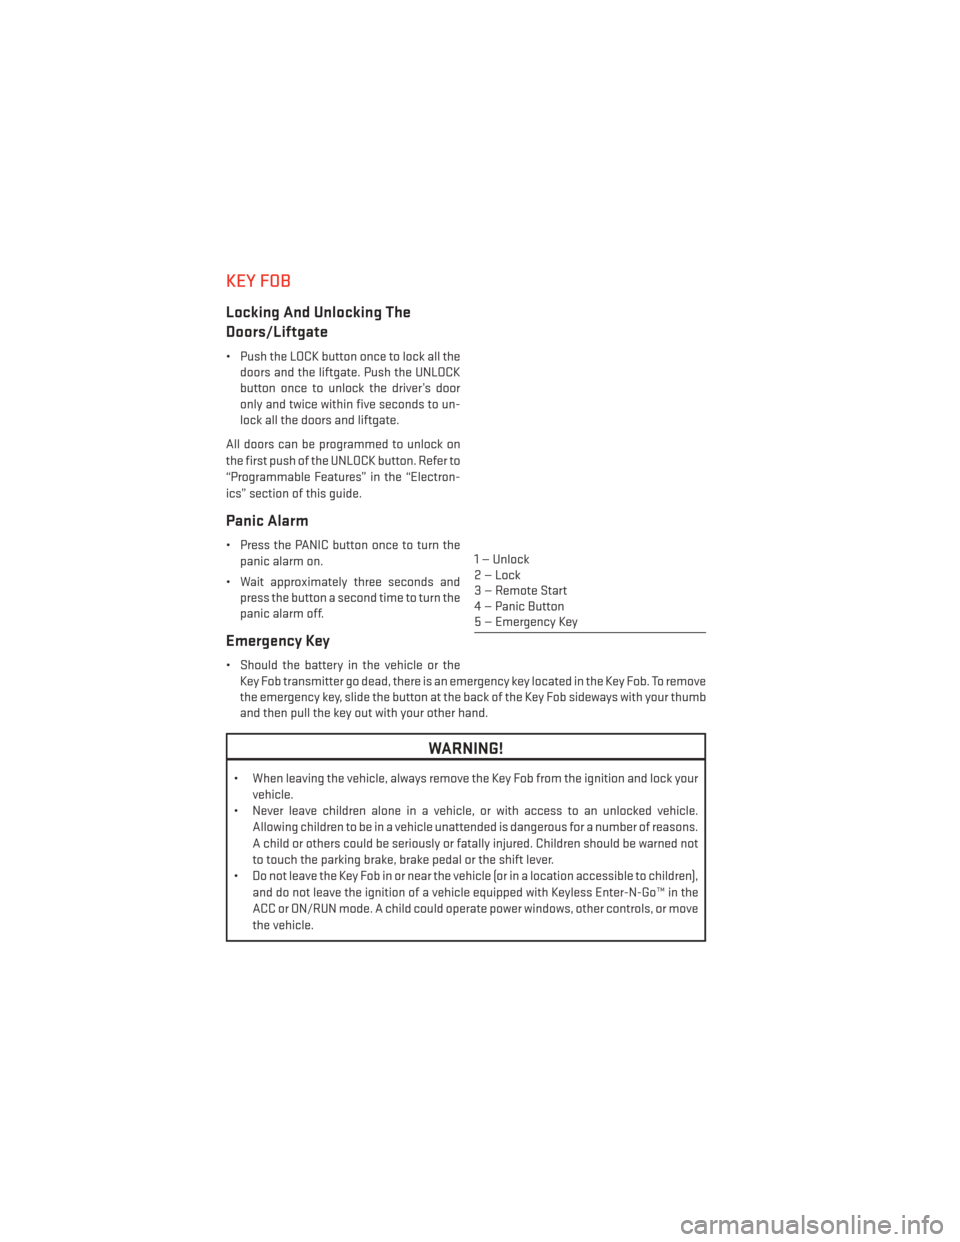
1 — Unlock
2—Lock
3 — Remote Start
4 — Panic Button
5 — Emergency Key
GETTING STARTED
8
Page 20 of 124
Installing The Child Restraints Using The Vehicle Seat Belts
• The seat belts in the outboard passenger seating positions are equipped with a Switch-able Automatic Locking Retractor (ALR). The center seating positions are equipped with
a cinching latch plate. Both types of seat belts are designed to keep the lap portion of the
seat belt tight around the child restraint. Any seat belt system will loosen with time, so
check the belt occasionally, and pull it tight if necessary.
Always use the tether anchor when using the seat belt to install a forward facing child
restraint, up to the recommended weight limit of the child restraint.
To Install A Child Seat Using An ALR:
1. Pull enough of the seat belt webbing from the retractor to pass it through the belt path of the child restraint. Do not twist the belt webbing in the belt path.
2. Slide the latch plate into the buckle until you hear a “click.”
3. Pull on the webbing to make the lap portion tight against the child seat.
4. To lock the seat belt, pull down on the shoulder part of the belt until you have pulled all the seat belt webbing out of the retractor. Then, allow the webbing to retract back into the
retractor. As the webbing retracts, you will hear a clicking sound. This means the seat
belt is now in the Automatic Locking mode.
5. Try to pull the webbing out of the retractor. If it is locked, you should not be able to pull out any webbing. If the retractor is not locked, repeat the last step.
6. Finally, pull up on any extra webbing to tighten the lap portion around the child restraint while you push the child restraint rearward and downward into the vehicle seat.
7. If the child restraint has a top tether strap and the seating position has a top tether anchorage, connect the tether strap to the anchorage and tighten the tether strap. See
below for directions to attach a tether anchor.
8. Test that the child restraint is installed tightly by pulling back and forth on the child seat at the belt path. It should not move more than 1 inch (25.4 mm) in any direction.
To Install A Child Seat Using A Cinching Latch Plate:
1. Place the child seat in the center of the seating position.
2. Next, pull enough of the seat belt webbing from the retractor to pass it through the beltpath of the child restraint. Do not twist the belt webbing in the belt path.
3. Slide the latch plate into the buckle until you hear a “click.”
4. Finally, pull up on any excess webbing to tighten the lap portion around the child restraint while you push the child restraint rearward and downward into the vehicle seat.
5. If the child restraint has a top tether strap and the seating position has a top tether anchorage, connect the tether strap to the anchorage and tighten the tether strap. See
below for directions to attach a tether anchor.
6. Test that the child restraint is installed tightly by pulling back and forth on the child seat at the belt path. It should not move more than 1 inch (25.4 mm) in any direction.
GETTING STARTED
18
Page 26 of 124
STADIUM Tip ’n Slide™ (EASY ENTRY/EXIT SEAT) — SEVEN PASSENGER
MODELS
To Move The Second-Row Passenger Seat Forward
NOTE:
Raise the 20% seatback/armrest before moving the 60% seat to allow for full seat travel.
• To allow passengers to easily enter or exit the third-row passenger seats move the Tip ’nSlide™ control lever on the upper outboard side of the seatback forward, and in one fluid
motion, the seat cushion flips upward and the seat moves forward on its tracks.
To Unfold And Move The Second-Row
Passenger Seat Rearward
• Move the seatback rearward until it locks in place and then continue sliding the
seat rearward on its tracks until it locks in
place.
• Push the seat cushion downward to lock it in place.
• Adjust the seat track position as desired.
50/50 SPLIT THIRD-ROW PASSENGER SEATS WITH FOLD-FLAT
FEATURE
To Fold The Seat
• With the second-row passenger seat fully upright, pull the latch release-loop located at the top of the seatback upward, push the seat forward slightly, and release the release-
loop. Then, continue to push the seat forward. The head restraints will fold automatically
as the seat moves forward.
To Unfold The Seat
• Grasp the assist strap loop on the seatback and pull it toward you to raise the seatback.Continue to raise the seatback until it locks in place. Then, raise the head restraint to lock
it in place.
• To lock the seatback in a reclined position, pull the latch release-loop located at the top of the seatback upward, allow the seatback to recline, then release the release-loop.
GETTING STARTED
24
Page 30 of 124
ENGINE BREAK-IN RECOMMENDATIONS
A long break-in period is not required for the engine and drivetrain (transmission and axle)
in your vehicle.
Drive moderately during the first 300 miles (500 km). After the initial 60 miles (100 km),
speeds up to 50 or 55 mph (80 or 90 km/h) are desirable.
While cruising, brief full-throttle acceleration within the limits of local traffic laws contrib-
utes to a good break-in. Wide-open throttle acceleration in low gear can be detrimental and
should be avoided.
The engine oil installed in the engine at the factory is a high-quality energy conserving type
lubricant. Oil changes should be consistent with anticipated climate conditions under
which vehicle operations will occur. For the recommended viscosity and quality grades,
refer to “Maintaining Your Vehicle.”
NOTE:
A new engine may consume some oil during its first few thousand miles (kilometers) of
operation. This should be considered a normal part of the break-in and not interpreted as an
indication of an engine problem or malfunction.
CAUTION!
Never use Non-Detergent Oil or Straight Mineral Oil in the engine or damage may result.
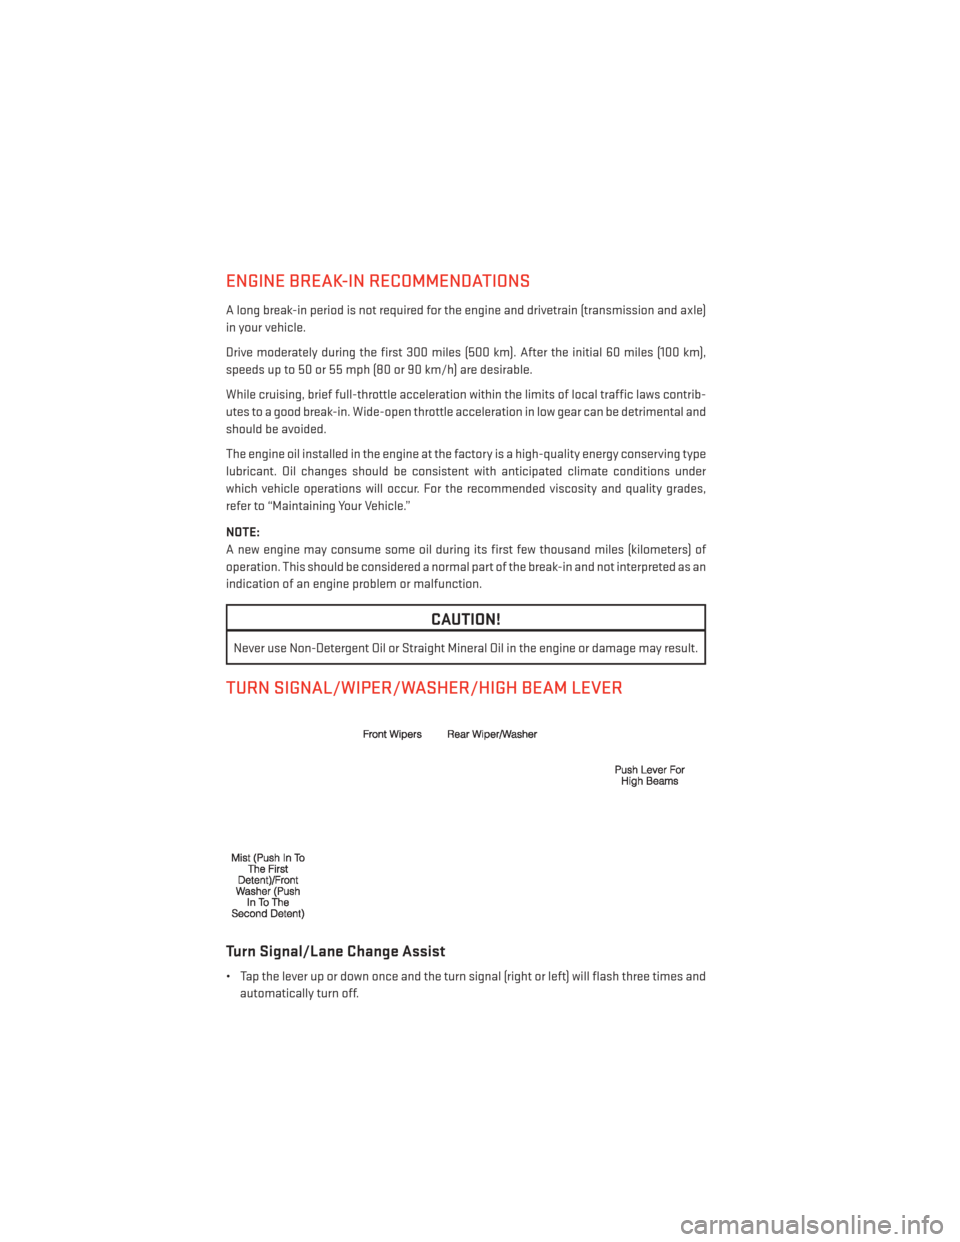
TURN SIGNAL/WIPER/WASHER/HIGH BEAM LEVER
Turn Signal/Lane Change Assist
• Tap the lever up or down once and the turn signal (right or left) will flash three times andautomatically turn off.
OPERATING YOUR VEHICLE
28
Page 37 of 124
Automatic Operation
• Press the AUTO button or AUTO soft-key.
• Select the desired temperature by pressing the Temperature Controls for the driver orpassenger.
• The system will maintain the set temperature automatically.
SYNC Temperature Soft-Key
•Press the SYNC soft-key once to control driver and passenger temperatures simultaneously.
• Press the SYNC soft-key a second time to control the temperatures individually.
Air Recirculation
• Use recirculation for maximum A/C operation.
• For window defogging, turn the recirculation button off.
• If the hard-key Recirculation button is pushed while in the AUTO mode, the indicator light may flash three times to indicate the cabin air is being controlled automatically.
The soft-key recirculation button will be greyed out in these conditions.
Heated Mirrors
The mirrors are heated to melt frost or ice. This feature is activated whenever you turn on
the rear window defroster.
PARKVIEW® REAR BACK-UP CAMERA
You can see an on-screen image of the rear of your vehicle whenever the shift lever is put
into REVERSE. The ParkView® Rear Back-Up Camera image will be displayed on the radio
display screen, located on the center stack of the instrument panel.
If the radio display screen appears foggy, clean the camera lens located on the liftgate.
Refer to your Owner's Manual on the DVD for further details.
WARNING!
Drivers must be careful when backing up; even when using the ParkView® Rear Back-Up
Camera. Always check carefully behind your vehicle, and be sure to check for pedestri-
ans, animals, other vehicles, obstructions, or blind spots before backing up. You must
continue to pay attention while backing up. Failure to do so can result in serious injury or
death.
OPERATING YOUR VEHICLE
35
Page 39 of 124
Pinch Protection Feature
This feature will detect an obstruction in the opening of the sunroof during Express Close
operation. If an obstruction in the path of the sunroof is detected, the sunroof will auto-
matically retract. Remove the obstruction if this occurs. Next, press the switch forward and
release to Express Close.
NOTE:
If three consecutive sunroof close attempts result in Pinch Protect reversals, the fourth
close attempt will be a Manual Close movement with Pinch Protect disabled.
WARNING!
• Do not let children play with the sunroof. Never leave children unattended in a vehicle,or with access to an unlocked vehicle. Do not leave the Key Fob in or near the vehicle,
and do not leave the ignition of a vehicle equipped with Keyless Enter-N-Go™ in the
ACC or ON/RUN mode. Occupants, particularly unattended children, can become
entrapped by the power sunroof while operating the power sunroof switch. Such
entrapment may result in serious injury or death.
• In a collision, there is a greater risk of being thrown from a vehicle with an open
sunroof. You could also be severely injured or killed. Always fasten your seat belt
properly and make sure all passengers are properly secured.
• Do not allow small children to operate the sunroof. Never allow your fingers, other
body parts, or any object to project through the sunroof opening. Injury may result.
WIND BUFFETING
Wind buffeting can be described as a helicopter-type percussion sound. If buffeting occurs
with the rear windows open, adjust the front and rear windows together.
If buffeting occurs with the sunroof open, adjust the sunroof opening, or adjust any window.
This will minimize buffeting.
OPERATING YOUR VEHICLE
37
Page 47 of 124
• To access the Radio mode, touch the RADIO hard-key on the upper left side of thefaceplate (4.3 & 4.3S) or the “Radio” soft-key at the lower left of the screen (8.4 & 8.4N).
• Unless otherwise noted, the information provided on the operation and functionality of the radios in this section is common to all Uconnect® radios.
Selecting Radio Stations
• Touch the “Radio band” soft-key to cycle through AM, FM or SAT (4.3 & 4.3S) or the desired radio band (AM, FM or SAT) soft-key (8.4 & 8.4N). SiriusXM Satellite Radio is not
available on the 4.3.
Seek Up/Seek Down
• Touch the “Seek arrow” soft-keys for less than two seconds to seek through radio stations.
• Touch and hold either “arrow” soft-key for more than two seconds to bypass stations without stopping. The radio will stop at the next listenable station once the arrow
soft-key is released.
Direct Tune
• Tune directly to a radio station by pressing the “Tune” button on the screen, and entering the desired station number.
Store Radio Presets
• Your radio can store 12 total preset stations. They are shown at the top of your screen. To see all 12 stations, Press the “All” soft-key (4.3 & 4.3S) or press the “arrow” soft-key at
the top right of the screen to toggle between the six presets (8.4 & 8.4N).
• To set a station into memory press and hold the desired numbered soft-key for more than two seconds or until you hear a confirmation beep.
SiriusXM SATELLITE RADIO
• SiriusXM Satellite Radio gives you over 130 channels, including 100% commercial-freemusic from nearly every genre, plus all your favorite sports, news, talk and entertainment
channels – all with crystal clear, coast-to-coast coverage, all in one place and all at your
fingertips.
• To access SiriusXM Satellite Radio, touch the “Radio band” soft-key and select the “SAT” soft-key (4.3S) or touch the “SAT” soft-key on the main Radio screen (8.4 & 8.4N).
• The following describes features that are available when in SiriusXM Satellite Radio mode.
• Unless otherwise noted, the information provided on the operation and functionality of the radios in this section is common to all Uconnect® radios.
ELECTRONICS
45
Page 48 of 124
Selecting SiriusXM Satellite Channels
Seek Up/Seek Down
• Touch the “Seek arrow” soft-keys for less than two seconds to seek through channels inSAT mode.
• Touch and hold either “arrow” soft-key for more than two seconds to bypass channels without stopping. The radio will stop at the next listenable channel once the arrow
soft-key is released.
Direct Tune
• Tune directly to a SAT channel by pressing the “Tune” button on the screen, and entering the desired station number.
Info (4.3S Only)
• Provides detailed information about the current SiriusXM Satellite Radio channel.
More... (4.3S Only)
• Access more menus: Audio, Favorites, Game Zone, and Replay.
Jump (8.4 & 8.4N Only)
• Automatically tells you when Traffic & Weather for a favorite city is available, and gives you the option to switch to that channel. Select Traffic then touch “Jump” to activate the
feature. After listening to Traffic and Weather, touch “Jump” again to return to the
previous channel.
Fav (8.4 & 8.4N Only)
• Activates the favorites menu. You can add up to 50 favorite artists or songs. Just touch “Add Fav Artist” or “Add Fav Song” while the song is playing. You will then be alerted any
time one of these songs, or works by these artists, is playing on other SiriusXM Satellite
Radio channels.
SiriusXM Parental Controls
• You can skip or hide certain channels from view if you do not want access to them. Press the SETTINGS hard-key (4.3S) or touch the “More” soft-key, then the “Settings” soft-key
(8.4 & 8.4N), next touch the “SiriusXM Satellite Radio Setup” soft-key, then select
“Channel Skip.” Touch the channel(s) to be skipped (4.3S) or touch the box, check-mark,
next to the channel you want skipped (8.4 & 8.4N). They will not show up in normal usage.
• SiriusXM Satellite Radio also offers the option to permanently block selected channels. Call 1-888-539-7474 and request the Family Package.
ELECTRONICS
46
Page 63 of 124
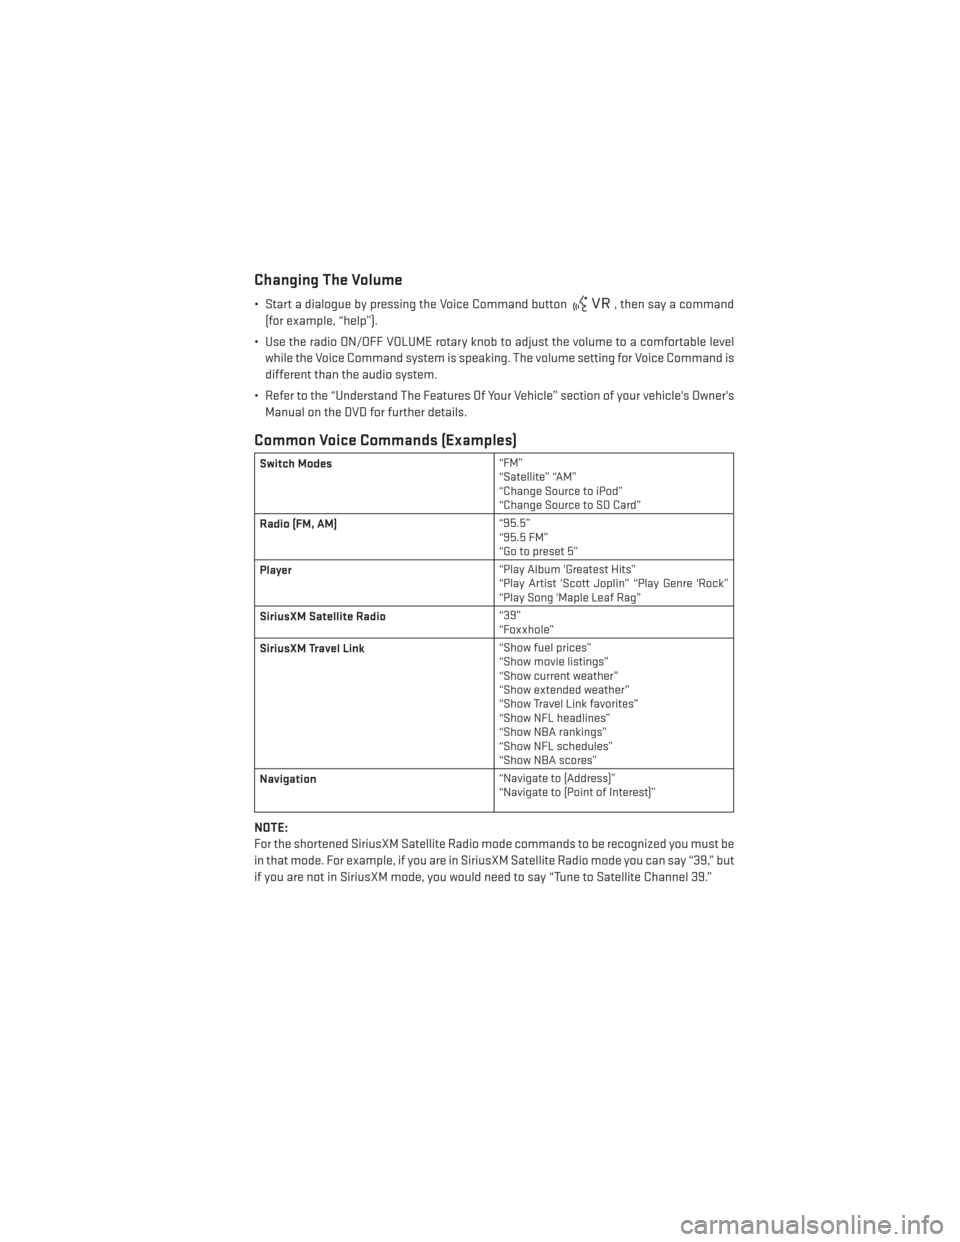
Changing The Volume
• Start a dialogue by pressing the Voice Command button, then say a command
(for example, “help”).
• Use the radio ON/OFF VOLUME rotary knob to adjust the volume to a comfortable level while the Voice Command system is speaking. The volume setting for Voice Command is
different than the audio system.
• Refer to the “Understand The Features Of Your Vehicle” section of your vehicle's Owner's Manual on the DVD for further details.
Common Voice Commands (Examples)
Switch Modes “FM”
“Satellite” “AM”
“Change Source to iPod”
“Change Source to SD Card”
Radio (FM, AM) “95.5”
“95.5 FM”
“Go to preset 5”
Player “Play Album 'Greatest Hits”
“Play Artist 'Scott Joplin” “Play Genre 'Rock”
“Play Song 'Maple Leaf Rag”
SiriusXM Satellite Radio “39”
“Foxxhole”
SiriusXM Travel Link “Show fuel prices”
“Show movie listings”
“Show current weather”
“Show extended weather”
“Show Travel Link favorites”
“Show NFL headlines”
“Show NBA rankings”
“Show NFL schedules”
“Show NBA scores”
Navigation “Navigate to (Address)”
“Navigate to (Point of Interest)”
NOTE:
For the shortened SiriusXM Satellite Radio mode commands to be recognized you must be
in that mode. For example, if you are in SiriusXM Satellite Radio mode you can say “39,” but
if you are not in SiriusXM mode, you would need to say “Tune to Satellite Channel 39.”
ELECTRONICS
61
Page 65 of 124
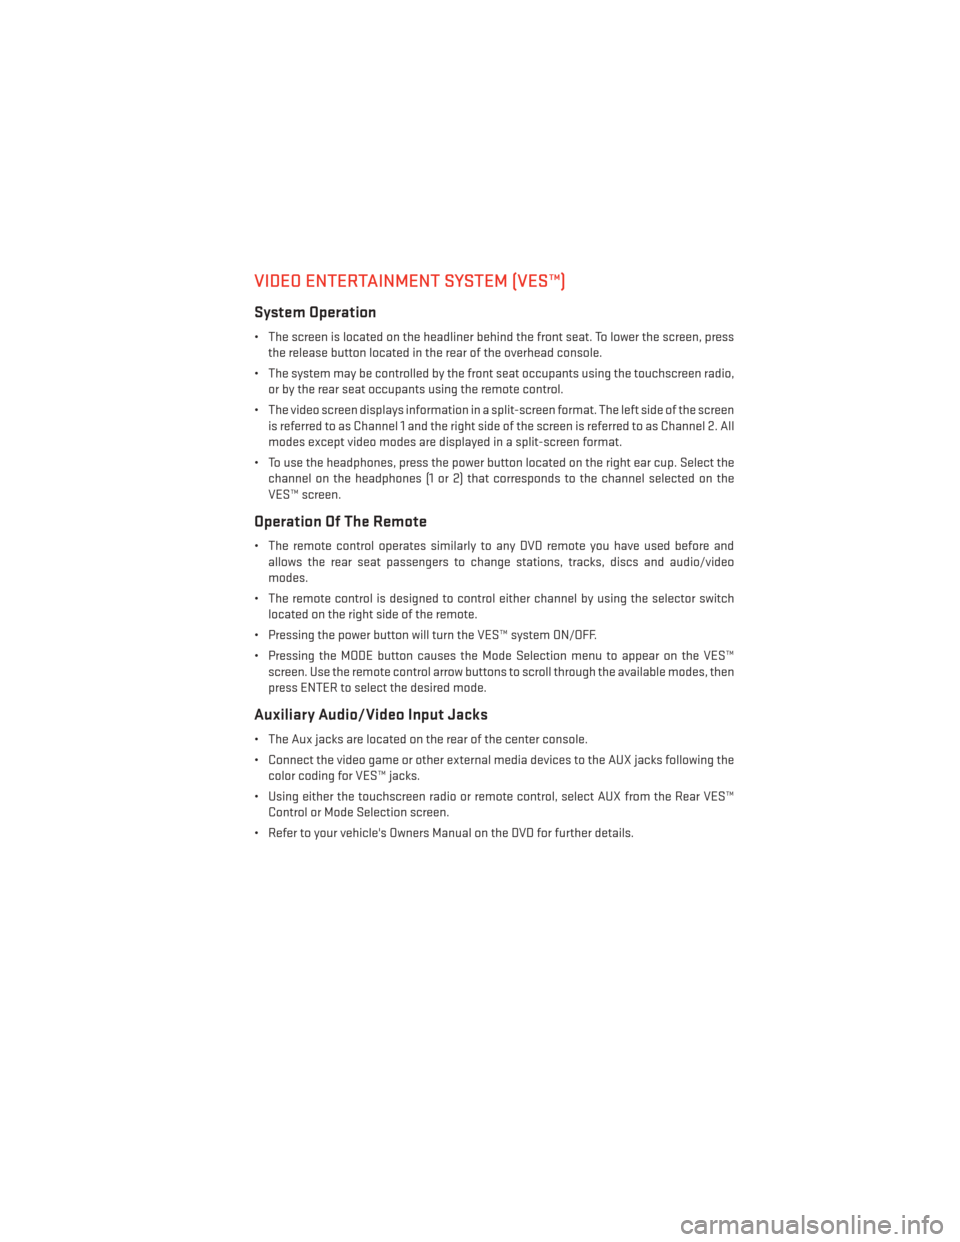
VIDEO ENTERTAINMENT SYSTEM (VES™)
System Operation
• The screen is located on the headliner behind the front seat. To lower the screen, pressthe release button located in the rear of the overhead console.
• The system may be controlled by the front seat occupants using the touchscreen radio, or by the rear seat occupants using the remote control.
• The video screen displays information in a split-screen format. The left side of the screen is referred to as Channel 1 and the right side of the screen is referred to as Channel 2. All
modes except video modes are displayed in a split-screen format.
• To use the headphones, press the power button located on the right ear cup. Select the channel on the headphones (1 or 2) that corresponds to the channel selected on the
VES™ screen.
Operation Of The Remote
• The remote control operates similarly to any DVD remote you have used before andallows the rear seat passengers to change stations, tracks, discs and audio/video
modes.
• The remote control is designed to control either channel by using the selector switch located on the right side of the remote.
• Pressing the power button will turn the VES™ system ON/OFF.
• Pressing the MODE button causes the Mode Selection menu to appear on the VES™ screen. Use the remote control arrow buttons to scroll through the available modes, then
press ENTER to select the desired mode.
Auxiliary Audio/Video Input Jacks
• The Aux jacks are located on the rear of the center console.
• Connect the video game or other external media devices to the AUX jacks following thecolor coding for VES™ jacks.
• Using either the touchscreen radio or remote control, select AUX from the Rear VES™ Control or Mode Selection screen.
• Refer to your vehicle's Owners Manual on the DVD for further details.
ELECTRONICS
63