airbag DODGE JOURNEY 2015 1.G User Guide
[x] Cancel search | Manufacturer: DODGE, Model Year: 2015, Model line: JOURNEY, Model: DODGE JOURNEY 2015 1.GPages: 140, PDF Size: 23.09 MB
Page 17 of 140
SEAT BELT SYSTEMS
Lap/Shoulder Belts
•Allseatingpositionsinyourvehicleareequippedwithlap/shoulderbelts.
•Besureeveryoneinyourvehicleisinaseatandusingaseatbeltproperly.
•Positionthelapbeltsothatitissnugandlieslowacrossyourhips,belowyour
abdomen. To remove slack in the lap belt portion, pull up on the shoulder belt. To loosen
the lap belt if it is too tight, tilt the latch plate and pull on the lap belt. A snug seat belt
reduces the risk of sliding under the seat belt in a collision.
•Positiontheshoulderbeltacrosstheshoulderandchestwithminimal,ifanyslackso
that it is comfortable and not resting on your neck. The retractor will withdraw any slack
in the shoulder belt.
Seat Belt Pretensioner
•Thefrontseatbeltsystemisequippedwithpretensioningdevicesthataredesignedto
remove slack from the seat belt in the event of a collision.
•Adeployedpretensioneroradeployedairbagmustbereplacedimmediately.
WARNING!
•Inacollision,youandyourpassengerscansuffermuchgreaterinjuriesifyouare
not properly buckled up. You can strike the interior of your vehicle or other
passengers, or you can be thrown out of the vehicle. Always be sure you and others
in your vehicle are buckled up properly.
•Ashoulderbeltplacedbehindyouwillnotprotectyoufrominjuryduringacollision.
Yo u a r e m o r e l i k e l y t o h i t y o u r h e a d i n a c o l l i s i o n i f y o u d o n o t w e a r y o u r s h o u l d e r
belt. The lap and shoulder belt are meant to be used together.
•Aseatbeltthatistooloosewillnotprotectyouproperly.Inasuddenstop,youcould
move too far forward, increasing the possibility of injury. Wear your seat belt snugly.
•Afrayedortornseatbeltcouldripapartinacollisionandleaveyouwithno
protection. Inspect the seat belt system periodically, checking for cuts, frays, or
loose parts. Damaged parts must be replaced immediately. Do not disassemble or
modify the system. Seat belt assemblies must be replaced after a collision.
GETTING STARTED
15
Page 18 of 140
SUPPLEMENTAL RESTRAINT SYSTEM (SRS) — AIR BAGS
Air Bag System Components
Yo u r v e h i c l e m a y b e e q u i p p e d w i t h t h e f o l l o w i n g a i r b a g s y s t e m c o m p o n e n t s :
•OccupantRestraintController(ORC)
•AirBagWarningLight
•SteeringWheelandColumn
•InstrumentPanel
•KneeImpactBolsters
•AdvancedFrontAirBags
•SupplementalSideAirBags
•SupplementalKneeAirBags
•FrontandSideImpactSensors
•SeatBeltPretenioners
•SeatBeltBuckleSwitch
•SeatTrackPositionSensors
Advanced Front Air Bags
•ThisvehiclehasAdvancedFrontAirBagsforboththedriverandfrontpassengerasa
supplement to the seat belt restraint systems. The Advanced Front Air Bags will not
deploy in every type of collision.
•AdvancedFrontAirBagsaredesignedtoprovideadditionalprotectionbysupplement-
ing the seat belts. Advanced Front Air Bags are not expected to reduce the risk of injury
in rear, side, or rollover collisions.
•TheAdvancedFrontAirBagswillnotdeployinallfrontalcollisions,includingsome
that may produce substantial vehicle damage — for example, some pole collisions,
truck underrides, and angle offset collisions.
•Ontheotherhand,dependingonthetypeandlocationofimpact,AdvancedFrontAir
Bags may deploy in crashes with little vehicle front-end damage but that produce a
severe initial deceleration.
•Becauseairbagsensorsmeasurevehicledecelerationovertime,vehiclespeedand
damage by themselves are not good indicators of whether or not an air bag should have
deployed.
•Seatbeltsarenecessaryforyourprotectioninallcollisions,andalsoareneededtohelp
keep you in position, away from an inflating air bag.
•Theairbagsmustbereadytoinflateforyourprotectioninacollision.TheOccupant
Restraint Controller (ORC) monitors the internal circuits and interconnecting wiring
associated with air bag system electrical components.
GETTING STARTED
16
Page 19 of 140
•TheORCturnsontheAirBagWarningLightintheinstrumentpanelforapproximately
four to eight seconds for a self-check when the ignition switch is first turned to the
ON/RUN position. After the self-check, the Air Bag Warning Light will turn off. If the
ORC detects a malfunction in any part of the system, it turns on the Air Bag Warning
Light, either momentarily or continuously. A single chime will sound to alert you if the
light comes on again after initial startup.
•TheORCmonitorsthereadinessoftheelectronicpartsoftheairbagsystemwhenever
the ignition switch is in the START or ON/RUN position. If the ignition switch is in the
OFF position or in the ACC position, the air bag system is not on and the air bags will
not inflate.
•IftheAirBagWarningLightintheinstrumentpanelisnotonduringthefourtoeight
seconds when the ignition switch is first turned to the ON/RUN position, stays on, or
turns on while driving, have the vehicle serviced by an authorized service center
immediately.
NOTE:
If the speedometer, tachometer, or any engine related gauges are not working, the
Occupant Restraint Controller (ORC) may also be disabled. In this condition the air bags
may not be ready to inflate for your protection. Have an authorized dealer service the air
bag system immediately.
•Afteranycollision,thevehicleshouldbetakentoanauthorizeddealerimmediately.
•Donotdriveyourvehicleaftertheairbagshavedeployed.Ifyouareinvolvedinanother
collision, the air bags will not be in place to protect you.
•Ifitisnecessarytomodifytheairbagsystemforpersonswithdisabilities,contactyour
authorized dealer.
•RefertotheOwner'sManualontheDVDforfurtherdetailsregardingtheSupplemental
Restraint System (SRS).
Supplemental Knee Air Bags
This vehicle is equipped with a Supplemental Driver Knee Air Bag mounted in the
instrument panel below the steering column. The Supplemental Driver Knee Air Bag
provides enhanced protection during a frontal impact by working together with the seat
belts, pretensioners, and Advanced Front Air Bags.
GETTING STARTED
17
Page 20 of 140
Supplemental Side Air Bags
•ThisvehicleisequippedwithSupplementalSeat-MountedSideAirBags(SABs)
located in the outboard side of the front seats. The SABs are marked with a SRS
AIRBAG or AIRBAG label sewn into the outboard side of the seats.
•ThisvehicleisequippedwithSupplementalSideAirBagInflatableCurtains(SABICs)
located above the side windows. The trim covering the SABICs is labeled SRS AIRBAG
or AIRBAG. The SABICs may help reduce the risk of partial or complete ejection of
vehicle occupants through side windows in certain side impact events.
•TheSABICsandSABs(“SideAirBags”)aredesignedtoactivateincertainside
impacts and certain rollover events. The Occupant Restraint Controller (“ORC”)
determines whether the deployment of the Side Air Bags in a particular side impact or
rollover event is appropriate, based on the severity and type of collision. Vehicle damage
by itself is not a good indicator of whether or not Side Air Bags should have deployed.
WARNING!
•SideAirBagsneedroomtoinflate.Donotleanagainstthedoororwindow.Sit
upright in the center of the seat.
•BeingtooclosetotheSideAirBagsduringdeploymentcouldcauseyoutobe
severely injured or killed.
•RelyingontheSideAirBagsalonecouldleadtomoresevereinjuriesinacollision.
The Side Air Bags work with your seat belt to restrain you properly. In some
collisions, Side Air Bags won’t deploy at all. Always wear your seat belt even though
you have Side Air Bags.
•This vehicle is equipped with left and right Supplemental Side Air Bag Inflatable
Curtains (SABICs). Do not stack luggage or other cargo up high enough to block the
deployment of the SABICs. The trim covering above the side windows where the SABIC
and its deployment path are located should remain free from any obstructions.
•ThisvehicleisequippedwithSABICs.InorderfortheSABICstoworkasintended,
do not install any accessory items in your vehicle which could alter the roof. Do not
add an aftermarket sunroof to your vehicle. Do not add roof racks that require
permanent attachments (bolts or screws) for installation on the vehicle roof. Do not
drill into the roof of the vehicle for any reason.
•DonotuseaccessoryseatcoversorplaceobjectsbetweenyouandtheSideAir
Bags; the performance could be adversely affected and/or objects could be pushed
into you, causing serious injury.
GETTING STARTED
18
Page 26 of 140
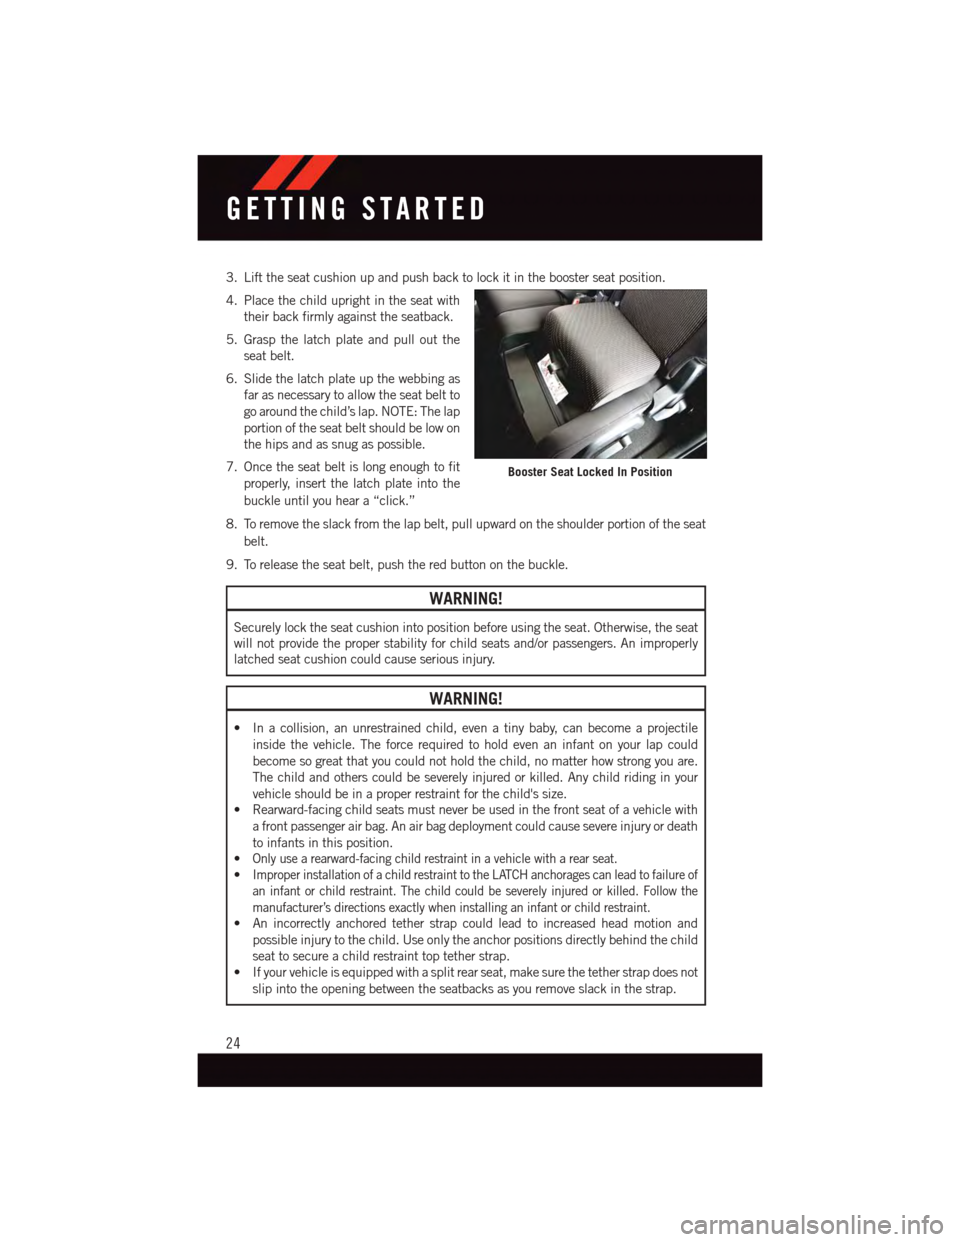
3. Lift the seat cushion up and push back to lock it in the booster seat position.
4. Place the child upright in the seat with
their back firmly against the seatback.
5. Grasp the latch plate and pull out the
seat belt.
6. Slide the latch plate up the webbing as
far as necessary to allow the seat belt to
go around the child’s lap. NOTE: The lap
portion of the seat belt should be low on
the hips and as snug as possible.
7. Once the seat belt is long enough to fit
properly, insert the latch plate into the
buckle until you hear a “click.”
8. To remove the slack from the lap belt, pull upward on the shoulder portion of the seat
belt.
9. To release the seat belt, push the red button on the buckle.
WARNING!
Securely lock the seat cushion into position before using the seat. Otherwise, the seat
will not provide the proper stability for child seats and/or passengers. An improperly
latched seat cushion could cause serious injury.
WARNING!
•Inacollision,anunrestrainedchild,evenatinybaby,canbecomeaprojectile
inside the vehicle. The force required to hold even an infant on your lap could
become so great that you could not hold the child, no matter how strong you are.
The child and others could be severely injured or killed. Any child riding in your
vehicle should be in a proper restraint for the child's size.
•Rearward-facingchildseatsmustneverbeusedinthefrontseatofavehiclewith
afrontpassengerairbag.Anairbagdeploymentcouldcausesevereinjuryordeath
to infants in this position.
•Only use a rearward-facing child restraint in a vehicle with a rear seat.
•Improper installation of a child restraint to the LATCH anchorages can lead to failure of
an infant or child restraint. The child could be severely injured or killed. Follow the
manufacturer’s directions exactly when installing an infant or child restraint.
•Anincorrectlyanchoredtetherstrapcouldleadtoincreasedheadmotionand
possible injury to the child. Use only the anchor positions directly behind the child
seat to secure a child restraint top tether strap.
•Ifyourvehicleisequippedwithasplitrearseat,makesurethetetherstrapdoesnot
slip into the opening between the seatbacks as you remove slack in the strap.
Booster Seat Locked In Position
GETTING STARTED
24
Page 89 of 140
-AirBagWarningLight
This light will turn on for four to eight seconds as a bulb check when the ignition switch
is first turned to the ON/RUN position. If the light is either not on during starting, stays on,
or turns on while driving, have the system inspected at an authorized dealer as soon as
possible. Refer to “Occupant Restraints” in “Things To Know Before Starting Your
Vehicle” of your Owner’s Manual for further information.
NOTE:
The Air Bag System is designed to be maintenance free.
-ElectronicThrottleControl(ETC)Light
This light informs you of a problem with the Electronic Throttle Control (ETC) system.
If a problem is detected, the light will come on while the engine is running. Cycle the
ignition when the vehicle has completely stopped and the shift lever is placed in the PARK
position; the light should turn off.
If the light remains lit with the engine running, your vehicle will usually be drivable;
however, see an authorized service center immediately. If the light is flashing when the
engine is running, immediate service is required and you may experience reduced
performance, an elevated/rough idle or engine stall and your vehicle may require towing.
-TirePressureMonitoringSystem(TPMS)Light
Each tire, including the spare (if provided), should be checked monthly, when cold and
inflated to the inflation pressure recommended by the vehicle manufacturer on the
vehicle placard or tire inflation pressure label. (If your vehicle has tires of a different size
than the size indicated on the vehicle placard or tire inflation pressure label, you should
determine the proper tire inflation pressure for those tires.)
As an added safety feature, your vehicle has been equipped with a Tire Pressure
Monitoring System (TPMS) which display in the Electronic Vehicle Information Center
(EVIC) when one or more of your tires is significantly under-inflated. Accordingly, when the
low tire pressure EVIC display illuminates, you should stop and check your tires as soon as
possible, and inflate them to the proper pressure. Driving on a significantly under-inflated
tire causes the tire to overheat and can lead to tire failure. Under-inflation also reduces
fuel efficiency and tire tread life, and may affect the vehicle’s handling and stopping
ability.
IF THE LIGHT STARTS FLASHING INDICATING A LOW TIRE PRESSURE, ADJUST THE AIR
PRESSURE IN THE LOW TIRE TO THE AIR PRESSURE SHOWN ON THE VEHICLE PLACARD OR
TIRE INFLATION PRESSURE LABEL LOCATED ON THE DRIVER'S DOOR.
NOTE:
After inflation, the vehicle may need to be driven for 20 minutes before the flashing light
will turn off.
WHAT TO DO IN EMERGENCIES
87
Page 135 of 140
Unlock The Doors...........8Replacement Bulbs..........124Reporting Safety Defects.......127Resetting Oil Change Indicator.....91Restraint, Head.............25Rocking Vehicle When Stuck.....105
Satellite Radio (Uconnect®studios) . .55Seat Belt Maintenance........114Seat BeltsAdjustable Shoulder Belt......15Pretensioners............15Reminder..............89Seats. . . . . . . . . . . . . . . . .27, 28Adjustment.............28Folding Front Passenger......28Heated . . . . . . . . . . . . . . .32Manual................28Power................27Rear Folding............30Security Alarm..............91Security Alarm............14Selection of Coolant (Antifreeze) . . .112Shift Lever Override..........104Signals, Turn . . . . . . . . . . . .36, 91SIRIUS Travel Link . . . . . . . . . . .64Spare Tire . . . . . . . . . .93,122, 123Spark Plugs . . . . . . . . . . . . . .112SpecificationsFuel (Gasoline)..........112Oil . . . . . . . . . . . . . . . . .112Speed ControlAccel/Decel.............38Cancel................39Resume . . . . . . . . . . . . . . .39Set . . . . . . . . . . . . . . . . . .38SteeringTi l t C o l u m n . . . . . . . . . . . . . 3 4Wheel, Heated...........33Steering Wheel Audio Controls.....76Stuck, Freeing . . . . . . . . . . . . .105Supplemental Restraint System -Airbag . . . . . . . . . . . . . . . . .16
Te m p e r a t u r e C o n t r o l ,Automatic (ATC) . . . . . . . . . . .40
Te t h e r A n c h o r, C h i l d R e s t r a i n t . . . 2 1 , 2 3Ti l t S t e e r i n g C o l u m n . . . . . . . . . . . 3 4Ti r e sAir Pressure . . . . . . . . . . . .121Changing..............93Compact Spare..........122Jacking...............93Pressure Warning Light . . . . . . .87Spare Tire..............93To w i n g . . . . . . . . . . . . . . . . . . 8 4Behind a Motorhome........85Disabled Vehicle . . . . . . . . . .105Recreational.............85To w i n g V e h i c l e B e h i n d a M o t o r h o m e . . 8 5Tr a c t i o n C o n t r o l . . . . . . . . . . . . . 9 1Tr a i l e r To w i n gTr a i l e r a n d To n g u e W e i g h t.....84Tr a i l e r W e i g h t . . . . . . . . . . . . . . 8 4Tr a n s m i s s i o nFluid . . . . . . . . . . . . . . . .114Maintenance............114Tu r n S i g n a l s.............36,91
Uconnect®Voice Command.......72Underhood Fuses...........120Universal Garage Door Opener(HomeLink®). . . . . . . . . . . . .78USB Port . . . . . . . . . . . . . . . . .65
Video Entertainment System™ (Rear SeatVideo System) . . . . . . . . . . . .75Voice Command.............72
WasherAdding Fluid............114Rear.................36Washers, Windshield . . . . . . . . . .36Washing Vehicle . . . . . . . . . . . .114Wheel and Wheel Trim.........114Wheel and Wheel Trim Care . . .114, 124Wind Buffeting. . . . . . . . . . . . . .45Windshield Washers...........36Windshield Wiper Blades.......114Windshield Wipers . . . . . . . . . . . .36Wiper Blade Replacement.......114Wiper, Rear................36
INDEX
133