buttons DODGE JOURNEY 2017 1.G Owners Manual
[x] Cancel search | Manufacturer: DODGE, Model Year: 2017, Model line: JOURNEY, Model: DODGE JOURNEY 2017 1.GPages: 510
Page 18 of 510
REMOTE KEYLESS ENTRY — PASSIVE ENTRY
The RKE system allows you to lock or unlock the doors,
open the liftgate, or activate the Panic Alarm from dis-
tances up to approximately 66 ft (20 m) using a hand-held
key fob with key fob. The key fob does not need to be
pointed at the vehicle to activate the system.
NOTE:Driving at speeds 5 MPH (8 km/h) and above
disables the system from responding to all key fob buttons
for all key fobs.
To Unlock The Doors And Liftgate
Push and release the UNLOCKbutton on the key fob
once to unlock the driver’s door or twice within five
seconds to unlock all doors and liftgate. The turn signal
lights will flash to acknowledge the unlock signal. The
illuminated entry system will also turn on.
If the vehicle is equipped with Passive Entry, refer to
“Keyless Enter-N-Go — Passive Entry” in “Things To
Know Before Starting Your Vehicle” for further informa-
tion.
1st Press Of Key Fob Unlocks
This feature lets you program the system to unlock either
the driver’s door or all doors on the first push of the
UNLOCK
button on the key fob. To change the
current setting, refer to “Uconnect Settings” in “Under-
standing Your Instrument Panel” for further informa-
tion.
Flash Lamps With Lock
This feature will cause the turn signal lights to flash when
the doors are locked
or unlockedwith the key fob.
This feature can be turned on or turned off. To change
Key Fob With RKE
16 THINGS TO KNOW BEFORE STARTING YOUR VEHICLE
Page 28 of 510
WARNING!
Avoid trapping anyone in a vehicle in a collision.
Remember that the rear doors can only be opened from
the outside when the Child-Protection locks are en-
gaged. Failure to follow this warning may result in
serious injury or death.
NOTE: •After engaging the Child-Protection Door Lock sys-
tem, always test the door from the inside to make
certain it is in the desired position.
• For emergency exit with the system engaged, move the
lock knob up to the UNLOCK position, roll down the
window, and open the door with the outside door
handle.
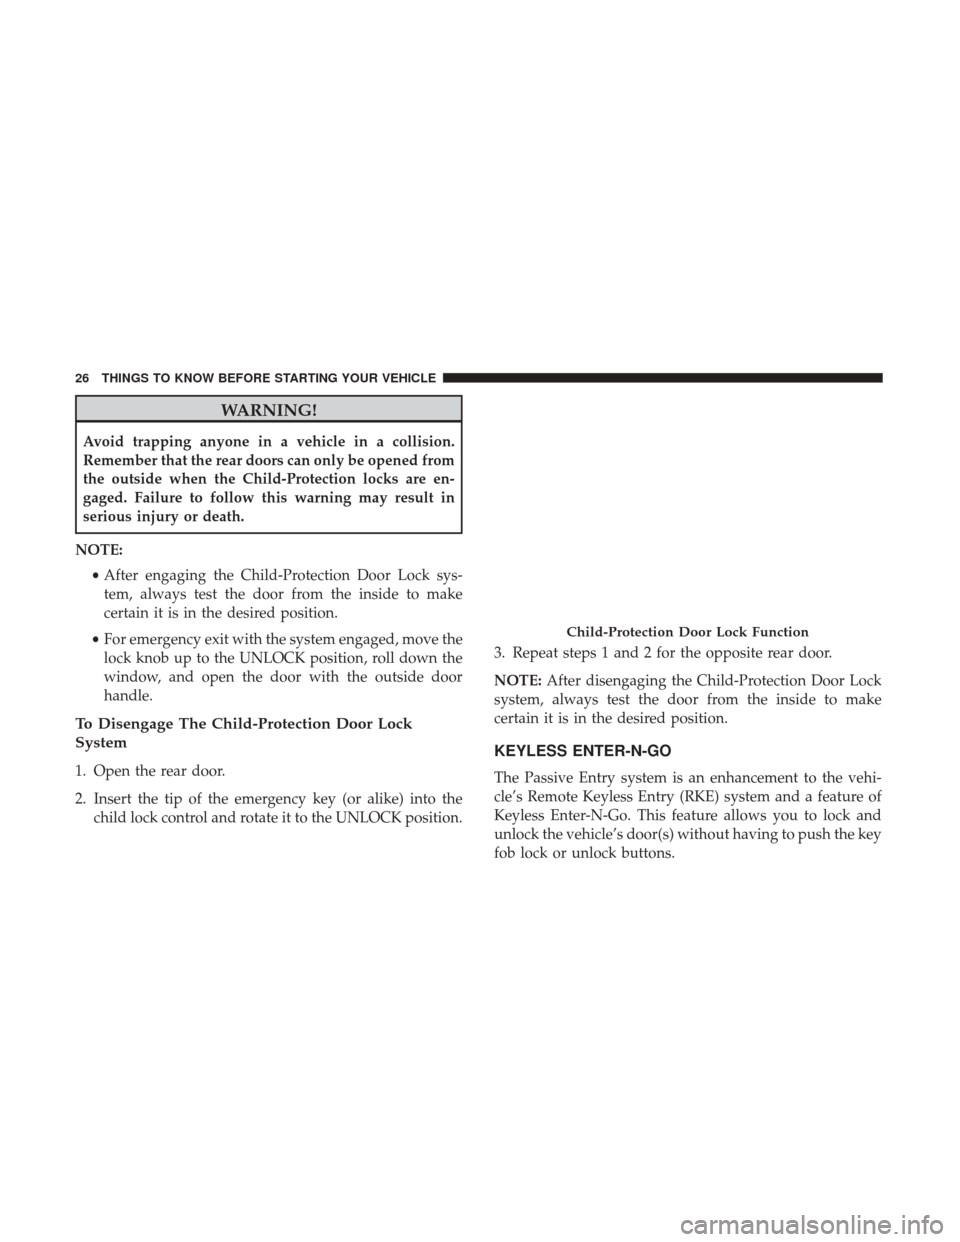
To Disengage The Child-Protection Door Lock
System
1. Open the rear door.
2. Insert the tip of the emergency key (or alike) into the child lock control and rotate it to the UNLOCK position. 3. Repeat steps 1 and 2 for the opposite rear door.
NOTE:
After disengaging the Child-Protection Door Lock
system, always test the door from the inside to make
certain it is in the desired position.
KEYLESS ENTER-N-GO
The Passive Entry system is an enhancement to the vehi-
cle’s Remote Keyless Entry (RKE) system and a feature of
Keyless Enter-N-Go. This feature allows you to lock and
unlock the vehicle’s door(s) without having to push the key
fob lock or unlock buttons.
Child-Protection Door Lock Function
26 THINGS TO KNOW BEFORE STARTING YOUR VEHICLE
Page 93 of 510
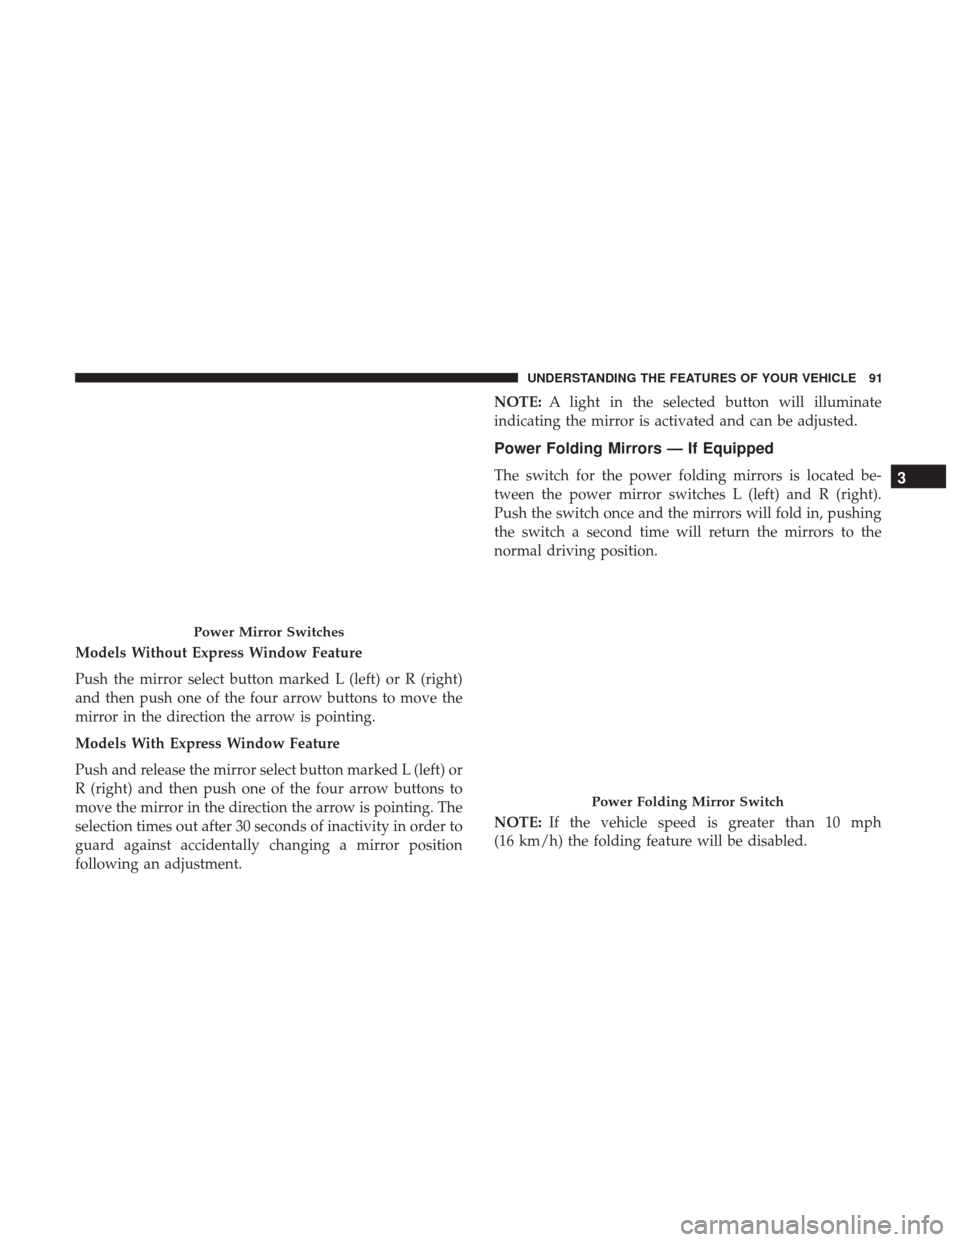
Models Without Express Window Feature
Push the mirror select button marked L (left) or R (right)
and then push one of the four arrow buttons to move the
mirror in the direction the arrow is pointing.
Models With Express Window Feature
Push and release the mirror select button marked L (left) or
R (right) and then push one of the four arrow buttons to
move the mirror in the direction the arrow is pointing. The
selection times out after 30 seconds of inactivity in order to
guard against accidentally changing a mirror position
following an adjustment.NOTE:
A light in the selected button will illuminate
indicating the mirror is activated and can be adjusted.
Power Folding Mirrors — If Equipped
The switch for the power folding mirrors is located be-
tween the power mirror switches L (left) and R (right).
Push the switch once and the mirrors will fold in, pushing
the switch a second time will return the mirrors to the
normal driving position.
NOTE: If the vehicle speed is greater than 10 mph
(16 km/h) the folding feature will be disabled.
Power Mirror Switches
Power Folding Mirror Switch
3
UNDERSTANDING THE FEATURES OF YOUR VEHICLE 91
Page 103 of 510
Call By Saying A Phonebook Name
1. Push the Phonebutton on your steering wheel to
begin.
2. After the “Listening” prompt and the following beep, say “Call John Doe Mobile.”
3. The Uconnect Phone will dial the number associated with John Doe, or if there are multiple numbers it will
ask which number you want to call for John Doe.
Call Controls
The touchscreen allows you to control the following call
features:
•Answer
• End
• Ignore
• Hold/unhold
• Mute/unmute
• Transfer the call to/from the phone
• Swap two active calls
• Join two active calls together
Touch-Tone Number Entry
1. Press the “Phone” button on the touchscreen.
2. Press the “Dial” button on the touchscreen.
3. The Touch-Tone screen will be displayed.
4. Use the numbered buttons on the touchscreen to enter
the number and press “Call.”
To send a touch tone using Voice Recognition (VR), push
the Voice Command
button while in a call and say
“1234#” or you can say “Send Voicemail Password” if
Voicemail password is stored in your mobile phone-
book.
Recent Calls
You may browse up to 34 of the most recent of each of the
following call types:
• Incoming Calls
• Outgoing Calls
• Missed Calls
• All Calls
These can be accessed by touching the recent calls button
on the touchscreen on the Phone main screen.
3
UNDERSTANDING THE FEATURES OF YOUR VEHICLE 101
Page 125 of 510
Call By Saying A Phonebook Name
1. Push the Phonebutton on your steering wheel to
begin.
2. After the “Listening” prompt and the following beep, say “Call John Doe Mobile.”
3. The Uconnect Phone will dial the number associated with John Doe, or if there are multiple numbers it will
ask which number you want to call for John Doe.
Call Controls
The touchscreen allows you to control the following call
features:
•Answer
• End
• Ignore
• Hold/unhold •
Mute/unmute
• Transfer the call to/from the phone
• Swap two active calls
• Join two active calls together
Touch-Tone Number Entry
1. Press the “Phone” button on the touchscreen.
2. Press the “Dial” button on the touchscreen.
3. The Touch-Tone screen will be displayed.
4. Use the numbered buttons on the touchscreens to enter
the number and press “Call.”
To send a touch-tone using Voice Recognition (VR), push
the Voice Command
button on your steering wheel
while in a call and say “Send 1234#” or you can say
“Send Voicemail Password” if Voicemail password is
stored in your mobile phonebook. 3
UNDERSTANDING THE FEATURES OF YOUR VEHICLE 123
Page 135 of 510
Send Messages Using Buttons On The Touchscreen:
You can send messages using Uconnect Phone. To send a
new message:
1. Press the “Phone” button on the touchscreen.
2. Press the “messaging” button on the touchscreen then“New Message.”
3. Press one of the 18 preset messages and the person you wish to send the message to. 4. If multiple numbers are available for the contact select
which number you would like to have the message sent.
5. Press “Send” or “Cancel.”
Send Messages Using Voice Commands:
1. Push the Phone
button.
2. After the “Listening” prompt and the following beep, say “Send message to John Smith mobile.”
3. After the system prompts you for what message you want to send, say the message you wish to send or say
“List.” There are 18 preset messages.
While the list of defined messages are being read, you can
interrupt the system by pushing the Voice Command
button and saying the message you want to send.
After the system confirms that you want to send your
message to John Smith, your message will be sent.
Preset Message List
3
UNDERSTANDING THE FEATURES OF YOUR VEHICLE 133
Page 153 of 510
Front Heated Seats — If Equipped
The front heated seats control buttons are located within
the Uconnect system. You can gain access to the control
buttons through the climate screen or the controls screen.
•Press the heated seat button
once to turn the HI
setting ON.
• Press the heated seat buttona second time to turn
the LO setting ON.
• Press the heated seat buttona third time to turn the
heating elements OFF.
If the HI-level setting is selected, the system will automati-
cally switch to LO-level after approximately 60 minutes of
continuous operation. At that time, the display will change
from HI to LO, indicating the change. The LO-level setting
will turn OFF automatically after approximately 45 min-
utes.
NOTE: The engine must be running for the heated seats to
operate.
Vehicles Equipped With Remote Start
On models that are equipped with remote start, the heated
seats can be programmed to come on during a remote start.
This feature can be programmed through the Uconnect
system. Refer to “Uconnect Settings” in “Understanding
Your Instrument Panel” for further information.
Power Lumbar Switch
3
UNDERSTANDING THE FEATURES OF YOUR VEHICLE 151
Page 160 of 510
push the adjustment button located on the base of the head
restraint, and push downward on the head restraint.
WARNING!
A loose head restraint thrown forward in a collision or
hard stop could cause serious injury or death to occu-
pants of the vehicle. Always securely stow removed
head restraints in a location outside the occupant
compartment.To remove the head restraint, push the adjustment and the
release buttons while pulling upward on the whole assem-
bly and raise it up as far as it can go. To reinstall the
headrest, put the headrest posts into the holes while
pushing the release buttons. Then adjust it to the appro-
priate height.
WARNING!
ALL the head restraints MUST be reinstalled in the
vehicle to properly protect the occupants. Follow the
re-installation instructions above prior to operating the
vehicle or occupying a seat.
NOTE: For proper routing of a Child Seat Tether, refer to
“Occupant Restraints” in “Things To Know Before Start-
ing”.
WARNING!
Driving a vehicle with the head restraints removed or
improperly adjusted could cause serious injury or
death in the event of a collision. The head restraints
should be checked prior to operating the vehicle and
never adjusted while the vehicle is in motion.
1 — Release Button
2 — Adjustment Button 158 UNDERSTANDING THE FEATURES OF YOUR VEHICLE
Page 179 of 510
WARNING!(Continued)
•Do not place anything on the steering wheel that
insulates against heat, such as a blanket or steering
wheel covers of any type and material. This may
cause the steering wheel heater to overheat.
ELECTRONIC SPEED CONTROL — IF EQUIPPED
When engaged, the Electronic Speed Control takes over
accelerator operations at speeds greater than 25 mph
(40 km/h).
The Electronic Speed Control buttons are located on the
right side of the steering wheel.
NOTE:In order to ensure proper operation, the Electronic
Speed Control System has been designed to shut down if
multiple Speed Control functions are operated at the same
time. If this occurs, the Electronic Speed Control System
can be reactivated by pushing the Electronic Speed Control
ON/OFF button and resetting the desired vehicle set
speed.
Electronic Speed Control Buttons
1 — ON/OFF 3 — SET -
2 — RES + 4 — CANCEL
3
UNDERSTANDING THE FEATURES OF YOUR VEHICLE 177
Page 192 of 510
To return to the full open position, the door must first be
closed and then opened by pushing the latch again to
release.
Power Sunroof Switch — If Equipped
Refer to “Power Sunroof” in “Understanding the Features
Of Your Vehicle” for further information.
GARAGE DOOR OPENER — IF EQUIPPED
HomeLink replaces up to three remote controls (hand-held
transmitters) that operate devices such as garage door
openers, motorized gates, lighting or home security sys-
tems. The HomeLink unit operates off your vehicle’s
battery.
The HomeLink buttons, located on either the overhead
console, headliner or sunvisor, designate the three different
HomeLink channels. The HomeLink indicator is located
above the center button.
Observation Mirror
HomeLink Buttons/Overhead Consoles
190 UNDERSTANDING THE FEATURES OF YOUR VEHICLE