radio controls DODGE JOURNEY 2020 User Guide
[x] Cancel search | Manufacturer: DODGE, Model Year: 2020, Model line: JOURNEY, Model: DODGE JOURNEY 2020Pages: 396, PDF Size: 25.53 MB
Page 92 of 396
90 GETTING TO KNOW YOUR VEHICLE
To reset the inverter manually press the power
inverter button off and on within the Uconnect
Settings. To avoid overloading the circuit, check
the power ratings on electrical devices prior to
using the inverter.
NOTE:
Due to built-in overload protection, the power
o u
tlet will shut down if the 115 Volt AC
(150 Watt maximum) power rating is exceeded.
Power Inverter Operation
The power inverter is turned on and off using
the Uconnect System.
Vehicles Equipped With Radio 4.3
To turn the power inverter on or off perform the
f o
llowing:
1. P ress the “More” button on the faceplate
(
located next to the Uconnect display).
2. P ress the “Outlet” button on the
t
ouchscreen (located on the Uconnect
display) to turn the power inverter on or off.
Vehicles Equipped With Uconnect 3/3 NAV
To turn the power inverter on or off perform the
f o
llowing:
1. P ress the “Controls” button on the
t
ouchscreen.
2. P ress the “Outlet” button on the touchscreen
t
o turn the power inverter on or off.
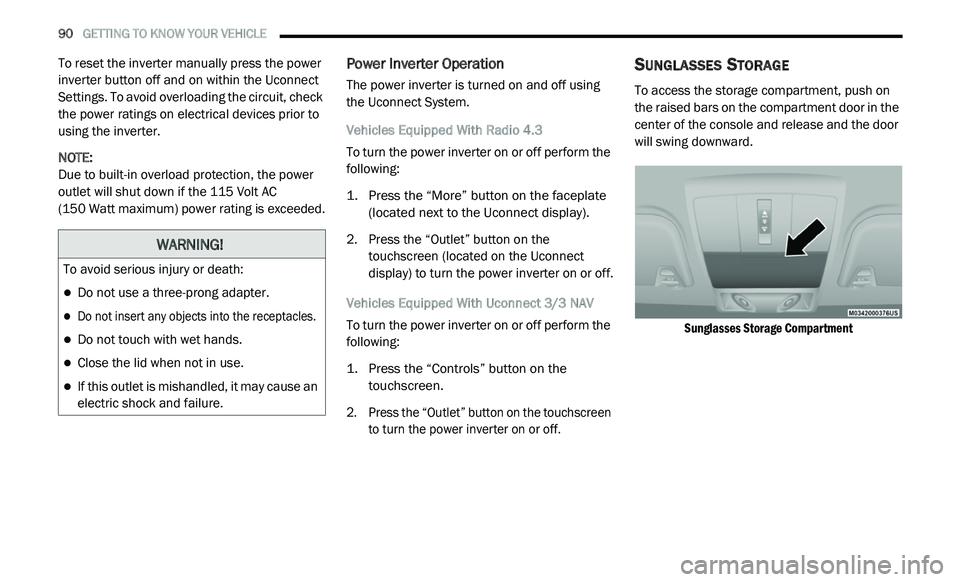
SUNGLASSES STORAGE
To access the storage compartment, push on
the raised bars on the compartment door in the
center of the console and release and the door
will swing downward.
Sunglasses Storage Compartment
WARNING!
To avoid serious injury or death:
Do not use a three-prong adapter.
Do not insert any objects into the receptacles.
Do not touch with wet hands.
Close the lid when not in use.
If this outlet is mishandled, it may cause an
electric shock and failure.
Page 97 of 396
GETTING TO KNOW YOUR INSTRUMENT PANEL 95
INSTRUMENT CLUSTER DISPLAY
Your vehicle may be equipped with an
instrument cluster display, which offers useful
information to the driver. With the ignition in
the OFF mode, opening/closing of a door will
a c
tivate the display for viewing, and display
the total miles, or kilometers, in the odometer.
Y o
ur instrument cluster display is designed to
display important information about your
vehicle’s systems and features. Using a driver
interactive display located on the instrument
panel, your instrument cluster display can show
you how systems are working and give you
warnings when they aren’t. The steering wheel
mounted controls allow you to scroll through
and enter the main menus and submenus.
You can access the specific information you
w a
nt and make selections and adjustments.
INSTRUMENT CLUSTER DISPLAY
L
OCATION AND CONTROLS
The instrument cluster display features a
driver-interactive display that is located in the
instrument cluster.
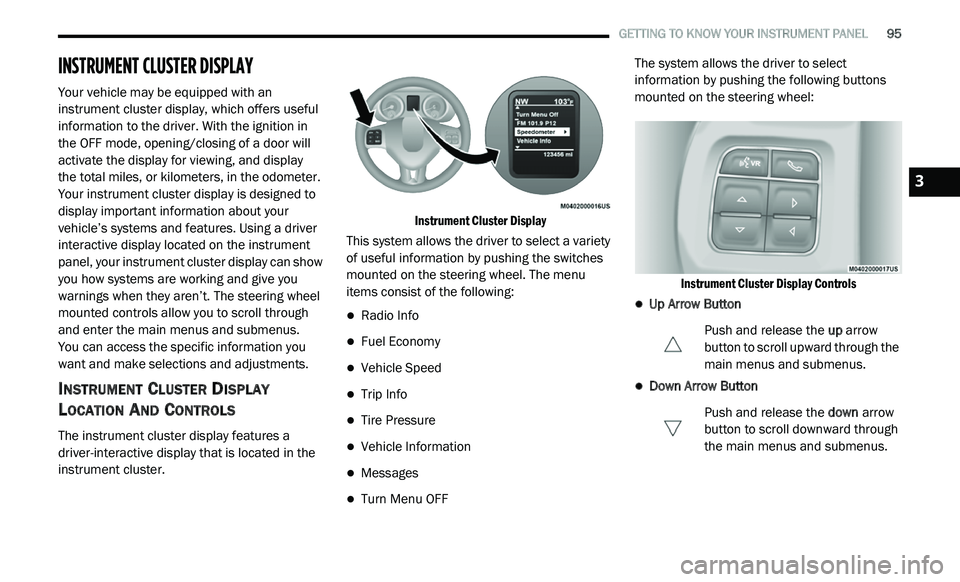
Instrument Cluster Display
This system allows the driver to select a variety
o f
useful information by pushing the switches
mounted on the steering wheel. The menu
items consist of the following:
Radio Info
Fuel Economy
Vehicle Speed
Trip Info
Tire Pressure
Vehicle Information
Messages
Turn Menu OFF The system allows the driver to select
i
n
formation by pushing the following buttons
mounted on the steering wheel:
Instrument Cluster Display Controls
Up Arrow Button Push and release the up
arrow
button to scroll upward through the
m a
in menus and submenus.
Down Arrow Button
Push and release the do
wn arrow
button to scroll downward through
t h
e main menus and submenus.
3
Page 289 of 396
MULTIMEDIA 287
5 — CLIMATE
Push the CLIMATE Control button on the
fa
ceplate to access climate controls. Refer to
“Climate Controls” in “Getting To Know Your
Vehicle” for more information.
6 — PLAYER
Push the PLAYER button, located on the
f a
ceplate, to access media sources such as
Disc, USB Device, and AUX as long as the
requested media is present.
RADIO MODE
Overview
The radio is equipped with the following modes:
FM
AM
SAT SiriusXM® Satellite Radio (if equipped)
Press the RADIO button, upper left corner, to
e n
ter the Radio Mode. The different tuner
modes; AM, FM, and SAT, can then be selected
by pressing the corresponding buttons on the
touchscreen.
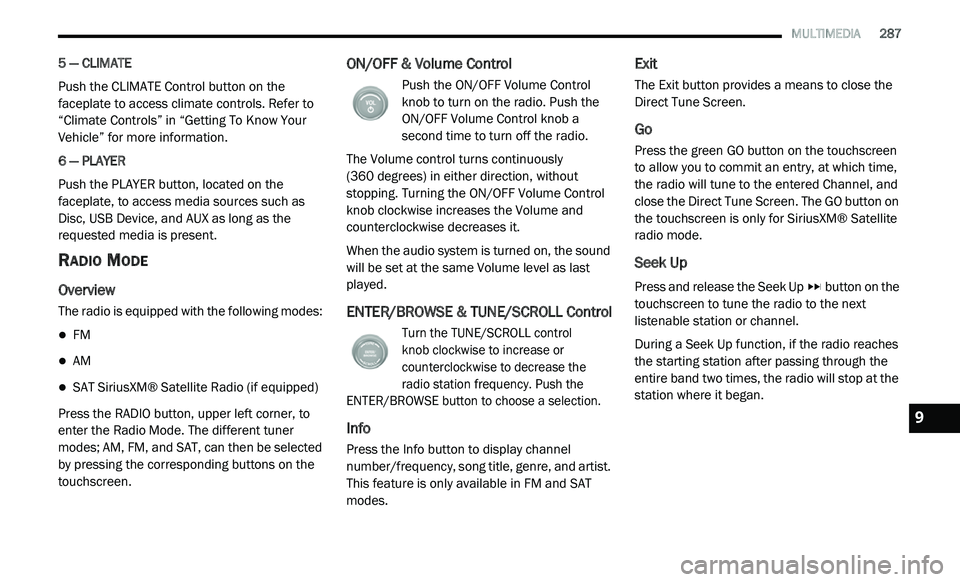
ON/OFF & Volume Control
Push the ON/OFF Volume Control
knob to turn on the radio. Push the
O N
/OFF Volume Control knob a
second time to turn off the radio.
The Volume control turns continuously
(360 degrees) in either direction, without
s t
opping. Turning the ON/OFF Volume Control
knob clockwise increases the Volume and
counterclockwise decreases it.
When the audio system is turned on, the sound
w i
ll be set at the same Volume level as last
played.
ENTER/BROWSE & TUNE/SCROLL Control
Turn the TUNE/SCROLL control
knob clockwise to increase or
c o
unterclockwise to decrease the
radio station frequency. Push the
ENTER/BROWSE button to choose a selection.
Info
Press the Info button to display channel
number/frequency, song title, genre, and artist.
This feature is only available in FM and SAT
modes.
Exit
The Exit button provides a means to close the
Direct Tune Screen.
Go
Press the green GO button on the touchscreen
to allow you to commit an entry, at which time,
the radio will tune to the entered Channel, and
close the Direct Tune Screen. The GO button on
the touchscreen is only for SiriusXM® Satellite
radio mode.
Seek Up
Press and release the Seek Up button on the
touchscreen to tune the radio to the next
l i
stenable station or channel.
During a Seek Up function, if the radio reaches
t h
e starting station after passing through the
entire band two times, the radio will stop at the
station where it began.
9
Page 295 of 396
MULTIMEDIA 293
Info
Press the Info button to display the current
tr
ack information. Press the X button to cancel
this feature.
Shuffle
Press the More... button then the Shuffle button
t o
play the selections on the USB/iPod® device
in random order to provide an interesting
change of pace. Press the Shuffle button a
second time to turn this feature off.
Audio
Refer to “Audio” in “Radio Mode” for further
i n
formation on adjusting the audio settings.
AUX Mode
Overview
AUX Mode is entered by inserting a AUX device
us
ing a cable with a 3.5 mm audio jack into the
A U
X port or by pushing the PLAYER button
located left of the display. Once in Player Mode,
press the Source button, and select “AUX.”
Inserting Auxiliary Device
Gently insert the Auxiliary device cable into the
A U
X Port. If you connect an Auxiliary device with a 3.5
mm stereo cable into the AUX Port, with
t h
e ignition ON and the radio ON, the unit will
switch to AUX mode and begin to play.
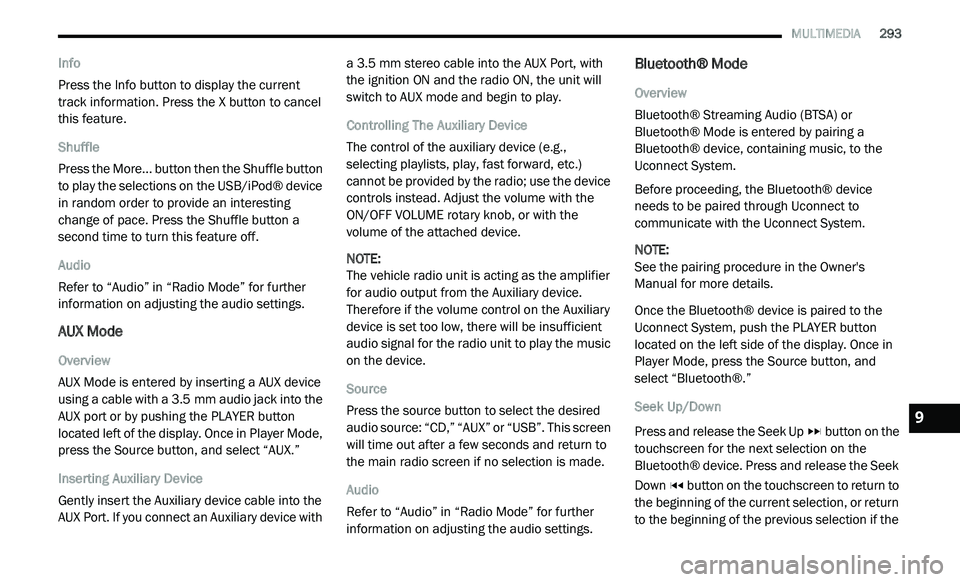
Controlling The Auxiliary Device
The control of the auxiliary device (e.g.,
s e
lecting playlists, play, fast forward, etc.)
cannot be provided by the radio; use the device
controls instead. Adjust the volume with the
ON/OFF VOLUME rotary knob, or with the
volume of the attached device.
NOTE:
The vehicle radio unit is acting as the amplifier
f o
r audio output from the Auxiliary device.
Therefore if the volume control on the Auxiliary
device is set too low, there will be insufficient
audio signal for the radio unit to play the music
on the device.
Source
Press the source button to select the desired
a u
dio source: “CD,” “AUX” or “USB”. This screen
will time out after a few seconds and return to
the main radio screen if no selection is made.
Audio
Refer to “Audio” in “Radio Mode” for further
i n
formation on adjusting the audio settings.
Bluetooth® Mode
Overview
Bluetooth® Streaming Audio (BTSA) or
Bl
uetooth® Mode is entered by pairing a
Bluetooth® device, containing music, to the
Uconnect System.
Before proceeding, the Bluetooth® device
n e
eds to be paired through Uconnect to
communicate with the Uconnect System.
NOTE:
See the pairing procedure in the Owner's
Ma
nual for more details.
Once the Bluetooth® device is paired to the
U c
onnect System, push the PLAYER button
located on the left side of the display. Once in
Player Mode, press the Source button, and
select “Bluetooth®.”
Seek Up/Down
Press and release the Seek Up button on the
touchscreen for the next selection on the
B l
uetooth® device. Press and release the Seek
Down button on the touchscreen to return to
the beginning of the current selection, or return
t o
the beginning of the previous selection if the
9
Page 308 of 396
306 MULTIMEDIA
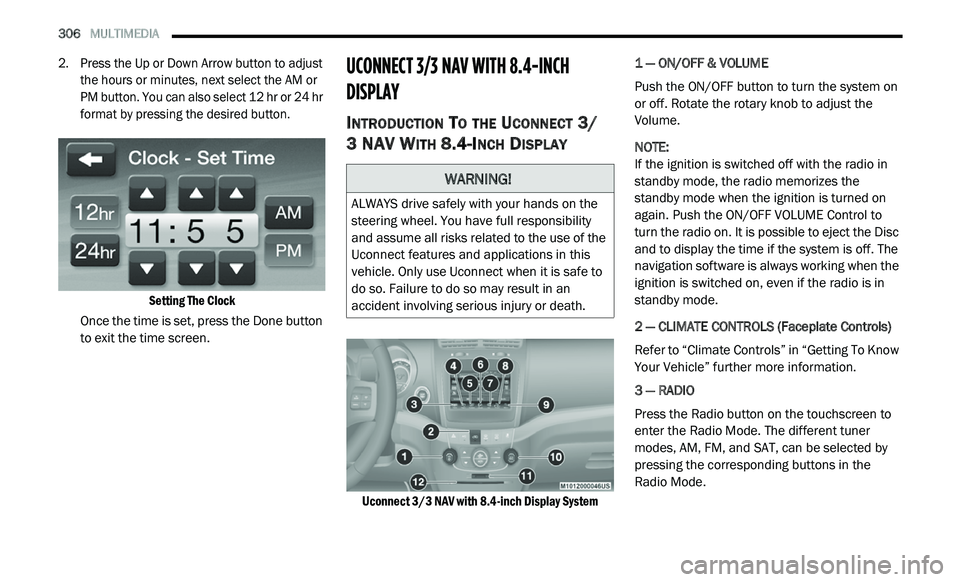
2. Press the Up or Down Arrow button to adjust
the hours or minutes, next select the AM or
PM button. You can also select 12 hr or 24 hr
format by pressing the desired button.
Setting The Clock
Once the time is set, press the Done button
t o
exit the time screen.
UCONNECT 3/3 NAV WITH 8.4-INCH
DI
SPLAY
INTRODUCTION TO THE UCONNECT 3/
3 NAV W
ITH 8.4-INCH DISPLAY
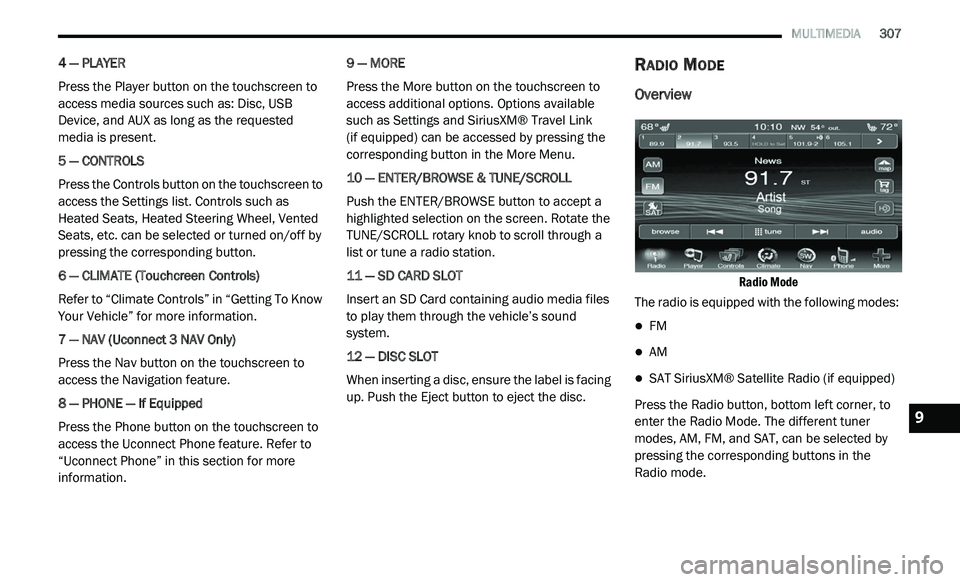
Uconnect 3/3 NAV with 8.4-inch Display System
1 — ON/OFF & VOLUME
Push the ON/OFF button to turn the system on
o
r
off. Rotate the rotary knob to adjust the
Volume.
NOTE:
If the ignition is switched off with the radio in
st
andby mode, the radio memorizes the
standby mode when the ignition is turned on
again. Push the ON/OFF VOLUME Control to
turn the radio on. It is possible to eject the Disc
and to display the time if the system is off. The
navigation software is always working when the
ignition is switched on, even if the radio is in
standby mode.
2 — CLIMATE CONTROLS (Faceplate Controls)
Refer to “Climate Controls” in “Getting To Know
Y o
ur Vehicle” further more information.
3 — RADIO
Press the Radio button on the touchscreen to
en
ter the Radio Mode. The different tuner
modes, AM, FM, and SAT, can be selected by
pressing the corresponding buttons in the
Radio Mode.
WARNING!
ALWAYS drive safely with your hands on the
steering wheel. You have full responsibility
and assume all risks related to the use of the
Uconnect features and applications in this
vehicle. Only use Uconnect when it is safe to
do so. Failure to do so may result in an
accident involving serious injury or death.
Page 309 of 396
MULTIMEDIA 307
4 — PLAYER
Press the Player button on the touchscreen to
ac
cess media sources such as: Disc, USB
Device, and AUX as long as the requested
media is present.
5 — CONTROLS
Press the Controls button on the touchscreen to
a c
cess the Settings list. Controls such as
Heated Seats, Heated Steering Wheel, Vented
Seats, etc. can be selected or turned on/off by
pressing the corresponding button.
6 — CLIMATE (Touchcreen Controls)
Refer to “Climate Controls” in “Getting To Know
Y o
ur Vehicle” for more information.
7 — NAV (Uconnect 3 NAV Only)
Press the Nav button on the touchscreen to
ac
cess the Navigation feature.
8 — PHONE — If Equipped
Press the Phone button on the touchscreen to
ac
cess the Uconnect Phone feature. Refer to
“Uconnect Phone” in this section for more
information. 9 — MORE
Press the More button on the touchscreen to
a
c
cess additional options. Options available
such as Settings and SiriusXM® Travel Link
(if equipped) can be accessed by pressing the
c o
rresponding button in the More Menu.
10 — ENTER/BROWSE & TUNE/SCROLL
Push the ENTER/BROWSE button to accept a
hi
ghlighted selection on the screen. Rotate the
TUNE/SCROLL rotary knob to scroll through a
list or tune a radio station.
11 — SD CARD SLOT
Insert an SD Card containing audio media files
t o
play them through the vehicle’s sound
system.
12 — DISC SLOT
When inserting a disc, ensure the label is facing
u p
. Push the Eject button to eject the disc.
RADIO MODE
Overview
Radio Mode
The radio is equipped with the following modes:
FM
AM
SAT SiriusXM® Satellite Radio (if equipped)
Press the Radio button, bottom left corner, to
e n
ter the Radio Mode. The different tuner
modes, AM, FM, and SAT, can be selected by
pressing the corresponding buttons in the
Radio mode.9
Page 322 of 396
320 MULTIMEDIA
Repeat
Press the Repeat button to toggle the repeat
fu
nctionality. The Repeat button is highlighted
when active. The Radio will continue to play the
current track, repeatedly, as long as the repeat
is active.
Shuffle
Press the Shuffle button to play the selections on
t h
e USB device in random order. Press the Shuffle
button a second time to turn this feature off.
Info
Press the Info button to display the current
t r
ack information. Press the Info button a
second time to cancel this feature.
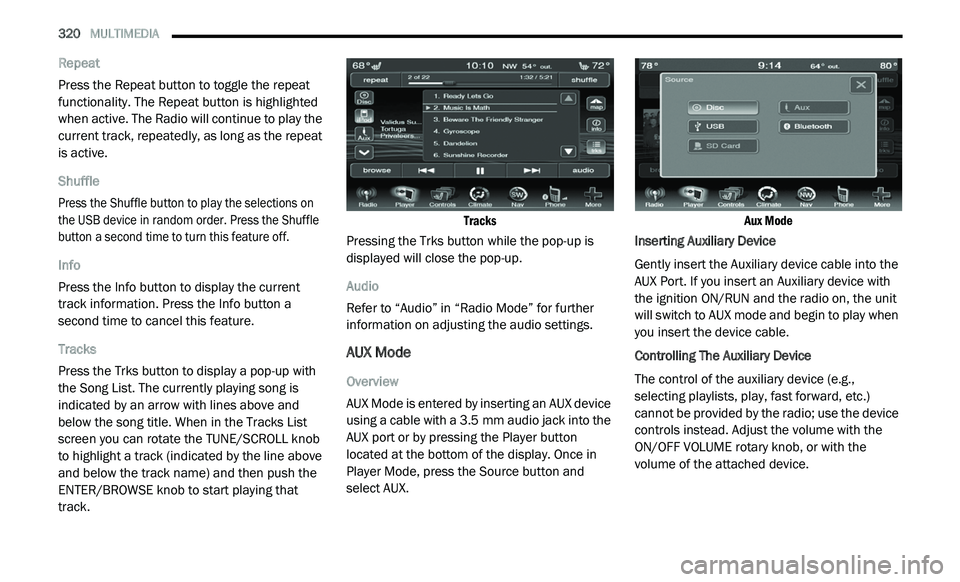
Tracks
Press the Trks button to display a pop-up with
t h
e Song List. The currently playing song is
indicated by an arrow with lines above and
below the song title. When in the Tracks List
screen you can rotate the TUNE/SCROLL knob
to highlight a track (indicated by the line above
and below the track name) and then push the
ENTER/BROWSE knob to start playing that
track.
Tracks
Pressing the Trks button while the pop-up is
d i
splayed will close the pop-up.
Audio
Refer to “Audio” in “Radio Mode” for further
i n
formation on adjusting the audio settings.
AUX Mode
Overview
AUX Mode is entered by inserting an AUX device
us
ing a cable with a 3.5 mm audio jack into the
A U
X port or by pressing the Player button
located at the bottom of the display. Once in
Player Mode, press the Source button and
select AUX.
Aux Mode
Inserting Auxiliary Device
Gently insert the Auxiliary device cable into the
A U
X Port. If you insert an Auxiliary device with
the ignition ON/RUN and the radio on, the unit
will switch to AUX mode and begin to play when
you insert the device cable.
Controlling The Auxiliary Device
The control of the auxiliary device (e.g.,
s e
lecting playlists, play, fast forward, etc.)
cannot be provided by the radio; use the device
controls instead. Adjust the volume with the
ON/OFF VOLUME rotary knob, or with the
volume of the attached device.
Page 365 of 396
MULTIMEDIA 363
Garmin® is a trademark of Garmin® Ltd. or its
subsidiaries, registered in the USA and other
countries. This trademark may not be used
without the express permission of Garmin®.
All other company names and trademarks
m e
ntioned or referenced in this documentation
are the properties of their respective owners. All
rights reserved.
MORE MODE
“More” Main Menu
The More Main Menu consists of the following
options:
Settings
SiriusXM® Travel Link (if equipped)
Refer to the “Navigation Mode” in this
s e
ction for more information.
Settings Main Menu
Radio Settings Main Menu
Press the Settings button to display the list of
a v
ailable settings.
Refer to “Uconnect Settings” in this section for
f u
rther information.
Accessibility
Accessibility is a feature of the DVD system that
a n
nounces a function prior to performing the
action. The first time a button is pressed the
system will identify the button, and will enact
the function of the button the second time it is
pressed. For further information, refer to
“Uconnect Settings” in “Multimedia.”
STEERING WHEEL AUDIO CONTROLS — IF
EQUIPPED
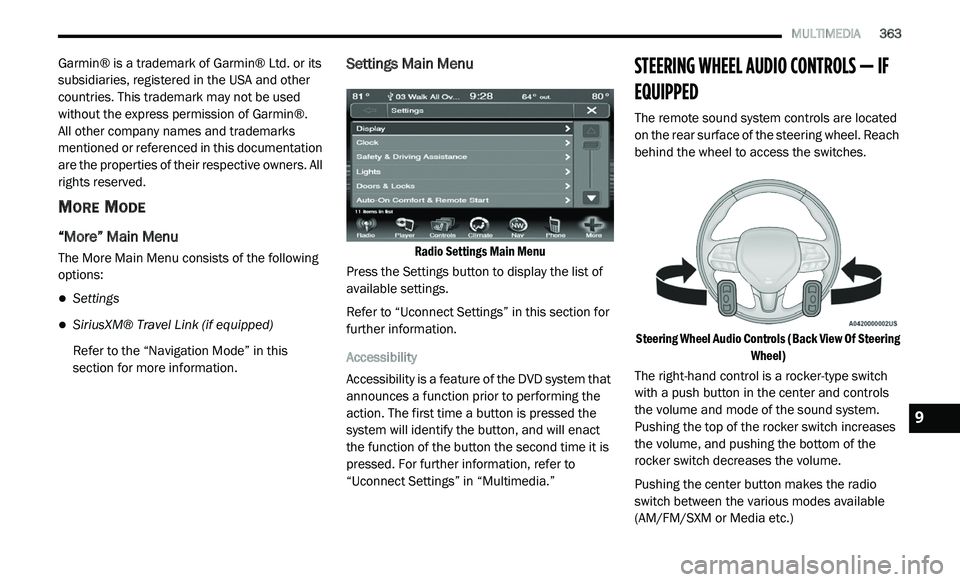
The remote sound system controls are located
on the rear surface of the steering wheel. Reach
behind the wheel to access the switches.
Steering Wheel Audio Controls (Back View Of Steering Wh
eel)
The right-hand control is a rocker-type switch
w i
th a push button in the center and controls
the volume and mode of the sound system.
Pushing the top of the rocker switch increases
the volume, and pushing the bottom of the
rocker switch decreases the volume.
Pushing the center button makes the radio
s w
itch between the various modes available
(AM/FM/SXM or Media etc.)
9
Page 368 of 396
366 MULTIMEDIA
When connecting an external source to the AUX
input, be sure to follow the standard color
coding for the VES jacks:
NOTE:
Certain high-end video games consoles will
ex
ceed the power limit of the vehicle's power
inverter. Refer to the Power Inverter section
within “Internal Equipment” in “Getting To Know
Your Vehicle”.
Ensure the remote control channel selector
s w
itch and headphone switch (IR channel) are
the same number.
Using The Remote Control
1. Push the MODE button on the Remote Control.
2. W hile looking at the video screen, highlight
V
ES AUX 2, by either pushing Up/Down/
Left/Right buttons or by repeatedly pushing
the MODE button, then push ENTER on the
Remote Control.
Using The Touchscreen Radio Controls
1. Press the MORE button on the touchscreen.
2. P ress the Rear Entertainment button on the
t
ouchscreen to display the Rear
Entertainment Controls.
3. I f the Rear Entertainment is turned off,
p
ress the Power button on the touchscreen.
4. P ress the 1 or 2 button on the touchscreen
f
or the channel desired and press the
Source button on the touchscreen to select
the desired mode.
LISTEN TO AN AUDIO SOURCE ON
C
HANNEL 2 WHILE A VIDEO IS PLAYING
O
N CHANNEL 1
Ensure the Remote Control and Headphone
switch is on Channel 2.
Using The Remote Control
1. Push the MODE button on the Remote
Control and the Mode Select Screen will
display, unless a video is playing, then only
a small banner will appear on the bottom
of the screen.
2. W
hile looking at the video screen, either
p
ress Up/Down/Left/Right on the Remote
Control to highlight the desired audio
source or repeatedly push the MODE button
on the remote until the desired audio
source appears on the screen.
Using The Touchscreen Radio Controls
1. Press the MORE button on the touchscreen.
2. P ress the Rear Entertainment button on
t
he touchscreen to display the Rear
E n
tertainment Controls.
3. I f the Rear Entertainment is turned off,
p
ress the Power button on the touchscreen.
4. P ress the 1 or 2 button on the touchscreen
f
or the channel desired and press the
Source button on the touchscreen to select
the desired mode.
Page 369 of 396
MULTIMEDIA 367
PLAY A DVD USING THE TOUCHSCREEN
R
ADIO
Insert the DVD with the label facing up.
The radio automatically selects the appropriate
m o
de after the disc is recognized and displays
the menu screen or starts playing the first track.
Using The Remote Control
1. Push the MODE button on the Remote Control.
2. W hile looking at the Video Screen, highlight
D
ISC by either pushing Up/Down/Left/Right
buttons or by repeatedly pushing the MODE
button, then push ENTER.
NOTE:
The VES system will retain the last setting
when turned off.
Viewing a DVD on the Touchscreen radio
screen is not available in some regions or
locations, the vehicle must be stopped, and
the gear selector must be in the PARK posi -
tion. Refer to local and state laws.
Using The Touchscreen Radio Controls
1. Press the MORE button on the
touchscreen.
2. P ress the Rear Entertainment button on the
t
ouchscreen to display the Rear
Entertainment Controls.
3. I f the Rear Entertainment is turned off,
p
ress the Power button on the touchscreen.
4. P ress the 1 or 2 button on the touchscreen
f
or the channel desired and press the
Source button on the touchscreen to select
the desired mode.
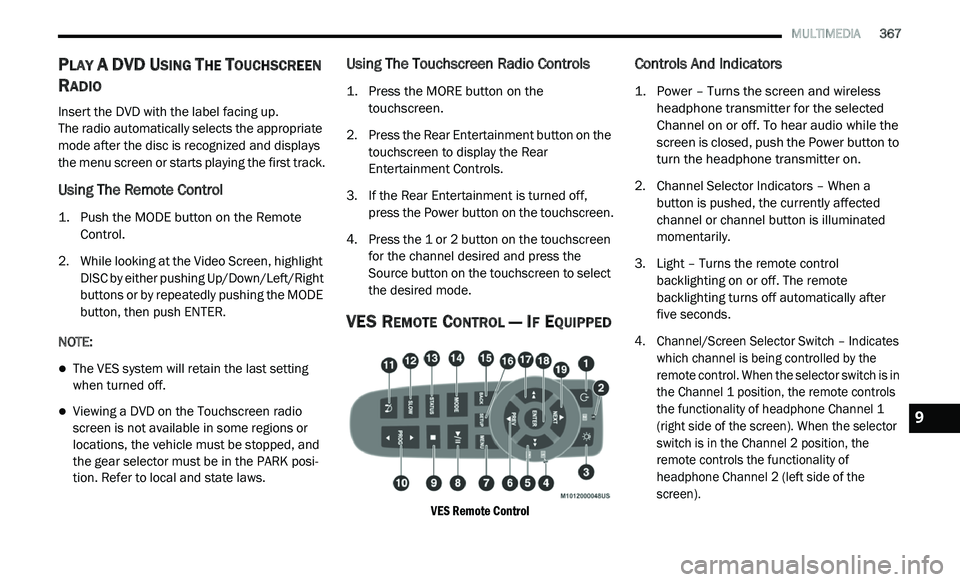
VES REMOTE CONTROL — IF EQUIPPED
VES Remote Control
Controls And Indicators
1. Power – Turns the screen and wireless headphone transmitter for the selected
Channel on or off. To hear audio while the
screen is closed, push the Power button to
turn the headphone transmitter on.
2. C hannel Selector Indicators – When a
b
utton is pushed, the currently affected
channel or channel button is illuminated
momentarily.
3. Light – Turns the remote control b
acklighting on or off. The remote
backlighting turns off automatically after
five seconds.
4. Channel/Screen Selector Switch – Indicates w
hich channel is being controlled by the
remote control. When the selector switch is in
the Channel 1 position, the remote controls
the functionality of headphone Channel 1
(right side of the screen). When the selector
switch is in the Channel 2 position, the
remote controls the functionality of
headphone Channel 2 (left side of the
screen).
9