ABS DODGE JOURNEY 2020 Owners Manual
[x] Cancel search | Manufacturer: DODGE, Model Year: 2020, Model line: JOURNEY, Model: DODGE JOURNEY 2020Pages: 396, PDF Size: 25.53 MB
Page 5 of 396
3
CLIMATE CONTROLS ...........................................47
Manual Climate Control Overview .. ............ 47
Automatic Climate Controls Overview . . ...... 58
Climate Control Functions . . ......................... 70
Automatic Temperature Control (ATC) — If
Equipped . ..................................................... 70
O
perating Tips . . ........................................... 71
WINDOWS . . ..........................................................72
Power Windows .. ......................................... 72
Wind Buffeting . . .......................................... 74
POWER SUNROOF — IF EQUIPPED. . ...................74
Opening Sunroof .. ........................................ 75
Closing Sunroof . . .......................................... 75
Wind Buffeting . . ........................................... 75
Sunshade Operation. . .................................. 75
Anti Pinch Protect Feature . . ........................ 75
Sunroof Maintenance . . ................................ 75
Ignition Off Operation . . ................................ 76
HOOD. .....................................................................76
O pening ........................................................ 76
C losing . ......................................................... 76
L
IFTGATE . ...............................................................77
O pening ........................................................ 77
C argo Area Features . . ................................. 78
GARAGE DOOR OPENER — IF EQUIPPED . . ........80
Before You Begin Programming
HomeLink® . .
................................................ 80
Canadian/Gate Operator Programming . . ... 82Using HomeLink®.
.
...................................... 83
Security. ........................................................ 83
T roubleshooting Tips . . ................................. 83
General Information . . .................................. 84
INTERNAL EQUIPMENT . . ...................................... 84
Storage ......................................................... 84
C upholders . . ................................................ 86
Power Outlets. . ............................................. 87
Power Inverter — If Equipped . . ................... 89
Sunglasses Storage . . .................................. 90
ROOF LUGGAGE RACK — IF EQUIPPED . . .......... 91
GETTING TO KNOW YOUR
INSTRUMENT PANEL
INSTRUMENT CLUSTER ....................................... 93
Instrument Cluster Descriptions .. ............... 94
INSTRUMENT CLUSTER DISPLAY. . ..................... 95
Instrument Cluster Display Location And
Controls . ....................................................... 95
O
il Change Due . . ......................................... 96
Instrument Cluster Display Selectable
Menu Items . .
................................................ 96
Battery Saver On/Battery Saver Mode
Message — Electrical Load Reduction
Actions — If Equipped . .
............................... 99 WARNING LIGHTS AND MESSAGES .
.
............. 100
Red Warning Lights .. ................................. 100
Yellow Warning Lights . . ............................. 103
Green Indicator Lights . . ............................. 106
White Indicator Lights . . ............................. 106
Blue Indicator Lights . . ............................... 106
ONBOARD DIAGNOSTIC SYSTEM — OBD II . . . 107
Onboard Diagnostic System (OBD II)
Cybersecurity . .
........................................... 107
EMISSIONS INSPECTION AND MAINTENANCE
PROGRAMS . .
...................................................... 108
SAFETY
SAFETY FEATURES ............................................ 109
Anti-Lock Brake System (ABS) .. ............... 109
Electronic Brake Control (EBC) System. . .. 110
AUXILIARY DRIVING SYSTEMS . . ...................... 116
Tire Pressure Monitoring System
(TPMS) . ....................................................... 116
O
CCUPANT RESTRAINT SYSTEMS . . ............... 120
Occupant Restraint Systems Features .. .. 120
Important Safety Precautions . . ................. 121
Seat Belt Systems . . .................................. 121
Supplemental Restraint
Systems (SRS) . .
......................................... 130
Child Restraints . . ....................................... 139
Transporting Pets . . ................................... 154
Page 21 of 396
GETTING TO KNOW YOUR VEHICLE 19
NOTE:
The driver's door key cylinder and the liftgate
button on the key fob cannot arm or disarm
the vehicle security alarm.
When the vehicle security alarm is armed,
the interior power door lock switches will not
unlock the doors.
The vehicle security alarm is designed to protect
y o
ur vehicle; however, you can create
conditions where the system will give you a false
alarm. If one of the previously described arming
sequences has occurred, the vehicle security
alarm will arm regardless of whether you are in
the vehicle or not. If you remain in the vehicle
and open a door, the alarm will sound. If this
occurs, disarm the vehicle security alarm.
If the vehicle security alarm is armed and the
b a
ttery becomes disconnected, the vehicle
security alarm will remain armed when the
battery is reconnected; the exterior lights will
flash, the horn will sound. If this occurs, disarm
the vehicle security alarm.
REARMING OF THE SYSTEM
If something triggers the alarm, and no action is
taken to disarm it, the vehicle security alarm will
turn the horn off after 3 minutes, turn all of the
v i
sual signals off after 15 additional minutes,
and then the vehicle security alarm will rearm
itself.
SECURITY SYSTEM MANUAL OVERRIDE
The vehicle security alarm will not arm/disarm if
you lock/unlock the doors using the manual
door lock.
TAMPER ALERT
If something has triggered the vehicle security
alarm in your absence, the horn will sound three
times and the exterior lights will blink three
times when you disarm the vehicle security
alarm. Check the vehicle for tampering.
DOORS
MANUAL DOOR LOCKS
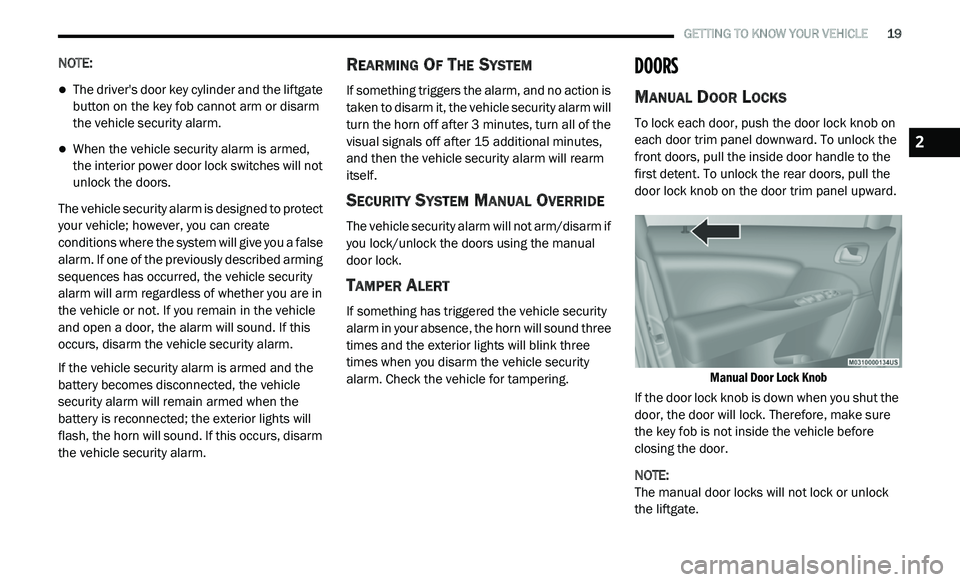
To lock each door, push the door lock knob on
each door trim panel downward. To unlock the
front doors, pull the inside door handle to the
first detent. To unlock the rear doors, pull the
door lock knob on the door trim panel upward.
Manual Door Lock Knob
If the door lock knob is down when you shut the
d o
or, the door will lock. Therefore, make sure
the key fob is not inside the vehicle before
closing the door.
NOTE:
The manual door locks will not lock or unlock
t h
e liftgate.
2
Page 103 of 396
GETTING TO KNOW YOUR INSTRUMENT PANEL 101
If the light remains on when the parking brake has
been disengaged, and the fluid level is at the full
mark on the master cylinder reservoir, it indicates a
possible brake hydraulic system malfunction or that
a problem with the Brake Booster has been
detected by the Anti-Lock Brake System (ABS) /
Electronic Stability Control (ESC) system. In this
case, the light will remain on until the condition has
been corrected. If the problem is related to the
brake booster, the ABS pump will run when applying
the brake, and a brake pedal pulsation may be felt
during each stop.
The dual brake system provides a reserve
br
aking capacity in the event of a failure to a
portion of the hydraulic system. A leak in either
half of the dual brake system is indicated by the
Brake Warning Light, which will turn on when
the brake fluid level in the master cylinder has
dropped below a specified level.
The light will remain on until the cause is
c o
rrected.
NOTE:
The light may flash momentarily during sharp
c o
rnering maneuvers, which change fluid level
conditions. The vehicle should have service
performed, and the brake fluid level checked. If brake failure is indicated, immediate repair is
n
e
cessary.
Vehicles equipped with the Anti-Lock Brake
S y
stem (ABS) are also equipped with Electronic
Brake Force Distribution (EBD). In the event of
an EBD failure, the Brake Warning Light will turn
on along with the ABS Light. Immediate repair to
the ABS system is required.
Operation of the Brake Warning Light can be
c h
ecked by turning the ignition switch from the
OFF position to the ON/RUN position. The light
should illuminate for approximately two
seconds. The light should then turn off unless
the parking brake is applied or a brake fault is
detected. If the light does not illuminate, have
the light inspected by an authorized dealer.
The light also will turn on when the parking
b r
ake is applied with the ignition switch in the
ON/RUN position. NOTE:
This light shows only that the parking brake is
a p
plied. It does not show the degree of brake
application.
Vehicle Security Warning Light — If
Equipped
This light will flash at a fast rate for
approximately 15 seconds when the
v e
hicle security alarm is arming, and
then will flash slowly until the vehicle
is disarmed.
Engine Coolant Temperature Warning
Light
This warning light warns of an
overheated engine condition. If the
e n
gine coolant temperature is too
high, this indicator will illuminate and
a single chime will sound. If the temperature
reaches the upper limit, a continuous chime will
sound for four minutes or until the engine is
able to cool, whichever comes first.
If the light turns on while driving, safely pull over
a n
d stop the vehicle. If the Air Conditioning (A/C)
system is on, turn it off. Also, shift the
transmission into NEUTRAL and idle the vehicle.
WARNING!
Driving a vehicle with the red brake light on is
dangerous. Part of the brake system may
have failed. It will take longer to stop the
vehicle. You could have a collision. Have the
vehicle checked immediately.
3
Page 107 of 396
GETTING TO KNOW YOUR INSTRUMENT PANEL 105
As an added safety feature, your vehicle has
been equipped with a Tire Pressure Monitoring
System (TPMS) that illuminates a low tire
pressure telltale when one or more of your tires is
significantly under-inflated. Accordingly, when
the low tire pressure telltale illuminates, you
should stop and check your tires as soon as
possible, and inflate them to the proper pressure.
Driving on a significantly under-inflated tire
causes the tire to overheat and can lead to tire
failure. Under-inflation also reduces fuel
efficiency and tire tread life, and may affect the
vehicle’s handling and stopping ability.
Please note that the TPMS is not a substitute for
pr
oper tire maintenance, and it is the driver’s
responsibility to maintain correct tire pressure,
even if under-inflation has not reached the level
to trigger illumination of the TPMS low tire
pressure telltale.
Your vehicle has also been equipped with a TPMS
m a
lfunction indicator to indicate when the system is
not operating properly. The TPMS malfunction
indicator is combined with the low tire pressure
telltale. When the system detects a malfunction, the
telltale will flash for approximately one minute and
then remain continuously illuminated. This
sequence will continue upon subsequent vehicle start-ups as long as the malfunction exists. When
the malfunction indicator is illuminated, the system
may not be able to detect or signal low tire pressure
as intended. TPMS malfunctions may occur for a
variety of reasons, including the installation of
replacement or alternate tires or wheels on the
vehicle that prevent the TPMS from functioning
properly. Always check the TPMS malfunction
telltale after replacing one or more tires or wheels
on your vehicle to ensure that the replacement or
alternate tires and wheels allow the TPMS to
continue to function properly.
Anti-Lock Brake System (ABS) Warning
Light
This warning light monitors the
Anti-Lock Brake System (ABS).
The light will turn on when the
ignition is placed in the ON/RUN or
A C
C/ON/RUN position and may stay on for as
long as four seconds.
If the ABS light remains on or turns on while
d r
iving, then the Anti-Lock portion of the brake
system is not functioning and service is
required as soon as possible. However, the
conventional brake system will continue to
operate normally, assuming the Brake Warning
Light is not also on.
If the ABS light does not turn on when the
i g
nition is placed in the ON/RUN or ACC/ON/
RUN position, have the brake system inspected
by an authorized dealer.
Low Fuel Warning Light
When the fuel level reaches
approximately 2 gal (7.5 L), this light
w i
ll turn on and a chime will sound. The
light will remain on until fuel is added.
CAUTION!
The TPMS has been optimized for the original
equipment tires and wheels. TPMS pressures and
warning have been established for the tire size
equipped on your vehicle. Undesirable system
operation or sensor damage may result when
using replacement equipment that is not of the
same size, type, and/or style. Aftermarket wheels
can cause sensor damage. Using aftermarket tire
sealants may cause the Tire Pressure Monitoring
System (TPMS) sensor to become inoperable.
After using an aftermarket tire sealant it is
recommended that you take your vehicle to an
authorized dealer to have your sensor function
checked.
3
Page 111 of 396
109
(Continued)
SAFETY
SAFETY FEATURES
ANTI-LOCK BRAKE SYSTEM (ABS)
The Anti-Lock Brake System (ABS) provides
increased vehicle stability and brake
performance under most braking conditions.
The system automatically prevents wheel lock,
and enhances vehicle control during braking.
The ABS performs a self-check cycle to ensure
th
at the ABS is working properly each time the
vehicle is started and driven. During this
self-check, you may hear a slight clicking sound
as well as some related motor noises.
ABS is activated during braking when the
sy
stem detects one or more wheels begin to
lock. Road conditions such as ice, snow, gravel,
bumps, railroad tracks, loose debris, or panic
stops may increase the likelihood of ABS
activation(s). You also may experience the following when
AB
S activates:
The ABS motor noise (it may continue to run
for a short time after the stop)
The clicking sound of solenoid valves
Brake pedal pulsations
A slight drop of the brake pedal at the end of
the stop
These are all normal characteristics of ABS.
WARNING!
The ABS contains sophisticated electronic
equipment that may be susceptible to inter -
ference caused by improperly installed or
h i
gh output radio transmitting equipment.
This interference can cause possible loss of
anti-lock braking capability. Installation of
such equipment should be performed by
qualified professionals.
Pumping of the Anti-Lock Brakes will diminish
their effectiveness and may lead to a collision.
Pumping makes the stopping distance longer.
Just press firmly on your brake pedal when you
need to slow down or stop.
The ABS cannot prevent the natural laws of
physics from acting on the vehicle, nor can
it increase braking or steering efficiency
beyond that afforded by the condition of the
vehicle brakes and tires or the traction
afforded.
The ABS cannot prevent collisions,
including those resulting from excessive
speed in turns, following another vehicle
too closely, or hydroplaning.
The capabilities of an ABS equipped vehicle
must never be exploited in a reckless or
dangerous manner that could jeopardize
the user’s safety or the safety of others.
WARNING! (Continued)
4
Page 112 of 396
110 SAFETY
ABS is designed to function with the Original
Equipment Manufacturer (OEM) tires.
Modification may result in degraded ABS
performance.
Anti-Lock Brake Warning Light
The yellow “Anti-Lock Brake Warning Light” will
turn on when the ignition is placed in the ON/RUN
mode and may stay on for as long as four
seconds.
If the “Anti-Lock Brake Warning Light” remains
on
or comes on while driving, it indicates that
the anti-lock portion of the brake system is not
functioning and that service is required.
However, the conventional brake system will
continue to operate normally if the “Anti-Lock
Brake Warning Light” is on.
If the “Anti-Lock Brake Warning Light” is on, the
b r
ake system should be serviced as soon as
possible to restore the benefits of anti-lock
brakes. If the “Anti-Lock Brake Warning Light”
does not come on when the ignition is placed in
the ON/RUN mode, have the light repaired as
soon as possible.
ELECTRONIC BRAKE CONTROL (EBC)
S
YSTEM
Your vehicle is equipped with an advanced
Electronic Brake Control (EBC) system.
This system includes Electronic Brake Force
D i
stribution (EBD), Anti-Lock Brake System
(ABS), Brake Assist System (BAS), Hill Start
Assist (HSA), Traction Control System (TCS),
Electronic Stability Control (ESC), and Electronic
Roll Mitigation (ERM). These systems work
together to enhance both vehicle stability and
control in various driving conditions.
Your vehicle may also be equipped with Trailer
S w
ay Control (TSC).
Brake Assist System (BAS)
The Brake Assist System (BAS) is designed to
optimize the vehicle’s braking capability during
emergency braking maneuvers. The system
detects an emergency braking situation by
sensing the rate and amount of brake application
and then applies optimum pressure to the
brakes. This can help reduce braking distances.
The BAS complements the Anti-Lock Brake
System (ABS). Applying the brakes very quickly
results in the best BAS assistance. To receive the
benefit of the system, you must apply continuous braking pressure during the stopping sequence
(do not “pump” the brakes). Do not reduce brake
pedal pressure unless braking is no longer
desired. Once the brake pedal is released, the
BAS is deactivated.
Brake System Warning Light
The red “Brake System Warning Light” will turn
on when the ignition is placed in the ON/RUN
mode and may stay on for as long as
four seconds.
WARNING!
The Brake Assist System (BAS) cannot prevent
the natural laws of physics from acting on
the vehicle, nor can it increase the traction
a f
forded by prevailing road conditions.
BAS cannot prevent collisions, including those
r e
sulting from excessive speed in turns, driving
on very slippery surfaces, or hydroplaning.
The capabilities of a BAS-equipped vehicle
m u
st never be exploited in a reckless or
dangerous manner, which could jeopardize
the user's safety or the safety of others.
Page 113 of 396
SAFETY 111
If the “Brake System Warning Light” remains on
or comes on while driving, it indicates that the
brake system is not functioning properly and
that immediate service is required. If the “Brake
System Warning Light” does not come on when
the ignition is placed in the ON/RUN mode,
have the light repaired as soon as possible.
Electronic Brake Force Distribution (EBD)
The Electronic Brake Force Distribution (EBD)
function manages the distribution of the braking
torque between the front and rear axles by
limiting braking pressure to the rear axle. This is
done to prevent overslip of the rear wheels to
avoid vehicle instability, and to prevent the rear
axle from entering the Anti-Lock Brake System
(ABS) before the front axle.
Electronic Roll Mitigation (ERM)
The Electronic Roll Mitigation (ERM) system
anticipates the potential for wheel lift by
monitoring the driver’s steering wheel input and
the speed of the vehicle. When ERM determines
that the rate of change of the steering wheel
angle and vehicle’s speed are sufficient to
potentially cause wheel lift, it then applies the
appropriate brake and may also reduce engine
power to lessen the chance that wheel lift will
occur. ERM can only reduce the chance of wheel lift occurring during severe or evasive driving
maneuvers; it cannot prevent wheel lift due to
other factors, such as road conditions, leaving
the roadway, or striking objects or other vehicles.
Electronic Stability Control (ESC)
The Electronic Stability Control (ESC) system
enhances directional control and stability of the
vehicle under various driving conditions. ESC
corrects for oversteering or understeering of the
vehicle by applying the brake of the appropriate
wheel(s) to assist in counteracting the oversteer
or understeer condition. Engine power may also
be reduced to help the vehicle maintain the
desired path.
ESC uses sensors in the vehicle to determine
t
h
e vehicle path intended by the driver and
compares it to the actual path of the vehicle.
When the actual path does not match the
intended path, ESC applies the brake of the
appropriate wheel to assist in counteracting the
oversteer or understeer condition.
Oversteer — when the vehicle is turning more
than appropriate for the steering wheel position.
Understeer — when the vehicle is turning less
than appropriate for the steering wheel position.
The ESC Activation/Malfunction Indicator Light
l o
cated in the instrument cluster will start to flash
as soon as the ESC system becomes active.
The ESC Activation/Malfunction Indicator Light
a l
so flashes when the TCS is active. If the ESC
Activation/Malfunction Indicator Light begins to
flash during acceleration, ease up on the
accelerator and apply as little throttle as
possible. Be sure to adapt your speed and driving
to the prevailing road conditions.
WARNING!
Many factors, such as vehicle loading, road
conditions and driving conditions, influence
the chance that wheel lift or rollover may occur.
ERM cannot prevent all wheel lift or roll overs,
especially those that involve leaving the
roadway or striking objects or other vehicles.
The capabilities of an ERM-equipped vehicle
must never be exploited in a reckless or
dangerous manner which could jeopardize the
user's safety or the safety of others.
4
Page 136 of 396
134 SAFETY
Supplemental Side Air Bags
Supplemental Seat-Mounted Side
Air Bags (SABs)
This vehicle is equipped with Supplemental
S e
at-Mounted Side Air Bags (SABs).
Supplemental Seat-Mounted Side Air Bags
( S
ABs) are located in the outboard side of the
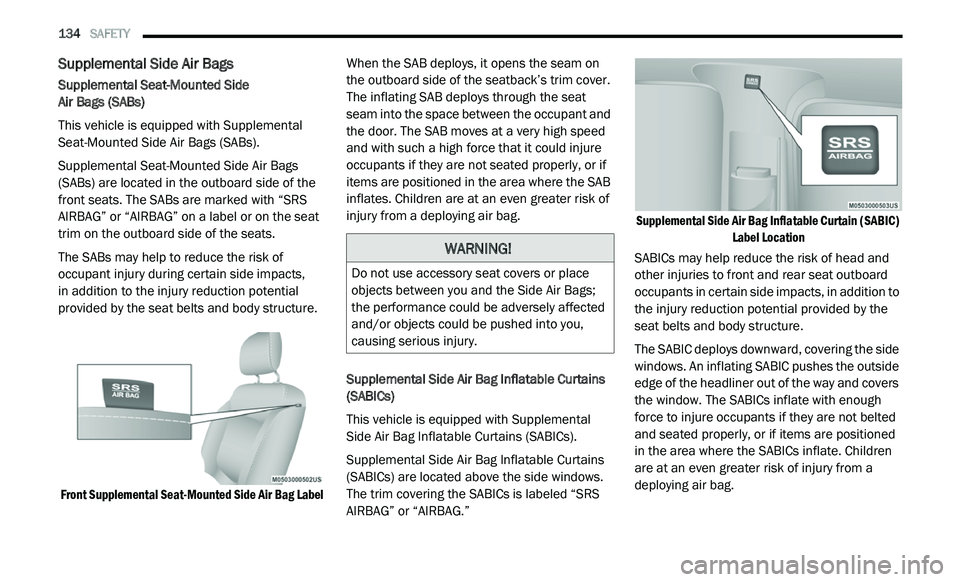
front seats. The SABs are marked with “SRS
AIRBAG” or “AIRBAG” on a label or on the seat
trim on the outboard side of the seats.
The SABs may help to reduce the risk of
oc
cupant injury during certain side impacts,
in addition to the injury reduction potential
p r
ovided by the seat belts and body structure.
Front Supplemental Seat-Mounted Side Air Bag Label
When the SAB deploys, it opens the seam on
t
h
e outboard side of the seatback’s trim cover.
The inflating SAB deploys through the seat
seam into the space between the occupant and
the door. The SAB moves at a very high speed
and with such a high force that it could injure
occupants if they are not seated properly, or if
items are positioned in the area where the SAB
inflates. Children are at an even greater risk of
injury from a deploying air bag.
Supplemental Side Air Bag Inflatable Curtains
( S
ABICs)
This vehicle is equipped with Supplemental
S i
de Air Bag Inflatable Curtains (SABICs).
Supplemental Side Air Bag Inflatable Curtains
( S
ABICs) are located above the side windows.
The trim covering the SABICs is labeled “SRS
AIRBAG” or “AIRBAG.”
Supplemental Side Air Bag Inflatable Curtain (SABIC)
La
bel Location
SABICs may help reduce the risk of head and
o t
her injuries to front and rear seat outboard
occupants in certain side impacts, in addition to
the injury reduction potential provided by the
seat belts and body structure.
The SABIC deploys downward, covering the side
wi
ndows. An inflating SABIC pushes the outside
edge of the headliner out of the way and covers
the window. The SABICs inflate with enough
force to injure occupants if they are not belted
and seated properly, or if items are positioned
in the area where the SABICs inflate. Children
are at an even greater risk of injury from a
deploying air bag.
WARNING!
Do not use accessory seat covers or place
objects between you and the Side Air Bags;
the performance could be adversely affected
and/or objects could be pushed into you,
causing serious injury.
Page 194 of 396
192 IN CASE OF EMERGENCY
Front Fog Lamp
NOTE:
Turn the steering wheel to the right if replacing
t h
e left front fog lamp or to the left if replacing
the right front fog lamp to allow for easier
access to the front of the wheel well.
1. Remove the fasteners retaining the front l
ower wheel well access panel and remove
the access panel.
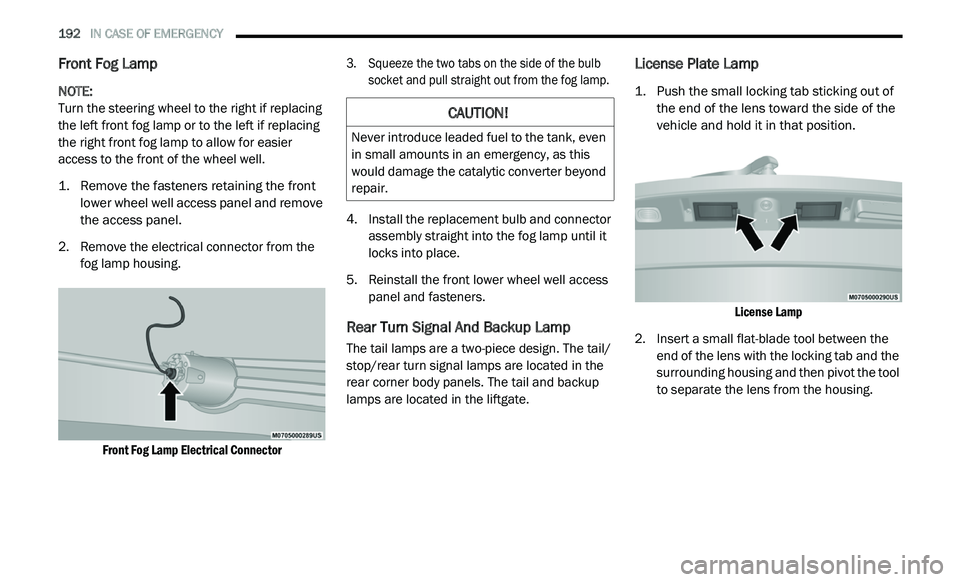
2. R emove the electrical connector from the
f
og lamp housing.
Front Fog Lamp Electrical Connector
3. S
queeze the two tabs on the side of the bulb
s
ocket and pull straight out from the fog lamp.
4. I nstall the replacement bulb and connector
a
ssembly straight into the fog lamp until it
locks into place.
5. R einstall the front lower wheel well access
p
anel and fasteners.
Rear Turn Signal And Backup Lamp
The tail lamps are a two-piece design. The tail/
stop/rear turn signal lamps are located in the
rear corner body panels. The tail and backup
lamps are located in the liftgate.
License Plate Lamp
1. Push the small locking tab sticking out of the end of the lens toward the side of the
vehicle and hold it in that position.
License Lamp
2. I nsert a small flat-blade tool between the
e
nd of the lens with the locking tab and the
surrounding housing and then pivot the tool
to separate the lens from the housing.
CAUTION!
Never introduce leaded fuel to the tank, even
in small amounts in an emergency, as this
would damage the catalytic converter beyond
repair.
Page 195 of 396
IN CASE OF EMERGENCY 193
3. Hold the lens with one hand and rotate the
bulb's electrical connector a quarter turn
counterclockwise, with the other hand
separate the bulb and connector assembly
from the lens.
4. R emove the bulb from the connector socket
a
nd install the replacement bulb.
5. I nstall the bulb and connector assembly
i
nto the lens and rotate the connector a
quarter turn clockwise to lock it in place.
6. I nsert the end of the lens without the
l
ocking tab into the housing on the liftgate
and then push the opposite end of the lens
into the housing, making sure it locks into
the housing.
FUSESINTERIOR FUSES
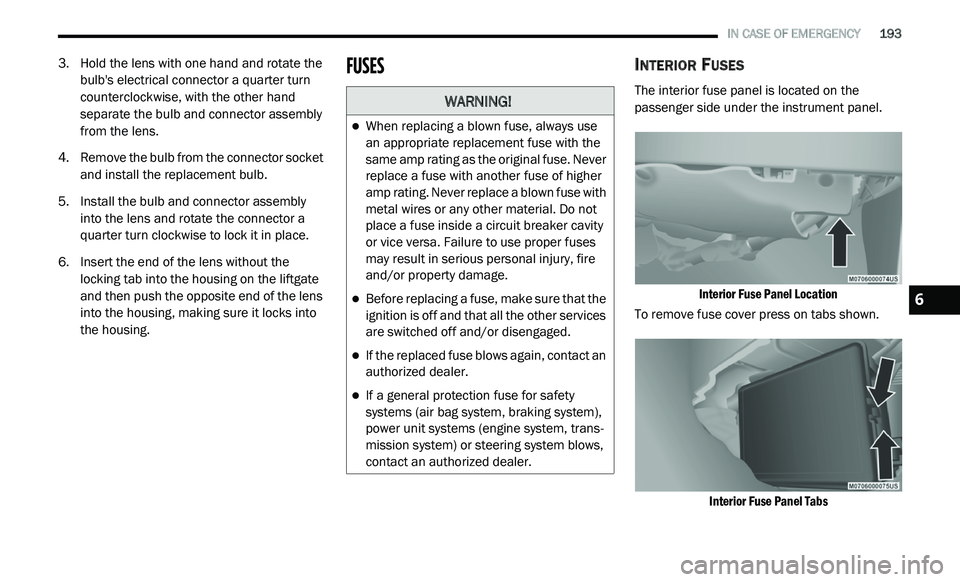
The interior fuse panel is located on the
passenger side under the instrument panel.
Interior Fuse Panel Location
To remove fuse cover press on tabs shown.
Interior Fuse Panel Tabs
WARNING!
When replacing a blown fuse, always use
an appropriate replacement fuse with the
same amp rating as the original fuse. Never
replace a fuse with another fuse of higher
amp rating. Never replace a blown fuse with
metal wires or any other material. Do not
place a fuse inside a circuit breaker cavity
or vice versa. Failure to use proper fuses
may result in serious personal injury, fire
and/or property damage.
Before replacing a fuse, make sure that the
ignition is off and that all the other services
are switched off and/or disengaged.
If the replaced fuse blows again, contact an
authorized dealer.
If a general protection fuse for safety
systems (air bag system, braking system),
power unit systems (engine system, trans -
mission system) or steering system blows,
c o
ntact an authorized dealer.
6