eco mode DODGE JOURNEY 2020 Owner's Manual
[x] Cancel search | Manufacturer: DODGE, Model Year: 2020, Model line: JOURNEY, Model: DODGE JOURNEY 2020Pages: 396, PDF Size: 25.53 MB
Page 80 of 396
78 GETTING TO KNOW YOUR VEHICLE
CARGO AREA FEATURES
Cargo Management System
Five Passenger System Features
A raised load floor that sits on top of a large
built-in storage bin.
A tri-fold door built into the load floor that
allows easy access to items in the built-in
storage bin.
60/40 split second-row passenger seats with
fold flat feature, which allows for extended
cargo space. Refer to “Seats” in this chapter
for further information.
An optional front passenger seat with fold flat
feature, which extends cargo space even
further. Refer to “Seats” in this chapter for
further information.
Cargo tie-downs.
A retractable cargo area cover (if equipped).
Seven Passenger System Features
A large built-in storage bin with a hinged hard -
cover located in the floor behind the third-row
p a
ssenger seats.
60/40 split second-row passenger seats with
fold flat feature, which allows for extended
cargo space. Refer to “Seats” in this chapter
for further information.
50/50 split third-row passenger seats with
fold flat feature, which allows for extended
cargo space. Refer to “Seats” in this chapter
for further information.
An optional front passenger seat with fold flat
feature, which extends cargo space even
further. Refer to “Seats” in this chapter for
further information.
Cargo tie-downs.
Retractable Cargo Area Cover (Five
Passenger Models) — If Equipped
NOTE:
The purpose of this cover is for privacy, not to
s e
cure loads. It will not prevent cargo from
shifting or protect passengers from loose cargo.
The removable retractable cargo area cover
m o
unts in the cargo area behind the top of the
rear seats. The cover, when extended, covers the cargo
a
r
ea to keep items out of sight. Notches in the
trim panels near the liftgate opening secure the
extended cover in place.
The cover rolls away neatly inside its housing
w h
en not in use. You can also remove the cover
from the vehicle to make more room in the
cargo area.
To Install The Cover:
1. P osition the cover in the vehicle so that the
f
lat side of the housing faces upward.
2. I nsert either the left or the right
s
pring-loaded post (located on the ends of
the cover housing) into the left attachment
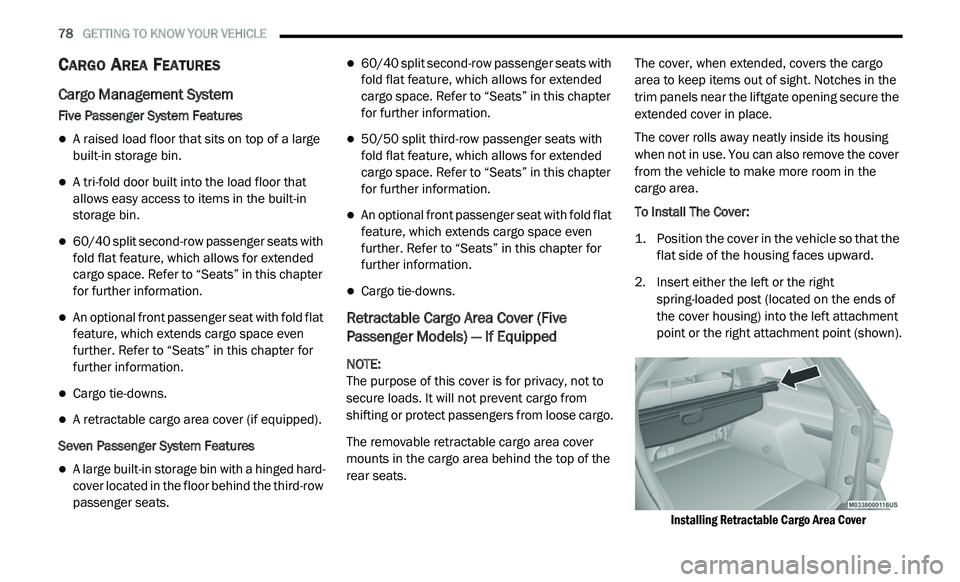
point or the right attachment point (shown).
Installing Retractable Cargo Area Cover
Page 83 of 396
GETTING TO KNOW YOUR VEHICLE 81
Programming A Rolling Code
For programming garage door openers that
were manufactured after 1995:
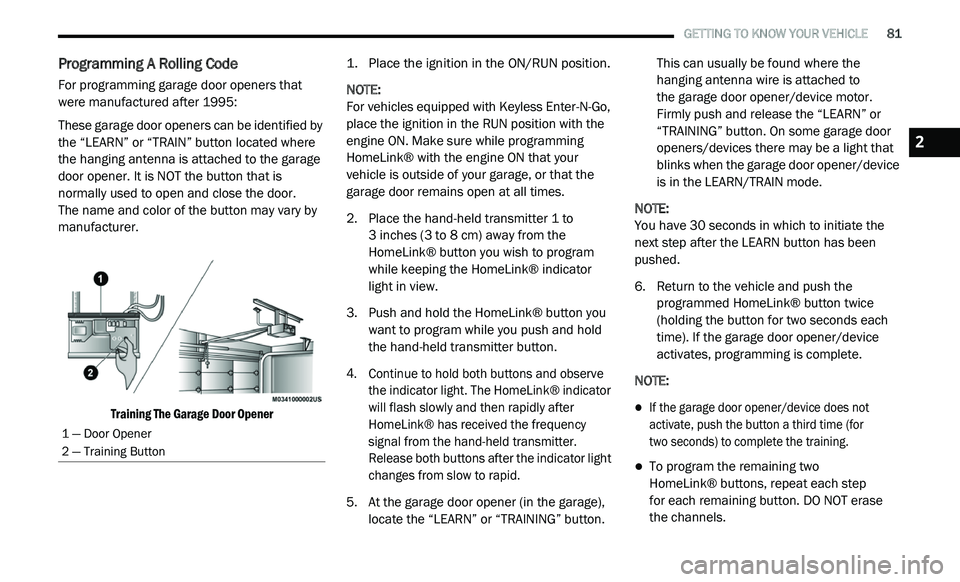
These garage door openers can be identified by
th
e “LEARN” or “TRAIN” button located where
the hanging antenna is attached to the garage
door opener. It is NOT the button that is
normally used to open and close the door.
The name and color of the button may vary by
m a
nufacturer.
Training The Garage Door Opener
1. P
lace the ignition in the ON/RUN position.
N
OTE:
For vehicles equipped with Keyless Enter-N-Go,
p l
ace the ignition in the RUN position with the
engine ON. Make sure while programming
HomeLink® with the engine ON that your
vehicle is outside of your garage, or that the
garage door remains open at all times.
2. P lace the hand-held transmitter 1 to
3
inches (3 to 8 cm) away from the
H o
meLink® button you wish to program
while keeping the HomeLink® indicator
light in view.
3. Push and hold the HomeLink® button you w
ant to program while you push and hold
the hand-held transmitter button.
4. C ontinue to hold both buttons and observe
t
he indicator light. The HomeLink® indicator
will flash slowly and then rapidly after
HomeLink® has received the frequency
signal from the hand-held transmitter.
Release both buttons after the indicator light
changes from slow to rapid.
5. A t the garage door opener (in the garage),
l
ocate the “LEARN” or “TRAINING” button. This can usually be found where the
hanging antenna wire is attached to
the garage door opener/device motor.
F i
rmly push and release the “LEARN” or
“TRAINING” button. On some garage door
openers/devices there may be a light that
blinks when the garage door opener/device
is in the LEARN/TRAIN mode.
NOTE:
You have 30 seconds in which to initiate the
n e
xt step after the LEARN button has been
pushed.
6. R eturn to the vehicle and push the
p
rogrammed HomeLink® button twice
(holding the button for two seconds each
time). If the garage door opener/device
activates, programming is complete.
NOTE:
If the garage door opener/device does not
activate, push the button a third time (for
two seconds) to complete the training.
To program the remaining two
HomeLink® buttons, repeat each step
for each remaining button. DO NOT erase
the channels.
1 — Door Opener
2 — Training Button
2
Page 86 of 396
84 GETTING TO KNOW YOUR VEHICLE
GENERAL INFORMATION
The following regulatory statement applies to all
Radio Frequency (RF) devices equipped in this
vehicle:
This device complies with Part 15 of the FCC
Ru
les and with Innovation, Science and
Economic Development Canada license-exempt
RSS standard(s). Operation is subject to the
following two conditions:
1. T his device may not cause harmful
i
nterference, and
2. This device must accept any interference
r
eceived, including interference that may
cause undesired operation.
Le présent appareil est conforme aux CNR
d`
Innovation, Science and Economic
Development applicables aux appareils radio
exempts de licence. L'exploitation est autorisée
aux deux conditions suivantes:
1. l 'appareil ne doit pas produire de
b
rouillage, et
2. l 'utilisateur de l'appareil doit accepter tout
b
rouillage radioélectrique subi, même si le
brouillage est susceptible d'en compro -
mettre le fonctionnement.
La operación de este equipo está sujeta a las
s i
guientes dos condiciones:
1. e s posible que este equipo o dispositivo no
c
ause interferencia perjudicial y
2. e ste equipo o dispositivo debe aceptar
c
ualquier interferencia, incluyendo la que
pueda causar su operación no deseada. NOTE:
Changes or modifications not expressly
a p
proved by the party responsible for compli -
ance could void the user’s authority to operate
t h
e equipment.
INTERNAL EQUIPMENT
STORAGE
Glove Compartment
The glove compartment is located on the
passenger side of the instrument panel.
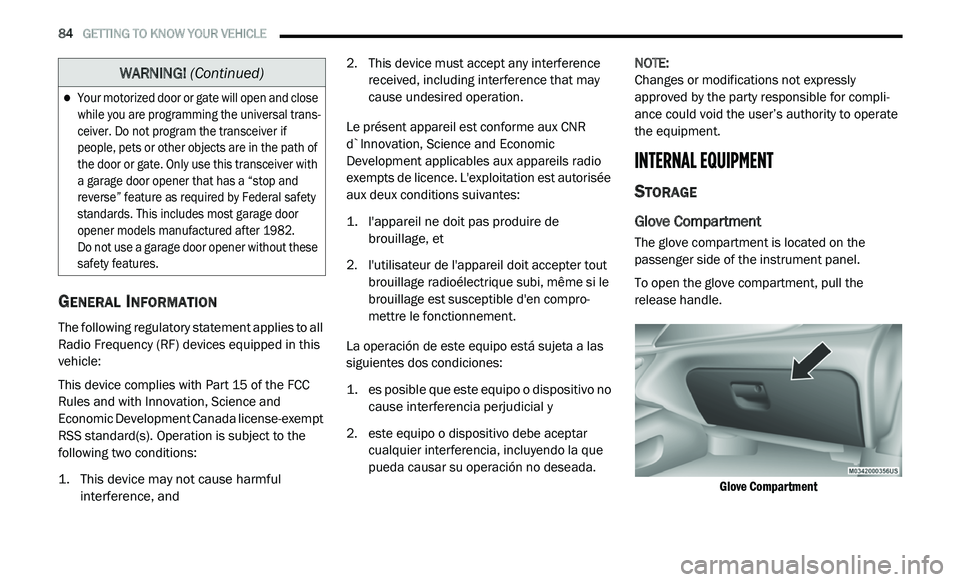
To open the glove compartment, pull the
re
lease handle.
Glove Compartment
Your motorized door or gate will open and close
while you are programming the universal trans -
ceiver. Do not program the transceiver if
p e
ople, pets or other objects are in the path of
the door or gate. Only use this transceiver with
a garage door opener that has a “stop and
reverse” feature as required by Federal safety
standards. This includes most garage door
opener models manufactured after 1982.
Do not use a garage door opener without these
s a
fety features.
WARNING! (Continued)
Page 97 of 396
GETTING TO KNOW YOUR INSTRUMENT PANEL 95
INSTRUMENT CLUSTER DISPLAY
Your vehicle may be equipped with an
instrument cluster display, which offers useful
information to the driver. With the ignition in
the OFF mode, opening/closing of a door will
a c
tivate the display for viewing, and display
the total miles, or kilometers, in the odometer.
Y o
ur instrument cluster display is designed to
display important information about your
vehicle’s systems and features. Using a driver
interactive display located on the instrument
panel, your instrument cluster display can show
you how systems are working and give you
warnings when they aren’t. The steering wheel
mounted controls allow you to scroll through
and enter the main menus and submenus.
You can access the specific information you
w a
nt and make selections and adjustments.
INSTRUMENT CLUSTER DISPLAY
L
OCATION AND CONTROLS
The instrument cluster display features a
driver-interactive display that is located in the
instrument cluster.
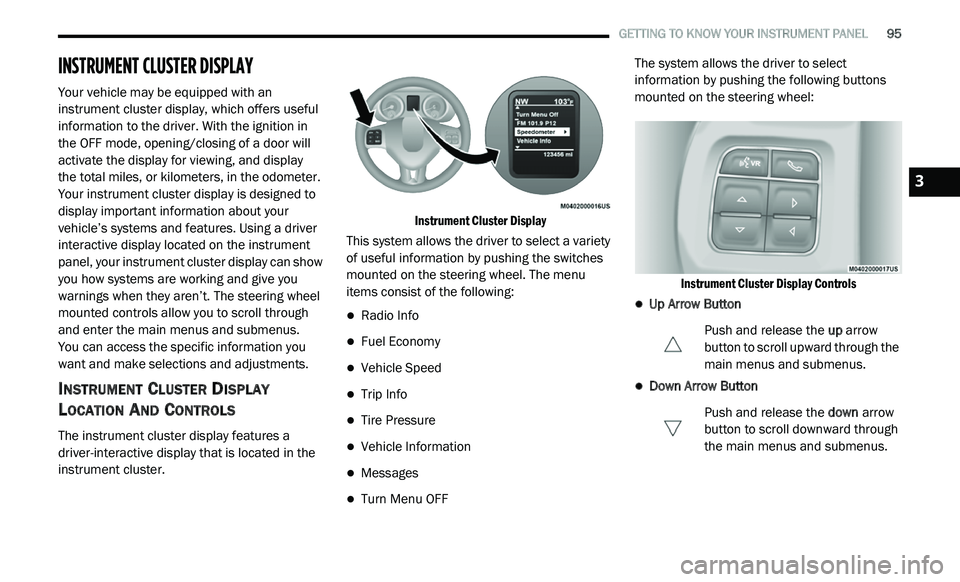
Instrument Cluster Display
This system allows the driver to select a variety
o f
useful information by pushing the switches
mounted on the steering wheel. The menu
items consist of the following:
Radio Info
Fuel Economy
Vehicle Speed
Trip Info
Tire Pressure
Vehicle Information
Messages
Turn Menu OFF The system allows the driver to select
i
n
formation by pushing the following buttons
mounted on the steering wheel:
Instrument Cluster Display Controls
Up Arrow Button Push and release the up
arrow
button to scroll upward through the
m a
in menus and submenus.
Down Arrow Button
Push and release the do
wn arrow
button to scroll downward through
t h
e main menus and submenus.
3
Page 102 of 396
100 GETTING TO KNOW YOUR INSTRUMENT PANEL
What to do when an electrical load reduction
action message is present (“Battery Saver On”
or “Battery Saver Mode”)
During a trip:
Reduce power to unnecessary loads if possible:
Turn off redundant lights (interior or exterior)
Check what may be plugged in to power
outlets +12 Volts, 115 Volts AC, USB ports
Check HVAC settings (blower, temperature)
Check the audio settings (volume)
After a trip:
Check if any aftermarket equipment was
installed (additional lights, upfitter electrical
accessories, audio systems, alarms) and
review specifications if any (load and ignition
OFF draw currents).
Evaluate the latest driving cycles (distance,
driving time and parking time).
The vehicle should have service performed if
the message is still present during consecu -
tive trips, and if the evaluation and driving
p a
ttern of the vehicle did not help to identify
the cause.
WARNING LIGHTS AND MESSAGES
The warning/indicator lights will illuminate in
the instrument panel together with a dedicated
message and/or acoustic signal when
applicable. These indications are indicative
and precautionary and as such must not be
c o
nsidered as exhaustive. Always refer to the
information in this chapter in the event of a
failure indication. All active telltales will display
first if applicable. The system check menu may
appear different based upon equipment
options and current vehicle status. Some
telltales are optional and may not appear.
RED WARNING LIGHTS
Seat Belt Reminder Warning Light
This warning light indicates when
the driver or passenger seat belt is
u n
buckled. When the ignition is first
placed in the ON/RUN or ACC/ON/RUN
position and if the driver’s seat belt is unbuckled,
a chime will sound and the light will turn on.
When driving, if the driver or front passenger seat
belt remains unbuckled, the Seat Belt Reminder
Light will flash or remain on continuously and a
chime will sound.
Refer to “Occupant Restraint Systems” in
“
S
afety” for further information.
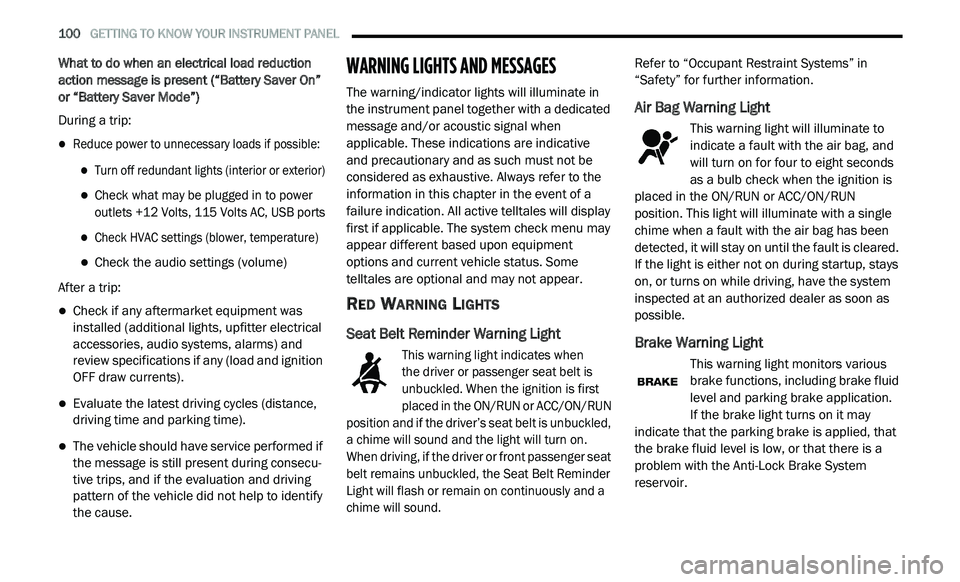
Air Bag Warning Light
This warning light will illuminate to
indicate a fault with the air bag, and
wi
ll turn on for four to eight seconds
as a bulb check when the ignition is
placed in the ON/RUN or ACC/ON/RUN
position. This light will illuminate with a single
chime when a fault with the air bag has been
detected, it will stay on until the fault is cleared.
If the light is either not on during startup, stays
on, or turns on while driving, have the system
inspected at an authorized dealer as soon as
possible.
Brake Warning Light
This warning light monitors various
brake functions, including brake fluid
l e
vel and parking brake application.
If the brake light turns on it may
i n
dicate that the parking brake is applied, that
the brake fluid level is low, or that there is a
problem with the Anti-Lock Brake System
reservoir.
Page 112 of 396
110 SAFETY
ABS is designed to function with the Original
Equipment Manufacturer (OEM) tires.
Modification may result in degraded ABS
performance.
Anti-Lock Brake Warning Light
The yellow “Anti-Lock Brake Warning Light” will
turn on when the ignition is placed in the ON/RUN
mode and may stay on for as long as four
seconds.
If the “Anti-Lock Brake Warning Light” remains
on
or comes on while driving, it indicates that
the anti-lock portion of the brake system is not
functioning and that service is required.
However, the conventional brake system will
continue to operate normally if the “Anti-Lock
Brake Warning Light” is on.
If the “Anti-Lock Brake Warning Light” is on, the
b r
ake system should be serviced as soon as
possible to restore the benefits of anti-lock
brakes. If the “Anti-Lock Brake Warning Light”
does not come on when the ignition is placed in
the ON/RUN mode, have the light repaired as
soon as possible.
ELECTRONIC BRAKE CONTROL (EBC)
S
YSTEM
Your vehicle is equipped with an advanced
Electronic Brake Control (EBC) system.
This system includes Electronic Brake Force
D i
stribution (EBD), Anti-Lock Brake System
(ABS), Brake Assist System (BAS), Hill Start
Assist (HSA), Traction Control System (TCS),
Electronic Stability Control (ESC), and Electronic
Roll Mitigation (ERM). These systems work
together to enhance both vehicle stability and
control in various driving conditions.
Your vehicle may also be equipped with Trailer
S w
ay Control (TSC).
Brake Assist System (BAS)
The Brake Assist System (BAS) is designed to
optimize the vehicle’s braking capability during
emergency braking maneuvers. The system
detects an emergency braking situation by
sensing the rate and amount of brake application
and then applies optimum pressure to the
brakes. This can help reduce braking distances.
The BAS complements the Anti-Lock Brake
System (ABS). Applying the brakes very quickly
results in the best BAS assistance. To receive the
benefit of the system, you must apply continuous braking pressure during the stopping sequence
(do not “pump” the brakes). Do not reduce brake
pedal pressure unless braking is no longer
desired. Once the brake pedal is released, the
BAS is deactivated.
Brake System Warning Light
The red “Brake System Warning Light” will turn
on when the ignition is placed in the ON/RUN
mode and may stay on for as long as
four seconds.
WARNING!
The Brake Assist System (BAS) cannot prevent
the natural laws of physics from acting on
the vehicle, nor can it increase the traction
a f
forded by prevailing road conditions.
BAS cannot prevent collisions, including those
r e
sulting from excessive speed in turns, driving
on very slippery surfaces, or hydroplaning.
The capabilities of a BAS-equipped vehicle
m u
st never be exploited in a reckless or
dangerous manner, which could jeopardize
the user's safety or the safety of others.
Page 113 of 396
SAFETY 111
If the “Brake System Warning Light” remains on
or comes on while driving, it indicates that the
brake system is not functioning properly and
that immediate service is required. If the “Brake
System Warning Light” does not come on when
the ignition is placed in the ON/RUN mode,
have the light repaired as soon as possible.
Electronic Brake Force Distribution (EBD)
The Electronic Brake Force Distribution (EBD)
function manages the distribution of the braking
torque between the front and rear axles by
limiting braking pressure to the rear axle. This is
done to prevent overslip of the rear wheels to
avoid vehicle instability, and to prevent the rear
axle from entering the Anti-Lock Brake System
(ABS) before the front axle.
Electronic Roll Mitigation (ERM)
The Electronic Roll Mitigation (ERM) system
anticipates the potential for wheel lift by
monitoring the driver’s steering wheel input and
the speed of the vehicle. When ERM determines
that the rate of change of the steering wheel
angle and vehicle’s speed are sufficient to
potentially cause wheel lift, it then applies the
appropriate brake and may also reduce engine
power to lessen the chance that wheel lift will
occur. ERM can only reduce the chance of wheel lift occurring during severe or evasive driving
maneuvers; it cannot prevent wheel lift due to
other factors, such as road conditions, leaving
the roadway, or striking objects or other vehicles.
Electronic Stability Control (ESC)
The Electronic Stability Control (ESC) system
enhances directional control and stability of the
vehicle under various driving conditions. ESC
corrects for oversteering or understeering of the
vehicle by applying the brake of the appropriate
wheel(s) to assist in counteracting the oversteer
or understeer condition. Engine power may also
be reduced to help the vehicle maintain the
desired path.
ESC uses sensors in the vehicle to determine
t
h
e vehicle path intended by the driver and
compares it to the actual path of the vehicle.
When the actual path does not match the
intended path, ESC applies the brake of the
appropriate wheel to assist in counteracting the
oversteer or understeer condition.
Oversteer — when the vehicle is turning more
than appropriate for the steering wheel position.
Understeer — when the vehicle is turning less
than appropriate for the steering wheel position.
The ESC Activation/Malfunction Indicator Light
l o
cated in the instrument cluster will start to flash
as soon as the ESC system becomes active.
The ESC Activation/Malfunction Indicator Light
a l
so flashes when the TCS is active. If the ESC
Activation/Malfunction Indicator Light begins to
flash during acceleration, ease up on the
accelerator and apply as little throttle as
possible. Be sure to adapt your speed and driving
to the prevailing road conditions.
WARNING!
Many factors, such as vehicle loading, road
conditions and driving conditions, influence
the chance that wheel lift or rollover may occur.
ERM cannot prevent all wheel lift or roll overs,
especially those that involve leaving the
roadway or striking objects or other vehicles.
The capabilities of an ERM-equipped vehicle
must never be exploited in a reckless or
dangerous manner which could jeopardize the
user's safety or the safety of others.
4
Page 114 of 396
112 SAFETY
(Continued)
ESC Operating Modes
NOTE:
Depending upon model and mode of operation,
t h
e ESC system may have multiple operating
modes. ESC On
This is the normal operating mode for the ESC.
Wh
enever the vehicle is started, the ESC system
will be in this mode. This mode should be used
for most driving conditions. Alternate ESC
modes should only be used for specific reasons
as noted in the following paragraphs.
Partial Off
The “Partial Off” mode is intended for times
w h
en a more spirited driving experience is
desired. This mode may modify TCS and ESC
thresholds for activation, which allows for more
wheel spin than normally allowed. This mode
may be useful if the vehicle becomes stuck.
To enter the “Partial Off” mode, momentarily
p u
sh the ESC OFF switch and the ESC OFF
Indicator Light will illuminate. To turn the ESC
on again, momentarily push the ESC OFF switch
and the ESC OFF Indicator Light will turn off.
WARNING!
Electronic Stability Control (ESC) cannot
prevent the natural laws of physics from
acting on the vehicle, nor can it increase the
traction afforded by prevailing road condi -
tions. ESC cannot prevent accidents,
i n
cluding those resulting from excessive
speed in turns, driving on very slippery
surfaces, or hydroplaning. ESC also cannot
prevent accidents resulting from loss of
vehicle control due to inappropriate driver
input for the conditions. Only a safe, atten -
tive, and skillful driver can prevent acci -
dents. The capabilities of an ESC equipped
ve
hicle must never be exploited in a reckless
or dangerous manner which could jeopar -
dize the user’s safety or the safety of others.
Vehicle modifications, or failure to properly
maintain your vehicle, may change the
handling characteristics of your vehicle,
and may negatively affect the performance
of the ESC system. Changes to the steering
system, suspension, braking system, tire
type and size or wheel size may adversely
affect ESC performance. Improperly
inflated and unevenly worn tires may also
degrade ESC performance. Any vehicle
modification or poor vehicle maintenance
that reduces the effectiveness of the ESC
system can increase the risk of loss of
vehicle control, vehicle rollover, personal
injury and death.
WARNING! (Continued)
Page 115 of 396
SAFETY 113
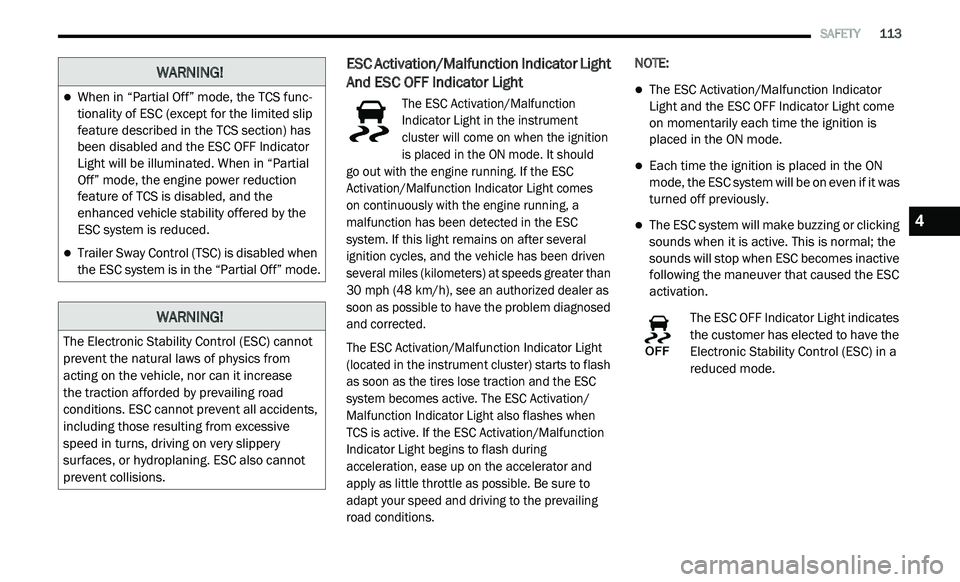
ESC Activation/Malfunction Indicator Light
And ESC OFF Indicator Light
The ESC Activation/Malfunction
Indicator Light in the instrument
cl
uster will come on when the ignition
is placed in the ON mode. It should
go out with the engine running. If the ESC
A c
tivation/Malfunction Indicator Light comes
on continuously with the engine running, a
m a
lfunction has been detected in the ESC
system. If this light remains on after several
ignition cycles, and the vehicle has been driven
several miles (kilometers) at speeds greater than
30 mph (48 km/h), see an authorized dealer as
s o
on as possible to have the problem diagnosed
and corrected.
The ESC Activation/Malfunction Indicator Light
( l
ocated in the instrument cluster) starts to flash
as soon as the tires lose traction and the ESC
system becomes active. The ESC Activation/
Malfunction Indicator Light also flashes when
TCS is active. If the ESC Activation/Malfunction
Indicator Light begins to flash during
acceleration, ease up on the accelerator and
apply as little throttle as possible. Be sure to
adapt your speed and driving to the prevailing
road conditions.
NOTE:
The ESC Activation/Malfunction Indicator
Light and the ESC OFF Indicator Light come
on momentarily each time the ignition is
placed in the ON mode.
Each time the ignition is placed in the ON
mode, the ESC system will be on even if it was
turned off previously.
The ESC system will make buzzing or clicking
sounds when it is active. This is normal; the
sounds will stop when ESC becomes inactive
following the maneuver that caused the ESC
activation.
The ESC OFF Indicator Light indicates
the customer has elected to have the
El
ectronic Stability Control (ESC) in a
reduced mode.
WARNING!
When in “Partial Off” mode, the TCS func -
tionality of ESC (except for the limited slip
f e
ature described in the TCS section) has
been disabled and the ESC OFF Indicator
Light will be illuminated. When in “Partial
Off” mode, the engine power reduction
feature of TCS is disabled, and the
enhanced vehicle stability offered by the
ESC system is reduced.
Trailer Sway Control (TSC) is disabled when
the ESC system is in the “Partial Off” mode.
WARNING!
The Electronic Stability Control (ESC) cannot
prevent the natural laws of physics from
acting on the vehicle, nor can it increase
the traction afforded by prevailing road
c o
nditions. ESC cannot prevent all accidents,
including those resulting from excessive
speed in turns, driving on very slippery
surfaces, or hydroplaning. ESC also cannot
prevent collisions.
4
Page 117 of 396
SAFETY 115
Disabling And Enabling HSA
This feature can be turned on or turned off. To
change the current setting, proceed as follows:
If disabling HSA using your instrument cluster
display, refer to “Instrument Cluster Display”
in “Getting To Know Your Instrument Panel”
for further information.
If disabling HSA using Uconnect Settings,
refer to “Uconnect Settings” in “Multimedia”
for further information.
For vehicles not equipped with an instrument
c lu
ster display, perform the following steps:
1. C enter the steering wheel (front wheels
p
ointing straight forward).
2. S hift the transmission into PARK.
3
. A pply the parking brake.
4
. S tart the engine.
5
. R otate the steering wheel slightly more than
o
ne-half turn to the left.
6. P ush the “ESC OFF” button located in the
l
ower switch bank below the climate control
four times within 20 seconds. The “ESC OFF
Indicator Light” should turn on and turn off
two times. 7. R
otate the steering wheel back to center
a
nd then an additional slightly more than
one-half turn to the right.
8. P lace the ignition in the OFF mode and then
b
ack to ON. If the sequence was completed
properly, the “ESC OFF Indicator Light” will blink
several times to confirm HSA is disabled.
9. Repeat these steps if you want to return this f
eature to its previous setting.
Traction Control System (TCS)
The Traction Control System (TCS) monitors the
amount of wheel spin of each of the driven
wheels. If wheel spin is detected, the TCS may
apply brake pressure to the spinning wheel(s)
and/or reduce engine power to provide
enhanced acceleration and stability. A feature
of the TCS, Brake Limited Differential (BLD),
functions similarly to a limited slip differential
and controls the wheel spin across a driven
axle. If one wheel on a driven axle is spinning
faster than the other, the system will apply the
brake of the spinning wheel. This will allow more
engine power to be applied to the wheel that is
not spinning. BLD may remain enabled even if
TCS and Electronic Stability Control (ESC) are in
reduced modes.
Trailer Sway Control (TSC)
TSC uses sensors in the vehicle to recognize an
excessively swaying trailer and will take the
appropriate actions to attempt to stop the sway.
TSC will become active automatically once an
excessively swaying trailer is recognized.
Note that TSC cannot stop all trailers from
s w
aying. Always use caution when towing a
trailer and follow the trailer tongue weight
r e
commendations. Refer to “Trailer Towing” in
“Starting And Operating” for further information.
When TSC is functioning, the ESC Activation/
M a
lfunction Indicator Light will flash, the engine
power may be reduced and you may feel the
brakes being applied to individual wheels to
attempt to stop the trailer from swaying. TSC is
disabled when the ESC system is in the “Partial
Off” mode.
WARNING!
If TSC activates while driving, slow the vehicle
down, stop at the nearest safe location, and
adjust the trailer load to eliminate trailer sway.
4