key DODGE JOURNEY 2020 Workshop Manual
[x] Cancel search | Manufacturer: DODGE, Model Year: 2020, Model line: JOURNEY, Model: DODGE JOURNEY 2020Pages: 396, PDF Size: 25.53 MB
Page 324 of 396
322 MULTIMEDIA
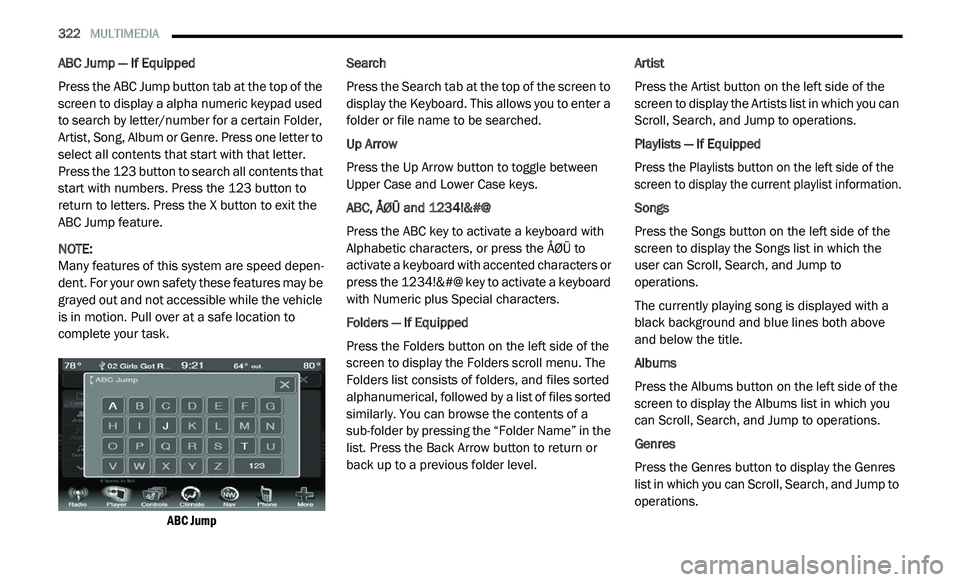
ABC Jump — If Equipped
Press the ABC Jump button tab at the top of the
sc
reen to display a alpha numeric keypad used
to search by letter/number for a certain Folder,
Artist, Song, Album or Genre. Press one letter to
select all contents that start with that letter.
Press the 123 button to search all contents that
start with numbers. Press the 123 button to
return to letters. Press the X button to exit the
ABC Jump feature.
NOTE:
Many features of this system are speed depen -
dent. For your own safety these features may be
g r
ayed out and not accessible while the vehicle
is in motion. Pull over at a safe location to
complete your task.
ABC Jump
Search
Press the Search tab at the top of the screen to
d
i
splay the Keyboard. This allows you to enter a
folder or file name to be searched.
Up Arrow
Press the Up Arrow button to toggle between
U p
per Case and Lower Case keys.
ABC, ÅØÜ and 1234!&#@
Press the ABC key to activate a keyboard with
Al
phabetic characters, or press the ÅØÜ to
activate a keyboard with accented characters or
press the 1234!&#@ key to activate a keyboard
with Numeric plus Special characters.
Folders — If Equipped
Press the Folders button on the left side of the
s c
reen to display the Folders scroll menu. The
Folders list consists of folders, and files sorted
alphanumerical, followed by a list of files sorted
similarly. You can browse the contents of a
sub-folder by pressing the “Folder Name” in the
list. Press the Back Arrow button to return or
back up to a previous folder level. Artist
Press the Artist button on the left side of the
s
c
reen to display the Artists list in which you can
Scroll, Search, and Jump to operations.
Playlists — If Equipped
Press the Playlists button on the left side of the
s c
reen to display the current playlist information.
Songs
Press the Songs button on the left side of the
sc
reen to display the Songs list in which the
user can Scroll, Search, and Jump to
operations.
The currently playing song is displayed with a
b la
ck background and blue lines both above
and below the title.
Albums
Press the Albums button on the left side of the
s c
reen to display the Albums list in which you
can Scroll, Search, and Jump to operations.
Genres
Press the Genres button to display the Genres
l i
st in which you can Scroll, Search, and Jump to
operations.
Page 326 of 396
324 MULTIMEDIA
Fast Seek Up
Press and hold the Seek Up button and the
Bluetooth® device will begin to fast forward
th
rough the current track until the button is
released.
Fast Seek Down
Press and hold the Seek Down button and
the Bluetooth® device will begin to rewind
t h
rough the current track until the button is
released.
Source
Press the Source button on the touchscreen to
s e
lect the desired audio source, Disc/USB/SD
Card/AUX/ or Bluetooth®. This screen will time
out after a few seconds and return to the main
radio screen if no selection is made.
Repeat
Press the Repeat button to toggle the repeat
f u
nctionality. The Repeat button is highlighted
when active. The Radio will continue to play the
current track, repeatedly, as long as the repeat
is active. Info
Press the Info button to display the current
t
r
ack information. Press the Info button a
second time to cancel this feature.
Audio
Refer to “Audio” in “Radio Mode” for further
i n
formation on adjusting the audio settings.
UCONNECT PHONE
Uconnect Phone is a voice-activated,
hands-free, in-vehicle communications system.
Uconnect Phone allows you to dial a phone
number with your mobile phone.
Uconnect Phone supports the following
fe
atures:
Voice Activated Features:
Hands-Free dialing via Voice (“Call John
Smith Mobile” or, “Dial 248 555 1212”).
Hands-Free text-to-speech listening of your
incoming SMS messages.
Hands-Free text messaging (“Send a
message to John Smith Mobile”).
Redialing last dialed numbers (“Redial”).
Calling Back the last incoming call number
(“Call Back”).
Viewing Call logs on screen (“Show Incoming
Calls,” “Show Outgoing Calls,” “Show Missed
Calls,” “Show Recent Calls”).
Searching Contacts phone number (“Search
for John Smith Mobile”).
Screen Activated Features
Dialing via Keypad using touchscreen.
Viewing and Calling contacts from Phone -
books displayed on the touchscreen.
Setting Favorite Contact Phone numbers so
they are easily accessible on the Main Phone
screen.
Viewing and Calling contacts from Recent
Call logs.
Reviewing your recent Incoming SMS.
Sending a text message via the touchscreen.
Page 337 of 396
MULTIMEDIA 335
Roadside Assistance/Towing Assistance
If you need roadside/towing assistance:
1. Push the Phone
button to begin.
2. A fter the “Listening” prompt and the
f
ollowing beep, say “Roadside Assistance”
or say “Towing Assistance.”
NOTE:
The roadside/towing assistance number dialed
i s
based on the country where the vehicle is
purchased (1-800-521-2779 for the U.S.,
1-800-363-4869 for Canada, 55-14-3454 for
Mexico City, and 1-800-712-3040 for outside
Mexico City in Mexico). Please refer to the FCA
US LLC 24-Hour “Roadside Assistance”
coverage details in the Warranty Information
Booklet. Working With Automated Systems
This method is used in instances where one
g
e
nerally has to push numbers on the mobile
phone keypad while navigating through an
automated telephone system.
You can use your Uconnect Phone to access a
v o
ice mail system or an automated service,
such as a paging service or automated
customer service line. Some services require
immediate response selection. In some
instances, that may be too quick for use of the
Uconnect Phone.
When calling a number with your Uconnect
P h
one that normally requires you to enter in a
touch-tone sequence on your mobile phone
keypad, you can utilize the touchscreen or push
the Voice Command button and say the word
“Send” then the sequence you wish to enter.
F o
r example, if required to enter your PIN
followed with a pound, (3 7 4 6 #), you can push
the Voice Command button and say, “Send
3 7 4 6 #.” Saying “Send” followed by a number,
o r
sequence of numbers, is also to be used for
navigating through an automated customer
service center menu structure, and to leave a
number on a pager.
You can also send stored mobile phonebook
e
n
tries as tones for fast and easy access to voice
mail and pager entries. For example, if you
previously created a Phonebook entry with First
and/or Last Name as “Voicemail Password”, then
if you push the Voice Command button and
say “Send Voicemail Password” the Uconnect
P h
one will then send the corresponding phone
number associated with the phonebook entry, as
tones over the phone.
NOTE:
The first number encountered for that
contact will be sent. All other numbers
entered for that contact will be ignored.
You may not hear all of the tones due to
mobile phone network configurations.
This is normal.
Some paging and voice mail systems have
system time-out settings that are too short
and may not allow the use of this feature.
Pauses, wait or other characters that are
supported by some phones are not
supported over Bluetooth®. These additional
symbols will be ignored in the dialing a
numbered sequence.
WARNING!
Your phone must be turned on and connected
to the Uconnect Phone to allow use of this
vehicle feature in emergency situations, when
the mobile phone has network coverage and
stays connected to the Uconnect Phone.
9
Page 338 of 396
336 MULTIMEDIA
Barge In — Overriding Prompts
The Voice Recognition button can be used
when you wish to skip part of a prompt and
i s
sue your voice command immediately.
For example, if a prompt is asking “There are
t w
o numbers with the name John. Say the full
name” you could push the Voice Recognition
button and say, “John Smith” to select that
option without having to listen to the rest of the
v o
ice prompt.
Voice Response Length
It is possible for you to choose between Brief
a n
d Detailed Voice Response Length.
1. P ress the Settings button on the
t
ouchscreen.
2. P ress the Voice button on the touchscreen,
t
hen scroll down to Voice Response Length.
3. S elect either “Brief” or “Detailed” by
p
ressing the box next to the selection.
A check mark will appear to indicate your
s e
lection. Phone And Network Status Indicators
Uconnect Phone will provide notification to
i
n
form you of your phone and network status
when you are attempting to make a phone call
using Uconnect Phone. The status is given for
network signal strength and phone battery
strength.
Dialing Using The Mobile Phone Keypad
You can dial a phone number with your mobile
p h
one keypad and still use the Uconnect Phone
(while dialing via the mobile phone keypad,
the user must exercise caution and take
p r
ecautionary safety measures). By dialing a
number with your connected Bluetooth® mobile
phone, the audio will be played through your
vehicle's audio system. The Uconnect Phone will
work the same as if you dial the number using a
voice command.
NOTE:
Certain brands of mobile phones do not send the
d i
al ring to the Uconnect Phone to play it on the
vehicle audio system, so you will not hear it.
Under this situation, after successfully dialing a
number the user may feel that the call did not go
through even though the call is in progress. Once
your call is answered, you will hear the audio.
Mute/Un-Mute (Mute ON/OFF)
When you mute the Uconnect Phone, you will
s
t
ill be able to hear the conversation coming
from the other party, but the other party will not
be able to hear you. To mute the Uconnect
Phone simply, press the Mute button on the
Phone main screen.
Advanced Phone Connectivity
Transfer Call To And From Mobile Phone
The Uconnect Phone allows ongoing calls to be
t r
ansferred from your mobile phone to the
Uconnect Phone without terminating the call.
To transfer an ongoing call from your connected
m o
bile phone to the Uconnect Phone or vice
versa, press the Transfer button on the Phone
main screen.
Connect Or Disconnect Link Between The
U c
onnect Phone And Mobile Phone
If you would like to connect or disconnect the
B l
uetooth® connection between a Uconnect
Phone paired mobile phone and the Uconnect
system, follow the instructions described in your
mobile phone User's Manual.
Page 342 of 396
340 MULTIMEDIA
Be careful of the ambient temperature. Using
the navigation system at extreme tempera -
tures can lead to malfunction or damage.
A ls
o note that the unit can be damaged by
strong vibration, metal objects, or by water
getting inside the unit. Notice
This navigation system can be used when the
i
g
nition key is turned to ON/RUN or ACC.
To preserve the battery, however, it should
be used with the engine running whenever
p o
ssible. Using the navigation system for a long
time with the engine switched off can cause the
battery to run down.
Map Data Information
Garmin® uses a combination of governmental
a n
d private data sources. Virtually all data
sources contain some inaccurate or incomplete
data. In some countries, complete and accurate
map information is either not available or is
prohibitively expensive.
Getting Started
To access the Navigation system, press the Nav
button on bottom of the screen.
Setting Up Your System
When using your navigation system for the first
t i
me, complete the following tasks:
1. Ac quire satellites.
2
. U nderstand the main menu. A
cquiring Satellites
The bars indicate satellite strength.
Go to an open area, away from tall buildings and
t r
ees.
Acquiring satellite signals can take a few
m i
nutes.
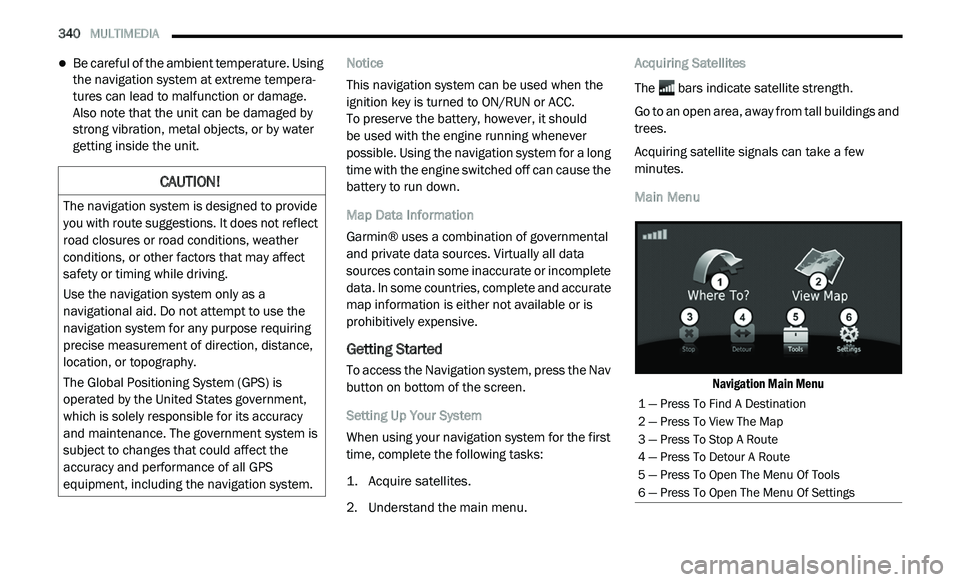
Main Menu
Navigation Main Menu
CAUTION!
The navigation system is designed to provide
you with route suggestions. It does not reflect
road closures or road conditions, weather
conditions, or other factors that may affect
safety or timing while driving.
Use the navigation system only as a
na
vigational aid. Do not attempt to use the
navigation system for any purpose requiring
precise measurement of direction, distance,
location, or topography.
The Global Positioning System (GPS) is
o p
erated by the United States government,
which is solely responsible for its accuracy
and maintenance. The government system is
subject to changes that could affect the
accuracy and performance of all GPS
equipment, including the navigation system.
1 — Press To Find A Destination
2 — Press To View The Map
3 — Press To Stop A Route
4 — Press To Detour A Route
5 — Press To Open The Menu Of Tools
6 — Press To Open The Menu Of Settings
Page 343 of 396
MULTIMEDIA 341
Using The On-Screen Buttons
Press and hold to quickly return to the
main menu.
Press and to see more choices.
Press and hold and to scroll faster.
Finding A Point Of Interest
The detailed maps loaded in your navigation
s y
stem contain points of interest, such as
restaurants, hotels and auto services.
1. Fr om the main menu, press
W
here To? >
Points of Interest
.
2. S elect a category.
3
. I f necessary, select a subcategory.
4
. S elect a destination.
5
. P ress Go!
F
inding A Location By Spelling The Name
1. Fr om the main menu, press
W
here To? >
Points of Interest > Spell Name
.
2. E nter all or part of the name.
3
. P ress Done . 4
. S
elect a destination.
5
. P ress Go!
U
sing The On-screen Keyboard
Press a character on the keyboard to enter a
letter or number.
Press “Space” to add a space.
Press to delete a character.
Press and hold to erase the entire entry.
Press to select the keyboard language
mode.
Press to enter special characters, such as
punctuation marks.
Adding Points To The Active Route
1. W hile navigating a route, press
to return
to the main menu.
2. F rom the main menu, press W
here To?
3. S elect a category.
4
. I f necessary, select a subcategory.
5
. S elect a destination. 6
. P
ress Go!
7
. P ress Add as a Via Point .
C
hanging The Destination Of The Active Route
Before you can change destinations you must
b e
navigating a route.
1. P ress
to return to the main menu.
2. P ress Where To?
3
. S earch for the location.
4
. P ress Go!
5
. P ress Set as a New Destination .
T
aking A Detour
While navigating a route, you can use detours to
a v
oid obstacles ahead of you, such as
construction zones.
NOTE:
If the route you are currently taking is the only
re
asonable option, the navigation system might
not calculate a detour.
1. W hile navigating a route, press .
2
. F rom the main menu, press D
etour.
9
Page 354 of 396
352 MULTIMEDIA
Changing The Map Perspective
1. From the main menu press
S
ettings > Map
> Map View
.
2. S elect an option:
Press Track Up to display the map in two
dimensions (2-D), with your direction of
travel at the top.
Press North Up to display the map in 2-D
with North at the top.
Press 3D to display the map in three
dimensions.
Route Preferences
From the main menu, press Se
ttings >
Navigation > Route Preference .
The route calculation is based on road speeds
a n
d vehicle acceleration data for a given route.
Faster Time — Calculates routes that are
faster to drive but can be longer in distance.
Shorter Distance — Calculates routes that are
shorter in distance but can take more time to
drive.
Prompted — Select the faster time and
shorter distance for your route. Avoiding Road Features
1. Fr
om the main menu press
S
ettings >
Navigation > Avoidances
.
2. S elect the road features to avoid on your
r
outes.
3. P ress “Save.”
A
bout trafficTrends
When the trafficTrends feature is enabled,
your navigation system uses historic traffic
i n
formation to calculate more-efficient routes.
Different routes may be calculated based on
traffic trends for the day of the week or based
on the time of day.
Enabling trafficTrends
1. Fr om the main menu press
S
ettings >
Navigation > trafficTrends
.
2. S elect E
nabled.
Restoring The Original Navigation Settings
From the main menu press Se
ttings >
Navigation > > Restore. Language Settings
From the main menu press
S
e
ttings >
Language .
Voice Personality — sets the language for
voice prompts.
Keyboard — sets the language for your
keyboard.
Keyboard Layout — sets the keyboard layout.
Restoring The Original Language Settings
From the main menu press Settings >
Language > > Restore.
Restoring Original Traffic Settings
From the main menu, press Se
ttings > Traffic >
> Restore .
Restoring All Original Settings
From the main menu, press Se
ttings > >
Restore > Yes .
Page 375 of 396
MULTIMEDIA 373
3. Channel 2 Audio Only/Mute — Audio: Only in
a single screen system: The Audio Only icon
is displayed on Channel 2 when Channel 1
is in a video mode. Mute: when the Mute
icon is displayed, the audio for Channel 2
has been muted using the remote control’s
MUTE button.
4. C hannel 2 Mode — Displays the current
s
ource for Channel 2.
5. R emote Locked Out — When the icon is
d
isplayed, the remote control functions are
disabled.
6. C lock — Displays the time.
7
. C hannel 1 Shared Status — When the icon is
d
isplayed, the audio for Channel 1 is also
shared with the radio and playing through
the cabin speakers.
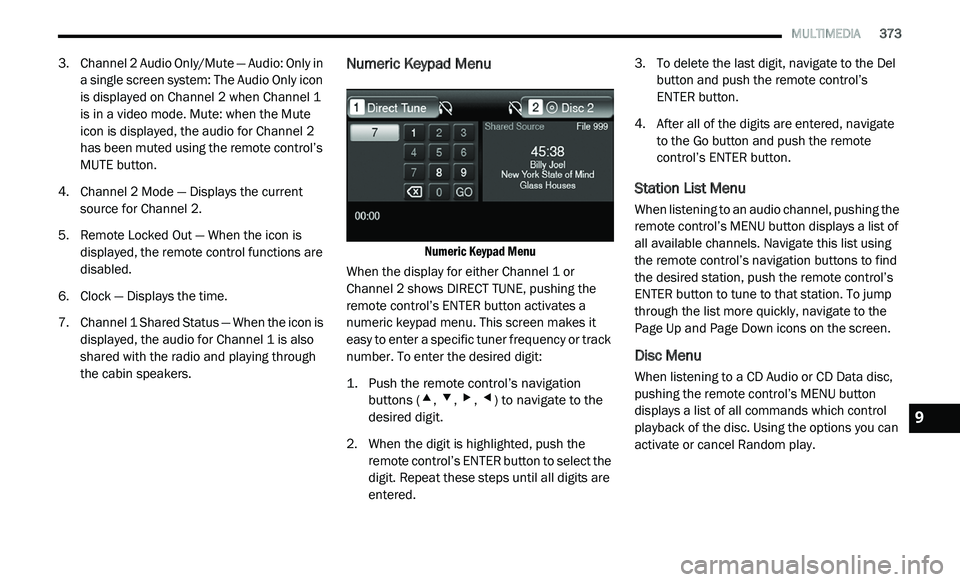
Numeric Keypad Menu
Numeric Keypad Menu
When the display for either Channel 1 or
C h
annel 2 shows DIRECT TUNE, pushing the
remote control’s ENTER button activates a
numeric keypad menu. This screen makes it
easy to enter a specific tuner frequency or track
number. To enter the desired digit:
1. P ush the remote control’s navigation
b
uttons (
▴, ▾, ▸, ◂) to navigate to the
desired digit.
2. W hen the digit is highlighted, push the
r
emote control’s ENTER button to select the
digit. Repeat these steps until all digits are
entered. 3. T
o delete the last digit, navigate to the Del
b
utton and push the remote control’s
ENTER button.
4. A fter all of the digits are entered, navigate
t
o the Go button and push the remote
control’s ENTER button.
Station List Menu
When listening to an audio channel, pushing the
remote control’s MENU button displays a list of
all available channels. Navigate this list using
the remote control’s navigation buttons to find
the desired station, push the remote control’s
ENTER button to tune to that station. To jump
through the list more quickly, navigate to the
Page Up and Page Down icons on the screen.
Disc Menu
When listening to a CD Audio or CD Data disc,
pushing the remote control’s MENU button
displays a list of all commands which control
playback of the disc. Using the options you can
activate or cancel Random play.
9
Page 386 of 396
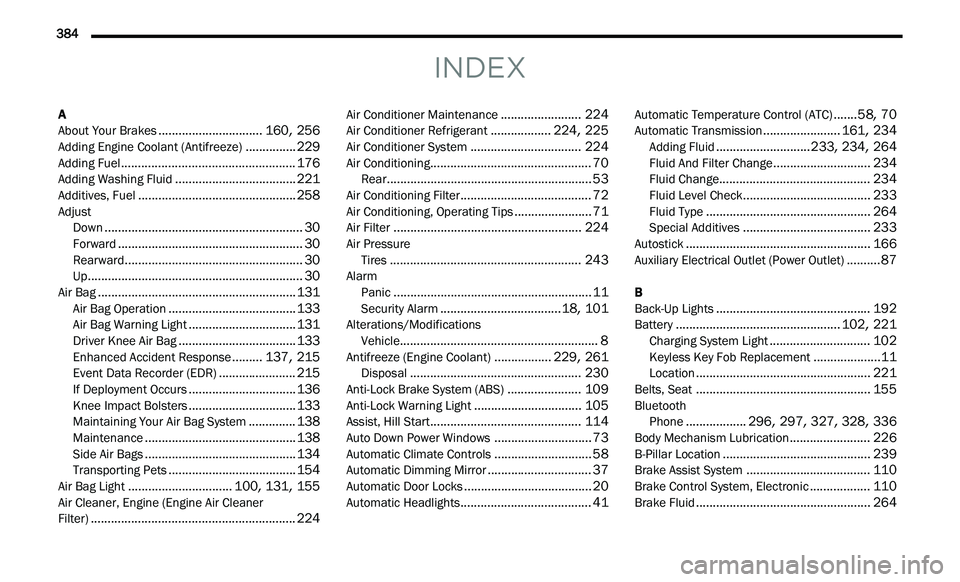
384
INDEX
A
About Your Brakes...............................160, 256Adding Engine Coolant (Antifreeze)...............229Adding Fuel....................................................176Adding Washing Fluid....................................221Additives, Fuel...............................................258Adjust
Down...........................................................30Forward.......................................................30Rearward.....................................................30Up................................................................30Air Bag...........................................................131Air Bag Operation......................................133Air Bag Warning Light................................131Driver Knee Air Bag...................................133Enhanced Accident Response.........137, 215Event Data Recorder (EDR).......................215If Deployment Occurs................................136Knee Impact Bolsters................................133Maintaining Your Air Bag System..............138Maintenance.............................................138Side Air Bags.............................................134Transporting Pets......................................154Air Bag Light...............................100, 131, 155Air Cleaner, Engine (Engine Air Cleaner
Filter).............................................................224
Air Conditioner Maintenance........................224Air Conditioner Refrigerant..................224, 225Air Conditioner System.................................224Air Conditioning................................................70Rear.............................................................53Air Conditioning Filter.......................................72Air Conditioning, Operating Tips.......................71Air Filter........................................................224Air Pressure Tires.........................................................243AlarmPanic...........................................................11Security Alarm....................................18, 101Alterations/ModificationsVehicle...........................................................8Antifreeze (Engine Coolant).................229, 261Disposal...................................................230Anti-Lock Brake System (ABS)......................109Anti-Lock Warning Light................................105Assist, Hill Start.............................................114Auto Down Power Windows.............................73Automatic Climate Controls.............................58Automatic Dimming Mirror...............................37Automatic Door Locks......................................20Automatic Headlights.......................................41
Automatic Temperature Control (ATC).......58, 70Automatic Transmission.......................161, 234Adding Fluid............................233, 234, 264Fluid And Filter Change.............................234Fluid Change.............................................234Fluid Level Check......................................233Fluid Type.................................................264Special Additives......................................233Autostick.......................................................166Auxiliary Electrical Outlet (Power Outlet)..........87
B
Back-Up Lights..............................................192Battery.................................................102, 221Charging System Light..............................102Keyless Key Fob Replacement....................11Location....................................................221Belts, Seat....................................................155BluetoothPhone..................296, 297, 327, 328, 336Body Mechanism Lubrication........................226B-Pillar Location............................................239Brake Assist System.....................................110Brake Control System, Electronic..................110Brake Fluid....................................................264
Page 389 of 396
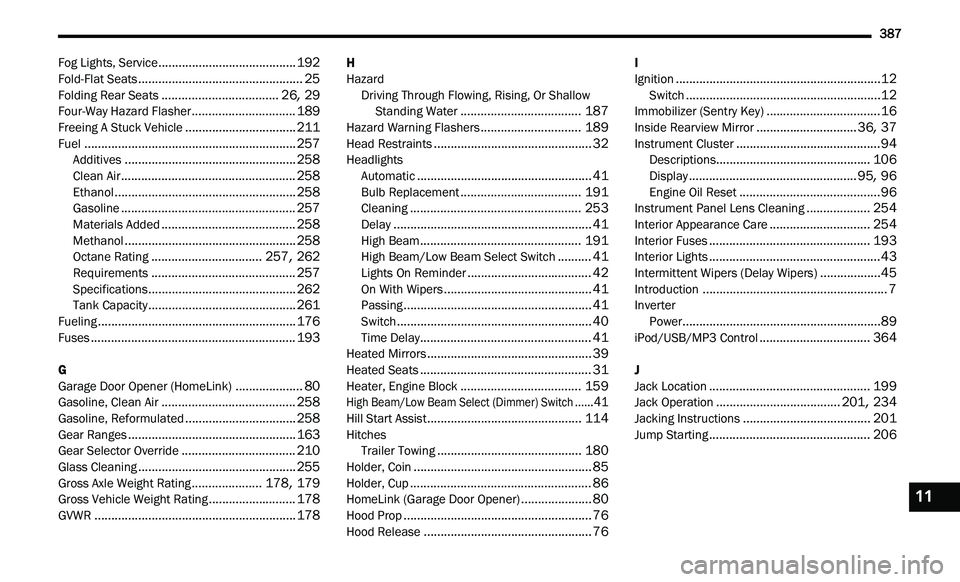
387
Fog Lights, Service.........................................192Fold-Flat Seats.................................................25Folding Rear Seats...................................26, 29Four-Way Hazard Flasher...............................189Freeing A Stuck Vehicle.................................211Fuel...............................................................257Additives...................................................258Clean Air....................................................258Ethanol......................................................258Gasoline....................................................257Materials Added........................................258Methanol...................................................258Octane Rating.................................257, 262Requirements...........................................257Specifications............................................262Tank Capacity............................................261Fueling...........................................................176Fuses.............................................................193
G
Garage Door Opener (HomeLink)....................80Gasoline, Clean Air........................................258Gasoline, Reformulated.................................258Gear Ranges..................................................163Gear Selector Override..................................210Glass Cleaning...............................................255Gross Axle Weight Rating.....................178, 179Gross Vehicle Weight Rating..........................178GVWR............................................................178
H
HazardDriving Through Flowing, Rising, Or Shallow St
anding Water....................................187Hazard Warning Flashers..............................189Head Restraints...............................................32HeadlightsAutomatic....................................................41Bulb Replacement....................................191Cleaning...................................................253Delay...........................................................41High Beam................................................191High Beam/Low Beam Select Switch..........41Lights On Reminder.....................................42On With Wipers............................................41Passing........................................................41Switch..........................................................40Time Delay...................................................41Heated Mirrors.................................................39Heated Seats...................................................31Heater, Engine Block....................................159
High Beam/Low Beam Select (Dimmer) Switch......41
Hill Start Assist..............................................114HitchesTrailer Towing...........................................180Holder, Coin.....................................................85Holder, Cup......................................................86HomeLink (Garage Door Opener).....................80Hood Prop........................................................76
Hood Release..................................................76
I
Ignition.............................................................12Switch..........................................................12Immobilizer (Sentry Key)..................................16Inside Rearview Mirror..............................36, 37Instrument Cluster...........................................94Descriptions..............................................106Display..................................................95, 96Engine Oil Reset..........................................96Instrument Panel Lens Cleaning...................254Interior Appearance Care..............................254Interior Fuses................................................193Interior Lights...................................................43Intermittent Wipers (Delay Wipers)..................45Introduction.......................................................7InverterPower...........................................................89iPod/USB/MP3 Control.................................364
J
Jack Location................................................199Jack Operation.....................................201, 234Jacking Instructions......................................201Jump Starting................................................206
11