manual radio set DODGE MAGNUM SRT 2007 1.G Owners Manual
[x] Cancel search | Manufacturer: DODGE, Model Year: 2007, Model line: MAGNUM SRT, Model: DODGE MAGNUM SRT 2007 1.GPages: 380, PDF Size: 6.63 MB
Page 20 of 380
Sound Horn with Remote Key Lock
This feature will cause the horn to chirp when the doors
are locked with the transmitter. This feature can be
enabled or disabled. For details on how to change the
current setting, refer to ªSound Horn with Remote Key
Lock,º under ªPersonal Settings (Customer Program-
mable Features),º under ªElectronic Vehicle Information
Center (EVIC)º in Section 4 of this manual.
Using The Panic Alarm:
To turn the panic alarm feature ON or OFF, press and
hold the PANIC button on the transmitter for at least one
second and release. When the panic alarm is on, the
headlights and park lights will flash, the horn will pulse
on and off, and the interior lights will turn on.
The panic alarm will stay on for 3 minutes unless you
turn it off by either pressing the PANIC button a second
time or drive the vehicle at a speed of 15 mph (24 km/h)
or greater.
NOTE:
²
The interior lights will turn off if you turn the ignitionswitch to the ACC or ON position while the panic
alarm is activated. However, the exterior lights and
horn will remain on.
²You may need to be less than 23 feet (7 meters) from
the vehicle when using the transmitter to turn off the
panic alarm due to the radio frequency noises emitted
by the system.
Programming Additional Transmitters
Refer to SENTRY KEY ªCustomer Key Programming.º
(See page 14 for more information.)
If you do not have a programmed transmitter, contact
your dealer for details.
Battery Replacement
The recommended replacement battery is CR2032.
NOTE:Do not touch the battery terminals that are on
the back housing or the printed circuit board.
1. With the transmitter buttons facing downward, re-
move the small screw (if equipped).
THINGS TO KNOW BEFORE STARTING YOUR VEHICLE 19
2
Page 132 of 380
NAudio Clock Display...................176
mVideo Entertainment System (Sales Code XRV) Ð
If Equipped
..........................177
NKicker Mobile Surround (Kms1)...........179
mSatellite Radio Ð If Equipped.............179
NSystem Activation.....................179
NElectronic Serial Number/Sirius Identification
Number (ESN/SID)....................180
NSelecting Satellite Mode In REF, RAQ, And
RAK Radios.........................180
NSelecting a Channel....................181
NStoring And Selecting Pre-Set Channels......181
NUsing The PTY (Program Type) Button (If
Equipped)..........................181
NPTY Button9Scan9.....................181
NPTY Button9Seek9.....................182
NSatellite Antenna......................182NReception Quality.....................182
mRemote Sound System Controls...........183
NRadio Operation......................184
NTape Player Operation..................184
NCD Player Operation...................184
NSatellite Radio Operation................185
mCassette Tape And Player Maintenance......185
mCD/DVD Disc Maintenance..............186
mRadio Operation And Cellular Phones.......186
mClimate Controls......................186
NManual Air Conditioning And Heating
System.............................187
NAutomatic Temperature Control Ð If
Equipped...........................189
NOperating Tips.......................194
mRear Window Features..................197
UNDERSTANDING YOUR INSTRUMENT PANEL 131
4
Page 156 of 380
and thus remain a part of the AM reception. They
interfere very little with the frequency variations that
carry the FM signal.
AM Reception
AM sound is based on wave amplitude, so AM reception
can be disrupted by such things as lightning, power lines
and neon signs.
FM Reception
Because FM transmission is based on frequency varia-
tions, interference that consists of amplitude variations
can be filtered out, leaving the reception relatively clear,
which is the major feature of FM radio.
NOTE:The radio, steering wheel radio controls, and 6
disc CD/DVD changer (if equipped) will remain active
for up to 60 minutes after the ignition switch is turned
off. Opening either front door will cancel this feature. The
time is programmable. For details, refer to ªDelay Power
Off to Accessories Until Exit,º under ªPersonal Settings
(Customer Programmable Features),º under ªElectronic
Vehicle Information Center (EVIC)º in Section 4 of this
manual.
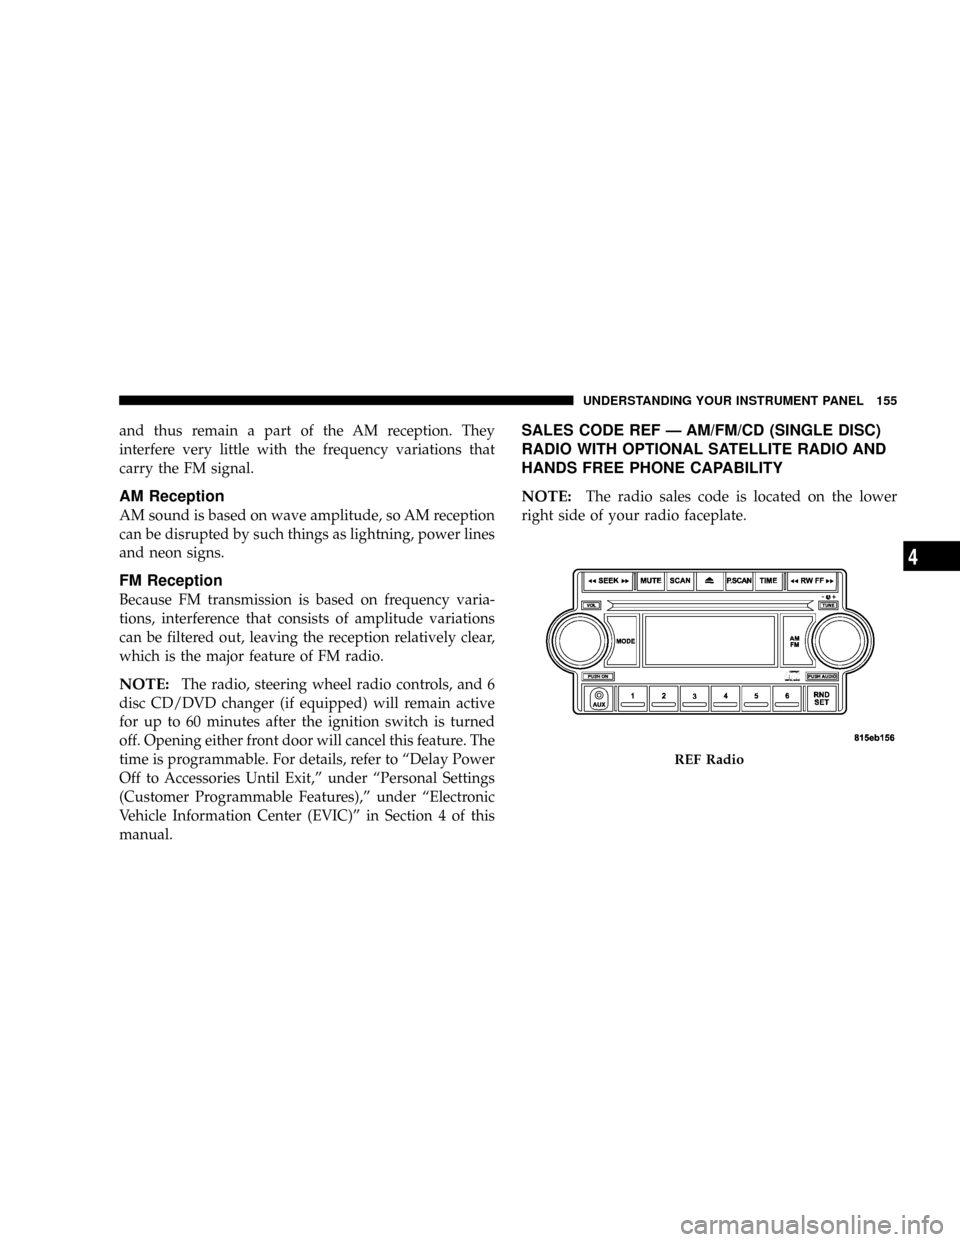
SALES CODE REF Ð AM/FM/CD (SINGLE DISC)
RADIO WITH OPTIONAL SATELLITE RADIO AND
HANDS FREE PHONE CAPABILITY
NOTE:
The radio sales code is located on the lower
right side of your radio faceplate.
REF Radio
UNDERSTANDING YOUR INSTRUMENT PANEL 155
4
Page 162 of 380
MUTE Button (Auxiliary Mode)
Press the MUTE button to cancel the sound from the
speakers.9MUTE9will display. Press the MUTE button a
second time and the sound from the speakers will return.
Rotating the volume control or turning OFF the ignition
will also return the sound from the speakers.
SCAN Button (Auxiliary Mode)
No function.
EJECT Button (Auxiliary Mode)
No function.
PSCAN Button (Auxiliary Mode)
No function.
TIME Button (Auxiliary Mode)
Press this button to change the display from elapsed
playing time to time of day. The time of day will display
for 5 seconds.
RW/FF (Auxiliary Mode)
No function.
RND/SET Button (Auxiliary Mode)
No function.
Mode Button (Auxiliary Mode)
Press the mode button repeatedly to select between the
CD player and Satellite Radio (if equipped).
Operating Instructions - Hands Free Phone Ð If
Equipped
Refer to the ªHANDS FREE PHONE (UConnectŸ)º
section of the Owner's Manual.
Operating Instructions - Satellite Radio Ð If
Equipped
Refer to the ªSatellite Radioº section of the Owner's
Manual.
UNDERSTANDING YOUR INSTRUMENT PANEL 161
4
Page 174 of 380
RND/PTY Button (CD Mode for MP3 Play)
Pressing this button plays files randomly.
SET/DIR Button (CD Mode for MP3 Play)
Press the SET/DIR Button to display folders, when
playing an MP3 discs that have a file/folder structure.
Turn the TUNE control to display available folders or
move through available folders. Press the TUNE control
to select a folder.
Buttons1-6(CDMode for MP3 Play)
Selects disc positions1-6forPlay/Load/Eject.
Operating Instructions - Hands Free Phone (If
Equipped)
Refer to ªHands-Free Phoneº in Section 3 of the Owner's
Manual.
Operating Instructions - Satellite Radio Mode (If
Equipped)
Refer to the ªSatellite Radioº section of the Owner's
Manual.
Operating Instructions - Video Entertainment
System (VES) (If Equipped)
Refer to separate ªVideo Entertainment System (VES)
Guide.º
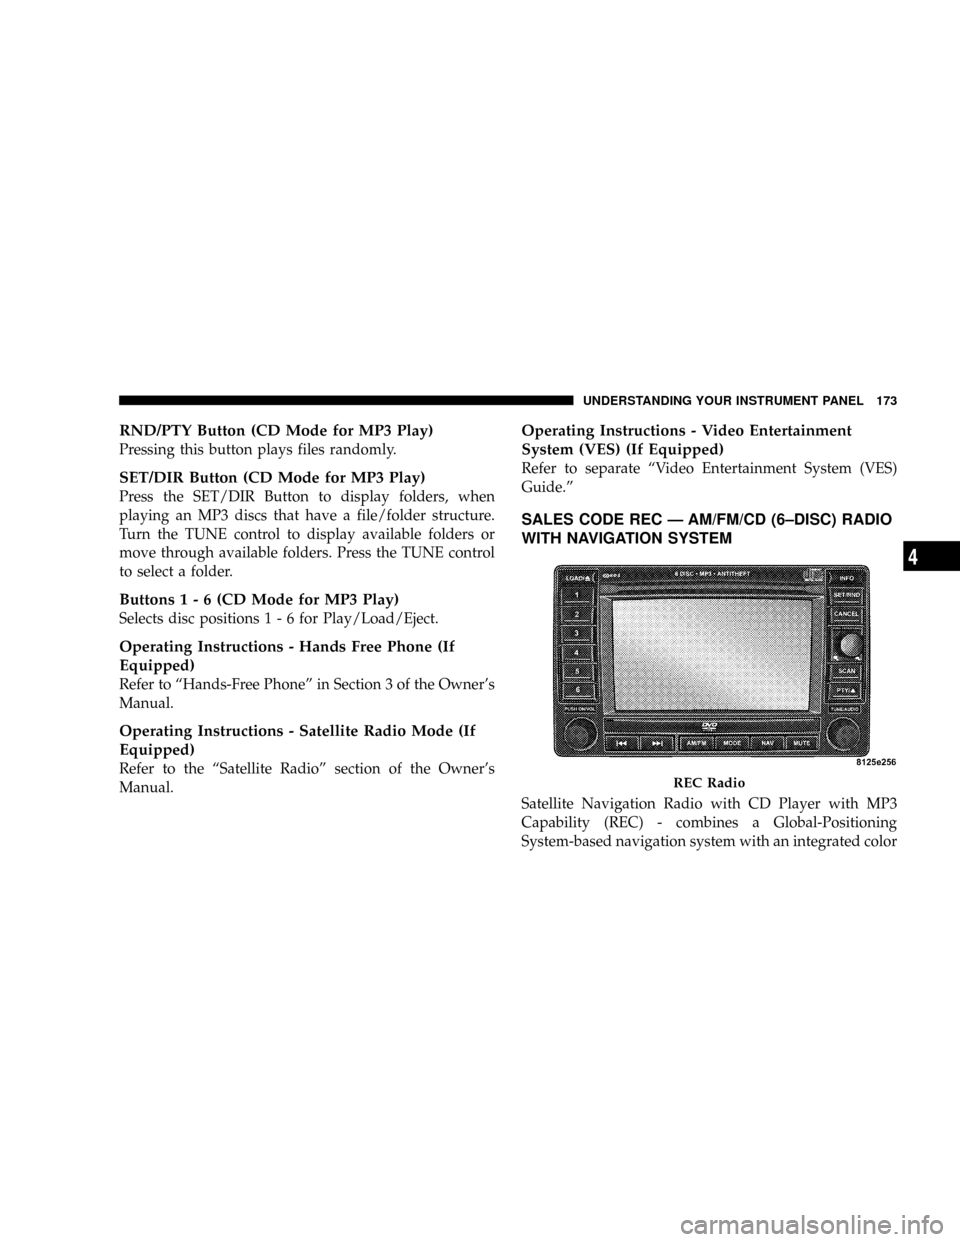
SALES CODE REC Ð AM/FM/CD (6±DISC) RADIO
WITH NAVIGATION SYSTEM
Satellite Navigation Radio with CD Player with MP3
Capability (REC) - combines a Global-Positioning
System-based navigation system with an integrated color
REC Radio
UNDERSTANDING YOUR INSTRUMENT PANEL 173
4
Page 175 of 380
screen to provide maps, turn identification, selection
menus and instructions for selecting a variety of destina-
tions and routes, AM/FM stereo radio and six-disc CD
changer with MP3 capability.
Mapping information for navigation is supplied on a
DVD that is loaded into the unit. One map DVD covers
all of North America. Refer to your ªNavigation User's
Manualº for detailed operating instructions.
Operating Instructions Ð Satellite Radio (If
Equipped)
Refer to your ªNavigation User's Manualº for detailed
operating instructions.
REC Setting the Clock
GPS Clock
The GPS receiver used in this system is synchronized to
the time data being transmitted by the GPS satellites. The
satellites' clock is Greenwich Mean Time (GMT). This is
the worldwide standard for time. This makes the sys-
tem's clock very accurate once the appropriate time zone
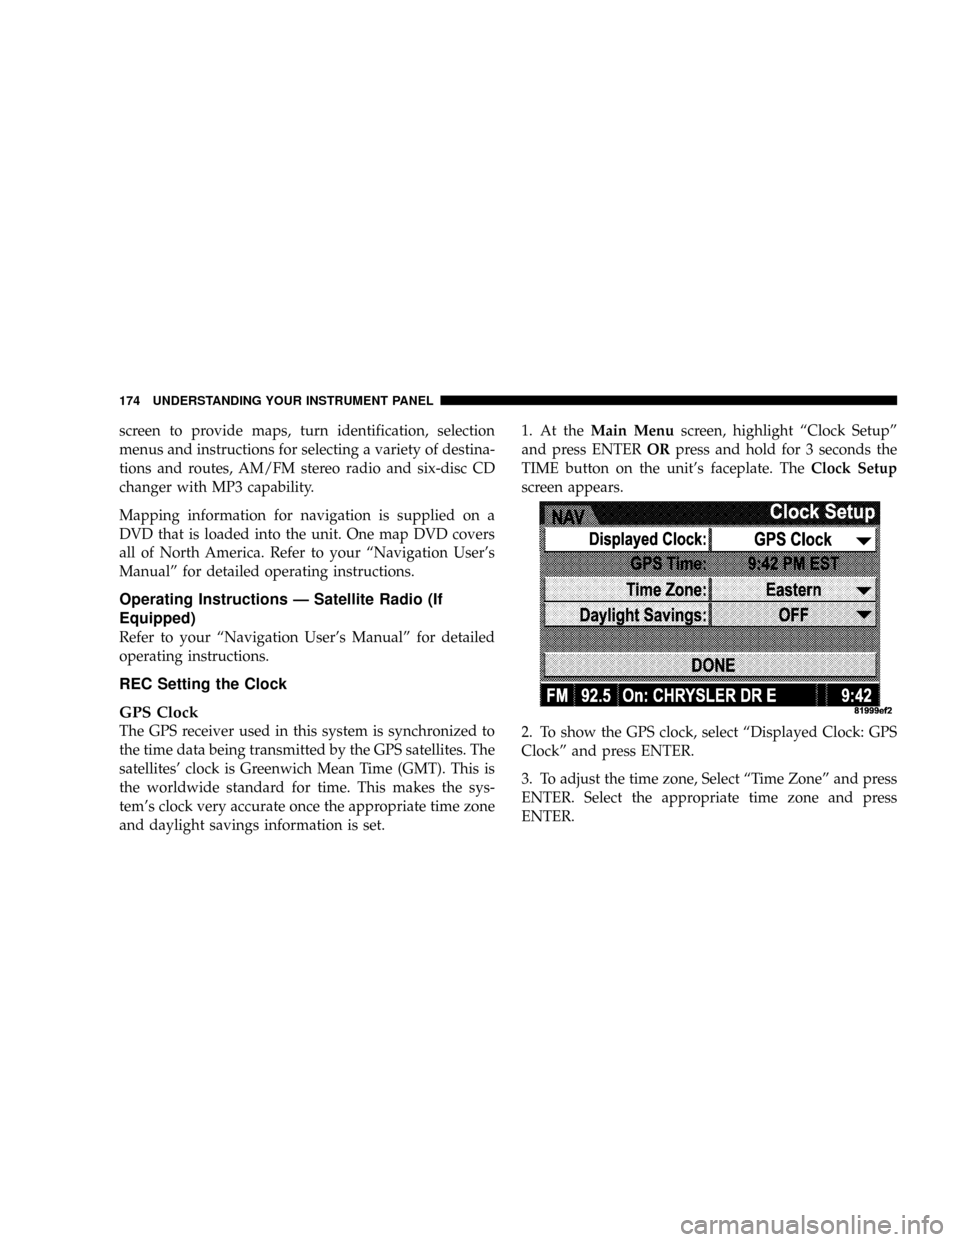
and daylight savings information is set.1. At theMain Menuscreen, highlight ªClock Setupº
and press ENTERORpress and hold for 3 seconds the
TIME button on the unit's faceplate. TheClock Setup
screen appears.
2. To show the GPS clock, select ªDisplayed Clock: GPS
Clockº and press ENTER.
3. To adjust the time zone, Select ªTime Zoneº and press
ENTER. Select the appropriate time zone and press
ENTER.
174 UNDERSTANDING YOUR INSTRUMENT PANEL
Page 181 of 380
Electronic Serial Number/Sirius Identification
Number (ESN/SID)
The Electronic Serial Number/Sirius Identification Num-
ber is needed to activate your Sirius Satellite Radio
system. To access the ESN/SID, refer to the following
steps:
ESN/SID Access With REF Radios
With the ignition switch in the ACCESSORY position and
the radio OFF, press the CD Eject and Time buttons
simultaneously for 3 seconds. The first four digits of the
twelve-digit ESN/SID number will display. Press the
SEEK UP button to display the next four digits. Continue
to press the SEEK UP button until all twelve ESN/SID
digits display. The SEEK DOWN will page down until
the first four digits display. The radio will exit the
ESN/SID mode when any other button is pushed, the
ignition is turned OFF, or 5 minutes has passed since any
button was pushed.
ESN/SID Access With RAQ and RAK Radios
With the ignition switch in the ACCESSORY position and
the radio OFF, press the CD Eject and TIME buttonssimultaneously for 3 seconds. All twelve ESN/SID num-
bers will display. The radio will exit the ESN/SID mode
when any other button is pushed, the ignition is turned
OFF, or 5 minutes has passed since any button was
pushed.
ESN/SID Access With REC Navigation Radios
Please refer to your Navigation User's Manual.
With the ignition in the ACCESSORY position and the
radio off, press the CD Eject and Set buttons simulta-
neously until the 12 digits of the ESN/SID appear on the
screen.
Selecting Satellite Mode in REF, RAQ, and RAK
Radios
Selecting Satellite Mode Ð REF Radio
Press the MODE button repeatedly until the word9SAT9
appears in the display.
A CD may remain in the radio while in the Satellite radio
mode.
180 UNDERSTANDING YOUR INSTRUMENT PANEL
Page 374 of 380
Dipstick............................ 295
Disposal............................ 298
Filter...........................298,332
Filter Disposal....................... 298
Materials Added to.................... 297
Recommendation..................297,331
Viscosity.........................297,331
Onboard Diagnostic System............292,293
Opener, Garage Door (HomeLinkt) ......... 107
Operating Precautions................... 292
Outside Rearview Mirrors................. 65
Overhead Console...................... 106
Overheating, Engine..................... 276
Owner's Manual (Operator Manual)......... 359
Panic Alarm........................... 19
Parking Brake......................... 217
Parking On Hill........................ 217
Passing Light........................... 96
Pedals, Adjustable...................... 102
Personal Settings....................... 151
Pets.................................. 56
Phone, Cellular......................... 67Phone, Hands-Free (UConnectŸ)............ 67
Placard, Tire and Loading Information....... 233
Power
Brakes............................. 219
Distribution Center (Fuses).............. 320
Door Locks.......................... 22
Mirrors............................. 66
Outlet (Auxiliary Electrical Outlet)........ 115
Seats............................... 87
Steering.........................221,304
Steering, Checking.................... 304
Sunroof............................ 112
Windows............................ 25
Pregnant Women and Seat Belts............. 38
Pretensioners
Seat Belts............................ 36
Programmable Electronic Features.....108,111,151
Programming Transmitters (Remote
Keyless Entry)....................19,108,111
Radial Ply Tires........................ 240
Radiator Cap (Coolant Pressure Cap)........ 309
Radio Broadcast Signals.................. 154
INDEX 373
10