trailer DODGE MAGNUM SRT 2007 1.G Owners Manual
[x] Cancel search | Manufacturer: DODGE, Model Year: 2007, Model line: MAGNUM SRT, Model: DODGE MAGNUM SRT 2007 1.GPages: 380, PDF Size: 6.63 MB
Page 137 of 380
engine running, your vehicle will usually be drivable.
However, see your dealer for service as soon as possible.
If the light is flashing when the engine is running,
immediate service is required. In this case, you may
experience reduced performance, an elevated/rough idle
or engine stall, and your vehicle may require towing.
Also, have the system checked by an authorized dealer if
the light does not come on during starting.
8. Temperature Gauge
The temperature gauge shows engine coolant tempera-
ture. Any reading within the normal range indicates that
the engine cooling system is operating satisfactorily.
The gauge pointer will likely indicate a higher tempera-
ture when driving in hot weather, up mountain grades,
or when towing a trailer. It should not be allowed to
exceed the upper limits of the normal operating range.
CAUTION!
Driving with a hot cooling system could damage
your vehicle. If temperature gauge reads 240ÉF
(116ÉC) or greater, pull over and stop the vehicle. Idle
the vehicle with the air conditioner turned off until
the pointer drops back into the normal range 200±
230ÉF (93±110ÉC). If the pointer remains at 240ÉF
(116ÉC) or greater and you hear a chime, turn the
engine off immediately, and call for service.
WARNING!
A hot engine cooling system is dangerous. You or
others could be badly burned by steam or boiling
coolant. You may want to call a service center if your
vehicle overheats. If you decide to look under the
hood yourself, see Section 7 of this manual. Follow
the warnings under the Cooling System Pressure
Cap paragraph.
136 UNDERSTANDING YOUR INSTRUMENT PANEL
Page 204 of 380
N6.1L Engine.........................253
NReformulated Gasoline.................254
NGasoline/Oxygenate Blends..............254
NMMT In Gasoline.....................255
NMaterials Added To Fuel................255
NFuel System Cautions..................255
NCarbon Monoxide Warnings..............256
mAdding Fuel..........................257
NFuel Filler Cap (Gas Cap)...............257
NLoose Fuel Filler Cap Message............259
mVehicle Loading.......................259
NVehicle Certification Label...............259
NGross Vehicle Weight Rating (GVWR).......260
NGross Axle Weight Rating (GAWR).........260
NOverloading.........................260NLoading............................261
mTrailer Towing........................262
NCommon Towing Definitions.............262
NTrailer Hitch Classification...............265
NTrailer Towing Weights (Maximum Trailer
Weight Ratings)......................265
NTrailer And Tongue Weight..............266
NTowing Requirements..................267
NTowing Tips.........................271
mRecreational Towing
(Behind Motorhome, Etc.)
................273
NTowing This Vehicle Behind Another Vehicle
(Flat Towing With All Four Wheels On The
Ground)............................273
mGround Clearance.....................273
STARTING AND OPERATING 203
5
Page 214 of 380
D (Drive)
This range should be used for most city and highway
driving. It provides the smoothest upshifts and down-
shifts and best fuel economy.
The transmission automatically upshifts through fifth
gear. The D (Drive) position provides optimum driving
characteristics under all normal operating conditions.
When frequent transmission shifting occurs when using
the Overdrive range, such as when operating the vehicle
under heavy loading conditions (in hilly terrain, travel-
ing into strong head winds, or while towing heavy
trailers, use the AutoSticktmode and select the ª3º
range.
AutoSticktGear selection
The AutoSticktfeature can be selected by pressing the
selector lever to the right or the left with the lever in the
D (Drive) position. The gear currently selected is indi-
cated in the instrument cluster display. Briefly, press the
selector lever in the ªD -º direction and the transmission
will shift from the current gear to the next lower gear.Press and hold the selector lever in the ªD-º direction and
the transmission will shift from the current gear directly
to the next lowest gear for best acceleration.
NOTE:To avoid overrevving the engine when the
selector lever is moved in ªD -º direction, the transmis-
sion will not shift to a lower gear if the engine's revolu-
tions per minute (RPM) limit would be exceeded.
Briefly, press the selector lever in the ªD +º direction and
the transmission will shift from the current gear to the
next higher gear.
Press and hold the selector lever in the ªD +º direction
and the transmission will shift from the current gear
directly to gear ªD.º
WARNING!
On slippery road surfaces, never downshift in order
to obtain braking action. This could result in drive
wheel slip and reduced vehicle control. Your vehi-
cle's ABS will not prevent this type of loss of control.
You could lose control of your vehicle and have an
accident.
STARTING AND OPERATING 213
5
Page 216 of 380
times. Follow the reset procedure described under ªTem-
porary Transmission Limp Home Modeº in this section.
In Permanent Limp Home Mode, P (Park), R (Reverse),
and N (Neutral) will continue to operate. Second gear
will operate in the D (Drive) shifter position. The mal-
function indicator light may illuminate.
AUTOSTICKT
Autosticktis a driver-interactive transmission that offers
manual gear shifting to provide you with more control of
the vehicle. Autosticktallows you to maximize engine
braking, eliminate undesirable upshifts and downshifts,
and improve overall vehicle performance. This system
can also provide you with more control during passing,
city driving, cold slippery conditions, mountain driving,
trailer towing, and many other situations.
AutostickTOperation
By placing the selector lever in the D (Drive) position, it
can be moved from side to side. This allows the driver to
select a higher or lower range of gears. Moving the
selector lever to the Left (-) triggers a downshift and tothe Right (+) an upshift. The gear position will display in
the instrument cluster on the transmission range indica-
tor.
NOTE:
²
In Autosticktmode, the transmission will only shift
up and down when the driver manually moves the
selector lever Right (D+) or Left (D-).
²An UPSHIFT message will appear in the Electronic
Vehicle Information Center (EVIC) portion of the in-
strument cluster when using Autostickt. This message
appears in order to alert the driver to upshift to the
next gear. The UPSHIFT message will display while
operating the vehicle at higher engine revolutions-per-
minute (RPM).
You can shift in or out of the Autosticktmode at any time
without taking your foot off the accelerator pedal. When
you wish to engage Autostickt, simply move the selector
lever to the Right (D+) or Left (D-) while in the D (Drive)
position. The transmission will remain in the current gear
until an upshift or downshift is chosen. When you wish
to disengage Autostickt, hold the selector lever to the
STARTING AND OPERATING 215
5
Page 235 of 380
Loading
The vehicle maximum load on the tire must not exceed
the load carrying capacity of the tire on your vehicle. You
will not exceed the tire's load carrying capacity if you
adhere to the loading conditions, tire size, and cold tire
inflation pressures specified on the ªTire and Loading
Informationº placard and in the ªVehicle Loadingº sec-
tion of this manual.
NOTE:Under a maximum loaded vehicle condition,
gross axle weight ratings (GAWR's) for the front and rear
axles must not be exceeded. For further information on
GAWR's, vehicle loading, and trailer towing, refer to the
ªVehicle Loadingº section of this manual.
To determine the maximum loading conditions of your
vehicle, locate the statement ªThe combined weight of
occupants and cargo should never exceed XXX kg or XXX
lbs.º on the Tire and Loading Information placard. The
combined weight of occupants, cargo/luggage and
trailer tongue weight (if applicable) should never exceed
the weight referenced here.
Steps for Determining Correct Load Limit
1. Locate the statement ªThe combined weight of occu-
pants and cargo should never exceed XXX poundsº on
your vehicle's placard.
2. Determine the combined weight of the driver and
passengers that will be riding in your vehicle.
3. Subtract the combined weight of the driver and pas-
sengers from XXX kilograms or XXX pounds.
4. The resulting figure equals the available amount of
cargo and luggage load capacity. For example, if ªXXXº
amount equals 1400 lbs. and there will be five 150 lb.
passengers in your vehicle, the amount of available cargo
and luggage load capacity is 650 lbs. (since 5 x 150 = 750,
and 1400 ± 750 = 650 lbs.)
5. Determine the combined weight of luggage and cargo
being loaded on the vehicle. That weight may not safely
exceed the available cargo and luggage load capacity
calculated in Step 4.
234 STARTING AND OPERATING
Page 236 of 380
6. If your vehicle will be towing a trailer, load from your
trailer will be transferred to your vehicle. Consult this
manual to determine how this reduces the available
cargo and luggage load capacity of your vehicle.
NOTE:The following table shows examples on how to
calculate total load, cargo/luggage, and towing capaci-
ties of your vehicle with varying seating configurationsand number and size of occupants. This table is for
illustration purposes only and may not be accurate for
the seating and load carry capacity of your vehicle.
NOTE:For the following example, the combined
weight of occupants and cargo should never exceed 865
lbs. (392 Kg).
STARTING AND OPERATING 235
5
Page 263 of 380
NOTE:Refer to the ªVehicle Certification Labelº at-
tached to the rear of the driver's door for your vehicle's
GVWR and GAWRs. This table is only an example.
TRAILER TOWING
In this section, you will find safety tips and information
on limits to the type of towing you can reasonably do
with your vehicle. Before towing a trailer, carefully
review this information to tow your load as efficiently
and safely as possible.
To maintain warranty coverage, follow the requirements
and recommendations in this manual concerning ve-
hicles used for trailer towing.
Common Towing Definitions
The following trailer towing related definitions will assist
you in understanding the following information:
Gross Vehicle Weight Rating (GVWR)
The GVWR is the total allowable weight of your vehicle.
This includes driver, passengers, cargo, and tongue
weight. The total load must be limited so that you do not
exceed the GVWR.
Gross Trailer Weight (GTW)
The gross trailer weight (GTW) is the weight of the trailer
plus the weight of all cargo, consumables, and equipment
(permanent or temporary) loaded in or on the trailer in its
9loaded and ready for operation9condition. The recom-
mended way to measure GTW is to put your fully loaded
trailer on a vehicle scale. The entire weight of the trailer
must be supported by the scale.
Gross Combination Weight Rating (GCWR)
The gross combination weight rating (GCWR) is the total
permissible weight of your vehicle and trailer when
weighed in combination. (Note that GCWR ratings in-
clude a 150 lbs (68 kg) allowance for the presence of a
driver).
Gross Axle Weight Rating (GAWR)
The GAWR is the maximum capacity of the front and rear
axles. Distribute the load over the front and rear axles
evenly. Make sure that you do not exceed either front or
rear GAWR.
262 STARTING AND OPERATING
Page 264 of 380
WARNING!
It is important that you do not exceed the maximum
front or rear GAWR. A dangerous driving condition
can result if either rating is exceeded. You could lose
control of the vehicle and have an accident.
Tongue Weight (TW)
Tongue weight (TW) is the downward force exerted on
the hitch ball by the trailer. In most cases it should not be
less than 10% or more than 15% of the trailer load. You
must consider this as part of the load on your vehicle.
Frontal Area
Frontal area is the maximum height and maximum width
of the front of a trailer.
Trailer Sway Control
The trailer sway control is a telescoping link that can be
installed between the hitch receiver and the trailer tongue
that typically provides adjustable friction associated with
the telescoping motion to dampen any unwanted trailer
swaying motions while traveling.
Weight-Carrying Hitch
A weight-carrying hitch supports the trailer tongue
weight, just as if it were luggage located at a hitch ball or
some other connecting point of the vehicle. These kinds
of hitches are the most popular on the market today and
they're commonly used to tow small- and medium-sized
trailers.
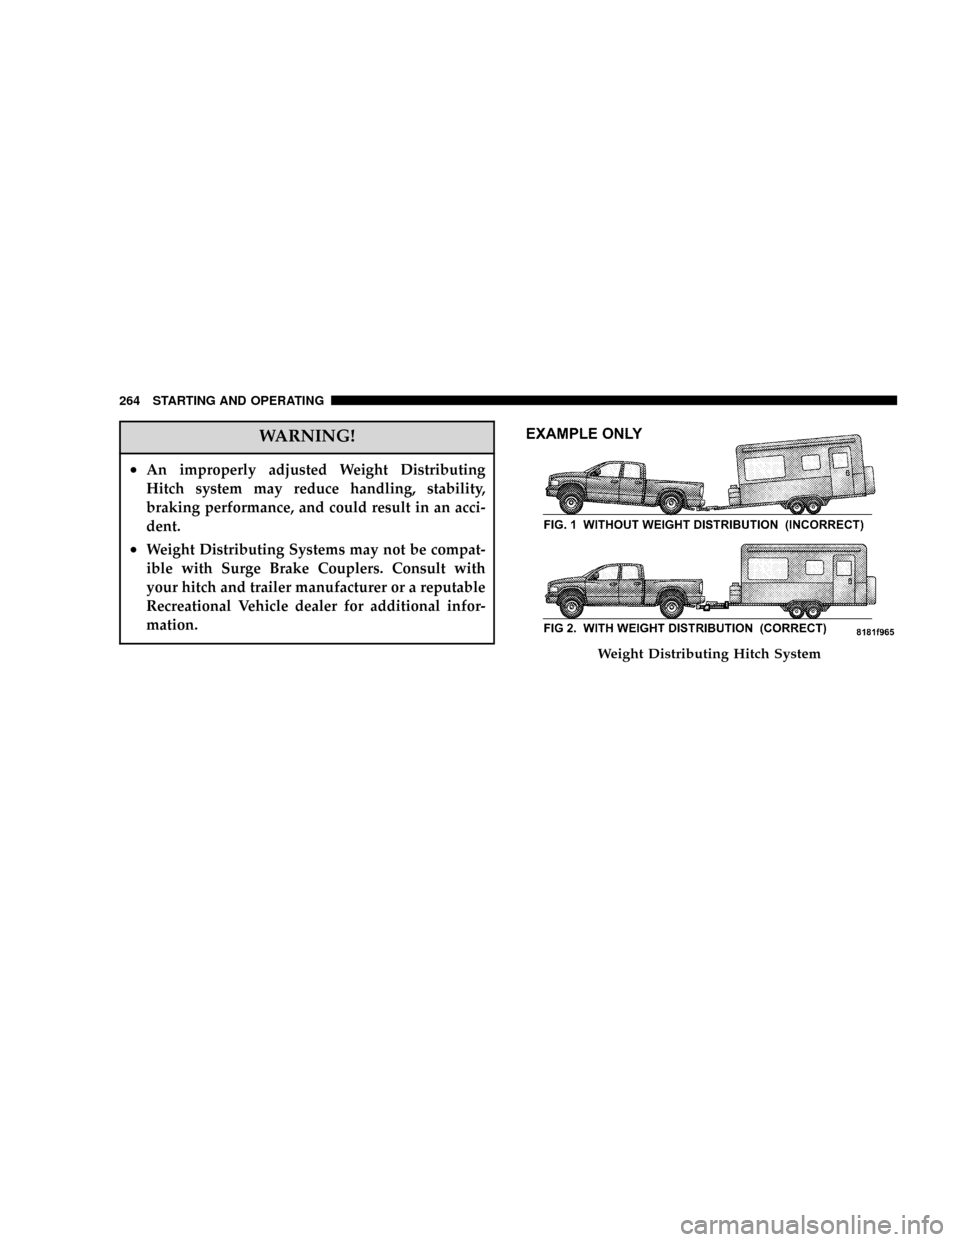
Weight-Distributing Hitch
A weight-distributing system works by applying lever-
age through spring (load) bars. They are typically used
for heavier loads, to distribute trailer tongue weight to
the tow vehicle's front axle and the trailer axle(s). When
used in accordance with the manufacturers' directions, it
provides for a more level ride, offering more consistent
steering and brake control thereby enhancing towing
safety. The addition of a friction / hydraulic sway control
also dampens sway caused by traffic and crosswinds and
contributes positively to tow vehicle and trailer stability.
Trailer sway control and a weight distributing (load
equalizing) hitch are recommended for heavier Tongue
Weights (TW) and may be required depending on Vehicle
and Trailer configuration / loading to comply with gross
axle weight rating (GAWR) requirements.
STARTING AND OPERATING 263
5
Page 265 of 380
WARNING!
²An improperly adjusted Weight Distributing
Hitch system may reduce handling, stability,
braking performance, and could result in an acci-
dent.
²Weight Distributing Systems may not be compat-
ible with Surge Brake Couplers. Consult with
your hitch and trailer manufacturer or a reputable
Recreational Vehicle dealer for additional infor-
mation.
Weight Distributing Hitch System
264 STARTING AND OPERATING
Page 266 of 380
Trailer Hitch Classification
Your vehicle may be factory equipped for safe towing of
trailers weighing over 2,000 lbs (907 kg) with the optional
Trailer Tow Prep Package. See your authorized dealer for
package content.
The following chart provides the industry standard for
the maximum trailer weight a given trailer hitch class cantow and should be used to assist you in selecting the
correct trailer hitch for your intended towing condition.
Refer to the ªTrailer Towing Weights (Maximum Trailer
Weight Ratings)º chart for the Max. GTW towable for
your given drivetrain.
Trailer Hitch Classification
Class Max. GTW (Gross Trailer
Wt.)
Class I - Light Duty 2,000 lbs (907 kg)
Class II - Medium
Duty3,500 lbs (1587 kg)
Class III - Heavy Duty 5,000 lbs (2268 kg)
Class IV - Extra
Heavy Duty10,000 lbs (4540 kg)
All trailer hitches should be professionally installed on
your vehicle.
Trailer Towing Weights (Maximum Trailer Weight
Ratings)
The following chart provides the maximum trailer
weight ratings towable for your given drivetrain.
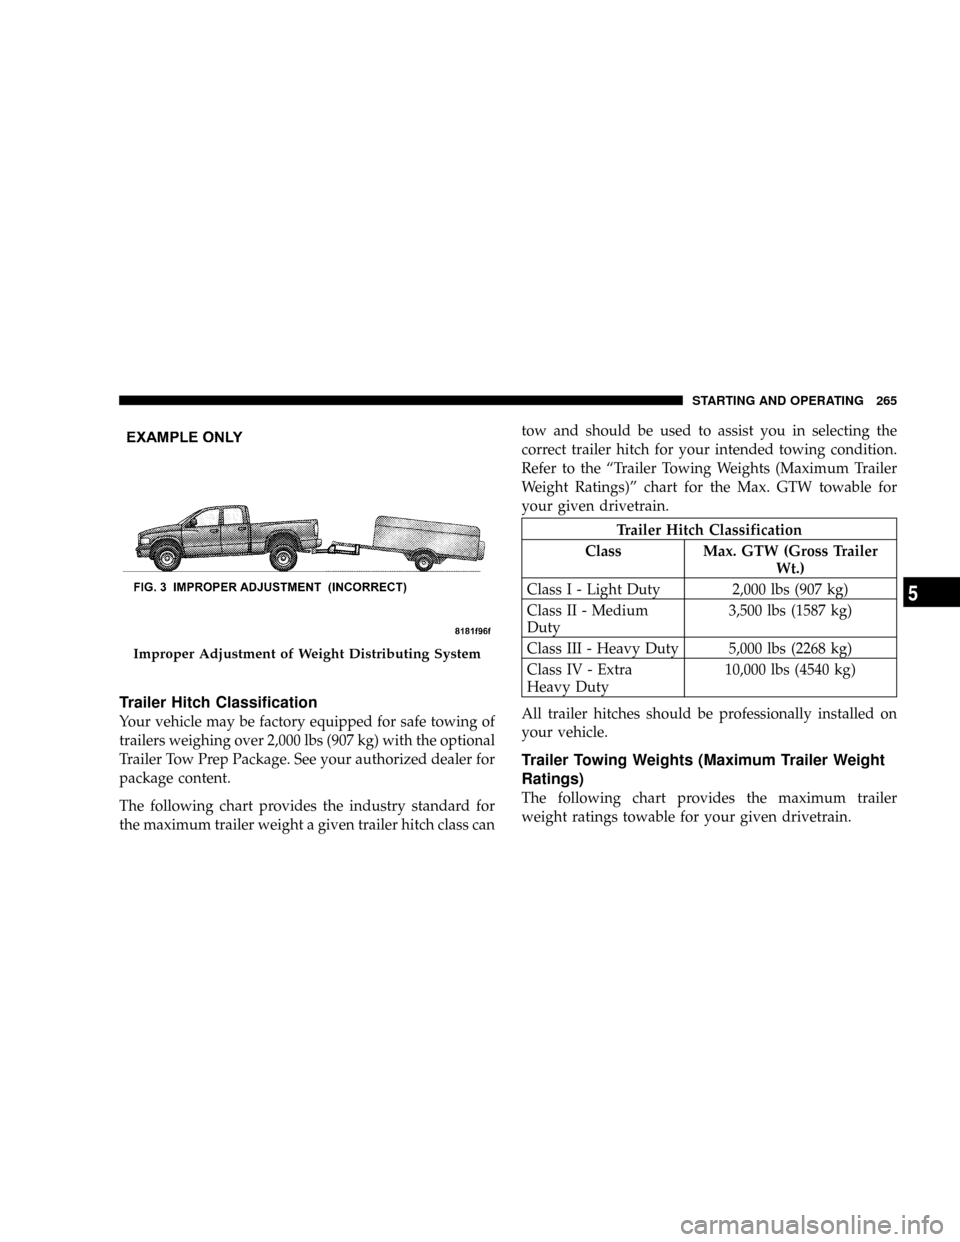
Improper Adjustment of Weight Distributing System
STARTING AND OPERATING 265
5