rear light DODGE RAM 1500 1998 2.G Repair Manual
[x] Cancel search | Manufacturer: DODGE, Model Year: 1998, Model line: RAM 1500, Model: DODGE RAM 1500 1998 2.GPages: 2627
Page 699 of 2627
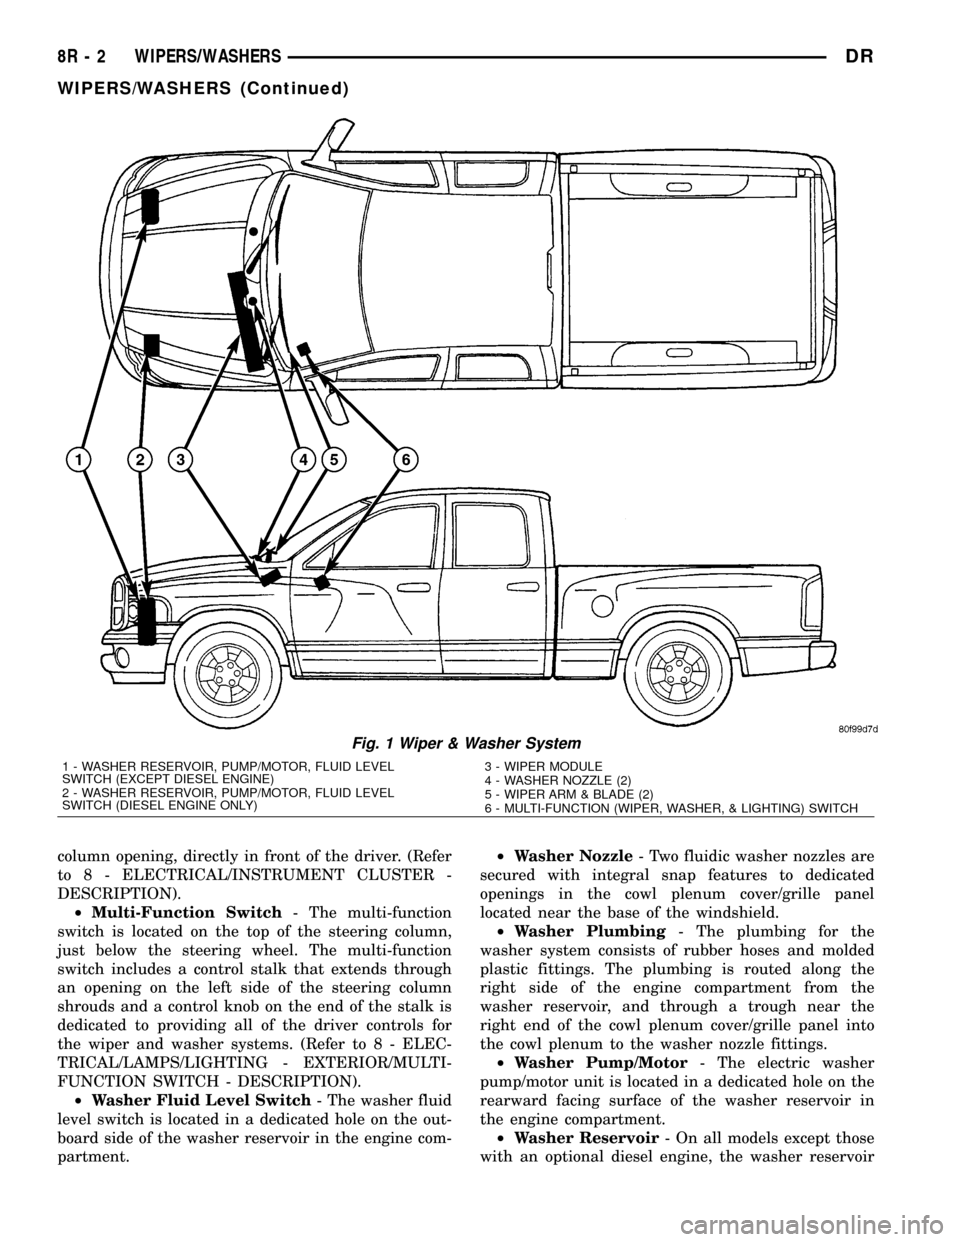
column opening, directly in front of the driver. (Refer
to 8 - ELECTRICAL/INSTRUMENT CLUSTER -
DESCRIPTION).
²Multi-Function Switch- The multi-function
switch is located on the top of the steering column,
just below the steering wheel. The multi-function
switch includes a control stalk that extends through
an opening on the left side of the steering column
shrouds and a control knob on the end of the stalk is
dedicated to providing all of the driver controls for
the wiper and washer systems. (Refer to 8 - ELEC-
TRICAL/LAMPS/LIGHTING - EXTERIOR/MULTI-
FUNCTION SWITCH - DESCRIPTION).
²Washer Fluid Level Switch- The washer fluid
level switch is located in a dedicated hole on the out-
board side of the washer reservoir in the engine com-
partment.²Washer Nozzle- Two fluidic washer nozzles are
secured with integral snap features to dedicated
openings in the cowl plenum cover/grille panel
located near the base of the windshield.
²Washer Plumbing- The plumbing for the
washer system consists of rubber hoses and molded
plastic fittings. The plumbing is routed along the
right side of the engine compartment from the
washer reservoir, and through a trough near the
right end of the cowl plenum cover/grille panel into
the cowl plenum to the washer nozzle fittings.
²Washer Pump/Motor- The electric washer
pump/motor unit is located in a dedicated hole on the
rearward facing surface of the washer reservoir in
the engine compartment.
²Washer Reservoir- On all models except those
with an optional diesel engine, the washer reservoir
Fig. 1 Wiper & Washer System
1 - WASHER RESERVOIR, PUMP/MOTOR, FLUID LEVEL
SWITCH (EXCEPT DIESEL ENGINE)
2 - WASHER RESERVOIR, PUMP/MOTOR, FLUID LEVEL
SWITCH (DIESEL ENGINE ONLY)3 - WIPER MODULE
4 - WASHER NOZZLE (2)
5 - WIPER ARM & BLADE (2)
6 - MULTI-FUNCTION (WIPER, WASHER, & LIGHTING) SWITCH
8R - 2 WIPERS/WASHERSDR
WIPERS/WASHERS (Continued)
Page 710 of 2627
(7) Reinstall both wiper arms onto the wiper piv-
ots. (Refer to 8 - ELECTRICAL/WIPERS/WASHERS/
WIPER ARM - INSTALLATION).
WASHER PUMP/MOTOR
DESCRIPTION
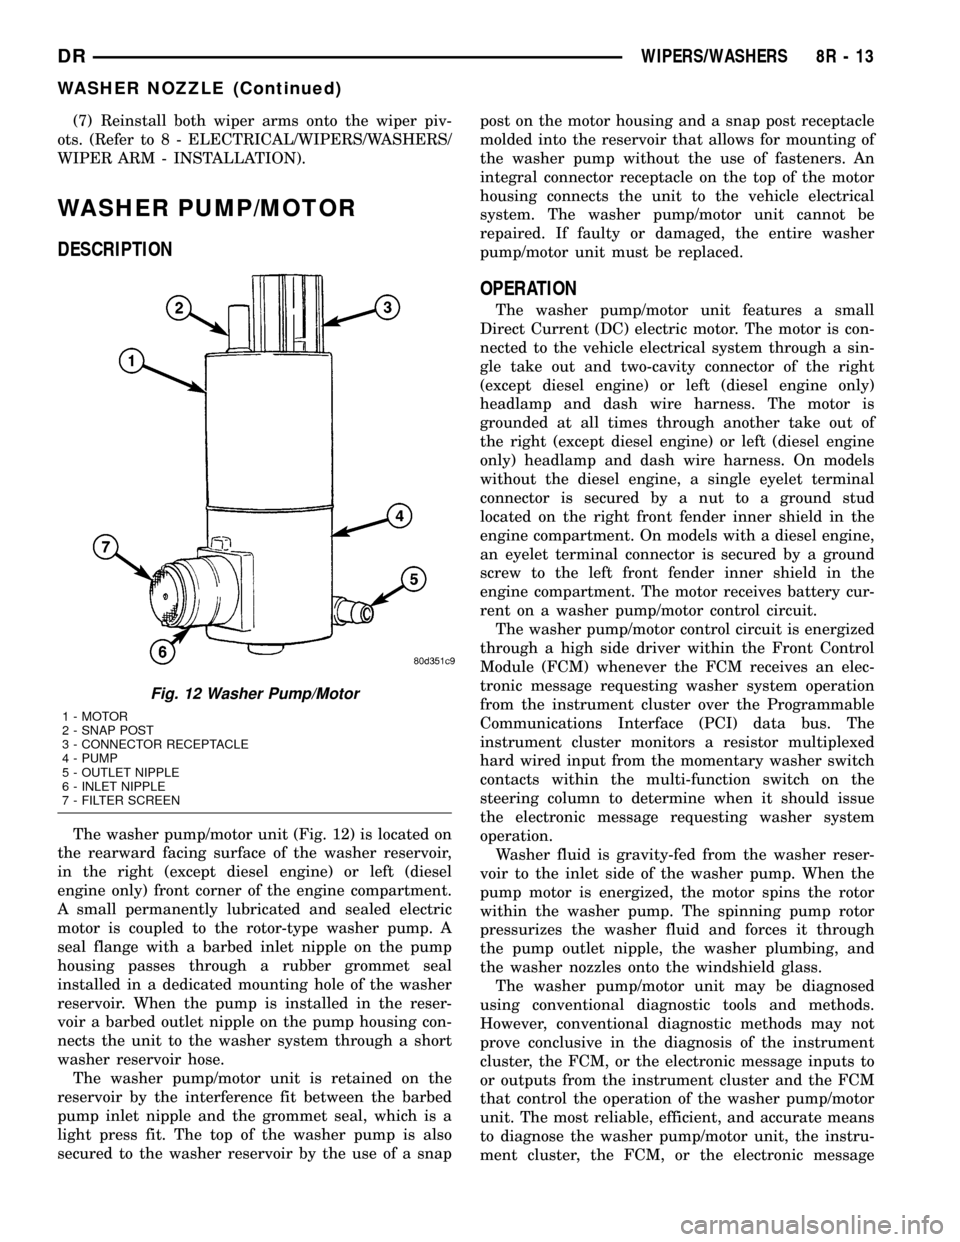
The washer pump/motor unit (Fig. 12) is located on
the rearward facing surface of the washer reservoir,
in the right (except diesel engine) or left (diesel
engine only) front corner of the engine compartment.
A small permanently lubricated and sealed electric
motor is coupled to the rotor-type washer pump. A
seal flange with a barbed inlet nipple on the pump
housing passes through a rubber grommet seal
installed in a dedicated mounting hole of the washer
reservoir. When the pump is installed in the reser-
voir a barbed outlet nipple on the pump housing con-
nects the unit to the washer system through a short
washer reservoir hose.
The washer pump/motor unit is retained on the
reservoir by the interference fit between the barbed
pump inlet nipple and the grommet seal, which is a
light press fit. The top of the washer pump is also
secured to the washer reservoir by the use of a snappost on the motor housing and a snap post receptacle
molded into the reservoir that allows for mounting of
the washer pump without the use of fasteners. An
integral connector receptacle on the top of the motor
housing connects the unit to the vehicle electrical
system. The washer pump/motor unit cannot be
repaired. If faulty or damaged, the entire washer
pump/motor unit must be replaced.
OPERATION
The washer pump/motor unit features a small
Direct Current (DC) electric motor. The motor is con-
nected to the vehicle electrical system through a sin-
gle take out and two-cavity connector of the right
(except diesel engine) or left (diesel engine only)
headlamp and dash wire harness. The motor is
grounded at all times through another take out of
the right (except diesel engine) or left (diesel engine
only) headlamp and dash wire harness. On models
without the diesel engine, a single eyelet terminal
connector is secured by a nut to a ground stud
located on the right front fender inner shield in the
engine compartment. On models with a diesel engine,
an eyelet terminal connector is secured by a ground
screw to the left front fender inner shield in the
engine compartment. The motor receives battery cur-
rent on a washer pump/motor control circuit.
The washer pump/motor control circuit is energized
through a high side driver within the Front Control
Module (FCM) whenever the FCM receives an elec-
tronic message requesting washer system operation
from the instrument cluster over the Programmable
Communications Interface (PCI) data bus. The
instrument cluster monitors a resistor multiplexed
hard wired input from the momentary washer switch
contacts within the multi-function switch on the
steering column to determine when it should issue
the electronic message requesting washer system
operation.
Washer fluid is gravity-fed from the washer reser-
voir to the inlet side of the washer pump. When the
pump motor is energized, the motor spins the rotor
within the washer pump. The spinning pump rotor
pressurizes the washer fluid and forces it through
the pump outlet nipple, the washer plumbing, and
the washer nozzles onto the windshield glass.
The washer pump/motor unit may be diagnosed
using conventional diagnostic tools and methods.
However, conventional diagnostic methods may not
prove conclusive in the diagnosis of the instrument
cluster, the FCM, or the electronic message inputs to
or outputs from the instrument cluster and the FCM
that control the operation of the washer pump/motor
unit. The most reliable, efficient, and accurate means
to diagnose the washer pump/motor unit, the instru-
ment cluster, the FCM, or the electronic message
Fig. 12 Washer Pump/Motor
1 - MOTOR
2 - SNAP POST
3 - CONNECTOR RECEPTACLE
4 - PUMP
5 - OUTLET NIPPLE
6 - INLET NIPPLE
7 - FILTER SCREEN
DRWIPERS/WASHERS 8R - 13
WASHER NOZZLE (Continued)
Page 711 of 2627
inputs and outputs related to the washer pump/mo-
tor unit operation requires the use of a DRBIIItscan
tool. Refer to the appropriate diagnostic information.
REMOVAL
The washer pump/motor unit can be removed from
the washer reservoir without removing the reservoir
from the vehicle.
(1) Unlatch and open the hood.
(2) Disconnect and isolate the battery negative
cable.
(3) Disconnect the washer hose from the barbed
outlet nipple of the washer pump/motor unit and
allow the washer fluid to drain into a clean container
for reuse.
(4) Disconnect the right (except diesel engine) or
left (diesel engine only) headlamp and dash wire har-
ness connector for the washer pump/motor unit from
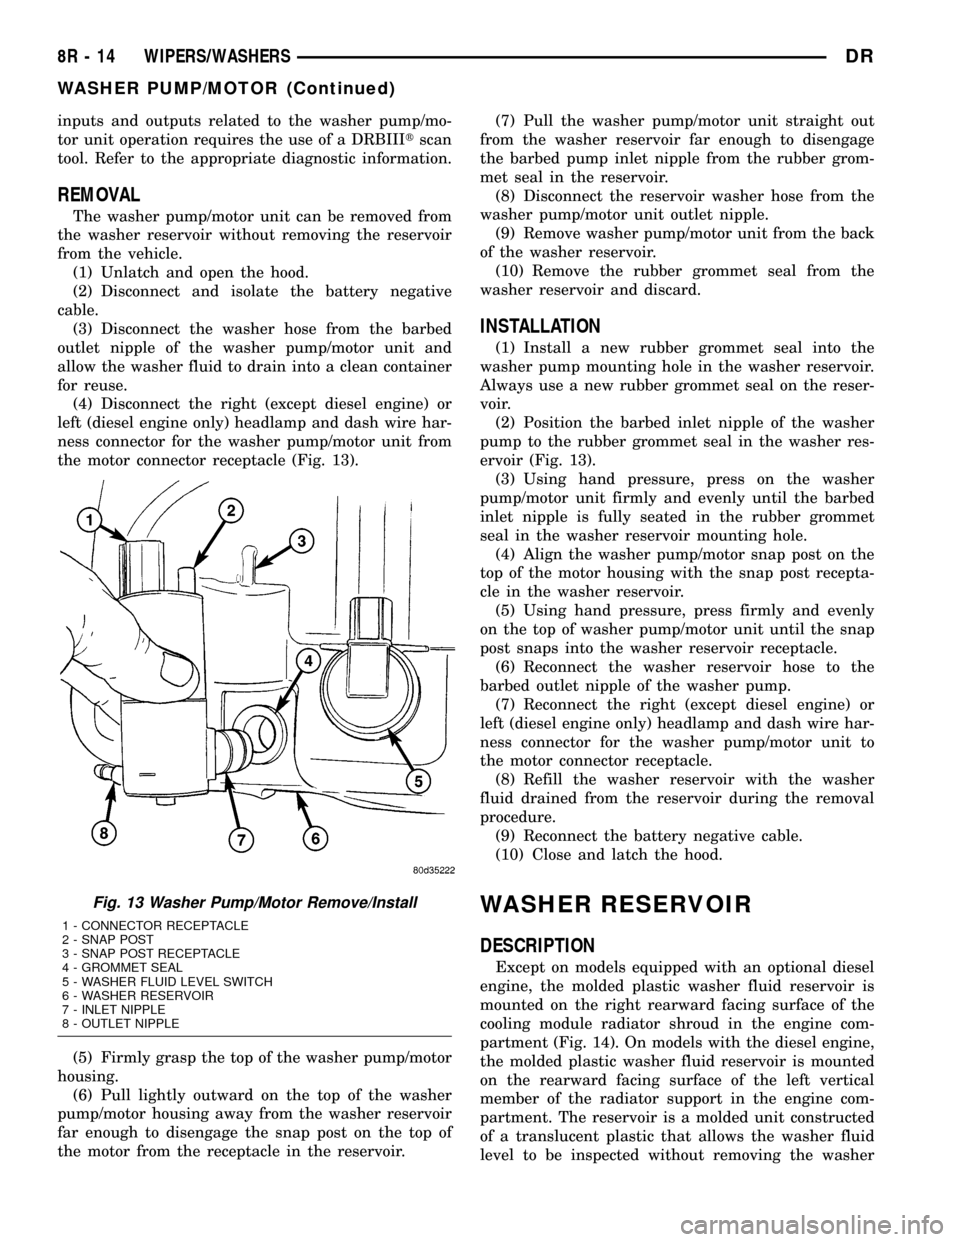
the motor connector receptacle (Fig. 13).
(5) Firmly grasp the top of the washer pump/motor
housing.
(6) Pull lightly outward on the top of the washer
pump/motor housing away from the washer reservoir
far enough to disengage the snap post on the top of
the motor from the receptacle in the reservoir.(7) Pull the washer pump/motor unit straight out
from the washer reservoir far enough to disengage
the barbed pump inlet nipple from the rubber grom-
met seal in the reservoir.
(8) Disconnect the reservoir washer hose from the
washer pump/motor unit outlet nipple.
(9) Remove washer pump/motor unit from the back
of the washer reservoir.
(10) Remove the rubber grommet seal from the
washer reservoir and discard.
INSTALLATION
(1) Install a new rubber grommet seal into the
washer pump mounting hole in the washer reservoir.
Always use a new rubber grommet seal on the reser-
voir.
(2) Position the barbed inlet nipple of the washer
pump to the rubber grommet seal in the washer res-
ervoir (Fig. 13).
(3) Using hand pressure, press on the washer
pump/motor unit firmly and evenly until the barbed
inlet nipple is fully seated in the rubber grommet
seal in the washer reservoir mounting hole.
(4) Align the washer pump/motor snap post on the
top of the motor housing with the snap post recepta-
cle in the washer reservoir.
(5) Using hand pressure, press firmly and evenly
on the top of washer pump/motor unit until the snap
post snaps into the washer reservoir receptacle.
(6) Reconnect the washer reservoir hose to the
barbed outlet nipple of the washer pump.
(7) Reconnect the right (except diesel engine) or
left (diesel engine only) headlamp and dash wire har-
ness connector for the washer pump/motor unit to
the motor connector receptacle.
(8) Refill the washer reservoir with the washer
fluid drained from the reservoir during the removal
procedure.
(9) Reconnect the battery negative cable.
(10) Close and latch the hood.
WASHER RESERVOIR
DESCRIPTION
Except on models equipped with an optional diesel
engine, the molded plastic washer fluid reservoir is
mounted on the right rearward facing surface of the
cooling module radiator shroud in the engine com-
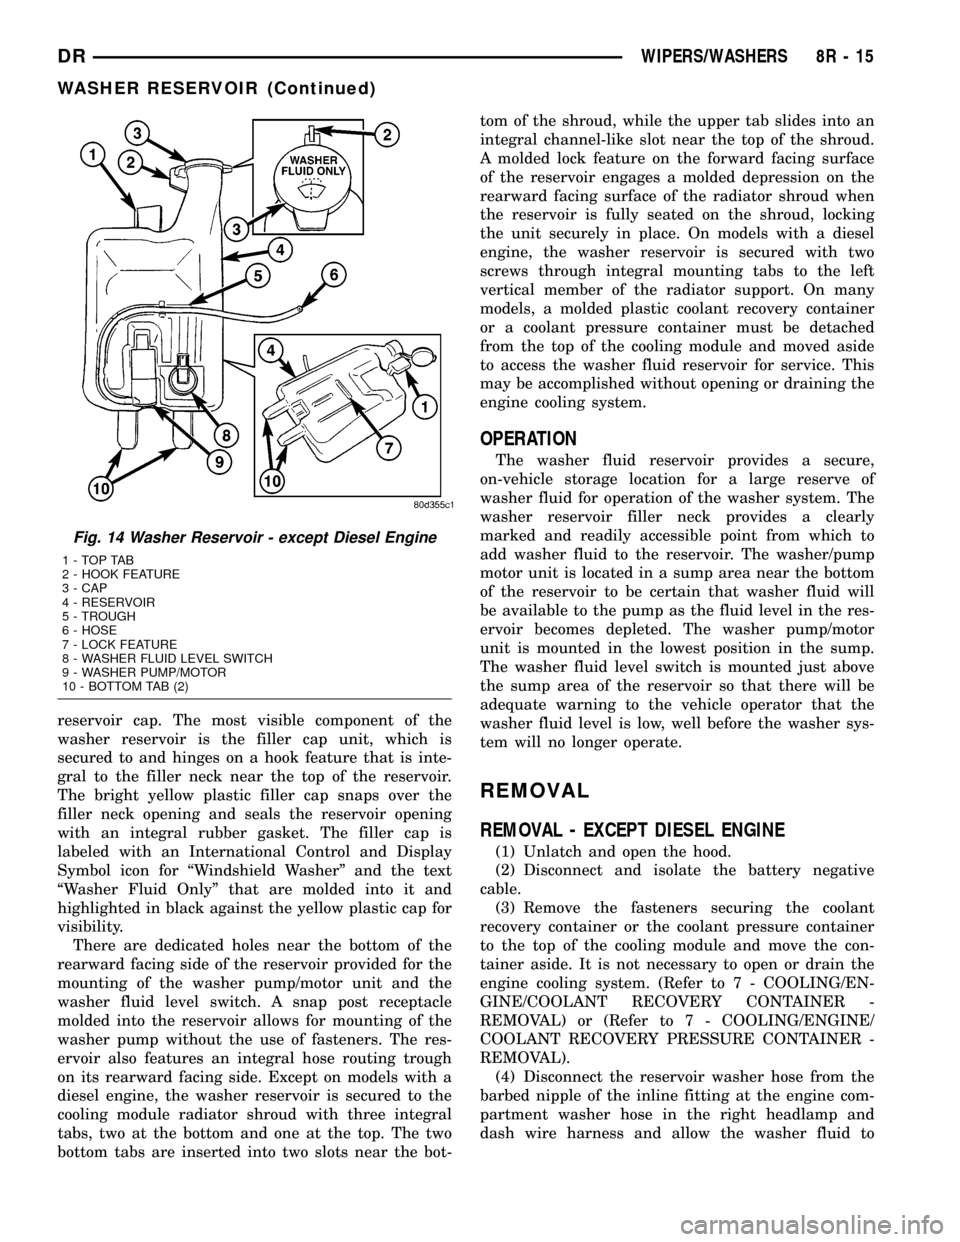
partment (Fig. 14). On models with the diesel engine,
the molded plastic washer fluid reservoir is mounted
on the rearward facing surface of the left vertical
member of the radiator support in the engine com-
partment. The reservoir is a molded unit constructed
of a translucent plastic that allows the washer fluid
level to be inspected without removing the washer
Fig. 13 Washer Pump/Motor Remove/Install
1 - CONNECTOR RECEPTACLE
2 - SNAP POST
3 - SNAP POST RECEPTACLE
4 - GROMMET SEAL
5 - WASHER FLUID LEVEL SWITCH
6 - WASHER RESERVOIR
7 - INLET NIPPLE
8 - OUTLET NIPPLE
8R - 14 WIPERS/WASHERSDR
WASHER PUMP/MOTOR (Continued)
Page 712 of 2627
reservoir cap. The most visible component of the
washer reservoir is the filler cap unit, which is
secured to and hinges on a hook feature that is inte-
gral to the filler neck near the top of the reservoir.
The bright yellow plastic filler cap snaps over the
filler neck opening and seals the reservoir opening
with an integral rubber gasket. The filler cap is
labeled with an International Control and Display
Symbol icon for ªWindshield Washerº and the text
ªWasher Fluid Onlyº that are molded into it and
highlighted in black against the yellow plastic cap for
visibility.
There are dedicated holes near the bottom of the
rearward facing side of the reservoir provided for the
mounting of the washer pump/motor unit and the
washer fluid level switch. A snap post receptacle
molded into the reservoir allows for mounting of the
washer pump without the use of fasteners. The res-
ervoir also features an integral hose routing trough
on its rearward facing side. Except on models with a
diesel engine, the washer reservoir is secured to the
cooling module radiator shroud with three integral
tabs, two at the bottom and one at the top. The two
bottom tabs are inserted into two slots near the bot-tom of the shroud, while the upper tab slides into an
integral channel-like slot near the top of the shroud.
A molded lock feature on the forward facing surface
of the reservoir engages a molded depression on the
rearward facing surface of the radiator shroud when
the reservoir is fully seated on the shroud, locking
the unit securely in place. On models with a diesel
engine, the washer reservoir is secured with two
screws through integral mounting tabs to the left
vertical member of the radiator support. On many
models, a molded plastic coolant recovery container
or a coolant pressure container must be detached
from the top of the cooling module and moved aside
to access the washer fluid reservoir for service. This
may be accomplished without opening or draining the
engine cooling system.
OPERATION
The washer fluid reservoir provides a secure,
on-vehicle storage location for a large reserve of
washer fluid for operation of the washer system. The
washer reservoir filler neck provides a clearly
marked and readily accessible point from which to
add washer fluid to the reservoir. The washer/pump
motor unit is located in a sump area near the bottom
of the reservoir to be certain that washer fluid will
be available to the pump as the fluid level in the res-
ervoir becomes depleted. The washer pump/motor
unit is mounted in the lowest position in the sump.
The washer fluid level switch is mounted just above
the sump area of the reservoir so that there will be
adequate warning to the vehicle operator that the
washer fluid level is low, well before the washer sys-
tem will no longer operate.
REMOVAL
REMOVAL - EXCEPT DIESEL ENGINE
(1) Unlatch and open the hood.
(2) Disconnect and isolate the battery negative
cable.
(3) Remove the fasteners securing the coolant
recovery container or the coolant pressure container
to the top of the cooling module and move the con-
tainer aside. It is not necessary to open or drain the
engine cooling system. (Refer to 7 - COOLING/EN-
GINE/COOLANT RECOVERY CONTAINER -
REMOVAL) or (Refer to 7 - COOLING/ENGINE/
COOLANT RECOVERY PRESSURE CONTAINER -
REMOVAL).
(4) Disconnect the reservoir washer hose from the
barbed nipple of the inline fitting at the engine com-
partment washer hose in the right headlamp and
dash wire harness and allow the washer fluid to
Fig. 14 Washer Reservoir - except Diesel Engine
1-TOPTAB
2 - HOOK FEATURE
3 - CAP
4 - RESERVOIR
5 - TROUGH
6 - HOSE
7 - LOCK FEATURE
8 - WASHER FLUID LEVEL SWITCH
9 - WASHER PUMP/MOTOR
10 - BOTTOM TAB (2)
DRWIPERS/WASHERS 8R - 15
WASHER RESERVOIR (Continued)
Page 726 of 2627
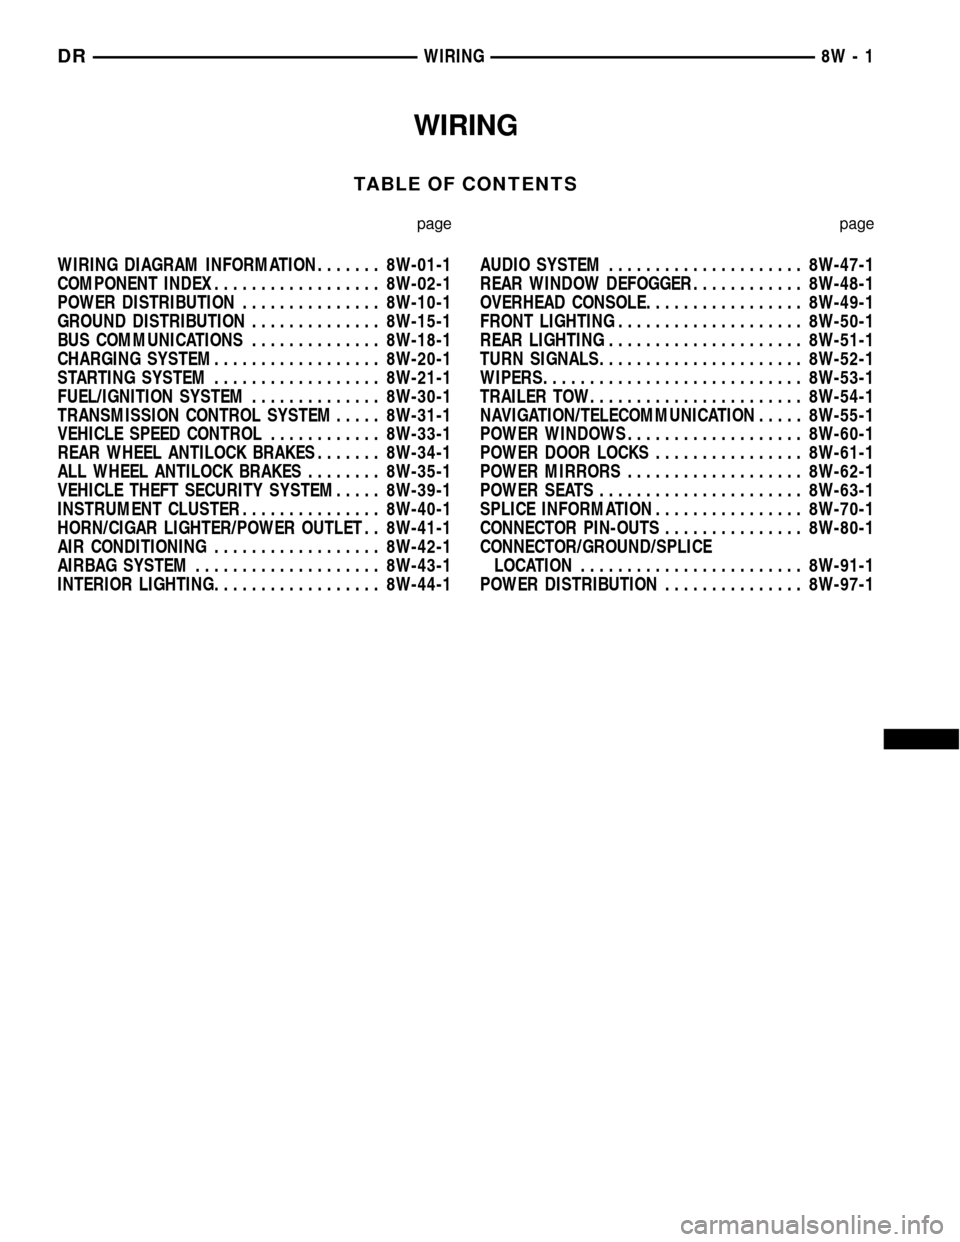
WIRING
TABLE OF CONTENTS
page page
WIRING DIAGRAM INFORMATION....... 8W-01-1
COMPONENT INDEX.................. 8W-02-1
POWER DISTRIBUTION............... 8W-10-1
GROUND DISTRIBUTION.............. 8W-15-1
BUS COMMUNICATIONS.............. 8W-18-1
CHARGING SYSTEM.................. 8W-20-1
STARTING SYSTEM.................. 8W-21-1
FUEL/IGNITION SYSTEM.............. 8W-30-1
TRANSMISSION CONTROL SYSTEM..... 8W-31-1
VEHICLE SPEED CONTROL............ 8W-33-1
REAR WHEEL ANTILOCK BRAKES....... 8W-34-1
ALL WHEEL ANTILOCK BRAKES........ 8W-35-1
VEHICLE THEFT SECURITY SYSTEM..... 8W-39-1
INSTRUMENT CLUSTER............... 8W-40-1
HORN/CIGAR LIGHTER/POWER OUTLET . . 8W-41-1
AIR CONDITIONING.................. 8W-42-1
AIRBAG SYSTEM.................... 8W-43-1
INTERIOR LIGHTING.................. 8W-44-1AUDIO SYSTEM..................... 8W-47-1
REAR WINDOW DEFOGGER............ 8W-48-1
OVERHEAD CONSOLE................. 8W-49-1
FRONT LIGHTING.................... 8W-50-1
REAR LIGHTING..................... 8W-51-1
TURN SIGNALS...................... 8W-52-1
WIPERS............................ 8W-53-1
TRAILER TOW....................... 8W-54-1
NAVIGATION/TELECOMMUNICATION..... 8W-55-1
POWER WINDOWS................... 8W-60-1
POWER DOOR LOCKS................ 8W-61-1
POWER MIRRORS................... 8W-62-1
POWER SEATS...................... 8W-63-1
SPLICE INFORMATION................ 8W-70-1
CONNECTOR PIN-OUTS............... 8W-80-1
CONNECTOR/GROUND/SPLICE
LOCATION........................ 8W-91-1
POWER DISTRIBUTION............... 8W-97-1 DRWIRING 8W - 1
Page 732 of 2627
TERMINOLOGY
This is a list of terms and definitions used in the
wiring diagrams.
LHD.................Left Hand Drive Vehicles
RHD ...............Right Hand Drive Vehicles
ATX . . Automatic Transmissions-Front Wheel Drive
MTX . . . Manual Transmissions-Front Wheel Drive
AT....Automatic Transmissions-Rear Wheel Drive
MT .....Manual Transmissions-Rear Wheel Drive
SOHC...........Single Over Head Cam Engine
DOHC..........Double Over Head Cam Engine
Export . . Vehicles Built For Sale In Markets Other
Than North America
Except Export.... Vehicles Built For Sale In North
America
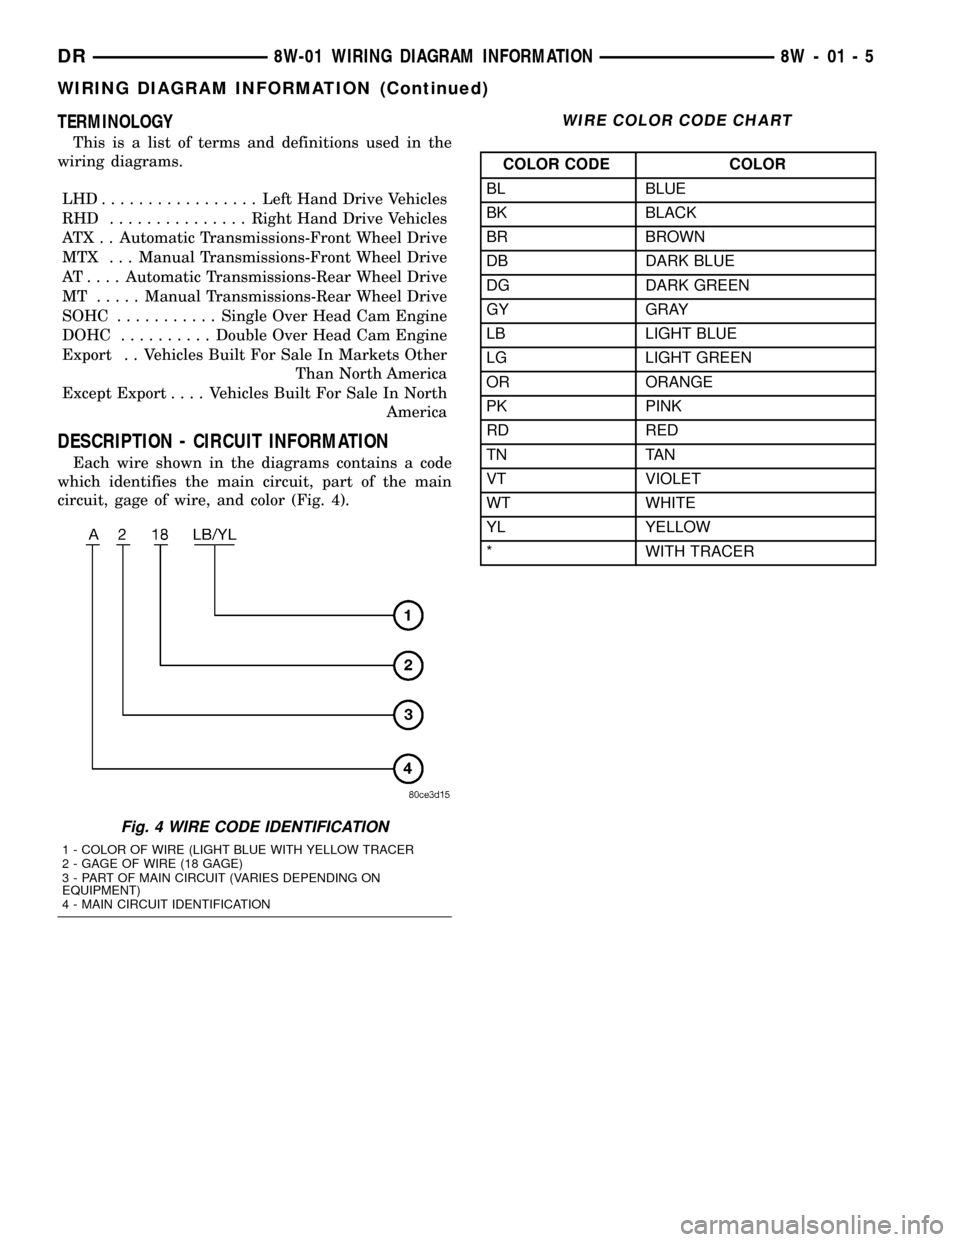
DESCRIPTION - CIRCUIT INFORMATION
Each wire shown in the diagrams contains a code
which identifies the main circuit, part of the main
circuit, gage of wire, and color (Fig. 4).
WIRE COLOR CODE CHART
COLOR CODE COLOR
BL BLUE
BK BLACK
BR BROWN
DB DARK BLUE
DG DARK GREEN
GY GRAY
LB LIGHT BLUE
LG LIGHT GREEN
OR ORANGE
PK PINK
RD RED
TN TAN
VT VIOLET
WT WHITE
YL YELLOW
* WITH TRACER
Fig. 4 WIRE CODE IDENTIFICATION
1 - COLOR OF WIRE (LIGHT BLUE WITH YELLOW TRACER
2 - GAGE OF WIRE (18 GAGE)
3 - PART OF MAIN CIRCUIT (VARIES DEPENDING ON
EQUIPMENT)
4 - MAIN CIRCUIT IDENTIFICATION
DR8W-01 WIRING DIAGRAM INFORMATION 8W - 01 - 5
WIRING DIAGRAM INFORMATION (Continued)
Page 746 of 2627
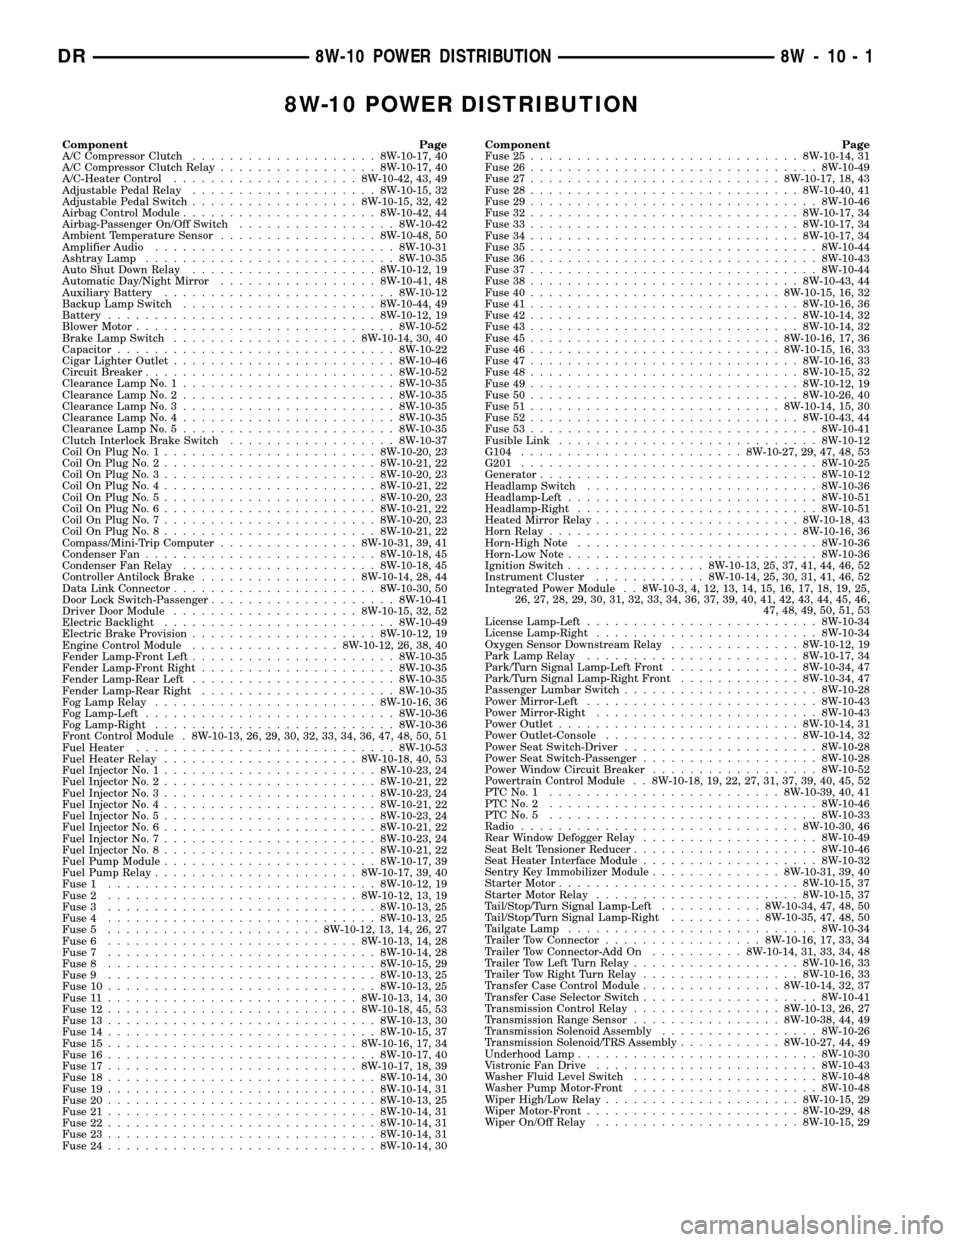
8W-10 POWER DISTRIBUTION
Component Page
A/C Compressor Clutch....................8W-10-17, 40
A/C Compressor Clutch Relay.................8W-10-17, 40
A/C-Heater Control....................8W-10-42, 43, 49
Adjustable Pedal Relay....................8W-10-15, 32
Adjustable Pedal Switch..................8W-10-15, 32, 42
Airbag Control Module.....................8W-10-42, 44
Airbag-Passenger On/Off Switch.................8W-10-42
Ambient Temperature Sensor.................8W-10-48, 50
Amplifier Audio..........................8W-10-31
Ashtray Lamp...........................8W-10-35
Auto Shut Down Relay....................8W-10-12, 19
Automatic Day/Night Mirror.................8W-10-41, 48
Auxiliary Battery.........................8W-10-12
Backup Lamp Switch.....................8W-10-44, 49
Battery.............................8W-10-12, 19
Blower Motor............................8W-10-52
Brake Lamp Switch....................8W-10-14, 30, 40
Capacitor..............................8W-10-22
Cigar Lighter Outlet........................8W-10-46
Circuit Breaker...........................8W-10-52
Clearance Lamp No. 1.......................8W-10-35
Clearance Lamp No. 2.......................8W-10-35
Clearance Lamp No. 3.......................8W-10-35
Clearance Lamp No. 4.......................8W-10-35
Clearance Lamp No. 5.......................8W-10-35
Clutch Interlock Brake Switch..................8W-10-37
Coil On Plug No. 1.......................8W-10-20, 23
Coil On Plug No. 2.......................8W-10-21, 22
Coil On Plug No. 3.......................8W-10-20, 23
Coil On Plug No. 4.......................8W-10-21, 22
Coil On Plug No. 5.......................8W-10-20, 23
Coil On Plug No. 6.......................8W-10-21, 22
Coil On Plug No. 7.......................8W-10-20, 23
Coil On Plug No. 8.......................8W-10-21, 22
Compass/Mini-Trip Computer...............8W-10-31, 39, 41
Condenser Fan.........................8W-10-18, 45
Condenser Fan Relay.....................8W-10-18, 45
Controller Antilock Brake.................8W-10-14, 28, 44
Data Link Connector......................8W-10-30, 50
Door Lock Switch-Passenger....................8W-10-41
Driver Door Module....................8W-10-15, 32, 52
Electric Backlight.........................8W-10-49
Electric Brake Provision....................8W-10-12, 19
Engine Control Module................8W-10-12, 26, 38, 40
Fender Lamp-Front Left......................8W-10-35
Fender Lamp-Front Right.....................8W-10-35
Fender Lamp-Rear Left......................8W-10-35
Fender Lamp-Rear Right.....................8W-10-35
Fog Lamp Relay........................8W-10-16, 36
Fog Lamp-Left...........................8W-10-36
Fog Lamp-Right..........................8W-10-36
Front Control Module . 8W-10-13, 26, 29, 30, 32, 33, 34, 36, 47, 48, 50, 51
Fuel Heater............................8W-10-53
Fuel Heater Relay.....................8W-10-18, 40, 53
Fuel Injector No. 1.......................8W-10-23, 24
Fuel Injector No. 2.......................8W-10-21, 22
Fuel Injector No. 3.......................8W-10-23, 24
Fuel Injector No. 4.......................8W-10-21, 22
Fuel Injector No. 5.......................8W-10-23, 24
Fuel Injector No. 6.......................8W-10-21, 22
Fuel Injector No. 7.......................8W-10-23, 24
Fuel Injector No. 8.......................8W-10-21, 22
Fuel Pump Module.......................8W-10-17, 39
Fuel Pump Relay......................8W-10-17, 39, 40
Fuse 1.............................8W-10-12, 19
Fuse 2...........................8W-10-12, 13, 19
Fuse 3.............................8W-10-13, 25
Fuse 4.............................8W-10-13, 25
Fuse 5.......................8W-10-12, 13, 14, 26, 27
Fuse 6...........................8W-10-13, 14, 28
Fuse 7.............................8W-10-14, 28
Fuse 8.............................8W-10-15, 29
Fuse 9.............................8W-10-13, 25
Fuse 10.............................8W-10-13, 25
Fuse 11...........................8W-10-13, 14, 30
Fuse 12...........................8W-10-18, 45, 53
Fuse 13.............................8W-10-13, 30
Fuse 14.............................8W-10-15, 37
Fuse 15...........................8W-10-16, 17, 34
Fuse 16.............................8W-10-17, 40
Fuse 17...........................8W-10-17, 18, 39
Fuse 18.............................8W-10-14, 30
Fuse 19.............................8W-10-14, 31
Fuse 20.............................8W-10-13, 25
Fuse 21.............................8W-10-14, 31
Fuse 22.............................8W-10-14, 31
Fuse 23.............................8W-10-14, 31
Fuse 24.............................8W-10-14, 30Component Page
Fuse 25.............................8W-10-14, 31
Fuse 26...............................8W-10-49
Fuse 27...........................8W-10-17, 18, 43
Fuse 28.............................8W-10-40, 41
Fuse 29...............................8W-10-46
Fuse 32.............................8W-10-17, 34
Fuse 33.............................8W-10-17, 34
Fuse 34.............................8W-10-17, 34
Fuse 35...............................8W-10-44
Fuse 36...............................8W-10-43
Fuse 37...............................8W-10-44
Fuse 38.............................8W-10-43, 44
Fuse 40...........................8W-10-15, 16, 32
Fuse 41.............................8W-10-16, 36
Fuse 42.............................8W-10-14, 32
Fuse 43.............................8W-10-14, 32
Fuse 45...........................8W-10-16, 17, 36
Fuse 46...........................8W-10-15, 16, 33
Fuse 47.............................8W-10-16, 33
Fuse 48.............................8W-10-15, 32
Fuse 49.............................8W-10-12, 19
Fuse 50.............................8W-10-26, 40
Fuse 51...........................8W-10-14, 15, 30
Fuse 52.............................8W-10-43, 44
Fuse 53...............................8W-10-41
Fusible Link............................8W-10-12
G104........................8W-10-27, 29, 47, 48, 53
G201................................8W-10-25
Generator..............................8W-10-12
Headlamp Switch.........................8W-10-36
Headlamp-Left...........................8W-10-51
Headlamp-Right..........................8W-10-51
Heated Mirror Relay......................8W-10-18, 43
Horn Relay...........................8W-10-16, 36
Horn-High Note..........................8W-10-36
Horn-Low Note...........................8W-10-36
Ignition Switch...............8W-10-13, 25, 37, 41, 44, 46, 52
Instrument Cluster............8W-10-14, 25, 30, 31, 41, 46, 52
Integrated Power Module . . 8W-10-3, 4, 12, 13, 14, 15, 16, 17, 18, 19, 25,
26, 27, 28, 29, 30, 31, 32, 33, 34, 36, 37, 39, 40, 41, 42, 43, 44, 45, 46,
47, 48, 49, 50, 51, 53
License Lamp-Left.........................8W-10-34
License Lamp-Right........................8W-10-34
Oxygen Sensor Downstream Relay..............8W-10-12, 19
Park Lamp Relay.......................8W-10-17, 34
Park/Turn Signal Lamp-Left Front..............8W-10-34, 47
Park/Turn Signal Lamp-Right Front.............8W-10-34, 47
Passenger Lumbar Switch.....................8W-10-28
Power Mirror-Left.........................8W-10-43
Power Mirror-Right........................8W-10-43
Power Outlet..........................8W-10-14, 31
Power Outlet-Console.....................8W-10-14, 32
Power Seat Switch-Driver.....................8W-10-28
Power Seat Switch-Passenger...................8W-10-28
Power Window Circuit Breaker..................8W-10-52
Powertrain Control Module . . 8W-10-18, 19, 22, 27, 31, 37, 39, 40, 45, 52
PTCNo.1 .........................8W-10-39, 40, 41
PTCNo.2 .............................8W-10-46
PTCNo.5 .............................8W-10-33
Radio..............................8W-10-30, 46
Rear Window Defogger Relay...................8W-10-49
Seat Belt Tensioner Reducer....................8W-10-46
Seat Heater Interface Module...................8W-10-32
Sentry Key Immobilizer Module..............8W-10-31, 39, 40
Starter Motor..........................8W-10-15, 37
Starter Motor Relay......................8W-10-15, 37
Tail/Stop/Turn Signal Lamp-Left...........8W-10-34, 47, 48, 50
Tail/Stop/Turn Signal Lamp-Right..........8W-10-35, 47, 48, 50
Tailgate Lamp...........................8W-10-34
Trailer Tow Connector.................8W-10-16, 17, 33, 34
Trailer Tow Connector-Add On..........8W-10-14, 31, 33, 34, 48
Trailer Tow Left Turn Relay..................8W-10-16, 33
Trailer Tow Right Turn Relay.................8W-10-16, 33
Transfer Case Control Module...............8W-10-14, 32, 37
Transfer Case Selector Switch...................8W-10-41
Transmission Control Relay................8W-10-13, 26, 27
Transmission Range Sensor................8W-10-38, 44, 49
Transmission Solenoid Assembly.................8W-10-26
Transmission Solenoid/TRS Assembly...........8W-10-27, 44, 49
Underhood Lamp..........................8W-10-30
Vistronic Fan Drive........................8W-10-43
Washer Fluid Level Switch....................8W-10-48
Washer Pump Motor-Front....................8W-10-48
Wiper High/Low Relay.....................8W-10-15, 29
Wiper Motor-Front.......................8W-10-29, 48
Wiper On/Off Relay......................8W-10-15, 29
DR8W-10 POWER DISTRIBUTION 8W - 10 - 1
Page 798 of 2627
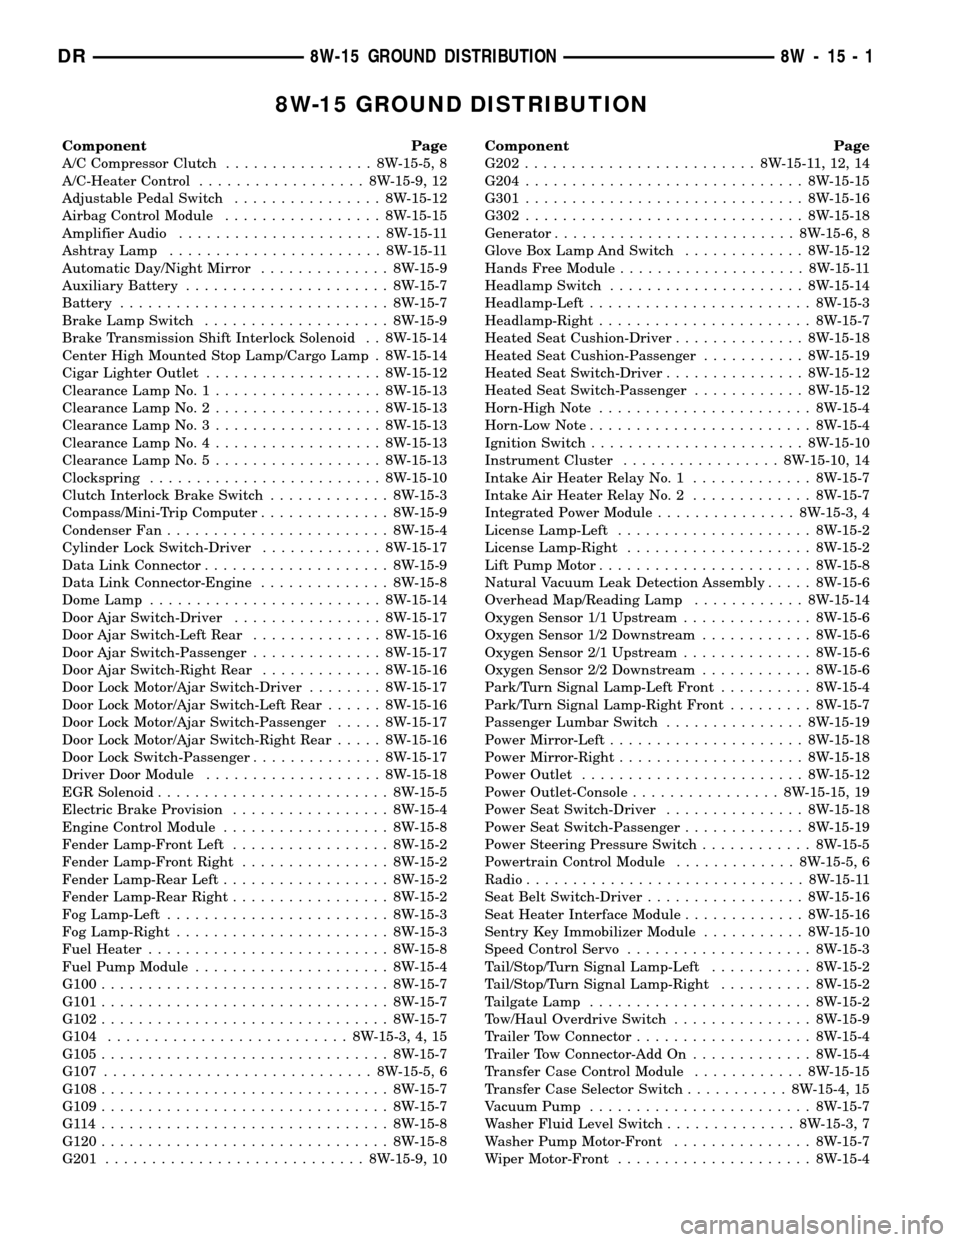
8W-15 GROUND DISTRIBUTION
Component Page
A/C Compressor Clutch................ 8W-15-5, 8
A/C-Heater Control.................. 8W-15-9, 12
Adjustable Pedal Switch................ 8W-15-12
Airbag Control Module................. 8W-15-15
Amplifier Audio...................... 8W-15-11
Ashtray Lamp....................... 8W-15-11
Automatic Day/Night Mirror.............. 8W-15-9
Auxiliary Battery...................... 8W-15-7
Battery............................. 8W-15-7
Brake Lamp Switch.................... 8W-15-9
Brake Transmission Shift Interlock Solenoid . . 8W-15-14
Center High Mounted Stop Lamp/Cargo Lamp . 8W-15-14
Cigar Lighter Outlet................... 8W-15-12
Clearance Lamp No. 1.................. 8W-15-13
Clearance Lamp No. 2.................. 8W-15-13
Clearance Lamp No. 3.................. 8W-15-13
Clearance Lamp No. 4.................. 8W-15-13
Clearance Lamp No. 5.................. 8W-15-13
Clockspring......................... 8W-15-10
Clutch Interlock Brake Switch............. 8W-15-3
Compass/Mini-Trip Computer.............. 8W-15-9
Condenser Fan........................ 8W-15-4
Cylinder Lock Switch-Driver............. 8W-15-17
Data Link Connector.................... 8W-15-9
Data Link Connector-Engine.............. 8W-15-8
Dome Lamp......................... 8W-15-14
Door Ajar Switch-Driver................ 8W-15-17
Door Ajar Switch-Left Rear.............. 8W-15-16
Door Ajar Switch-Passenger.............. 8W-15-17
Door Ajar Switch-Right Rear............. 8W-15-16
Door Lock Motor/Ajar Switch-Driver........ 8W-15-17
Door Lock Motor/Ajar Switch-Left Rear...... 8W-15-16
Door Lock Motor/Ajar Switch-Passenger..... 8W-15-17
Door Lock Motor/Ajar Switch-Right Rear..... 8W-15-16
Door Lock Switch-Passenger.............. 8W-15-17
Driver Door Module................... 8W-15-18
EGR Solenoid......................... 8W-15-5
Electric Brake Provision................. 8W-15-4
Engine Control Module.................. 8W-15-8
Fender Lamp-Front Left................. 8W-15-2
Fender Lamp-Front Right................ 8W-15-2
Fender Lamp-Rear Left.................. 8W-15-2
Fender Lamp-Rear Right................. 8W-15-2
Fog Lamp-Left........................ 8W-15-3
Fog Lamp-Right....................... 8W-15-3
Fuel Heater.......................... 8W-15-8
Fuel Pump Module..................... 8W-15-4
G100............................... 8W-15-7
G101............................... 8W-15-7
G102............................... 8W-15-7
G104.......................... 8W-15-3, 4, 15
G105............................... 8W-15-7
G107............................. 8W-15-5, 6
G108............................... 8W-15-7
G109............................... 8W-15-7
G114............................... 8W-15-8
G120............................... 8W-15-8
G201............................ 8W-15-9, 10Component Page
G202......................... 8W-15-11, 12, 14
G204.............................. 8W-15-15
G301.............................. 8W-15-16
G302.............................. 8W-15-18
Generator.......................... 8W-15-6, 8
Glove Box Lamp And Switch............. 8W-15-12
Hands Free Module.................... 8W-15-11
Headlamp Switch..................... 8W-15-14
Headlamp-Left........................ 8W-15-3
Headlamp-Right....................... 8W-15-7
Heated Seat Cushion-Driver.............. 8W-15-18
Heated Seat Cushion-Passenger........... 8W-15-19
Heated Seat Switch-Driver............... 8W-15-12
Heated Seat Switch-Passenger............ 8W-15-12
Horn-High Note....................... 8W-15-4
Horn-Low Note........................ 8W-15-4
Ignition Switch....................... 8W-15-10
Instrument Cluster................. 8W-15-10, 14
Intake Air Heater Relay No. 1............. 8W-15-7
Intake Air Heater Relay No. 2............. 8W-15-7
Integrated Power Module............... 8W-15-3, 4
License Lamp-Left..................... 8W-15-2
License Lamp-Right.................... 8W-15-2
Lift Pump Motor....................... 8W-15-8
Natural Vacuum Leak Detection Assembly..... 8W-15-6
Overhead Map/Reading Lamp............ 8W-15-14
Oxygen Sensor 1/1 Upstream.............. 8W-15-6
Oxygen Sensor 1/2 Downstream............ 8W-15-6
Oxygen Sensor 2/1 Upstream.............. 8W-15-6
Oxygen Sensor 2/2 Downstream............ 8W-15-6
Park/Turn Signal Lamp-Left Front.......... 8W-15-4
Park/Turn Signal Lamp-Right Front......... 8W-15-7
Passenger Lumbar Switch............... 8W-15-19
Power Mirror-Left..................... 8W-15-18
Power Mirror-Right.................... 8W-15-18
Power Outlet........................ 8W-15-12
Power Outlet-Console................ 8W-15-15, 19
Power Seat Switch-Driver............... 8W-15-18
Power Seat Switch-Passenger............. 8W-15-19
Power Steering Pressure Switch............ 8W-15-5
Powertrain Control Module............. 8W-15-5, 6
Radio.............................. 8W-15-11
Seat Belt Switch-Driver................. 8W-15-16
Seat Heater Interface Module............. 8W-15-16
Sentry Key Immobilizer Module........... 8W-15-10
Speed Control Servo.................... 8W-15-3
Tail/Stop/Turn Signal Lamp-Left........... 8W-15-2
Tail/Stop/Turn Signal Lamp-Right.......... 8W-15-2
Tailgate Lamp........................ 8W-15-2
Tow/Haul Overdrive Switch............... 8W-15-9
Trailer Tow Connector................... 8W-15-4
Trailer Tow Connector-Add On............. 8W-15-4
Transfer Case Control Module............ 8W-15-15
Transfer Case Selector Switch........... 8W-15-4, 15
Vacuum Pump........................ 8W-15-7
Washer Fluid Level Switch.............. 8W-15-3, 7
Washer Pump Motor-Front............... 8W-15-7
Wiper Motor-Front..................... 8W-15-4
DR8W-15 GROUND DISTRIBUTION 8W - 15 - 1
Page 968 of 2627
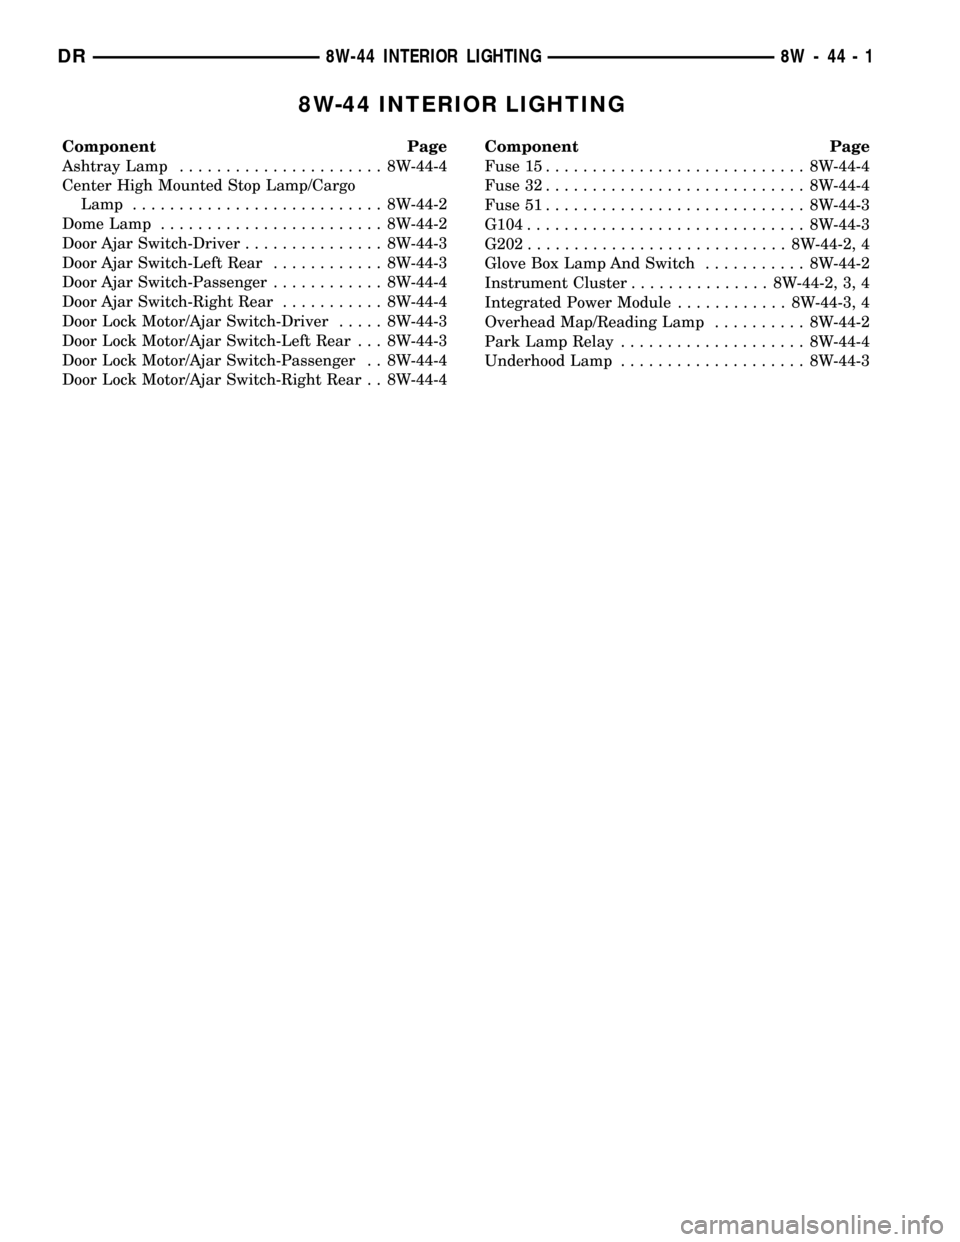
8W-44 INTERIOR LIGHTING
Component Page
Ashtray Lamp...................... 8W-44-4
Center High Mounted Stop Lamp/Cargo
Lamp........................... 8W-44-2
Dome Lamp........................ 8W-44-2
Door Ajar Switch-Driver............... 8W-44-3
Door Ajar Switch-Left Rear............ 8W-44-3
Door Ajar Switch-Passenger............ 8W-44-4
Door Ajar Switch-Right Rear........... 8W-44-4
Door Lock Motor/Ajar Switch-Driver..... 8W-44-3
Door Lock Motor/Ajar Switch-Left Rear . . . 8W-44-3
Door Lock Motor/Ajar Switch-Passenger . . 8W-44-4
Door Lock Motor/Ajar Switch-Right Rear . . 8W-44-4Component Page
Fuse 15............................ 8W-44-4
Fuse 32............................ 8W-44-4
Fuse 51............................ 8W-44-3
G104.............................. 8W-44-3
G202............................ 8W-44-2, 4
Glove Box Lamp And Switch........... 8W-44-2
Instrument Cluster............... 8W-44-2, 3, 4
Integrated Power Module............ 8W-44-3, 4
Overhead Map/Reading Lamp.......... 8W-44-2
Park Lamp Relay.................... 8W-44-4
Underhood Lamp.................... 8W-44-3
DR8W-44 INTERIOR LIGHTING 8W - 44 - 1
Page 980 of 2627
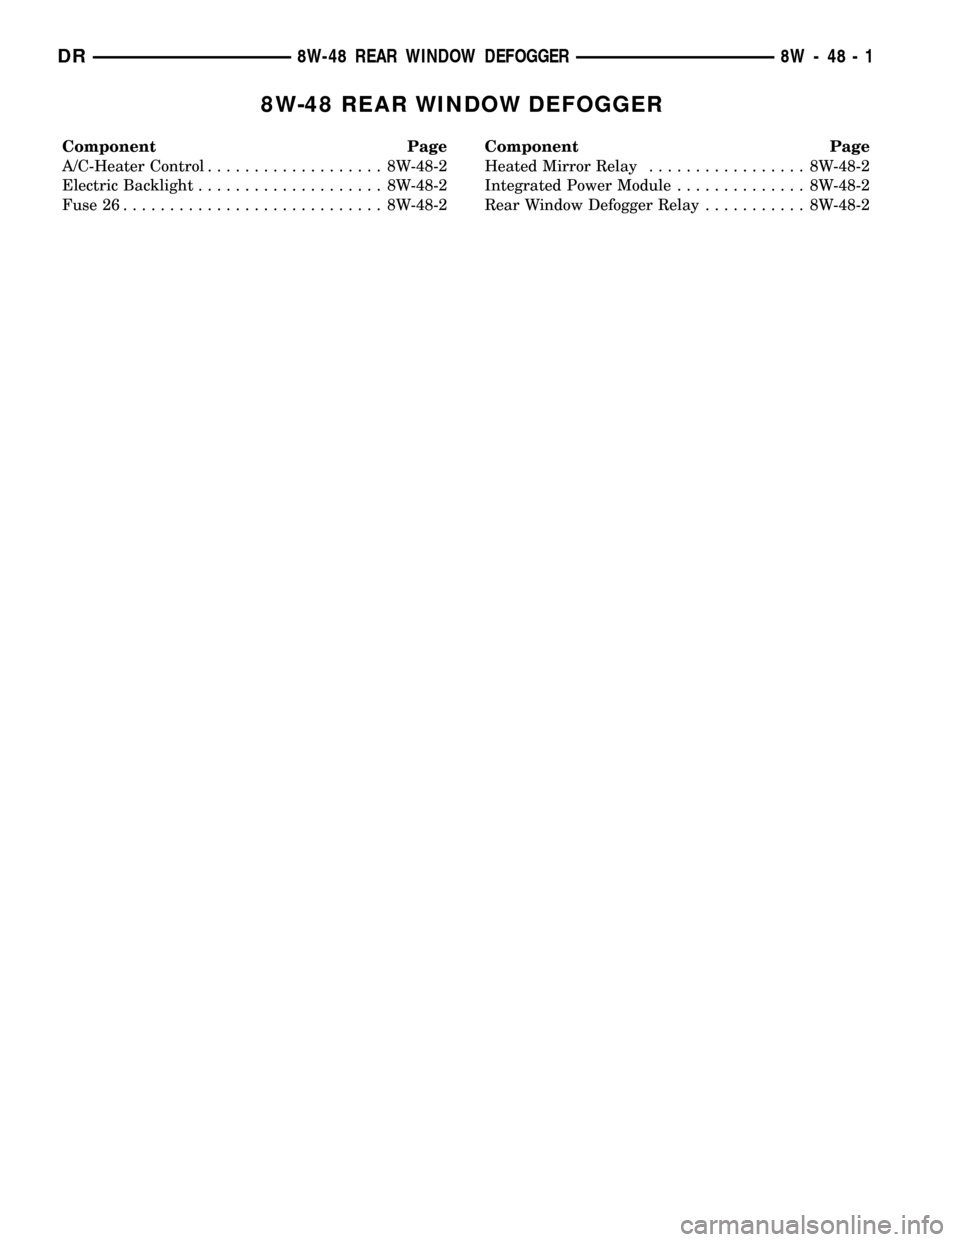
8W-48 REAR WINDOW DEFOGGER
Component Page
A/C-Heater Control................... 8W-48-2
Electric Backlight.................... 8W-48-2
Fuse 26............................ 8W-48-2Component Page
Heated Mirror Relay................. 8W-48-2
Integrated Power Module.............. 8W-48-2
Rear Window Defogger Relay........... 8W-48-2
DR8W-48 REAR WINDOW DEFOGGER 8W - 48 - 1