DODGE SPRINTER 2005 1.G Owners Manual
Manufacturer: DODGE, Model Year: 2005, Model line: SPRINTER, Model: DODGE SPRINTER 2005 1.GPages: 288, PDF Size: 27.89 MB
Page 121 of 288
UNDERSTANDING YOUR INSTRUMENT PANEL 121
4
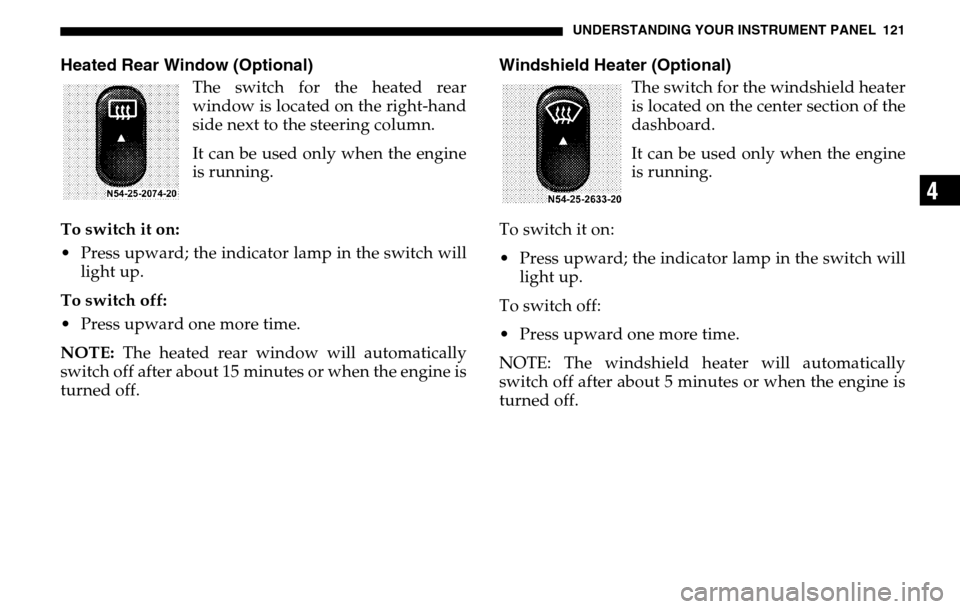
Heated Rear Window (Optional)
The switch for the heated rear
window is located on the right-hand
side next to the steering column.
It can be used only when the engine
is running.
To switch it on:
Press upward; the indicator lamp in the switch will light up.
To switch off:
Press upward one more time.
NOTE: The heated rear window will automatically
switch off after about 15 minutes or when the engine is
turned off.
Windshield Heater (Optional)
The switch for the windshield heater
is located on the center section of the
dashboard.
It can be used only when the engine
is running.
To switch it on:
Press upward; the indicator lamp in the switch will light up.
To switch off:
Press upward one more time.
NOTE: The windshield heater will automatically
switch off after about 5 minutes or when the engine is
turned off.
Page 122 of 288
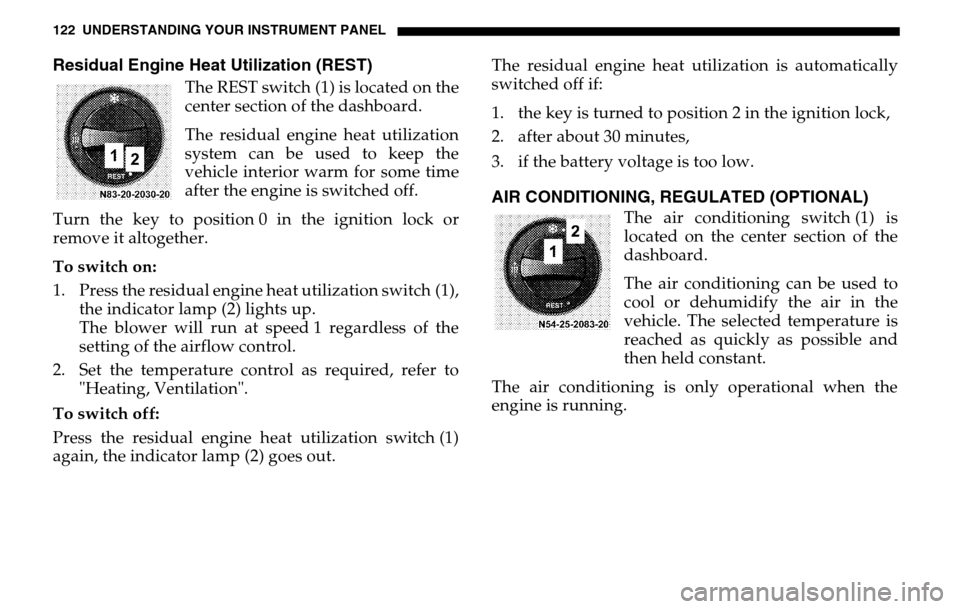
122 UNDERSTANDING YOUR INSTRUMENT PANELResidual Engine Heat Utilization (REST)
The REST switch (1) is located on the
center section of the dashboard.
The residual engine heat utilization
system can be used to keep the
vehicle interior warm for some time
after the engine is switched off.
Turn the key to position 0 in the ignition lock or
remove it altogether.
To switch on:
1. Press the residual engine heat utilization switch (1), the indicator lamp (2) lights up.
The blower will run at speed 1 regardless of the
setting of the airflow control.
2. Set the temperature control as required, refer to "Heating, Ventilation".
To switch off:
Press the residual engine heat utilization switch (1)
again, the indicator lamp (2) goes out. The residual engine heat utilization is automatically
switched off if:
1. the key is turned to position 2 in the ignition lock,
2. after about 30 minutes,
3. if the battery voltage is too low.
AIR CONDITIONING, REGULATED (OPTIONAL)
The air conditioning switch (1) is
located on the center section of the
dashboard.
The air conditioning can be used to
cool or dehumidify the air in the
vehicle. The selected temperature is
reached as quickly as possible and
then held constant.
The air conditioning is only operational when the
engine is running.
Page 123 of 288
UNDERSTANDING YOUR INSTRUMENT PANEL 123
4
To switch on:
Press switch (1), the indicator lamp (2) in the switch
lights up.
To switch off:
Press switch (1) again, the indicator lamp (2) goes out.
NOTE : Run the air conditioning at least once a month
for about 10 minutes.
It is possible that the air conditioning will
automatically switch off at outside temperatures below
41 °F (+5 °C). Dehumidification is then also not
possible.
Condensation may emerge from the underside of the
vehicle.
The air conditioner only uses the refrigerant R-134a.
This refrigerant does not damage the earth’s ozone
layer.
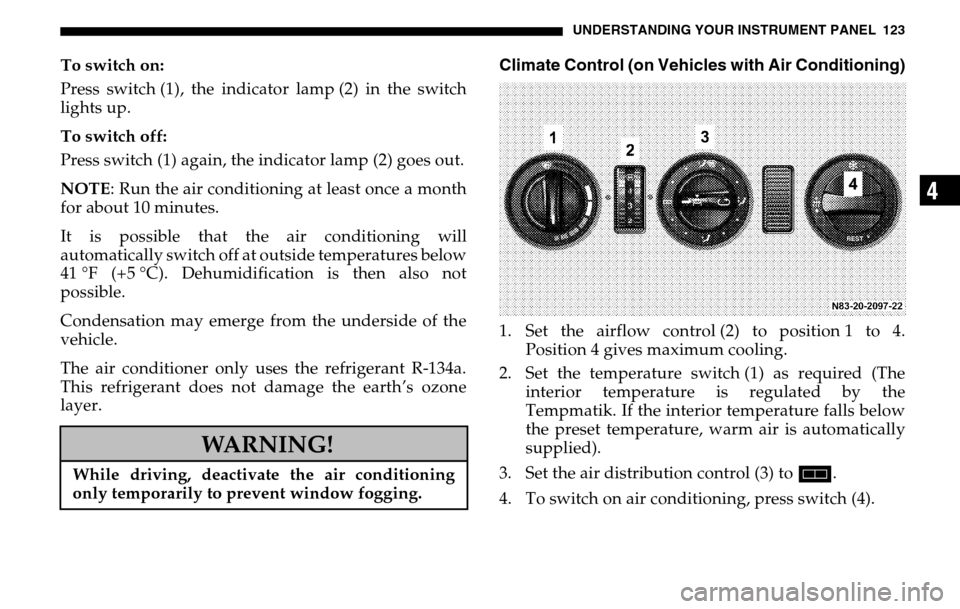
Climate Control (on Vehicles with Air Conditioning)1. Set the airflow control (2) to position 1 to 4. Position 4 gives maximum cooling.
2. Set the temperature switch (1) as required (The interior temperature is regulated by the
Tempmatik. If the interior temperature falls below
the preset temperature, warm air is automatically
supplied).
3. Set the air distribution control (3) to h.
4. To switch on air conditioning, press switch (4).
WARNING!
While driving, deactivate the air conditioning
only temporarily to prevent window fogging.
Page 124 of 288
124 UNDERSTANDING YOUR INSTRUMENT PANELNOTE: Open and adjust the air vents as required, refer
to "Side Air Vents and Center Air Vents" .
At high outside temperatures, a better cooling
performance is achieved by switching on air
recirculation. For note on air recirculation, refer to "Air
Recirculation" .
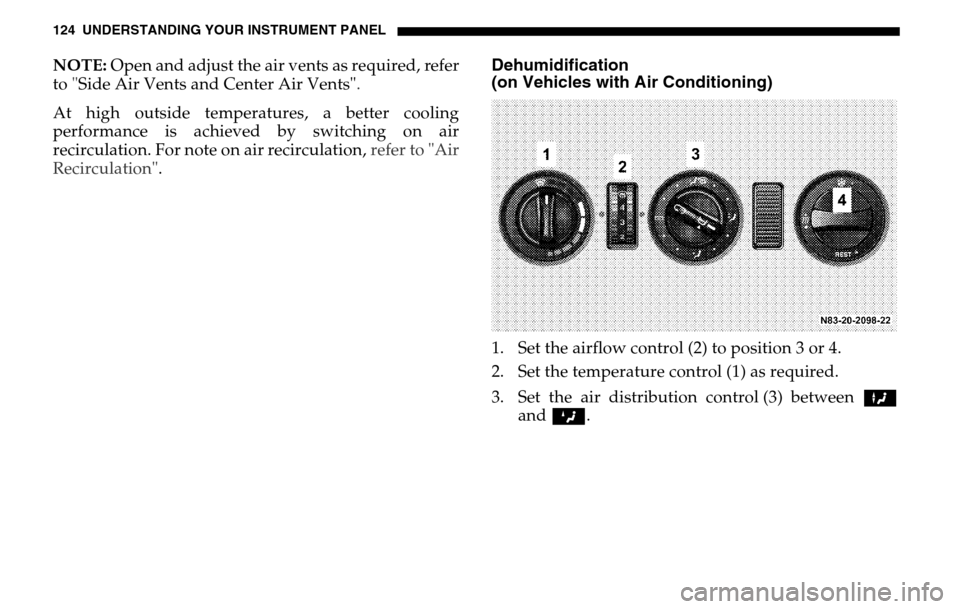
Dehumidification
(on Vehicles with Air Conditioning)1. Set the airflow control (2) to position 3 or 4.
2. Set the temperature control (1) as required.
3. Set the air distribution control (3) between X
and Z .
Page 125 of 288
UNDERSTANDING YOUR INSTRUMENT PANEL 125
4
NOTE: It is possible that the air conditioning will
automatically switch off at outside temperatures below
41 °F (+5 °C). Dehumidification is then also not
possible.
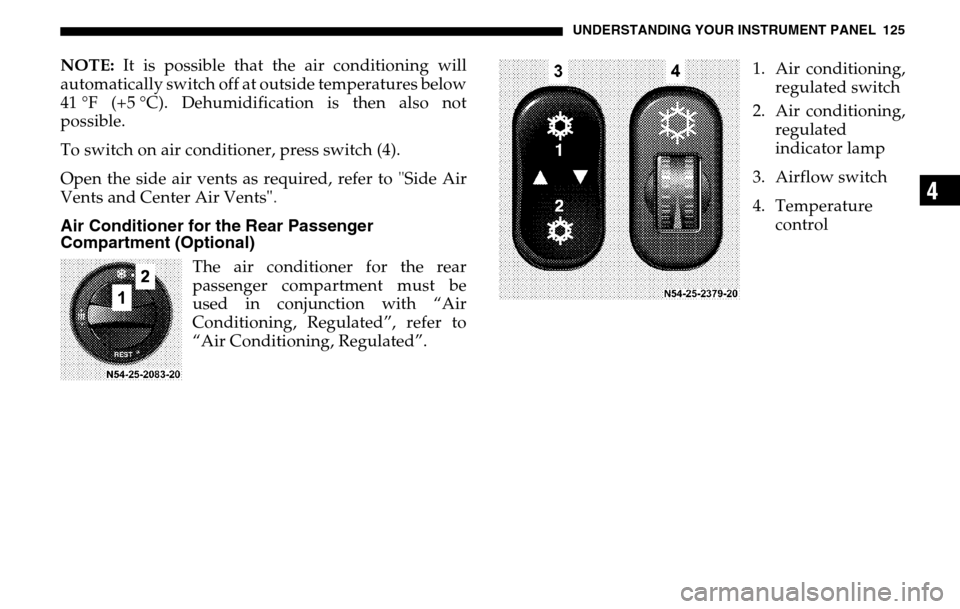
To switch on air conditioner, press switch (4).
Open the side air vents as required, refer to "Side Air
Vents and Center Air Vents" .Air Conditioner for the Rear Passenger
Compartment (Optional)
The air conditioner for the rear
passenger compartment must be
used in conjunction with “Air
Conditioning, Regulated”, refer to
“Air Conditioning, Regulated”. 1. Air conditioning,
regulated switch
2. Air conditioning, regulated
indicator lamp
3. Airflow switch
4. Temperature control
Page 126 of 288

126 UNDERSTANDING YOUR INSTRUMENT PANELTo switch it on:
1. Press switch (1) on air conditioning, regulated. The indicator lamp (2) will light up.
2. Operate the airflow switch (3). Blower level 1, press the airflow switch (3)
upwards; the left-hand indicator lamp will light up.
Blower level 2, press the airflow switch (3)
downwards; the right-hand indicator lamp will
light up.
3. Set temperature control (4) as needed. Increase cooling turn upwards.
Decrease cooling turn downwards.
To switch off:
1. Switch the airflow switch (3) to the center position.
2. Press switch (1) air conditioning, regulated; the indicator lamp (2) will go out.
Air RecirculationRecirculation mode can now be assisted by the air
conditioner for rear passenger compartment.
To switch it on:
Operate the airflow switch (3)
Blower level 1, press the airflow switch (3) upwards;
the left-hand indicator lamp will light up.
Blower level 2, press the airflow switch (3)
downwards; the right-hand indicator lamp will light
up.
To switch off:
Switch the airflow switch (3) to the center position.
Page 127 of 288
UNDERSTANDING YOUR INSTRUMENT PANEL 127
4
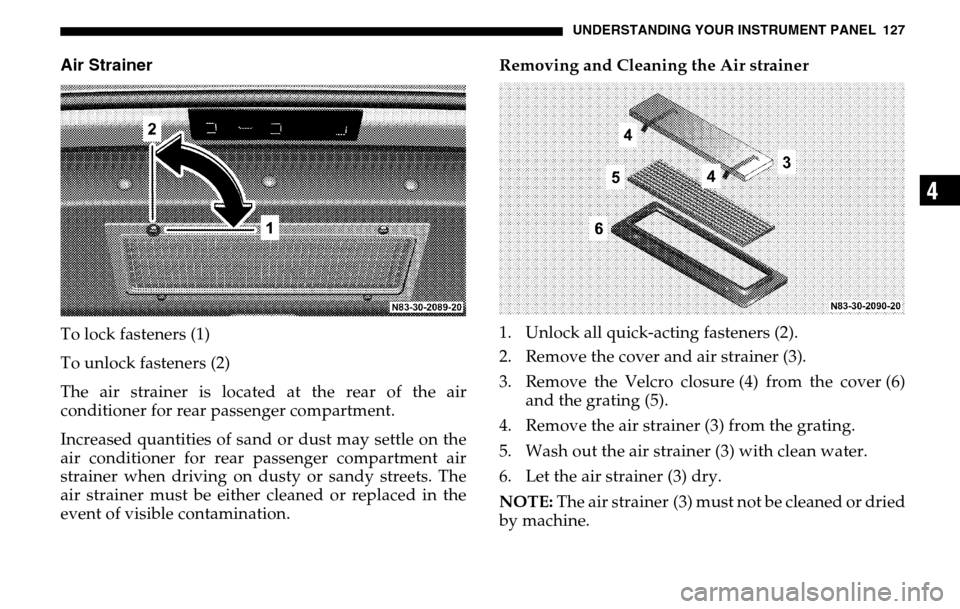
Air StrainerTo lock fasteners (1)
To unlock fasteners (2)
The air strainer is located at the rear of the air
conditioner for rear passenger compartment.
Increased quantities of sand or dust may settle on the
air conditioner for rear passenger compartment air
strainer when driving on dusty or sandy streets. The
air strainer must be either cleaned or replaced in the
event of visible contamination. Removing and Cleaning the Air strainer
1. Unlock all quick-acting fasteners (2).
2. Remove the cover and air strainer (3).
3. Remove the Velcro closure (4) from the cover (6)
and the grating (5).
4. Remove the air strainer (3) from the grating.
5. Wash out the air strainer (3) with clean water.
6. Let the air strainer (3) dry.
NOTE: The air strainer (3) must not be cleaned or dried
by machine.
Page 128 of 288
128 UNDERSTANDING YOUR INSTRUMENT PANELInstalling the Air Strainer
1. Affix the air strainer (3) to the grating (5) (make certain that the ends project evenly).
2. Replace the air strainer (3) and grating (5) on the cover and press the Velcro closure (4) on the
cover (6).
3. Insert the air strainer (3) with the cover and grating (5).
4. Lock (1) all quick-acting fasteners.
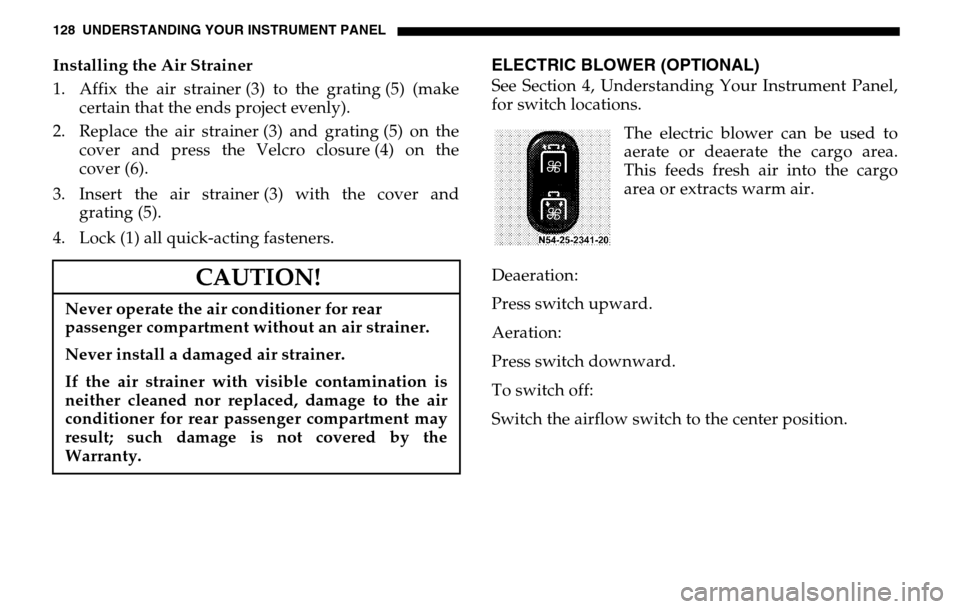
ELECTRIC BLOWER (OPTIONAL)See Section 4, Understanding Your Instrument Panel,
for switch locations.
The electric blower can be used to
aerate or deaerate the cargo area.
This feeds fresh air into the cargo
area or extracts warm air.
Deaeration:
Press switch upward.
Aeration:
Press switch downward.
To switch off:
Switch the airflow switch to the center position.
CAUTION!
Never operate the air conditioner for rear
passenger compartment without an air strainer.
Never install a damaged air strainer.
If the air strainer with visible contamination is
neither cleaned nor replaced, damage to the air
conditioner for rear passenger compartment may
result; such damage is not covered by the
Warranty.
Page 129 of 288

UNDERSTANDING YOUR INSTRUMENT PANEL 129
4
HEATER BOOSTER
The switch (1) for activating the
heater booster system is located in
the center section of the dashboard.
The heater booster system can be
switched on while the vehicle is
being driven to help the engine to
reach its normal operating
temperature more quickly, which
will help to heat up the passenger compartment as
quickly as possible when the heating is switched on. To switch on with the engine running:
Press switch (1), the indicator lamp (2) lights up.
To switch off:
Press switch (1) again or switch the engine off. The
heater booster will then switch to run-on mode (about
2minutes).
NOTE:
When the vehicle is being driven and a coolant
temperature of over 185 °F (+80 °C) is reached, the
heater booster system will switch to regulation mode.
If the coolant temperature drops to below 167 °F
(+75 °C) with the heater booster system switched on,
heat output is increased again.
If the key is turned to position 0 in the ignition lock
(run-on for about 2 minutes), the last setting selected at
switch (1) is retained when the engine is restarted
(memory function).
The operation of the heater booster system is usually
not required at outside temperatures above 41 °F
(+5 °C).
Page 130 of 288

130 UNDERSTANDING YOUR INSTRUMENT PANELAUXILIARY HEATER – WATER OR AIR HEATER
(OPTIONAL)
NOTE: The auxiliary heater (water or air heating
device) can be used whether or not the engine is
running.
After you have filled your vehicle’s gas tank with
winterized diesel fuel for the first time, it is
recommended that you operate the auxiliary heater
before beginning a journey or operating the heater
continuously so that any summer diesel fuel left in the
auxiliary heater can combust.
Before switching the auxiliary heater on make sure that
that the battery is sufficiently charged and that there is
enough fuel in the tank. At least a quarter of the tank
should be filled up. See Fuel Gauge.
WARNING!
The auxiliary heating must not be operated at gas
stations due to the risk of fire and explosion. For
this reason, switch off the auxiliary heating before
refuelling.
Auxiliary heaters emit fumes when in operation,
including carbon monoxide.
Inhaling carbon monoxide is a health hazard and
can result in unconsciousness and death.
For this reason, do not operate auxiliary heating in
enclosed spaces without ventilation or an
extractor system, e.g. in a garage. Otherwise you
could endanger yourself and others.
Always keep the ground under the vehicle as clear
as possible so that the auxiliary heater can receive
enough combustion air and exhaust fumes can
escape. Otherwise you could endanger yourself
and others.
WARNING!
Vehicles for transporting hazardous goods:
Observe the relevant safety regulations.