warning light DODGE SPRINTER 2005 1.G User Guide
[x] Cancel search | Manufacturer: DODGE, Model Year: 2005, Model line: SPRINTER, Model: DODGE SPRINTER 2005 1.GPages: 288, PDF Size: 27.89 MB
Page 115 of 288

UNDERSTANDING YOUR INSTRUMENT PANEL 115
4
ENGINE OIL LEVEL INDICATOR IN INSTRUMENT
CLUSTER
(VEHICLES WITHOUT ASSYST MAINTENANCE
COMPUTER)If the : indicator lamp lights up when the engine is
running, the engine oil level has dropped to the
minimum mark. Check the engine oil level without
delay and add engine oil up to the upper mark on the
dipstick.
If there is no engine oil in the oil sump, a warning
buzzer will sound if the key is turned to position 2 in
the ignition lock or if the vehicle is being driven, and
the warning
will appear in the multi-function indicator. About 2
quarts (1.9 liters) of oil must be added.
Check the engine oil level without delay and add
engine oil to the upper mark on the dipstick.
NOTE: Engine oil level display– "qt" in USA only.
– "l" in Canada only.
Symb
N00.00-2384-00
qt
CAUTION!
If the : indicator lamp lights up, the warning
symbol in the multi-function indicator appears
and the warning buzzer sounds, the operating
safety of the engine is endangered (possibility of
engine damage).
Safely pull off the road and turn off the engine (do
not restart the engine). Determine the cause of the
problem. If there are no obvious signs of leakage,
add engine oil. The engine oil level must be
between the lower and upper marks on the
dipstick. Only add engine oil up to the upper
mark – do not overfill.
If the engine oil level is above maximum, there is
a danger of damage to the engine or catalytic
converter.
Page 116 of 288
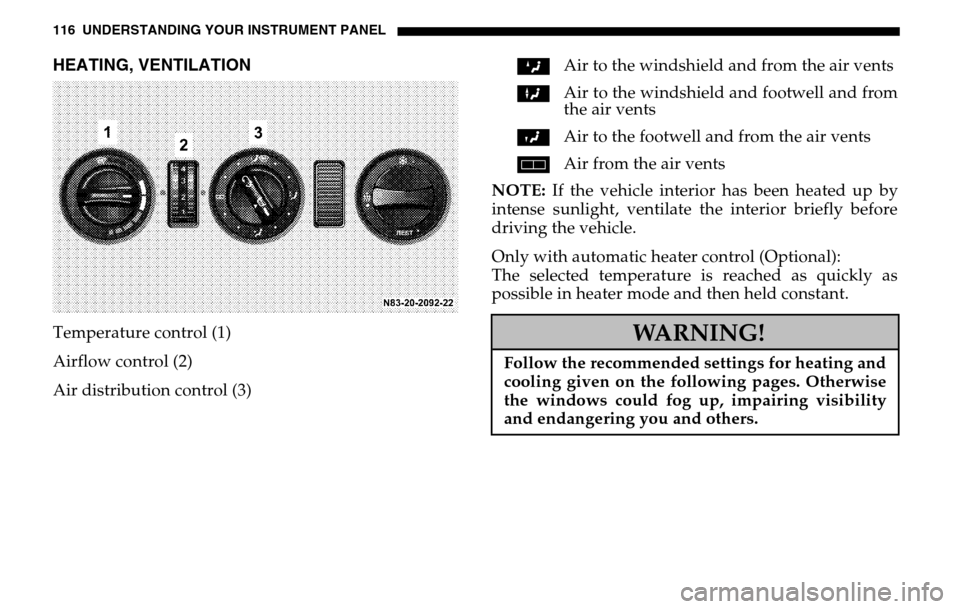
116 UNDERSTANDING YOUR INSTRUMENT PANELHEATING, VENTILATIONTemperature control (1)
Airflow control (2)
Air distribution control (3) Z
Air to the windshield and from the air vents
X Air to the windshield and footwell and from
the air vents
Y Air to the footwell and from the air vents
h Air from the air vents
NOTE: If the vehicle interior has been heated up by
intense sunlight, ventilate the interior briefly before
driving the vehicle.
Only with automatic heater control (Optional):
The selected temperature is reached as quickly as
possible in heater mode and then held constant.
WARNING!
Follow the recommended settings for heating and
cooling given on the following pages. Otherwise
the windows could fog up, impairing visibility
and endangering you and others.
Page 123 of 288
UNDERSTANDING YOUR INSTRUMENT PANEL 123
4
To switch on:
Press switch (1), the indicator lamp (2) in the switch
lights up.
To switch off:
Press switch (1) again, the indicator lamp (2) goes out.
NOTE : Run the air conditioning at least once a month
for about 10 minutes.
It is possible that the air conditioning will
automatically switch off at outside temperatures below
41 °F (+5 °C). Dehumidification is then also not
possible.
Condensation may emerge from the underside of the
vehicle.
The air conditioner only uses the refrigerant R-134a.
This refrigerant does not damage the earth’s ozone
layer.
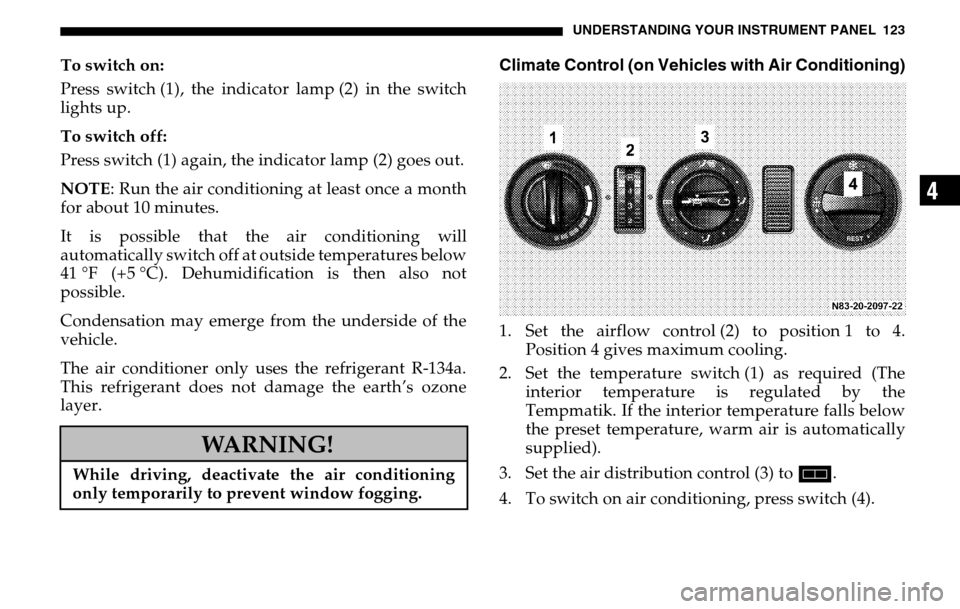
Climate Control (on Vehicles with Air Conditioning)1. Set the airflow control (2) to position 1 to 4. Position 4 gives maximum cooling.
2. Set the temperature switch (1) as required (The interior temperature is regulated by the
Tempmatik. If the interior temperature falls below
the preset temperature, warm air is automatically
supplied).
3. Set the air distribution control (3) to h.
4. To switch on air conditioning, press switch (4).
WARNING!
While driving, deactivate the air conditioning
only temporarily to prevent window fogging.
Page 142 of 288
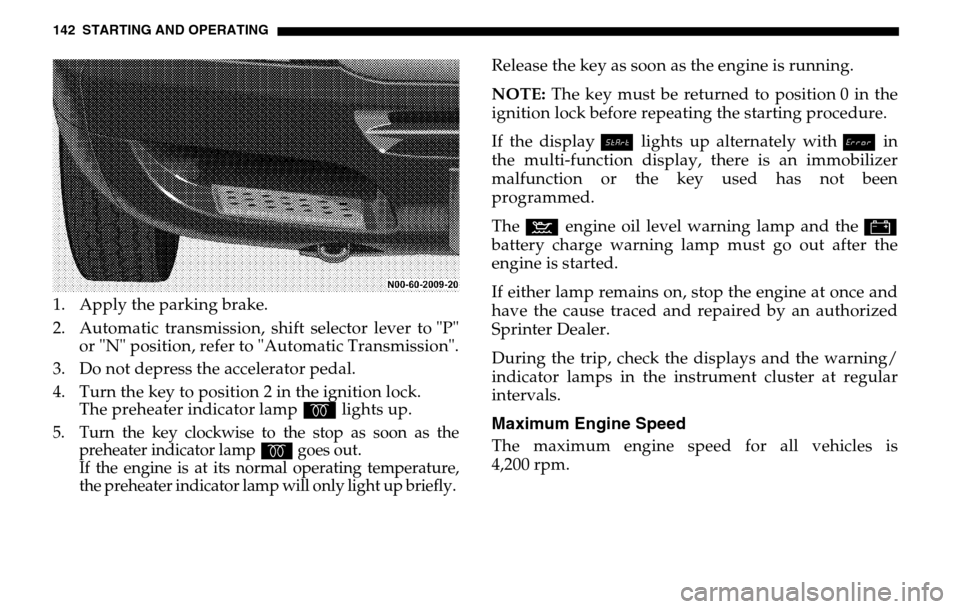
142 STARTING AND OPERATING1. Apply the parking brake.
2. Automatic transmission, shift selector lever to "P" or "N" position, refer to "Automatic Transmission".
3. Do not depress the accelerator pedal.
4. Turn the key to position 2 in the ignition lock. The preheater indicator lamp q lights up.5. Turn the key clockwise to the stop as soon as the
preheater indicator lamp
q
goes out.
If the engine is at its normal operating temperature,
the preheater indicator lamp will only light up briefly.
Release the key as soon as the engine is running.
NOTE: The key must be returned to position 0 in the
ignition lock before repeating the starting procedure.
If the display Á lights up alternately with î in
the multi-function display, there is an immobilizer
malfunction or the key used has not been
programmed.
The : engine oil level warning lamp and the #
battery charge warning lamp must go out after the
engine is started.
If either lamp remains on, stop the engine at once and
have the cause traced and repaired by an authorized
Sprinter Dealer.
During the trip, check the displays and the warning/
indicator lamps in the instrument cluster at regular
intervals.Maximum Engine SpeedThe maximum engine speed for all vehicles is
4,200 rpm.
Page 146 of 288

146 STARTING AND OPERATINGNOTE: After selecting any driving position from "N"
or "P", wait a moment to allow the gear to fully engage
before accelerating, especially when the engine is cold.Accelerator PositionPartial throttle, for early upshifting and normal
acceleration
Full throttle, for later upshifting and rapid acceleration
Kickdown, (depressing the accelerator beyond full
throttle) for downshifting to a lower gear and
maximum acceleration. Once the desired speed is
attained, ease up on the accelerator, the transmission
shifts up again.StoppingFor brief stops, such as at traffic lights, leave the
transmission in gear and hold vehicle with the service
brake.
For longer stops with the engine idling, shift into "N"
or "P" and hold the vehicle with the service brake.
When stopping the vehicle on an uphill grade, do not
hold it with the accelerator, use the brake. This avoids
unnecessary transmission heat build up.
ManeuveringTo maneuver in tight areas, such as when pulling into
a parking space, control the vehicle speed by gradually
releasing the brakes. Acce lerate gently and never
abruptly step on the accelerator.
To rock a vehicle out of soft ground (mud or snow),
alternately shift from forward to reverse, while
applying slight partial throttle.
WARNING!
Getting out of your vehicle with the gear selector le-
ver not fully engaged in position "P" is dangerous.
Also, when parked on an incline, position "P" alone
may not prevent your vehicle from moving, possibly
hitting people or objects.Always set the parking brake in addition to
shifting to position "P".
When parked on an incline, also turn front wheel
against curb.
Page 158 of 288
158 STARTING AND OPERATINGNOTE: If you find that the minimum mark on the
brake fluid reservoir is reached, have the brake system
checked for pad thickness and leaks.
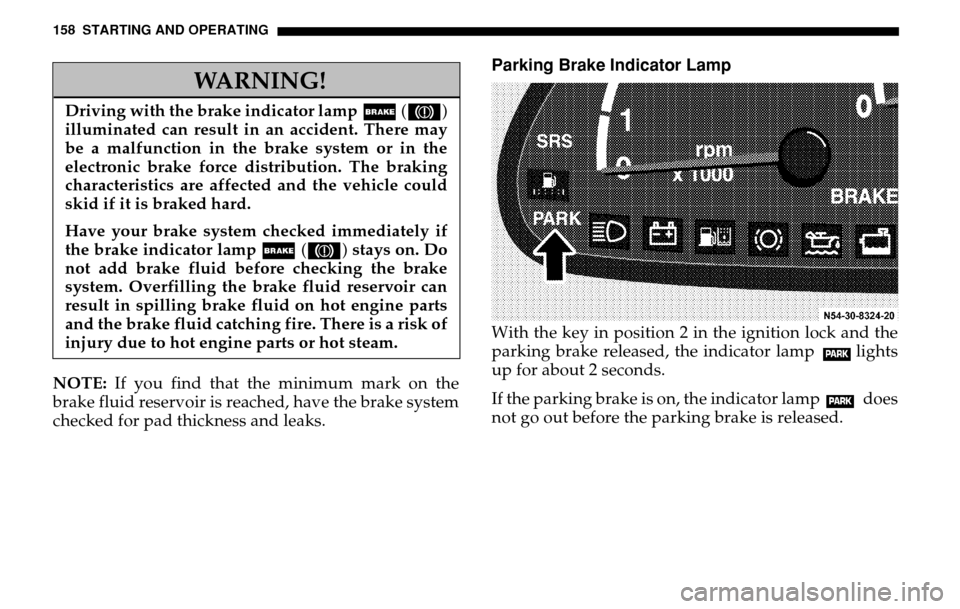
Parking Brake Indicator LampWith the key in position 2 in the ignition lock and the
parking brake released, th e indicator lamp lights
up for about 2 seconds.
If the parking brake is on, the indicator lamp does
not go out before the parking brake is released.
WARNING!
Driving with the brake indicator lamp ; (3 )
illuminated can result in an accident. There may
be a malfunction in the brake system or in the
electronic brake force distribution. The braking
characteristics are affected and the vehicle could
skid if it is braked hard.
Have your brake system checked immediately if
the brake indicator lamp ; (3 ) stays on. Do
not add brake fluid before checking the brake
system. Overfilling the brake fluid reservoir can
result in spilling brake fluid on hot engine parts
and the brake fluid catching fire. There is a risk of
injury due to hot engine parts or hot steam.
Page 159 of 288
STARTING AND OPERATING 159
5
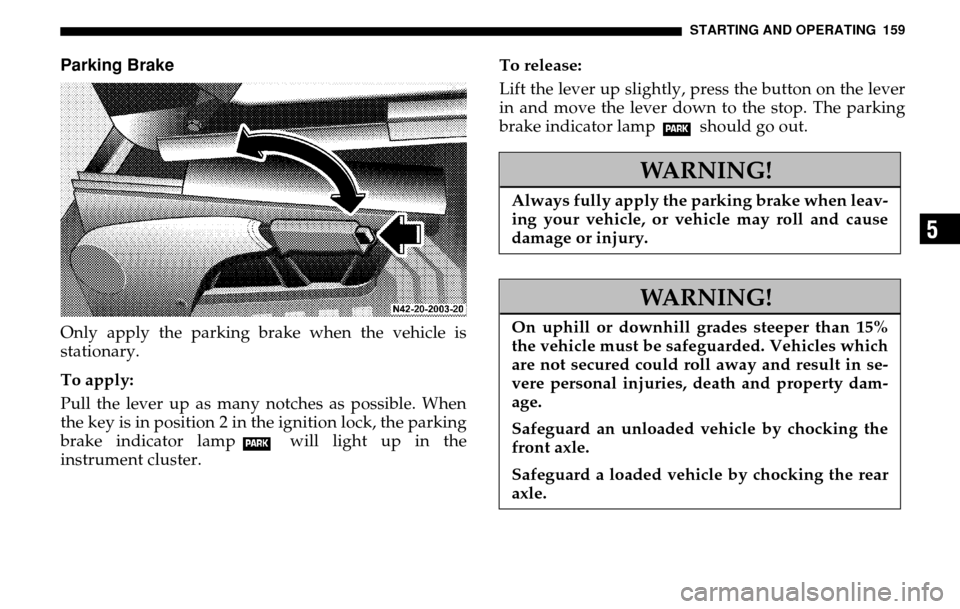
Parking BrakeOnly apply the parking brake when the vehicle is
stationary.
To apply:
Pull the lever up as many notches as possible. When
the key is in position 2 in the ignition lock, the parking
brake indicator lamp will light up in the
instrument cluster. To release:
Lift the lever up slightly, press the button on the lever
in and move the lever down to the stop. The parking
brake indicator lamp should go out.
WARNING!
Always fully apply the parking brake when leav-
ing your vehicle, or vehicle may roll and cause
damage or injury.
WARNING!
On uphill or downhill grades steeper than 15%
the vehicle must be safeguarded. Vehicles which
are not secured could roll away and result in se-
vere personal injuries, death and property dam-
age.
Safeguard an unloaded vehicle by chocking the
front axle.
Safeguard a loaded vehicle by chocking the rear
axle.
Page 161 of 288
STARTING AND OPERATING 161
5
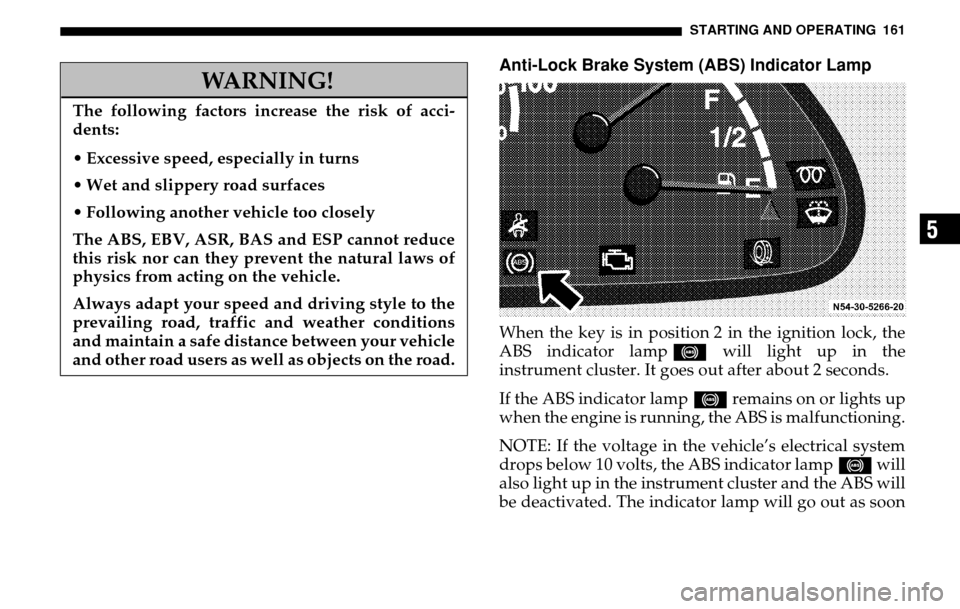
Anti-Lock Brake System (ABS) Indicator LampWhen the key is in position 2 in the ignition lock, the
ABS indicator lamp - will light up in the
instrument cluster. It goes out after about 2 seconds.
If the ABS indicator lamp - remains on or lights up
when the engine is running, the ABS is malfunctioning.
NOTE: If the voltage in the vehicle’s electrical system
drops below 10 volts, the ABS indicator lamp - will
also light up in the instrument cluster and the ABS will
be deactivated. The indicator lamp will go out as soon
WARNING!
The following factors increase the risk of acci-
dents:
Excessive speed, especially in turns
Wet and slippery road surfaces
Following another vehicle too closely
The ABS, EBV, ASR, BAS and ESP cannot reduce
this risk nor can they prevent the natural laws of
physics from acting on the vehicle.
Always adapt your speed and driving style to the
prevailing road, traffic and weather conditions
and maintain a safe distance between your vehicle
and other road users as well as objects on the road.
Page 162 of 288

162 STARTING AND OPERATINGas the voltage reaches this level again
– the ABS is then
reactivated.
If ABS malfunctions, the other driving safety systems
are deactivated. The handling and braking
characteristics of your vehicle change. The other
braking and driving systems still function normally.
I
Anti-Lock Brake System (ABS)ABS prevents the wheels from locking at any speed
above about 5 mph (8 km/h), regardless of road
surface conditions. The vehicle remains steerable even
if the brakes are applied fully.
A light vibrating of the steering wheel and pulsating of
the brake pedal indicate that the ABS is working.
On slippery road surfaces, the ABS will respond even
with light brake pedal pressure because of the
increased likelihood of locking wheels. The pulsating
brake pedal can be an indication of hazardous road
conditions and works as a reminder to take extra care
while driving.
WARNING!
If the ABS indicator lamp - does not go out or
lights up again while driving, the ABS is malfunc-
tioning. If ABS malfunctions, the other driving
safety systems are deactivated. The vehicle’s brak-
ing characteristics may be affected. There is an in-
creased risk that your vehicle could skid in the
event of sharp braking. Have the malfunction
traced and repaired without delay by an autho-
rized Sprinter Dealer.
Adapt your speed and driving style to the
prevailing road, traffic and weather conditions.
Driving too fast increases the risk of an accident.
Page 164 of 288
164 STARTING AND OPERATINGElectronic Brake Force Distribution (EBD)The electronic brake force distribution (EBD) prevents
the rear wheels from being overbraked when there is
little load on the rear axle or if there is not much friction
between the tires and road (e.g., if the road is wet).
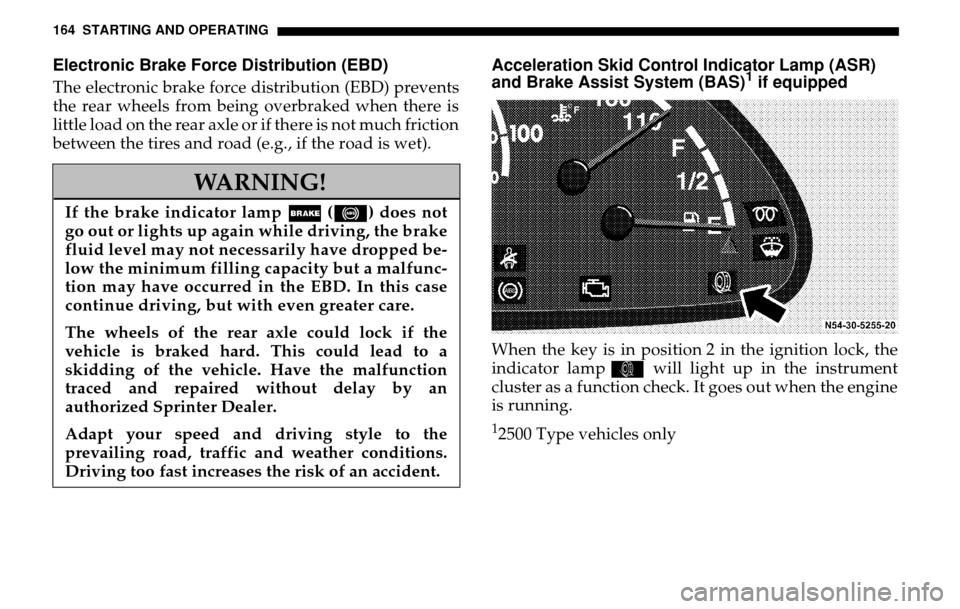
Acceleration Skid Control Indicator Lamp (ASR)
and Brake Assist System (BAS)
1if equipped
When the key is in position 2 in the ignition lock, the
indicator lamp k will light up in the instrument
cluster as a function check. It goes out when the engine
is running.12500 Type vehicles only
WARNING!
If the brake indicator lamp ; (- ) does not
go out or lights up again while driving, the brake
fluid level may not necessarily have dropped be-
low the minimum filling capacity but a malfunc-
tion may have occurred in the EBD. In this case
continue driving, but with even greater care.
The wheels of the rear axle could lock if the
vehicle is braked hard. This could lead to a
skidding of the vehicle. Have the malfunction
traced and repaired without delay by an
authorized Sprinter Dealer.
Adapt your speed and driving style to the
prevailing road, traffic and weather conditions.
Driving too fast increases the risk of an accident.