sensor DODGE SPRINTER 2007 2.G User Guide
[x] Cancel search | Manufacturer: DODGE, Model Year: 2007, Model line: SPRINTER, Model: DODGE SPRINTER 2007 2.GPages: 393, PDF Size: 7.61 MB
Page 219 of 393
218 OperationTires and wheels
4
\1Switch on the ignition (\2page 67).
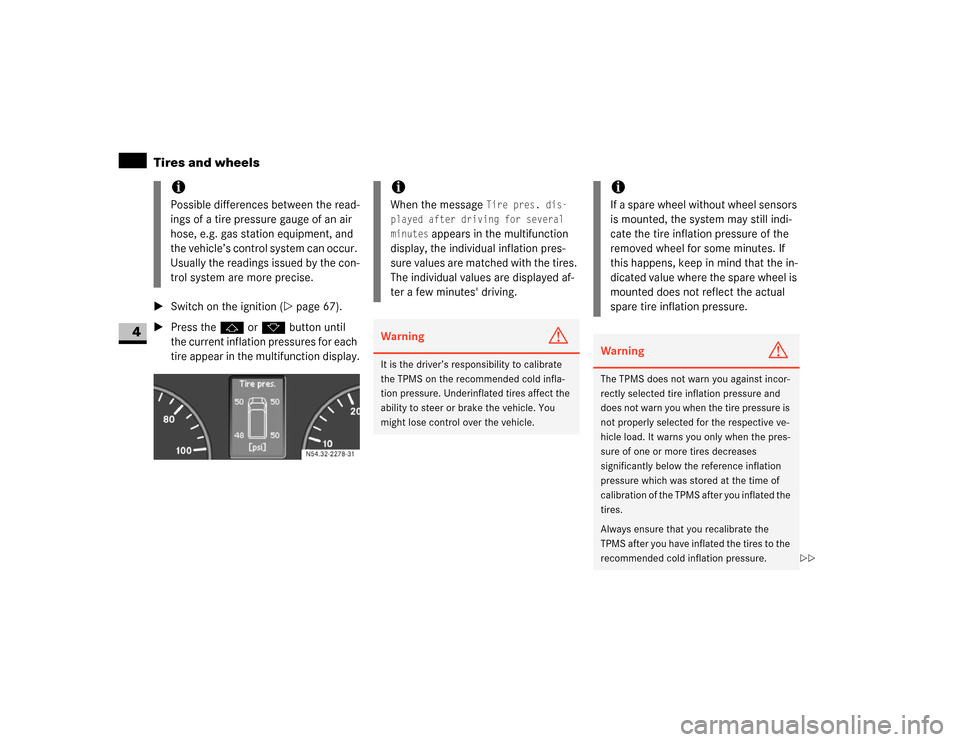
\1Press thej or kbutton until
the current inflation pressures for each
tire appear in the multifunction display.
iPossible differences between the read-
ings of a tire pressure gauge of an air
hose, e.g. gas station equipment, and
the vehicle’s control system can occur.
Usually the readings issued by the con-
trol system are more precise.
54.32-2278-31
iWhen the message
Tire pres. dis-
played after driving for several
minutes
appears in the multifunction
display, the individual inflation pres-
sure values are matched with the tires.
The individual values are displayed af-
ter a few minutes' driving.
Warning
G
It is the driver’s responsibility to calibrate
the TPMS on the recommended cold infla-
tion pressure. Underinflated tires affect the
ability to steer or brake the vehicle. You
might lose control over the vehicle.
iIf a spare wheel without wheel sensors
is mounted, the system may still indi-
cate the tire inflation pressure of the
removed wheel for some minutes. If
this happens, keep in mind that the in-
dicated value where the spare wheel is
mounted does not reflect the actual
spare tire inflation pressure.Warning
G
The TPMS does not warn you against incor-
rectly selected tire inflation pressure and
does not warn you when the tire pressure is
not properly selected for the respective ve-
hicle load. It warns you only when the pres-
sure of one or more tires decreases
significantly below the reference inflation
pressure which was stored at the time of
calibration of the TPMS after you inflated the
tires.
Always ensure that you recalibrate the
TPMS after you have inflated the tires to the
recommended cold inflation pressure.
\2\2
Page 243 of 393
242 OperationCleaning and care of the vehicle
4
Automatic car wash
You can clean the vehicle in an automatic
car wash from the very start. It is prefera-
ble to use a car wash that does not have
brushes.
If the vehicle is very dirty, prewash it be-
fore you drive into the car wash.
\1Remove the radio / telephone antenna
and fold the exterior mirrors in before
driving into the automatic car wash.After using an automatic car wash, wipe off
wax from the windshield and the wiper
blades. This prevents smears and reduces
wiping noises which can be caused by res-
idue on the windshield.High-pressure cleaners
\1The minimum distance that must be
maintained between the vehicle and
the nozzle of the high-pressure cleaner
is:
\4approximately 2.2 ft (70 cm) for
round-spray jets
\4approximately 1 ft (30 cm) for 25°
flat-spray jets and concentrated-
power jets
\1Move the high-pressure cleaner nozzle
around when cleaning your vehicle.Care of the vehicle!
CAUTION
After cleaning your vehicle, especially
the wheel rims with rim cleaner, do not
simply park the vehicle and leave it.
Rim cleaners can promote corrosion of
the brake discs and the brake pads /
linings. Before parking and leaving the
vehicle after cleaning, always warm the
vehicle up to normal operating temper-
ature first.
!
CAUTION
Make sure that the automatic car wash
is suitable for the size of the vehicle.
If you do not remove the radio / tele-
phone antenna and fold in the exterior
mirrors, there is a possibility that the
antenna, the exterior mirrors or the ve-
hicle could be damaged by the auto-
matic car wash.
!
CAUTION
Make sure that the windshield wiper
switch is set to 0 (\2page 126), other-
wise the rain sensor could be activated,
for example, and the windshield wipers
could be triggered unintentionally. This
could cause damage to the vehicle.
!
CAUTION
Do not use high-pressure cleaners with
round-spray jets for cleaning the tires.
You could otherwise damage the tires.
Have damaged tires replaced.
!
CAUTION
To avoid damage, do not aim directly at
the door joints, brake hoses, electrical
components, connectors or seals.
Page 245 of 393
244 OperationCleaning and care of the vehicle
4
Windows
Headlamps
\1Wipe the headlamp lenses with a damp
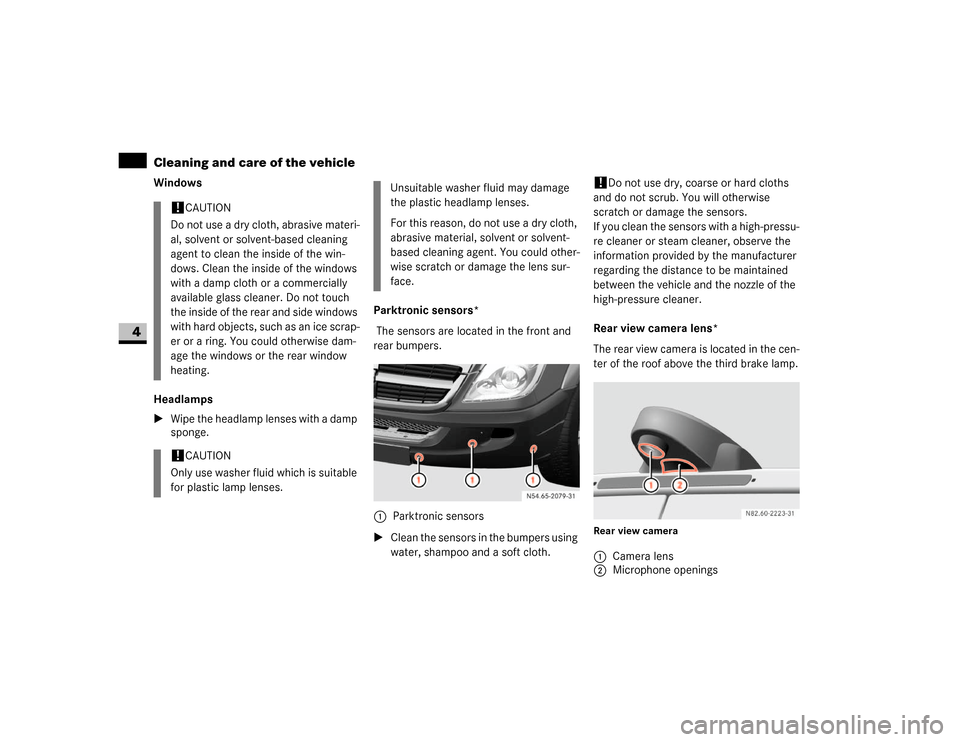
sponge.Parktronic sensors*
The sensors are located in the front and
rear bumpers.
\1Clean the sensors in the bumpers using
water, shampoo and a soft cloth.
!
Do not use dry, coarse or hard cloths
and do not scrub. You will otherwise
scratch or damage the sensors.
If you clean the sensors with a high-pressu-
re cleaner or steam cleaner, observe the
information provided by the manufacturer
regarding the distance to be maintained
between the vehicle and the nozzle of the
high-pressure cleaner.
Rear view camera lens*
The rear view camera is located in the cen-
ter of the roof above the third brake lamp.
Rear view camera
!
CAUTION
Do not use a dry cloth, abrasive materi-
al, solvent or solvent-based cleaning
agent to clean the inside of the win-
dows. Clean the inside of the windows
with a damp cloth or a commercially
available glass cleaner. Do not touch
the inside of the rear and side windows
with hard objects, such as an ice scrap-
er or a ring. You could otherwise dam-
age the windows or the rear window
heating.
!
CAUTION
Only use washer fluid which is suitable
for plastic lamp lenses.
Unsuitable washer fluid may damage
the plastic headlamp lenses.
For this reason, do not use a dry cloth,
abrasive material, solvent or solvent-
based cleaning agent. You could other-
wise scratch or damage the lens sur-
face.
1Parktronic sensors
1Camera lens
2Microphone openings
Page 263 of 393
262 Practical hintsWhat to do if ...
5
Driving systemsWarning
G
Always have maintenance work carried out
at an authorized Sprinter Dealer which has
the necessary specialist knowledge and
tools to carry out the work required.
The manufacturer recommends that you use
an authorized Sprinter Dealer for this pur-
pose.
In particular, work relevant to safety or on
safety-related systems must be carried out
at an authorized Sprinter Dealer. There is a
risk of an accident and injury if this work is
carried out incorrectly.
Problem
Possible cause / result
Suggested solutions
Only the red segments in the Parktronic*
warning displays are lit.
A warning tone also sounds for approxi-
mately 2 seconds.
Parktronic* switches off after approxi-
mately 20 seconds.
The indicator lamp on the Parktronic
switch comes on and the red segments in
the warning display go out.
Parktronic* has malfunctioned and has
switched off.
When you press the Parktronic switch, the
red segments in the Parktronic warning dis-
plays light up again and the warning tone
sounds for approximately 2 seconds.
\1Have Parktronic* checked as soon as
possible at an authorized Sprinter
Dealer.
The Parktronic* warning displays indicate
implausible distances.
For example, all the segments may be lit
even though there is no obstacle present.
The Parktronic* sensors are dirty or iced up.
\1Clean the Parktronic* sensors
(\2page 244).
\1Switch on the ignition again.
An external radio or ultrasonic source may
be causing interference.
\1Check whether Parktronic* works at
another location.
The license plate or other attachment parts
near the sensors may not be secured cor-
rectly.
\1Check the number plate and attach-
ment parts near the sensors to see if
they are securely in place.
Page 288 of 393
287 Practical hints
Display messages
5
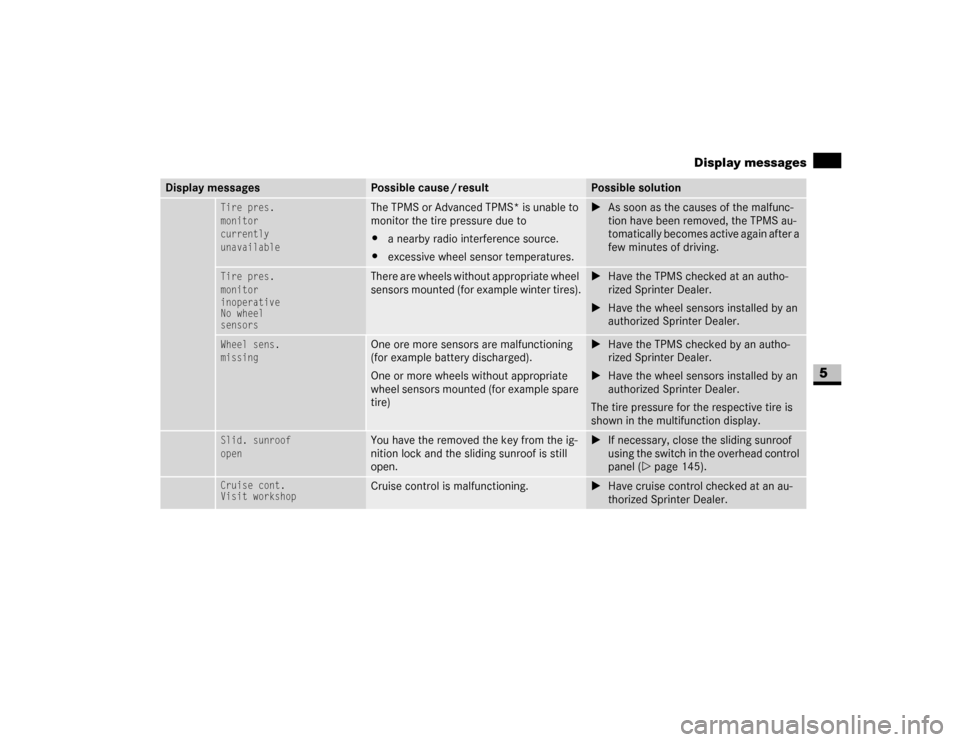
Tire pres.
monitor
currently
unavailable
The TPMS or Advanced TPMS* is unable to
monitor the tire pressure due to
\4a nearby radio interference source.
\4excessive wheel sensor temperatures.
\1As soon as the causes of the malfunc-
tion have been removed, the TPMS au-
tomatically becomes active again after a
few minutes of driving.
Tire pres.
monitor
inoperative
No wheel
sensors
There are wheels without appropriate wheel
sensors mounted (for example winter tires).
\1Have the TPMS checked at an autho-
rized Sprinter Dealer.
\1Have the wheel sensors installed by an
authorized Sprinter Dealer.
Wheel sens.
missing
One ore more sensors are malfunctioning
(for example battery discharged).
One or more wheels without appropriate
wheel sensors mounted (for example spare
tire)
\1Have the TPMS checked by an autho-
rized Sprinter Dealer.
\1Have the wheel sensors installed by an
authorized Sprinter Dealer.
The tire pressure for the respective tire is
shown in the multifunction display.
Slid. sunroof
open
You have the removed the key from the ig-
nition lock and the sliding sunroof is still
open.
\1If necessary, close the sliding sunroof
using the switch in the overhead control
panel (\2page 145).
Cruise cont.
Visit workshop
Cruise control is malfunctioning.
\1Have cruise control checked at an au-
thorized Sprinter Dealer.
Display messages
Possible cause / result
Possible solution
Page 298 of 393
297 Practical hints
Display messages
5
N
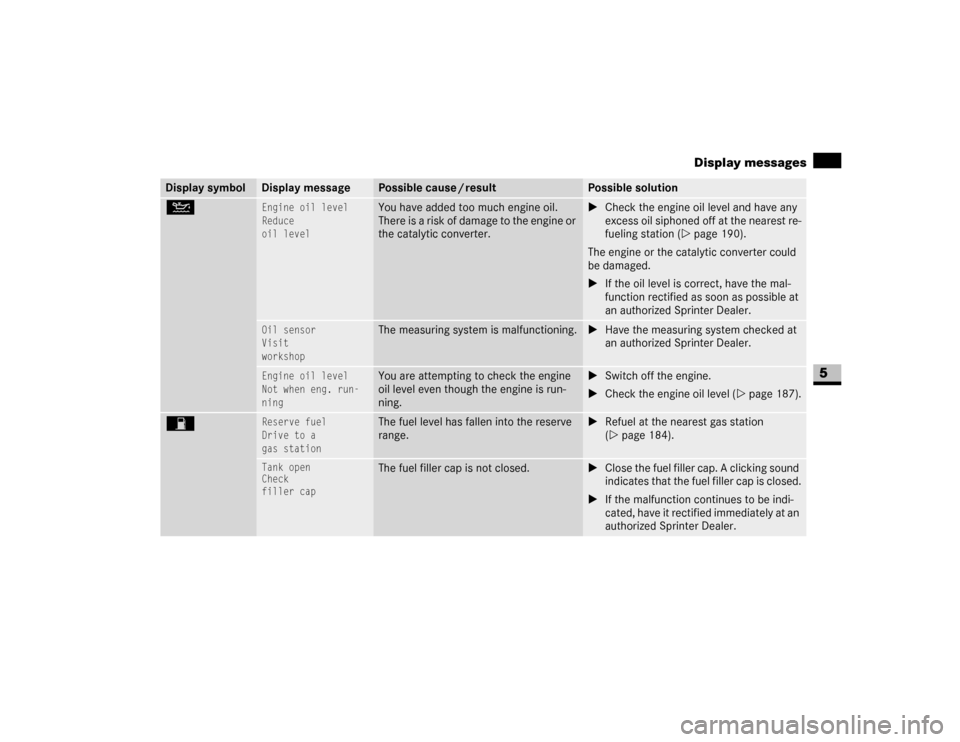
Engine oil level
Reduce
oil level
You have added too much engine oil.
There is a risk of damage to the engine or
the catalytic converter.
\1Check the engine oil level and have any
excess oil siphoned off at the nearest re-
fueling station (\2page 190).
The engine or the catalytic converter could
be damaged.
\1If the oil level is correct, have the mal-
function rectified as soon as possible at
an authorized Sprinter Dealer.
Oil sensor
Visit
workshop
The measuring system is malfunctioning.
\1Have the measuring system checked at
an authorized Sprinter Dealer.
Engine oil level
Not when eng. run-
ning
You are attempting to check the engine
oil level even though the engine is run-
ning.
\1Switch off the engine.
\1Check the engine oil level (\2page 187).
W
Reserve fuel
Drive to a
gas station
The fuel level has fallen into the reserve
range.
\1Refuel at the nearest gas station
(\2page 184).
Tank open
Check
filler cap
The fuel filler cap is not closed.
\1Close the fuel filler cap. A clicking sound
indicates that the fuel filler cap is closed.
\1If the malfunction continues to be indi-
cated, have it rectified immediately at an
authorized Sprinter Dealer.
Display symbol
Display message
Possible cause / result
Possible solution
Page 320 of 393
319 Practical hints
Replacing the wiper blades
5
\3 Replacing the wiper blades
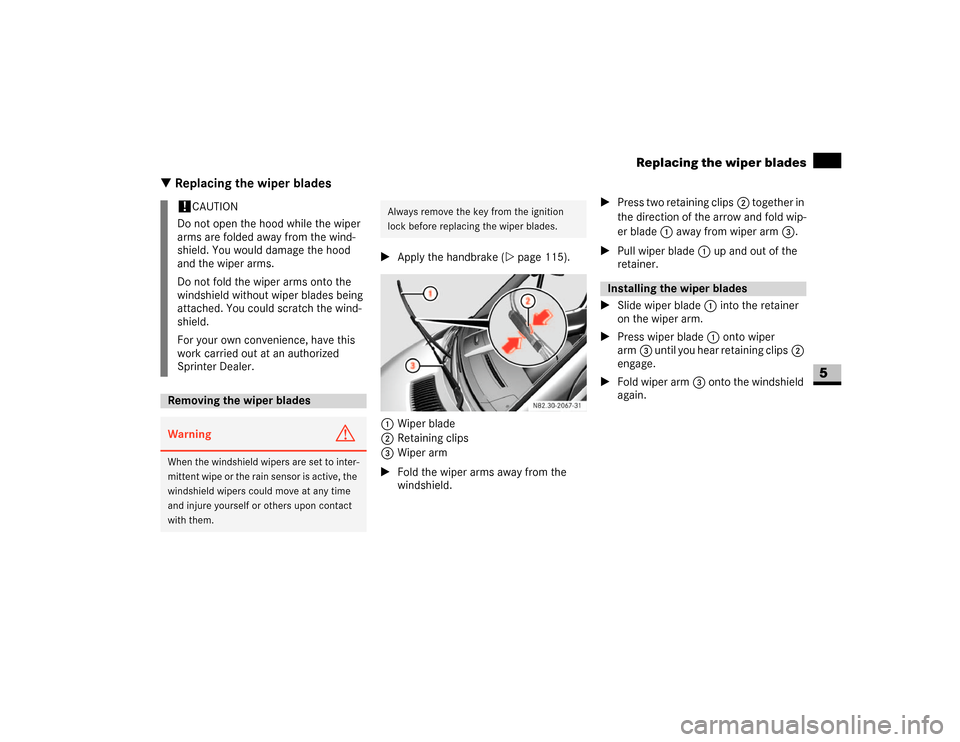
\1Apply the handbrake (\2page 115).
1Wiper blade
2Retaining clips
3Wiper arm
\1Fold the wiper arms away from the
windshield.\1Press two retaining clips2 together in
the direction of the arrow and fold wip-
er blade1 away from wiper arm3.
\1Pull wiper blade1 up and out of the
retainer.
\1Slide wiper blade1 into the retainer
on the wiper arm.
\1Press wiper blade1 onto wiper
arm3 until you hear retaining clips2
engage.
\1Fold wiper arm3 onto the windshield
again.
!
CAUTION
Do not open the hood while the wiper
arms are folded away from the wind-
shield. You would damage the hood
and the wiper arms.
Do not fold the wiper arms onto the
windshield without wiper blades being
attached. You could scratch the wind-
shield.
For your own convenience, have this
work carried out at an authorized
Sprinter Dealer.
Removing the wiper bladesWarning
G
When the windshield wipers are set to inter-
mittent wipe or the rain sensor is active, the
windshield wipers could move at any time
and injure yourself or others upon contact
with them.
Always remove the key from the ignition
lock before replacing the wiper blades.
Installing the wiper blades
Page 355 of 393
354 *Technical dataVehicle electronics
6
\3 Vehicle electronics
Electrical and electronic equipment can
jeopardize the operational safety of your
vehicle. If equipment of this kind is retrofit-
ted, it must be type-approved and must
bear the e mark.
If you wish to install telephones or two-way
radios in the vehicle, you must obtain for-
mal approval.
The manufacturer recommends that you
consult an authorized Sprinter Dealer.
You may retrofit telephones and two-way
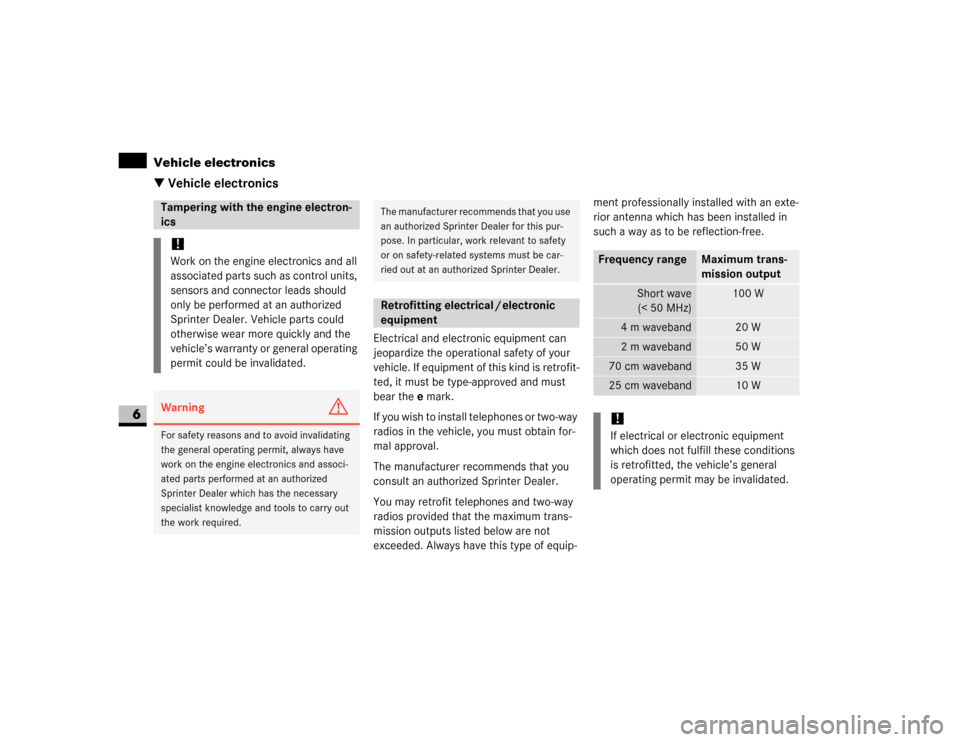
radios provided that the maximum trans-
mission outputs listed below are not
exceeded. Always have this type of equip-ment professionally installed with an exte-
rior antenna which has been installed in
such a way as to be reflection-free.
.
Tampering with the engine electron-
ics !Work on the engine electronics and all
associated parts such as control units,
sensors and connector leads should
only be performed at an authorized
Sprinter Dealer. Vehicle parts could
otherwise wear more quickly and the
vehicle’s warranty or general operating
permit could be invalidated.Warning
G
For safety reasons and to avoid invalidating
the general operating permit, always have
work on the engine electronics and associ-
ated parts performed at an authorized
Sprinter Dealer which has the necessary
specialist knowledge and tools to carry out
the work required.
The manufacturer recommends that you use
an authorized Sprinter Dealer for this pur-
pose. In particular, work relevant to safety
or on safety-related systems must be car-
ried out at an authorized Sprinter Dealer.Retrofitting electrical / electronic
equipment
Frequency range
Maximum trans-
mission output
Short wave
(< 50 MHz)
100 W
4m waveband
20 W
2m waveband
50 W
70 cm waveband
35 W
25 cm waveband
10 W
!If electrical or electronic equipment
which does not fulfill these conditions
is retrofitted, the vehicle’s general
operating permit may be invalidated.
Page 384 of 393
383 Index
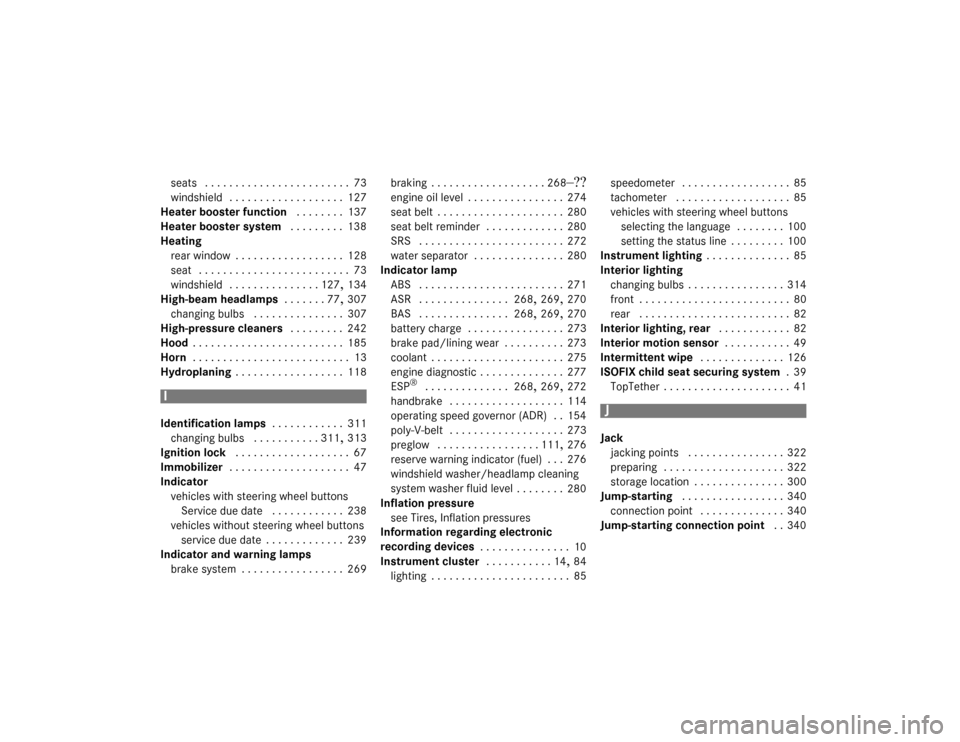
seats
. . . . . . . . . . . . . . . . . . . . . . . . 73
windshield
. . . . . . . . . . . . . . . . . . . 127
Heater booster function
. . . . . . . . 137
Heater booster system
. . . . . . . . . 138
Heating
rear window
. . . . . . . . . . . . . . . . . . 128
seat
. . . . . . . . . . . . . . . . . . . . . . . . . 73
windshield
. . . . . . . . . . . . . . . 127
, 134
High-beam headlamps
. . . . . . . 77
, 307
changing bulbs
. . . . . . . . . . . . . . . 307
High-pressure cleaners
. . . . . . . . . 242
Hood
. . . . . . . . . . . . . . . . . . . . . . . . . 185
Horn . . . . . . . . . . . . . . . . . . . . . . . . . . 13
Hydroplaning
. . . . . . . . . . . . . . . . . . 118
I
Identification lamps
. . . . . . . . . . . . 311
changing bulbs
. . . . . . . . . . . 311
, 313
Ignition lock
. . . . . . . . . . . . . . . . . . . 67
Immobilizer . . . . . . . . . . . . . . . . . . . . 47
Indicator
vehicles with steering wheel buttons
Service due date
. . . . . . . . . . . . 238
vehicles without steering wheel buttons
service due date . . . . . . . . . . . . . 239
Indicator and warning lamps
brake system
. . . . . . . . . . . . . . . . . 269braking
. . . . . . . . . . . . . . . . . . . 268
–??
engine oil level
. . . . . . . . . . . . . . . . 274
seat belt
. . . . . . . . . . . . . . . . . . . . . 280
seat belt reminder
. . . . . . . . . . . . . 280
SRS
. . . . . . . . . . . . . . . . . . . . . . . . 272
water separator
. . . . . . . . . . . . . . . 280
Indicator lamp
ABS
. . . . . . . . . . . . . . . . . . . . . . . . 271
ASR . . . . . . . . . . . . . . . 268
, 269
, 270
BAS
. . . . . . . . . . . . . . . 268
, 269
, 270
battery charge
. . . . . . . . . . . . . . . . 273
brake pad/lining wear
. . . . . . . . . . 273
coolant
. . . . . . . . . . . . . . . . . . . . . . 275
engine diagnostic
. . . . . . . . . . . . . . 277
ESP
® . . . . . . . . . . . . . . 268
, 269
, 272
handbrake
. . . . . . . . . . . . . . . . . . . 114
operating speed governor (ADR)
. . 154
poly-V-belt
. . . . . . . . . . . . . . . . . . . 273
preglow
. . . . . . . . . . . . . . . . . 111
, 276
reserve warning indicator (fuel)
. . . 276
windshield washer/headlamp cleaning
system washer fluid level
. . . . . . . . 280
Inflation pressure
see Tires, Inflation pressures
Information regarding electronic
recording devices
. . . . . . . . . . . . . . . 10
Instrument cluster . . . . . . . . . . . 14
, 84
lighting
. . . . . . . . . . . . . . . . . . . . . . . 85speedometer
. . . . . . . . . . . . . . . . . . 85
tachometer
. . . . . . . . . . . . . . . . . . . 85
vehicles with steering wheel buttons
selecting the language
. . . . . . . . 100
setting the status line . . . . . . . . . 100
Instrument lighting
. . . . . . . . . . . . . . 85
Interior lighting
changing bulbs
. . . . . . . . . . . . . . . . 314
front
. . . . . . . . . . . . . . . . . . . . . . . . . 80
rear . . . . . . . . . . . . . . . . . . . . . . . . . 82
Interior lighting, rear
. . . . . . . . . . . . 82
Interior motion sensor . . . . . . . . . . . 49
Intermittent wipe
. . . . . . . . . . . . . . 126
ISOFIX child seat securing system
. 39
TopTether
. . . . . . . . . . . . . . . . . . . . . 41
J
Jack
jacking points
. . . . . . . . . . . . . . . . 322
preparing
. . . . . . . . . . . . . . . . . . . . 322
storage location
. . . . . . . . . . . . . . . 300
Jump-starting
. . . . . . . . . . . . . . . . . 340
connection point
. . . . . . . . . . . . . . 340
Jump-starting connection point
. . 340
I
J
Page 387 of 393
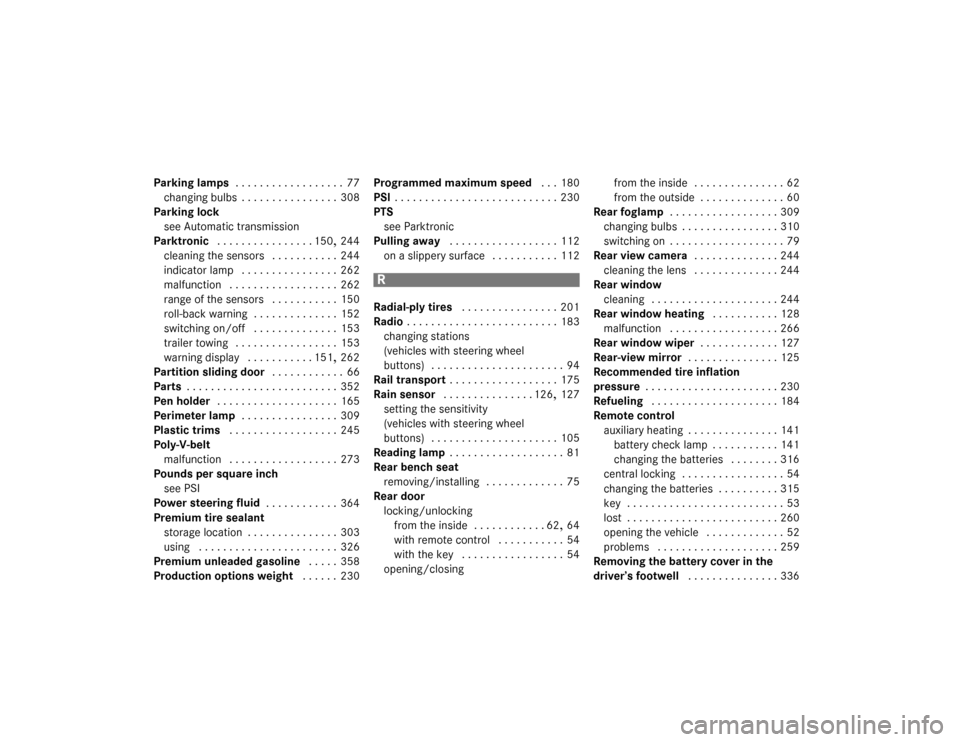
386 IndexParking lamps
. . . . . . . . . . . . . . . . . . 77
changing bulbs . . . . . . . . . . . . . . . . 308
Parking lock
see Automatic transmission
Parktronic
. . . . . . . . . . . . . . . . 150
, 244
cleaning the sensors
. . . . . . . . . . . 244
indicator lamp
. . . . . . . . . . . . . . . . 262
malfunction
. . . . . . . . . . . . . . . . . . 262
range of the sensors
. . . . . . . . . . . 150
roll-back warning
. . . . . . . . . . . . . . 152
switching on/off . . . . . . . . . . . . . . 153
trailer towing
. . . . . . . . . . . . . . . . . 153
warning display . . . . . . . . . . . 151
, 262
Partition sliding door
. . . . . . . . . . . . 66
Parts
. . . . . . . . . . . . . . . . . . . . . . . . . 352
Pen holder
. . . . . . . . . . . . . . . . . . . . 165
Perimeter lamp
. . . . . . . . . . . . . . . . 309
Plastic trims
. . . . . . . . . . . . . . . . . . 245
Poly-V-belt
malfunction . . . . . . . . . . . . . . . . . . 273
Pounds per square inch
see PSI
Power steering fluid
. . . . . . . . . . . . 364
Premium tire sealant
storage location
. . . . . . . . . . . . . . . 303
using
. . . . . . . . . . . . . . . . . . . . . . . 326
Premium unleaded gasoline
. . . . . 358
Production options weight
. . . . . . 230Programmed maximum speed
. . . 180
PSI
. . . . . . . . . . . . . . . . . . . . . . . . . . . 230
PTS
see Parktronic
Pulling away
. . . . . . . . . . . . . . . . . . 112
on a slippery surface
. . . . . . . . . . . 112
R
Radial-ply tires
. . . . . . . . . . . . . . . . 201
Radio
. . . . . . . . . . . . . . . . . . . . . . . . . 183
changing stations
(vehicles with steering wheel
buttons)
. . . . . . . . . . . . . . . . . . . . . . 94
Rail transport
. . . . . . . . . . . . . . . . . . 175
Rain sensor
. . . . . . . . . . . . . . . 126
, 127
setting the sensitivity
(vehicles with steering wheel
buttons)
. . . . . . . . . . . . . . . . . . . . . 105
Reading lamp
. . . . . . . . . . . . . . . . . . . 81
Rear bench seat
removing/installing
. . . . . . . . . . . . . 75
Rear door
locking/unlocking
from the inside
. . . . . . . . . . . . 62
, 64
with remote control
. . . . . . . . . . . 54
with the key
. . . . . . . . . . . . . . . . . 54
opening/closingfrom the inside
. . . . . . . . . . . . . . . 62
from the outside . . . . . . . . . . . . . . 60
Rear foglamp
. . . . . . . . . . . . . . . . . . 309
changing bulbs . . . . . . . . . . . . . . . . 310
switching on
. . . . . . . . . . . . . . . . . . . 79
Rear view camera
. . . . . . . . . . . . . . 244
cleaning the lens . . . . . . . . . . . . . . 244
Rear window
cleaning
. . . . . . . . . . . . . . . . . . . . . 244
Rear window heating
. . . . . . . . . . . 128
malfunction
. . . . . . . . . . . . . . . . . . 266
Rear window wiper
. . . . . . . . . . . . . 127
Rear-view mirror
. . . . . . . . . . . . . . . 125
Recommended tire inflation
pressure
. . . . . . . . . . . . . . . . . . . . . . 230
Refueling . . . . . . . . . . . . . . . . . . . . . 184
Remote control
auxiliary heating
. . . . . . . . . . . . . . . 141
battery check lamp
. . . . . . . . . . . 141
changing the batteries . . . . . . . . 316
central locking
. . . . . . . . . . . . . . . . . 54
changing the batteries
. . . . . . . . . . 315
key
. . . . . . . . . . . . . . . . . . . . . . . . . . 53
lost . . . . . . . . . . . . . . . . . . . . . . . . . 260
opening the vehicle
. . . . . . . . . . . . . 52
problems
. . . . . . . . . . . . . . . . . . . . 259
Removing the battery cover in the
driver’s footwell
. . . . . . . . . . . . . . . 336
R