fold seats DODGE SPRINTER 2007 2.G Owners Manual
[x] Cancel search | Manufacturer: DODGE, Model Year: 2007, Model line: SPRINTER, Model: DODGE SPRINTER 2007 2.GPages: 393, PDF Size: 7.61 MB
Page 71 of 393
70 Controls in detailSeats
3
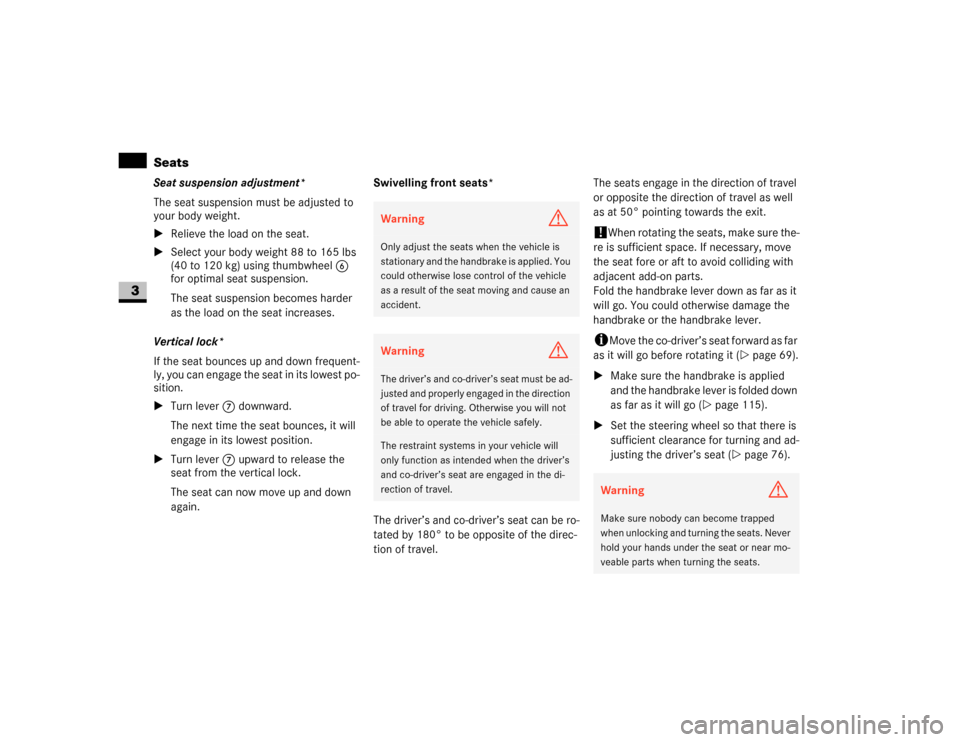
Seat suspension adjustment*
The seat suspension must be adjusted to
your body weight.
\1Relieve the load on the seat.
\1Select your body weight 88 to 165 lbs
(40 to 120 kg) using thumbwheel6
for optimal seat suspension.
The seat suspension becomes harder
as the load on the seat increases.
Vertical lock*
If the seat bounces up and down frequent-
ly, you can engage the seat in its lowest po-
sition.
\1Turn lever7 downward.
The next time the seat bounces, it will
engage in its lowest position.
\1Turn lever7 upward to release the
seat from the vertical lock.
The seat can now move up and down
again.Swivelling front seats*
The driver’s and co-driver’s seat can be ro-
tated by 180° to be opposite of the direc-
tion of travel.The seats engage in the direction of travel
or opposite the direction of travel as well
as at 50° pointing towards the exit.
!
When rotating the seats, make sure the-
re is sufficient space. If necessary, move
the seat fore or aft to avoid colliding with
adjacent add-on parts.
Fold the handbrake lever down as far as it
will go. You could otherwise damage the
handbrake or the handbrake lever.
i
Move the co-driver’s seat forward as far
as it will go before rotating it (\2page 69).
\1Make sure the handbrake is applied
and the handbrake lever is folded down
as far as it will go (\2page 115).
\1Set the steering wheel so that there is
sufficient clearance for turning and ad-
justing the driver’s seat (\2page 76).
Warning
G
Only adjust the seats when the vehicle is
stationary and the handbrake is applied. You
could otherwise lose control of the vehicle
as a result of the seat moving and cause an
accident.Warning
G
The driver’s and co-driver’s seat must be ad-
justed and properly engaged in the direction
of travel for driving. Otherwise you will not
be able to operate the vehicle safely.The restraint systems in your vehicle will
only function as intended when the driver’s
and co-driver’s seat are engaged in the di-
rection of travel.
Warning
G
Make sure nobody can become trapped
when unlocking and turning the seats. Never
hold your hands under the seat or near mo-
veable parts when turning the seats.
Page 72 of 393
71 Controls in detail
Seats
3
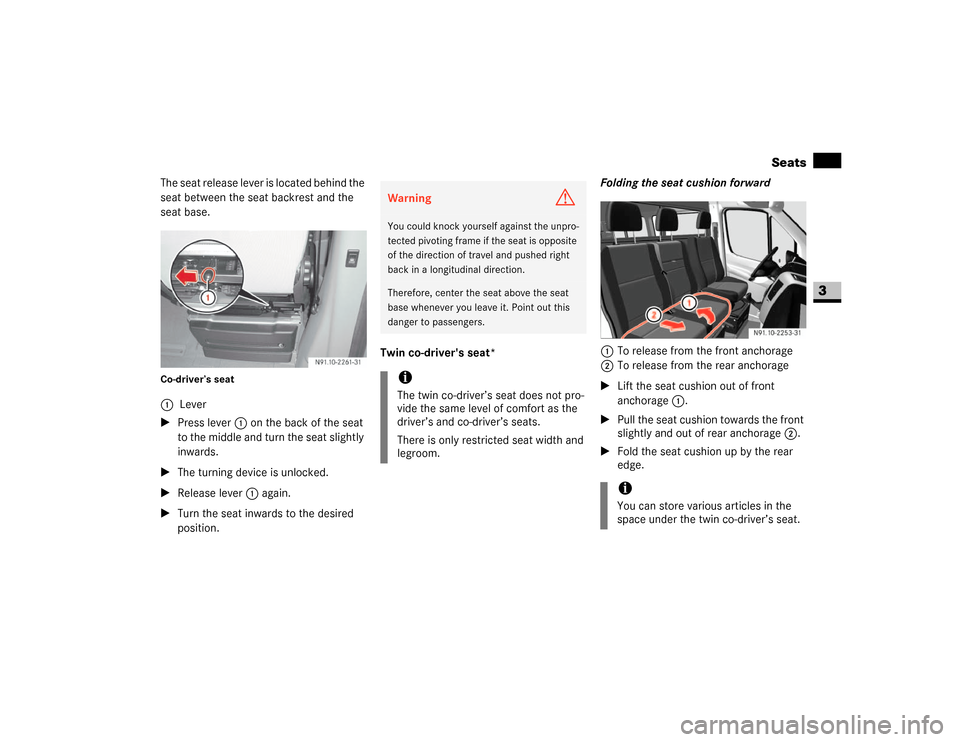
The seat release lever is located behind the
seat between the seat backrest and the
seat base.Co-driver’s seat\1Press lever 1 on the back of the seat
to the middle and turn the seat slightly
inwards.
\1The turning device is unlocked.
\1Release lever 1 again.
\1Turn the seat inwards to the desired
position.Twin co-driver's seat*Folding the seat cushion forward
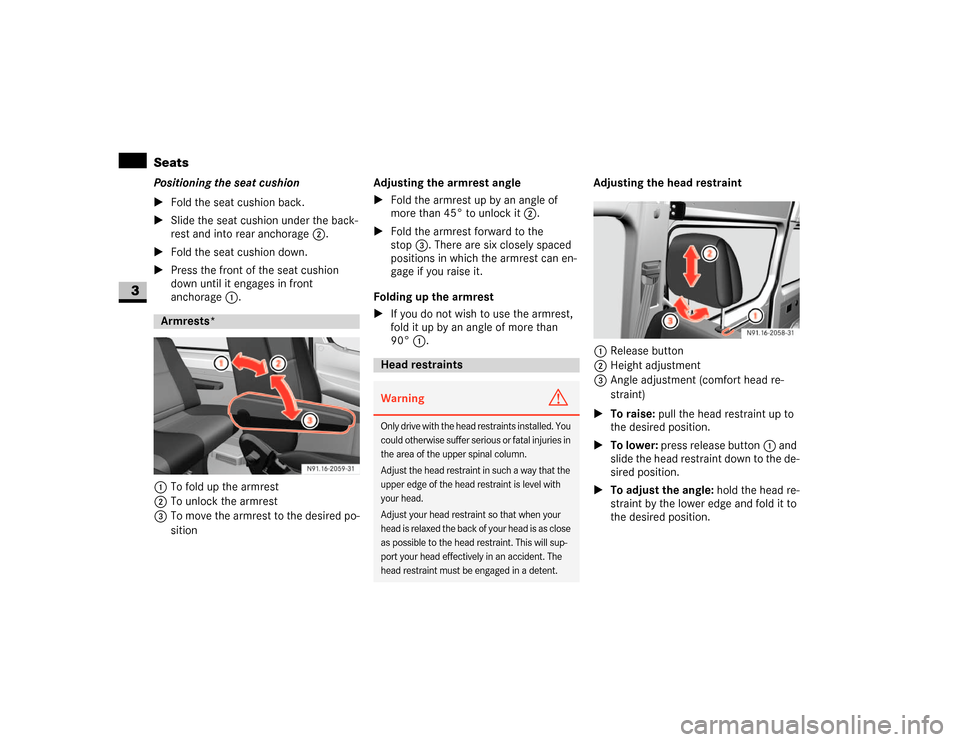
1To release from the front anchorage
2To release from the rear anchorage
\1Lift the seat cushion out of front
anchorage1.
\1Pull the seat cushion towards the front
slightly and out of rear anchorage2.
\1Fold the seat cushion up by the rear
edge. 1Lever
Warning
G
You could knock yourself against the unpro-
tected pivoting frame if the seat is opposite
of the direction of travel and pushed right
back in a longitudinal direction.Therefore, center the seat above the seat
base whenever you leave it. Point out this
danger to passengers.iThe twin co-driver’s seat does not pro-
vide the same level of comfort as the
driver’s and co-driver’s seats.
There is only restricted seat width and
legroom.
iYou can store various articles in the
space under the twin co-driver’s seat.
Page 73 of 393
72 Controls in detailSeats
3
Positioning the seat cushion
\1Fold the seat cushion back.
\1Slide the seat cushion under the back-
rest and into rear anchorage2.
\1Fold the seat cushion down.
\1Press the front of the seat cushion
down until it engages in front
anchorage1.
1To fold up the armrest
2To unlock the armrest
3To move the armrest to the desired po-
sitionAdjusting the armrest angle
\1Fold the armrest up by an angle of
more than 45° to unlock it2.
\1Fold the armrest forward to the
stop3. There are six closely spaced
positions in which the armrest can en-
gage if you raise it.
Folding up the armrest
\1If you do not wish to use the armrest,
fold it up by an angle of more than
90°1.Adjusting the head restraint
1Release button
2Height adjustment
3Angle adjustment (comfort head re-
straint)
\1To raise: pull the head restraint up to
the desired position.
\1To lower: press release button1 and
slide the head restraint down to the de-
sired position.
\1To adjust the angle: hold the head re-
straint by the lower edge and fold it to
the desired position.Armrests*
Head restraints Warning
G
Only drive with the head restraints installed. You
could otherwise suffer serious or fatal injuries in
the area of the upper spinal column.
Adjust the head restraint in such a way that the
upper edge of the head restraint is level with
your head.
Adjust your head restraint so that when your
head is relaxed the back of your head is as close
as possible to the head restraint. This will sup-
port your head effectively in an accident. The
head restraint must be engaged in a detent.
Page 75 of 393
74 Controls in detailSeats
3
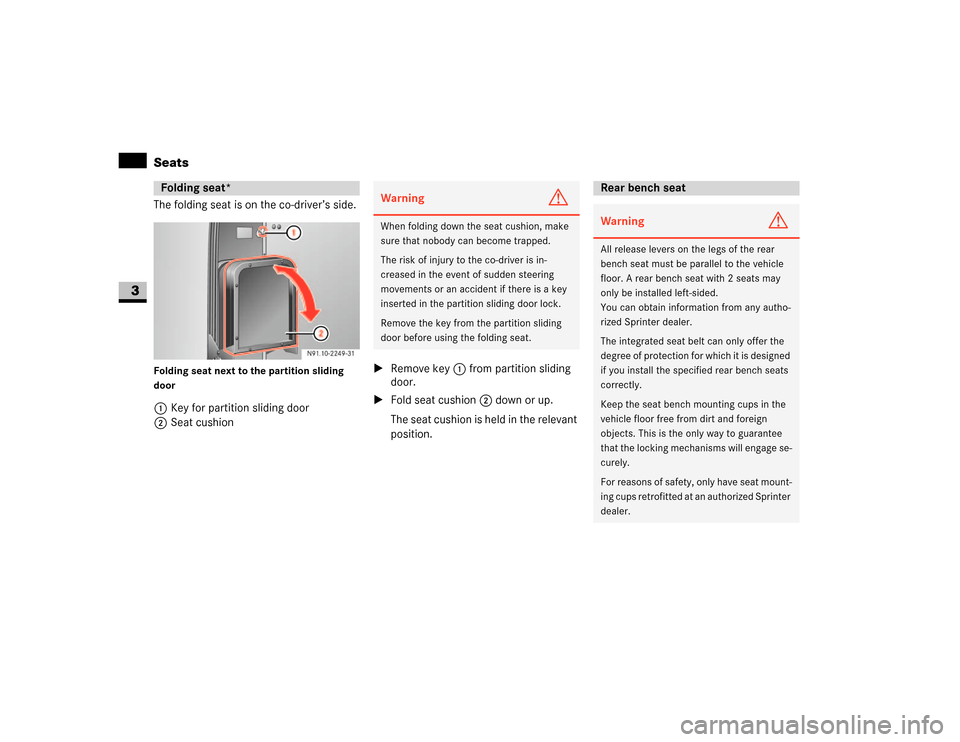
The folding seat is on the co-driver’s side. Folding seat next to the partition sliding
door1Key for partition sliding door
2Seat cushion\1Remove key1 from partition sliding
door.
\1Fold seat cushion2 down or up.
The seat cushion is held in the relevant
position.Folding seat*
Warning
G
When folding down the seat cushion, make
sure that nobody can become trapped.
The risk of injury to the co-driver is in-
creased in the event of sudden steering
movements or an accident if there is a key
inserted in the partition sliding door lock.
Remove the key from the partition sliding
door before using the folding seat.
Rear bench seatWarning
G
All release levers on the legs of the rear
bench seat must be parallel to the vehicle
floor. A rear bench seat with 2 seats may
only be installed left-sided.
You can obtain information from any autho-
rized Sprinter dealer.
The integrated seat belt can only offer the
degree of protection for which it is designed
if you install the specified rear bench seats
correctly.
Keep the seat bench mounting cups in the
vehicle floor free from dirt and foreign
objects. This is the only way to guarantee
that the locking mechanisms will engage se-
curely.
For reasons of safety, only have seat mount-
ing cups retrofitted at an authorized Sprinter
dealer.
Page 169 of 393
168 Controls in detailFeatures
3
\1Place the container in cup holder5.
\1Press clamping arm6 onto the con-
tainer.
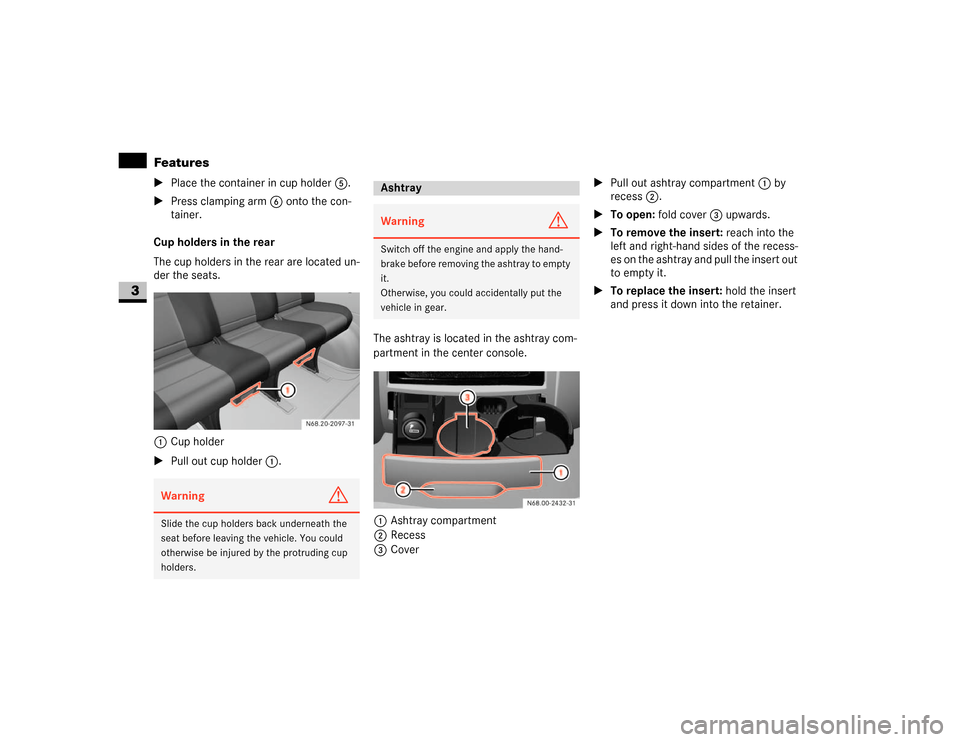
Cup holders in the rear
The cup holders in the rear are located un-
der the seats.
1Cup holder
\1Pull out cup holder1.The ashtray is located in the ashtray com-
partment in the center console.
1Ashtray compartment
2Recess
3Cover\1Pull out ashtray compartment1 by
recess2.
\1To open: fold cover3 upwards.
\1To remove the insert: reach into the
left and right-hand sides of the recess-
es on the ashtray and pull the insert out
to empty it.
\1To replace the insert: hold the insert
and press it down into the retainer.Warning
G
Slide the cup holders back underneath the
seat before leaving the vehicle. You could
otherwise be injured by the protruding cup
holders.
AshtrayWarning
G
Switch off the engine and apply the hand-
brake before removing the ashtray to empty
it.
Otherwise, you could accidentally put the
vehicle in gear.