DODGE VIPER 2015 VX / 3.G Owners Manual
VIPER 2015 VX / 3.G
DODGE
DODGE
https://www.carmanualsonline.info/img/12/5695/w960_5695-0.png
DODGE VIPER 2015 VX / 3.G Owners Manual
Trending: oil temperature, seats, lock, hood open, low oil pressure, bolt pattern, manual transmission
Page 131 of 400
General Information
This device complies with FCC rules Part 15 and Industry
Canada RSS-210. Operation is subject to the following
two conditions:
1. This device may not cause harmful interference.
2. This device must accept any interference that may be
received including interference that may cause unde-
sired operation.
NOTE:
•The transmitter has been tested and it complies with
FCC and IC rules. Changes or modifications not ex-
pressly approved by the party responsible for compli-
ance could void the user ’s authority to operate the
device.
•The term IC before the certification/registration num-
ber only signifies that Industry Canada technical speci-
fications were met.
ELECTRICAL POWER OUTLETS
Your vehicle is equipped with two 12 Volt (13 Amp)
power outlet that can be used to power cellular phones,
small electronics and other low powered electrical acces-
sories.
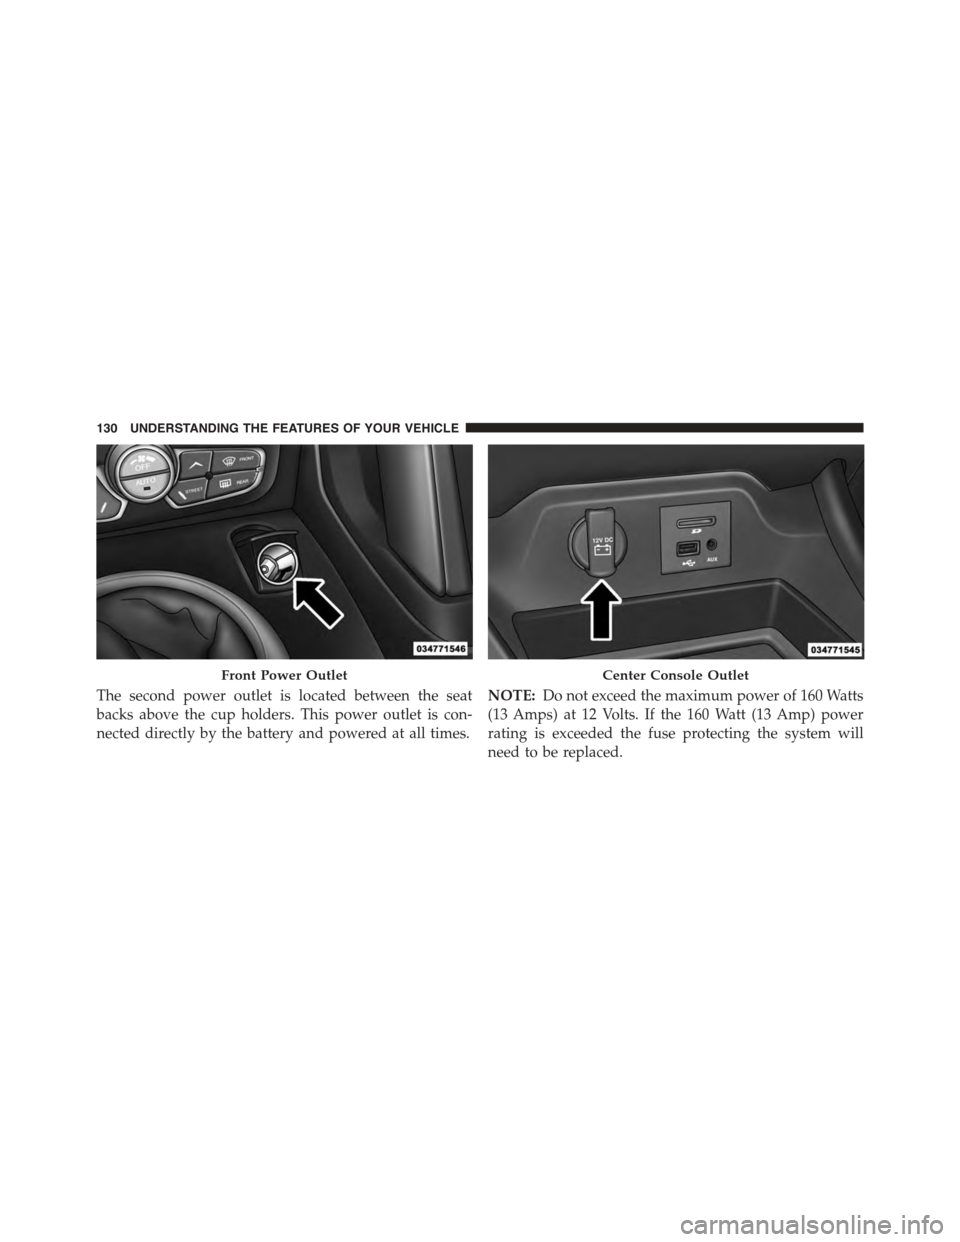
One power outlet is located on the center console to the
right of the shifter. Push down on the power outlet to
access the opening. Push down on it again to close. This
power outlet is powered when the ignition is in the ON
or ACC position.
3
UNDERSTANDING THE FEATURES OF YOUR VEHICLE 129
Page 132 of 400
The second power outlet is located between the seat
backs above the cup holders. This power outlet is con-
nected directly by the battery and powered at all times.
NOTE:Do not exceed the maximum power of 160 Watts
(13 Amps) at 12 Volts. If the 160 Watt (13 Amp) power
rating is exceeded the fuse protecting the system will
need to be replaced.
Front Power OutletCenter Console Outlet
130 UNDERSTANDING THE FEATURES OF YOUR VEHICLE
Page 133 of 400
WARNING!
To avoid serious injury or death:
•Only devices designed for use in this type of outlet
should be inserted into any 12 Volt outlet.
•Do not touch with wet hands.
•Close the lid when not in use and while driving the
vehicle.
•If this outlet is mishandled, it may cause an electric
shock and failure.
CAUTION!
•Many accessories that can be plugged in draw
power from the vehicle’s battery, even when not in
use (i.e., cellular phones, etc.). Eventually, if
plugged in long enough, the vehicle’s battery will
discharge sufficiently to degrade battery life and/or
prevent the engine from starting.
•Accessories that draw higher power (i.e., coolers,
vacuum cleaners, lights, etc.) will degrade the bat-
tery even more quickly. Only use these intermit-
tently and with greater caution.
•After the use of high power draw accessories, or
long periods of the vehicle not being started (with
accessories still plugged in), the vehicle must be
driven a sufficient length of time to allow the
generator to recharge the vehicle’s battery.
3
UNDERSTANDING THE FEATURES OF YOUR VEHICLE 131
Page 134 of 400
Auxiliary Jumper Harness
The SRT Viper is equipped with an auxiliary power
jumper, allowing an electronic device to be directly
connected to the vehicle without having to use the
console power outlets. Power to the device will be
controlled by the ignition switch.
NOTE:The electronic device must draw less than five
amps to prevent damage.
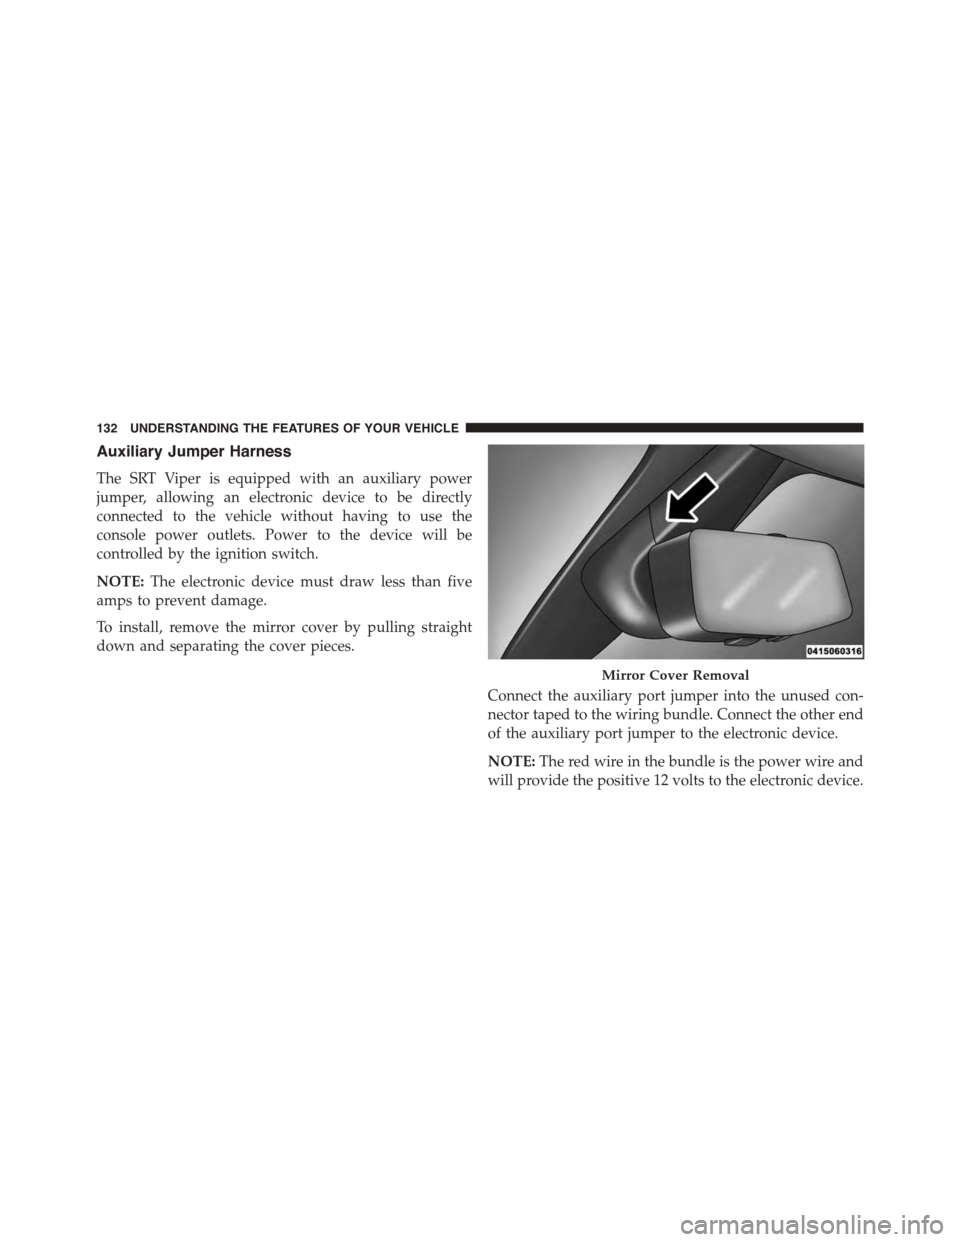
To install, remove the mirror cover by pulling straight
down and separating the cover pieces.
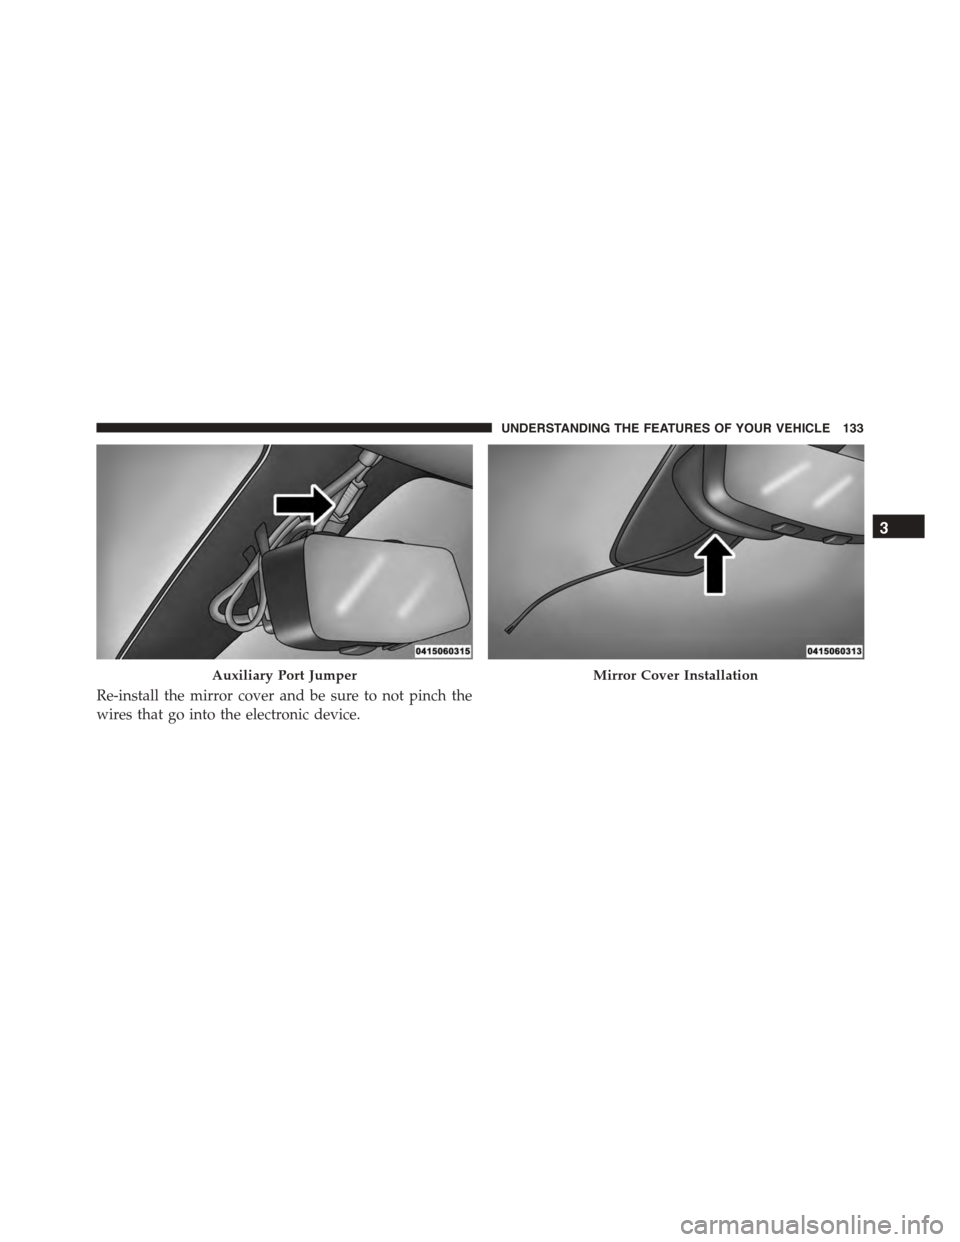
Connect the auxiliary port jumper into the unused con-
nector taped to the wiring bundle. Connect the other end
of the auxiliary port jumper to the electronic device.
NOTE:The red wire in the bundle is the power wire and
will provide the positive 12 volts to the electronic device.
Mirror Cover Removal
132 UNDERSTANDING THE FEATURES OF YOUR VEHICLE
Page 135 of 400
Re-install the mirror cover and be sure to not pinch the
wires that go into the electronic device.
Auxiliary Port JumperMirror Cover Installation
3
UNDERSTANDING THE FEATURES OF YOUR VEHICLE 133
Page 136 of 400
CUPHOLDERS — IF EQUIPPED
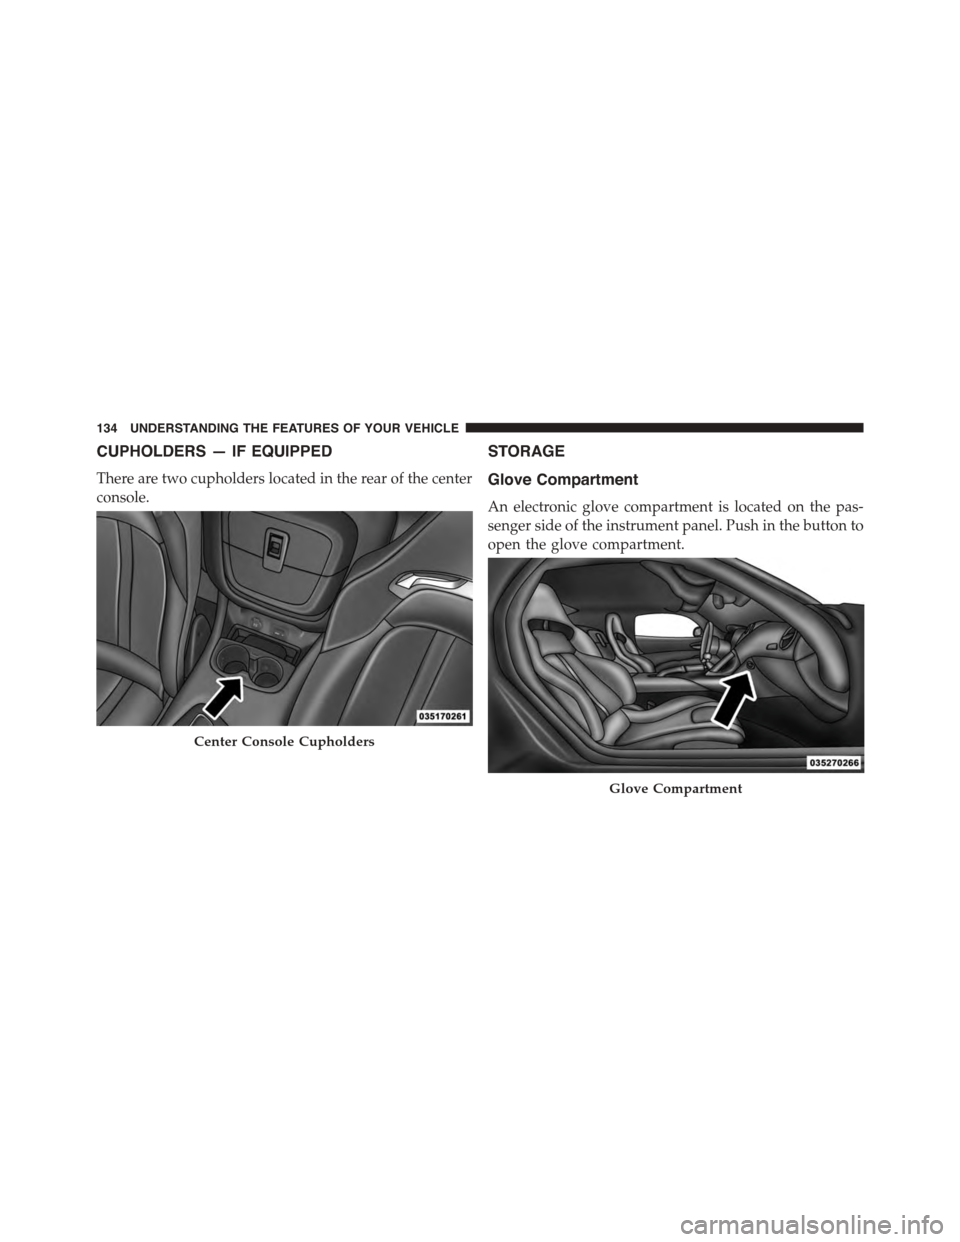
There are two cupholders located in the rear of the center
console.
STORAGE
Glove Compartment
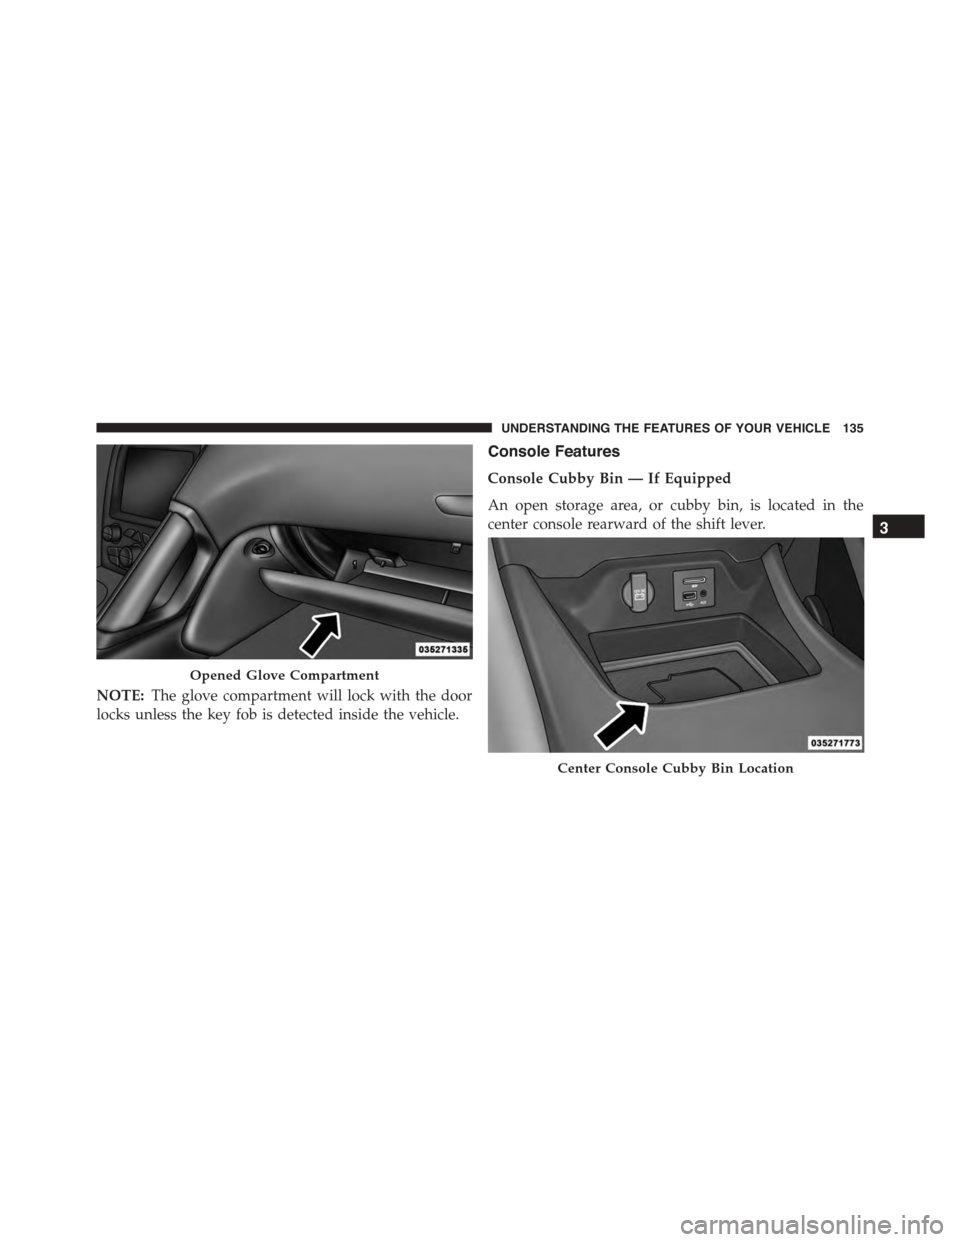
An electronic glove compartment is located on the pas-
senger side of the instrument panel. Push in the button to
open the glove compartment.
Center Console Cupholders
Glove Compartment
134 UNDERSTANDING THE FEATURES OF YOUR VEHICLE
Page 137 of 400
NOTE:The glove compartment will lock with the door
locks unless the key fob is detected inside the vehicle.
Console Features
Console Cubby Bin — If Equipped
An open storage area, or cubby bin, is located in the
center console rearward of the shift lever.
Opened Glove Compartment
Center Console Cubby Bin Location
3
UNDERSTANDING THE FEATURES OF YOUR VEHICLE 135
Page 138 of 400
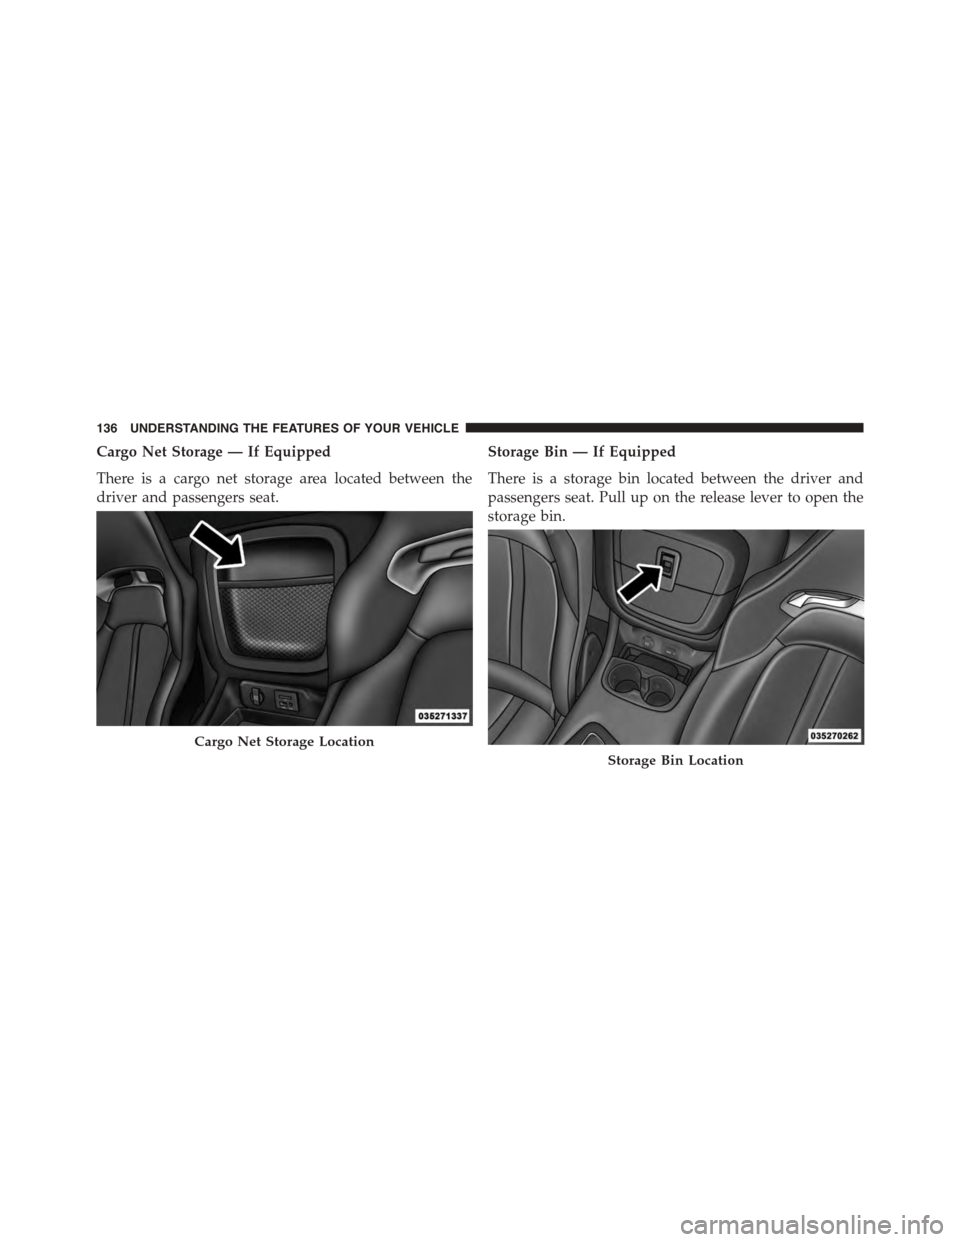
Cargo Net Storage — If Equipped
There is a cargo net storage area located between the
driver and passengers seat.
Storage Bin — If Equipped
There is a storage bin located between the driver and
passengers seat. Pull up on the release lever to open the
storage bin.
Cargo Net Storage Location
Storage Bin Location
136 UNDERSTANDING THE FEATURES OF YOUR VEHICLE
Page 139 of 400
WARNING!
Do not operate this vehicle with a console compart-
ment lid in the open position. Driving with the
console compartment lid open may result in injury in
a collision.
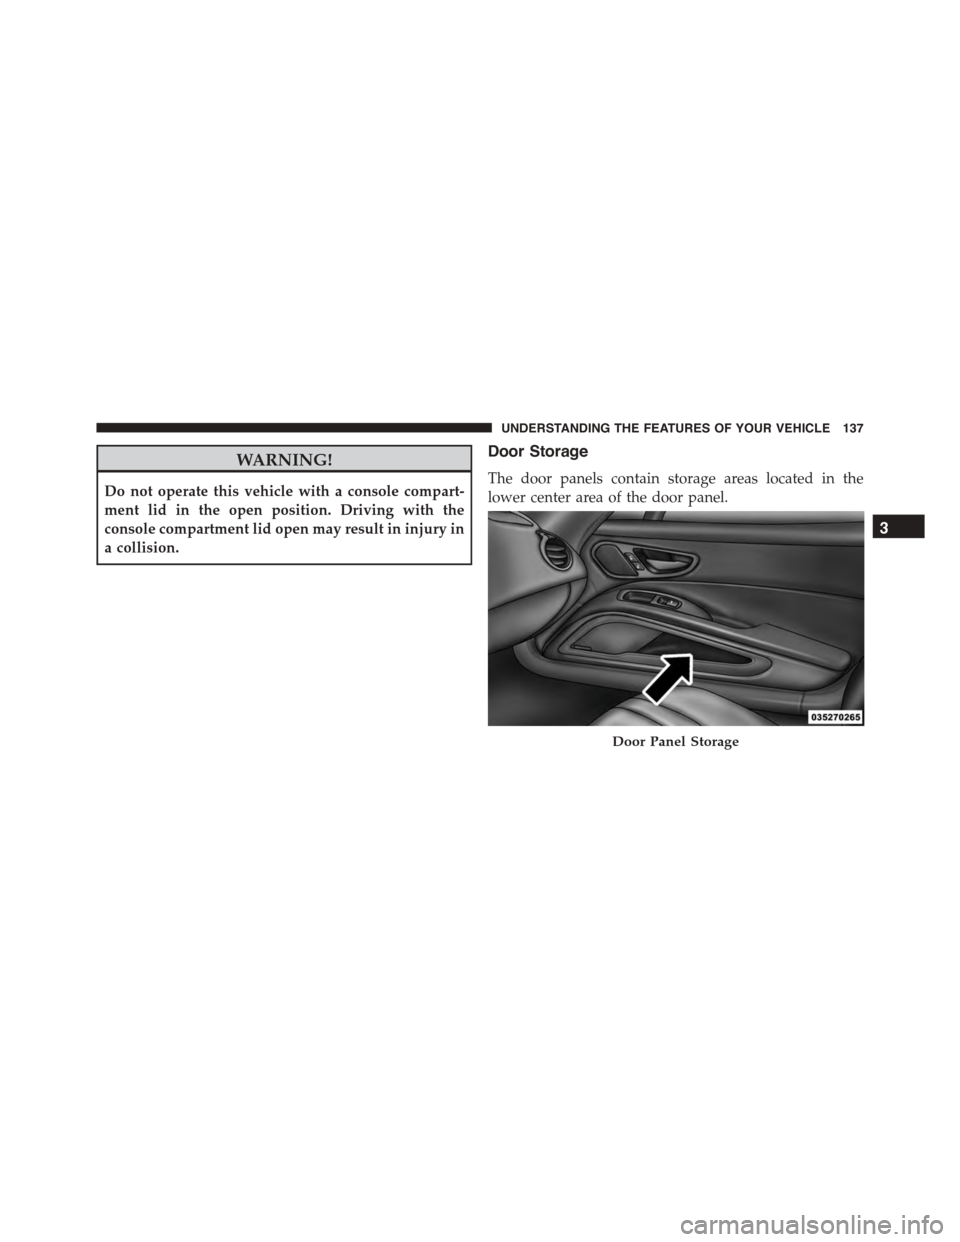
Door Storage
The door panels contain storage areas located in the
lower center area of the door panel.
Door Panel Storage
3
UNDERSTANDING THE FEATURES OF YOUR VEHICLE 137
Page 140 of 400
REAR WINDOW FEATURES
Rear Window Defroster
The rear window defroster button is located on
the climate control panel. Push this button to turn
on the rear window defroster. An indicator in the button
will illuminate when the rear window defroster is on. The
rear window defroster automatically turns off after ap-
proximately 10 minutes. For an additional five minutes of
operation, push the button a second time.
NOTE:To prevent excessive battery drain, use the rear
window defroster only when the engine is operating.
CAUTION!
Failure to follow these cautions can cause damage to
the heating elements:
•Use care when washing the inside of the rear
window. Do not use abrasive window cleaners on
the interior surface of the window. Use a soft cloth
and a mild washing solution, wiping parallel to the
heating elements. Labels can be peeled off after
soaking with warm water.
•Do not use scrapers, sharp instruments, or abrasive
window cleaners on the interior surface of the
window.
•Keep all objects a safe distance from the window.
138 UNDERSTANDING THE FEATURES OF YOUR VEHICLE
Trending: fuel consumption, headlamp, brakes, wheel, gas mileage, manual transmission, lights

