clock DODGE VIPER 2015 VX / 3.G User Guide
[x] Cancel search | Manufacturer: DODGE, Model Year: 2015, Model line: VIPER, Model: DODGE VIPER 2015 VX / 3.GPages: 148, PDF Size: 21.7 MB
Page 17 of 148

Installing the Child Restraint Using the Vehicle Seat Belts
•ThefrontpassengerseatingpositionisequippedwithaSwitchableAutomaticLocking
Retractor (ALR) that is designed to keep the lap portion of the seat belt tight around the
child restraint. Any seat belt system will loosen with time, so check the belt occasion-
ally, and pull it tight if necessary.
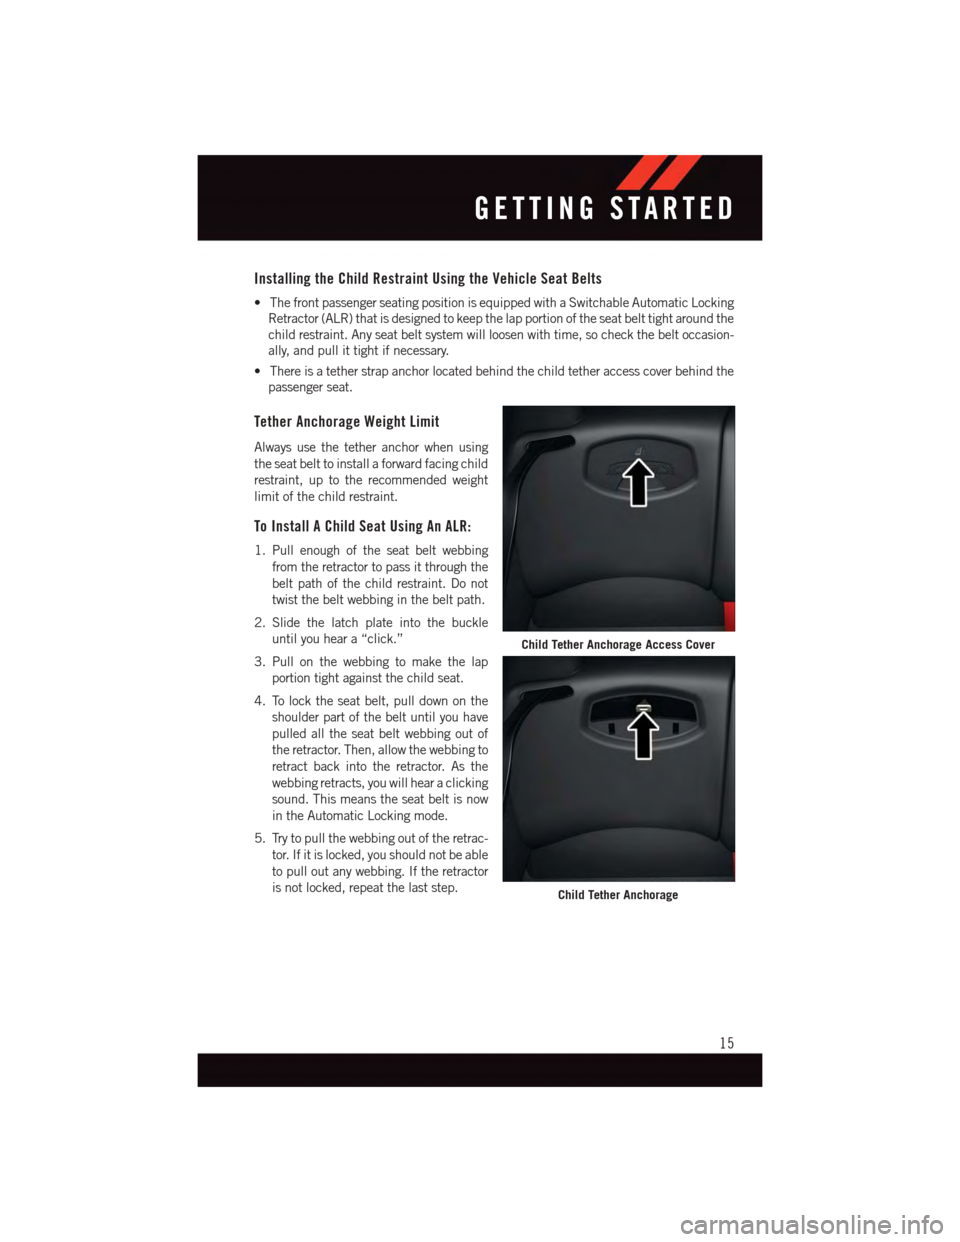
•Thereisatetherstrapanchorlocatedbehindthechildtetheraccesscoverbehindthe
passenger seat.
Tether Anchorage Weight Limit
Always use the tether anchor when using
the seat belt to install a forward facing child
restraint, up to the recommended weight
limit of the child restraint.
To Install A Child Seat Using An ALR:
1. Pull enough of the seat belt webbing
from the retractor to pass it through the
belt path of the child restraint. Do not
twist the belt webbing in the belt path.
2. Slide the latch plate into the buckle
until you hear a “click.”
3. Pull on the webbing to make the lap
portion tight against the child seat.
4. To lock the seat belt, pull down on the
shoulder part of the belt until you have
pulled all the seat belt webbing out of
the retractor. Then, allow the webbing to
retract back into the retractor. As the
webbing retracts, you will hear a clicking
sound. This means the seat belt is now
in the Automatic Locking mode.
5. Try to pull the webbing out of the retrac-
tor. If it is locked, you should not be able
to pull out any webbing. If the retractor
is not locked, repeat the last step.
Child Tether Anchorage Access Cover
Child Tether Anchorage
GETTING STARTED
15
Page 56 of 148

Uconnect® 8.4AN
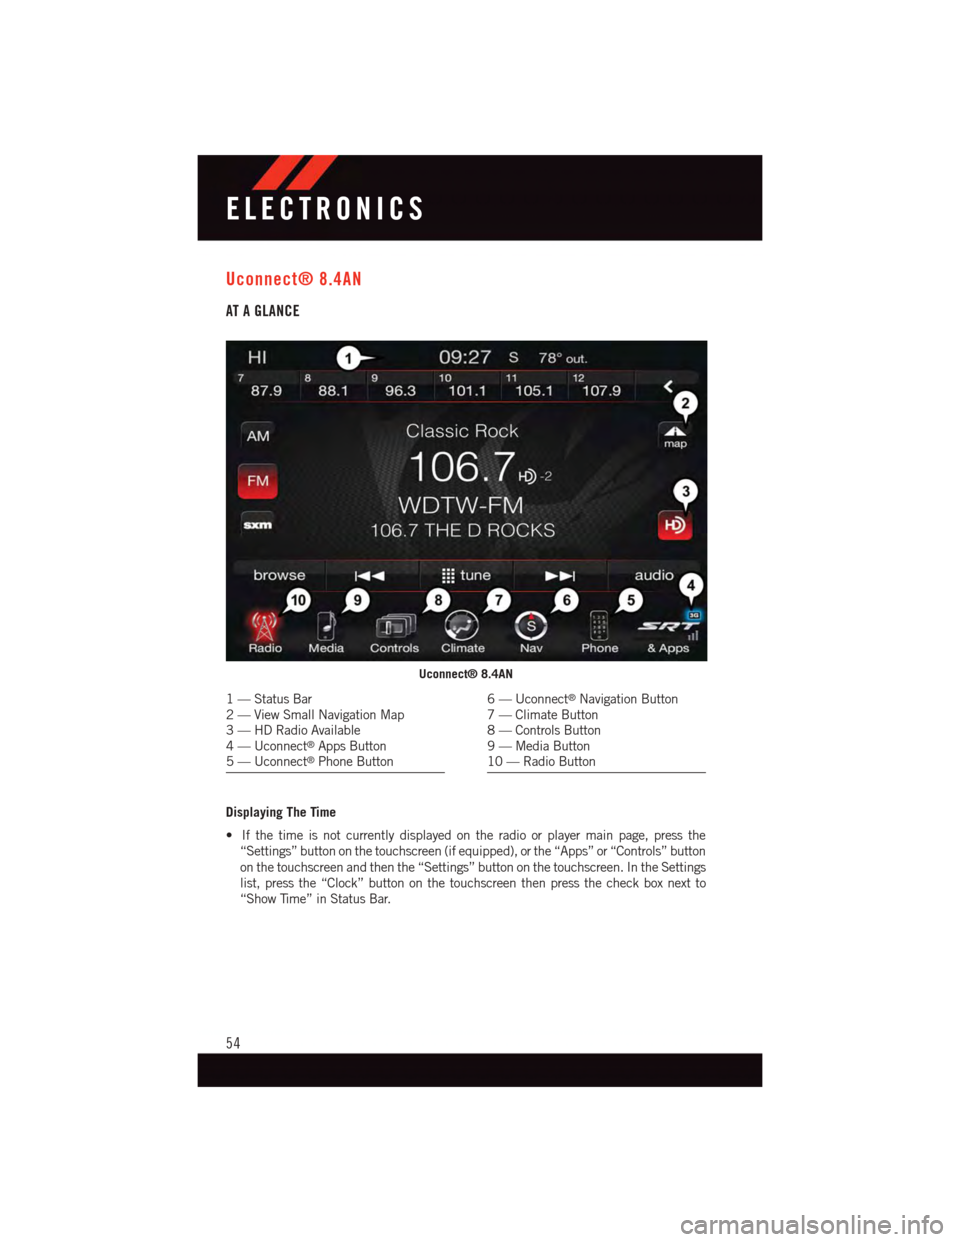
AT A GLANCE
Displaying The Time
•Ifthetimeisnotcurrentlydisplayedontheradioorplayermainpage,pressthe
“Settings” button on the touchscreen (if equipped), or the “Apps” or “Controls” button
on the touchscreen and then the “Settings” button on the touchscreen. In the Settings
list, press the “Clock” button on the touchscreen then press the check box next to
“Show Time” in Status Bar.
Uconnect® 8.4AN
1—StatusBar2—ViewSmallNavigationMap3—HDRadioAvailable4—Uconnect®Apps Button5—Uconnect®Phone Button
6—Uconnect®Navigation Button7—ClimateButton8—ControlsButton9—MediaButton10 — Radio Button
ELECTRONICS
54
Page 96 of 148

PROGRAMMABLE FEATURES
Uconnect® Customer Programmable Features
The Uconnect®system allows you to access Customer Programmable feature settings
such as Display, Voice, Clock, Safety & Driving Assistance, Lights, Doors & Locks, Engine
Off Options, Audio, Phone / Bluetooth, SiriusXM Setup, Restore Settings, Clear Personal
Data, and System Information through buttons on the touchscreen.
•Pressthe“SRT&Apps”buttononthetouchscreen,thenpressthe“Settings”button
on the touchscreen to access the Settings screen. When making a selection, scroll up
or down until the preferred setting is highlighted, then press and release the preferred
setting until a check-mark appears next to the setting, showing that setting has been
selected. The following feature settings are available:
•Display•Audio
•Voice•Phone/Bluetooth
•Clock•SiriusXMSetup
•Safety&DrivingAssistance•RestoreSettings
•Lights•ClearPersonalData
•Doors&Locks•SystemInformation
•EngineOffOptions
UNIVERSAL GARAGE DOOR OPENER (HomeLink®)
HomeLink®replaces up to three hand-held transmitters that operate devices such as
garage door openers, motorized gates, lighting or home security systems. The HomeLink®
unit is powered by your vehicles 12 Volt battery.
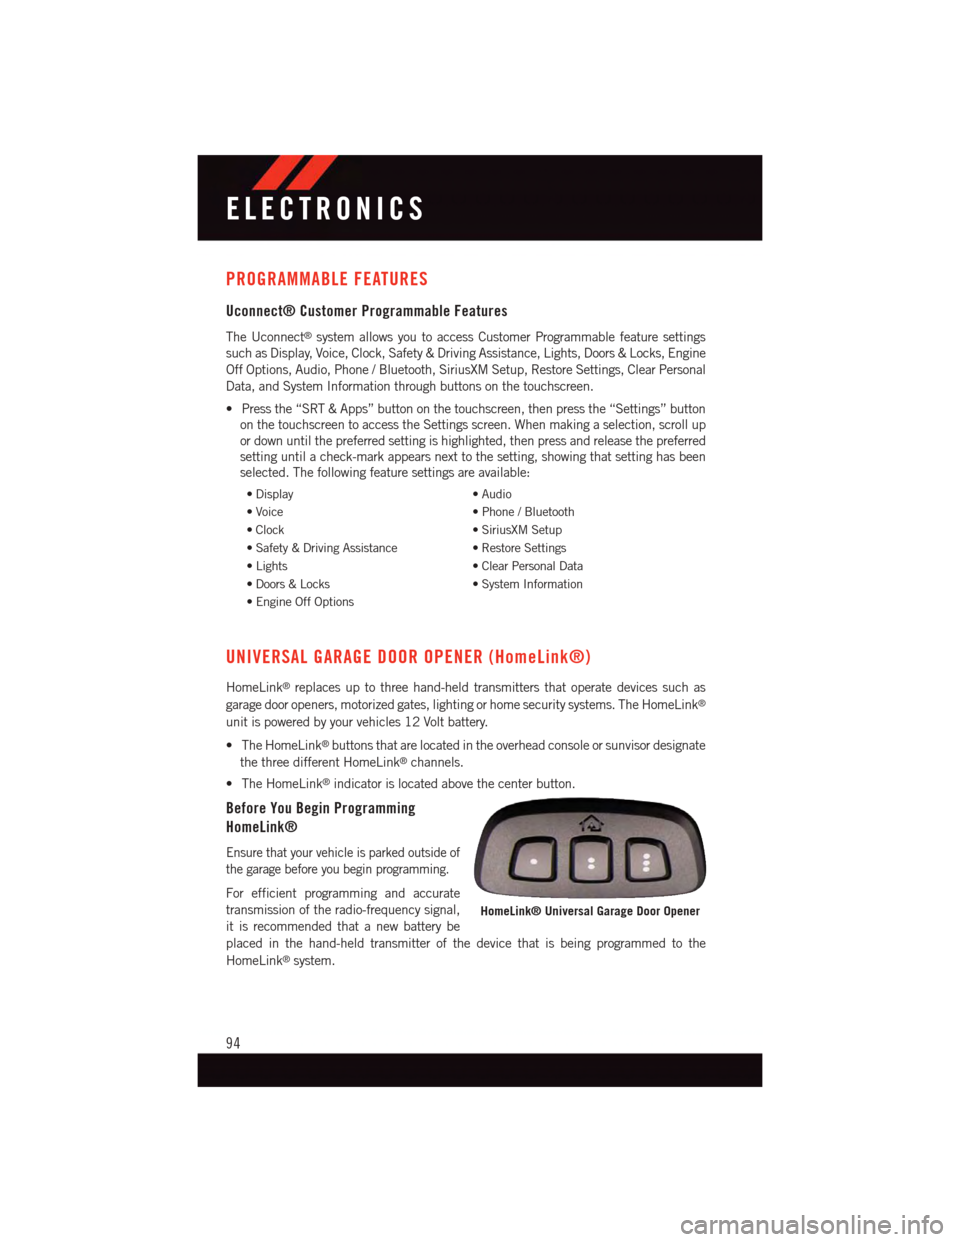
•TheHomeLink®buttons that are located in the overhead console or sunvisor designate
the three different HomeLink®channels.
•TheHomeLink®indicator is located above the center button.
Before You Begin Programming
HomeLink®
Ensure that your vehicle is parked outside of
the garage before you begin programming.
For efficient programming and accurate
transmission of the radio-frequency signal,
it is recommended that a new battery be
placed in the hand-held transmitter of the device that is being programmed to the
HomeLink®system.
HomeLink® Universal Garage Door Opener
ELECTRONICS
94
Page 135 of 148

FREQUENTLY ASKED QUESTIONS
GETTING STARTED
•HowdoIadjustmyfootrest?pg.20
•HowdoIadjustmypedals?pg.19
OPERATING YOUR VEHICLE
•Howdoesmyspeedcontrolwork?pg.24
ELECTRONICS
Which radio is in my vehicle?
•Uconnect®8.4AN pg. 54
How do I activate the Audio Jack?
•Uconnect®8.4AN pg. 60
How do I set the clock on my radio?
•Uconnect®8.4AN pg. 54
•HowdoIpairmycellphoneviaBluetooth®with the Uconnect®Hands-Free Voice
Activation System? pg. 83
•HowdoIusemyUSBporttolistentoaudiothroughmytouch-screenradio?pg.60
•HowdoIconfiguremyUniversalGarageDoorOpener(HomeLink®)? pg. 94
UTILITY
•HowdoIknowhowmuchIcantowwithmyViper?pg.98
WHAT TO DO IN EMERGENCIES
•WhatdoIdoifmyTPMSwarninglightisblinking?pg.100
•HowdoIJump-Startmyvehicle?pg.111
MAINTAINING YOUR VEHICLE
•WhereismyFuseBlocklocated?pg.124
•WhattypeofoildoIuse?pg.118
•HowoftenshouldIchangemyengine’soil?pg.121
•Whatshouldmytirepressurebesetat?pg.127
FREQUENTLY ASKED QUESTIONS
133