FIAT 500E 2016 2.G Workshop Manual
Manufacturer: FIAT, Model Year: 2016, Model line: 500E, Model: FIAT 500E 2016 2.GPages: 132, PDF Size: 4.59 MB
Page 51 of 132
Automatic Operation
1.Push the AUTO button.
2.Select the desired temperature by pushing the temperature control buttons.
NOTE:
The system will maintain the set temperature automatically.
Air Recirculation
•Use recirculation for maximum A/C operation.
•For window defogging, turn the air recirculation button off.
Heated Mirrors
The mirrors are heated to melt frost or ice.This feature is activated when you turn on the
rear window defroster, which is located in the center of the instrument panel, below the radio.
REAR PARK ASSIST
If an object is detected behind the rear bumper while the vehicle is in REVERSE, a chime
will sound.The chime rate will change depending on the distance of the object, getting
faster as the object gets closer to the bumper.The chime will become continuous when
the distance between the vehicle and the obstacle is less than 12 inches (30 cm).
OPERATING YOUR VEHICLE
49
Page 52 of 132
POWER SUNROOF
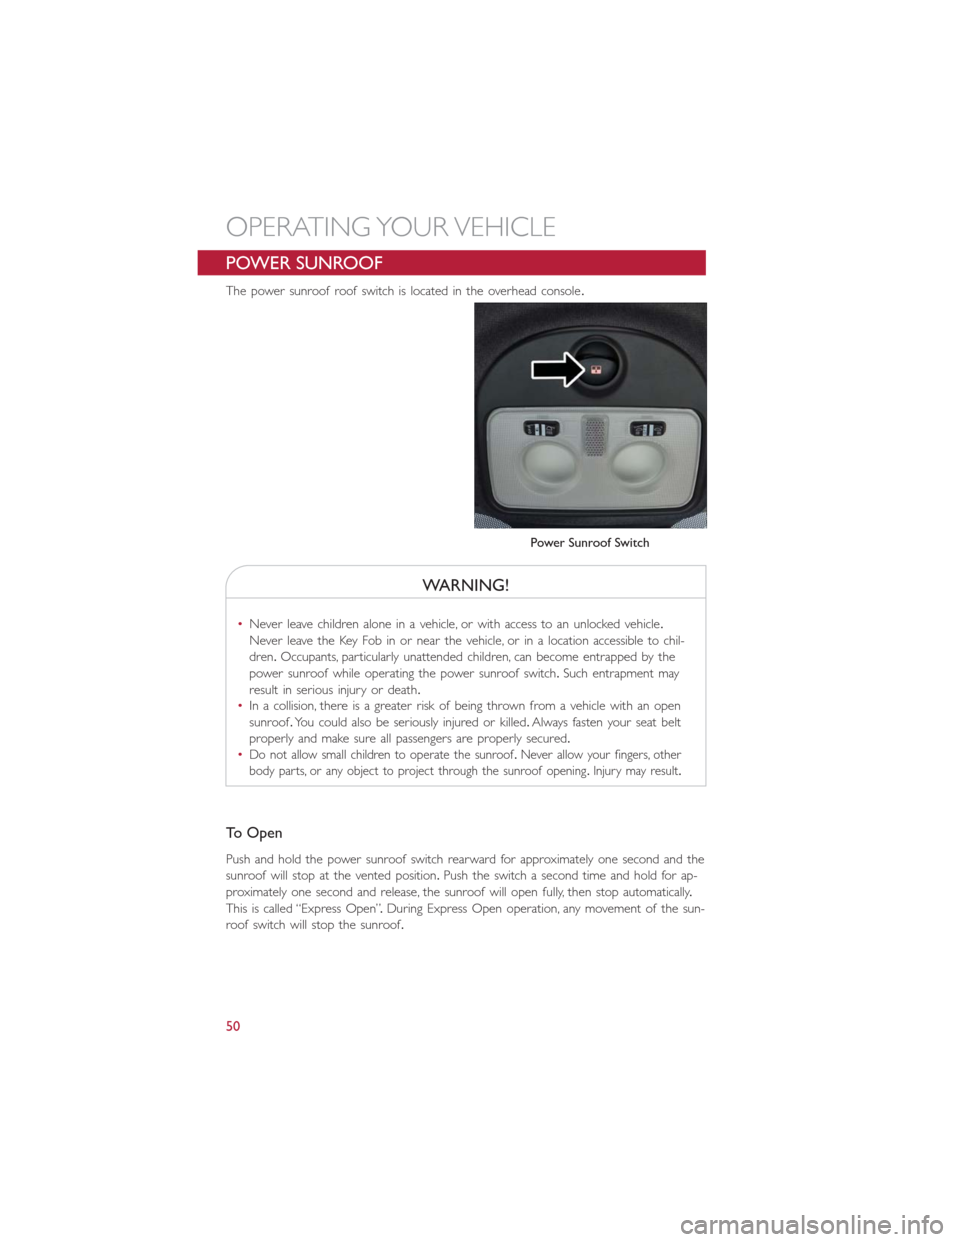
The power sunroof roof switch is located in the overhead console.
WARNING!
•Never leave children alone in a vehicle, or with access to an unlocked vehicle.
Never leave the Key Fob in or near the vehicle, or in a location accessible to chil-
dren.Occupants, particularly unattended children, can become entrapped by the
power sunroof while operating the power sunroof switch.Such entrapment may
result in serious injury or death.
•In a collision, there is a greater risk of being thrown from a vehicle with an open
sunroof.You could also be seriously injured or killed.Always fasten your seat belt
properly and make sure all passengers are properly secured.
•
Do not allow small children to operate the sunroof.Never allow your fingers, other
body parts, or any object to project through the sunroof opening.Injury may result.
To Open
Push and hold the power sunroof switch rearward for approximately one second and the
sunroof will stop at the vented position.Push the switch a second time and hold for ap-
proximately one second and release, the sunroof will open fully, then stop automatically.
This is called “Express Open”.During Express Open operation, any movement of the sun-
roof switch will stop the sunroof.
Power Sunroof Switch
OPERATING YOUR VEHICLE
50
Page 53 of 132
To Close
With the sunroof in the full open position, pull the power sunroof button and hold it for
approximately one second, the sunroof will return to the vented position.Pull the switch
a second time and hold for approximately one second to completely close the sunroof.
Pinch Protect Feature
This feature will detect an obstruction in the opening of the sunroof during Express
Close operation.If an obstruction in the path of the sunroof is detected, the sunroof will
automatically retract.Remove the obstruction if this occurs.Next, push the switch for-
ward and release to Express Close.
Wind Buffeting
Wind buffeting can be described as the perception of pressure on the ears or a
helicopter-type sound in the ears.Your vehicle may exhibit wind buffeting with the win-
dows down, or the sunroof (if equipped) in certain open or partially open positions.This
is a normal occurrence and can be minimized.If the buffeting occurs with the rear win-
dows open, open the front and rear windows together to minimize the buffeting.If the
buffeting occurs with the sunroof open, adjust the sunroof opening to minimize the buf-
feting or open any window.
Emergency Operation
In case of electrical failure, the sunroof can be operated with the hex wrench that is lo-
cated in the glove compartment.There is a plug located in the rear of the sunroof open-
ing at the center of the vehicle.Removing the plug reveals a hex opening in the motor
assembly of the sunroof.Insert the hex wrench and turn, moving the sunroof to the de-
sired location.
Sun Shade — If Equipped
For vehicles equipped with either a power sunroof or a fixed glass roof, there is a sun
shade that can be open or closed.To open the sun shade, push the tab and move the
shade to a full open position.
OPERATING YOUR VEHICLE
51
Page 54 of 132
YOUR VEHICLE'S SOUND SYSTEM
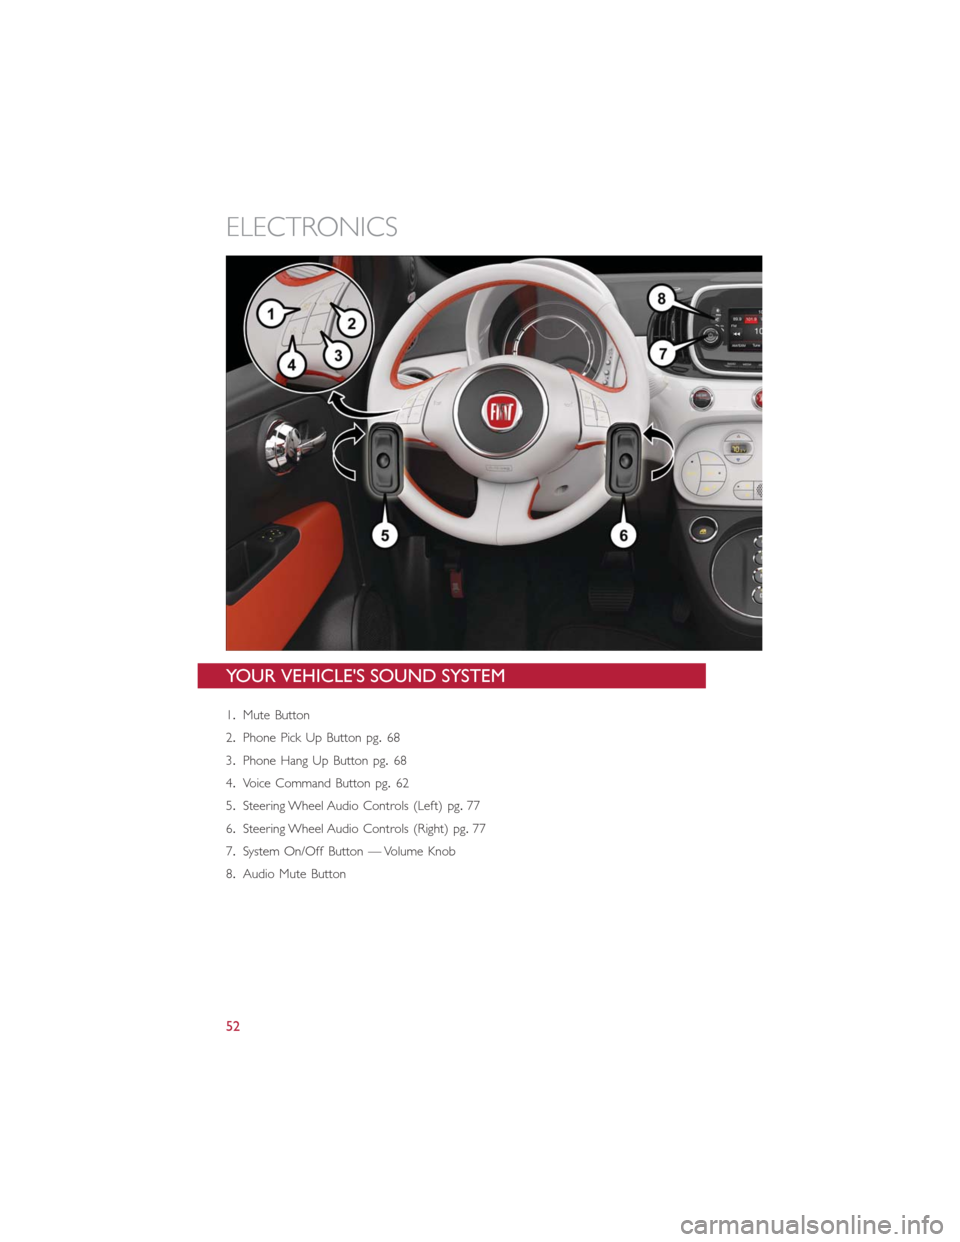
1.Mute Button
2.Phone Pick Up Button pg.68
3.Phone Hang Up Button pg.68
4.Voice Command Button pg.62
5.Steering Wheel Audio Controls (Left) pg.77
6.Steering Wheel Audio Controls (Right) pg.77
7.System On/Off Button — Volume Knob
8.Audio Mute Button
ELECTRONICS
52
Page 55 of 132
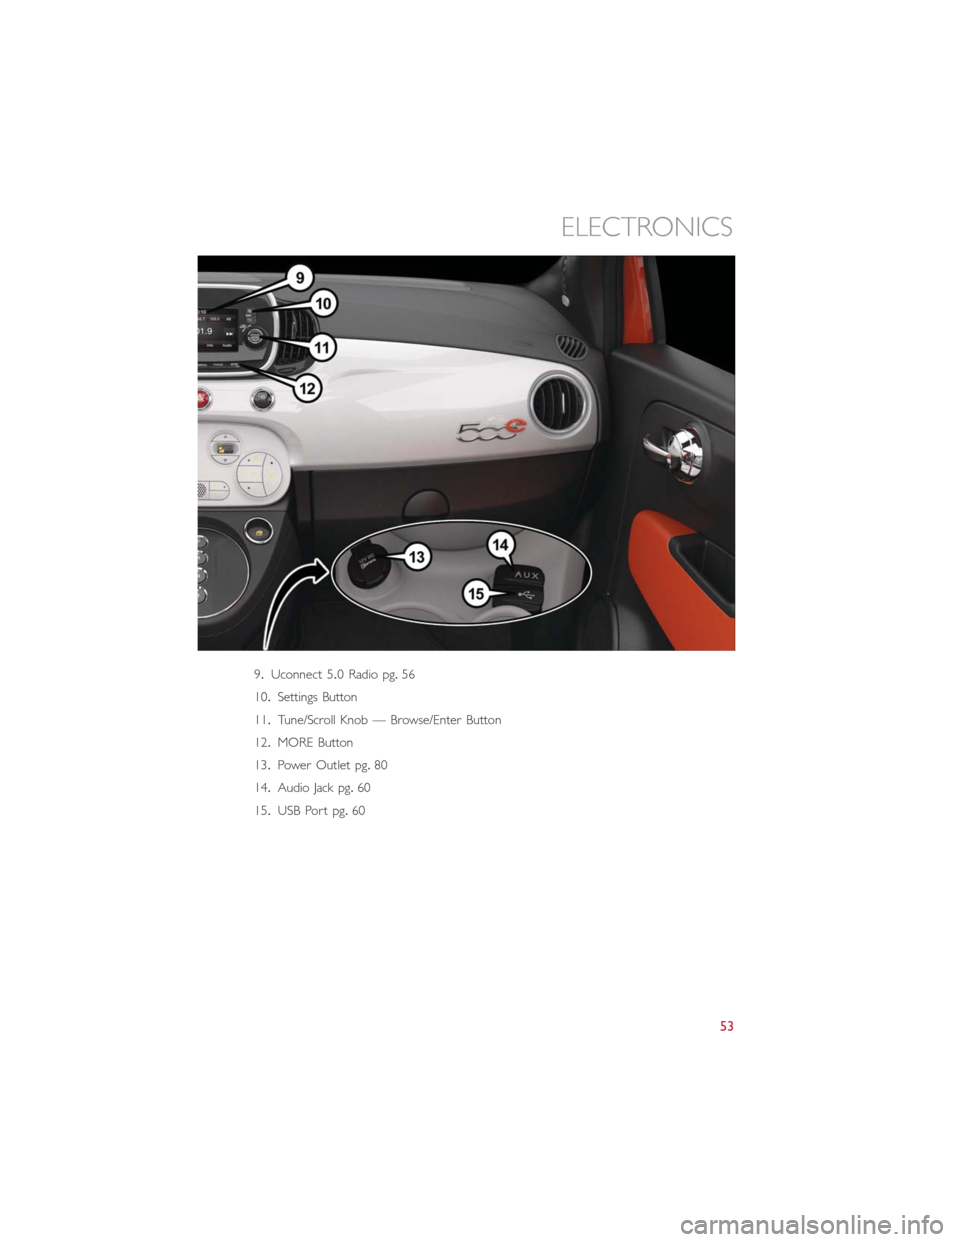
9.Uconnect 5.0 Radio pg.56
10.Settings Button
11.Tune/Scroll Knob — Browse/Enter Button
12.MORE Button
13.Power Outlet pg.80
14.Audio Jack pg.60
15.USB Port pg.60
ELECTRONICS
53
Page 56 of 132
CYBERSECURITY
Your vehicle may be a connected vehicle and may be equipped with both wired and
wireless networks.These networks allow your vehicle to send and receive information.
This information allows systems and features in your vehicle to function properly.
Your vehicle may be equipped with certain security features to reduce the risk of unau-
thorized and unlawful access to vehicle systems and wireless communications.Vehicle soft-
ware technology continues to evolve over time and FCA US LLC, working with its suppli-
ers, evaluates and takes appropriate steps as needed.Similar to a computer or other
devices, your vehicle may require software updates to improve the usability and perfor-
mance of your systems or to reduce the potential risk of unauthorized and unlawful ac-
cess to your vehicle systems.
The risk of unauthorized and unlawful access to your vehicle systems may still exist, even
if the most recent version of vehicle software (such as Uconnect software) is installed.
WARNING!
•It is not possible to know or to predict all of the possible outcomes if your vehi-
cle’s systems are breached.It may be possible that vehicle systems, including safety
related systems, could be impaired or a loss of vehicle control could occur that
may result in an accident involving serious injury or death.
•ONLY insert media (e.g., USB, SD card, or CD) into your vehicle if it came from a
trusted source.Media of unknown origin could possibly contain malicious software,
and if installed in your vehicle, it may increase the possibility for vehicle systems to
be breached.
•As always, if you experience unusual vehicle behavior, take your vehicle to your
nearest authorized dealer immediately.
NOTE:
•FCA or your dealer may contact you directly regarding software updates.
•To help further improve vehicle security and minimize the potential risk of a security
breach, vehicle owners should:
•Routinely check www.driveuconnect.com/software-update to learn about available
Uconnect software updates.
•Only connect and use trusted media devices (e.g.personal mobile phones, USBs,
CDs).
ELECTRONICS
54
Page 57 of 132
Privacy of any wireless and wired communications cannot be assured.Third parties may
unlawfully intercept information and private communications without your consent.For
further information, refer to “Onboard Diagnostic System (OBD II) Cybersecurity” in
“Maintaining Your Vehicle” in your Owner’s Manual on the DVD.
IDENTIFYING YOUR RADIO
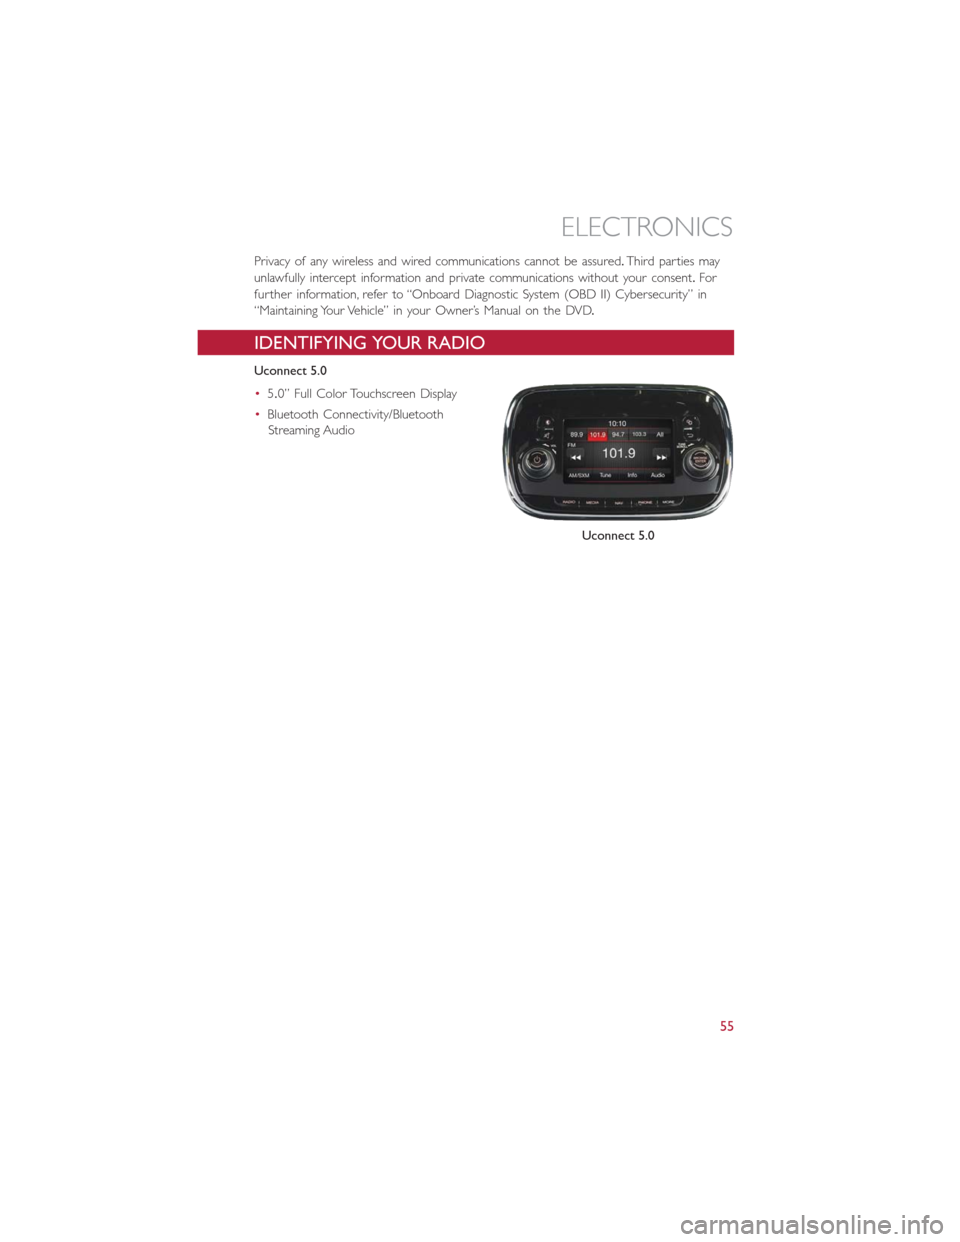
Uconnect 5.0
•5.0” Full Color Touchscreen Display
•Bluetooth Connectivity/Bluetooth
Streaming Audio
Uconnect 5.0
ELECTRONICS
55
Page 58 of 132
UCONNECT 5.0
NOTE:
Do NOT attach any object to the touchscreen, doing so can result in damage to the
touchscreen.
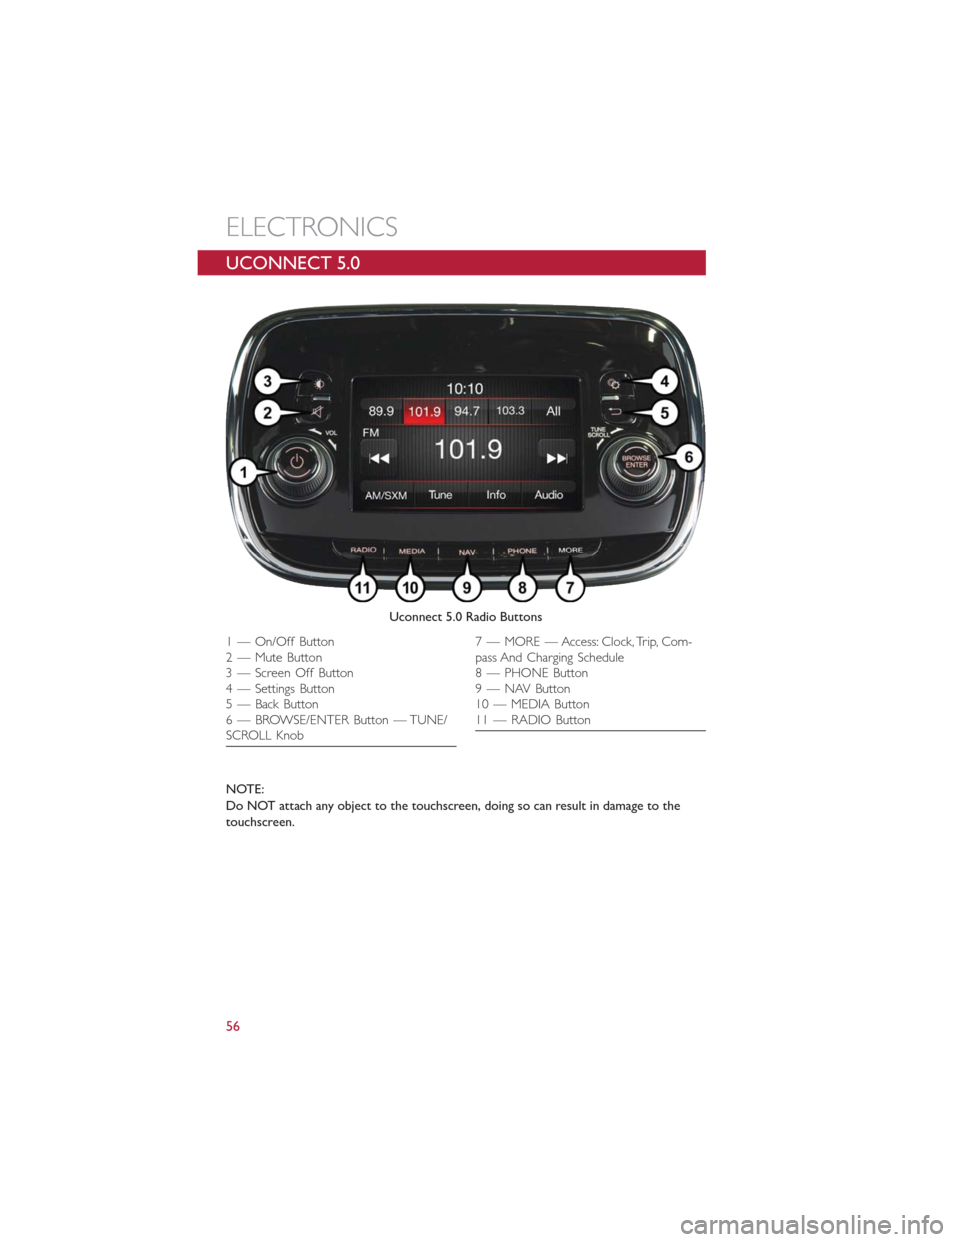
Uconnect 5.0 Radio Buttons
1 — On/Off Button
2 — Mute Button
3 — Screen Off Button
4 — Settings Button
5 — Back Button
6 — BROWSE/ENTER Button — TUNE/
SCROLL Knob7 — MORE — Access: Clock, Trip, Com-
pass And Charging Schedule
8 — PHONE Button
9 — NAV Button
10 — MEDIA Button
11 — RADIO Button
ELECTRONICS
56
Page 59 of 132
Clock Setting
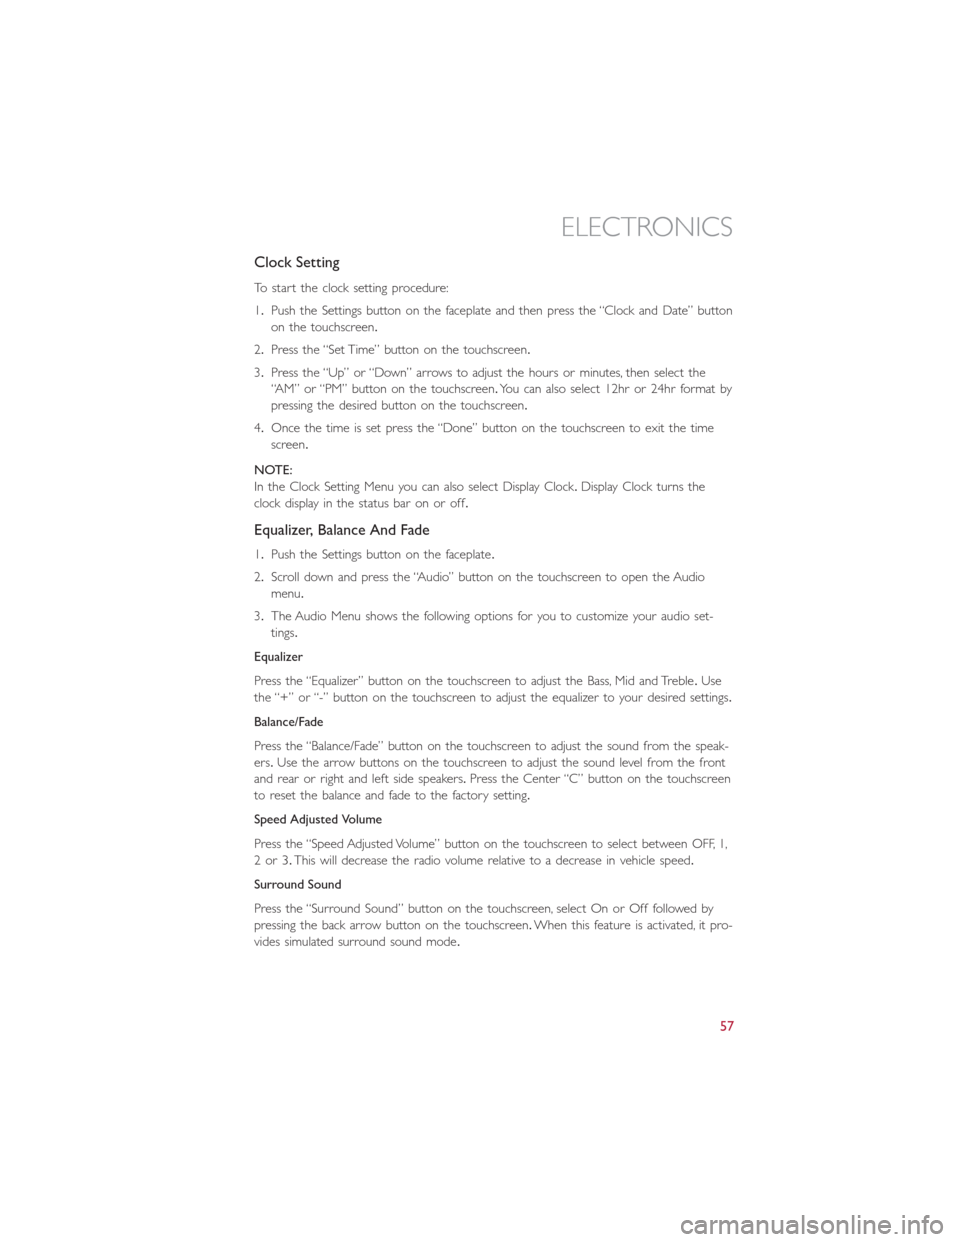
To start the clock setting procedure:
1.Push the Settings button on the faceplate and then press the “Clock and Date” button
on the touchscreen.
2.Press the “Set Time” button on the touchscreen.
3.Press the “Up” or “Down” arrows to adjust the hours or minutes, then select the
“AM” or “PM” button on the touchscreen.You can also select 12hr or 24hr format by
pressing the desired button on the touchscreen.
4.Once the time is set press the “Done” button on the touchscreen to exit the time
screen.
NOTE:
In the Clock Setting Menu you can also select Display Clock.Display Clock turns the
clock display in the status bar on or off.
Equalizer, Balance And Fade
1.Push the Settings button on the faceplate.
2.Scroll down and press the “Audio” button on the touchscreen to open the Audio
menu.
3.The Audio Menu shows the following options for you to customize your audio set-
tings.
Equalizer
Press the “Equalizer” button on the touchscreen to adjust the Bass, Mid and Treble.Use
the “+” or “-” button on the touchscreen to adjust the equalizer to your desired settings.
Balance/Fade
Press the “Balance/Fade” button on the touchscreen to adjust the sound from the speak-
ers.Use the arrow buttons on the touchscreen to adjust the sound level from the front
and rear or right and left side speakers.Press the Center “C” button on the touchscreen
to reset the balance and fade to the factory setting.
Speed Adjusted Volume
Press the “Speed Adjusted Volume” button on the touchscreen to select between OFF, 1,
2or3.This will decrease the radio volume relative to a decrease in vehicle speed.
Surround Sound
Press the “Surround Sound” button on the touchscreen, select On or Off followed by
pressing the back arrow button on the touchscreen.When this feature is activated, it pro-
vides simulated surround sound mode.
ELECTRONICS
57
Page 60 of 132
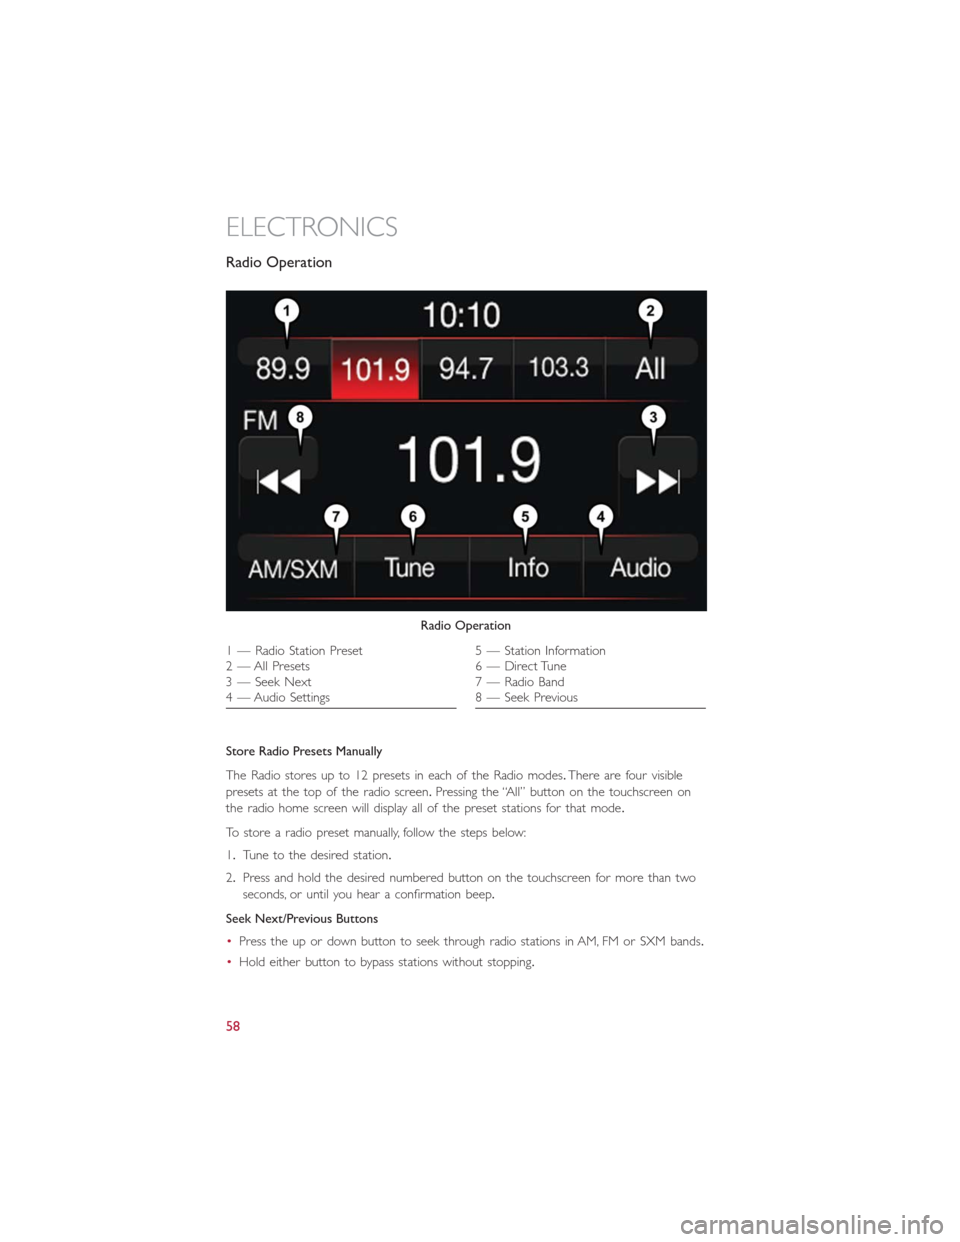
Radio Operation
Store Radio Presets Manually
The Radio stores up to 12 presets in each of the Radio modes.There are four visible
presets at the top of the radio screen.Pressing the “All” button on the touchscreen on
the radio home screen will display all of the preset stations for that mode.
To store a radio preset manually, follow the steps below:
1.Tune to the desired station.
2.Press and hold the desired numbered button on the touchscreen for more than two
seconds, or until you hear a confirmation beep.
Seek Next/Previous Buttons
•Press the up or down button to seek through radio stations in AM, FM or SXM bands.
•Hold either button to bypass stations without stopping.
Radio Operation
1 — Radio Station Preset
2 — All Presets
3 — Seek Next
4 — Audio Settings5 — Station Information
6 — Direct Tune
7 — Radio Band
8 — Seek Previous
ELECTRONICS
58