buttons FIAT 500L 2015 2.G Owner's Manual
[x] Cancel search | Manufacturer: FIAT, Model Year: 2015, Model line: 500L, Model: FIAT 500L 2015 2.GPages: 148, PDF Size: 3.77 MB
Page 77 of 148

The Uconnect® Phone feature enables you to place and receive hands-free mobile
phone calls.Drivers can also place mobile phone calls using their voice or by using the
buttons on the touchscreen (see Voice Command section).
The hands-free calling feature is made possible through Bluetooth® technology — the
global standard that enables different electronic devices to connect to each other wire-
lessly.
If the Uconnect® Phone Buttonexists on your steering wheel, you then have the
Uconnect® Phone features.
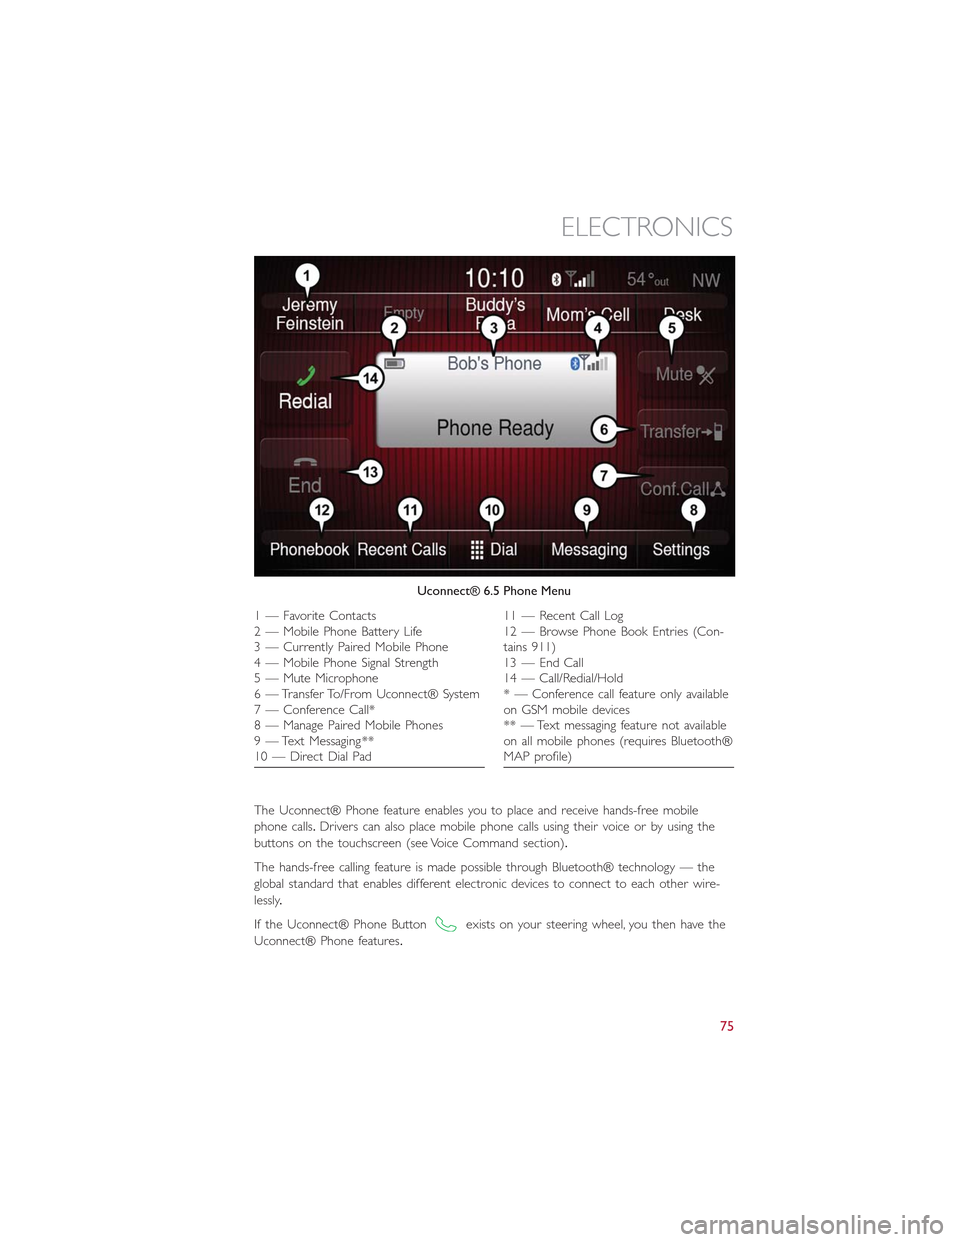
Uconnect® 6.5 Phone Menu
1—FavoriteContacts2 — Mobile Phone Battery Life3 — Currently Paired Mobile Phone4 — Mobile Phone Signal Strength5 — Mute Microphone6 — Transfer To/From Uconnect® System7 — Conference Call*8 — Manage Paired Mobile Phones9 — Text Messaging **10 — Direct Dial Pad
11 — Recent Call Log12 — Browse Phone Book Entries (Con-tains 911)13 — End Call14 — Call/Redial/Hold* — Conference call feature only availableon GSM mobile devices** — Text messaging feature not availableon all mobile phones (requires Bluetooth®MAP profile)
ELECTRONICS
75
Page 87 of 148

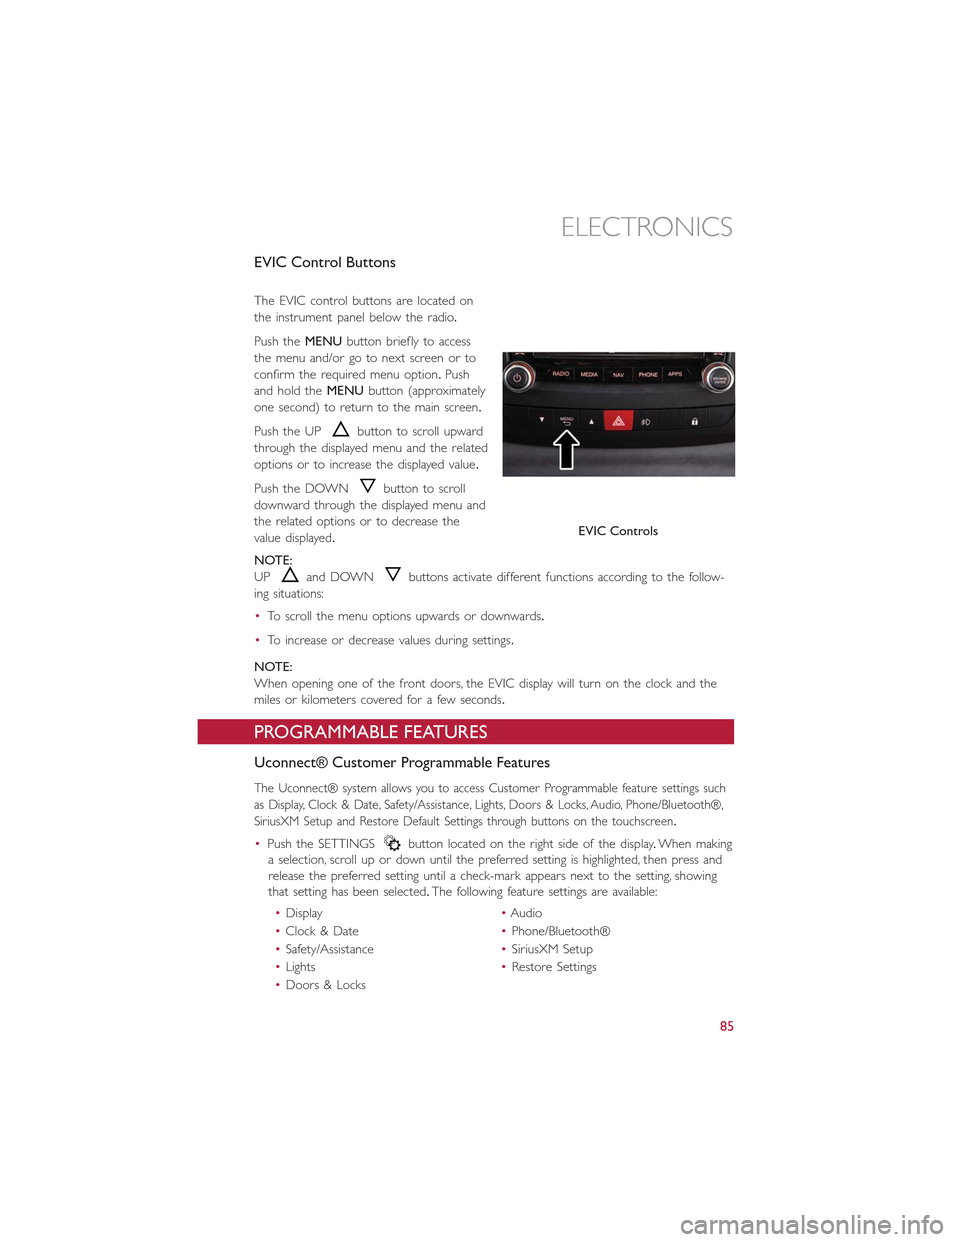
EVIC Control Buttons
The EVIC control buttons are located on
the instrument panel below the radio.
Push theMENUbutton briefly to access
the menu and/or go to next screen or to
confirm the required menu option.Push
and hold theMENUbutton (approximately
one second) to return to the main screen.
Push the UPbutton to scroll upward
through the displayed menu and the related
options or to increase the displayed value.
Push the DOWNbutton to scroll
downward through the displayed menu and
the related options or to decrease the
value displayed.
NOTE:
UPand DOWNbuttons activate different functions according to the follow-
ing situations:
•To scroll the menu options upwards or downwards.
•To increase or decrease values during settings.
NOTE:
When opening one of the front doors, the EVIC display will turn on the clock and the
miles or kilometers covered for a few seconds.
PROGRAMMABLE FEATURES
Uconnect® Customer Programmable Features
The Uconnect® system allows you to access Customer Programmable feature settings such
as Display, Clock & Date, Safety/Assistance, Lights, Doors & Locks, Audio, Phone/Bluetooth®,
SiriusXM Setup and Restore Default Settings through buttons on the touchscreen.
•Push the SETTINGSbutton located on the right side of the display.When making
a selection, scroll up or down until the preferred setting is highlighted, then press and
release the preferred setting until a check-mark appears next to the setting, showing
that setting has been selected.The following feature settings are available:
•Display•Audio
•Clock & Date•Phone/Bluetooth®
•Safety/Assistance•SiriusXM Setup
•Lights•Restore Settings
•Doors & Locks
EVIC Controls
ELECTRONICS
85
Page 88 of 148

UNIVERSAL GARAGE DOOR OPENER (HomeLink®)
HomeLink®replaces up to three hand-held transmitters that operate devices such
as garage door openers, motorized gates, lighting or home security systems.The
HomeLink® unit is powered by your vehicles 12 Volt battery.
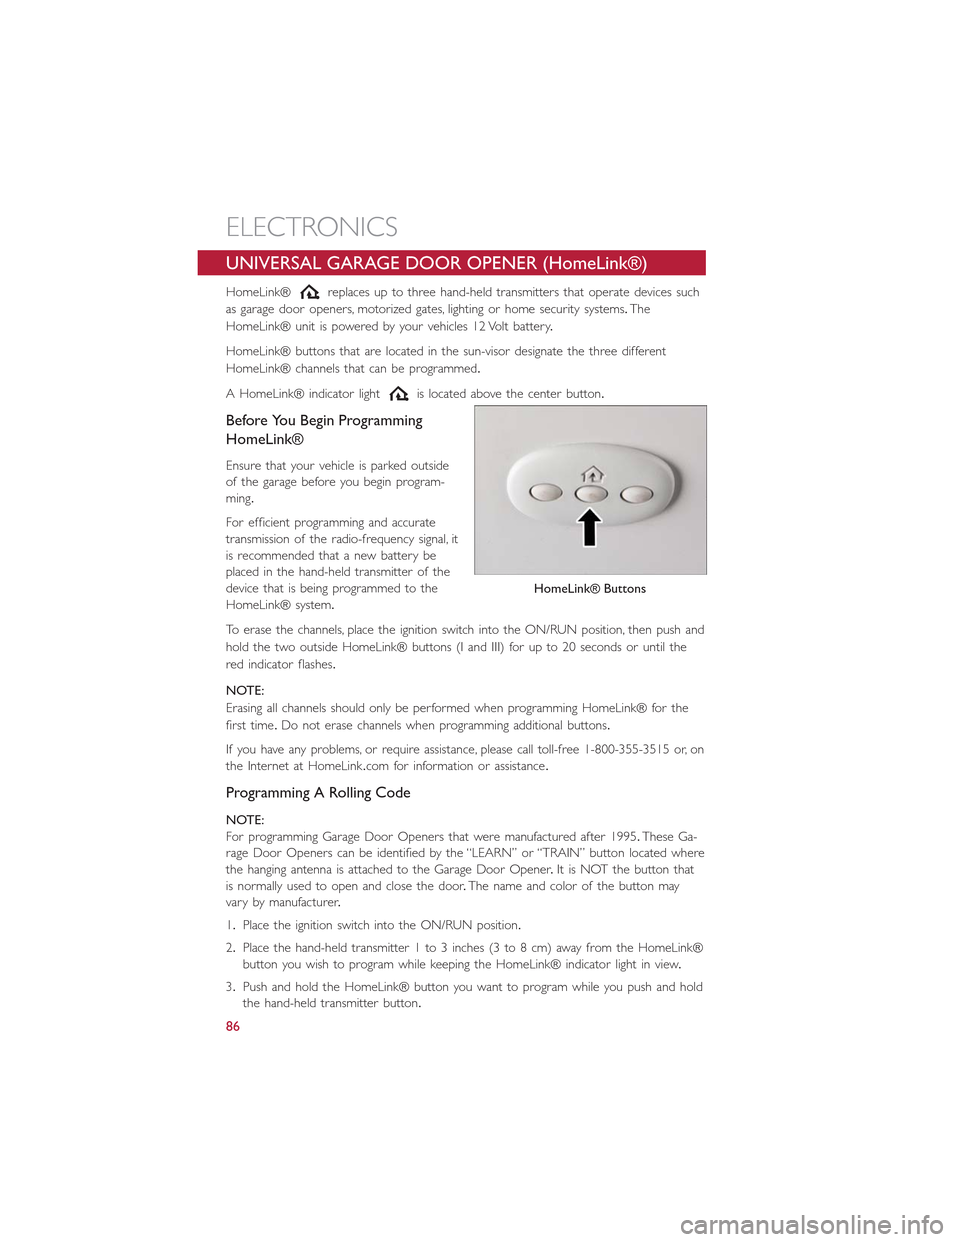
HomeLink® buttons that are located in the sun-visor designate the three different
HomeLink® channels that can be programmed.
A HomeLink® indicator lightis located above the center button.
Before You Begin Programming
HomeLink®
Ensure that your vehicle is parked outside
of the garage before you begin program-
ming.
For efficient programming and accurate
transmission of the radio-frequency signal, it
is recommended that a new battery be
placed in the hand-held transmitter of the
device that is being programmed to the
HomeLink® system.
To erase the channels, place the ignition switch into the ON/RUN position, then push and
hold the two outside HomeLink® buttons (I and III) for up to 20 seconds or until the
red indicator flashes.
NOTE:
Erasing all channels should only be performed when programming HomeLink® for the
first time.Do not erase channels when programming additional buttons.
If you have any problems, or require assistance, please call toll-free 1-800-355-3515 or, on
the Internet at HomeLink.com for information or assistance.
Programming A Rolling Code
NOTE:
For programming Garage Door Openers that were manufactured after 1995.These Ga-
rage Door Openers can be identified by the “LEARN” or “TRAIN” button located where
the hanging antenna is attached to the Garage Door Opener.It is NOT the button that
is normally used to open and close the door.The name and color of the button may
vary by manufacturer.
1.Place the ignition switch into the ON/RUN position.
2.Place the hand-held transmitter 1 to 3 inches (3 to 8 cm) away from the HomeLink®
button you wish to program while keeping the HomeLink® indicator light in view.
3.Push and hold the HomeLink® button you want to program while you push and hold
the hand-held transmitter button.
HomeLink® Buttons
ELECTRONICS
86
Page 89 of 148

4.Continue to hold both buttons and observe the indicator light.The HomeLink® indi-
cator will flash slowly and then rapidly after HomeLink® has received the frequency
signal from the hand-held transmitter.Release both buttons after the indicator light
changes from slow to rapid.
5.At the garage door opener motor (in the garage), locate the “LEARN” or “TRAIN-
ING” button.This can usually be found where the hanging antenna wire is attached to
the garage door opener motor.Firmly push and release the “LEARN” or “TRAINING”
button.
NOTE:
You have 30 seconds in which to initiate the next step after the LEARN button has been
pushed.
6.Return to the vehicle and push the programmed HomeLink® button twice (holding
the button for two seconds each time).If the device is plugged in and activates, pro-
gramming is complete.
NOTE:
If the device does not activate, push the button a third time (for two seconds) to com-
plete the training.
7.To program the remaining two HomeLink® buttons, repeat each step for each re-
maining button.DO NOT erase the channels.
Programming A Non-Rolling Code
NOTE:
For programming Garage Door Openers manufactured before 1995.
1.Turn the ignition switch to the ON/RUN position.
2.Place the hand-held transmitter 1 to 3 inches (3 to 8 cm) away from the HomeLink®
button you wish to program while keeping the HomeLink® indicator light in view.
3.Push and hold the HomeLink® button you want to program while you push and hold
the hand-held transmitter button.
4.Continue to hold both buttons and observe the indicator light.The HomeLink® indi-
cator will flash slowly and then rapidly after HomeLink® has received the frequency
signal from the hand-held transmitter.Release both buttons after the indicator light
changes from slow to rapid.
5.Push and hold the programmed HomeLink® button and observe the indicator light.If
the indicator light stays on constantly, programming is complete and the garage door
(or device) should activate when the HomeLink® button is pushed.
6.To program the two remaining HomeLink® buttons, repeat each step for each re-
maining button.DO NOT erase the channels.
ELECTRONICS
87