engine FIAT 500X 2015 2.G Owner's Guide
[x] Cancel search | Manufacturer: FIAT, Model Year: 2015, Model line: 500X, Model: FIAT 500X 2015 2.GPages: 240, PDF Size: 10.72 MB
Page 72 of 240
❒System partially active: the system (if
active) does not provide limited braking,
but guarantees automatic braking or
additional assistance in braking stage,
where the driver does not brake at all or
not sufficiently in the event of a
potential frontal impact. The visual and
acoustic warnings are deactivated,
and will not be provided;
❒System deactivated: the system
does not provide visual and acoustic
warnings, limited braking, automatic
braking or additional assistance in
braking stage. The system will therefore
provide no indication of a possible
accident.Activation/deactivationIf the Full Brake Control system has
been correctly activated with the
Uconnect™system, this will be active
each time the engine is started.
Following a deactivation, the system will
not warn the driver about the possible
collision with the preceding vehicle,
regardless of the setting selected with
theUconnect™system.
The system deactivation status will not
be stored when the engine is switched
off: if the system is deactivated when
the engine is switched off, it will be
active when it is next started.This function is not active at a speed
lower than 7 km/h or higher than 200
km/h.
The system is only active if:
❒it is correctly activated via the
Uconnect™system;
❒the ignition device is at MAR;
❒the vehicle speed is between 7 and
200 km/h;
❒the front seat belts are fastened.
Changing the system sensitivityThe sensitivity of the system can be
changed through theUconnect™
system menu, choosing from one of the
following three options: "Near", "Med"
or "Far". See the description in the
Uconnect™supplement for how to
change the settings.
The pre-set option is "Med". With this
setting, the system warns the driver
of a possible collision with the vehicle in
front when that vehicle is at a standard
distance, between that of the other
two settings.With the system sensitivity set to "Far",
the system will warn the driver of a
possible collision with the vehicle in
front when that vehicle is at a greater
distance, thus providing the possibility
of acting on the brakes more lightly and
gradually. This setting provides the
drivers with the maximum possible
reaction time to prevent a potential
accident.
With the option set to "Near", the
system will warn the driver of a possible
collision with the vehicle in front when
that vehicle is close. This setting offers
the driver a lower reaction time
compared to the "Med" and "Far"
settings, in the event of a potential
collision, but permits more dynamic
driving of the vehicle.
The system sensitivity setting is kept in
the memory when the engine is
switched off.
System limited operation signalIf the dedicated message is displayed,
a condition limiting the system
operation may have occurred. The
possible reasons of this limitation are
something blocking the camera view or
a fault.
If an obstruction is signalled, clean the
area of the windscreen indicated in
fig. 58 and check that the message has
disappeared.
70
SAFETY
15-12-2014 8:23 Pagina 70
Page 75 of 240
Low tyre pressureThe system warns the driver if one or
more tyres are flat by switching on
the
warning light on the instrument
panel and a warning message on
the display, along with an acoustic
signal. .
If the system does not recognise the
pressure value of one or more tyres, the
display will show dashes "– –"
This indication is displayed also when
turning the engine off and on again until
the RESET procedure is carried out.
Reset procedureThe iTPMS needs an initial "self-
learning" phase (with length depending
on the driving style and road conditions:
optimal conditions being driving on a
straight road at 80 km/h for at least 20
minutes) which starts when the RESET
procedure is carried out.
The RESET procedure must be carried
out:
❒whenever the tyre pressure is
modified;
❒when even only one tyre is changed;
❒when tyres are rotated/inverted;
❒when the space-saver wheel is fitted.Before carrying out the RESET
procedure, inflate the tyres to the rated
pressure values specified in the inflation
pressure table (see "Wheels" paragraph
in the "Technical specifications"
chapter).
If the RESET is not carried out, in all
above cases, the
warning light may
give false indications on one or more
tyres.
To carry out the RESET procedure, with
the vehicle stopped and the ignition
device at MAR, use the Main Menu as
follows:
❒go to "Vehicle info" and then to
"Reset tyre pressure"
❒press the "OK" and hold down (more
than 2 seconds)
❒the display will show the procedure
progress (with a graphic bar) till the
RESET is completed.
At the end of the RESET procedure the
display will show the "Reset saved"
message, indicating that the self-
learning has been started.
Working conditionsThe system is active for speeds above
15 km/h.In a few situations such as sporty
driving, particular conditions of the road
surface (e.g. icy, snowy, unsurfaced
roads...) the signalling may be delayed
or partial in detecting the contemporary
deflation of more than one tyre.
Under special conditions (e.g. vehicle
loaded asymmetrically on one side,
damaged or worn tyre, fitting the
space-saver wheel, fitting snow chains,
fitting different tyres on the axles) the
system may give false indications or be
temporarily deactivated.
If the system is temporarily deactivated
the
warning light flashes for about
75 seconds and then is continuously
on; at the same time, the display shows
a warning message.
This indication is displayed also after
the engine has been switched off and
then on again if the correct operating
conditions are not restored.
WARNING
57)The system is an aid for vehicle driving,
it DOES NOT warn the driver about
incoming vehicles outside of the detection
areas. The driver must always maintain a
sufficient level of attention to the traffic and
road conditions and for controlling the
trajectory of the vehicle.
73
15-12-2014 8:23 Pagina 73
Page 99 of 240
WARNING
87)Do not apply stickers or other objects
on the steering wheel, on the dashboard in
the passenger side airbag area, on side
upholstery on the roof or on the seats.
Never put objects (e.g. mobile phones) on
the passenger's side dashboard since
they could interfere with correct inflation of
the airbag and also cause serious injury
to the passengers.
88)Always drive keeping your hands on
the steering wheel rim so that the airbag
can inflate freely if necessary. Do not drive
with your body bent forward. Keep your
back straight against the backrest.
89)When an active passenger airbag is
fitted, DO NOT install rearward facing child
restraint systems on the front passenger
seat. Deployment of the airbag in an
accident could cause fatal injuries to the
child regardless of the severity of the
impact. Therefore, always deactivate the
passenger side airbag when a rear facing
child restraint system is installed on the
front passenger seat. The front passenger
seat must also be positioned back as far as
possible in order to prevent the child
restraint system from coming into contact
with the dashboard. Immediately reactivate
the passenger airbag as soon as the child
restraint system has been removed.
90)To deactivate the airbags using the
instrument panel menu, see the description
in the "Knowing the instrument panel"
chapter, "Menu Options" paragraph.91)Do not hang rigid objects on the coat
hooks and the support handles.
92)Do not rest your head, arms or elbows
on the door, windows or in the window
bag area to prevent injury during
deployment.
93)Never lean your head, arms or elbows
out of the window.
94)If, when the ignition device is turned to
MAR, the
warning light does not switch
on or stays on whilst driving, a fault may
have occurred in the restraint systems. In
this case the airbags or pretensioners may
not be deployed in an impact or, in a lower
number of cases, they may be deployed
accidentally. Before proceeding, contact a
Fiat Dealership immediately to have the
system checked.
95)On some versions, if the
OFFor
ONLED (located on the dashboard
trim) is faulty, the
warning light comes
on in the instrument panel.
96)If a side bag is present, do not cover
the front seat backrests with extra covers.
97)Do not travel carrying objects in your
lap, in front of your chest or between your
lips (pipe, pencils, etc.). They could cause
severe injury if the airbag is deployed.
98)If the vehicle has been subject to theft,
attempted theft, vandalism, or flooding,
have the airbag system inspected at a Fiat
Dealership.99)If the ignition device is at MAR, even if
the engine is switched off, airbags may
be deployed when the vehicle is stationary
and hit by another vehicle. Therefore,
even if the vehicle is stationary, when an
active front passenger airbag is fitted, DO
NOT install rearward facing child restraint
systems on the front passenger seat.
Deployment of the airbag following an
impact could cause fatal injuries to the
child. Therefore, always deactivate the
passenger side airbag when a rear facing
child restraint system is installed on the
front passenger seat. The front passenger
seat must also be positioned back as far as
possible in order to prevent the child
restraint system from coming into contact
with the dashboard. Immediately reactivate
the passenger airbag as soon as the child
restraint system has been removed. Also
remember that, if the ignition device is
set to STOP, none of the safety devices
(airbags or pretensioners) will be deployed
in the event of collision. Non-deployment
in such cases does not indicate a system
malfunction.
100)Malfunction of the
warning light is
indicated by the activation of an airbag
failure icon and dedicated message on the
instrument panel display. The pyrotechnic
charges are not disabled. Before
proceeding, contact a Fiat Dealership
immediately to have the system checked
101)The front airbag deployment threshold
is higher than that of the pretensioners.
When the impact is between the two
deployment thresholds, it is normal that
pretensioners only are engaged.
97
15-12-2014 8:23 Pagina 97
Page 101 of 240
STARTING AND DRIVING
Let’s get to the "heart" of the vehicle:
seeing how you can exploit all of its
potential to the full.
We’ll look at how to drive it safely in any
situation, so that it can be a welcome
companion, with our comfort and
our wallets in mind.STARTING THE ENGINE .................100
ELECTRIC PARKING BRAKE (EPB).101
MANUAL GEARBOX .......................10
AUTOMATIC TRANSMISSION.........10
START&STOP SYSTEM ..................107
SPEED LIMITER ..............................108
ELECTRONIC CRUISE CONTROL ..109
MOOD SELECTOR (DRIVING
MODE SELECTOR) .........................110
PARK ASSIST SYSTEM ..................112
LANE ASSIST SYSTEM (LANE
CROSSING WARNING) ...................114
REAR VIEW CAMERA .....................116
TOWING TRAILERS ........................117
REFUELLING THE VEHICLE ...........119
99
15-12-2014 8:23 Pagina 99
5 4
Page 102 of 240
STARTING THE
ENGINEBefore starting the engine, adjust the
seat, the interior rear view mirrors,
the door mirrors and fasten the seat
belt correctly.
Never press the accelerator pedal for
starting the engine.
If necessary, messages indicating the
starting procedure can be shown on
the display.ENGINE STARTING
PROCEDURE
103) 104) 105) 106)33) 34) 35) 36)
Versions with manual gearboxProceed as follows:
❒engage the electric parking brake
and place the gear lever in neutral;
❒bring the ignition device to MAR. On
Diesel versions, warning light
lights up in the instrument panel:
wait for the warning light to switch off;
❒fully depress the clutch pedal without
touching the accelerator;
❒turn the ignition device to AVV and
release it as soon as the engine starts;❒if the engine does not start within 10
seconds, bring the ignition device
back to STOP and wait for 10-15
seconds before repeating the starting
procedure.
❒after the manoeuvre has been
repeated, if the problem persists,
contact a Fiat Dealership.
Versions with automatic
transmissionProceed as follows:
❒engage
the electric parking brake
and set the gear lever to P (Park) or N
(Neutral);
❒fully depress the brake pedal without
touching the accelerator;
❒set the ignition device to AVV;
❒if the engine does not start, bring the
ignition device back to STOP and
wait for 10-15 seconds before
repeating the starting procedure;
❒after the manoeuvre has been
repeated, if the problem persists,
contact a Fiat Dealership.
ENGINE STARTING
F
AILURE
Starting the engine with electronic
key battery (Keyless Go) run down
or flatIf the ignition device does not respond
when the relevant button is pressed the
electronic key battery might be run
down or flat. Therefore, the system
does not detect the presence of the
electronic key on board the vehicle and
displays a dedicated message. In this
case, rest the rounded edge of the
electronic key (the side opposite the
metal insert) on the ignition device and
press the button using the electronic
key. The ignition device is thus
activated and the engine can be
started.
WARNING
103)Do not try to start the engine by
pouring fuel or other flammable fluid inside
the throttle body air intake: this might
damage the engine and injury people
nearby.
104)It is dangerous to run the engine in
enclosed areas. The engine consumes
oxygen and produces carbon dioxide,
carbon monoxide and other toxic gases.
105)The brake servo is not operational
until the engine has been started; therefore
you need to apply much more force than
usual to the brake pedal.
100
STARTING AND DRIVING
12-1-2015 15:6 Pagina 100
Page 103 of 240
106)Do not start the engine by pushing,
towing or driving downhill. These
manoeuvres may damage the catalytic
converter.
WARNING
33)In the first period of use, i.e. in the first
1,600 km, we recommend not to demand
maximum performance from the vehicle
(for instance excessive accelerations,
extended travel at maximum speed,
sudden braking, etc.).
34)With the engine off, do not leave the
ignition device at MAR to prevent the
battery from draining.
35)A quick burst on the accelerator before
turning off the engine serves absolutely
no practical purpose; it wastes fuel and is
especially damaging to turbocharged
engines.
36)Warning light
will flash after
starting or during prolonged cranking to
indicate a fault with the glow plug heating
system. If the engine starts, the vehicle can
be used as normal, but a Fiat Dealership
must be contacted as soon as possible.
ELECTRIC PARKING
BRAKE (EPB)The vehicle is equipped with electric
parking brake (EPB) to guarantee better
use and optimal performance
compared to a manually operated
parking brake.
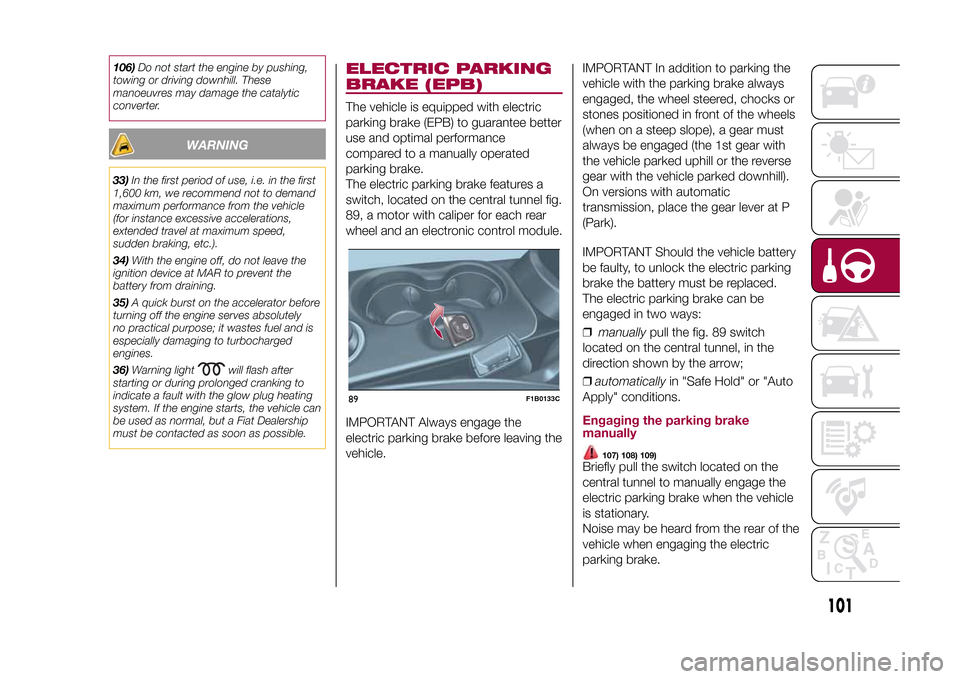
The electric parking brake features a
switch, located on the central tunnel fig.
89, a motor with caliper for each rear
wheel and an electronic control module.
IMPORTANT Always engage the
electric parking brake before leaving the
vehicle.IMPORTANT In addition to parking the
vehicle with the parking brake always
engaged, the wheel steered, chocks or
stones positioned in front of the wheels
(when on a steep slope), a gear must
always be engaged (the 1st gear with
the vehicle parked uphill or the reverse
gear with the vehicle parked downhill).
On versions with automatic
transmission, place the gear lever at P
(Park).
IMPORTANT Should the vehicle battery
be faulty, to unlock the electric parking
brake the battery must be replaced.
The electric parking brake can be
engaged in two ways:
❒manuallypull the fig. 89 switch
located on the central tunnel, in the
direction shown by the arrow;
❒automaticallyin "Safe Hold" or "Auto
Apply" conditions.
Engaging the parking brake
manually
107) 108) 109)
Briefly pull the switch located on the
central tunnel to manually engage the
electric parking brake when the vehicle
is stationary.
Noise may be heard from the rear of the
vehicle when engaging the electric
parking brake.
89
F1B0133C
101
12-1-2015 15:6 Pagina 101
Page 106 of 240
MANUAL GEARBOX
110)37)
To engage the gears, press the clutch
pedal fully and put the gear lever into
the required position (the diagram
for gear engagement is shown on the
knob ).
To engage 6
th
gear, operate the lever by
pressing it towards the right in order to
avoid engaging 4
th
gear by mistake.
The same applies to the shift from 6
th
to 5
th
gear.
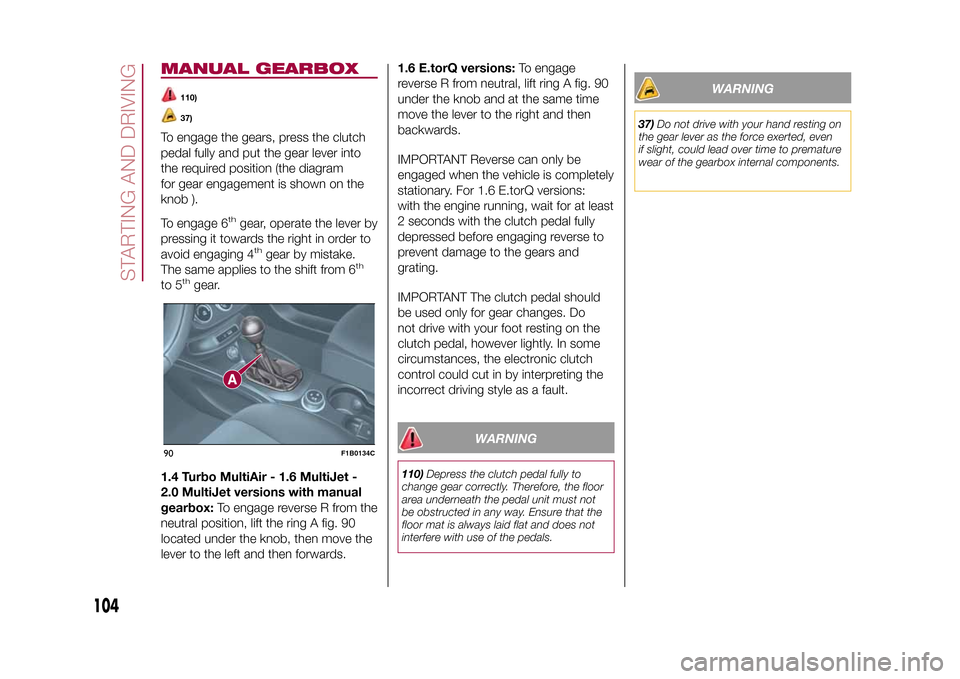
1.4 Turbo MultiAir - 1.6 MultiJet -
2.0 MultiJet versions with manual
gearbox:To engage reverse R from the
neutral position, lift the ring A fig. 90
located under the knob, then move the
lever to the left and then forwards.1.6 E.torQ versions:To engage
reverse R from neutral, lift ring A fig. 90
under the knob and at the same time
move the lever to the right and then
backwards.
IMPORTANT Reverse can only be
engaged when the vehicle is completely
stationary. For 1.6 E.torQ versions:
with the engine running, wait for at least
2 seconds with the clutch pedal fully
depressed before engaging reverse to
prevent damage to the gears and
grating.
IMPORTANT The clutch pedal should
be used only for gear changes. Do
not drive with your foot resting on the
clutch pedal, however lightly. In some
circumstances, the electronic clutch
control could cut in by interpreting the
incorrect driving style as a fault.
WARNING
110)Depress the clutch pedal fully to
change gear correctly. Therefore, the floor
area underneath the pedal unit must not
be obstructed in any way. Ensure that the
floor mat is always laid flat and does not
interfere with use of the pedals.
WARNING
37)Do not drive with your hand resting on
the gear lever as the force exerted, even
if slight, could lead over time to premature
wear of the gearbox internal components.
90
F1B0134C
104
STARTING AND DRIVING
12-1-2015 15:6 Pagina 104
Page 107 of 240
To select the "sequential" mode, move
the lever from D (Drive) to the left: the
position + (upper gear) or – (lower gear)
can be reached; these are unstable
positions, which means that the lever
always returns to the central position.
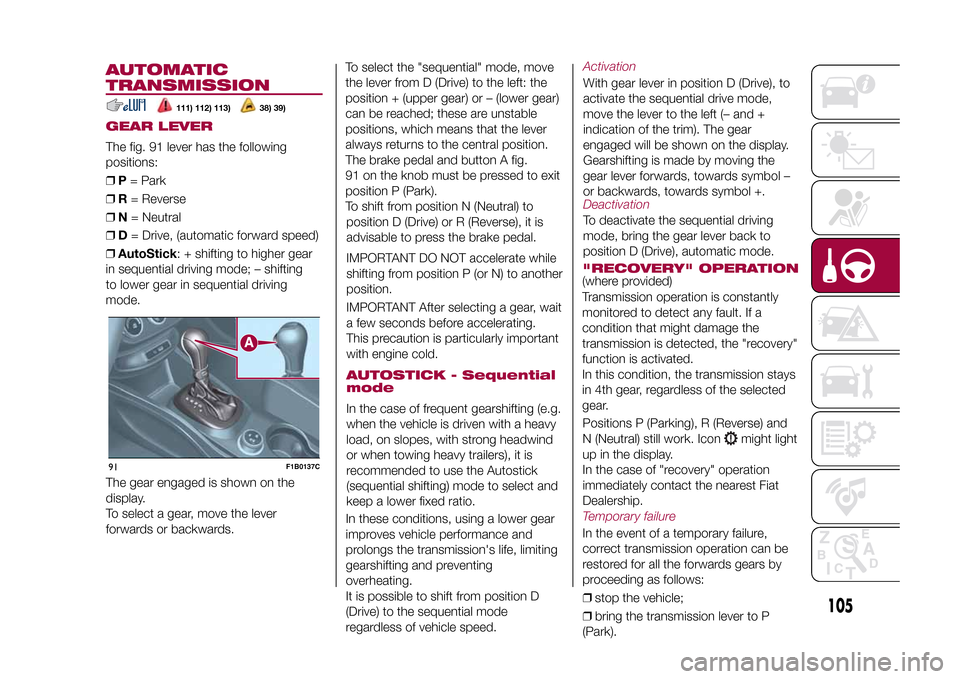
The brake pedal and button A fig.
91 on the knob must be pressed to exit
position P (Park).
To shift from position N (Neutral) to
position D (Drive) or R (Reverse), it is
advisable to press the brake pedal.
IMPORTANT DO NOT accelerate while
shifting from position P (or N) to another
position.
IMPORTANT After selecting a gear, wait
a few seconds before accelerating.
This precaution is particularly important
with engine cold.AUTOSTICK - Sequential
modeIn the case of frequent gearshifting (e.g.
when the vehicle is driven with a heavy
load, on slopes, with strong headwind
or when towing heavy trailers), it is
recommended to use the Autostick
(sequential shifting) mode to select and
keep a lower fixed ratio.
In these conditions, using a lower gear
improves vehicle performance and
prolongs the transmission's life, limiting
gearshifting and preventing
overheating.
It is possible to shift from position D
(Drive) to the sequential mode
regardless of vehicle speed.
ActivationWith gear lever in position D (Drive), to
activate the sequential drive mode,
move the lever to the left (– and +
indication of the trim). The gear
engaged will be shown on the display.
Gearshifting is made by moving the
gear lever forwards, towards symbol –
or backwards, towards symbol +.DeactivationTo deactivate the sequential driving
mode, bring the gear lever back to
position D (Drive), automatic mode."RECOVERY" OPERATION(where provided)
Transmission operation is constantly
monitored to detect any fault. If a
condition that might damage the
transmission is detected, the "recovery"
function is activated.
In this condition, the transmission stays
in 4th gear, regardless of the selected
gear.
Positions P (Parking), R (Reverse) and
N (Neutral) still work. Icon
might light
up in the display.
In the case of "recovery" operation
immediately contact the nearest Fiat
Dealership.
Temporary failureIn the event of a temporary failure,
correct transmission operation can be
restored for all the forwards gears by
proceeding as follows:
❒stop the vehicle;
❒bring the transmission lever to P
(Park).
105
15-12-2014 8:23 Pagina 105
AUTOMATIC
TRANSMISSIONGEAR LEVERThe fig. 91 lever has the following
positions:
❒P= Park
❒R= Reverse
❒N= Neutral
❒D= Drive, (automatic forward speed)
❒AutoStick: + shifting to higher gear
in sequential driving mode; – shifting
to lower gear in sequential driving
mode.
111) 112) 113)
38) 39)
The gear engaged is shown on the
display.
To select a gear, move the lever
forwards or backwards.91
F1B0137C
Page 108 of 240
IGNITION LOCK AND
PARK POSITIONVersions equipped with the Keyless
Go system: this function requires the
gear lever to be positioned at P (Park);
then bring the ignition device to STOP.
Versions equipped with key without
remote control: this function requires
the gear lever to be positioned at P
(Park) before extracting the key from
the ignition device.
If the vehicle battery is flat and the
ignition key is engaged, the latter is
locked in position.
To remove the key manually see
paragraph "Automatic transmission
lever unlock" in chapter "In an
emergency".GEAR ENGAGEMENT
DISABLING WITHOUT
BRAKE PEDAL PRESSEDThis system prevents you from moving
the gear lever from position P (Park) if
the brake pedal has not been previously
depressed.To bring the gear lever to a position
other than P (Park), the ignition device
must be in position MAR (engine on
or off) and the brake pedal must be
depressed. Button A fig. 91 on the gear
lever knob must also be pressed.
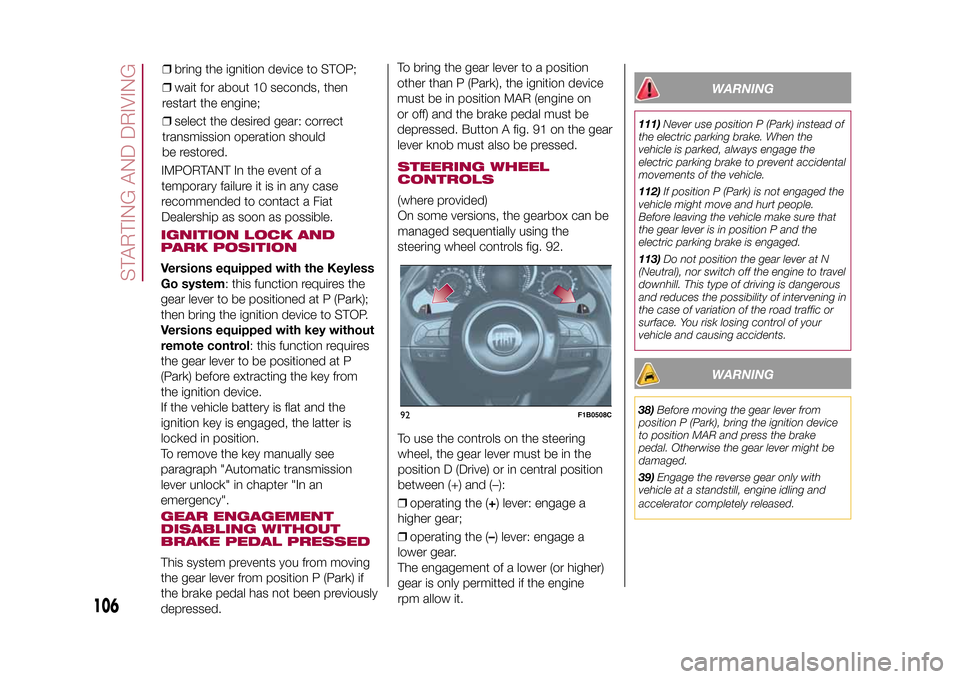
STEERING WHEEL
CONTROLS(where provided)
On some versions, the gearbox can be
managed sequentially using the
steering wheel controls fig. 92.
To use the controls on the steering
wheel, the gear lever must be in the
position D (Drive) or in central position
between (+) and (–):
❒operating the (+) lever: engage a
higher gear;
❒operating the (–) lever: engage a
lower gear.
The engagement of a lower (or higher)
gear is only permitted if the engine
rpm allow it.
WARNING
111)Never use position P (Park) instead of
the electric parking brake. When the
vehicle is parked, always engage the
electric parking brake to prevent accidental
movements of the vehicle.
112)If position P (Park) is not engaged the
vehicle might move and hurt people.
Before leaving the vehicle make sure that
the gear lever is in position P and the
electric parking brake is engaged.
113)Do not position the gear lever at N
(Neutral), nor switch off the engine to travel
downhill. This type of driving is dangerous
and reduces the possibility of intervening in
the case of variation of the road traffic or
surface. You risk losing control of your
vehicle and causing accidents.
WARNING
38)Before moving the gear lever from
position P (Park), bring the ignition device
to position MAR and press the brake
pedal. Otherwise the gear lever might be
damaged.
39)Engage the reverse gear only with
vehicle at a standstill, engine idling and
accelerator completely released.
92
F1B0508C
106
STARTING AND DRIVING
15-12-2014 8:23 Pagina 106
IMPORTANT In the event of a
temporary failure it is in any case
recommended to contact a Fiat
Dealership as soon as possible.❒bring the ignition device to STOP;
❒wait for about 10 seconds, then
restart the engine;
❒select the desired gear: correct
transmission operation should
be restored.
Page 109 of 240
START&STOP
SYSTEMThe Start&Stop system automatically
stops the engine each time the vehicle
is stationary and starts it again when
the driver wants to move off.
In this way, the vehicle efficiency is
increased, by reducing consumption,
dangerous gas emissions and noise
pollution.
114)40)
OPERATING MODE
Engine stopping mode
Versions with manual gearboxWith the vehicle stopped, the engine
stops with gearbox in neutral and
clutch pedal released.Versions with automatic transmissionWith vehicle at a standstill and brake
pedal pressed, the engine switches off
if the gear lever is in a position other
than R.
In the event of stops uphill, engine
switching off is disabled to make the
"Hill Hold Control" function available
(works only with running engine).The
warning light on the instrument
panel switches on to signal that the
engine was stopped.
Engine restarting mode
Versions with manual gearboxTo restart the engine, press the clutch
pedal.
If the vehicle does not start when the
clutch is pressed, place the gear lever
in neutral and repeat the procedure.
If the problem persists, contact a Fiat
Dealership.Versions with automatic transmissionTo restart the engine, release the brake
pedal.
With brake pressed, if the gear lever is
in automatic mode - D (Drive) - the
engine can be restarted by moving the
lever to R (Reverse) or N (Neutral) or
"AutoStick".
With brake pressed, if the gear lever is
in "AutoStick" mode, the engine can be
restarted by moving the lever to "+" or
"–", or R (Reverse) or N (Neutral).
When the engine has been stopped
automatically, keeping the brake pedal
pressed, the brake can be released
keeping the engine off by quickly
shifting the gear lever to P (Park).
To restart the engine, just move the
lever out of position P.
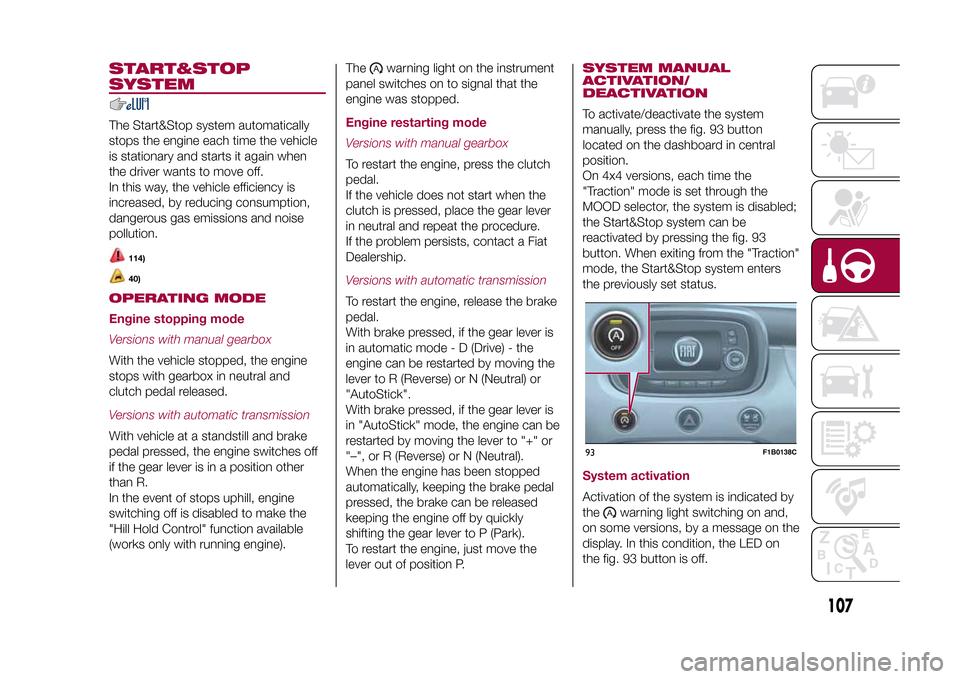
SYSTEM MANUAL
ACTIVATION/
DEACTIVATIONTo activate/deactivate the system
manually, press the fig. 93 button
located on the dashboard in central
position.
On 4x4 versions, each time the
"Traction" mode is set through the
MOOD selector, the system is disabled;
the Start&Stop system can be
reactivated by pressing the fig. 93
button. When exiting from the "Traction"
mode, the Start&Stop system enters
the previously set status.System activationActivation of the system is indicated by
the
warning light switching on and,
on some versions, by a message on the
display. In this condition, the LED on
the fig. 93 button is off.
93
F1B0138C
107
15-12-2014 8:23 Pagina 107