buttons FIAT 500X 2017 Owner handbook (in English)
[x] Cancel search | Manufacturer: FIAT, Model Year: 2017, Model line: 500X, Model: FIAT 500X 2017Pages: 284, PDF Size: 11.14 MB
Page 87 of 284
IMPORTANT When returning the rear
seat from the tilted position to the
normal operating position, take care to
refit the seat belt correctly, in order to
guarantee prompt availability every
time.
ADJUSTING THE SEAT
BELT HEIGHT
70) 71)
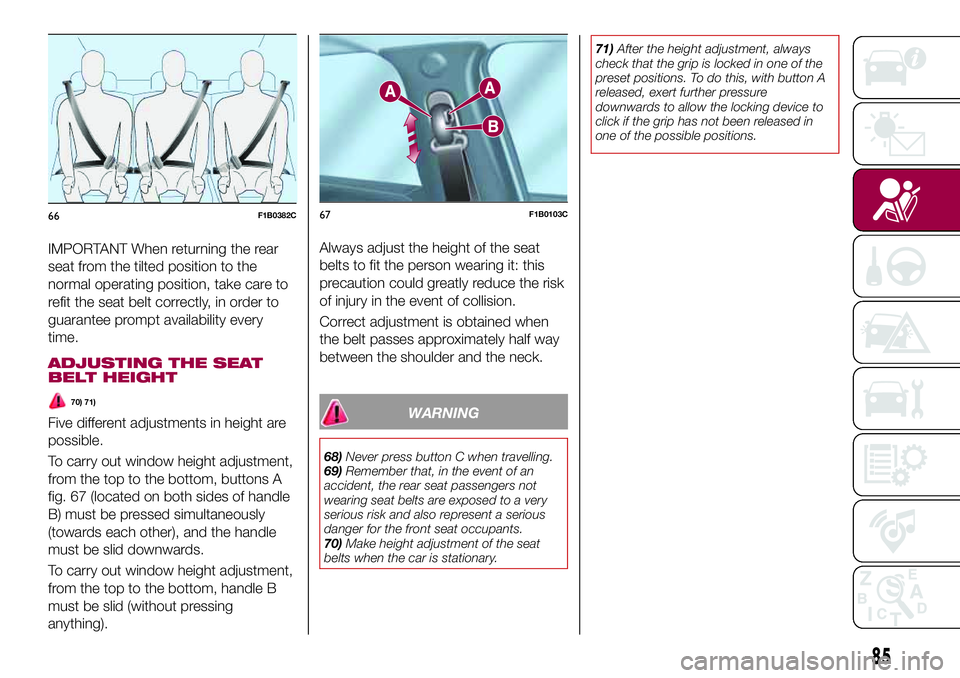
Five different adjustments in height are
possible.
To carry out window height adjustment,
from the top to the bottom, buttons A
fig. 67 (located on both sides of handle
B) must be pressed simultaneously
(towards each other), and the handle
must be slid downwards.
To carry out window height adjustment,
from the top to the bottom, handle B
must be slid (without pressing
anything).Always adjust the height of the seat
belts to fit the person wearing it: this
precaution could greatly reduce the risk
of injury in the event of collision.
Correct adjustment is obtained when
the belt passes approximately half way
between the shoulder and the neck.WARNING
68)Never press button C when travelling.
69)Remember that, in the event of an
accident, the rear seat passengers not
wearing seat belts are exposed to a very
serious risk and also represent a serious
danger for the front seat occupants.
70)Make height adjustment of the seat
belts when the car is stationary.71)After the height adjustment, always
check that the grip is locked in one of the
preset positions. To do this, with button A
released, exert further pressure
downwards to allow the locking device to
click if the grip has not been released in
one of the possible positions.
66F1B0382C67F1B0103C
85
Page 127 of 284
the accelerator; when you release the
pedal, the vehicle goes back to the
speed stored previously.
When travelling downhill with the device
active, the vehicle speed may slightly
exceed the set one.
IMPORTANT Before pressing the SET +
or SET – buttons, the vehicle must be
travelling at a constant speed on a flat
surface.
SPEED INCREASE
Once the electronic Cruise Control has
been activated, the speed can be
increased by pressing button SET +.
SPEED DECREASE
With the device activated, the speed
can be decreased by pressing button
SET–.
RECALLING THE SPEED
For versions with automatic
transmission operating in D mode (Drive
- automatic), press and release the RES
button to recall the previously set
speed.
For versions with manual gearbox or
automatic transmission in Autostick
(sequential) mode, before recalling the
previously set speed you should
accelerate until getting close to it, then
press and release the RES button.
DEACTIVATING THE
DEVICE
Lightly pressing the brake pedal or
pressing the CANC button deactivates
the electronic Cruise Control without
deleting the stored speed.
The Cruise Control may be deactivated
also by applying the electric parking
brake (EPB) or when the braking
system is operated (e.g. operation of
the ESC system).
DEACTIVATING THE
DEVICE
The electronic Cruise Control is
deactivated by pressing button A
fig. 99 or bringing the ignition device to
STOP.
WARNING
120)When travelling with the device active,
never move the gear lever to neutral.
121)In case of a malfunction or failure of
the device, contact a Fiat Dealership.
122)The electronic Cruise Control can be
dangerous if the system cannot keep a
constant speed. In specific conditions
speed may be excessive, resulting in the
risk of losing control of the vehicle and
causing accidents. Do not use the device
in heavy traffic or on winding, icy, snowy or
slippery roads.
ADAPTIVE CRUISE
CONTROL (ACC)
(where provided)
123) 124) 125) 126) 127) 128)
46) 47) 48) 49) 50) 51) 52)
DESCRIPTION
The Adaptive Cruise Control (ACC) is a
driver assist device which combines the
Cruise Control functions with one for
controlling the distance from the vehicle
ahead.
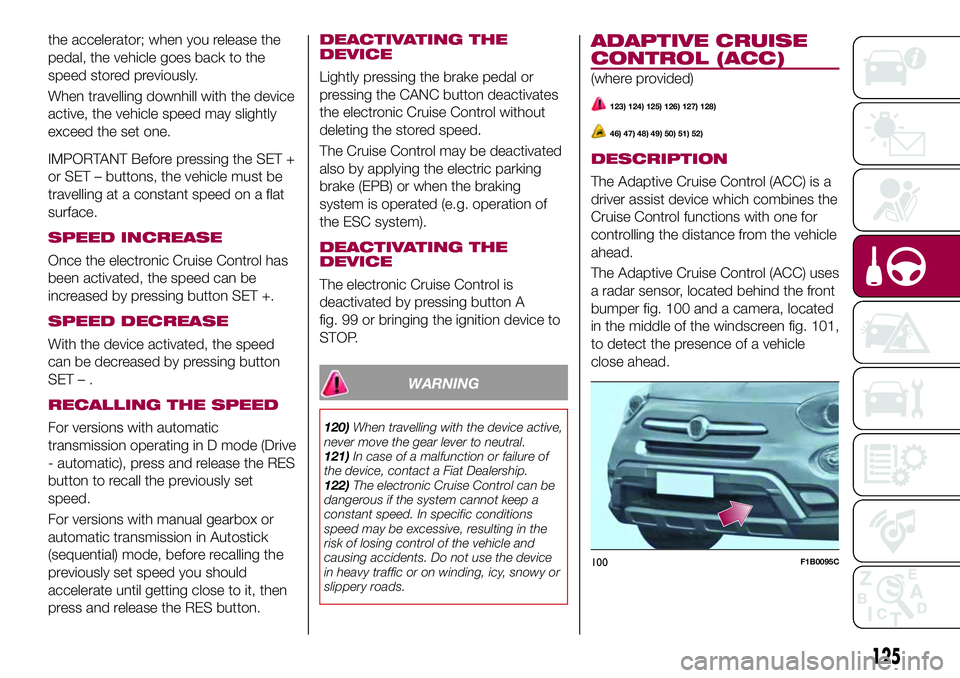
The Adaptive Cruise Control (ACC) uses
a radar sensor, located behind the front
bumper fig. 100 and a camera, located
in the middle of the windscreen fig. 101,
to detect the presence of a vehicle
close ahead.
100F1B0095C
125
Page 236 of 284
Buttons Interaction
Button A (left side, behind the steering wheel)
Upper button
Brief button press: search for next radio station or selection of USB/iPod next
track.
Long button press: scan of higher frequencies until released/fast forward of
USB/iPod track.
Central buttonWith each press it scrolls through sources AM, FM, USB/iPod, AUX. Only the
available sources will be selected.
Lower button
Brief button press: search for previous radio station or selection of USB/iPod next
track.
Long button press: scan of lower frequencies until released/fast forward of
USB/iPod track.
Button B (right side, behind the steering wheel)
Upper buttonVolume increase
Brief button press: single volume increase
Long button press: fast volume increase
Central button Activation/deactivation of Mute function
Lower buttonVolume decrease
Brief button press: single volume decrease
Long button press: fast volume decrease
234
MULTIMEDIA
Page 237 of 284
SWITCHING THE SYSTEM
ON/OFF
The system is switched on/off by
pressing the
button/knob.
Turn the button/knob clockwise to
increase the radio volume or
anticlockwise to decrease it.
RADIO (TUNER) MODE
The system features the following
tuners: AM, FM.
RADIO MODE SELECTION
Press the RADIO button on the front
panel to activate radio mode.
FREQUENCY BAND
SELECTION
The different tuning modes can be
selected by pressing the RADIO button
on the front panel.
DISPLAYED
INFORMATION
After the desired radio station is
selected on the display, the following
information is shown (INFO mode
activated):
In the upper part: the preset station, the
time and the other active radio settings
are highlighted.
In the central part: the name of the
current station, the frequency and the
radio text information (if any) are
highlighted.
FM station list
Press the BROWSE ENTER
button/knob to display the complete list
of the FM stations that can be received.
SETTING THE PRESETS
The preset stations are available in all
system modes and are selected by
touching one of the presetting buttons
1-2-3-4-5-6on the front panel.
If you are tuned to a radio station that
you wish to store, hold down the button
on the display which corresponds to
the desired preset until an acoustic
confirmation signal is emitted.
RADIO STATION
SELECTION
To search for the desired radio station
press the
orbutton or use
the wheel of the steering wheel controls
, or turn the "BROWSE ENTER"
knob.
PREVIOUS/NEXT RADIO
STATION SEARCH
Press briefly theorbutton
or use the wheel of the steering wheel
controls
: when the button is
released the previous or next radio
station is displayed.
PREVIOUS/NEXT RADIO
STATION FAST SEARCH
Hold down theorbutton to
start the fast search: when the button is
released, the first tunable radio is
played.
MEDIA MODE
Interaction modes for AUX, USB/iPod
operation.
TRACK CHANGE
(previous/next)
Briefly press thebutton or turn
the BROWSE ENTER button/knob
clockwise to play the next track.
Briefly press the
button or turn
the BROWSE ENTER button/knob
anticlockwise to return to the beginning
of the selected track or to the beginning
of the previous track (if this has been
played for less than 3 seconds).
TRACK FAST FORWARD/
REWIND
Hold down thebutton to fast
forward the selected track.
Hold down the
button to fast
rewind the track.
235
Page 243 of 284
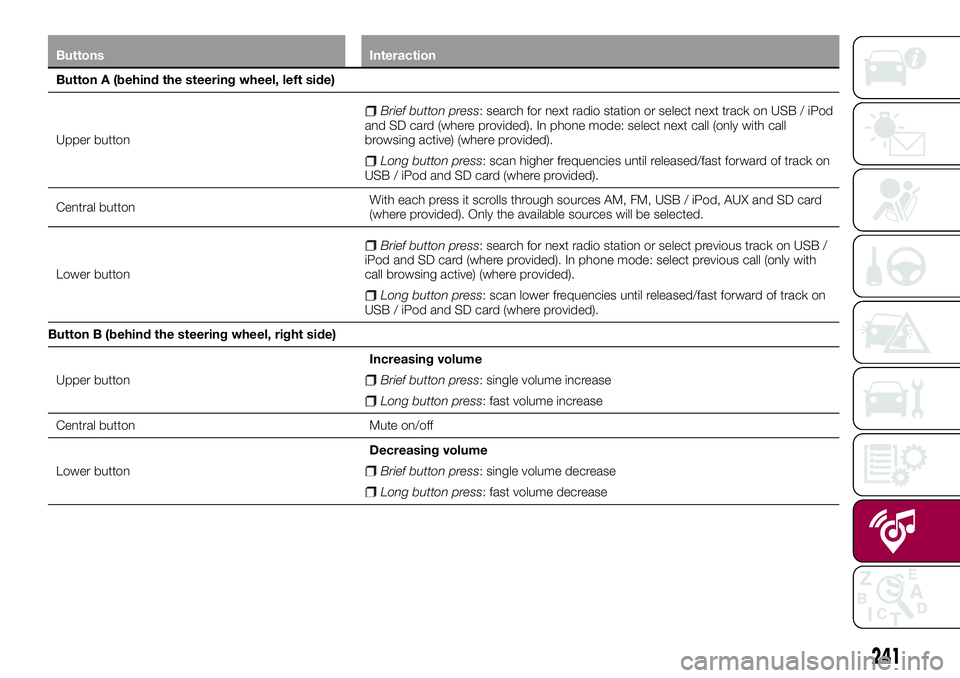
Buttons Interaction
Button A (behind the steering wheel, left side)
Upper button
Brief button press: search for next radio station or select next track on USB / iPod
and SD card (where provided). In phone mode: select next call (only with call
browsing active) (where provided).
Long button press: scan higher frequencies until released/fast forward of track on
USB / iPod and SD card (where provided).
Central buttonWith each press it scrolls through sources AM, FM, USB / iPod, AUX and SD card
(where provided). Only the available sources will be selected.
Lower button
Brief button press: search for next radio station or select previous track on USB /
iPod and SD card (where provided). In phone mode: select previous call (only with
call browsing active) (where provided).
Long button press: scan lower frequencies until released/fast forward of track on
USB / iPod and SD card (where provided).
Button B (behind the steering wheel, right side)
Upper buttonIncreasing volume
Brief button press: single volume increase
Long button press: fast volume increase
Central button Mute on/off
Lower buttonDecreasing volume
Brief button press: single volume decrease
Long button press: fast volume decrease
241
Page 244 of 284
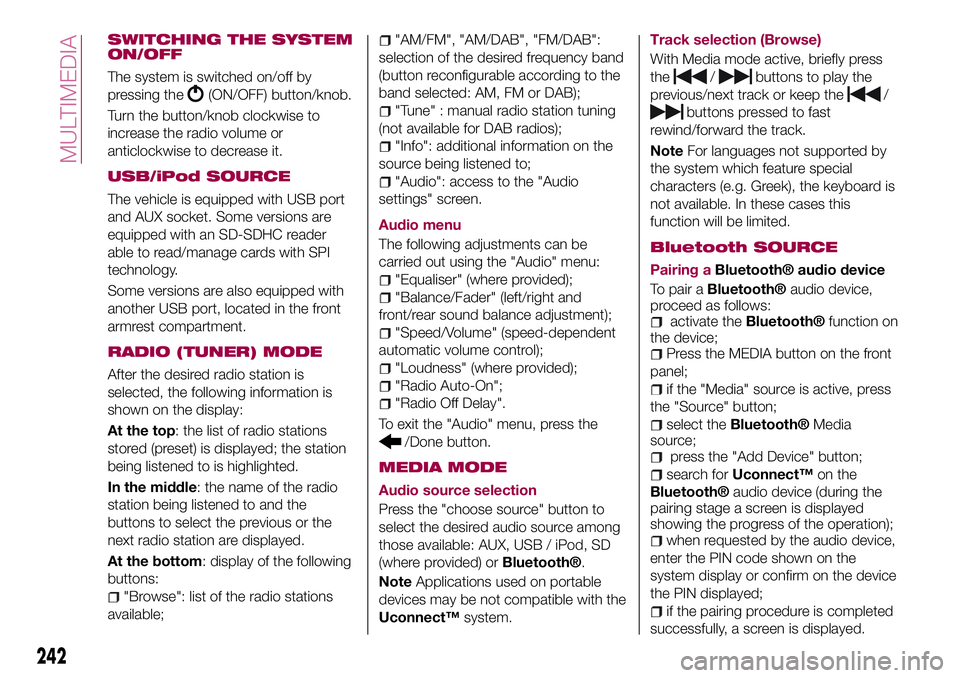
SWITCHING THE SYSTEM
ON/OFF
The system is switched on/off by
pressing the
(ON/OFF) button/knob.
Turn the button/knob clockwise to
increase the radio volume or
anticlockwise to decrease it.
USB/iPod SOURCE
The vehicle is equipped with USB port
and AUX socket. Some versions are
equipped with an SD-SDHC reader
able to read/manage cards with SPI
technology.
Some versions are also equipped with
another USB port, located in the front
armrest compartment.
RADIO (TUNER) MODE
After the desired radio station is
selected, the following information is
shown on the display:
At the top: the list of radio stations
stored (preset) is displayed; the station
being listened to is highlighted.
In the middle: the name of the radio
station being listened to and the
buttons to select the previous or the
next radio station are displayed.
At the bottom: display of the following
buttons:
"Browse": list of the radio stations
available;
"AM/FM", "AM/DAB", "FM/DAB":
selection of the desired frequency band
(button reconfigurable according to the
band selected: AM, FM or DAB);
"Tune" : manual radio station tuning
(not available for DAB radios);
"Info": additional information on the
source being listened to;
"Audio": access to the "Audio
settings" screen.
Audio menu
The following adjustments can be
carried out using the "Audio" menu:
"Equaliser" (where provided);
"Balance/Fader" (left/right and
front/rear sound balance adjustment);
"Speed/Volume" (speed-dependent
automatic volume control);
"Loudness" (where provided);
"Radio Auto-On";
"Radio Off Delay".
To exit the "Audio" menu, press the
/Done button.
MEDIA MODE
Audio source selection
Press the "choose source" button to
select the desired audio source among
those available: AUX, USB / iPod, SD
(where provided) or
Bluetooth®.
NoteApplications used on portable
devices may be not compatible with the
Uconnect™system.Track selection (Browse)
With Media mode active, briefly press
the
/buttons to play the
previous/next track or keep the
/
buttons pressed to fast
rewind/forward the track.
NoteFor languages not supported by
the system which feature special
characters (e.g. Greek), the keyboard is
not available. In these cases this
function will be limited.
Bluetooth SOURCE
Pairing aBluetooth® audio device
To pair a
Bluetooth®audio device,
proceed as follows:
activate theBluetooth®function on
the device;
Press the MEDIA button on the front
panel;
if the "Media" source is active, press
the "Source" button;
select theBluetooth®Media
source;
press the "Add Device" button;
search forUconnect™on the
Bluetooth®audio device (during the
pairing stage a screen is displayed
showing the progress of the operation);
when requested by the audio device,
enter the PIN code shown on the
system display or confirm on the device
the PIN displayed;
if the pairing procedure is completed
successfully, a screen is displayed.
242
MULTIMEDIA
Page 245 of 284
Answer "Yes" to the question to pair the
Bluetooth®audio device as favourite
(the device will have priority over all
other devices to be paired
subsequently). If "No" is selected, the
priority is determined according to the
order of connection. The last device
connected will have the highest priority;
an audio device can also be paired
by pressing the
PHONE button on
the front panel and by selecting
"Settings" or, from the "Settings" menu,
selecting "Phone/Bluetooth".
IMPORTANT If theBluetooth®
connection between mobile phone and
system is lost, consult the mobile
phone Owner's handbook.
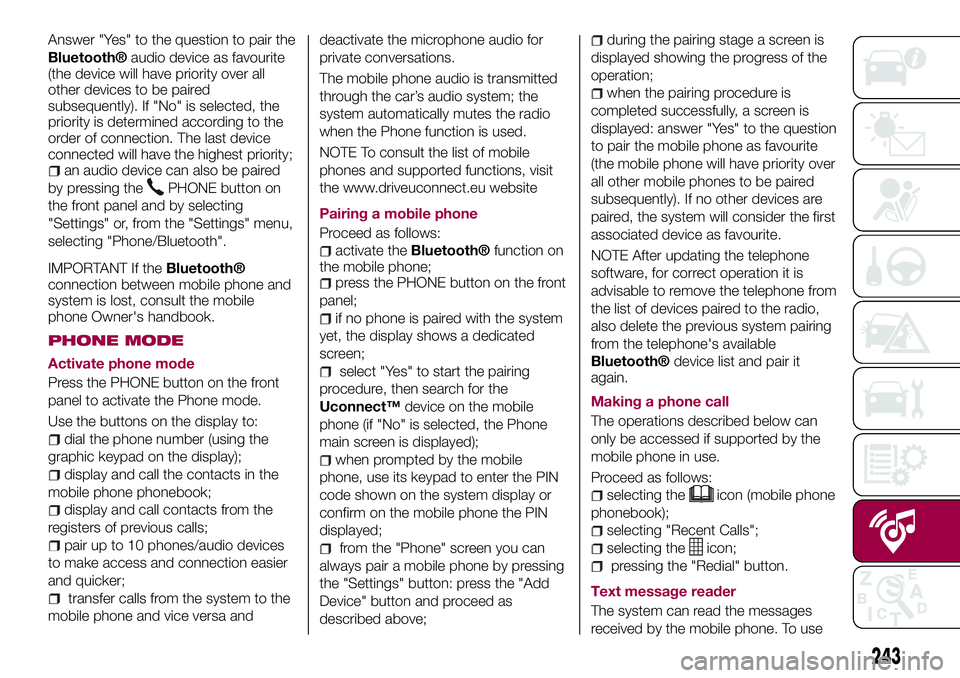
PHONE MODE
Activate phone mode
Press the PHONE button on the front
panel to activate the Phone mode.
Use the buttons on the display to:
dial the phone number (using the
graphic keypad on the display);
display and call the contacts in the
mobile phone phonebook;
display and call contacts from the
registers of previous calls;
pair up to 10 phones/audio devices
to make access and connection easier
and quicker;
transfer calls from the system to the
mobile phone and vice versa anddeactivate the microphone audio for
private conversations.
The mobile phone audio is transmitted
through the car’s audio system; the
system automatically mutes the radio
when the Phone function is used.
NOTE To consult the list of mobile
phones and supported functions, visit
the www.driveuconnect.eu website
Pairing a mobile phone
Proceed as follows:
activate theBluetooth®function on
the mobile phone;
press the PHONE button on the front
panel;
if no phone is paired with the system
yet, the display shows a dedicated
screen;
select "Yes" to start the pairing
procedure, then search for the
Uconnect™device on the mobile
phone (if "No" is selected, the Phone
main screen is displayed);
when prompted by the mobile
phone, use its keypad to enter the PIN
code shown on the system display or
confirm on the mobile phone the PIN
displayed;
from the "Phone" screen you can
always pair a mobile phone by pressing
the "Settings" button: press the "Add
Device" button and proceed as
described above;
during the pairing stage a screen is
displayed showing the progress of the
operation;
when the pairing procedure is
completed successfully, a screen is
displayed: answer "Yes" to the question
to pair the mobile phone as favourite
(the mobile phone will have priority over
all other mobile phones to be paired
subsequently). If no other devices are
paired, the system will consider the first
associated device as favourite.
NOTE After updating the telephone
software, for correct operation it is
advisable to remove the telephone from
the list of devices paired to the radio,
also delete the previous system pairing
from the telephone's available
Bluetooth®device list and pair it
again.
Making a phone call
The operations described below can
only be accessed if supported by the
mobile phone in use.
Proceed as follows:
selecting theicon (mobile phone
phonebook);
selecting "Recent Calls";
selecting theicon;
pressing the "Redial" button.
Text message reader
The system can read the messages
received by the mobile phone. To use
243
Page 257 of 284
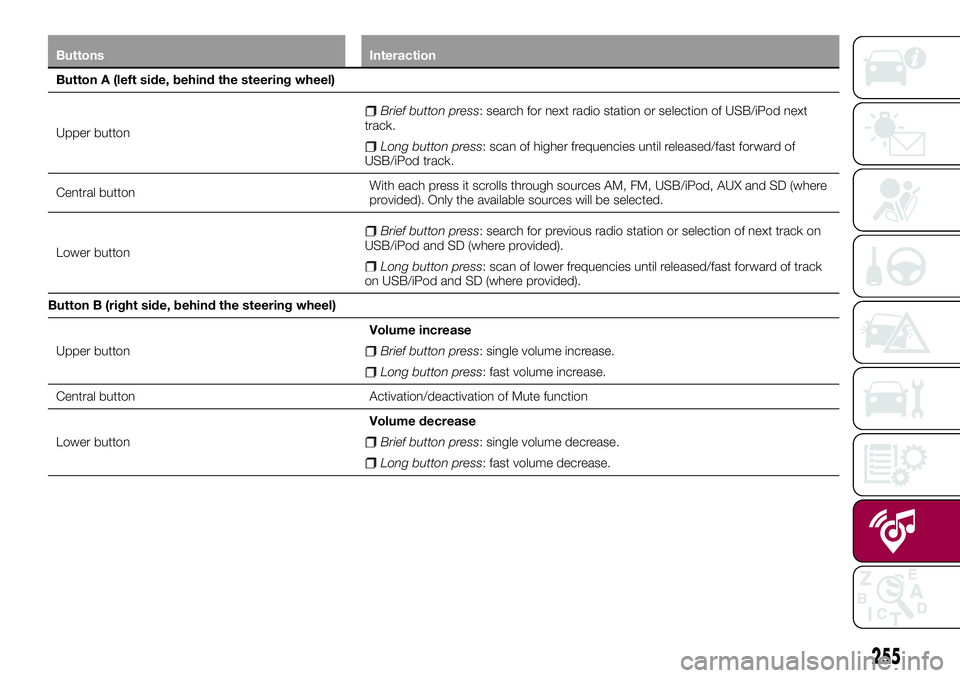
Buttons Interaction
Button A (left side, behind the steering wheel)
Upper button
Brief button press: search for next radio station or selection of USB/iPod next
track.
Long button press: scan of higher frequencies until released/fast forward of
USB/iPod track.
Central buttonWith each press it scrolls through sources AM, FM, USB/iPod, AUX and SD (where
provided). Only the available sources will be selected.
Lower button
Brief button press: search for previous radio station or selection of next track on
USB/iPod and SD (where provided).
Long button press: scan of lower frequencies until released/fast forward of track
on USB/iPod and SD (where provided).
Button B (right side, behind the steering wheel)
Upper buttonVolume increase
Brief button press: single volume increase.
Long button press: fast volume increase.
Central button Activation/deactivation of Mute function
Lower buttonVolume decrease
Brief button press: single volume decrease.
Long button press: fast volume decrease.
255
Page 258 of 284
SWITCHING THE SYSTEM
ON/OFF
The system is switched on/off by
pressing the
(ON/OFF) button/knob.
Turn the button/knob clockwise to
increase the radio volume or
anticlockwise to decrease it.
RADIO (TUNER) MODE
The system has the following tuners:
AM, FM and DAB (where provided).
RADIO MODE SELECTION
Press the RADIO button on the front
panel to activate radio mode.
The different tuning modes can be
selected with the corresponding button
on the display.
Up to 12 favourite radio stations can be
stored in each mode.
FREQUENCY BAND
SELECTION
Press one of the buttons at the left of
the display to select the frequency
band: AM, FM and DAB (where
provided).
DISPLAYED
INFORMATION
After the desired radio station is
selected, the following information is
shown on the display:
At the top: display of the stored radiostation (preset) list. If the current station
is in the list of presets, it will be
highlighted on the display.
In the middle: the name of the radio
station being listened to and the
buttons to select the previous or the
next radio station are displayed.
At the bottom: display of the following
buttons:
"browse": search available radio
stations
"tune" : manual radio station tuning
(not available for DAB radios);
"audio": access to the "Audio
settings" screen
and: permit searching
for the desired radio station.
Select previous/next
radio station
The previous/next radio station can be
selected using the following methods:
turning the BROWSE ENTER
button/knob, briefly pressing the
orbutton on the display,
pressing of the buttons behind the
steering wheel.
Holding down the
or
buttons on the display activates
rapid scrolling through the active
frequency band.
PREVIOUS/NEXT RADIO
STATION FAST SEARCH
To start the fast search press the
orbutton on the display, or
use the corresponding steering wheel
controls.
AM/FM RADIO STATION
TUNING
Press the "tune" button, then select the
first digit of the desired radio station.
Press the
button to delete a wrong
number (and enter the correct station
number).
After entering the last digit of the station
the system will tune to the selected
one.
The screen disappears automatically
after 5 seconds or manually by pressing
the OK button.
DAB RADIO
Once DAB radio mode is selected, the
information on the current station is
displayed and the following functions.
The "browse" button is used to display:
the list of all DAB stations;
the list of all the favourites;
the list of stations filtered by
"Ensembles" (broadcast group).
Within each list, the "ABC" button
allows the user to skip to the desired
letter in the list.
256
MULTIMEDIA
Page 259 of 284
The "Refresh" button requests an
update of the DAB radio station list: the
update may last from a few seconds to
about two minutes.
SETTING THE PRESETS
Presets are available in all system
modes and are activated by touching
one of the preset buttons located in the
upper area of the display.
The system can store up to 12 radio
stations in each mode: 4 of these are
displayed in the upper area.
Press the "browse" button on the
display to show all the radio stations
stored in the selected frequency band.
AUDIO
The Audio Settings menu, which can be
accessed by pressing the "audio"
button at the bottom of the display, can
be used to change the following
settings:
"Balance/Fader" (left/right and
front/rear audio balance adjustment);
"Equaliser" (where provided);
"Speed/Volume" (speed-dependent
automatic volume control);
"Surround Sound" (where provided);
"AUX Volume comp.";
"Loudness" (where provided);
"Auto-On radio" (allows you to set
the automatic switching on of the radio
when the engine is started).To exit the "audio" menu, press the
/Done button.
MEDIA MODE
Audio source selection
Press the "choose source" button to
select the desired audio source among
those available: AUX, USB / iPod, SD
(where provided) or
Bluetooth®.
Note: Applications used on portable
devices may be not compatible with the
Uconnect™system.
Track change (next/
previous)
Briefly press thebutton or turn
the BROWSE ENTER button/knob
clockwise to play the next track.
Briefly press the
button or turn
the BROWSE ENTER button/knob
anticlockwise to return to the beginning
of the selected track or to the beginning
of the previous track (if this has been
played for less than 8 seconds).
TRACK FAST FORWARD/
REWIND
Hold down thebutton to fast
forward the selected track.
Hold down the
button to fast
rewind the track.
TRACK SELECTION
(Browse)
Use this function to scroll through and
select the tracks on the active device.
Within each list, the "ABC" button
allows the user to skip to the desired
letter in the list.
Press the "Browse" button to activate
this function on the source being
played.
Turn the BROWSE ENTER button/knob
to select the desired category and then
press the button/knob to confirm the
selection.
Press the "X" button to cancel the
function.
NOTE The "Browse" button may be
disabled for some
Apple®devices.
NOTE The "Browse" button does not
allow any operation on an AUX device.
NOTE Not all
Bluetooth®devices
enable you to scroll the information on
the tracks.
TRACK INFORMATION
DISPLAY
Press the "Info" button to show the
information on the track being listened
to on the display.
Press the "X" button to exit the screen.
257