reset FIAT 500X 2019 Owner handbook (in English)
[x] Cancel search | Manufacturer: FIAT, Model Year: 2019, Model line: 500X, Model: FIAT 500X 2019Pages: 284, PDF Size: 8.33 MB
Page 24 of 284
IMPORTANT Always reposition the
head restraints if they have been
removed before starting to drive
normally.
REAR
14)
Adjustment
Three head restraints that can be
height-adjusted to 3 positions
(completely raised / intermediate /
completely lowered) are provided for
the rear seats
Upward adjustment: raise the head
restraint until it clicks into place.
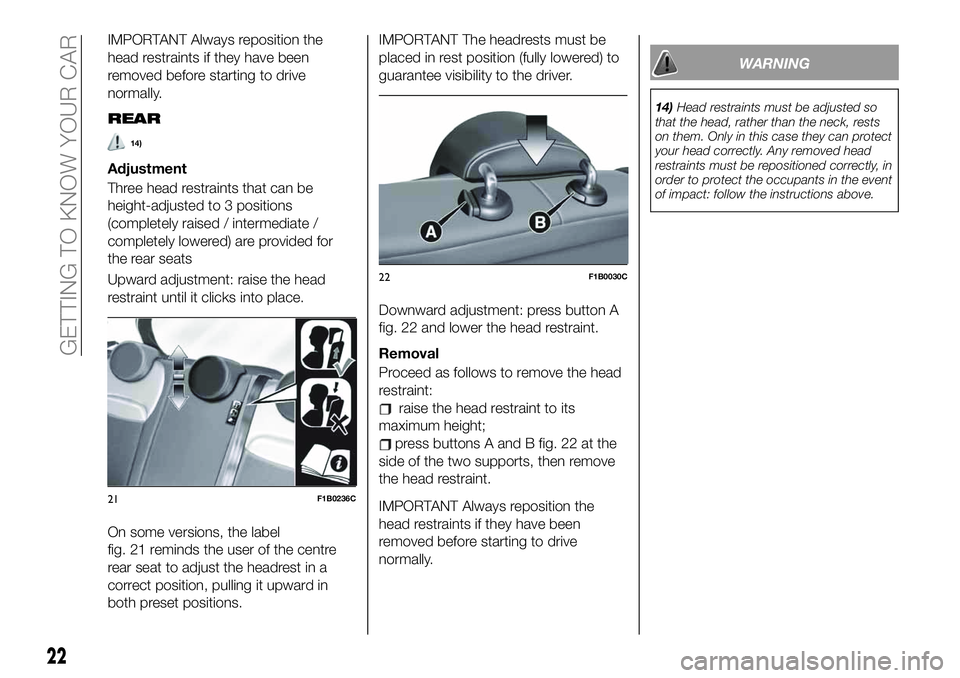
On some versions, the label
fig. 21 reminds the user of the centre
rear seat to adjust the headrest in a
correct position, pulling it upward in
both preset positions.
IMPORTANT The headrests must be
placed in rest position (fully lowered) to
guarantee visibility to the driver.
Downward adjustment: press button A
fig. 22 and lower the head restraint.
Removal
Proceed as follows to remove the head
restraint:
raise the head restraint to its
maximum height;
press buttons A and B fig. 22 at the
side of the two supports, then remove
the head restraint.
IMPORTANT Always reposition the
head restraints if they have been
removed before starting to drive
normally.
WARNING
14)Head restraints must be adjusted so
that the head, rather than the neck, rests
on them. Only in this case they can protect
your head correctly. Any removed head
restraints must be repositioned correctly, in
order to protect the occupants in the event
of impact: follow the instructions above.
21F1B0236C
22F1B0030C
22
GETTING TO KNOW YOUR CAR
Page 33 of 284
wiper moves with active control.
Releasing the stalk will activate three
strokes.
With the ring nut A fig. 32 turned to
positionLOorHI, the smart washing
function is not carried out.
IMPORTANT If the stalk is activated for
less than half a second, only the
windscreen washer jet is activated. Do
not prolong the activation of the "Smart
Washing" function for more than
30 seconds. Do not activate the
windscreen washer control when the
reservoir is empty.
RAIN SENSOR
(where provided)
9) 10)
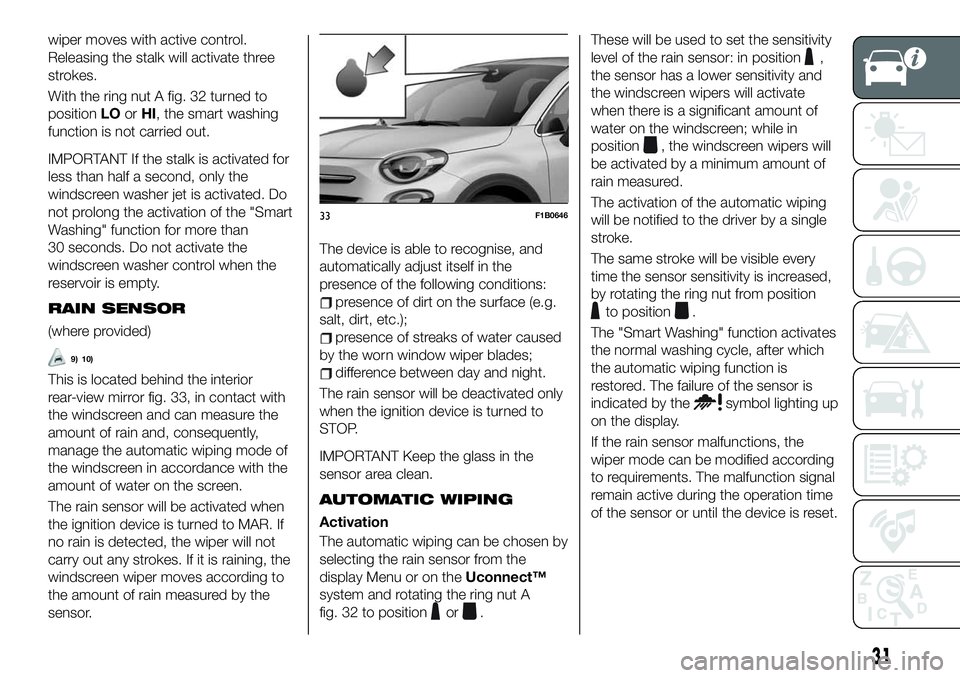
This is located behind the interior
rear-view mirror fig. 33, in contact with
the windscreen and can measure the
amount of rain and, consequently,
manage the automatic wiping mode of
the windscreen in accordance with the
amount of water on the screen.
The rain sensor will be activated when
the ignition device is turned to MAR. If
no rain is detected, the wiper will not
carry out any strokes. If it is raining, the
windscreen wiper moves according to
the amount of rain measured by the
sensor.The device is able to recognise, and
automatically adjust itself in the
presence of the following conditions:
presence of dirt on the surface (e.g.
salt, dirt, etc.);
presence of streaks of water caused
by the worn window wiper blades;
difference between day and night.
The rain sensor will be deactivated only
when the ignition device is turned to
STOP.
IMPORTANT Keep the glass in the
sensor area clean.
AUTOMATIC WIPING
Activation
The automatic wiping can be chosen by
selecting the rain sensor from the
display Menu or on theUconnect™
system and rotating the ring nut A
fig. 32 to position
or.These will be used to set the sensitivity
level of the rain sensor: in position
,
the sensor has a lower sensitivity and
the windscreen wipers will activate
when there is a significant amount of
water on the windscreen; while in
position
, the windscreen wipers will
be activated by a minimum amount of
rain measured.
The activation of the automatic wiping
will be notified to the driver by a single
stroke.
The same stroke will be visible every
time the sensor sensitivity is increased,
by rotating the ring nut from position
to position.
The "Smart Washing" function activates
the normal washing cycle, after which
the automatic wiping function is
restored. The failure of the sensor is
indicated by the
symbol lighting up
on the display.
If the rain sensor malfunctions, the
wiper mode can be modified according
to requirements. The malfunction signal
remain active during the operation time
of the sensor or until the device is reset.
33F1B0646
31
Page 50 of 284
DISPLAY
DESCRIPTION
The vehicle is equipped with a display
that can show useful information to the
driver while driving.
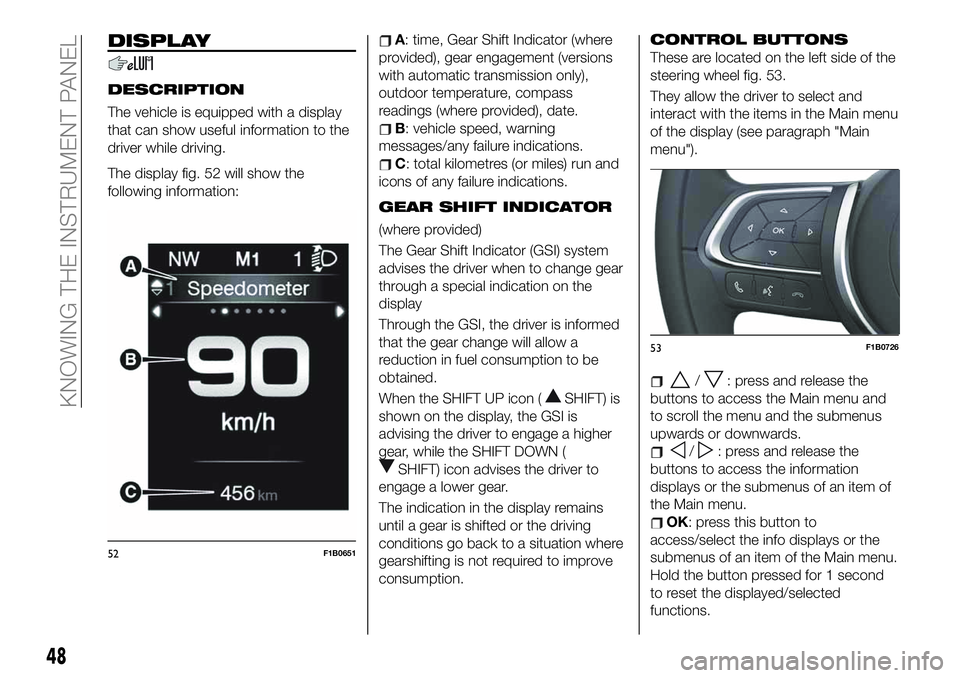
The display fig. 52 will show the
following information:
A: time, Gear Shift Indicator (where
provided), gear engagement (versions
with automatic transmission only),
outdoor temperature, compass
readings (where provided), date.
B: vehicle speed, warning
messages/any failure indications.
C: total kilometres (or miles) run and
icons of any failure indications.
GEAR SHIFT INDICATOR
(where provided)
The Gear Shift Indicator (GSI) system
advises the driver when to change gear
through a special indication on the
display
Through the GSI, the driver is informed
that the gear change will allow a
reduction in fuel consumption to be
obtained.
When the SHIFT UP icon (
SHIFT) is
shown on the display, the GSI is
advising the driver to engage a higher
gear, while the SHIFT DOWN (
SHIFT) icon advises the driver to
engage a lower gear.
The indication in the display remains
until a gear is shifted or the driving
conditions go back to a situation where
gearshifting is not required to improve
consumption.
CONTROL BUTTONS
These are located on the left side of the
steering wheel fig. 53.
They allow the driver to select and
interact with the items in the Main menu
of the display (see paragraph "Main
menu").
/: press and release the
buttons to access the Main menu and
to scroll the menu and the submenus
upwards or downwards.
/: press and release the
buttons to access the information
displays or the submenus of an item of
the Main menu.
OK: press this button to
access/select the info displays or the
submenus of an item of the Main menu.
Hold the button pressed for 1 second
to reset the displayed/selected
functions.
52F1B0651
53F1B0726
48
KNOWING THE INSTRUMENT PANEL
Page 51 of 284
MAIN MENU
The Menu includes the following items:
SPEED
TRIP
DRIVE MODE SELECTOR (where
provided) / GSI
VEHICLE INFO
DRIVER ASSIST
AUDIO
PHONE
NAVIGATION
ALERTS
VEHICLE SET-UP
Vehicle setup (Change car settings)
This menu item allows you to change
the settings for:
Vehicle off (where provided);
Display;
Units;
Clock & Date;
Safety;
Safety & Assistance;
Lights;
Doors & Locks.
“Vehicle off” (where provided)
This is used to switch off the engine in
the event of a Keyless Enter-N-Go
system fault, following the procedure
described on the display.Display
By selecting item "Display" you can
access the settings/information
regarding: "Language", "See phone",
"See navigation", "Automatic Trip B
reset", “Drive Mode Selector Repetition”
(where provided), "Display settings".
Units
Select item "Units" to choose the unit of
measurement between: "Imperial",
"Metric", "Custom".
Clock & Date
Select item "Clock & Date" to make the
following adjustments: "Set time", "Time
format", "Set date".
Safety
Select item "Security" to make the
following adjustments: "Passenger
AIRBAG", "Speed beep", "Seat belt
buzzer", "Hill Hold Control".
"Passenger AIRBAG" adjustment allows
you to activate/deactivate the
passenger airbag:
Passenger's protection active:
the
ONLED comes on constantly in
the instrument panel dashboard.
Passenger's protection not
active: the
OFFLED comes on
constantly in the instrument panel
dashboard.Safety & Assistance
For possible adjustments see
paragraphUconnect™in the
dedicated chapter.
Lights
Select item "Lights" to make the
following adjustments: "Interior Ambient
lighting", "Headlight sensor", "Follow
me", "Headlights while opening", "Auto
high beams", "Daytime Lights",
"Cornering lights".
Doors & Locks
Select item "Doors & Locks" to make
the following adjustments: "Autoclose",
"Aut. unl. on exit", "Flsh.Light w/Lock",
"Horn with Lock", "Horn with remote
start", "Remote unlock", "Door Unlock"
(versions with Keyless Entry), "Keyless
Entry".
NOTE With theUconnect™system,
some Menu items are shown and
managed on the display of the latter
and not on the instrument panel display
(refer to the Multimedia chapter or to
the supplement available online).
49
Page 52 of 284
TRIP COMPUTER
The "Trip computer" is used to display
information on vehicle operation when
the ignition device is at MAR.
This function is characterised by two
separate memories, called "Trip A" and
"Trip B", where the vehicle's "complete
missions" (journeys) are recorded in a
reciprocally independent manner.
“Trip A” and “Trip B” are used to display
the values relating to:
Distance travelled
Average fuel consumption
Average speed
Trip time (driving time)To reset the values, press and hold
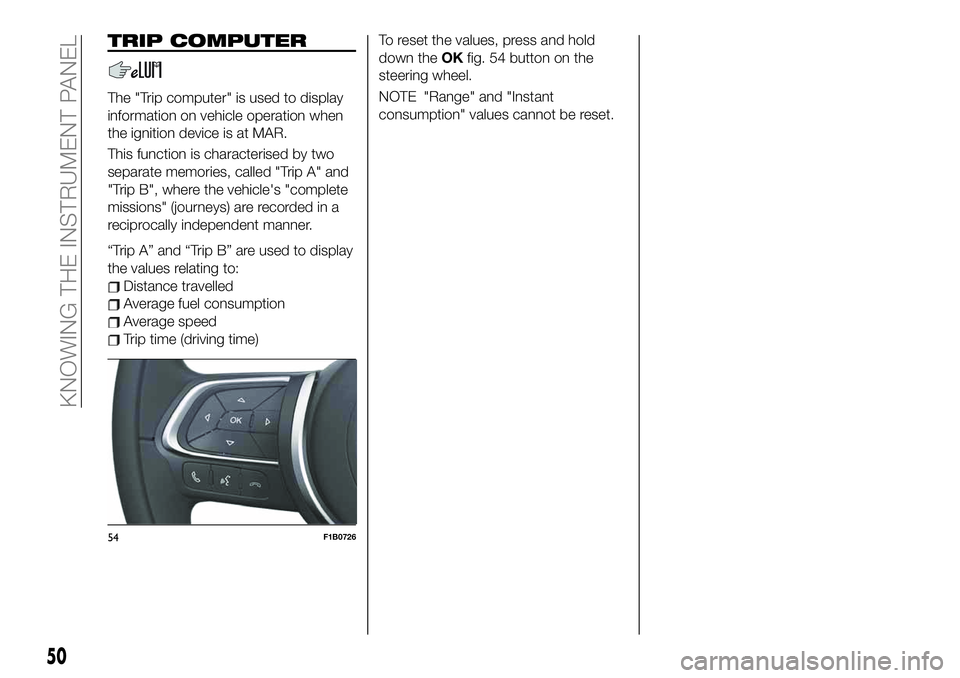
down theOKfig. 54 button on the
steering wheel.
NOTE "Range" and "Instant
consumption" values cannot be reset.
54F1B0726
50
KNOWING THE INSTRUMENT PANEL
Page 56 of 284
Warning light What it means
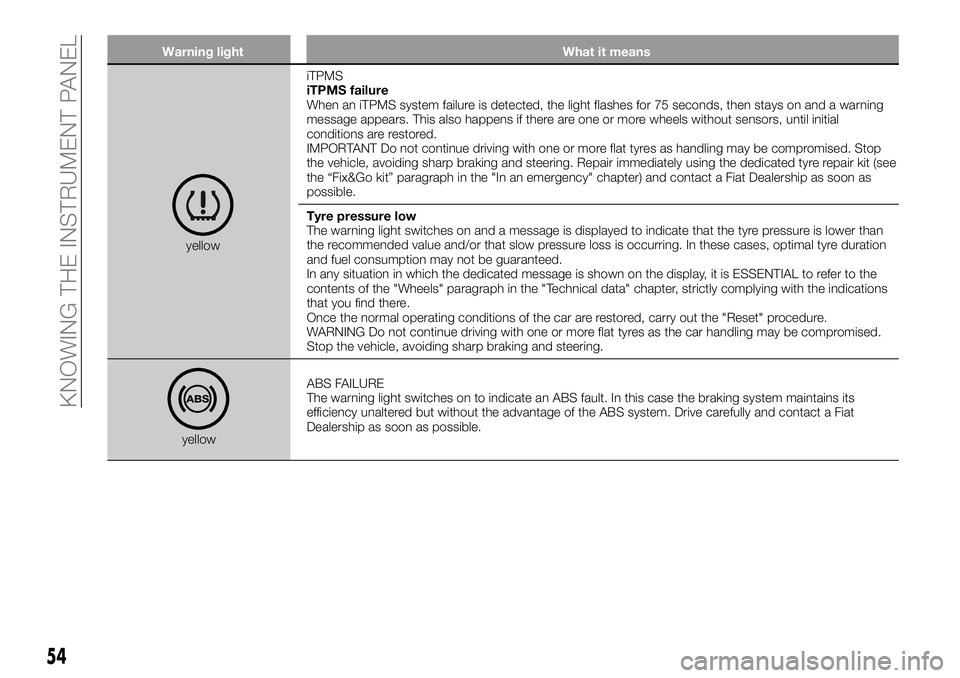
yellowiTPMS
iTPMS failure
When an iTPMS system failure is detected, the light flashes for 75 seconds, then stays on and a warning
message appears. This also happens if there are one or more wheels without sensors, until initial
conditions are restored.
IMPORTANT Do not continue driving with one or more flat tyres as handling may be compromised. Stop
the vehicle, avoiding sharp braking and steering. Repair immediately using the dedicated tyre repair kit (see
the “Fix&Go kit” paragraph in the "In an emergency" chapter) and contact a Fiat Dealership as soon as
possible.
Tyre pressure low
The warning light switches on and a message is displayed to indicate that the tyre pressure is lower than
the recommended value and/or that slow pressure loss is occurring. In these cases, optimal tyre duration
and fuel consumption may not be guaranteed.
In any situation in which the dedicated message is shown on the display, it is ESSENTIAL to refer to the
contents of the "Wheels" paragraph in the "Technical data" chapter, strictly complying with the indications
that you find there.
Once the normal operating conditions of the car are restored, carry out the "Reset" procedure.
WARNING Do not continue driving with one or more flat tyres as the car handling may be compromised.
Stop the vehicle, avoiding sharp braking and steering.
yellowABS FAILURE
The warning light switches on to indicate an ABS fault. In this case the braking system maintains its
efficiency unaltered but without the advantage of the ABS system. Drive carefully and contact a Fiat
Dealership as soon as possible.
54
KNOWING THE INSTRUMENT PANEL
Page 59 of 284
Warning light What it means
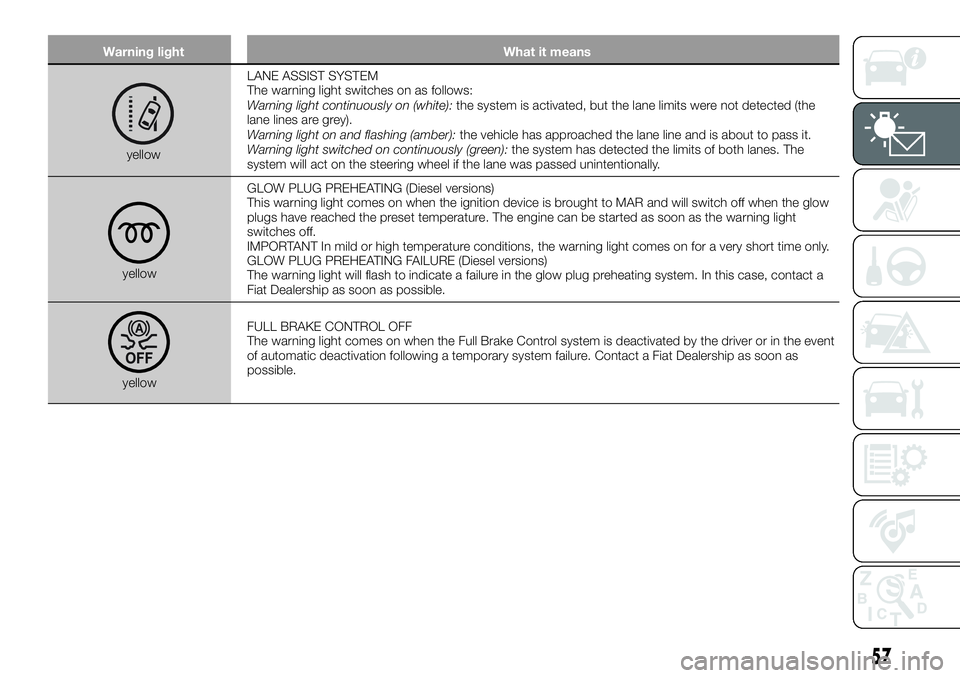
yellowLANE ASSIST SYSTEM
The warning light switches on as follows:
Warning light continuously on (white):the system is activated, but the lane limits were not detected (the
lane lines are grey).
Warning light on and flashing (amber):the vehicle has approached the lane line and is about to pass it.
Warning light switched on continuously (green):the system has detected the limits of both lanes. The
system will act on the steering wheel if the lane was passed unintentionally.
yellowGLOW PLUG PREHEATING (Diesel versions)
This warning light comes on when the ignition device is brought to MAR and will switch off when the glow
plugs have reached the preset temperature. The engine can be started as soon as the warning light
switches off.
IMPORTANT In mild or high temperature conditions, the warning light comes on for a very short time only.
GLOW PLUG PREHEATING FAILURE (Diesel versions)
The warning light will flash to indicate a failure in the glow plug preheating system. In this case, contact a
Fiat Dealership as soon as possible.
yellowFULL BRAKE CONTROL OFF
The warning light comes on when the Full Brake Control system is deactivated by the driver or in the event
of automatic deactivation following a temporary system failure. Contact a Fiat Dealership as soon as
possible.
57
Page 70 of 284
Symbol What it means
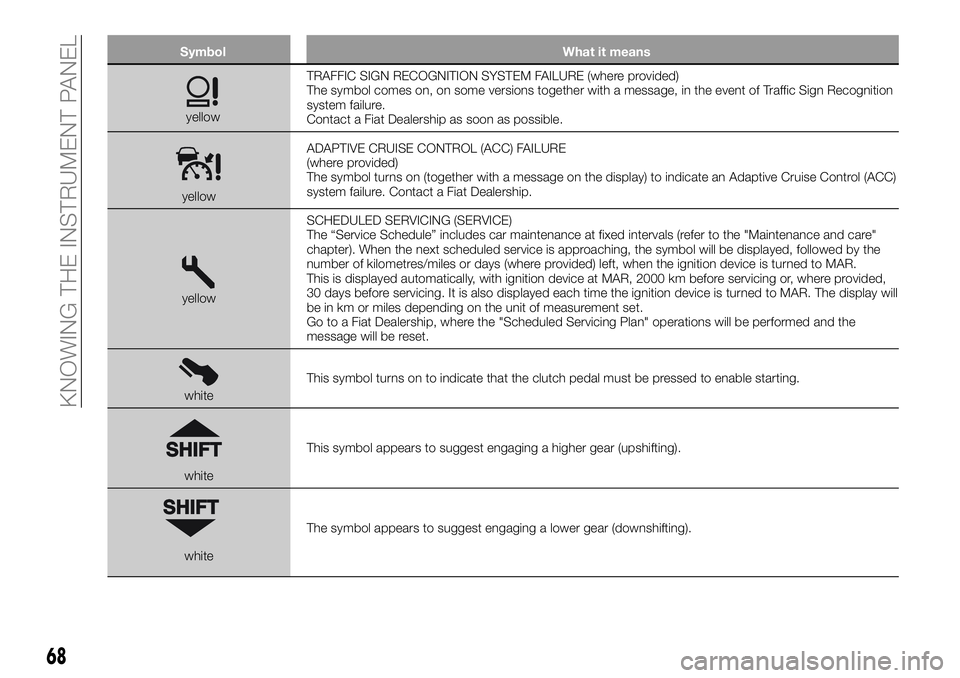
yellowTRAFFIC SIGN RECOGNITION SYSTEM FAILURE (where provided)
The symbol comes on, on some versions together with a message, in the event of Traffic Sign Recognition
system failure.
Contact a Fiat Dealership as soon as possible.
yellowADAPTIVE CRUISE CONTROL (ACC) FAILURE
(where provided)
The symbol turns on (together with a message on the display) to indicate an Adaptive Cruise Control (ACC)
system failure. Contact a Fiat Dealership.
yellowSCHEDULED SERVICING (SERVICE)
The “Service Schedule” includes car maintenance at fixed intervals (refer to the "Maintenance and care"
chapter). When the next scheduled service is approaching, the symbol will be displayed, followed by the
number of kilometres/miles or days (where provided) left, when the ignition device is turned to MAR.
This is displayed automatically, with ignition device at MAR, 2000 km before servicing or, where provided,
30 days before servicing. It is also displayed each time the ignition device is turned to MAR. The display will
be in km or miles depending on the unit of measurement set.
Go to a Fiat Dealership, where the "Scheduled Servicing Plan" operations will be performed and the
message will be reset.
whiteThis symbol turns on to indicate that the clutch pedal must be pressed to enable starting.
whiteThis symbol appears to suggest engaging a higher gear (upshifting).
whiteThe symbol appears to suggest engaging a lower gear (downshifting).
68
KNOWING THE INSTRUMENT PANEL
Page 73 of 284
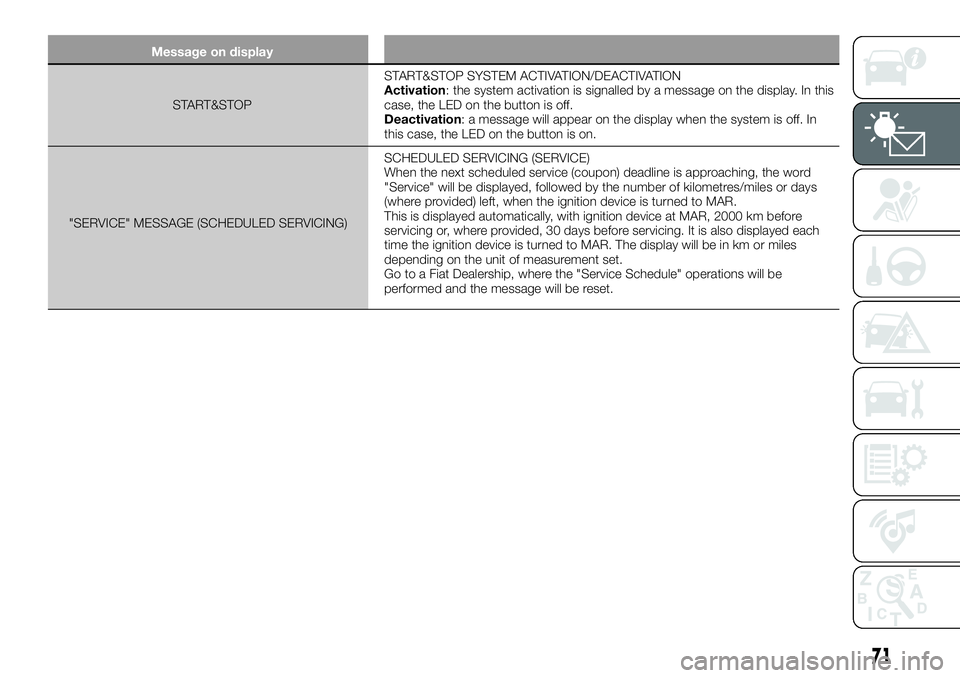
Message on display
START&STOPSTART&STOP SYSTEM ACTIVATION/DEACTIVATION
Activation: the system activation is signalled by a message on the display. In this
case, the LED on the button is off.
Deactivation: a message will appear on the display when the system is off. In
this case, the LED on the button is on.
"SERVICE" MESSAGE (SCHEDULED SERVICING)SCHEDULED SERVICING (SERVICE)
When the next scheduled service (coupon) deadline is approaching, the word
"Service" will be displayed, followed by the number of kilometres/miles or days
(where provided) left, when the ignition device is turned to MAR.
This is displayed automatically, with ignition device at MAR, 2000 km before
servicing or, where provided, 30 days before servicing. It is also displayed each
time the ignition device is turned to MAR. The display will be in km or miles
depending on the unit of measurement set.
Go to a Fiat Dealership, where the "Service Schedule" operations will be
performed and the message will be reset.
71
Page 87 of 284
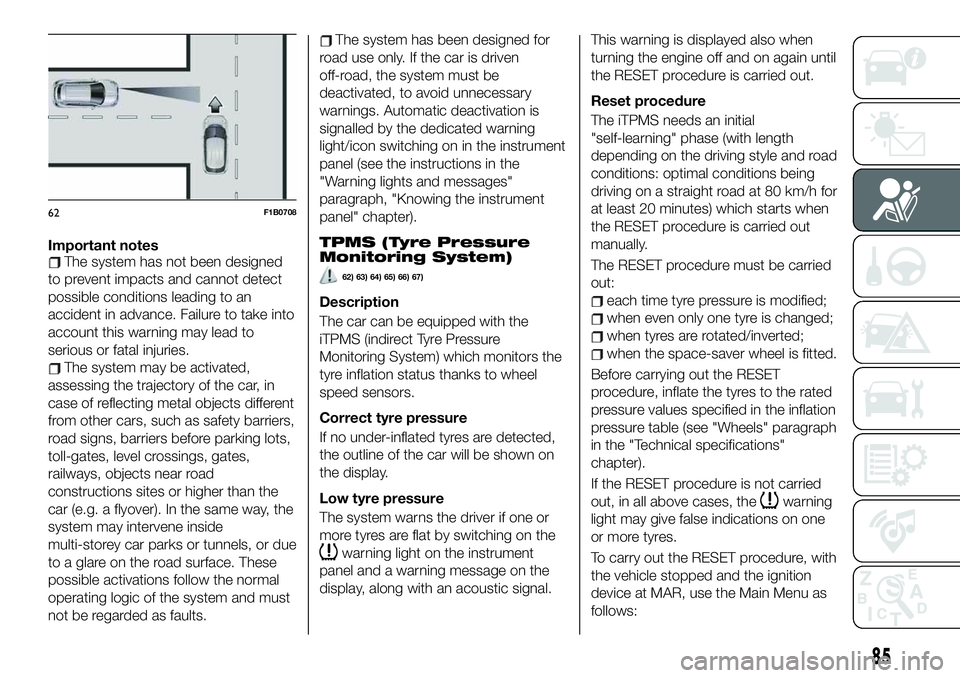
Important notesThe system has not been designed
to prevent impacts and cannot detect
possible conditions leading to an
accident in advance. Failure to take into
account this warning may lead to
serious or fatal injuries.
The system may be activated,
assessing the trajectory of the car, in
case of reflecting metal objects different
from other cars, such as safety barriers,
road signs, barriers before parking lots,
toll-gates, level crossings, gates,
railways, objects near road
constructions sites or higher than the
car (e.g. a flyover). In the same way, the
system may intervene inside
multi-storey car parks or tunnels, or due
to a glare on the road surface. These
possible activations follow the normal
operating logic of the system and must
not be regarded as faults.
The system has been designed for
road use only. If the car is driven
off-road, the system must be
deactivated, to avoid unnecessary
warnings. Automatic deactivation is
signalled by the dedicated warning
light/icon switching on in the instrument
panel (see the instructions in the
"Warning lights and messages"
paragraph, "Knowing the instrument
panel" chapter).
TPMS (Tyre Pressure
Monitoring System)
62) 63) 64) 65) 66) 67)
Description
The car can be equipped with the
iTPMS (indirect Tyre Pressure
Monitoring System) which monitors the
tyre inflation status thanks to wheel
speed sensors.
Correct tyre pressure
If no under-inflated tyres are detected,
the outline of the car will be shown on
the display.
Low tyre pressure
The system warns the driver if one or
more tyres are flat by switching on the
warning light on the instrument
panel and a warning message on the
display, along with an acoustic signal.This warning is displayed also when
turning the engine off and on again until
the RESET procedure is carried out.
Reset procedure
The iTPMS needs an initial
"self-learning" phase (with length
depending on the driving style and road
conditions: optimal conditions being
driving on a straight road at 80 km/h for
at least 20 minutes) which starts when
the RESET procedure is carried out
manually.
The RESET procedure must be carried
out:
each time tyre pressure is modified;
when even only one tyre is changed;
when tyres are rotated/inverted;
when the space-saver wheel is fitted.
Before carrying out the RESET
procedure, inflate the tyres to the rated
pressure values specified in the inflation
pressure table (see "Wheels" paragraph
in the "Technical specifications"
chapter).
If the RESET procedure is not carried
out, in all above cases, the
warning
light may give false indications on one
or more tyres.
To carry out the RESET procedure, with
the vehicle stopped and the ignition
device at MAR, use the Main Menu as
follows:
62F1B0708
85