display FIAT CROMA 2007 2.G Connect NavPlus Manual
[x] Cancel search | Manufacturer: FIAT, Model Year: 2007, Model line: CROMA, Model: FIAT CROMA 2007 2.GPages: 166, PDF Size: 4.82 MB
Page 68 of 166
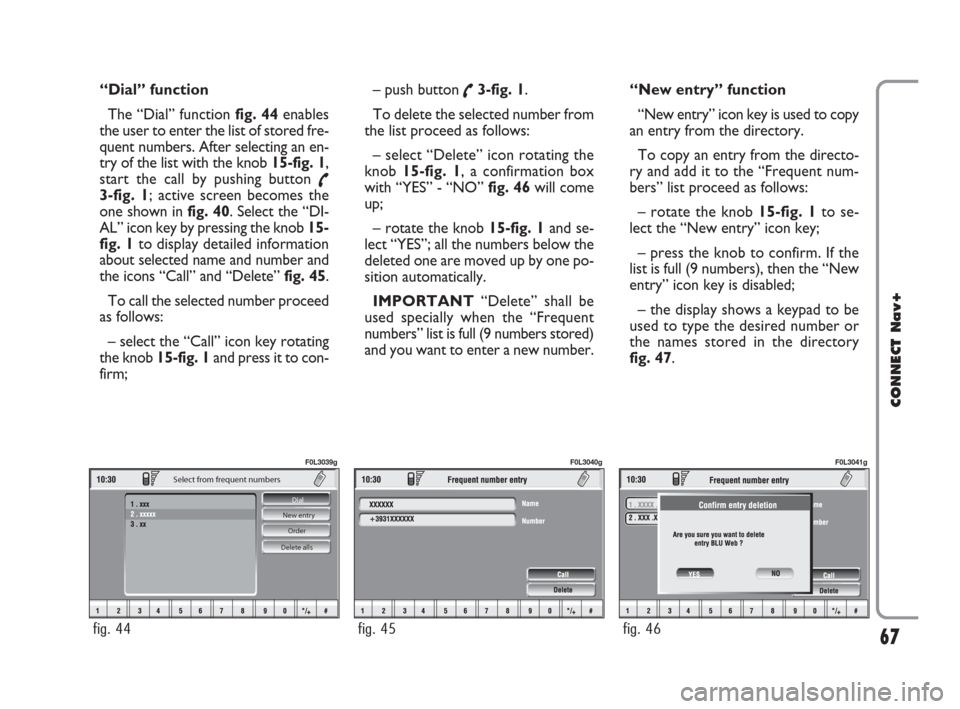
“Dial” function
The “Dial” function fig. 44enables
the user to enter the list of stored fre-
quent numbers. After selecting an en-
try of the list with the knob 15-fig. 1,
start the call by pushing button
˜3-fig. 1; active screen becomes the
one shown in fig. 40. Select the “DI-
AL” icon key by pressing the knob 15-
fig. 1to display detailed information
about selected name and number and
the icons “Call” and “Delete” fig. 45.
To call the selected number proceed
as follows:
– select the “Call” icon key rotating
the knob 15-fig. 1and press it to con-
firm; – push button
˜3-fig. 1.
To delete the selected number from
the list proceed as follows:
– select “Delete” icon rotating the
knob 15-fig. 1, a confirmation box
with “YES” - “NO” fig. 46will come
up;
– rotate the knob 15-fig. 1and se-
lect “YES”; all the numbers below the
deleted one are moved up by one po-
sition automatically.
IMPORTANT“Delete” shall be
used specially when the “Frequent
numbers” list is full (9 numbers stored)
and you want to enter a new number.“New entry” function
“New entry” icon key is used to copy
an entry from the directory.
To copy an entry from the directo-
ry and add it to the “Frequent num-
bers” list proceed as follows:
– rotate the knob 15-fig. 1to se-
lect the “New entry” icon key;
– press the knob to confirm. If the
list is full (9 numbers), then the “New
entry” icon key is disabled;
– the display shows a keypad to be
used to type the desired number or
the names stored in the directory
fig. 47.
67
CONNECT Nav+
Delete alls Order New entry Dial
Select from frequent numbers
fig. 44
F0L3039g
fig. 45
F0L3040g
fig. 46
F0L3041g
060-091 Connect CROMA GB 4-07-2007 14:20 Pagina 67
Page 69 of 166
Type-in or search as required by se-
lecting the first letters of the name
with the knob 15-fig. 1and press it to
confirm.
If the user tries to add an already ex-
isting number to the “Frequent num-
bers” list, the display will show the al-
ready stored entry.
“Order” function
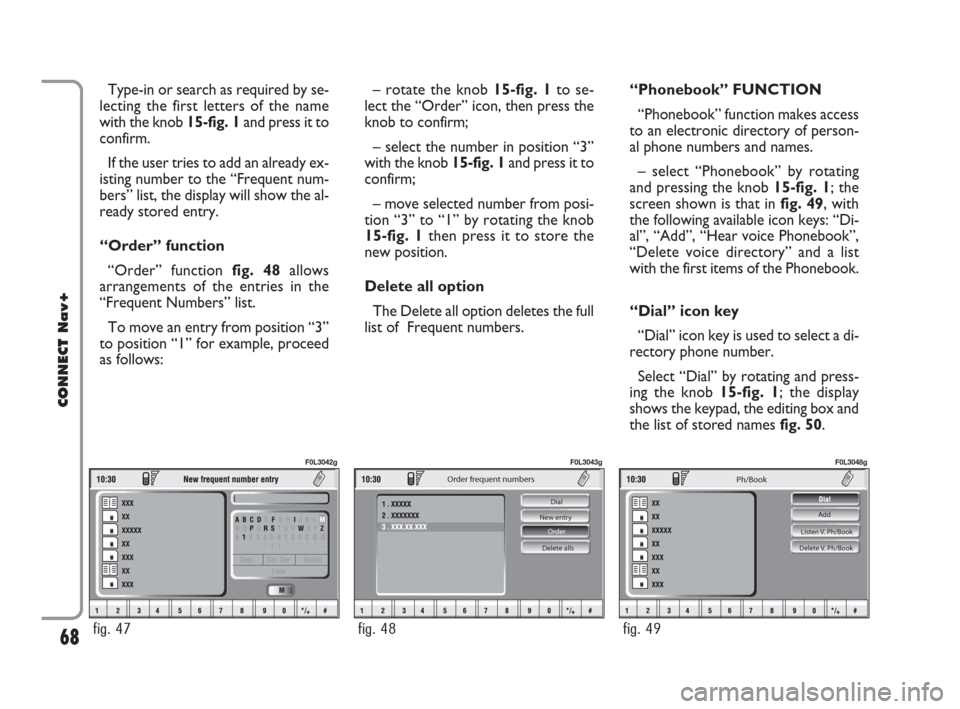
“Order” function fig. 48allows
arrangements of the entries in the
“Frequent Numbers” list.
To move an entry from position “3”
to position “1” for example, proceed
as follows:– rotate the knob 15-fig. 1to se-
lect the “Order” icon, then press the
knob to confirm;
– select the number in position “3”
with the knob 15-fig. 1and press it to
confirm;
– move selected number from posi-
tion “3” to “1” by rotating the knob
15-fig. 1 then press it to store the
new position.
Delete all option
The Delete all option deletes the full
list of Frequent numbers.“Phonebook” FUNCTION
“Phonebook” function makes access
to an electronic directory of person-
al phone numbers and names.
– select “Phonebook” by rotating
and pressing the knob 15-fig. 1; the
screen shown is that in fig. 49, with
the following available icon keys: “Di-
al”, “Add”, “Hear voice Phonebook”,
“Delete voice directory” and a list
with the first items of the Phonebook.
“Dial” icon key
“Dial” icon key is used to select a di-
rectory phone number.
Select “Dial” by rotating and press-
ing the knob 15-fig. 1; the display
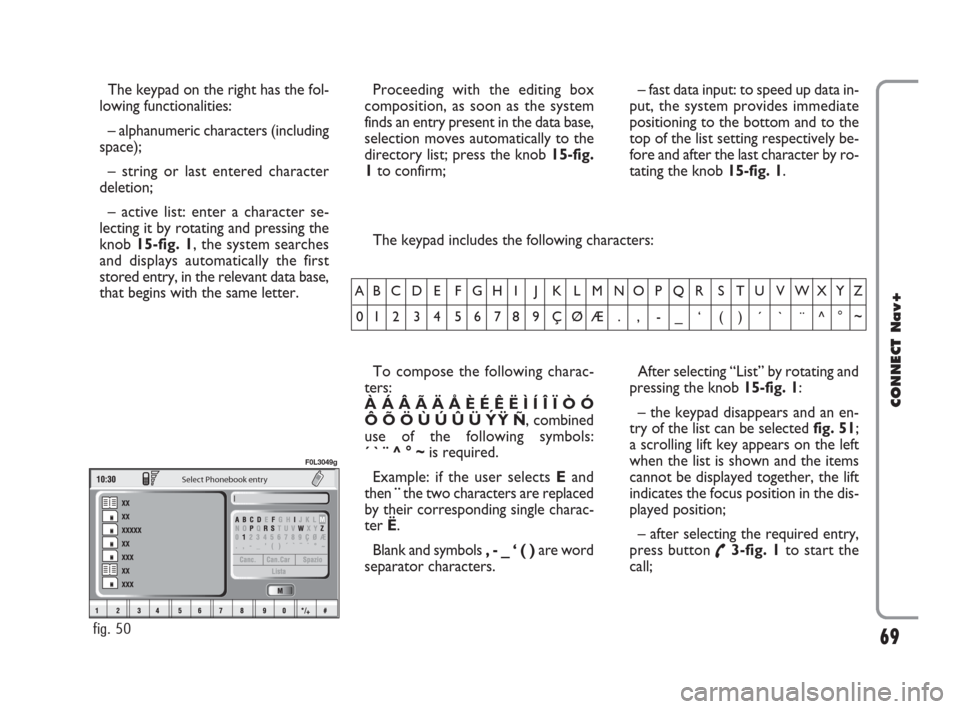
shows the keypad, the editing box and
the list of stored names fig. 50.
68
CONNECT Nav+
fig. 47
F0L3042g
Delete alls Order New entry Dial
Order frequent numbers
fig. 48
F0L3043g
Listen V. Ph/Book
Delete V. Ph/Book
Ph/Book
Add
fig. 49
F0L3048g
060-091 Connect CROMA GB 4-07-2007 14:20 Pagina 68
Page 70 of 166
69
CONNECT Nav+
The keypad on the right has the fol-
lowing functionalities:
– alphanumeric characters (including
space);
– string or last entered character
deletion;
– active list: enter a character se-
lecting it by rotating and pressing the
knob 15-fig. 1, the system searches
and displays automatically the first
stored entry, in the relevant data base,
that begins with the same letter. The keypad includes the following characters:
To compose the following charac-
ters:
À Á Â Ã Ä Å È É Ê Ë Ì Í Î Ï Ò Ó
Ô Õ Ö Ù Ú Û Ü Y´
Ÿ Ñ, combined
use of the following symbols:
´ ` ¨ ^ ° ~is required.
Example: if the user selects Eand
then ¨the two characters are replaced
by their corresponding single charac-
ter Ë.
Blank and symbols , - _ ‘ ( ) are word
separator characters.After selecting “List” by rotating and
pressing the knob 15-fig. 1:
– the keypad disappears and an en-
try of the list can be selected fig. 51;
a scrolling lift key appears on the left
when the list is shown and the items
cannot be displayed together, the lift
indicates the focus position in the dis-
played position;
– after selecting the required entry,
press button
˜3-fig. 1to start the
call;
AB C D E F G H I J K L M NO P Q R S T U V WXYZ
0123456789ÇØÆ. , -_ ‘ ()´ ` ¨^°~
Select Phonebook entry
fig. 50
F0L3049g
Proceeding with the editing box
composition, as soon as the system
finds an entry present in the data base,
selection moves automatically to the
directory list; press the knob 15-fig.
1to confirm;– fast data input: to speed up data in-
put, the system provides immediate
positioning to the bottom and to the
top of the list setting respectively be-
fore and after the last character by ro-
tating the knob 15-fig. 1.
060-091 Connect CROMA GB 4-07-2007 14:20 Pagina 69
Page 71 of 166
70
CONNECT Nav+
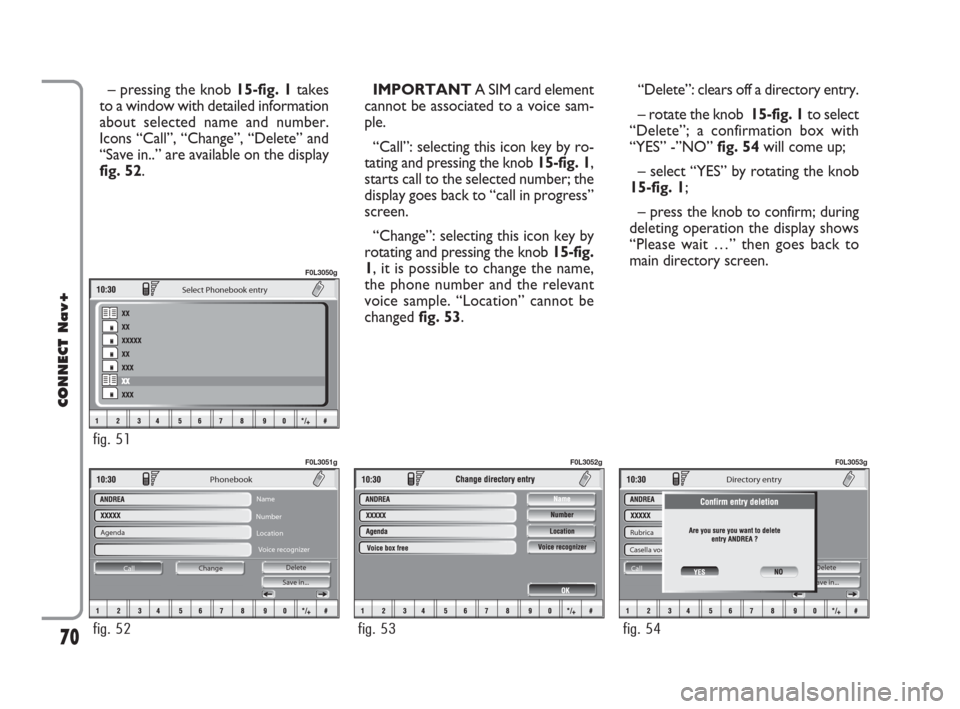
– pressing the knob 15-fig. 1takes
to a window with detailed information
about selected name and number.
Icons “Call”, “Change”, “Delete” and
“Save in..” are available on the display
fig. 52.IMPORTANT A SIM card element
cannot be associated to a voice sam-
ple.
“Call”: selecting this icon key by ro-
tating and pressing the knob 15-fig. 1,
starts call to the selected number; the
display goes back to “call in progress”
screen.
“Change”: selecting this icon key by
rotating and pressing the knob 15-fig.
1, it is possible to change the name,
the phone number and the relevant
voice sample. “Location” cannot be
changed fig. 53. “Delete”: clears off a directory entry.
– rotate the knob 15-fig. 1to select
“Delete”; a confirmation box with
“YES” -”NO” fig. 54will come up;
– select “YES” by rotating the knob
15-fig. 1;
– press the knob to confirm; during
deleting operation the display shows
“Please wait …” then goes back to
main directory screen.
Agenda
Change Call Save in... Delete
Phonebook
Name
Number
Location
Voice recognizer
fig. 52
F0L3051g
fig. 53
F0L3052g
Rubrica
Casella voc. già registrata
ModificaCall Save in... Delete
Ricon.Voc.
Directory entry
fig. 54
F0L3053g
Select Phonebook entry
fig. 51
F0L3050g
060-091 Connect CROMA GB 4-07-2007 14:20 Pagina 70
Page 72 of 166
71
CONNECT Nav+
Ph/Book
ANDREA
+39XXXXXXX
SIM Card
?????
fig. 55
F0L3054g
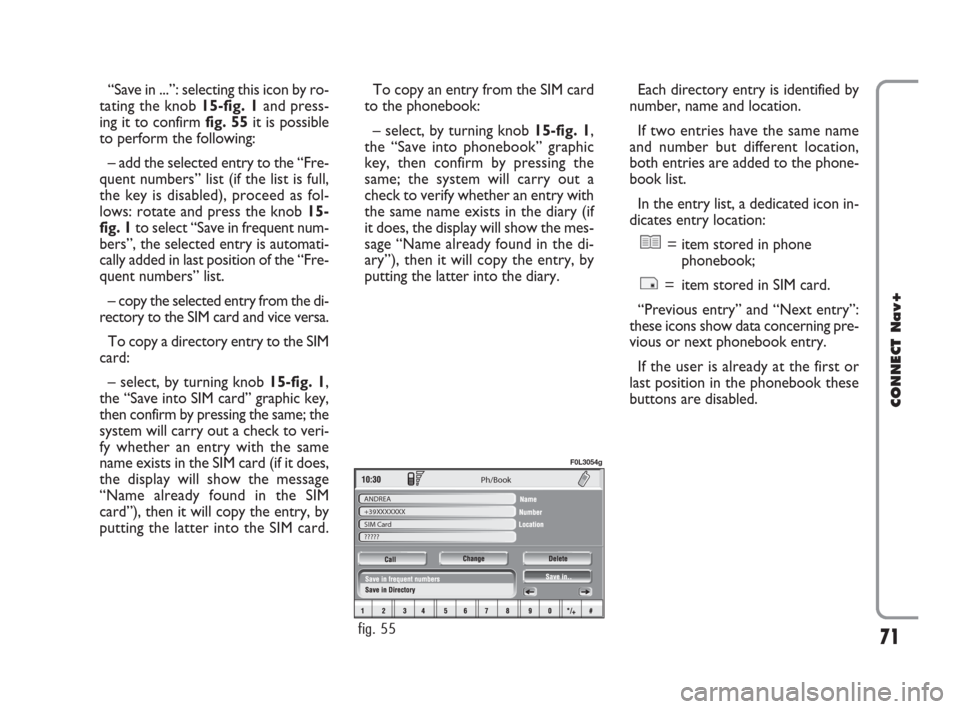
“Save in ...”: selecting this icon by ro-
tating the knob 15-fig. 1and press-
ing it to confirm fig. 55it is possible
to perform the following:
– add the selected entry to the “Fre-
quent numbers” list (if the list is full,
the key is disabled), proceed as fol-
lows: rotate and press the knob 15-
fig. 1to select “Save in frequent num-
bers”, the selected entry is automati-
cally added in last position of the “Fre-
quent numbers” list.
– copy the selected entry from the di-
rectory to the SIM card and vice versa.
To copy a directory entry to the SIM
card:
– select, by turning knob 15-fig. 1,
the “Save into SIM card” graphic key,
then confirm by pressing the same; the
system will carry out a check to veri-
fy whether an entry with the same
name exists in the SIM card (if it does,
the display will show the message
“Name already found in the SIM
card”), then it will copy the entry, by
putting the latter into the SIM card. To copy an entry from the SIM card
to the phonebook:
– select, by turning knob 15-fig. 1,
the “Save into phonebook” graphic
key, then confirm by pressing the
same; the system will carry out a
check to verify whether an entry with
the same name exists in the diary (if
it does, the display will show the mes-
sage “Name already found in the di-
ary”), then it will copy the entry, by
putting the latter into the diary.Each directory entry is identified by
number, name and location.
If two entries have the same name
and number but different location,
both entries are added to the phone-
book list.
In the entry list, a dedicated icon in-
dicates entry location:
= item stored in phone
phonebook;
= item stored in SIM card.
“Previous entry” and “Next entry”:
these icons show data concerning pre-
vious or next phonebook entry.
If the user is already at the first or
last position in the phonebook these
buttons are disabled.
060-091 Connect CROMA GB 4-07-2007 14:20 Pagina 71
Page 73 of 166
72
CONNECT Nav+
“Add” icon key
“Add” icon enables to add a new en-
try to the phonebook.
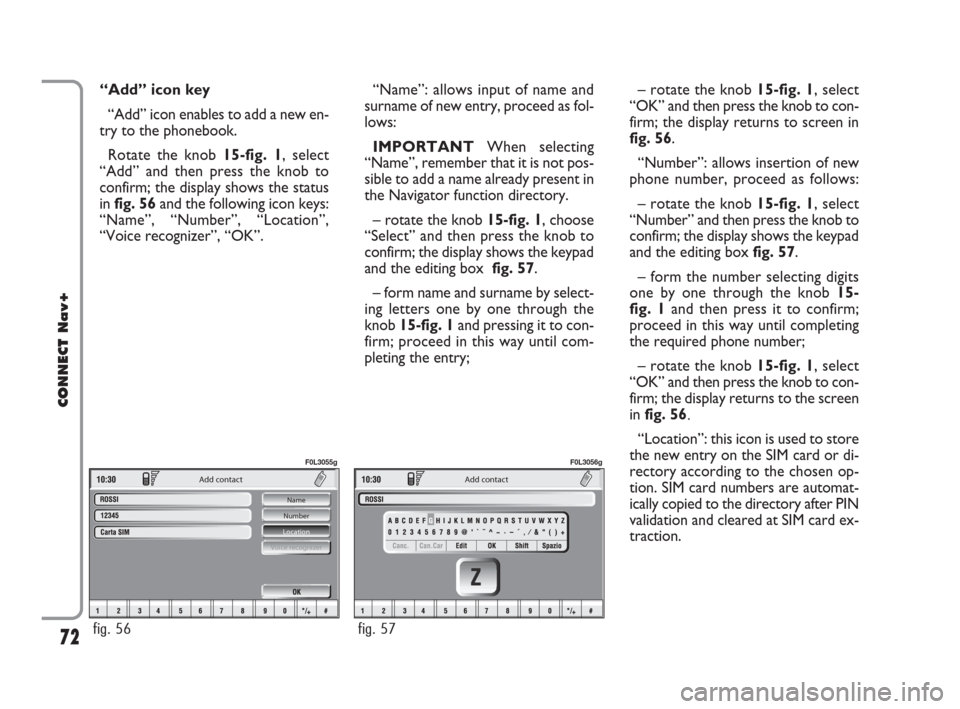
Rotate the knob 15-fig. 1, select
“Add” and then press the knob to
confirm; the display shows the status
in fig. 56and the following icon keys:
“Name”, “Number”, “Location”,
“Voice recognizer”, “OK”.
Add contact
Name
Number
Location
Voice recognizer
fig. 56
F0L3055g
Add contact
fig. 57
F0L3056g
“Name”: allows input of name and
surname of new entry, proceed as fol-
lows:
IMPORTANTWhen selecting
“Name”, remember that it is not pos-
sible to add a name already present in
the Navigator function directory.
– rotate the knob 15-fig. 1, choose
“Select” and then press the knob to
confirm; the display shows the keypad
and the editing box fig. 57.
– form name and surname by select-
ing letters one by one through the
knob 15-fig. 1and pressing it to con-
firm; proceed in this way until com-
pleting the entry;– rotate the knob 15-fig. 1, select
“OK” and then press the knob to con-
firm; the display returns to screen in
fig. 56.
“Number”: allows insertion of new
phone number, proceed as follows:
– rotate the knob 15-fig. 1, select
“Number” and then press the knob to
confirm; the display shows the keypad
and the editing box fig. 57.
– form the number selecting digits
one by one through the knob 15-
fig. 1and then press it to confirm;
proceed in this way until completing
the required phone number;
– rotate the knob 15-fig. 1, select
“OK” and then press the knob to con-
firm; the display returns to the screen
in fig. 56.
“Location”: this icon is used to store
the new entry on the SIM card or di-
rectory according to the chosen op-
tion. SIM card numbers are automat-
ically copied to the directory after PIN
validation and cleared at SIM card ex-
traction.
060-091 Connect CROMA GB 4-07-2007 14:20 Pagina 72
Page 74 of 166
73
CONNECT Nav+
“Voice recognizer”: allows to man-
age a voice sample associated to
stored names/numbers.
“OK”: confirms the insertion of the
new entry, proceed as follows:
– rotate the knob 15-fig. 1, select
the icon key and then press the knob
to confirm; the display shows “Please
wait…” and the system will store the
new entry in the directory.IMPORTANTIf the same name is
already existing, the display will show
“Name already in phonebook”.
Voice recognition
(active only when phonebook has
been selected as stored phone
number location)
To enter this mode proceed as fol-
lows:
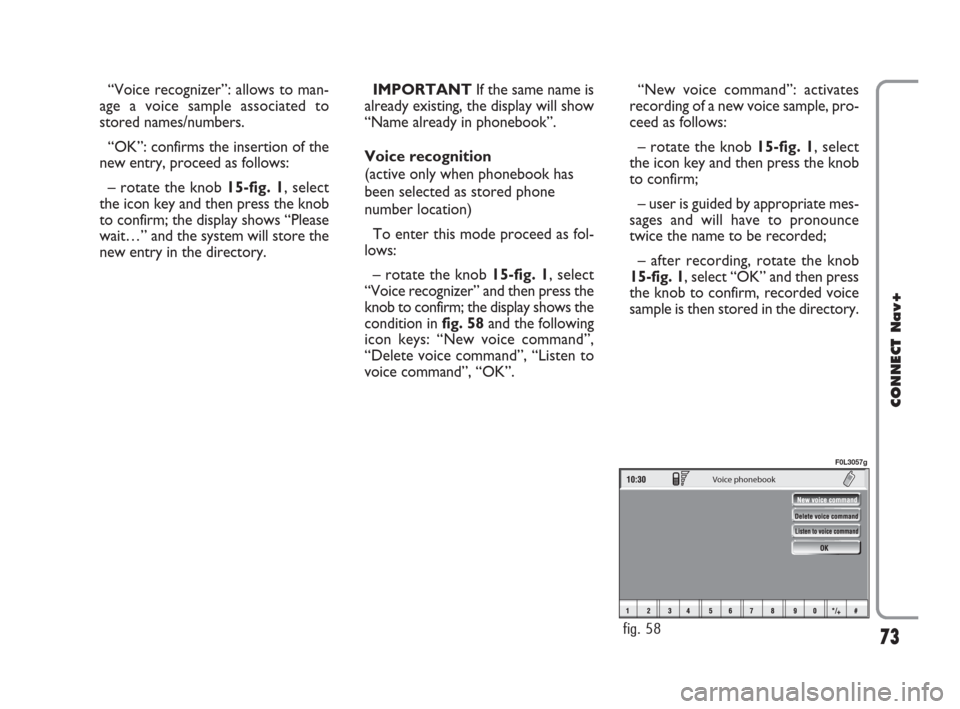
– rotate the knob 15-fig. 1, select
“Voice recognizer” and then press the
knob to confirm; the display shows the
condition infig. 58and the following
icon keys: “New voice command”,
“Delete voice command”, “Listen to
voice command”, “OK”.
Voice phonebook
fig. 58
F0L3057g
“New voice command”: activates
recording of a new voice sample, pro-
ceed as follows:
– rotate the knob 15-fig. 1, select
the icon key and then press the knob
to confirm;
– user is guided by appropriate mes-
sages and will have to pronounce
twice the name to be recorded;
– after recording, rotate the knob
15-fig. 1, select “OK” and then press
the knob to confirm, recorded voice
sample is then stored in the directory.
060-091 Connect CROMA GB 4-07-2007 14:20 Pagina 73
Page 75 of 166
74
CONNECT Nav+
“Delete voice command”: allows
deletion of a previously recorded
voice sample; proceed as follows:
– rotate the knob 15-fig. 1, select
the icon key and then press the knob
to confirm;
– rotate the knob 15-fig. 1, select
“OK” and then press the knob to con-
firm, the voice sample will be deleted
from the directory.
IMPORTANTThis icon key is ac-
tive only if the concerned entry, in the
directory, is associated to a voice sam-
ple as described previously.“Listen to voice command”: repro-
duces a previously recorded voice
sample; proceed as follows:
– rotate the knob 15-fig. 1, select
the icon key and then press the knob
to confirm; the system will reproduce
the selected voice sample.
IMPORTANTThis icon key is ac-
tive only if the concerned entry, in the
directory, is associated to a voice sam-
ple as described previously.
“OK”: confirm changes and stores
them in the directory.
IMPORTANTIf the user after end-
ing these operations doesn’t select
“OK” and confirm by pressing the
knob 15-fig. 1new settings will not
be stored in the directory. “Hear voice phonebook”
icon key
This graphic key (“Listening to the
voice diary) makes it possible to re-
produce all the voice samples previ-
ously recorded; proceed as follows:
– rotate the knob 15-fig. 1, select
the icon key and then press the knob
to confirm; the system will reproduce
stored samples.
Press “ESC” 14-fig. 1 to stop as sug-
gested on the display.
060-091 Connect CROMA GB 4-07-2007 14:20 Pagina 74
Page 76 of 166
75
CONNECT Nav+
Center number Enter Dial
Messages
fig. 59
F0L3072g
“Delete voice phonebook”
icon key
This icon key (Delete voice directo-
ry) allows to clear off previously
recorded voice samples; proceed as
follows:
– rotate the knob 15-fig. 1, select
the icon key and then press the knob
to confirm; the display will show the
following string: “Press “ENTER” to
confirm, “ESCAPE” to cancel”.
– pressing the knob 15-fig. 1clears
off voice samples, during deletion the
display will show “Please wait…”.
– pressing “ESC” 14-fig. 1deletion
is not performed and previous screen
is displayed.“Messages” FUNCTION
(SMS - Short Message Service)
“Messages” key allows reading and
sending short messages (maximum
length is 160 characters) by GSM
phone.
Read and sent messages are stored
into two separate boxes, which how-
ever share a common memory sec-
tion; so the sum of sent and read
stored messages must not exceed the
maximum number of allowed SMSs (it
depends on the SIM card).
Telephone module stops input of
new messages when the buffer is full
and the “Enter” key is disabled.In this case the display shows a string
with the following warning message:
“Further SMS messages cannot be
stored or received”.
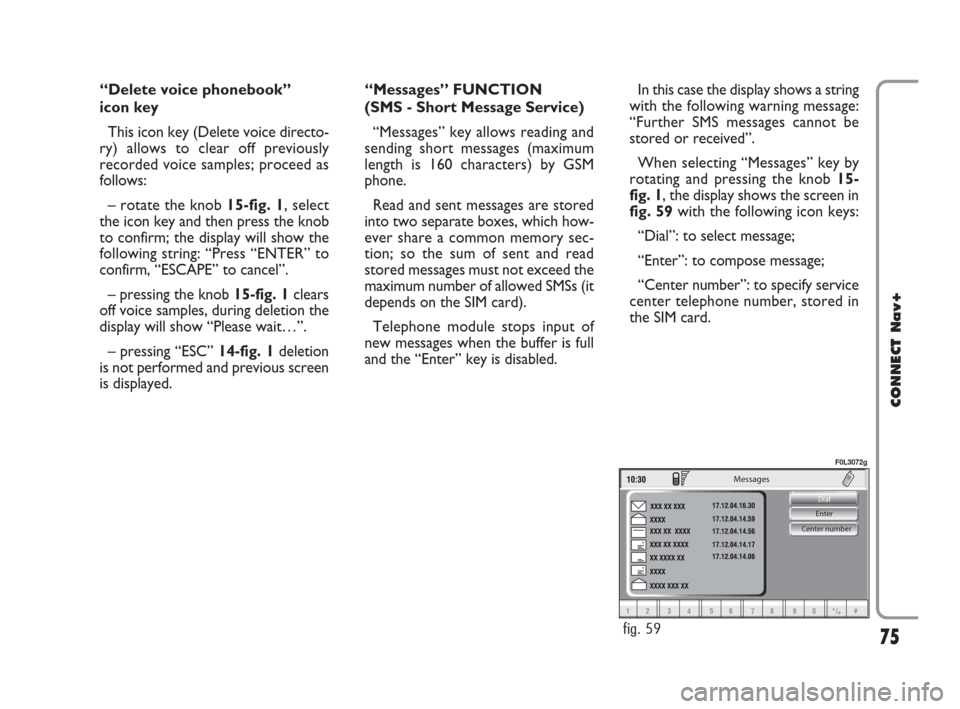
When selecting “Messages” key by
rotating and pressing the knob 15-
fig. 1, the display shows the screen in
fig. 59with the following icon keys:
“Dial”: to select message;
“Enter”: to compose message;
“Center number”: to specify service
center telephone number, stored in
the SIM card.
060-091 Connect CROMA GB 4-07-2007 14:20 Pagina 75
Page 77 of 166
76
CONNECT Nav+
Center number Enter Dial
Select message
fig. 60
F0L3073g
Delete
Display last message written
Send
fig. 61
F0L3074g
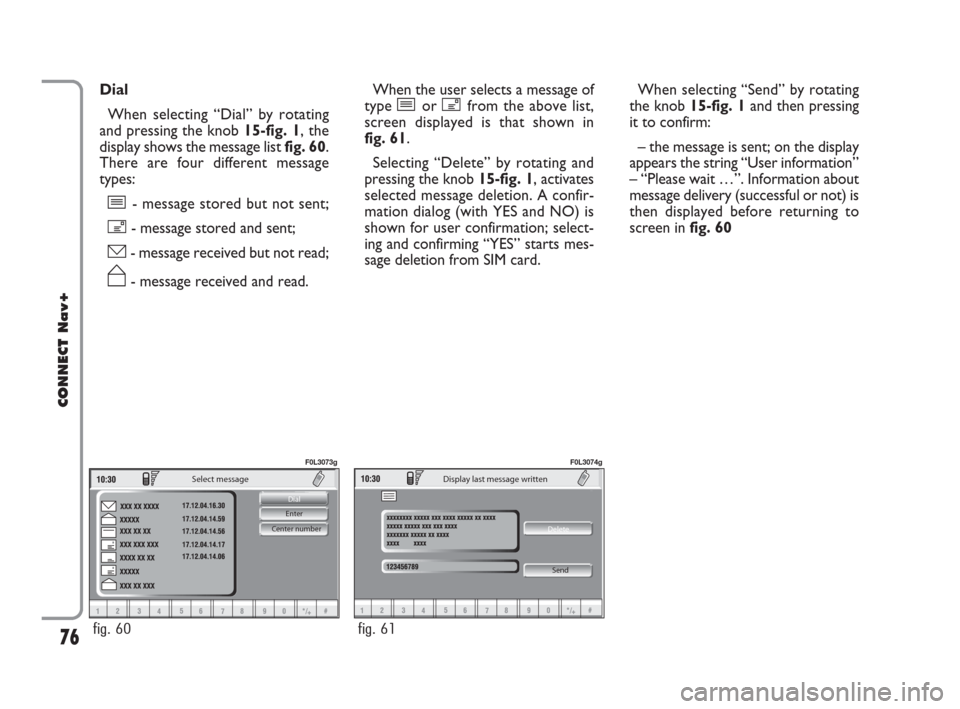
Dial
When selecting “Dial” by rotating
and pressing the knob 15-fig. 1, the
display shows the message list fig. 60.
There are four different message
types:
î- message stored but not sent;
í- message stored and sent;
ó- message received but not read;
ñ- message received and read.When the user selects a message of
type îor ífrom the above list,
screen displayed is that shown in
fig. 61.
Selecting “Delete” by rotating and
pressing the knob 15-fig. 1, activates
selected message deletion. A confir-
mation dialog (with YES and NO) is
shown for user confirmation; select-
ing and confirming “YES” starts mes-
sage deletion from SIM card.When selecting “Send” by rotating
the knob 15-fig. 1and then pressing
it to confirm:
– the message is sent; on the display
appears the string “User information”
– “Please wait …”. Information about
message delivery (successful or not) is
then displayed before returning to
screen in fig. 60
060-091 Connect CROMA GB 4-07-2007 14:21 Pagina 76