buttons FIAT DOBLO COMBI 2011 Owner handbook (in English)
[x] Cancel search | Manufacturer: FIAT, Model Year: 2011, Model line: DOBLO COMBI, Model: FIAT DOBLO COMBI 2011Pages: 274, PDF Size: 5.96 MB
Page 50 of 274
49
KNOW
YOUR
VEHICLE
SAFETY
STAR
TING
AND
DRIVING
WARNING
LIGHTS AND
MESSAGES
IN AN
EMERGENCY
SERVICING
AND
MAINTENANCE
TECHNICAL
SPECIFICATIONS
INDEX
INTERNAL AIR RECIRCULATION
ACTIVATION
Press button E: when the function is on, the button LED
lights up.
It is advisable to switch the internal air recirculation on
while standing in queues or in tunnels to prevent the in-
troduction of polluted air. Do not use the function for a
long time, particularly if there are many passengers on
board, to prevent the windows from misting up.
WARNING The air recirculation system makes it possi-
ble to reach the required heating or cooling conditions
faster. It is not advisable to switch the air recirculation
on when it is rainy/cold or the windows might steam up,
especially if the climate control system is not turned on.
CLIMATE CONTROL (cooling)
Proceed as follows:
❒turn knob A to the blue section;
❒turn knob B to the required speed;
❒turn knob C to ¶;
❒press buttons ❄and E (button LEDs on). HEATED REAR WINDSCREEN AND DOOR
MIRRORS DEMISTING/DEFROSTING
(for versions/markets where provided)
Press button F (to activate; when this function is on, the
LED on button F (lights up.
This function is timed and will turn off automatically after
20 minutes. Press button F (again to switch it off before
20 minutes elapse.
WARNING Do not apply stickers to the inside of the heat-
ed rear windscreen over the heating filaments to avoid
damage that might cause it to stop working properly.
REGULATING THE FAN SPEED
To ventilate the passenger compartment properly, pro-
ceed as follows:
❒fully open the central and side air diffusers;
❒turn knob A to the blue section;
❒turn knob B to the required speed;
❒turn knob C to ¶;
❒turn off internal air recirculation (button E LED off).
Page 53 of 274
52
KNOW
YOUR
VEHICLE
SAFETY
STAR
TING
AND
DRIVING
WARNING
LIGHTS AND
MESSAGES
IN AN
EMERGENCY
SERVICING
AND
MAINTENANCE
TECHNICAL
SPECIFICATIONS
INDEX
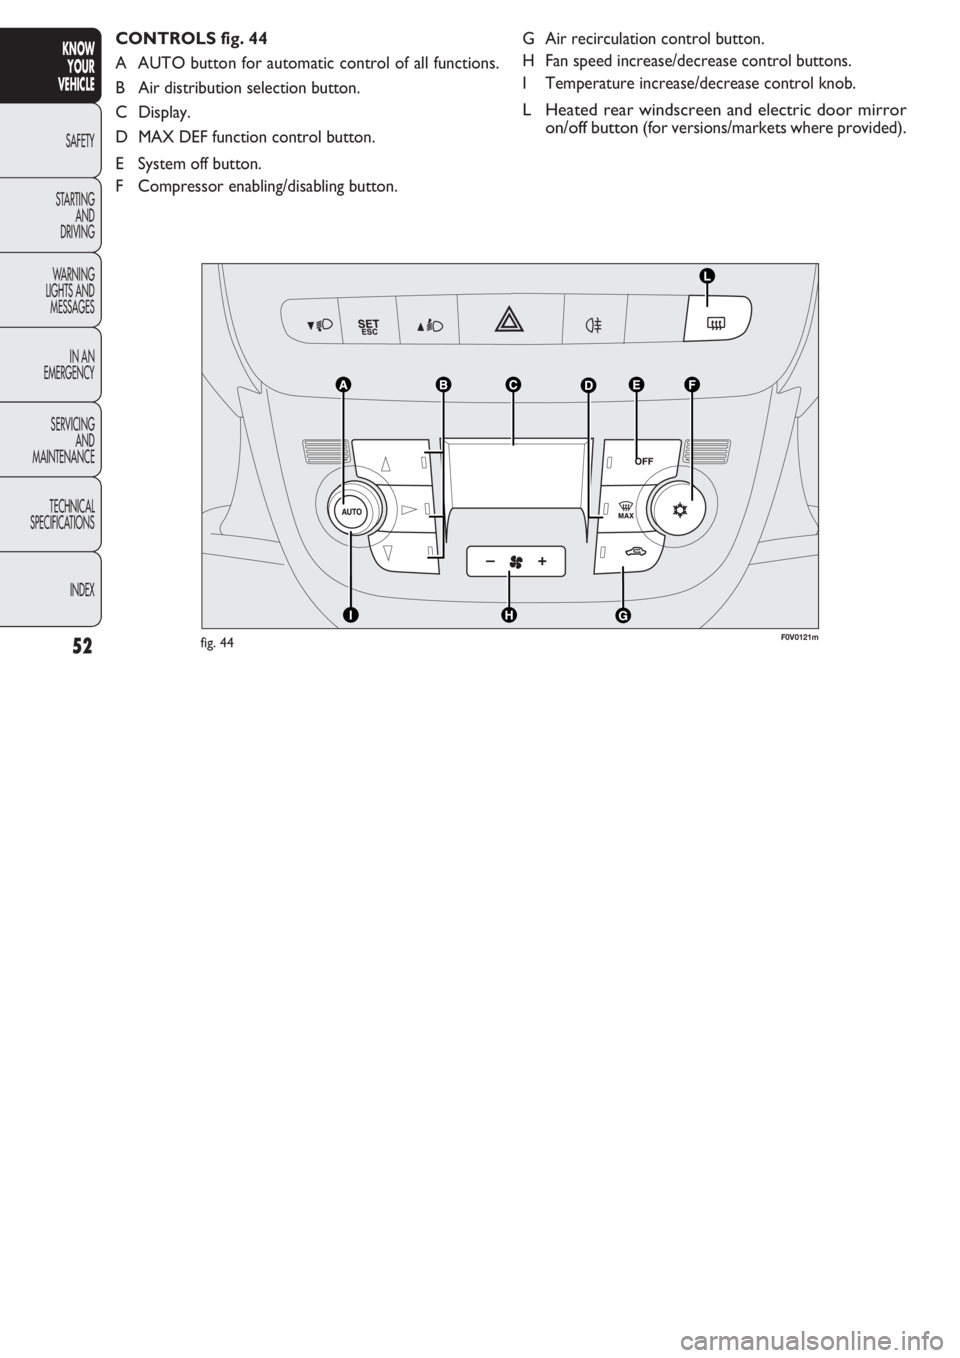
G Air recirculation control button.
H Fan speed increase/decrease control buttons.
I Temperature increase/decrease control knob.
L Heated rear windscreen and electric door mirror
on/off button
(for versions/markets where provided).
CONTROLS fig. 44
A AUTO button for automatic control of all functions.
B Air distribution selection button.
C Display.
D MAX DEF function control button.
E System off button.
F Compressor enabling/disabling button.
F0V0121mfig. 44
Page 54 of 274
53
KNOW
YOUR
VEHICLE
SAFETY
STAR
TING
AND
DRIVING
WARNING
LIGHTS AND
MESSAGES
IN AN
EMERGENCY
SERVICING
AND
MAINTENANCE
TECHNICAL
SPECIFICATIONS
INDEX
During fully automatic operation (FULL AUTO), the word
FULL will disappear if the air distribution and/or flow rate
and/or activation of the compressor and/or recirculation
settings are changed. In this way, the functions will switch
from automatic to manual control until the AUTO button
is pressed again. With one or more functions turned on
manually, the adjustment of the intake air temperature con-
tinues to be managed automatically, except with the com-
pressor switched off: if this is the case, the temperature of
the air introduced into the passenger compartment can-
not be lower than that of the outside air.
CONTROLS
Air temperature adjustment knob (I)
Turn the knob either clockwise or anticlockwise to in-
crease or lower the temperature in the passenger com-
partment.
The temperature set is shown on the display.
Turn the knob either all to the right or all to the left to
the extreme HI or LO position to turn the maximum heat-
ing or maximum cooling functions on:
❒HI Function (maximum heating):
select by turning the temperature knob clockwise over the
maximum value (32 °C). USING THE CLIMATE CONTROL SYSTEM
The system can be started in different ways, but it is ad-
visable to start by pressing the AUTO button and then
turning the knob to set the temperature required on the
display. The system will start running automatically in this
way and the set temperature will be reached as quickly
as possible. The system will adjust the temperature, the
quantity and the distribution of the air introduced into the
passenger compartment and will manage the recirculation
function and the air conditioning compressor engagement.
During fully automatic operation the only manual inter-
vention required is the possible activation of the following
functions:
❒Òair recirculation, to keep it always on or off;
❒Zto speed up demisting/defrosting of the front door
window glasses, rear door window glasses and door
mirrors.
During fully automatic system operation, you can change
the set temperatures, air distribution and fan speed at any
time by using the relevant buttons or knobs: the system
will automatically change its settings to adjust to the new
requirements.
Page 55 of 274
54
KNOW
YOUR
VEHICLE
SAFETY
STAR
TING
AND
DRIVING
WARNING
LIGHTS AND
MESSAGES
IN AN
EMERGENCY
SERVICING
AND
MAINTENANCE
TECHNICAL
SPECIFICATIONS
INDEX
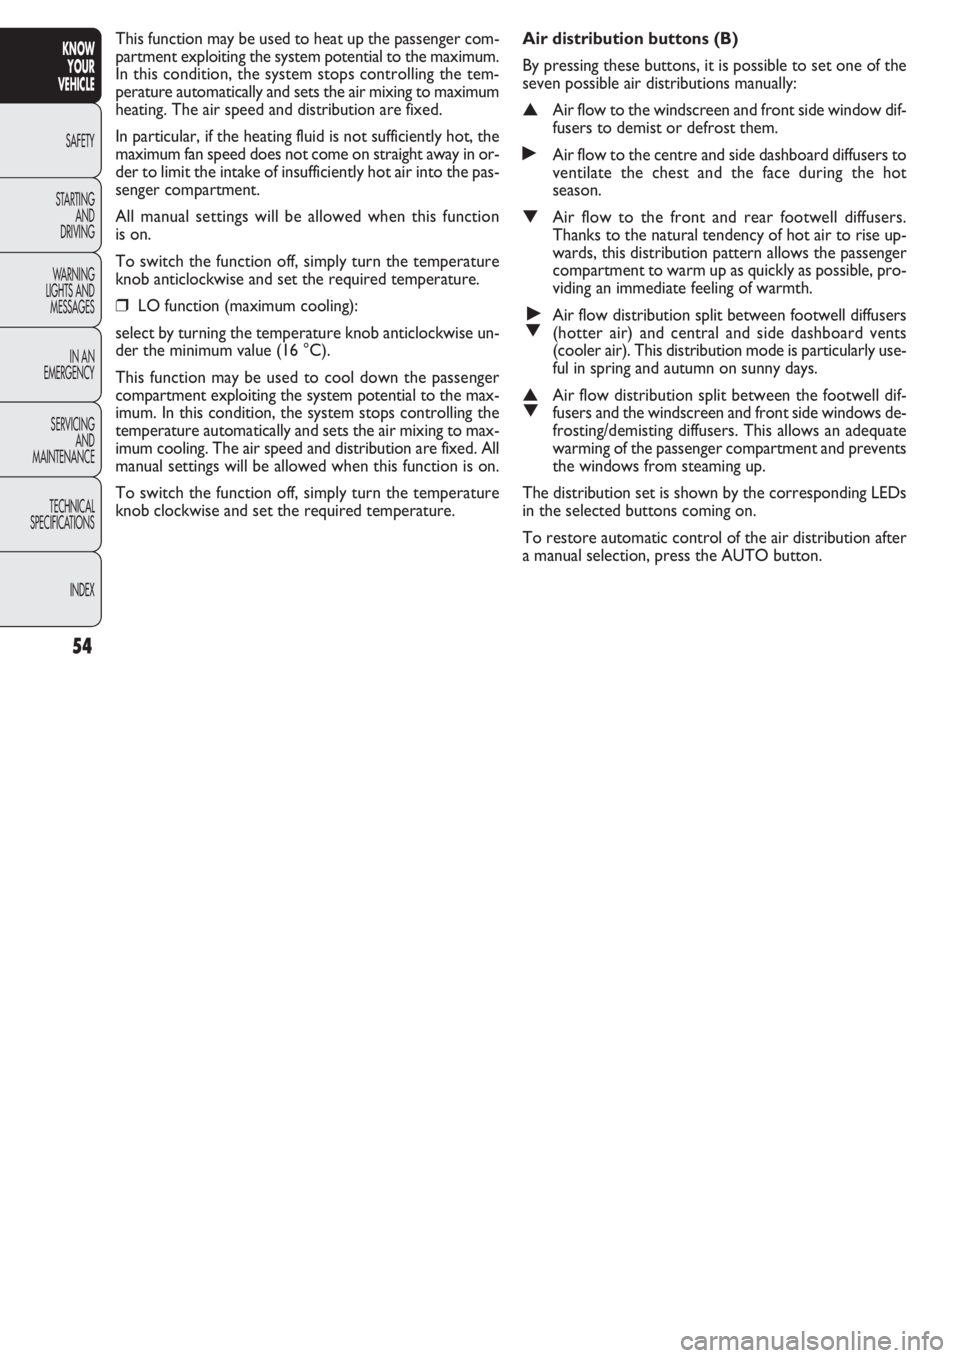
Air distribution buttons (B)
By pressing these buttons, it is possible to set one of the
seven possible air distributions manually:
▲Air flow to the windscreen and front side window dif-
fusers to demist or defrost them.
˙Air flow to the centre and side dashboard diffusers to
ventilate the chest and the face during the hot
season.
▼Air flow to the front and rear footwell diffusers.
Thanks to the natural tendency of hot air to rise up-
wards, this distribution pattern allows the passenger
compartment to warm up as quickly as possible, pro-
viding an immediate feeling of warmth.
˙
▼Air flow distribution split between footwell diffusers
(hotter air) and central and side dashboard vents
(cooler air). This distribution mode is particularly use-
ful in spring and autumn on sunny days.
▲
▼Air flow distribution split between the footwell dif-
fusers and the windscreen and front side windows de-
frosting/demisting diffusers. This allows an adequate
warming of the passenger compartment and prevents
the windows from steaming up.
The distribution set is shown by the corresponding LEDs
in the selected buttons coming on.
To restore automatic control of the air distribution after
a manual selection, press the AUTO button. This function may be used to heat up the passenger com-
partment exploiting the system potential to the maximum.
In this condition, the system stops controlling the tem-
perature automatically and sets the air mixing to maximum
heating. The air speed and distribution are fixed.
In particular, if the heating fluid is not sufficiently hot, the
maximum fan speed does not come on straight away in or-
der to limit the intake of insufficiently hot air into the pas-
senger compartment.
All manual settings will be allowed when this function
is on.
To switch the function off, simply turn the temperature
knob anticlockwise and set the required temperature.
❒LO function (maximum cooling):
select by turning the temperature knob anticlockwise un-
der the minimum value (16 °C).
This function may be used to cool down the passenger
compartment exploiting the system potential to the max-
imum. In this condition, the system stops controlling the
temperature automatically and sets the air mixing to max-
imum cooling. The air speed and distribution are fixed. All
manual settings will be allowed when this function is on.
To switch the function off, simply turn the temperature
knob clockwise and set the required temperature.
Page 56 of 274

55
KNOW
YOUR
VEHICLE
SAFETY
STAR
TING
AND
DRIVING
WARNING
LIGHTS AND
MESSAGES
IN AN
EMERGENCY
SERVICING
AND
MAINTENANCE
TECHNICAL
SPECIFICATIONS
INDEX
AUTO button (A)
(automatic operation)
Press AUTO to make the system automatically adjust the
quantity and distribution of the air introduced into the pas-
senger compartment. All previous manual settings will be
cancelled.
The message FULL AUTO appears on the front display.
By manually adjusting at least one of the functions auto-
matically managed by the system (air recirculation, air dis-
tribution, fan speed or air conditioning compressor on/off),
the word FULL will disappear from the display, indicating
that the system is no longer automatically controlling all
the functions (the temperature will still be controlled au-
tomatically by the system).
WARNING Should the system (after manual intervention)
no longer be able to guarantee the target temperature for
the passenger compartment, the set temperature value will
start flashing to indicate the difficulties the system is ex-
periencing and then the word AUTO will go out.
To restore system automatic control at any time, after one
or more manual adjustments, press the AUTO
button. Fan speed adjustment buttons (H)
Press the outsides of button
Hto increase or decrease the
fan speed and therefore the amount of air admitted into
the passenger compartment, although maintaining the tar-
get temperature.
The fan speed is shown by the bars lit up on the display:
❒Max. fan speed = all bars lit
❒Min. fan speed = one bar lit.
The fan can only be disabled if the climate control com-
pressor has been switched off by pressing button
F-fig. 42.
WARNING To restore automatic fan speed control af-
ter a manual adjustment, press the AUTO button.
WARNING At high vehicle speeds, the dynamic effect may
increase the air flow rate into the passenger compartment,
which in this case will not directly correspond to the fan
speed bar display.
Page 84 of 274
83
KNOW
YOUR
VEHICLE
SAFETY
STAR
TING
AND
DRIVING
WARNING
LIGHTS AND
MESSAGES
IN AN
EMERGENCY
SERVICING
AND
MAINTENANCE
TECHNICAL
SPECIFICATIONS
INDEX
WARNING In the event that the anti-crushing function
is activated five times in less than a minute, the system will
automatically enter “recovery” mode (self-protection).
This condition is apparent from the window closing in
stages.
On such occasions, it is necessary to carry out the system
restore procedure, acting as follows:
❒open the windows;
or
❒turn the ignition key to STOP and then to MAR.
If no malfunction is present, the window returns to its nor-
mal operation automatically.
WARNING With the ignition key at STOP or removed,
the window opening mechanism remains activated for
about two minutes and is deactivated as soon a door is
opened.
WINDOW OPENING MECHANISM
FRONT ELECTRIC WINDOWS
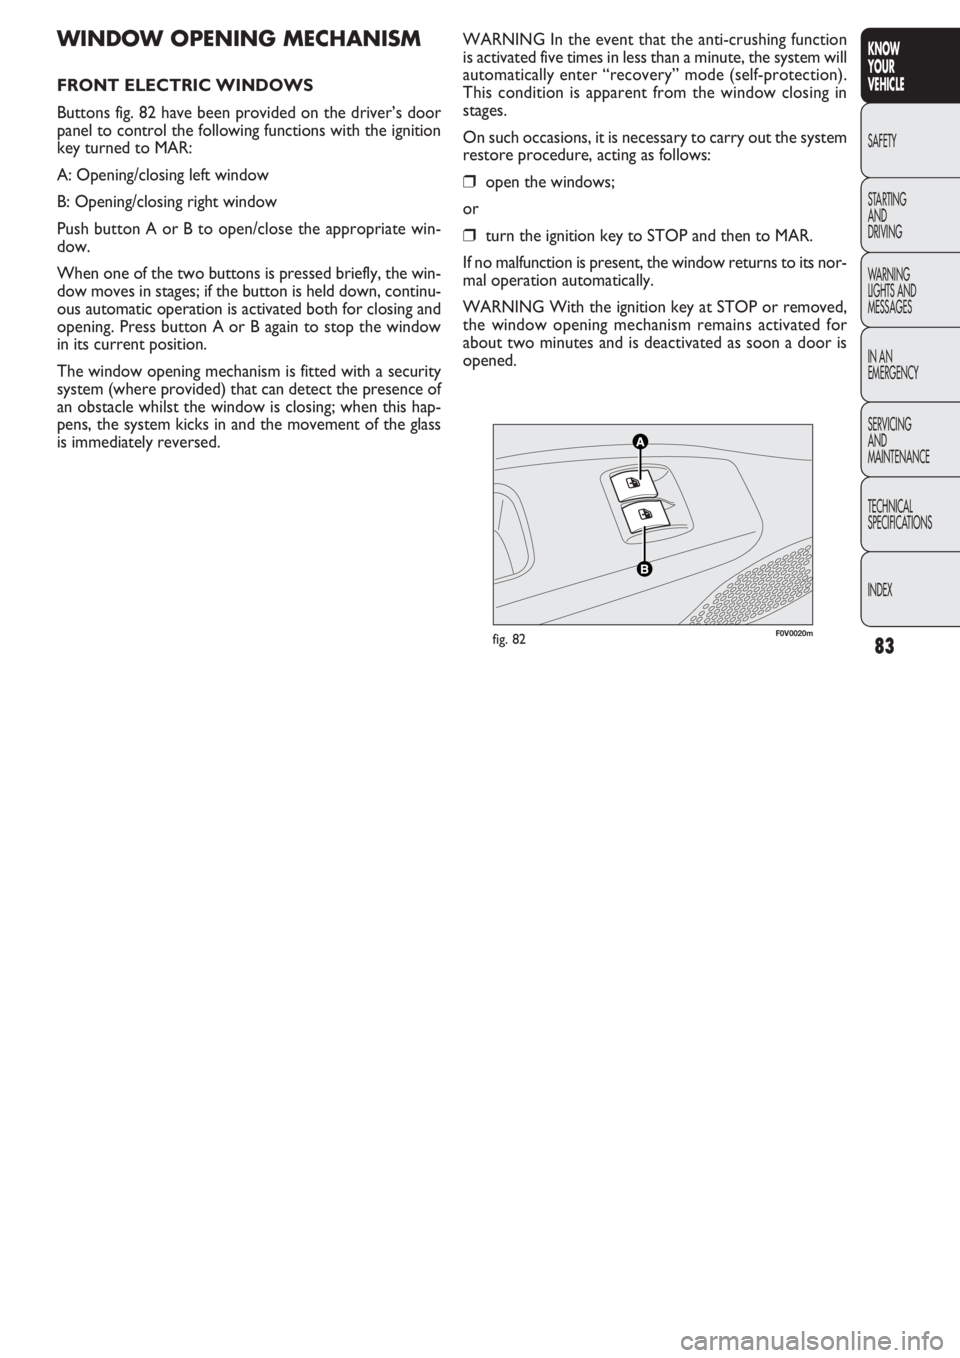
Buttons fig. 82 have been provided on the driver’s door
panel to control the following functions with the ignition
key turned to MAR:
A: Opening/closing left window
B: Opening/closing right window
Push button A or B to open/close the appropriate win-
dow.
When one of the two buttons is pressed briefly, the win-
dow moves in stages; if the button is held down, continu-
ous automatic operation is activated both for closing and
opening. Press button A or B again to stop the window
in its current position.
The window opening mechanism is fitted with a security
system (where provided) that can detect the presence of
an obstacle whilst the window is closing; when this hap-
pens, the system kicks in and the movement of the glass
is immediately reversed.
F0V0020mfig. 82
Page 97 of 274
96
KNOW
YOUR
VEHICLE
SAFETY
STAR
TING
AND
DRIVING
WARNING
LIGHTS AND
MESSAGES
IN AN
EMERGENCY
SERVICING
AND
MAINTENANCE
TECHNICAL
SPECIFICATIONS
INDEX
ABS SYSTEM
(for versions/markets where provided)
This is an integral part of the braking system, which pre-
vents one or more wheels from locking or slipping re-
gardless of the road surface conditions and braking action,
giving the best control during emergency braking.
The EBD system (Electronic Braking Force Distribution)
completes the system, allowing the braking action to be
distributed between the front and rear wheels.
WARNING For maximum efficiency of the braking sys-
tem, a bedding-in period of about 500 km is needed: dur-
ing this period it is better to avoid sharp, repeated and pro-
longed braking.
SYSTEM INTERVENTION
The driver can tell the ABS system has come into action
because the brake pedal pulsates slightly and the system
gets noisier: it means that the vehicle speed should be al-
tered to suit the type of road surface. Headlamp alignment adjustment
To adjust, press buttons Òandfig. 100 on the control
panel.
The display located on the instrument panel provides the
visual indication of the positions during the adjustment op-
eration.
Position 0 – one or two people in the front seats.
Position 1 – five people.
Position 2 – five people + load in the boot.
Position 3 – driver + maximum permitted load stowed in
the luggage compartment.
WARNING Check the light beam alignment every time
the load transported changes.
FOG LIGHT DIRECTION
(for versions/markets where provided)
Contact the Fiat Service Network to have the direction
checked and, if necessary, adjusted.
ADJUSTING THE HEADLIGHTS WHEN
ABROAD
The dipped headlamps are adjusted to work in the coun-
try where the vehicle was originally purchased. When in
countries where you drive on the other side of the road,
you need to alter the light beam direction by affixing a spe-
cially designed self-adhesive film in order not to dazzle the
vehicles travelling in the opposite direction. This film is
provided by Lineaccessori Fiat and is available at Fiat Ser-
vice Network.
When the ABS intervenes and you notice
the brake pedal pulsating, do not be afraid
to keep the pedal pushed down. This will help you
to stop in the shortest distance possible, depend-
ing on the road conditions.
WARNING
Page 264 of 274

263
KNOW
YOUR
VEHICLE
SAFETY
STARTING
AND
DRIVING
WARNING
LIGHTS AND
MESSAGES
IN AN
EMERGENCY
SERVICING
AND
MAINTENANCE
TECHNICAL
SPECIFICATIONS
INDEX
Dashboard .................................. 3
Dead lock device ....................... 8
Defrosting-demisting
– rear windscreen ..... 46-49-58
– windscreen and front
side windows .......... 45-48-57
Demisting/defrosting
– door mirrors ..........46-49-58
– rear windscreen ..... 46-49-58
– windscreen and front
side windows ................ 45-49
Diesel filter ............................. 206
– water in the filter
warning light ..................... 151
Diesel particulate filter
(DPF) ..................................... 114
Digital display ........................... 14
– control buttons .................. 14
– Set-up menu ....................... 15
– standard screen ................. 14Dipped beam headlights
– bulb replacement.............. 173
– switching on......................... 59
Direction indicators
– front bulb replacement ... 173
– rear bulb
replacement..............175-176
– side bulb replacement ..... 173
– switching on ....................... 60
Document holder clip ............. 76
Door locking ............................ 77
Doors
– central locking .................... 77
– child safety device ............. 80
– load compartment
unlocking device ................ 77
– opening/closing from
the inside........................79-80
– remote opening/closing ....... 6 Cleaning your vehicle
– engine compartment ...... 216
– exterior ............................. 214
– interiors ............................ 216
Climate control system ... 47-51
– Air vents .............................. 43
Climate control vents ............ 43
Clock
– adjusting .............................. 22
Clutch
– technical specifications .... 224
CO
2emissions at exhaust .. 253
CODE Card ............................... 5
Constant speed regulator
(Cruise Control) ................... 63
Control buttons ...................... 70
Cruise Control (constant
speed regulator) .................... 63
Cut-off system ......................... 70
Page 268 of 274
267
KNOW
YOUR
VEHICLE
SAFETY
STARTING
AND
DRIVING
WARNING
LIGHTS AND
MESSAGES
IN AN
EMERGENCY
SERVICING
AND
MAINTENANCE
TECHNICAL
SPECIFICATIONS
INDEX
Interior lighting
– front .........................65-66-69
– rear .....................66-67-68-69
Interiors (cleaning) ............... 216
Isofix (child seat)
– capability for Isofix child
seat ..................................... 125
– suitability for using
child seats ......................... 127
Jack
– use ...................................... 159
– warnings ............................ 158
Keys .............................................. 5
– key with remote control ... 6
– key without remote
control.................................... 6
– remote control battery
replacement .......................... 7
– remote door opening/
closing ................................. 5-6– requesting additional
remote control keys ............ 8
Knowing your vehicle ............... 3
Ladder bulkhead behind
driver ....................................... 37
Lights
(switching on controls) ........ 59
Load limiters .......................... 118
Long vehicle inactivity .......... 142
Lubricant specifications 247-248
Lubricants
(specifications) ............247-248
Lubricants
specifications ...............247-248
Main beam headlights
– bulb replacement .............. 174
– flashing ................................. 59
– switching on......................... 59
Main beam headlights
– bulb replacement .............. 174– switching on......................... 59
Manual climate control
system ......................................47
Mirror adjustment.............. 40-41
MSR system ............................ 100
MSR(system) .......................... 100
Multifunction display .............. 19
– control buttons .................. 19
– Set-up menu ....................... 20
– standard screen ................. 19
Nozzles
–
windscreen/rearscreen
washer ................................ 213
Number plate lights
– bulb replacement ............. 177
On-board computer (trip) .... 28
On-board instruments
(panel) ..................................... 12