ESP FIAT DUCATO 2007 Owner handbook (in English)
[x] Cancel search | Manufacturer: FIAT, Model Year: 2007, Model line: DUCATO, Model: FIAT DUCATO 2007Pages: 282, PDF Size: 4.49 MB
Page 109 of 282
SOUND SYSTEM
(where provided)
For sound system operation refer to the
Supplement attached to the Owner Hand-
book.
SOUND SYSTEM PRESETTING
(where provided)
The system consists of:
❒sound system power wires
❒front speaker connecting wires
❒aerial power wire
❒2 tweeters Aon front posts (30W
max power each);
❒2 mid-woofers Bon front doors
(165 mm diameter, 40W max
power each);
❒radio aerial wire.
108
SAFETY
DEVICES
CORRECT USE
OF THE
VEHICLE
WARNING
LIGHTS AND
MESSAGES
IN AN
EMERGENCY
VEHICLE
MAINTENANCE
TECHNICAL
SPECIFICATIONS
INDEX
DASHBOARD
AND CONTROLS
Parking manoeuvres howev-
er are always under the dri-
ver’s responsibility that shall always
check the absence of people (spe-
cially children) or animals in the ma-
noeuvre space. This system is just a
help for the driver but she/he shall
never reduce attention during dan-
gerous manoeuvres even if performed
at low speed.
WARNING
GENERAL WARNINGS
❒When parking, take the utmost care
to obstacles that may be set above or
under the sensors.
❒Objects set close to the vehicle, un-
der certain circumstances are not de-
tected and could therefore cause
damages to the vehicle or be dam-
aged.
Below are listed some conditions that
could affect the parking system perfor-
mance:
❒Reduced sensor sensitivity or re-
duced parking system performance
could be due to the presence on the
sensor surface of: ice, snow, mud,
multiple painting.
❒The sensor detects a non-existent ob-
ject (“echo disturbances”) caused by
disturbances of mechanical nature,
e.g.: vehicle washing, rain (extreme
wind conditions), hail.
❒Indications sent by the sensors can al-
so be altered by ultrasound systems
(e.g.: truck pneumatic brakes or pneu-
matic hammers) set nearby the vehi-
cle.
❒Parking system performance could al-
so be affected by sensor position. For
instance, when trimming is changed
(due to wear of shock absorbers, sus-
pensions) or when changing tyres,
loading excessively the vehicle, car-
rying out specific tuning for lowering
the vehicle.
❒Obstacle detection at the top of the
vehicle (specially for vans or chassis
cabs) could not be guaranteed since
the system detects obstacles that can
strike the bottom of the vehicle.
Page 110 of 282
109
SAFETY
DEVICES
CORRECT USE
OF THE
VEHICLE
WARNING
LIGHTS AND
MESSAGES
IN AN
EMERGENCY
VEHICLE
MAINTENANCE
TECHNICAL
SPECIFICATIONS
INDEX
DASHBOARD
AND CONTROLS
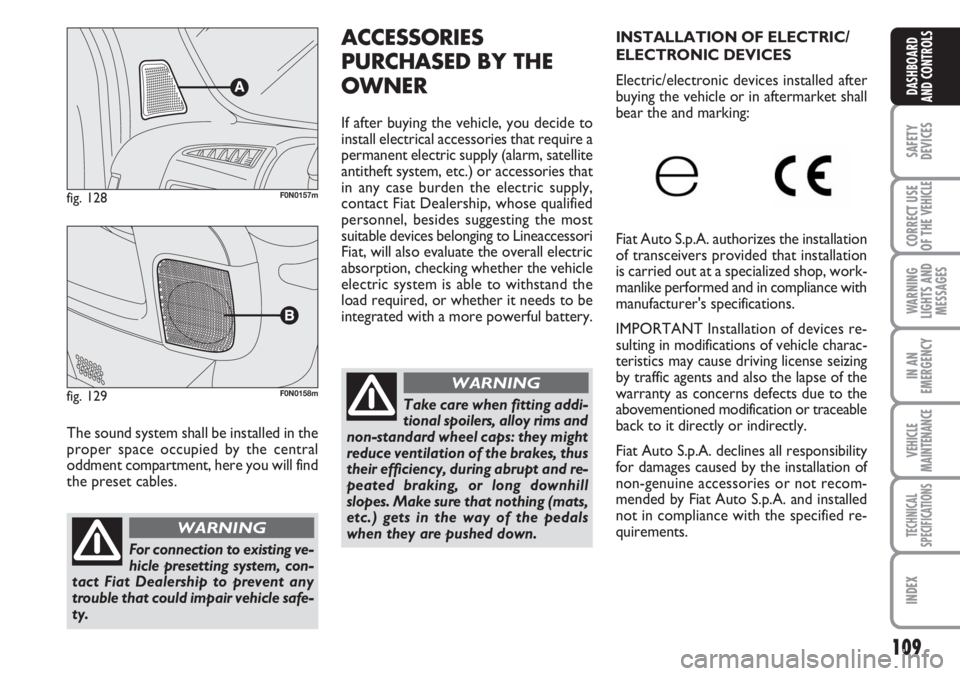
The sound system shall be installed in the
proper space occupied by the central
oddment compartment, here you will find
the preset cables.
fig. 128F0N0157m
ACCESSORIES
PURCHASED BY THE
OWNER
If after buying the vehicle, you decide to
install electrical accessories that require a
permanent electric supply (alarm, satellite
antitheft system, etc.) or accessories that
in any case burden the electric supply,
contact Fiat Dealership, whose qualified
personnel, besides suggesting the most
suitable devices belonging to Lineaccessori
Fiat, will also evaluate the overall electric
absorption, checking whether the vehicle
electric system is able to withstand the
load required, or whether it needs to be
integrated with a more powerful battery.
For connection to existing ve-
hicle presetting system, con-
tact Fiat Dealership to prevent any
trouble that could impair vehicle safe-
ty.
WARNING
fig. 129F0N0158mTake care when fitting addi-
tional spoilers, alloy rims and
non-standard wheel caps: they might
reduce ventilation of the brakes, thus
their efficiency, during abrupt and re-
peated braking, or long downhill
slopes. Make sure that nothing (mats,
etc.) gets in the way of the pedals
when they are pushed down.
WARNING
INSTALLATION OF ELECTRIC/
ELECTRONIC DEVICES
Electric/electronic devices installed after
buying the vehicle or in aftermarket shall
bear the and marking:
Fiat Auto S.p.A. authorizes the installation
of transceivers provided that installation
is carried out at a specialized shop, work-
manlike performed and in compliance with
manufacturer's specifications.
IMPORTANT Installation of devices re-
sulting in modifications of vehicle charac-
teristics may cause driving license seizing
by traffic agents and also the lapse of the
warranty as concerns defects due to the
abovementioned modification or traceable
back to it directly or indirectly.
Fiat Auto S.p.A. declines all responsibility
for damages caused by the installation of
non-genuine accessories or not recom-
mended by Fiat Auto S.p.A. and installed
not in compliance with the specified re-
quirements.
Page 136 of 282
135
WARNING
LIGHTS AND
MESSAGES
IN AN
EMERGENCY
VEHICLE
MAINTENANCE
TECHNICAL
SPECIFICATIONS
INDEX
DASHBOARD
AND CONTROLS
SAFETY
DEVICES
CORRECT USE
OF THE VEHICLE
If the engine does not start at the first at-
tempt, return the ignition key to STOP
before repeating starting.
If, when the ignition key is at MAR, the in-
strument panel warning light
Yremains
lit together with warning light
mturn
the key to STOPand then back to MAR;
if the warning lights remain on, try with
the other keys provided with the vehicle.
IMPORTANT If the instrument panel
warning light
Ystays on glowing steadi-
ly, contact immediately Fiat Dealership.
IMPORTANT Never leave the ignition key
to MARwhen the engine is off.
The warning light
mwill
flash for 60 seconds at start-
up or during prolonged crank-
ing to indicate a fault in the
glow plug heating system. You can use
the vehicle as usual if the engine starts
but you should contact Fiat Dealership
as soon as possible.
HOW TO WARM UP THE
ENGINE AFTER IT HAS JUST
STARTED
Proceed as follows:
❒drive off slowly, letting the engine turn
at medium revs. Do not accelerate
abruptly;
❒do not drive at full performance for
the initial kilometres. Wait until the
coolant temperature gauge starts
moving.
Remember that the servo-
brake and power steering are
not operational until the en-
gine has been started, there-
fore much effort than usual is required
on the brake pedal and steering wheel.
Never bump start the engine
by pushing, towing or coast-
ing downhill as this could
cause fuel to flow into the
catalytic exhaust system and damage
it beyond repair.
STOPPING THE ENGINE
Turn the ignition to STOPwhile the en-
gine is idling.
IMPORTANT After a taxing drive, you
should allow the engine to “catch its
breath” before turning it off by letting it
idle to allow the temperature in the en-
gine compartment to fall.
A quick burst on the acceler-
ator before turning off the en-
gine serves absolutely no
practical purpose, it wastes
fuel and is damaging especially to tur-
bocharged engines.
Page 138 of 282

137
WARNING
LIGHTS AND
MESSAGES
IN AN
EMERGENCY
VEHICLE
MAINTENANCE
TECHNICAL
SPECIFICATIONS
INDEX
DASHBOARD
AND CONTROLS
SAFETY
DEVICES
CORRECT USE
OF THE VEHICLE
fig. 2F0N0074m
To change gears properly
you must push the clutch
pedal fully down. It is therefore es-
sential that there is nothing under the
pedals: make sure the mats are lying
flat and do not get in the way of the
pedals.
WARNING
Do not drive with your hand
resting on the gear lever as
the force exerted, even if
slight, could lead over time to
premature wear on the gearbox inter-
nal components.
To engage reverse R from neutral, pro-
ceed as follows: raise the sliding ring Aun-
der the knob and at the same time move
the gearshift lever leftwards and then for-
ward.
LOAD
RECOMMENDATIONS
The version of the Fiat Ducato you are
driving has been designed and approved
on the basis of several set maximum
weights (see the tables “Weights” in sec-
tion “Technical specifications”): kerb
weight; payload; total weight; total weight
on the front axle; total weight on the rear
axle; towable weight
Each of these limits must be
borne in mind and MUST
NEVER BE EXCEEDED under any cir-
cumstances. In particular, never ex-
ceed the maximum weight permitted
on the front and rear axles when ar-
ranging loads in vehicle (especially for
special version vehicles).Chance knocks or sudden
braking can cause sudden
shifts of the load which could jeop-
ardise the safety of the driver and the
passengers: before you start off make
sure the load is firmly secured by us-
ing the hooks built into the floor for
that purpose. Use metal cables, ropes
or straps strong enough to support
the weight of the load to be fixed.
WARNING
WARNING
Even if the vehicle is sta-
tionary on a steep hill or
sideways incline, goods not properly
secured could fall out when the back
or side doors are opened.
WARNING
IMPORTANT Max. admitted load on floor
fixings is 500 kg; max. admitted load on
body side is 150 kg.IMPORTANT For versions with right and
left side boards, before opening the side
boards you are recommended to refit the
release lever in closing position.
Page 139 of 282
138
WARNING
LIGHTS AND
MESSAGES
IN AN
EMERGENCY
VEHICLE
MAINTENANCE
TECHNICAL
SPECIFICATIONS
INDEX
DASHBOARD
AND CONTROLS
SAFETY
DEVICES
CORRECT USE
OF THE VEHICLE
CONTAINING
RUNNING COSTS
Here are some suggestions which may
help you to keep the running costs of your
vehicle down and lower the amount of
toxic emissions released into the atmos-
phere.
GENERAL CONSIDERATIONS
Vehicle maintenance
Carry out the checks and adjustments/reg-
ulations specified in the “Service Sched-
ule”.
Tyres
Check the pressure of the tyres routine-
ly at an interval of no more than 4 weeks:
if the pressure is too low, consumption
levels increase as resistance to rolling is
higher.
Unnecessary loads
Do not travel with too much luggage
stowed in the boot. The weight of the ve-
hicle (especially when driving in town) and
its trim greatly affects consumption and
stability.Roof rack/ski rack
Remove the roof rack or the ski rack from
the roof as soon as they are no longer
used. These accessories lower air pene-
tration and adversely affect consumption
levels. When needing to carry particular-
ly voluminous objects, preferably use a
trailer.
Electric devices
Use electric devices only for the amount
of time needed. Rear heated window, ad-
ditional headlights, windscreen wipers and
heater fan need a considerable amount of
energy, therefore increasing the require-
ment of current increases fuel consump-
tion (up to +25% in the urban cycle).
Climate control
The air conditioner is an additional load
which greatly affects the engine leading to
higher consumption (on average up to
+20%). When the temperature outside
the vehicle permits it, use the air vents
where possible.
Spoilers
The use of non-certified aerodynamic
items may adversely affect air drag and
consumption levels.
Observe the enforced rules if
you need to carry a spare
can of petrol. Only use a homologat-
ed can and secure it to the load an-
choring eyebolts. Even given these
precautions, the risk of fire in the
event of an accident is increased.
WARNING
In addition to these general precautions,
some simple measures could enhance dri-
ving safety, comfort and the length of the
vehicle’s life:
❒distribute the load evenly over the
load floor: if you need to concentrate
it all in one point choose the part be-
tween the axles;
❒remember that the lower the load is,
the lower the vehicle’s centre of grav-
ity will be, contributing to a safe drive;
you should therefore always position
the heavier goods at the bottom;
❒finally, remember that the way in
which the vehicle moves is influenced
by the weight being carried. In partic-
ular, stopping distance lengthens par-
ticularly at high speed.
Page 146 of 282
145
IN AN
EMERGENCY
VEHICLE
MAINTENANCE
TECHNICAL
SPECIFICATIONS
INDEX
DASHBOARD
AND CONTROLS
SAFETY
DEVICES
CORRECT USE
OF THE
VEHICLE
WARNING
LIGHTS AND
MESSAGES
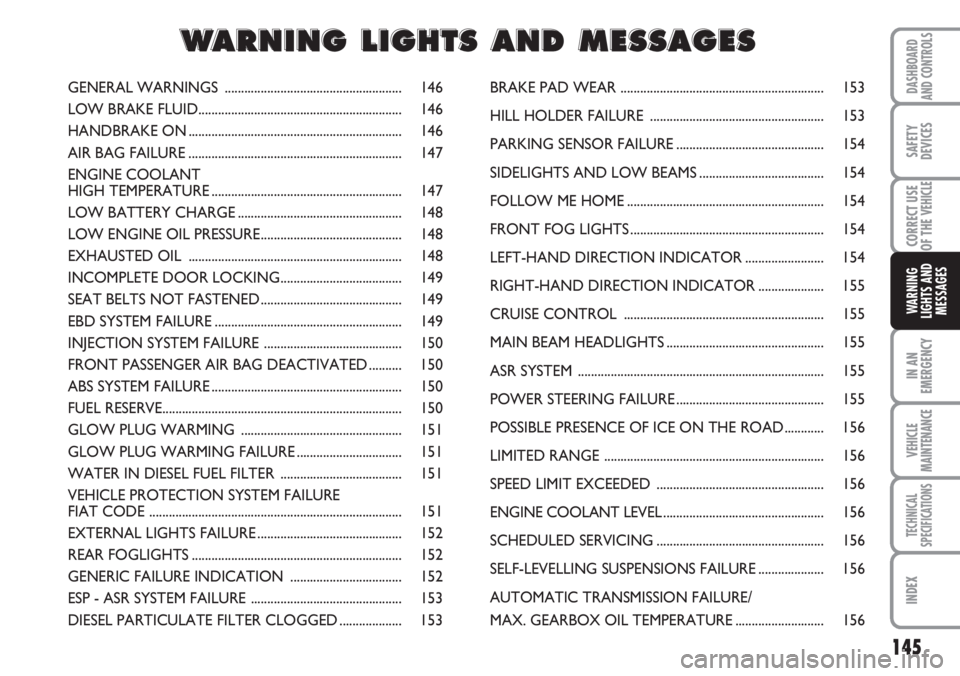
GENERAL WARNINGS ...................................................... 146
LOW BRAKE FLUID.............................................................. 146
HANDBRAKE ON ................................................................. 146
AIR BAG FAILURE ................................................................. 147
ENGINE COOLANT
HIGH TEMPERATURE .......................................................... 147
LOW BATTERY CHARGE .................................................. 148
LOW ENGINE OIL PRESSURE........................................... 148
EXHAUSTED OIL ................................................................. 148
INCOMPLETE DOOR LOCKING..................................... 149
SEAT BELTS NOT FASTENED ........................................... 149
EBD SYSTEM FAILURE ......................................................... 149
INJECTION SYSTEM FAILURE .......................................... 150
FRONT PASSENGER AIR BAG DEACTIVATED .......... 150
ABS SYSTEM FAILURE .......................................................... 150
FUEL RESERVE......................................................................... 150
GLOW PLUG WARMING ................................................. 151
GLOW PLUG WARMING FAILURE ................................ 151
WATER IN DIESEL FUEL FILTER ..................................... 151
VEHICLE PROTECTION SYSTEM FAILURE
FIAT CODE ............................................................................. 151
EXTERNAL LIGHTS FAILURE ............................................ 152
REAR FOGLIGHTS ................................................................ 152
GENERIC FAILURE INDICATION .................................. 152
ESP - ASR SYSTEM FAILURE .............................................. 153
DIESEL PARTICULATE FILTER CLOGGED ................... 153BRAKE PAD WEAR .............................................................. 153
HILL HOLDER FAILURE ..................................................... 153
PARKING SENSOR FAILURE ............................................. 154
SIDELIGHTS AND LOW BEAMS ...................................... 154
FOLLOW ME HOME ............................................................ 154
FRONT FOG LIGHTS ........................................................... 154
LEFT-HAND DIRECTION INDICATOR ........................ 154
RIGHT-HAND DIRECTION INDICATOR .................... 155
CRUISE CONTROL ............................................................. 155
MAIN BEAM HEADLIGHTS ................................................ 155
ASR SYSTEM ........................................................................... 155
POWER STEERING FAILURE ............................................. 155
POSSIBLE PRESENCE OF ICE ON THE ROAD ............ 156
LIMITED RANGE ................................................................... 156
SPEED LIMIT EXCEEDED ................................................... 156
ENGINE COOLANT LEVEL................................................. 156
SCHEDULED SERVICING ................................................... 156
SELF-LEVELLING SUSPENSIONS FAILURE .................... 156
AUTOMATIC TRANSMISSION FAILURE/
MAX. GEARBOX OIL TEMPERATURE ........................... 156
W W
A A
R R
N N
I I
N N
G G
L L
I I
G G
H H
T T
S S
A A
N N
D D
M M
E E
S S
S S
A A
G G
E E
S S
Page 154 of 282
153
IN AN
EMERGENCY
VEHICLE
MAINTENANCE
TECHNICAL
SPECIFICATIONS
INDEX
DASHBOARD
AND CONTROLS
SAFETY
DEVICES
CORRECT USE
OF THE
VEHICLE
WARNING
LIGHTS AND
MESSAGES
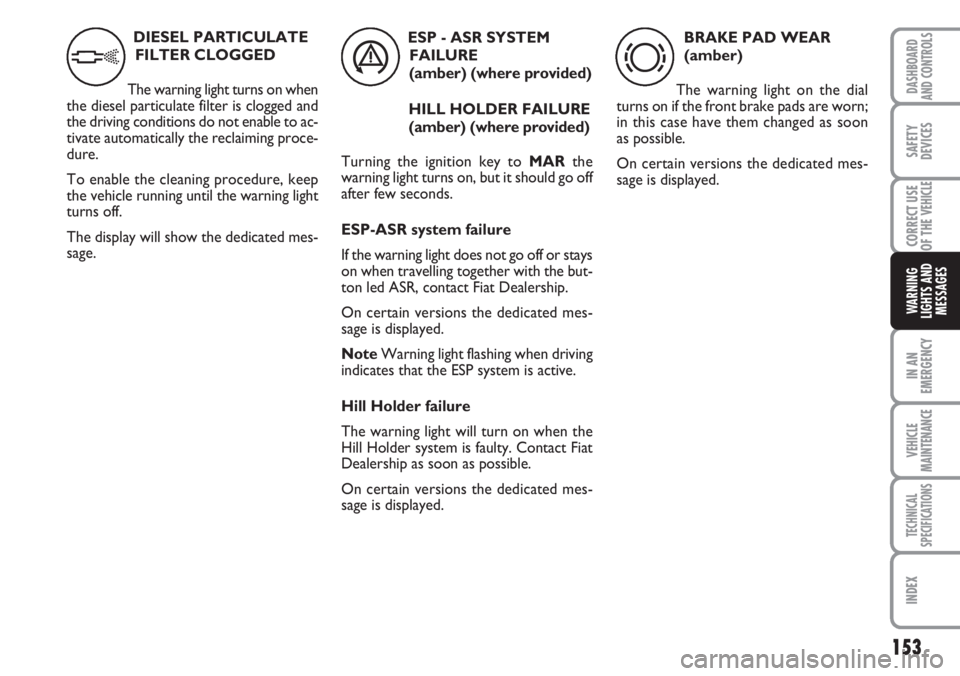
DIESEL PARTICULATE
FILTER CLOGGED
The warning light turns on when
the diesel particulate filter is clogged and
the driving conditions do not enable to ac-
tivate automatically the reclaiming proce-
dure.
To enable the cleaning procedure, keep
the vehicle running until the warning light
turns off.
The display will show the dedicated mes-
sage.ESP - ASR SYSTEM
FAILURE
(amber) (where provided)
HILL HOLDER FAILURE
(amber) (where provided)
Turning the ignition key to MARthe
warning light turns on, but it should go off
after few seconds.
ESP-ASR system failure
If the warning light does not go off or stays
on when travelling together with the but-
ton led ASR, contact Fiat Dealership.
On certain versions the dedicated mes-
sage is displayed.
NoteWarning light flashing when driving
indicates that the ESP system is active.
Hill Holder failure
The warning light will turn on when the
Hill Holder system is faulty. Contact Fiat
Dealership as soon as possible.
On certain versions the dedicated mes-
sage is displayed.
áh
BRAKE PAD WEAR
(amber)
The warning light on the dial
turns on if the front brake pads are worn;
in this case have them changed as soon
as possible.
On certain versions the dedicated mes-
sage is displayed.
d
Page 160 of 282
159
WARNING
LIGHTS AND
MESSAGES
VEHICLE
MAINTENANCE
TECHNICAL
SPECIFICATIONS
INDEX
DASHBOARD
AND CONTROLS
SAFETY
DEVICES
CORRECT USE
OF THE
VEHICLE
IN AN
EMERGENCY
IMPORTANT Do not directly connect the
negative terminals of the two batteries:
sparks could ignite the flammable gas from
the battery. If the other battery is fitted in
another vehicle, prevent accidental con-
tacts between the metal parts of the two
vehicles.
BUMP STARTING
Never bump start the engine (by pushing,
towing, or coasting downhill) as this could
cause fuel to flow into the catalytic ex-
haust system and damage it beyond repair.
IMPORTANT Remember that the brake
booster and the power steering system
are not operating until the engine is start-
ed, a greater effort will therefore be re-
quired to press the brake pedal or turn
the steering wheel.IF A TYRE
IS PUNCTURED
GENERAL INSTRUCTIONS
Wheel changing and correct use of the
jack and spare wheel call for some pre-
cautions as listed below.
Alert other drivers that the
vehicle is stationary in com-
pliance with the regulations in force:
hazard warning lights, warning trian-
gle etc. Any passengers on board
should leave the vehicle, especially if
it is heavily laden. Passengers should
stay away from oncoming traffic
while the wheel is being changed on.
Pull the handbrake.
WARNING
The spare wheel is specific to
your vehicle, do not use it on
other models, or use the spare wheel
of other models on your vehicle.
Wheel bolts are specific to your vehi-
cle: do not use them on other models
and do not use bolts of other models.
WARNING
Have the punctured wheel
repaired and refitted as soon
as possible. Do not grease the threads
of bolts before installing them: they
might slip out.
WARNING
Page 163 of 282
162
WARNING
LIGHTS AND
MESSAGES
VEHICLE
MAINTENANCE
TECHNICAL
SPECIFICATIONS
IINDEX
DASHBOARD
AND CONTROLS
SAFETY
DEVICES
CORRECT USE
OF THE
VEHICLE
IN AN
EMERGENCY
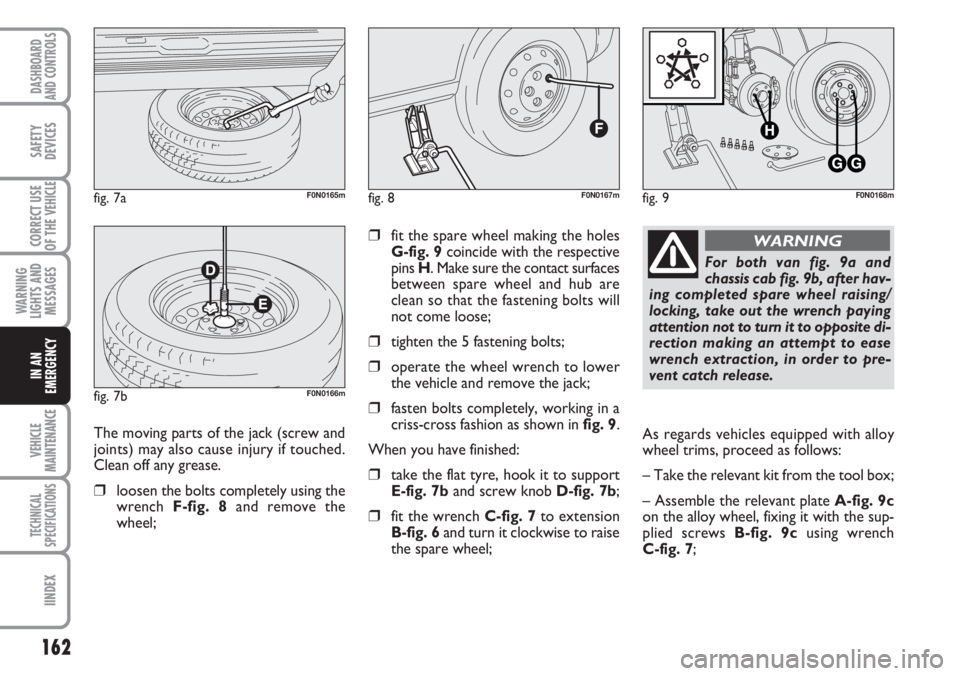
❒fit the spare wheel making the holes
G-fig. 9coincide with the respective
pins H. Make sure the contact surfaces
between spare wheel and hub are
clean so that the fastening bolts will
not come loose;
❒tighten the 5 fastening bolts;
❒operate the wheel wrench to lower
the vehicle and remove the jack;
❒fasten bolts completely, working in a
criss-cross fashion as shown in fig. 9.
When you have finished:
❒take the flat tyre, hook it to support
E-fig. 7band screw knob D-fig. 7b;
❒fit the wrench C-fig. 7to extension
B-fig. 6and turn it clockwise to raise
the spare wheel;
fig. 8F0N0167mfig. 9F0N0168m
The moving parts of the jack (screw and
joints) may also cause injury if touched.
Clean off any grease.
❒loosen the bolts completely using the
wrench F-fig. 8and remove the
wheel;
fig. 7aF0N0165m
fig. 7bF0N0166m
For both van fig. 9a and
chassis cab fig. 9b, after hav-
ing completed spare wheel raising/
locking, take out the wrench paying
attention not to turn it to opposite di-
rection making an attempt to ease
wrench extraction, in order to pre-
vent catch release.
WARNING
As regards vehicles equipped with alloy
wheel trims, proceed as follows:
– Take the relevant kit from the tool box;
– Assemble the relevant plate A-fig. 9c
on the alloy wheel, fixing it with the sup-
plied screws B-fig. 9cusing wrench
C-fig. 7;
Page 167 of 282
166
WARNING
LIGHTS AND
MESSAGES
VEHICLE
MAINTENANCE
TECHNICAL
SPECIFICATIONS
IINDEX
DASHBOARD
AND CONTROLS
SAFETY
DEVICES
CORRECT USE
OF THE
VEHICLE
IN AN
EMERGENCY
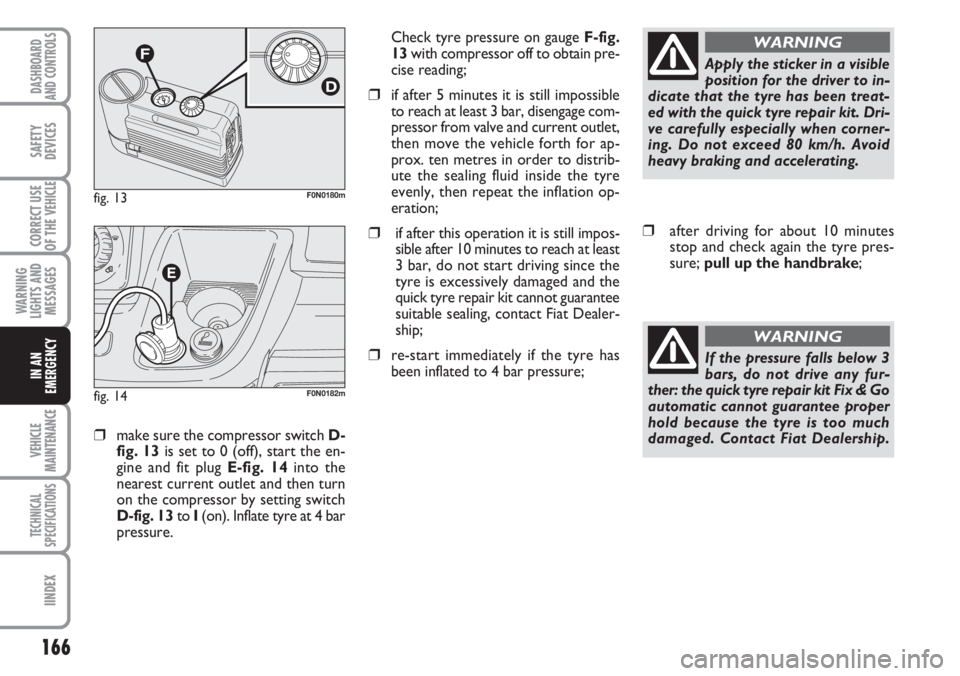
❒make sure the compressor switch D-
fig. 13is set to 0 (off), start the en-
gine and fit plug E-fig. 14into the
nearest current outlet and then turn
on the compressor by setting switch
D-fig. 13to I(on). Inflate tyre at 4 bar
pressure. Check tyre pressure on gauge F-fig.
13with compressor off to obtain pre-
cise reading;
❒if after 5 minutes it is still impossible
to reach at least 3 bar, disengage com-
pressor from valve and current outlet,
then move the vehicle forth for ap-
prox. ten metres in order to distrib-
ute the sealing fluid inside the tyre
evenly, then repeat the inflation op-
eration;
❒if after this operation it is still impos-
sible after 10 minutes to reach at least
3 bar, do not start driving since the
tyre is excessively damaged and the
quick tyre repair kit cannot guarantee
suitable sealing, contact Fiat Dealer-
ship;
❒re-start immediately if the tyre has
been inflated to 4 bar pressure;
fig. 13F0N0180m
fig. 14F0N0182m
Apply the sticker in a visible
position for the driver to in-
dicate that the tyre has been treat-
ed with the quick tyre repair kit. Dri-
ve carefully especially when corner-
ing. Do not exceed 80 km/h. Avoid
heavy braking and accelerating.
WARNING
❒after driving for about 10 minutes
stop and check again the tyre pres-
sure; pull up the handbrake;
If the pressure falls below 3
bars, do not drive any fur-
ther: the quick tyre repair kit Fix & Go
automatic cannot guarantee proper
hold because the tyre is too much
damaged. Contact Fiat Dealership.
WARNING