technical specifications FIAT DUCATO 2007 Owner handbook (in English)
[x] Cancel search | Manufacturer: FIAT, Model Year: 2007, Model line: DUCATO, Model: FIAT DUCATO 2007Pages: 282, PDF Size: 4.49 MB
Page 25 of 282
24
SAFETY
DEVICES
CORRECT USE
OF THE
VEHICLE
WARNING
LIGHTS AND
MESSAGES
IN AN
EMERGENCY
VEHICLE
MAINTENANCE
TECHNICAL
SPECIFICATIONS
INDEX
DASHBOARD
AND CONTROLS
Setting the speed limit (SPEEd)
With this function it is possible to set the
vehicle speed limit (km/h or mph), when
this limit is exceeded the driver is imme-
diately alerted (see section “Warning lights
and messages”).
To set the speed limit, proceed as follows:
– briefly press button MODE, the display
will show the wording (SPEEd) and the
unit (km/h) or (mph) previously set;
– press button▲or ▼to select speed
limit activation (On) or deactivation
(OFF);
– if the function has been activated (On),
press buttons ▲or ▼to select the re-
quired speed limit and then press MODE
to confirm;
NoteThe possible setting is between 30
and 200 km/h, or between 20 and 125
mph depending on the unit set previous-
ly (see paragraph “Setting the distance unit
(Unit)”) described later. Every press on
button ▲/▼increases/decreases by 5
units. Keeping the button ▲/▼pressed
obtains the automatic fast increase or de-
crease. When you are near the required
setting complete adjustment by single
presses.
– briefly press button MODEto go back
to the menu screen or press the button
for long to go back to the standard screen
without storing settings.Setting the clock (Hour)
With this function it is possible to set the
clock.
To set the required unit proceed as fol-
lows:
– briefly press button MODE, “hours”
will flash on the display;
– press button ▲or ▼for setting;
– briefly press button MODE, “minutes”
will flash on the display;
– press button ▲or ▼for setting;
– briefly press button MODEto go back
to the menu screen or press the button
for long to go back to the standard screen
without storing settings.
Adjusting the buzzer volume
(bUZZ)
This function enables to adjust the volume
of the buzzer accompanying any fail-
ure/warning indication.
To adjust the volume proceed as follows:
– briefly press button MODE, the display
will show the wording (bUZZ);
– press button ▲or ▼to select the re-
quired volume (volume can be adjusted ac-
cording to 8 levels).
– briefly press button MODEto go back
to the menu screen or press the button
for long to go back to the standard screen
without storing settings.Setting the distance unit (Unit)
With this function it is possible to set the
unit.
To set the required unit proceed as fol-
lows:
– briefly press button MODE, the display
will show the wording (Unit) and the pre-
viously set unit (km) or (mi);
– press button ▲or ▼to select the re-
quired distance unit.
– briefly press button MODE
to go back
to the menu screen or press the button
for long to go back to the standard screen
without storing settings.
Page 26 of 282
25
SAFETY
DEVICES
CORRECT USE
OF THE
VEHICLE
WARNING
LIGHTS AND
MESSAGES
IN AN
EMERGENCY
VEHICLE
MAINTENANCE
TECHNICAL
SPECIFICATIONS
INDEX
DASHBOARD
AND CONTROLS
MODE
MODE
MODE
▼ ▲
▼ ▲
▼ ▲
▼ ▲
F0N1001g
F0N1003gF0N1002g F0N1005g
F0N1006g F0N1002g
F0N1003g
Front passenger’s air bag
and side bag (where provided)
activation/deactivation (BAG P)
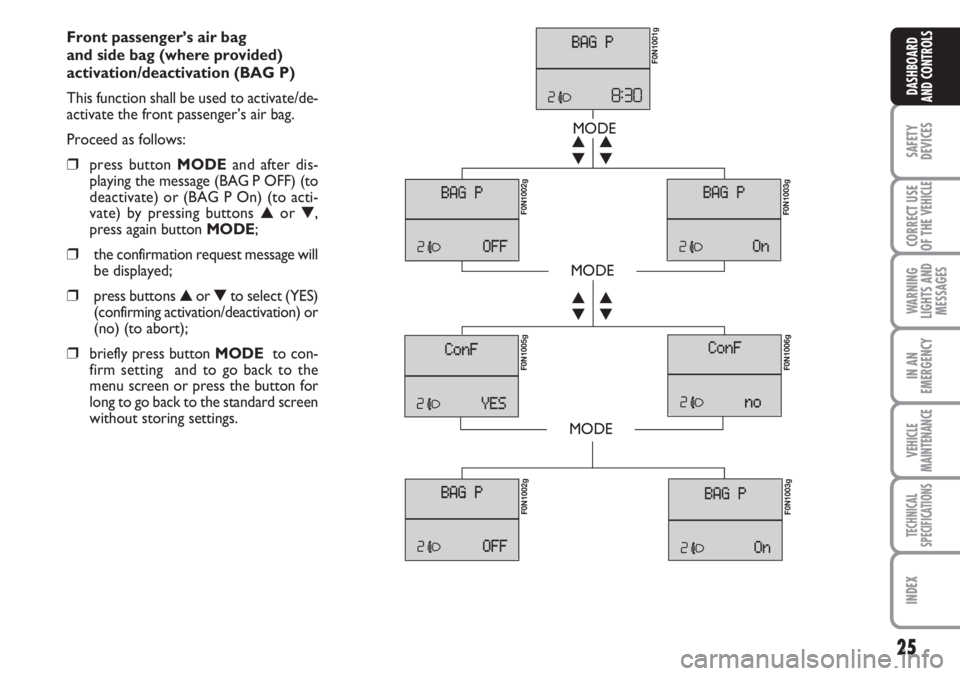
This function shall be used to activate/de-
activate the front passenger’s air bag.
Proceed as follows:
❒press button MODEand after dis-
playing the message (BAG P OFF) (to
deactivate) or (BAG P On) (to acti-
vate) by pressing buttons ▲or ▼,
press again button MODE;
❒the confirmation request message will
be displayed;
❒press buttons ▲or ▼to select (YES)
(confirming activation/deactivation) or
(no) (to abort);
❒briefly press button MODE to con-
firm setting and to go back to the
menu screen or press the button for
long to go back to the standard screen
without storing settings.
Page 27 of 282
26
SAFETY
DEVICES
CORRECT USE
OF THE
VEHICLE
WARNING
LIGHTS AND
MESSAGES
IN AN
EMERGENCY
VEHICLE
MAINTENANCE
TECHNICAL
SPECIFICATIONS
INDEX
DASHBOARD
AND CONTROLS
CONTROL BUTTONS fig. 20
▲To scroll the displayed menu and the
related options upwards or to in-
crease the value displayed.
MODEPress briefly to display
the menu and/or to go to next
screen or to confirm the re-
quired menu option.
Long press to go back to the
standard screen.
▼To scroll the displayed menu and the
related options downwards or to de-
crease the value displayed.
MULTIFUNCTION
DISPLAY (where
provided)
The multifunction display shows useful in-
formation necessary when driving, in par-
ticular:
INFORMATION ON
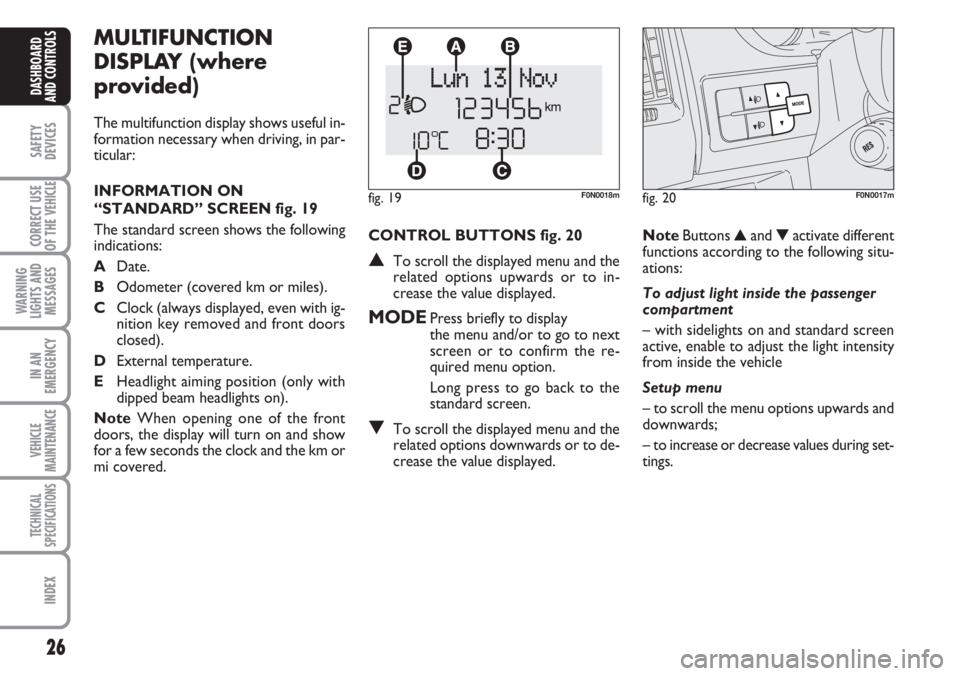
“STANDARD” SCREEN fig. 19
The standard screen shows the following
indications:
ADate.
BOdometer (covered km or miles).
CClock (always displayed, even with ig-
nition key removed and front doors
closed).
DExternal temperature.
EHeadlight aiming position (only with
dipped beam headlights on).
NoteWhen opening one of the front
doors, the display will turn on and show
for a few seconds the clock and the km or
mi covered.
fig. 19F0N0018m
NoteButtons ▲and ▼activate different
functions according to the following situ-
ations:
To adjust light inside the passenger
compartment
– with sidelights on and standard screen
active, enable to adjust the light intensity
from inside the vehicle
Setup menu
– to scroll the menu options upwards and
downwards;
– to increase or decrease values during set-
tings.
fig. 20F0N0017m
Page 28 of 282
27
SAFETY
DEVICES
CORRECT USE
OF THE
VEHICLE
WARNING
LIGHTS AND
MESSAGES
IN AN
EMERGENCY
VEHICLE
MAINTENANCE
TECHNICAL
SPECIFICATIONS
INDEX
DASHBOARD
AND CONTROLS
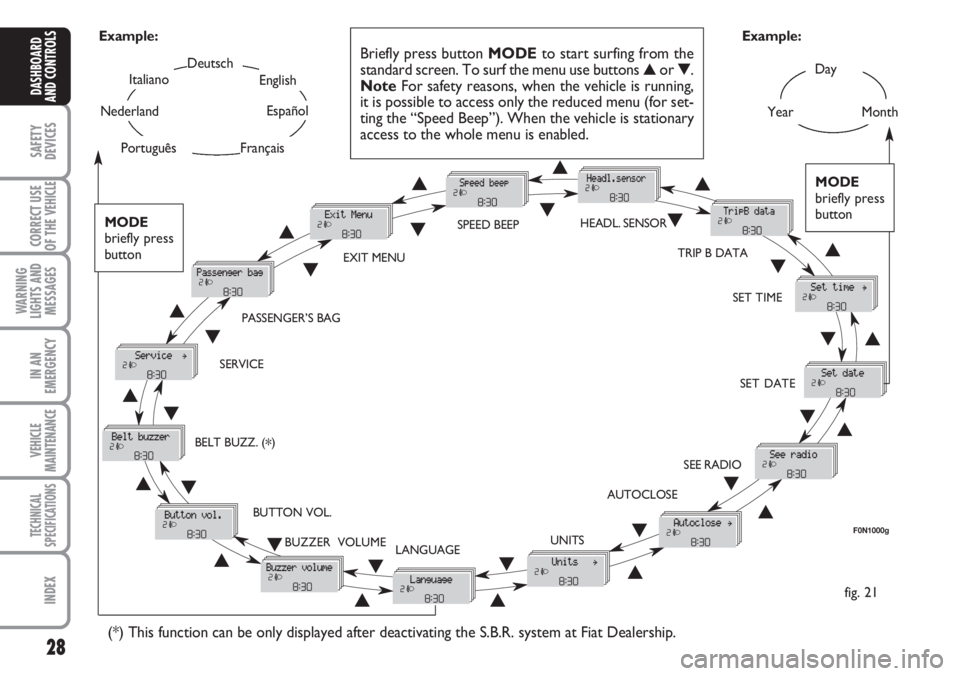
SETUP MENU fig. 21
The menu comprises a series of functions
arranged in a “circular fashion” which can
be selected through buttons +and –to
access the different select operations and
settings (setup) given in the following para-
graphs. For certain options (Hour and
Unit) a submenu is provided.
The setup menu can be activated by press-
ing briefly button MODE.
Single presses on buttons ▲or ▼will
scroll the setup menu options.
Handling modes differ with each other ac-
cording to the characteristic of the option
selected.
Selecting an option of the main menu with-
out submenu:
– press briefly button MODE to select
the main menu option to set;
– press buttons ▲or ▼(by single press-
es) to select the new setting;
– press briefly button MODEto store the
new setting and to go back to the main
menu option previously selected.Selecting “Set Date” and
“Set time”:
– briefly press button MODEto select
the first value to change (e.g. hours /min-
utes or year / month / day);
– press buttons ▲or ▼(by single press-
es) to select the new setting;
– briefly press button MODEto store the
new setting and to go to the next setup
menu option, if this is the last one you will
go back to the previously selected option of
the main menu.
Press button MODE for long:
– to quit the set up menu if you are in the
main menu;
– to quit the main menu if you are at an-
other point of the menu (e.g.: at submenu
option setting level, at submenu level or
at main menu option setting level);
– to save only the settings stored yet (and
confirmed by pressing button MODE).
The setup menu displaying is timed; when
quitting the menu due to timing expiry,
only settings stored yet by the user (and
confirmed by pressing briefly button
MODE) will be saved. Selecting an option of the main menu with
submenu:
– press briefly button to display the first
submenu option;
– press buttons ▲or ▼(by single press-
es) to scroll all the submenu options;
– press briefly button MODEto select
the displayed submenu option and to open
the relevant setup menu;
– press buttons ▲or ▼(by single press-
es) to select the new setting for this sub-
menu option;
– press briefly button MODE to store the
new setting and to go back to the previ-
ously selected submenu option.
Page 29 of 282
28
SAFETY
DEVICES
CORRECT USE
OF THE
VEHICLE
WARNING
LIGHTS AND
MESSAGES
IN AN
EMERGENCY
VEHICLE
MAINTENANCE
TECHNICAL
SPECIFICATIONS
INDEX
DASHBOARD
AND CONTROLS
Day
YearMonth
Deutsch
Français
English
Español
Italiano
Nederland
Português Example:
fig. 21 Example:
Briefly press button MODEto start surfing from the
standard screen. To surf the menu use buttons ▲or ▼.
NoteFor safety reasons, when the vehicle is running,
it is possible to access only the reduced menu (for set-
ting the “Speed Beep”). When the vehicle is stationary
access to the whole menu is enabled.
F0N1000g
MODE
briefly press
button
▲
▼
EXIT MENUSPEED BEEPHEADL. SENSOR
SET TIME
SET DATE
SEE RADIO
AUTOCLOSE
UNITS
LANGUAGE BUZZER VOLUME BUTTON VOL. SERVICEPASSENGER’S BAG
(*) This function can be only displayed after deactivating the S.B.R. system at Fiat Dealership.
TRIP B DATA
MODE
briefly press
button
▲
▼▲
▼▲
▼
▲
▼
▲ ▼
▲ ▼ ▲
▼
▲
▼
▲
▼
▲▼
▲▼
▲▼
▲▼▲ ▼
BELT BUZZ. (*)
Page 30 of 282
29
SAFETY
DEVICES
CORRECT USE
OF THE
VEHICLE
WARNING
LIGHTS AND
MESSAGES
IN AN
EMERGENCY
VEHICLE
MAINTENANCE
TECHNICAL
SPECIFICATIONS
INDEX
DASHBOARD
AND CONTROLS
– briefly press button MODE to go back
to the menu screen or press the button
for long to go back to the standard screen
without storing settings.
To cancel the setting, proceed as follows:
– briefly press button MODE: (On) will
flash on the display;
– press button ▼: (Off) will flash on the
display;
– briefly press button MODEto go back
to the menu screen or press the button
for long to go back to the standard screen
without storing settings.
Headlight sensor sensitivity
adjustment (where provided)
With this function it is possible to adjust
the light sensor sensitivity according to 3
levels.
To set the required sensitivity level pro-
ceed as follows:
– briefly press button MODE, the previ-
ously set sensitivity “level” will flash on the
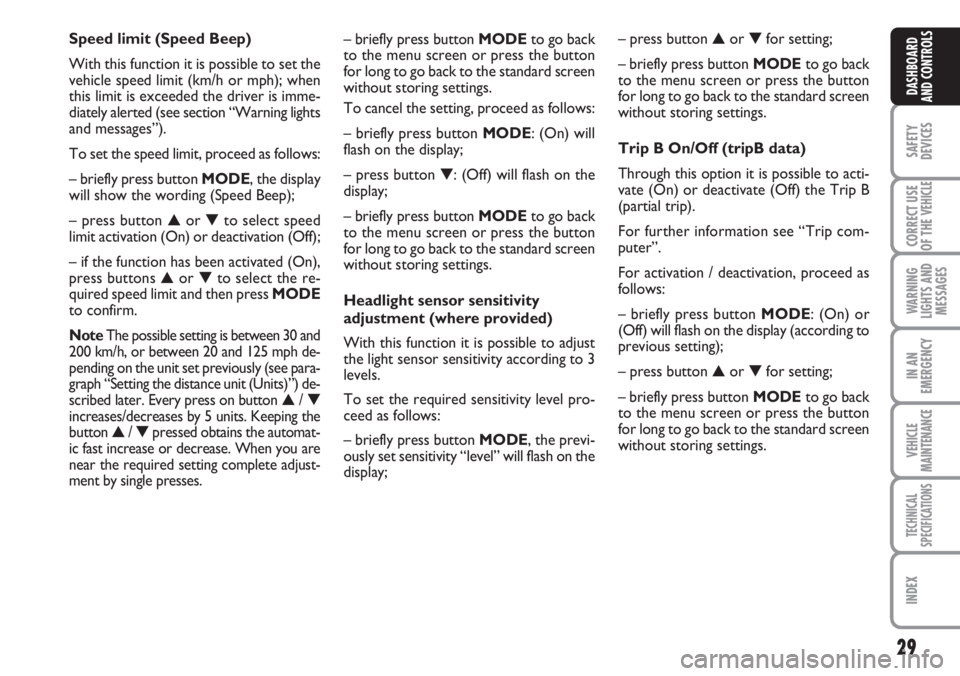
display; Speed limit (Speed Beep)
With this function it is possible to set the
vehicle speed limit (km/h or mph); when
this limit is exceeded the driver is imme-
diately alerted (see section “Warning lights
and messages”).
To set the speed limit, proceed as follows:
– briefly press button MODE, the display
will show the wording (Speed Beep);
– press button ▲or ▼to select speed
limit activation (On) or deactivation (Off);
– if the function has been activated (On),
press buttons ▲or ▼to select the re-
quired speed limit and then press MODE
to confirm.
NoteThe possible setting is between 30 and
200 km/h, or between 20 and 125 mph de-
pending on the unit set previously (see para-
graph “Setting the distance unit (Units)”) de-
scribed later. Every press on button
▲/ ▼increases/decreases by 5 units. Keeping the
button ▲/ ▼pressed obtains the automat-
ic fast increase or decrease. When you are
near the required setting complete adjust-
ment by single presses.
– press button ▲or ▼for setting;
– briefly press button MODEto go back
to the menu screen or press the button
for long to go back to the standard screen
without storing settings.
Trip B On/Off (tripB data)
Through this option it is possible to acti-
vate (On) or deactivate (Off) the Trip B
(partial trip).
For further information see “Trip com-
puter”.
For activation / deactivation, proceed as
follows:
– briefly press button MODE: (On) or
(Off) will flash on the display (according to
previous setting);
– press button ▲or ▼for setting;
– briefly press button MODEto go back
to the menu screen or press the button
for long to go back to the standard screen
without storing settings.
Page 31 of 282
30
SAFETY
DEVICES
CORRECT USE
OF THE
VEHICLE
WARNING
LIGHTS AND
MESSAGES
IN AN
EMERGENCY
VEHICLE
MAINTENANCE
TECHNICAL
SPECIFICATIONS
INDEX
DASHBOARD
AND CONTROLS
– if selecting “Mode”:briefly press button
MODE, “24h” or “12h” mode will flash
on the display;
– press button ▲or ▼to select “24h” or
“12h”.
After setting, briefly press button MODE
to go back to the submenu screen or
press the button for long to go back to the
main menu screen without storing set-
tings.
– press again button MODEfor long to
go back to the standard screen or to the
main menu according to the current menu
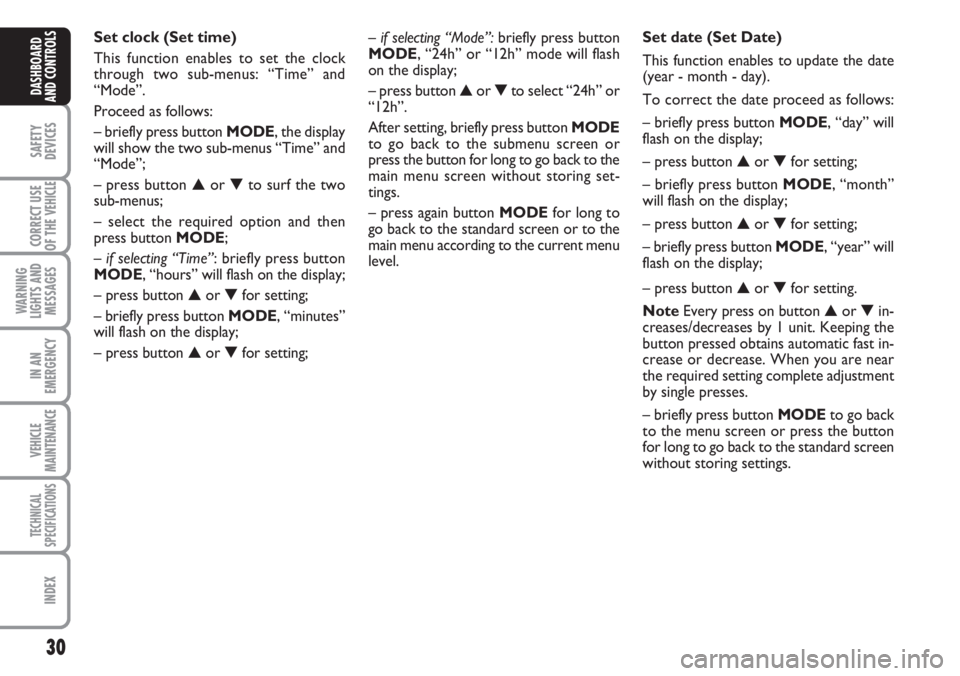
level. Set clock (Set time)
This function enables to set the clock
through two sub-menus: “Time” and
“Mode”.
Proceed as follows:
– briefly press button MODE, the display
will show the two sub-menus “Time” and
“Mode”;
– press button ▲or ▼to surf the two
sub-menus;
– select the required option and then
press button MODE;
– if selecting “Time”: briefly press button
MODE, “hours” will flash on the display;
– press button ▲or ▼for setting;
– briefly press button MODE, “minutes”
will flash on the display;
– press button ▲or ▼for setting;Set date (Set Date)
This function enables to update the date
(year - month - day).
To correct the date proceed as follows:
– briefly press button MODE, “day” will
flash on the display;
– press button ▲or ▼for setting;
– briefly press button MODE, “month”
will flash on the display;
– press button ▲or ▼for setting;
– briefly press button MODE, “year” will
flash on the display;
– press button ▲or ▼for setting.
NoteEvery press on button ▲or ▼in-
creases/decreases by 1 unit. Keeping the
button pressed obtains automatic fast in-
crease or decrease. When you are near
the required setting complete adjustment
by single presses.
– briefly press button MODEto go back
to the menu screen or press the button
for long to go back to the standard screen
without storing settings.
Page 32 of 282
31
SAFETY
DEVICES
CORRECT USE
OF THE
VEHICLE
WARNING
LIGHTS AND
MESSAGES
IN AN
EMERGENCY
VEHICLE
MAINTENANCE
TECHNICAL
SPECIFICATIONS
INDEX
DASHBOARD
AND CONTROLS
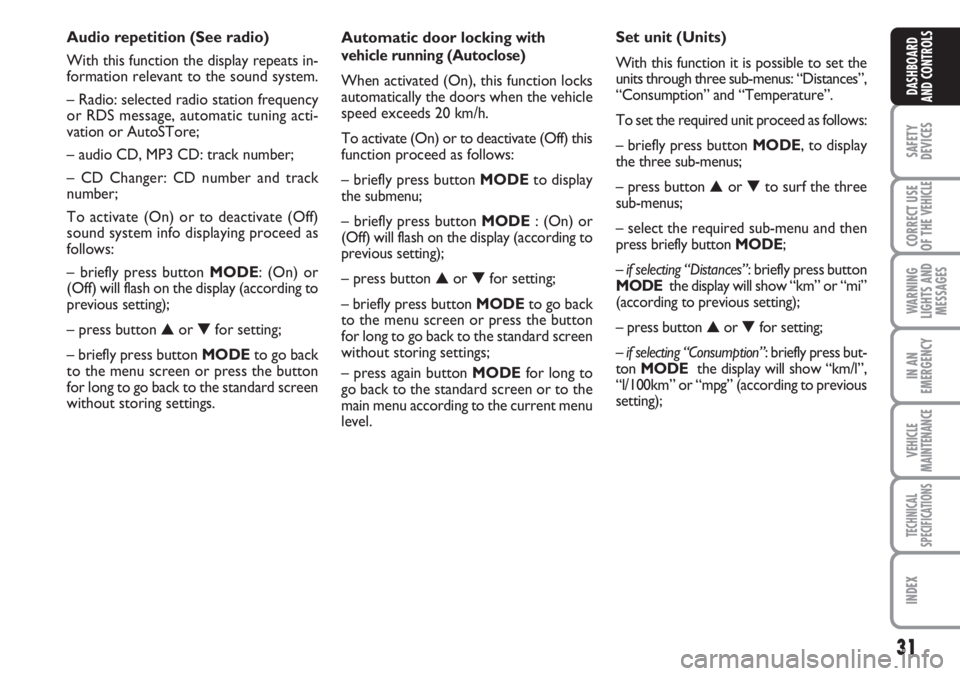
Automatic door locking with
vehicle running (Autoclose)
When activated (On), this function locks
automatically the doors when the vehicle
speed exceeds 20 km/h.
To activate (On) or to deactivate (Off) this
function proceed as follows:
– briefly press button MODEto display
the submenu;
– briefly press button MODE : (On) or
(Off) will flash on the display (according to
previous setting);
– press button ▲or ▼for setting;
– briefly press button MODEto go back
to the menu screen or press the button
for long to go back to the standard screen
without storing settings;
– press again button MODEfor long to
go back to the standard screen or to the
main menu according to the current menu
level. Audio repetition (See radio)
With this function the display repeats in-
formation relevant to the sound system.
– Radio: selected radio station frequency
or RDS message, automatic tuning acti-
vation or AutoSTore;
– audio CD, MP3 CD: track number;
– CD Changer: CD number and track
number;
To activate (On) or to deactivate (Off)
sound system info displaying proceed as
follows:
– briefly press button MODE: (On) or
(Off)will flash on the display (according to
previous setting);
– press button ▲or ▼for setting;
– briefly press button MODEto go back
to the menu screen or press the button
for long to go back to the standard screen
without storing settings.Set unit (Units)
With this function it is possible to set the
units through three sub-menus: “Distances”,
“Consumption” and “Temperature”.
To set the required unit proceed as follows:
– briefly press button MODE, to display
the three sub-menus;
– press button ▲or ▼to surf the three
sub-menus;
– select the required sub-menu and then
press briefly button MODE;
– if selecting “Distances”: briefly press button
MODEthe display will show “km” or “mi”
(according to previous setting);
– press button ▲or ▼for setting;
– if selecting “Consumption”: briefly press but-
ton MODEthe display will show “km/l”,
“l/100km” or “mpg” (according to previous
setting);
Page 33 of 282
32
SAFETY
DEVICES
CORRECT USE
OF THE
VEHICLE
WARNING
LIGHTS AND
MESSAGES
IN AN
EMERGENCY
VEHICLE
MAINTENANCE
TECHNICAL
SPECIFICATIONS
INDEX
DASHBOARD
AND CONTROLS
Selecting the language (Language)
Display messages can be shown (after set-
ting) in different languages: Italian, German,
English, Spanish, French, Portuguese and
Dutch.
To set the required language proceed as
follows:
– briefly press button MODE: the previ-
ously set “language” will flash on the dis-
play;
– press button ▲or ▼for setting;
– briefly press button MODEto go back
to the menu screen or press the button
for long to go back to the standard screen
without storing settings.Adjusting the failure/warning
buzzer volume
(Buzzer Volume)
With this function the volume of the
buzzer accompanying any failure/warning
indication can be adjusted according to 8
levels.
To adjust the volume proceed as follows:
– briefly press button MODE: the previ-
ously set volume “level” will flash on the
display;
– press button ▲or ▼for setting;
– briefly press button MODEto go back
to the menu screen or press the button
for long to go back to the standard screen
without storing settings. If the distance unit set is “km” the fuel con-
sumption unit will be displayed in km/l or
l/100km.
If the distance unit set is “mi” the fuel con-
sumption unit will be displayed in “mpg”.
– press button ▲or ▼for setting;
– if selecting “Temperature”: briefly press but-
ton MODE, the display will show “°C” or
“°F” (according to previous setting);
– press button ▲or ▼for setting;
After setting, briefly press button MODE
to go back to the submenu screen or
press the button for long to go back to the
main menu screen without storing set-
tings.
– press again button MODEfor long to
go back to the standard screen or to the
main menu according to the current menu
level.
Page 34 of 282
33
SAFETY
DEVICES
CORRECT USE
OF THE
VEHICLE
WARNING
LIGHTS AND
MESSAGES
IN AN
EMERGENCY
VEHICLE
MAINTENANCE
TECHNICAL
SPECIFICATIONS
INDEX
DASHBOARD
AND CONTROLS
Adjusting the button volume
(Button Vol.)
With this function the volume of the
roger-beep accompanying the activation
of buttons MODE, ▲and ▼can be ad-
justed according to 8 levels.
To adjust the volume proceed as follows:
– briefly press button MODE: the previ-
ously set volume “level” will flash on the
display;
– press button ▲or ▼for setting;
– briefly press button MODEto go back
to the menu screen or press the button
for long to go back to the standard screen
without storing settings.S.B.R. buzzer reactivation
(Belt Buzzer)
This function can be only displayed after
Fiat Dealership has deactivated the S.B.R.
system (see paragraph “S.B.R. system” in
section “Safety devices”).
Scheduled Servicing (Service)
Through this function it is possible to dis-
play information connected to proper ve-
hicle servicing.
Proceed as follows:
– briefly press button MODE: service in
km or mi, according to previous setting,
will be displayed (see paragraph “Units”);
– briefly press button MODEto go back
to the menu screen or press the button
for long to go back to the standard screen.NoteThe “Service schedule” plans dif-
ferent service intervals according to en-
gine models; service interval is displayed
automatically, with the ignition key at
MAR, starting from 2,000 km (or 1,240
mi) from this deadline and it is shown again
every 200 km (or 124 mi). Oil change
warning messages are displayed in the
same way. Use buttons ▲and ▼to dis-
play alternately service schedule info and
engine oil change info. Below 200 km ser-
vicing indications are displayed more fre-
quently. Service indications will be dis-
played in km or mi according to previous
unit setting. When a programmed main-
tenance interval (coupon) is near to come,
turning the ignition key to MAR, the dis-
play will show the message “Service” fol-
lowed by the number of km/mi to go be-
fore vehicle servicing. Contact a Fiat Deal-
ership to carry out any service operation
provided by the “Service schedule” and to
reset the display.