stop start FIAT DUCATO 2011 Owner handbook (in English)
[x] Cancel search | Manufacturer: FIAT, Model Year: 2011, Model line: DUCATO, Model: FIAT DUCATO 2011Pages: 287, PDF Size: 4.42 MB
Page 60 of 287
56
KNOWING
YOUR CAR
SAFETY
STARTING
AND
DRIVING
WARNING
LIGHTS AND
MESSAGES
IN AN
EMERGENCY
MAINTENANCE
AND CARE
TECHNICAL
SPECIFICATIONS
INDEX
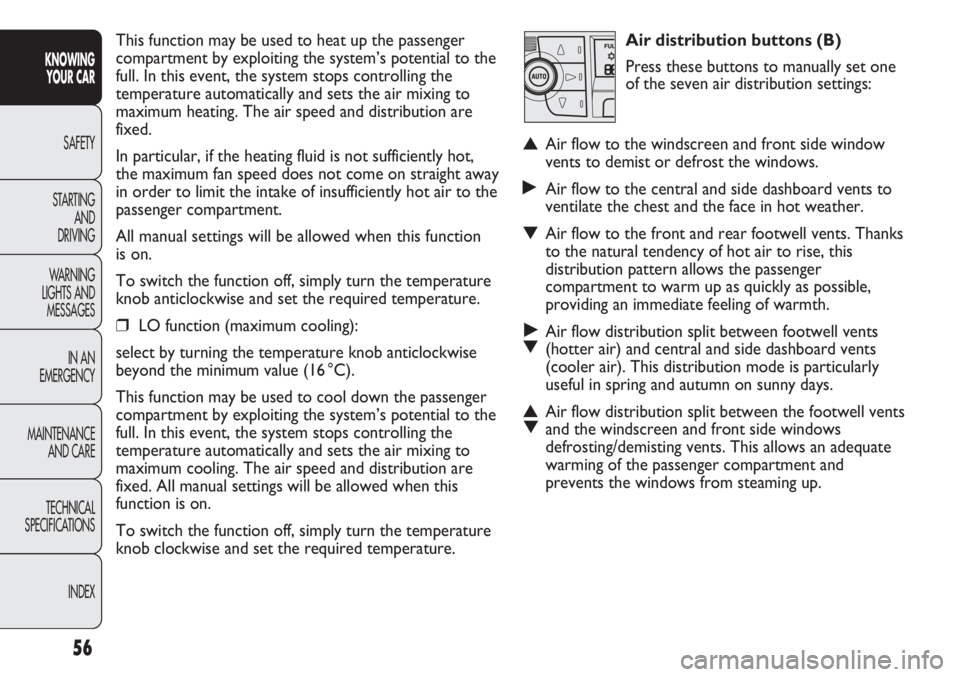
Air distribution buttons (B)
Press these buttons to manually set one
of the seven air distribution settings:
▲Air flow to the windscreen and front side window
vents to demist or defrost the windows.
˙Air flow to the central and side dashboard vents to
ventilate the chest and the face in hot weather.
▼Air flow to the front and rear footwell vents. Thanks
to the natural tendency of hot air to rise, this
distribution pattern allows the passenger
compartment to warm up as quickly as possible,
providing an immediate feeling of warmth.
˙
▼Air flow distribution split between footwell vents
(hotter air) and central and side dashboard vents
(cooler air). This distribution mode is particularly
useful in spring and autumn on sunny days.
▲
▼Air flow distribution split between the footwell vents
and the windscreen and front side windows
defrosting/demisting vents. This allows an adequate
warming of the passenger compartment and
prevents the windows from steaming up.
This function may be used to heat up the passenger
compartment by exploiting the system’s potential to the
full. In this event, the system stops controlling the
temperature automatically and sets the air mixing to
maximum heating. The air speed and distribution are
fixed.
In particular, if the heating fluid is not sufficiently hot,
the maximum fan speed does not come on straight away
in order to limit the intake of insufficiently hot air to the
passenger compartment.
All manual settings will be allowed when this function
is on.
To switch the function off, simply turn the temperature
knob anticlockwise and set the required temperature.
❒LO function (maximum cooling):
select by turning the temperature knob anticlockwise
beyond the minimum value (16 °C).
This function may be used to cool down the passenger
compartment by exploiting the system’s potential to the
full. In this event, the system stops controlling the
temperature automatically and sets the air mixing to
maximum cooling. The air speed and distribution are
fixed. All manual settings will be allowed when this
function is on.
To switch the function off, simply turn the temperature
knob clockwise and set the required temperature.
Page 63 of 287
59
KNOWING
YOUR CAR
SAFETY
STARTING
AND
DRIVING
WARNING
LIGHTS AND
MESSAGES
IN AN
EMERGENCY
MAINTENANCE
AND CARE
TECHNICAL
SPECIFICATIONS
INDEX
IMPORTANT With the compressor off, it is not
possible to introduce air into the passenger
compartment at a temperature lower than that of the
outside air. In certain weather conditions, the windows
could mist up rapidly due to the non-dehumidified air.
The system remembers that the compressor has been
switched off, even after the engine has stopped.
To restore automatic compressor activation control,
press the √button again (in this case, the system will
work only as a heater) or press the AUTO button.
With the compressor switched off, if the outside
temperature is higher than the one set, the system is
not capable of satisfying this request. This is signalled by
the target temperature flashing, after which the word
AUTO goes out.
With the climate control compressor off, the fan speed
can be set to zero manually (no bar shown).
With the compressor enabled and the engine started,
the fan speed may be reduced to the minimum setting
(only one bar shown).
Button for rapid window demisting/
defrosting (D)
When this button is pressed, the climate
control automatically activates all the
functions necessary to speed up the
demising/defrosting of the windscreen
and the side windows:❒turns on the climate control compressor when
weather conditions are suitable;
❒air recirculation switching-off;
❒sets the maximum temperature for the HI air in both
zones;
❒sets the fan speed set according to the engine
coolant temperature to limit the flow of air that is
insufficiently warm to demist the windows;
❒directs the air flow to the windscreen and front side
windows vents;
❒switches on the heated rear window.
IMPORTANT The rapid demisting/defrosting function
for the windows remains on for about 3 minutes from
when the engine coolant reaches the appropriate
temperature for a rapid demisting of the windows.
When this function is active, the LED on the
corresponding button and the one on the heated rear
window button switch on. The message FULL AUTO
goes off on the display.
You can only adjust the fan speed and switch off the
heated rear windscreen manually when this function is
active.
To restore the operating conditions, prior to activation,
simply press button B, air recirculation button G, the
compressor button F or the
AUTO button A.
Page 69 of 287
65
KNOWING
YOUR CAR
SAFETY
STARTING
AND
DRIVING
WARNING
LIGHTS AND
MESSAGES
IN AN
EMERGENCY
MAINTENANCE
AND CARE
TECHNICAL
SPECIFICATIONS
INDEX
Deactivation of the programmed activation time
fig. 59
To delete the programmed activation time, press button
6 briefly: the display lighting will go off and the number 3
relating to the preselected time will disappear.
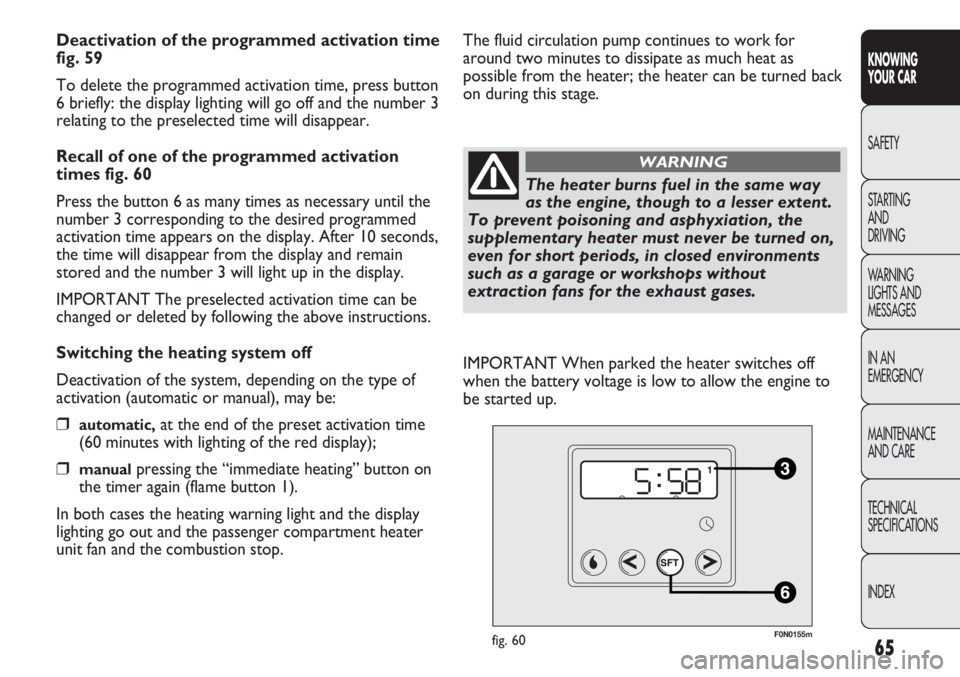
Recall of one of the programmed activation
times fig. 60
Press the button 6 as many times as necessary until the
number 3 corresponding to the desired programmed
activation time appears on the display. After 10 seconds,
the time will disappear from the display and remain
stored and the number 3 will light up in the display.
IMPORTANT The preselected activation time can be
changed or deleted by following the above instructions.
Switching the heating system off
Deactivation of the system, depending on the type of
activation (automatic or manual), may be:
❒automatic,at the end of the preset activation time
(60 minutes with lighting of the red display);
❒manualpressing the “immediate heating” button on
the timer again (flame button 1).
In both cases the heating warning light and the display
lighting go out and the passenger compartment heater
unit fan and the combustion stop.
F0N0155mfig. 60
The fluid circulation pump continues to work for
around two minutes to dissipate as much heat as
possible from the heater; the heater can be turned back
on during this stage.
The heater burns fuel in the same way
as the engine, though to a lesser extent.
To prevent poisoning and asphyxiation, the
supplementary heater must never be turned on,
even for short periods, in closed environments
such as a garage or workshops without
extraction fans for the exhaust gases.
WARNING
IMPORTANT When parked the heater switches off
when the battery voltage is low to allow the engine to
be started up.
Page 72 of 287
68
KNOWING
YOUR CAR
SAFETY
STARTING
AND
DRIVING
WARNING
LIGHTS AND
MESSAGES
IN AN
EMERGENCY
MAINTENANCE
AND CARE
TECHNICAL
SPECIFICATIONS
INDEX
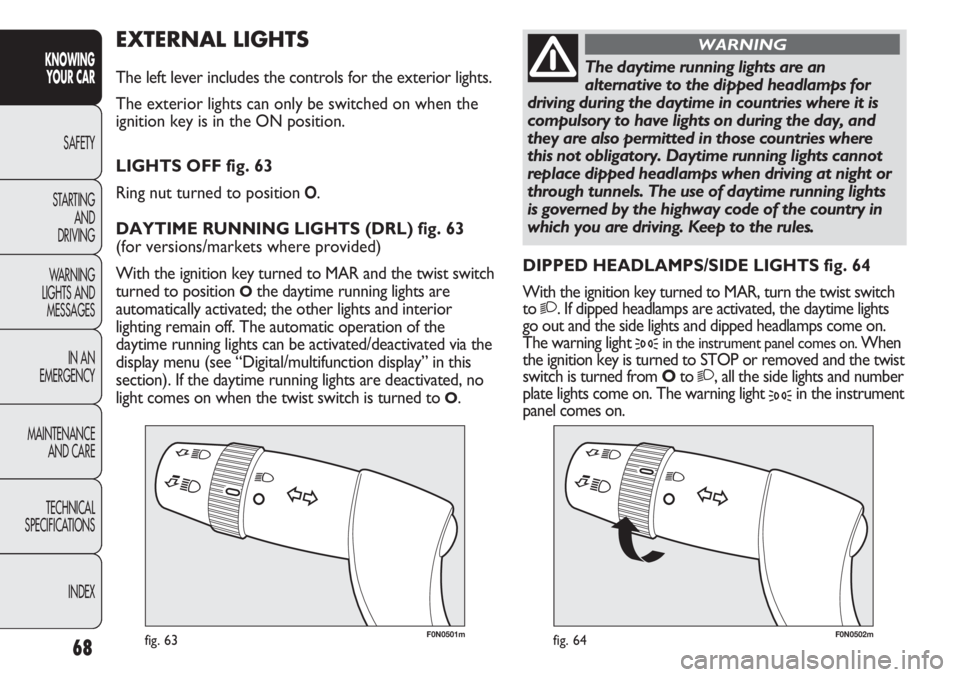
F0N0501mfig. 63F0N0502mfig. 64
EXTERNAL LIGHTS
The left lever includes the controls for the exterior lights.
The exterior lights can only be switched on when the
ignition key is in the ON position.
LIGHTS OFF fig. 63
Ring nut turned to position
O.
DAYTIME RUNNING LIGHTS (DRL) fig. 63
(for versions/markets where provided)
With the ignition key turned to MAR and the twist switch
turned to position
Othe daytime running lights are
automatically activated; the other lights and interior
lighting remain off. The automatic operation of the
daytime running lights can be activated/deactivated via the
display menu (see “Digital/multifunction display” in this
section). If the daytime running lights are deactivated, no
light comes on when the twist switch is turned to
O.DIPPED HEADLAMPS/SIDE LIGHTS fig. 64
With the ignition key turned to MAR, turn the twist switch
to
2. If dipped headlamps are activated, the daytime lights
go out and the side lights and dipped headlamps come on.
The warning light
3in the instrument panel comes on. When
the ignition key is turned to STOP or removed and the twist
switch is turned from Oto
2, all the side lights and number
plate lights come on. The warning light
3in the instrument
panel comes on.
The daytime running lights are an
alternative to the dipped headlamps for
driving during the daytime in countries where it is
compulsory to have lights on during the day, and
they are also permitted in those countries where
this not obligatory. Daytime running lights cannot
replace dipped headlamps when driving at night or
through tunnels. The use of daytime running lights
is governed by the highway code of the country in
which you are driving. Keep to the rules.
WARNING
Page 73 of 287
69
KNOWING
YOUR CAR
SAFETY
STARTING
AND
DRIVING
WARNING
LIGHTS AND
MESSAGES
IN AN
EMERGENCY
MAINTENANCE
AND CARE
TECHNICAL
SPECIFICATIONS
INDEX
F0N0503mfig. 65
F0N0504mfig. 66
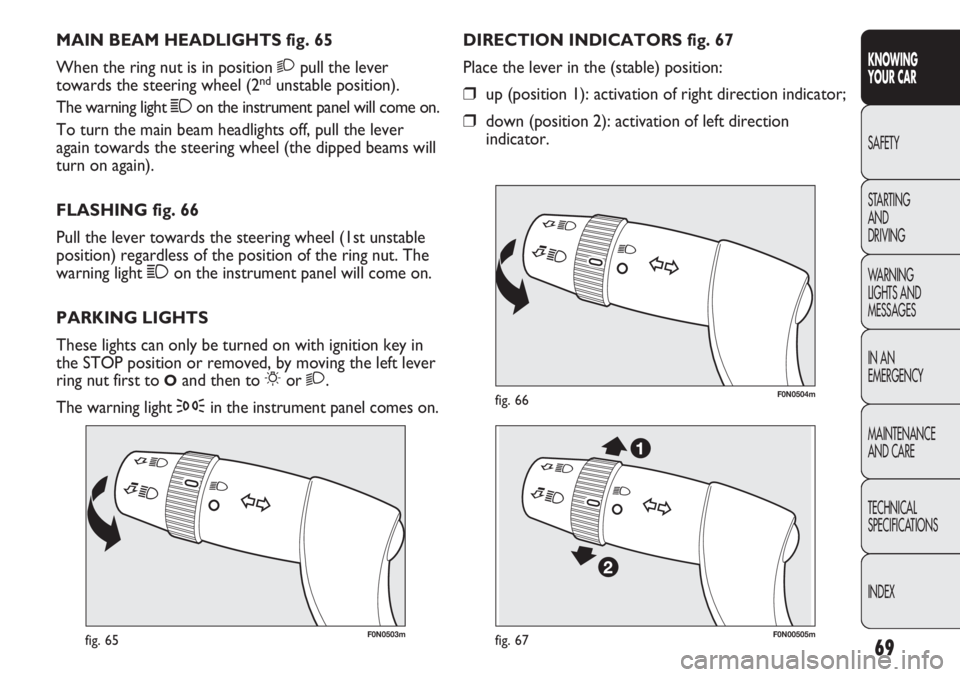
DIRECTION INDICATORS fig. 67
Place the lever in the (stable) position:
❒up (position 1): activation of right direction indicator;
❒down (position 2): activation of left direction
indicator. MAIN BEAM HEADLIGHTS fig. 65
When the ring nut is in position 2pull the lever
towards the steering wheel (2
ndunstable position).
The warning light 1on the instrument panel will come on.
To turn the main beam headlights off, pull the lever
again towards the steering wheel (the dipped beams will
turn on again).
FLASHING fig. 66
Pull the lever towards the steering wheel (1st unstable
position) regardless of the position of the ring nut. The
warning light 1on the instrument panel will come on.
PARKING LIGHTS
These lights can only be turned on with ignition key in
the STOP position or removed, by moving the left lever
ring nut first to
Oand then to 6or 2.
The warning light
3in the instrument panel comes on.
F0N00505mfig. 67
Page 76 of 287
72
KNOWING
YOUR CAR
SAFETY
STARTING
AND
DRIVING
WARNING
LIGHTS AND
MESSAGES
IN AN
EMERGENCY
MAINTENANCE
AND CARE
TECHNICAL
SPECIFICATIONS
INDEX
F0N0039mfig. 71
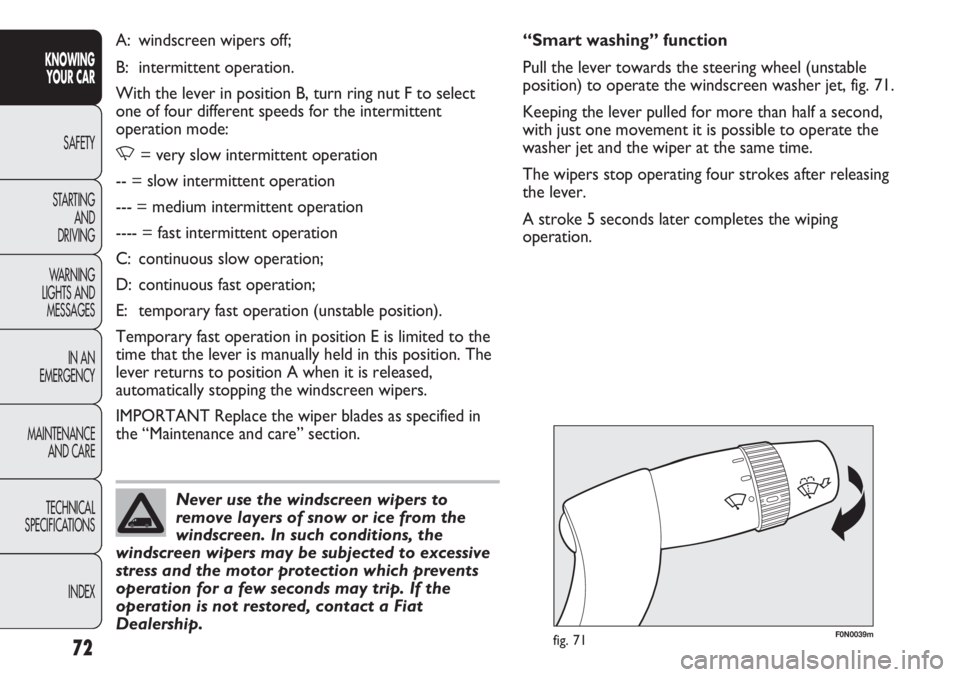
“Smart washing” function
Pull the lever towards the steering wheel (unstable
position) to operate the windscreen washer jet, fig. 71.
Keeping the lever pulled for more than half a second,
with just one movement it is possible to operate the
washer jet and the wiper at the same time.
The wipers stop operating four strokes after releasing
the lever.
A stroke 5 seconds later completes the wiping
operation. A: windscreen wipers off;
B: intermittent operation.
With the lever in position B, turn ring nut F to select
one of four different speeds for the intermittent
operation mode:
,= very slow intermittent operation
-- = slow intermittent operation
--- = medium intermittent operation
---- = fast intermittent operation
C: continuous slow operation;
D: continuous fast operation;
E: temporary fast operation (unstable position).
Temporary fast operation in position E is limited to the
time that the lever is manually held in this position. The
lever returns to position A when it is released,
automatically stopping the windscreen wipers.
IMPORTANT Replace the wiper blades as specified in
the “Maintenance and care” section.
Never use the windscreen wipers to
remove layers of snow or ice from the
windscreen. In such conditions, the
windscreen wipers may be subjected to excessive
stress and the motor protection which prevents
operation for a few seconds may trip. If the
operation is not restored, contact a Fiat
Dealership.
Page 82 of 287
78
KNOWING
YOUR CAR
SAFETY
STARTING
AND
DRIVING
WARNING
LIGHTS AND
MESSAGES
IN AN
EMERGENCY
MAINTENANCE
AND CARE
TECHNICAL
SPECIFICATIONS
INDEX
F0N0220mfig. 76F0N0219mfig. 75
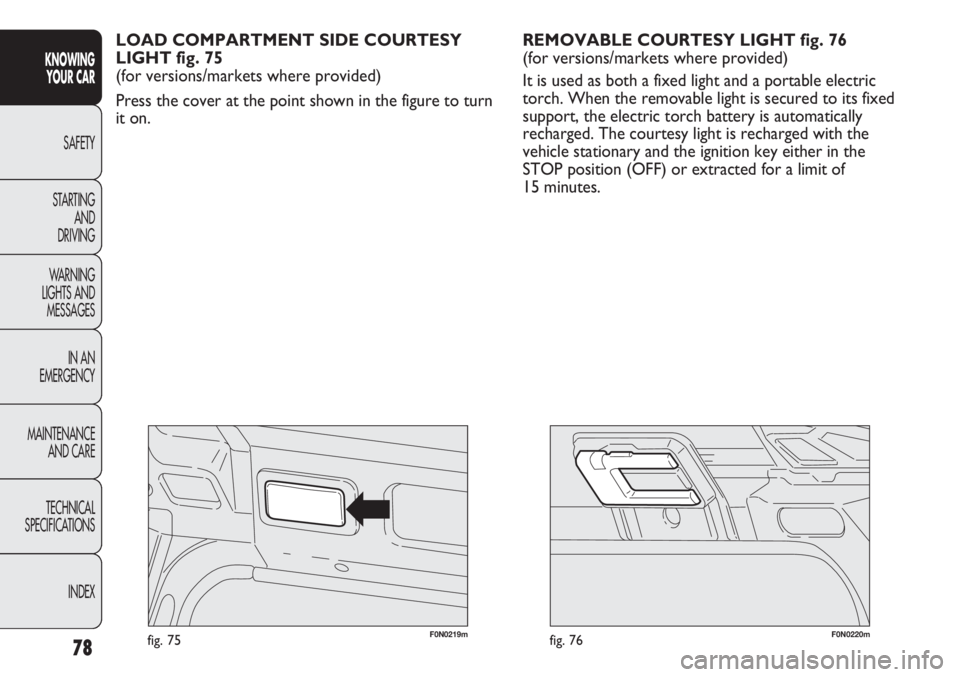
REMOVABLE COURTESY LIGHT fig. 76
(for versions/markets where provided)
It is used as both a fixed light and a portable electric
torch. When the removable light is secured to its fixed
support, the electric torch battery is automatically
recharged. The courtesy light is recharged with the
vehicle stationary and the ignition key either in the
STOP position (OFF) or extracted for a limit of
15 minutes. LOAD COMPARTMENT SIDE COURTESY
LIGHT fig. 75
(for versions/markets where provided)
Press the cover at the point shown in the figure to turn
it on.
Page 84 of 287
80
KNOWING
YOUR CAR
SAFETY
STARTING
AND
DRIVING
WARNING
LIGHTS AND
MESSAGES
IN AN
EMERGENCY
MAINTENANCE
AND CARE
TECHNICAL
SPECIFICATIONS
INDEX
F0N0046mfig. 79
F0N0043mfig. 80
PARKING LIGHTS
These lights can only be turned on with ignition key in
the STOP position or removed, by turning the control
on the left lever first to
Oand then to position 6or
2. The warning light 3on the instrument panel
comes on.
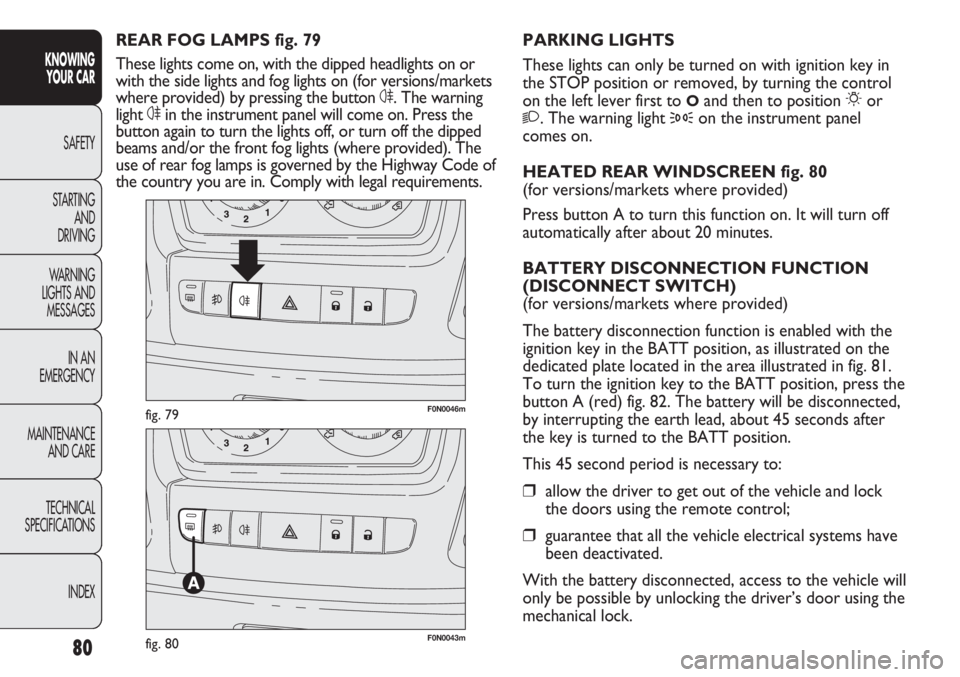
HEATED REAR WINDSCREEN fig. 80
(for versions/markets where provided)
Press button A to turn this function on. It will turn off
automatically after about 20 minutes.
BATTERY DISCONNECTION FUNCTION
(DISCONNECT SWITCH)
(for versions/markets where provided)
The battery disconnection function is enabled with the
ignition key in the BATT position, as illustrated on the
dedicated plate located in the area illustrated in fig. 81.
To turn the ignition key to the BATT position, press the
button A (red) fig. 82. The battery will be disconnected,
by interrupting the earth lead, about 45 seconds after
the key is turned to the BATT position.
This 45 second period is necessary to:
❒allow the driver to get out of the vehicle and lock
the doors using the remote control;
❒guarantee that all the vehicle electrical systems have
been deactivated.
With the battery disconnected, access to the vehicle will
only be possible by unlocking the driver’s door using the
mechanical lock. REAR FOG LAMPS fig. 79
These lights come on, with the dipped headlights on or
with the side lights and fog lights on (for versions/markets
where provided) by pressing the button 4. The warning
light 4in the instrument panel will come on. Press the
button again to turn the lights off, or turn off the dipped
beams and/or the front fog lights (where provided). The
use of rear fog lamps is governed by the Highway Code of
the country you are in. Comply with legal requirements.
Page 104 of 287
100
KNOWING
YOUR CAR
SAFETY
STARTING
AND
DRIVING
WARNING
LIGHTS AND
MESSAGES
IN AN
EMERGENCY
MAINTENANCE
AND CARE
TECHNICAL
SPECIFICATIONS
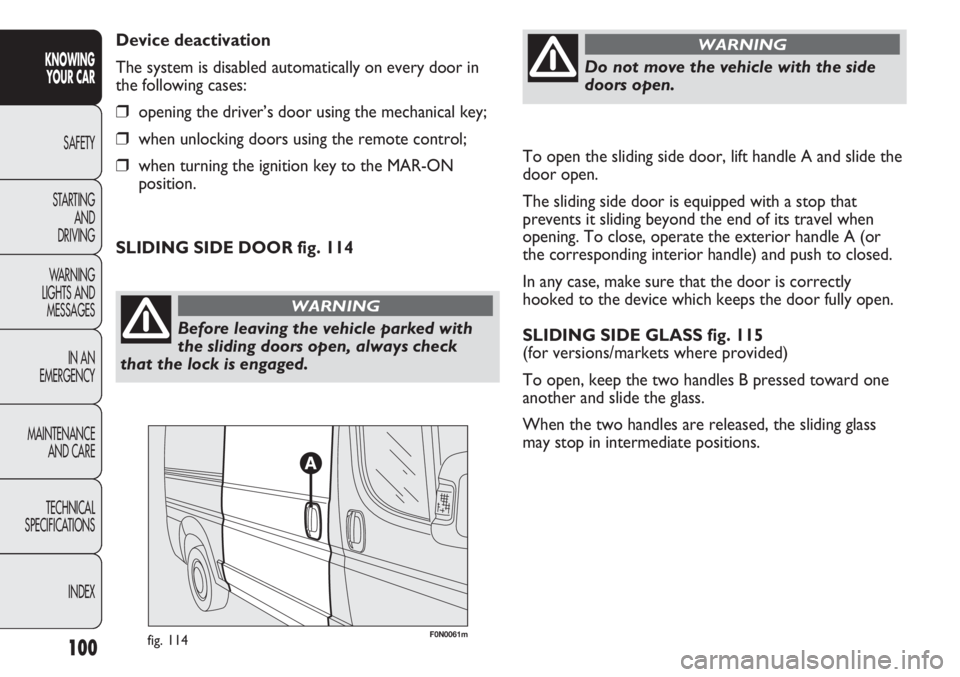
INDEXTo open the sliding side door, lift handle A and slide the
door open.
The sliding side door is equipped with a stop that
prevents it sliding beyond the end of its travel when
opening. To close, operate the exterior handle A (or
the corresponding interior handle) and push to closed.
In any case, make sure that the door is correctly
hooked to the device which keeps the door fully open.
SLIDING SIDE GLASS fig. 115
(for versions/markets where provided)
To open, keep the two handles B pressed toward one
another and slide the glass.
When the two handles are released, the sliding glass
may stop in intermediate positions. Device deactivation
The system is disabled automatically on every door in
the following cases:
❒opening the driver’s door using the mechanical key;
❒when unlocking doors using the remote control;
❒when turning the ignition key to the MAR-ON
position.
Before leaving the vehicle parked with
the sliding doors open, always check
that the lock is engaged.
WARNING
Do not move the vehicle with the side
doors open.
WARNING
SLIDING SIDE DOOR fig. 114
F0N0061mfig. 114
Page 107 of 287
103
KNOWING
YOUR CAR
SAFETY
STARTING
AND
DRIVING
WARNING
LIGHTS AND
MESSAGES
IN AN
EMERGENCY
MAINTENANCE
AND CARE
TECHNICAL
SPECIFICATIONS
INDEX
F0N0188mfig. 121F0N0062mfig. 122
POWER WINDOWS
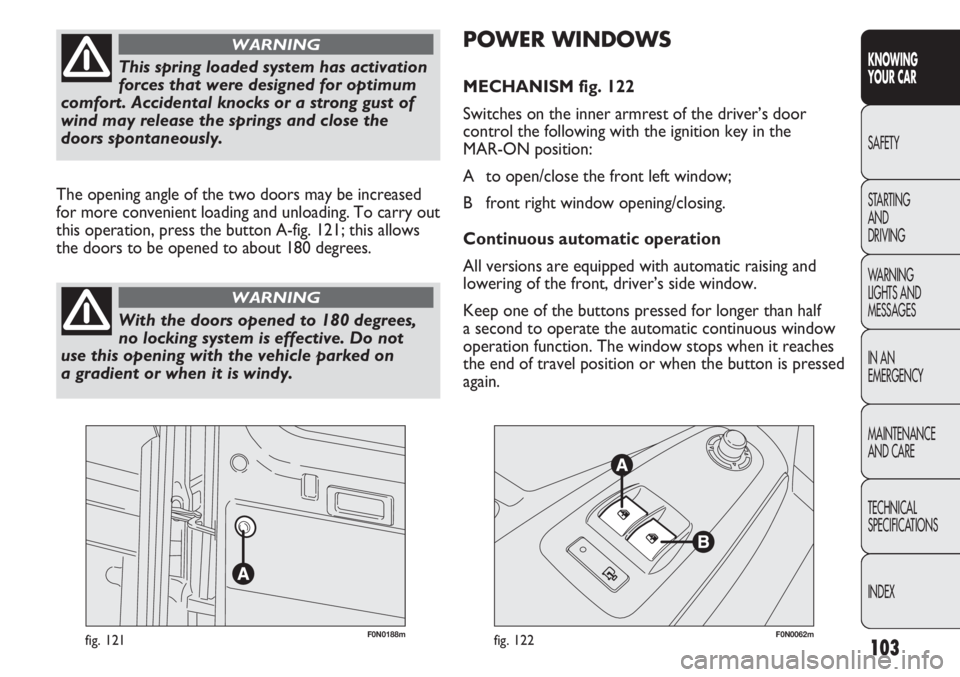
MECHANISM fig. 122
Switches on the inner armrest of the driver’s door
control the following with the ignition key in the
MAR-ON position:
A to open/close the front left window;
B front right window opening/closing.
Continuous automatic operation
All versions are equipped with automatic raising and
lowering of the front, driver’s side window.
Keep one of the buttons pressed for longer than half
a second to operate the automatic continuous window
operation function. The window stops when it reaches
the end of travel position or when the button is pressed
again. The opening angle of the two doors may be increased
for more convenient loading and unloading. To carry out
this operation, press the button A-fig. 121; this allows
the doors to be opened to about 180 degrees.
This spring loaded system has activation
forces that were designed for optimum
comfort. Accidental knocks or a strong gust of
wind may release the springs and close the
doors spontaneously.
WARNING
With the doors opened to 180 degrees,
no locking system is effective. Do not
use this opening with the vehicle parked on
a gradient or when it is windy.
WARNING