instrument panel FIAT DUCATO 2015 Owner handbook (in English)
[x] Cancel search | Manufacturer: FIAT, Model Year: 2015, Model line: DUCATO, Model: FIAT DUCATO 2015Pages: 367, PDF Size: 19.73 MB
Page 65 of 367

Emergency braking
(for versions/markets, where
provided)
In the event of emergency braking
the hazard warning lights come
on automatically, as do the
and
warning lights in the panel.
The function switches off
automatically when the nature of
the braking changes. This function
complies with the relevant
legislation currently in force.
FOG LIGHTS
(for versions/markets, where
provided)
To turn front fog lights on, press
button
fig. 74. To activate these
lights it is necessary to have the
side/taillights switched on. The
warning light on the panel
switches on.
Press the button again to switch
the lights off.
The use of fog lights is governed by
the highway code of the country
in which you are driving. Comply
with legal requirements.REAR FOG LIGHT
These lights switch on, with the
dipped headlights on or with the
side lights and fog lights on (for
versions/markets, where provided)
when the
fig. 75 button is
pressed. The
warning light on
the panel switches on. Press the
button again to turn the lights off, or
turn off the dipped beams and/or
the front fog lights (where provided).
The use of rear fog lights is
governed by the highway code of
the country you are in. Comply with
legal requirements.PARKING LIGHTS
These lights can only be turned on
with ignition key in STOP position
or removed, by moving the left stalk
ring nut first to positionOand
then to position
or. The
warning light switches on in
the instrument panel.
HEATED REAR
WINDOW
(for versions/markets, where
provided)
Press button A fig. 76 to activate.
The device will be switched off
automatically after approximately
20 minutes.
MODE
74F1A0331
MODE
75F1A0323
61
Page 74 of 367
The tachograph is installed and
sealed by authorised personnel: do
not try and access the device or
the supply and recording leads
in any way. It is the responsibility of
the owner of the vehicle on which
the tachograph is installed to check
the device regularly.
The check must be carried out at
least every two years and a test
must be carried out to ensure that it
is working properly. Ensure that
the data label is renewed after
every check and that the
label contains the specified data.SPEED BLOCK
(for versions/markets, where
provided)
The vehicle is equipped with a
speed limitation function that can
be set at the user's request to one
of 4 predefined values: 90, 100,
110, 130 km/h.
To activate/deactivate this function,
contact a Fiat Dealership.
Following the operation, a sticker
will be applied to the windscreen
showing the maximum speed
setting.
IMPORTANT The speedometer
could indicate a higher maximum
speed than the effective one, set by
the Dealership, in accordance with
the regulations in force.
SELF-LEVELLING AIR
SUSPENSION
GENERAL
INFORMATION
The system only acts on the rear
wheels.
The system maintains the rear ride
setting for the vehicle constant in
any loading condition, while
ensuring a greater driving comfort.
In addition, the system allows
the height of the vehicle to
be adjusted with the vehicle
stationary, by selecting from 7
different positions to facilitate
access to the rear compartment.
HEIGHT ADJUSTMENT
There are 7 pre-defined levels for
the free height from the ground:
from “ride -3” to “ride 0” till “ride
+3”.
The multifunction display, located in
the middle of the instrument panel,
can show the ride position.
70
KNOW YOUR VEHICLE
Page 77 of 367
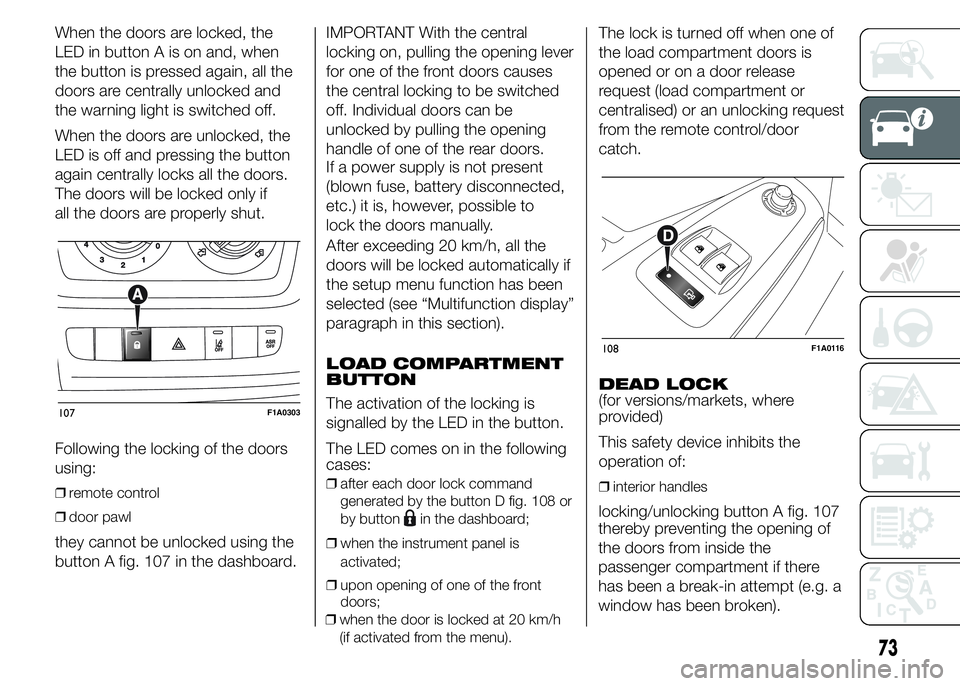
When the doors are locked, the
LED in button A is on and, when
the button is pressed again, all the
doors are centrally unlocked and
the warning light is switched off.
When the doors are unlocked, the
LED is off and pressing the button
again centrally locks all the doors.
The doors will be locked only if
all the doors are properly shut.
Following the locking of the doors
using:
❒remote control
❒door pawl
they cannot be unlocked using the
button A fig. 107 in the dashboard.IMPORTANT With the central
locking on, pulling the opening lever
for one of the front doors causes
the central locking to be switched
off. Individual doors can be
unlocked by pulling the opening
handle of one of the rear doors.
If a power supply is not present
(blown fuse, battery disconnected,
etc.) it is, however, possible to
lock the doors manually.
After exceeding 20 km/h, all the
doors will be locked automatically if
the setup menu function has been
selected (see “Multifunction display”
paragraph in this section).
LOAD COMPARTMENT
BUTTON
The activation of the locking is
signalled by the LED in the button.
The LED comes on in the following
cases:
❒after each door lock command
generated by the button D fig. 108 or
by button
in the dashboard;
❒when the instrument panel is
activated;
❒upon opening of one of the front
doors;
❒when the door is locked at 20 km/h
(if activated from the menu).
The lock is turned off when one of
the load compartment doors is
opened or on a door release
request (load compartment or
centralised) or an unlocking request
from the remote control/door
catch.
DEAD LOCK
(for versions/markets, where
provided)
This safety device inhibits the
operation of:
❒interior handles
locking/unlocking button A fig. 107
107F1A0303
108F1A0116
73
thereby preventing the opening of
the doors from inside the
passenger compartment if there
has been a break-in attempt (e.g. a
window has been broken).
Page 81 of 367

WARNING
34) Once the dead lock system is
engaged it is impossible to open
the doors from inside the vehicle.
Therefore, before engaging the
system check that there is no one
left inside. If the remote control
battery is flat, the system can be
disengaged only by inserting
the key metal insert in either of
the door locks as described
previously: in this case the device
remains active only for the rear
doors.
35) Before leaving the vehicle
parked with sliding doors open,
always check that the latch is
engaged.
36) Do not move the vehicle with
side doors open.37) Before setting off after parking
or before moving the vehicle in
any way, ensure that the
footboard is fully stowed away. As
the movement of the platform is
linked to that of the sliding side
door, thewarning light in the
instrument panel comes on if it is
not fully retracted in the same
way as when the rear doors are
not shut.
38) This spring loaded system has
activation forces that were
designed for optimum comfort.
Accidental knocks or a strong
gust of wind may release the
springs and close the doors
spontaneously.
39) With the doors opened to 180
degrees, no locking system is
effective. Do not use this opening
with the vehicle parked on a
gradient or when it is windy.
40) It is forbidden to drive the
vehicle with the footboard open.
41) Do not use the retracted
footboard for getting up or down
the load compartment.42) Make sure that the footboard is
suitably locked by the provided
retaining systems before, after
and during its use. An incomplete
opening or closing might cause
an improper movement of the
footboard with risks arising for the
operator and external users.
43) The footboard lightly projects
from the vehicle even if retracted;
therefore, when rear parking
sensors are provided, their
operating range is lightly reduced.
IMPORTANT
5) The footboard presence may
reduce the ramp approach angles;
it is therefore recommended, in
case of a very steep ramp, to
be very careful in order not to
damage the footboard.
77
Page 85 of 367

HEADLIGHTS
LIGHT BEAM
ALIGNMENT
The correct alignment of the
headlights is essential for the
comfort and safety of the driver and
other road users. To ensure the
best visibility when travelling with
the headlights on, the headlight
alignment must be correct. Contact
a Fiat Dealership to have the
headlights checked and adjusted.
HEADLIGHT
ALIGNMENT
CORRECTOR
This device works with the ignition
key in the MAR-ON position and
the dipped beam headlights on.
The vehicle tilts backwards when it
is laden, raising the beam.
The beams must therefore be
realigned in this case.Headlight alignment
adjustment
Pressoron the control panel
fig. 124.
The instrument panel display shows
the position in relation to the
adjustment set.
IMPORTANT Check the alignment
of the light beams each time the
weight of the load transported
changes.
FOG LIGHTS
ALIGNMENT
(for versions/markets, where
provided)
Contact a Fiat Dealership to have
the headlights checked and
adjusted.ADJUSTING THE
HEADLIGHTS WHEN
ABROAD
The dipped beam headlights are
aligned for operation in the country
where the vehicle was originally
purchased. When in countries
where you drive on the other side of
the road, you need to alter the
beam direction by affixing a
specially designed self-adhesive
film in order not to dazzle the
vehicles travelling in the opposite
direction. Such film is provided
by Lineaccessori Fiat and is
available at Fiat Dealerships.
MODEMODE
124F1A0326
81
Page 87 of 367
53) The ABS can’t overrule the
natural laws of physics, and can’t
increase the grip available
according to the condition of the
road.
54) The ABS cannot prevent
accidents, including those due to
excessive speed on corners,
driving on low-grip surfaces or
aquaplaning.
55) The capability of the ABS must
never be tested irresponsibly and
dangerously, in such a way as
to compromise personal safety
and the safety of others.
56) For the correct operation of the
ABS, it is essential that the tyres
are of the same make and type on
all wheels, in perfect condition
and, above all, of the specified
type and dimensions.
57) If the space-saver wheel (for
versions/markets, where
provided) is used, the ABS keeps
operating. Always remember
that the space-saver wheel, being
smaller than the original wheel,
provides less grip.ESC (Electronic
Stability Control)
SYSTEM
(for versions/markets, where
provided)
The ESC system improves the
directional control and stability of
the vehicle in various driving
conditions.
The ESC system corrects the
vehicle’s understeer and oversteer,
distributing the brake force on
the appropriate wheels. The torque
supplied by the engine can also
be reduced in order to maintain
control of the vehicle.
The ESC system uses the sensors
in the vehicle to determine the
trajectory required by the driver
through steering and compares it
with the real trajectory of the
vehicle. When the real trajectory
deviates from the desired trajectory,
the ESC system intervenes to
counter the car’s understeer or
oversteer.
❒Oversteer: occurs when the vehicle is
turning more than it should according
to the angle of the steering wheel.❒Understeer: occurs when the vehicle
is turning less than it should
according to the angle of the steering
wheel
The ESC system also includes the
following subsystems:
❒Hill Holder
❒ASR
❒HBA
❒ERM
❒HDC
58) 59) 60)
SYSTEM
INTERVENTION
This is signalled by the flashing of
warning light
in the instrument
panel, to inform the driver that
the vehicle is in critical stability and
grip conditions.
SYSTEM ACTIVATION
The ESC system switches on
automatically when the engine is
started and cannot be switched off.
83
Page 92 of 367
TRACTION PLUS
SYSTEM
(for versions/markets, where
provided)
Traction Plus is a driving aid, useful
for setting off in poor grip
conditions on non-homogeneous
road surfaces (snow/asphalt,
ice/asphalt, mud/asphalt, etc.),
which allows the drive force to be
distributed adequately on the
engine axle when one of the two
drive wheels slips.
Traction Plus acts by braking the
wheel with poor grip (or slipping
more than the others), thereby
transferring the drive force to that
which has greater grip on the
ground.
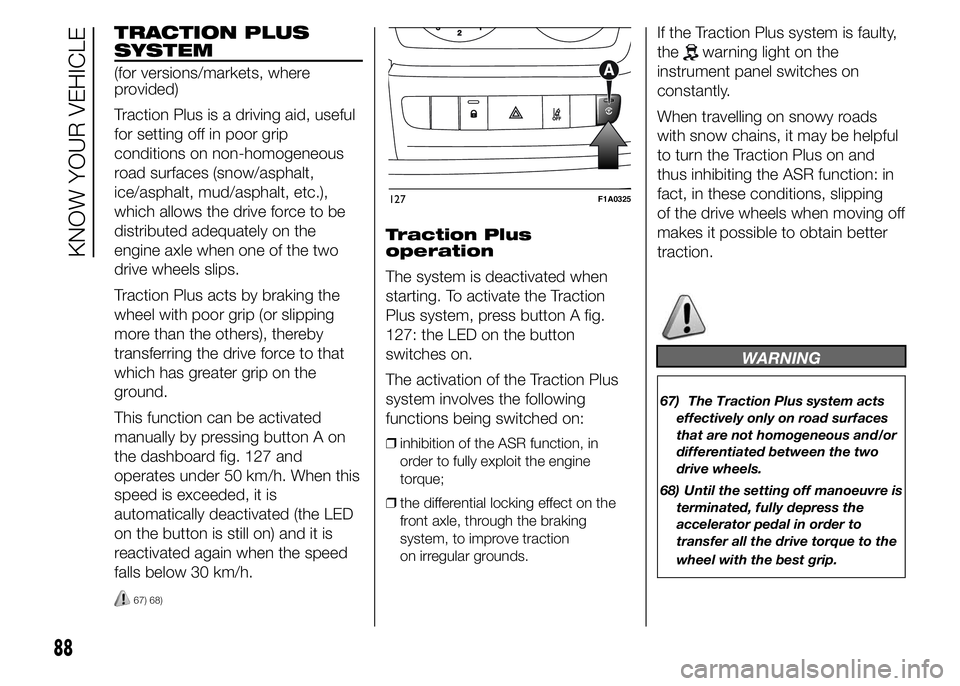
This function can be activated
manually by pressing button A on
the dashboard fig. 127 and
operates under 50 km/h. When this
speed is exceeded, it is
automatically deactivated (the LED
on the button is still on) and it is
reactivated again when the speed
falls below 30 km/h.
67) 68)
Traction Plus
operation
The system is deactivated when
starting. To activate the Traction
Plus system, press button A fig.
127: the LED on the button
switches on.
The activation of the Traction Plus
system involves the following
functions being switched on:
❒inhibition of the ASR function, in
order to fully exploit the engine
torque;
❒the differential locking effect on the
front axle, through the braking
system, to improve traction
on irregular grounds.
If the Traction Plus system is faulty,
the
warning light on the
instrument panel switches on
constantly.
When travelling on snowy roads
with snow chains, it may be helpful
to turn the Traction Plus on and
thus inhibiting the ASR function: in
fact, in these conditions, slipping
of the drive wheels when moving off
makes it possible to obtain better
traction.
WARNING
67) The Traction Plus system acts
effectively only on road surfaces
that are not homogeneous and/or
differentiated between the two
drive wheels.
68) Until the setting off manoeuvre is
terminated, fully depress the
accelerator pedal in order to
transfer all the drive torque to the
wheel with the best grip.
127F1A0325
88
KNOW YOUR VEHICLE
Page 94 of 367

The TPMS uses wireless devices
with electronic sensors mounted on
the wheel rims to constantly
monitor the value of tyre pressure.
The sensors mounted on each
wheel as part of the valve stem
transmit various information of the
tyres to the receiver module, in
order to calculate the pressure.
WARNING Monitoring and
maintaining the correct pressure in
all four tyres are particularly
important.
Tyre pressure
monitoring system
low pressure
warnings
The system warns the driver if one
or more tyres are flat by switching
on the warning light
on the
instrument panel (together with a
warning message and an acoustic
signal).In this case, stop the vehicle as
soon as possible, check the
inflation pressure of each tyre and
inflate to the cold tyre pressure
value prescribed for the vehicle.
The system will automatically
update and after receiving the tyre
pressure update the tyre pressure
control warning light switches
off. You may need to drive
the vehicle for about 20 minutes at
a speed higher than 20 km/h to
allow the system to receive this
information.
TPMS operation faults
The system fault is indicated by
warning light
which first flashes
for 75 seconds and then stays
on steadily. This can occur in any of
the following situations:
❒interference caused by electronic
devices or radio frequency emissions
similar to those of the TPM sensors.
❒Application of tinted films which
interfere with the signals of the radio
waves.
❒Presence of snow or ice on the
wheels or the wheel arches.
❒Use of snow chains.❒Use of wheels/tyres not equipped
with TPM sensors.
❒The space-saver wheel is not
equipped with the tyre pressure
control sensor. Therefore, the tyre
pressure is not controlled by the
system.
❒If the space-saver wheel replaces a
tyre with a pressure lower than the
insufficient pressure limit, an acoustic
signal will be emitted and the warning
light
will switch on at the next
ignition cycle.
❒When the original tyre is repaired or
replaced and it is mounted back on
the vehicle to replace the space-
saver wheel, the TPMS will update
automatically and the warning light
will switch off, provided that the
pressure of none of the four tyres is
below the insufficient pressure limit.
You may need to drive the vehicle for
about 20 minutes at a speed higher
than 20 km/h to allow the TPMS
to receive this information.
90
KNOW YOUR VEHICLE
Page 96 of 367
DRIVING ADVISOR
(lane crossing warning)
(for versions/markets, where
provided)
82) 79) 80)
The Driving Advisor is a warning
system that notifies the driver
if he/she crosses the lane because
he/she has been distracted.
A video sensor, fitted on the
windscreen near the interior rear
view mirror, detects the lane
demarcation lines and the position
of the car in relation to them.
IMPORTANT On cars with Driving
Advisor, it is advisable to contact
a Fiat Dealership should the
windscreen need to be replaced. If
the repair is carried out at a
specialist window replacement
centre, it is still necessary to go to a
Fiat Dealership to have the camera
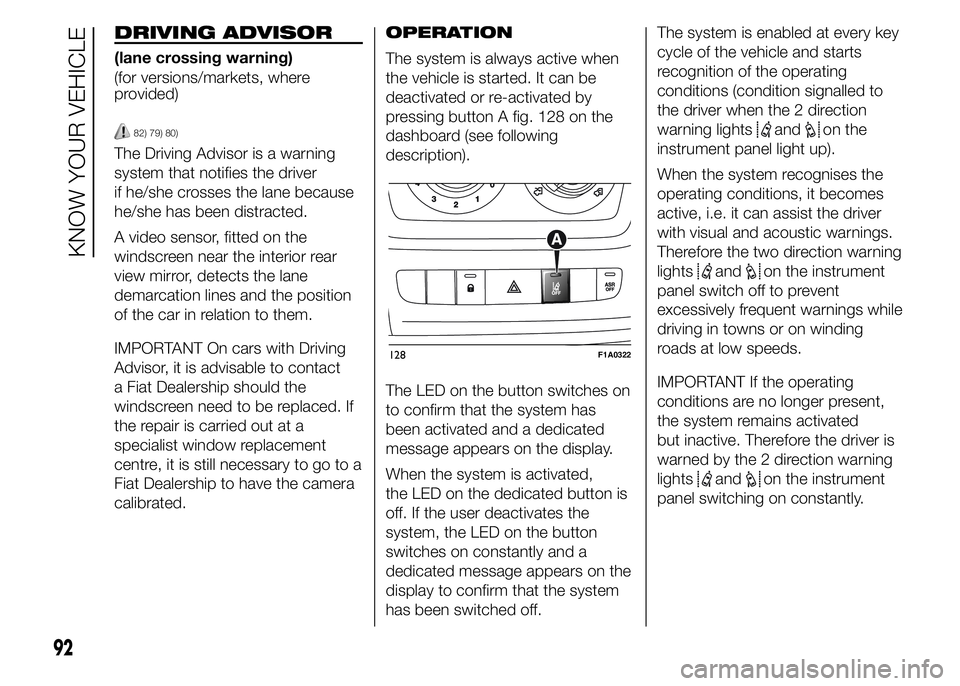
calibrated.OPERATION
The system is always active when
the vehicle is started. It can be
deactivated or re-activated by
pressing button A fig. 128 on the
dashboard (see following
description).
The LED on the button switches on
to confirm that the system has
been activated and a dedicated
message appears on the display.
When the system is activated,
the LED on the dedicated button is
off. If the user deactivates the
system, the LED on the button
switches on constantly and a
dedicated message appears on the
display to confirm that the system
has been switched off.The system is enabled at every key
cycle of the vehicle and starts
recognition of the operating
conditions (condition signalled to
the driver when the 2 direction
warning lights
andon the
instrument panel light up).
When the system recognises the
operating conditions, it becomes
active, i.e. it can assist the driver
with visual and acoustic warnings.
Therefore the two direction warning
lights
andon the instrument
panel switch off to prevent
excessively frequent warnings while
driving in towns or on winding
roads at low speeds.
IMPORTANT If the operating
conditions are no longer present,
the system remains activated
but inactive. Therefore the driver is
warned by the 2 direction warning
lights
andon the instrument
panel switching on constantly.
128F1A0322
92
KNOW YOUR VEHICLE
Page 103 of 367

TRAFFIC SIGN
RECOGNITION
(for versions/markets, where
provided)
78) 83) 84) 85)
10) 11) 12) 13) 14) 15) 16)
The system automatically detects
the recognisable traffic signs: speed
limits, no overtaking signs and
signs indicating the end of such
prohibitions.
The camera is fitted behind the
internal rear view mirror. The sensor
always checks the traffic signs
indicating the current speed limit
and possible no overtaking signs.
IMPORTANT The system is
designed to read signs complying
with the specifications of the Vienna
convention.USE OF THE TRAFFIC
SIGN RECOGNITION
System switching on
and off
The system can be activated/
deactivated using the display menu.
Refer to the "Display" paragraph in
the "Knowing the instrument panel"
chapter.
Note: the system condition and
settings do not change throughout
the different on-off cycles.
The system condition can always
be shown on the display.
The system displaying includes the
following two steps:
❒All new traffic signs that can be
recognised are displayed as pop-ups
for 40 seconds over the other
signallings.❒After the preset time, they are
displayed in the dedicated screen on
the panel.
The system can display two traffic
signs (speed limit and no
overtaking) at the same time in the
two dedicated areas of the panel.
If an additional traffic sign is
detected, e.g. a reduced speed
limit for wet road conditions, this is
displayed as an empty box under
the relevant sign.
The additional signs are filtered as
follows:
❒The additional sign for "snow" or
"rain" will not be displayed if the
outside temperature is over 3°C.
❒The additional sign for "snow" or
"rain" or "cloudy" will not be
displayed if the windscreen wipers
are off and the outside temperature is
below 3°C.
❒The additional sign for "truck" will not
be displayed if the vehicle weighs
less than 4-4.5 t.
❒The speed limit sign will not be
displayed if coupled with the
additional "tractor" sign.
100
131F1A0373
99