heating FIAT DUCATO 244 2005 3.G Owners Manual
[x] Cancel search | Manufacturer: FIAT, Model Year: 2005, Model line: DUCATO 244, Model: FIAT DUCATO 244 2005 3.GPages: 258, PDF Size: 4.05 MB
Page 20 of 258
19GETTING TO KNOW YOUR VEHICLE
IMPORTANTThe pretensioner
will give maximum protection when
the seat belt adheres snugly to the
wearer’s chest and hips.
A small amount of smoke may be
produced when the pretensioners are
fired. This smoke is harmless and does
not indicate the principle of a fire.
The pretensioner does not require
any maintenance or lubrication. Any
modification of its original state inval-
idates its efficiency. If, as the result of
exceptional natural occurrences
(floods, sea storms, etc.) the device is
soaked through with water and mud,
it must be replaced.Operations involving
banging, vibrations or
heating (exceeding 100°C
for a maximum of 6 hours) in the
area around the pretensioner
may trigger or damage the de-
vice. Vibrations from rough road
surfaces or accidental jolting
caused by mounting pavements,
etc. do not have any effect on the
pretensioner. If, however, you
need any assistance, go to a Fiat
Dealership.
fig. 17
F0D0264m
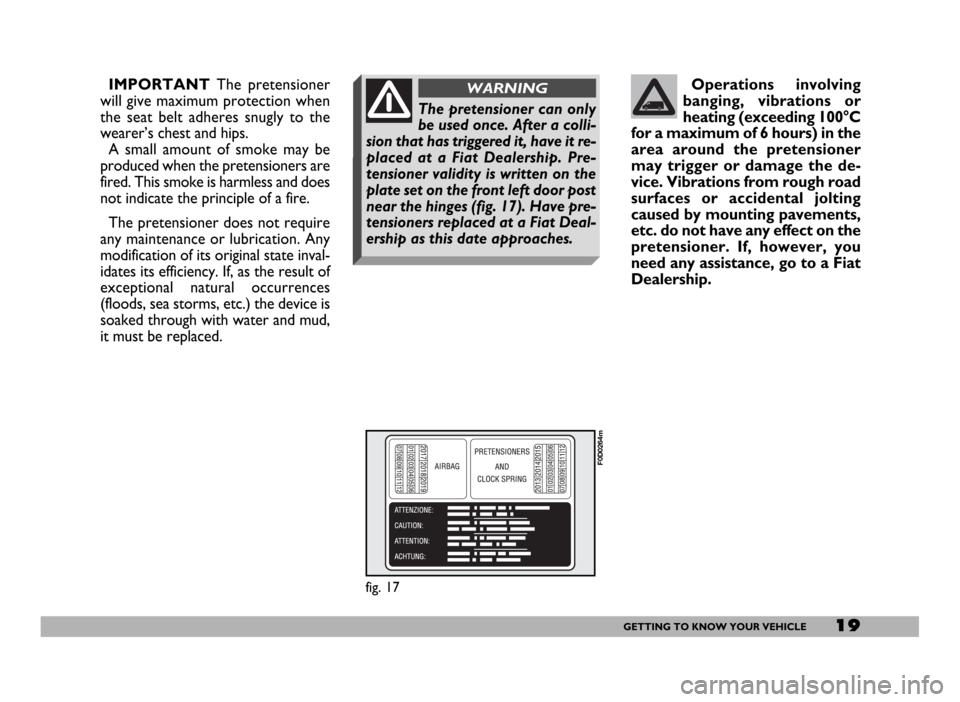
The pretensioner can only
be used once. After a colli-
sion that has triggered it, have it re-
placed at a Fiat Dealership. Pre-
tensioner validity is written on the
plate set on the front left door post
near the hinges (fig. 17). Have pre-
tensioners replaced at a Fiat Deal-
ership as this date approaches.
WARNING
Page 54 of 258
53GETTING TO KNOW YOUR VEHICLE
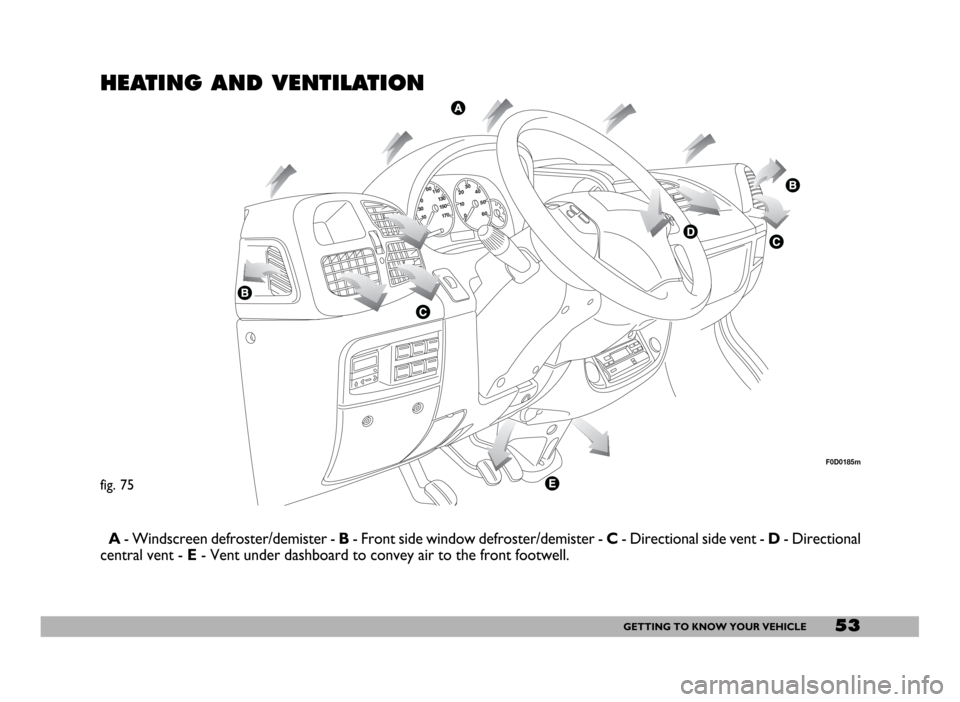
HEATING AND VENTILATION
A- Windscreen defroster/demister - B- Front side window defroster/demister - C- Directional side vent - D- Directional
central vent - E- Vent under dashboard to convey air to the front footwell.
fig. 75
F0D0185m
Page 56 of 258
55GETTING TO KNOW YOUR VEHICLE
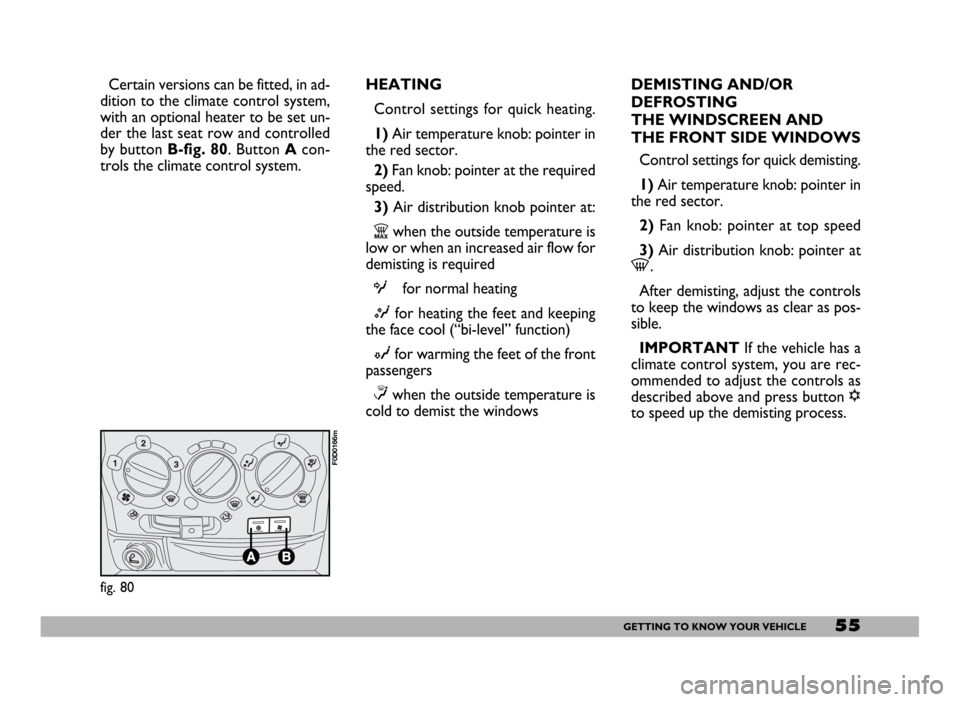
Certain versions can be fitted, in ad-
dition to the climate control system,
with an optional heater to be set un-
der the last seat row and controlled
by button B-fig. 80. Button Acon-
trols the climate control system.HEATING
Control settings for quick heating.
1)Air temperature knob: pointer in
the red sector.
2) Fan knob: pointer at the required
speed.
3) Air distribution knob pointer at:
Zwhen the outside temperature is
low or when an increased air flow for
demisting is required
Ofor normal heating
Mfor heating the feet and keeping
the face cool (“bi-level” function)
Nfor warming the feet of the front
passengers
≤when the outside temperature is
cold to demist the windowsDEMISTING AND/OR
DEFROSTING
THE WINDSCREEN AND
THE FRONT SIDE WINDOWS
Control settings for quick demisting.
1) Air temperature knob: pointer in
the red sector.
2) Fan knob: pointer at top speed
3) Air distribution knob: pointer at
-.
After demisting, adjust the controls
to keep the windows as clear as pos-
sible.
IMPORTANT If the vehicle has a
climate control system, you are rec-
ommended to adjust the controls as
described above and press button √
to speed up the demisting process.
fig. 80
F0D0166m
Page 59 of 258
58GETTING TO KNOW YOUR VEHICLE
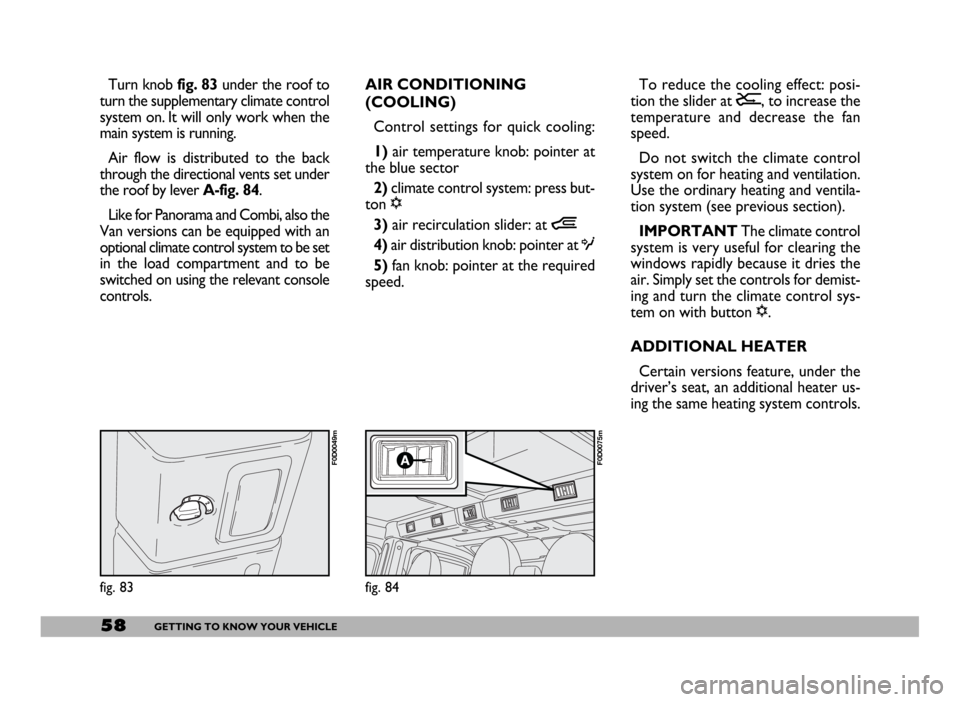
Turn knob fig. 83 under the roof to
turn the supplementary climate control
system on. It will only work when the
main system is running.
Air flow is distributed to the back
through the directional vents set under
the roof by lever A-fig. 84.
Like for Panorama and Combi, also the
Van versions can be equipped with an
optional climate control system to be set
in the load compartment and to be
switched on using the relevant console
controls.AIR CONDITIONING
(COOLING)
Control settings for quick cooling:
1)air temperature knob: pointer at
the blue sector
2)climate control system: press but-
ton √
3)air recirculation slider: at Ò
4) air distribution knob: pointer at O
5)fan knob: pointer at the required
speed.To reduce the cooling effect: posi-
tion the slider at Ú, to increase the
temperature and decrease the fan
speed.
Do not switch the climate control
system on for heating and ventilation.
Use the ordinary heating and ventila-
tion system (see previous section).
IMPORTANT The climate control
system is very useful for clearing the
windows rapidly because it dries the
air. Simply set the controls for demist-
ing and turn the climate control sys-
tem on with button √.
ADDITIONAL HEATER
Certain versions feature, under the
driver’s seat, an additional heater us-
ing the same heating system controls.
fig. 83
F0D0049m
fig. 84
F0D0075m
Page 61 of 258
60GETTING TO KNOW YOUR VEHICLE
– a control unit connected to the
heater/ventilation unit for automatic
operation;
– an electronic control unit to check
and adjusted the integrated heater
burner;
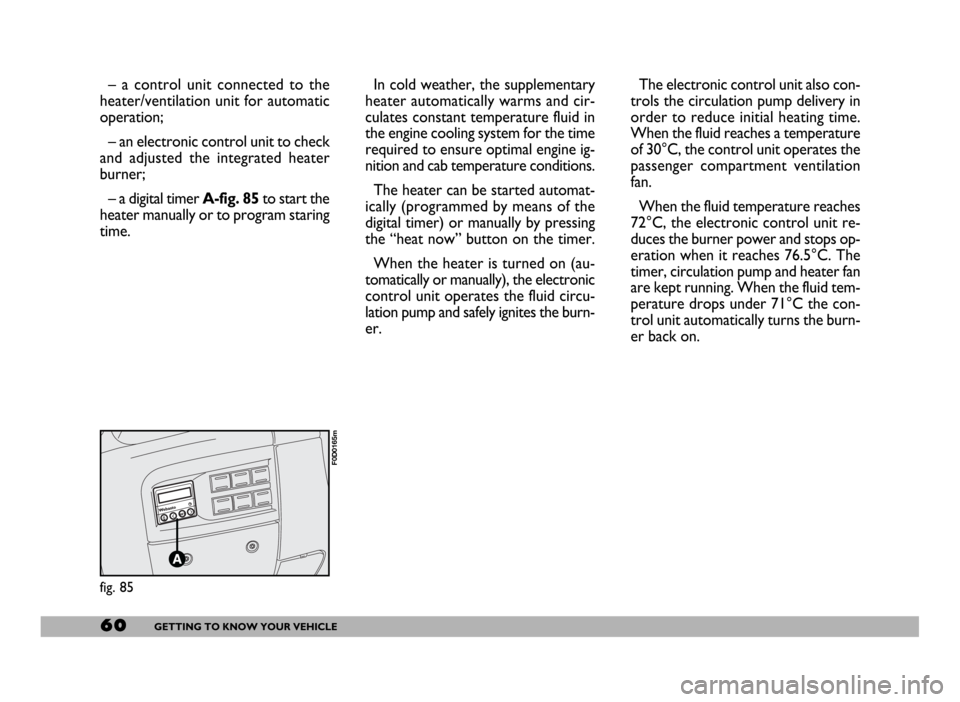
– a digital timer A-fig. 85to start the
heater manually or to program staring
time.In cold weather, the supplementary
heater automatically warms and cir-
culates constant temperature fluid in
the engine cooling system for the time
required to ensure optimal engine ig-
nition and cab temperature conditions.
The heater can be started automat-
ically (programmed by means of the
digital timer) or manually by pressing
the “heat now” button on the timer.
When the heater is turned on (au-
tomatically or manually), the electronic
control unit operates the fluid circu-
lation pump and safely ignites the burn-
er.The electronic control unit also con-
trols the circulation pump delivery in
order to reduce initial heating time.
When the fluid reaches a temperature
of 30°C, the control unit operates the
passenger compartment ventilation
fan.
When the fluid temperature reaches
72°C, the electronic control unit re-
duces the burner power and stops op-
eration when it reaches 76.5°C. The
timer, circulation pump and heater fan
are kept running. When the fluid tem-
perature drops under 71°C the con-
trol unit automatically turns the burn-
er back on.
fig. 85
F0D0165m
Page 62 of 258
61GETTING TO KNOW YOUR VEHICLE
IMPORTANTThe heater is
equipped with a thermal switch which
cuts off the heater in the event of
overheating caused by low or leaking
coolant. In this case, press the pro-
gram selection button to start the
heater again after repairing the cool-
ing system fault and/or topping up the
fluid.
The heater can turn itself off after en-
gine ignition or if the flame goes out.
In this case, turn the heater off man-
ually and attempt to turn it back on
again. If you cannot turn the heater on,
contact a Fiat Dealership.Turning the heater on
Before turning the heater on check
that:
– the heating/ventilation unit knob is
turned to “warm air”;
– the heating/ventilation fan speed
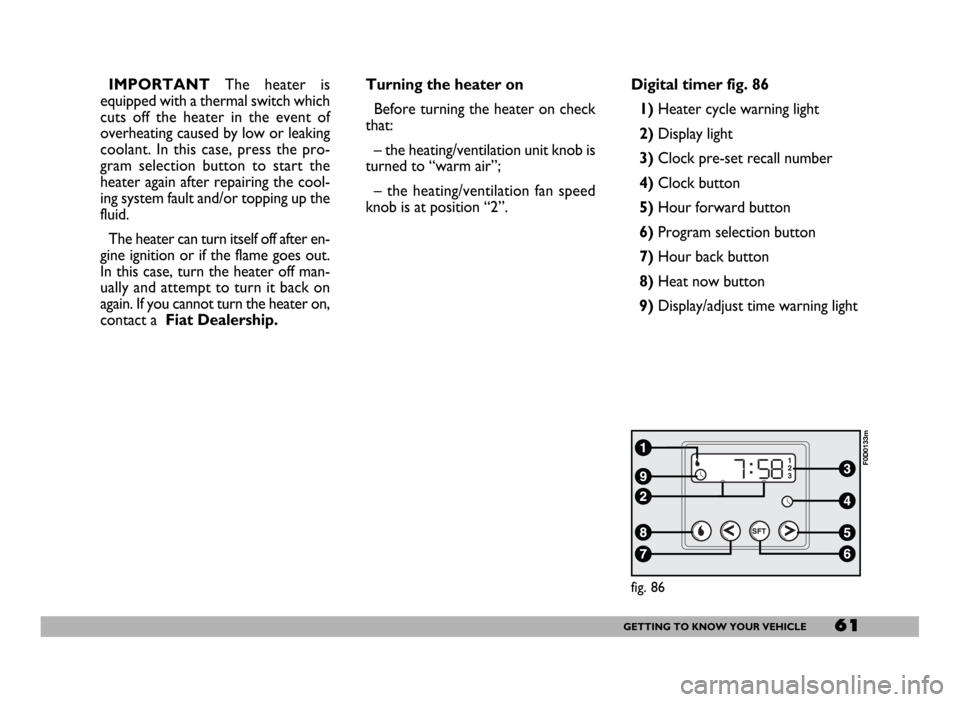
knob is at position “2”.Digital timer fig. 86
1) Heater cycle warning light
2)Display light
3)Clock pre-set recall number
4)Clock button
5)Hour forward button
6)Program selection button
7)Hour back button
8) Heat now button
9) Display/adjust time warning light
fig. 86
F0D0133m
Page 63 of 258
62GETTING TO KNOW YOUR VEHICLE
fig. 87
F0D0132m
fig. 88
F0D0134m
fig. 89
F0D0136m
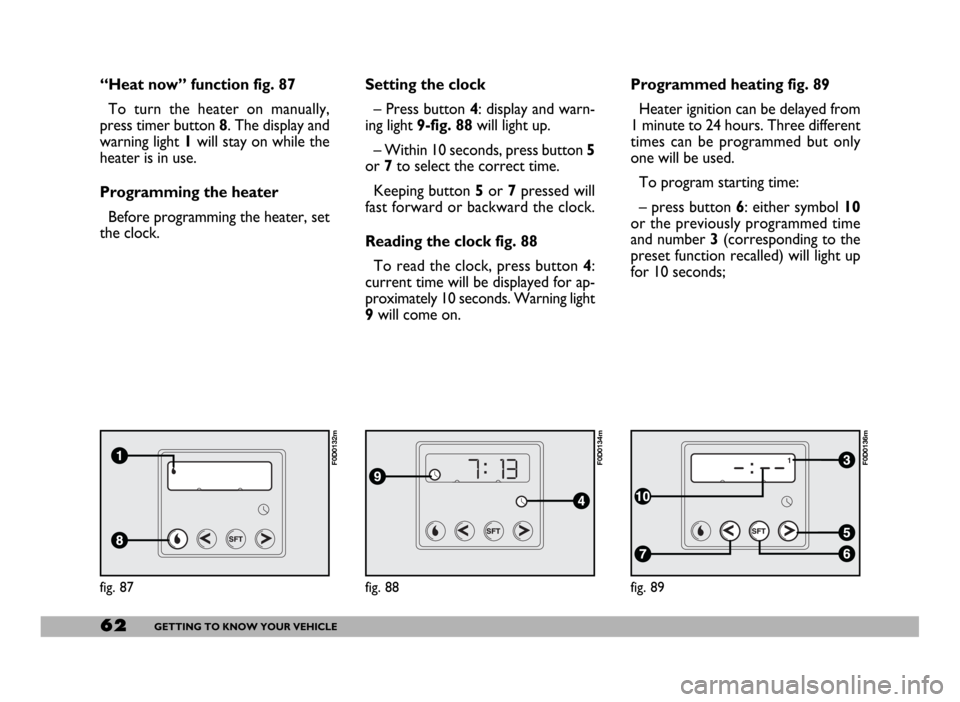
“Heat now” function fig. 87
To turn the heater on manually,
press timer button 8. The display and
warning light 1will stay on while the
heater is in use.
Programming the heater
Before programming the heater, set
the clock.Setting the clock
– Press button 4: display and warn-
ing light 9-fig. 88will light up.
– Within 10 seconds, press button 5
or 7to select the correct time.
Keeping button 5or 7pressed will
fast forward or backward the clock.
Reading the clock fig. 88
To read the clock, press button 4:
current time will be displayed for ap-
proximately 10 seconds. Warning light
9will come on.Programmed heating fig. 89
Heater ignition can be delayed from
1 minute to 24 hours. Three different
times can be programmed but only
one will be used.
To program starting time:
– press button 6: either symbol 10
or the previously programmed time
and number 3 (corresponding to the
preset function recalled) will light up
for 10 seconds;
Page 66 of 258
65GETTING TO KNOW YOUR VEHICLE
STEERING COLUMN
STALKS
LEFT-HAND STALK
The left-hand stalk operates most of
the external lights.
The external lights can only be
switched on when the ignition key is
at MAR. The instrument panel and
the heating/ventilation (or climate con-
trol system) controls and the cigar
lighter ring will come on with the ex-
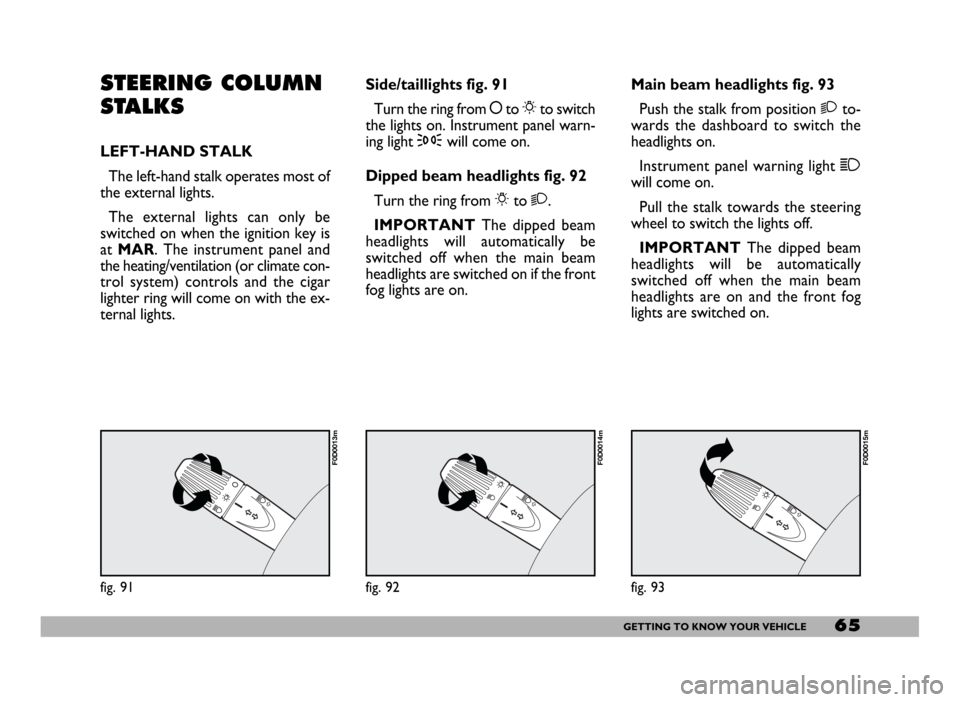
ternal lights.Side/taillights fig. 91
Turn the ring from åto 6to switch
the lights on. Instrument panel warn-
ing light 3will come on.
Dipped beam headlights fig. 92
Turn the ring from 6to 2.
IMPORTANTThe dipped beam
headlights will automatically be
switched off when the main beam
headlights are switched on if the front
fog lights are on.Main beam headlights fig. 93
Push the stalk from position 2to-
wards the dashboard to switch the
headlights on.
Instrument panel warning light 1
will come on.
Pull the stalk towards the steering
wheel to switch the lights off.
IMPORTANTThe dipped beam
headlights will be automatically
switched off when the main beam
headlights are on and the front fog
lights are switched on.
fig. 91
F0D0013m
fig. 92
F0D0014m
fig. 93
F0D0015m
Page 107 of 258
106GETTING THE BEST OUT OF YOUR VEHICLE
HOW TO START DIESEL
VERSIONS
1) Ensure that the handbrake is up.
2)Put the gear lever into neutral.
3)Press the clutch pedal down to
the floor without touching the accel-
erator.
4) Turn the ignition key to MAR. In-
strument panel warning lights mand
Ywill come on.
5)Wait for the instrument panel
warning light Yto go out.
6) Wait for the instrument panel
warning light mto go out. The hot-
ter the engine is, the quicker this will
happen.
7) Turn the key to AVVimmediate-
ly after the mwarning light goes out.
If you wait too long, you will lose the
benefit of the work done by the glow
plugs.
Release the key as soon as the engine
starts.Intake air heater (Heat Flange)
An air heating device is fitted on the
intake manifold inlet in 2.8 JTD ver-
sions to facilitate starting the engine in
cold weather.
This device will be switched on au-
tomatically when the key is turned to
MAR.
The heater is fitted in all 2.8 JTD ver-
sions with EGR system. It is optional
for other JTD versions.
The engine start-up procedure is the
same with and without the heater.GENERAL NOTES
If the engine does not start first time,
return the key to STOPbefore try-
ing to start the engine again.
If warning light Yremains lit when
the ignition key is at MAR, turn the
key to STOPand then to MAR; if the
warning light stays on, try with the
other keys provided. The warning light m
will flash (for approxi-
mately 60 seconds) at
start-up or during prolonged
cranking to signal a fault in the
glow plug heating system. You
can use the vehicle as usual if the
engine starts but you should con-
tact a Fiat Dealership as soon as
possible to have problem seen to.
SELENIA 20K (petrol en-
gines) is recommended
when the vehicle is mainly
used in relatively mild climates. If
however, the vehicle is mainly
used where the climate is partic-
ularly severe, the use of SELENIA
PERFORMER MULTIPOWER
(petrol engines) or SELENIA WR
(diesel engines) is recommended.
Page 116 of 258
115GETTING THE BEST OUT OF YOUR VEHICLE
Moving the lever back to position D
the gearbox instantly resumes the au-
tomatic mode selecting the ratio ac-
cording to the driving characteristics.
IMPORTANTThe electronic con-
trol unit is programmed to change
gear one at a time, therefore repeat-
ed fast actuations will not result in re-
peated engagements of the gears. The
higher or lower gear is engaged mov-
ing the lever to the (+) or (–) position
when the previous request has been
performed.
In the event of a fault to the sequen-
tial manual system, the system will se-
lect the automatic mode.FAILURE INDICATIONS
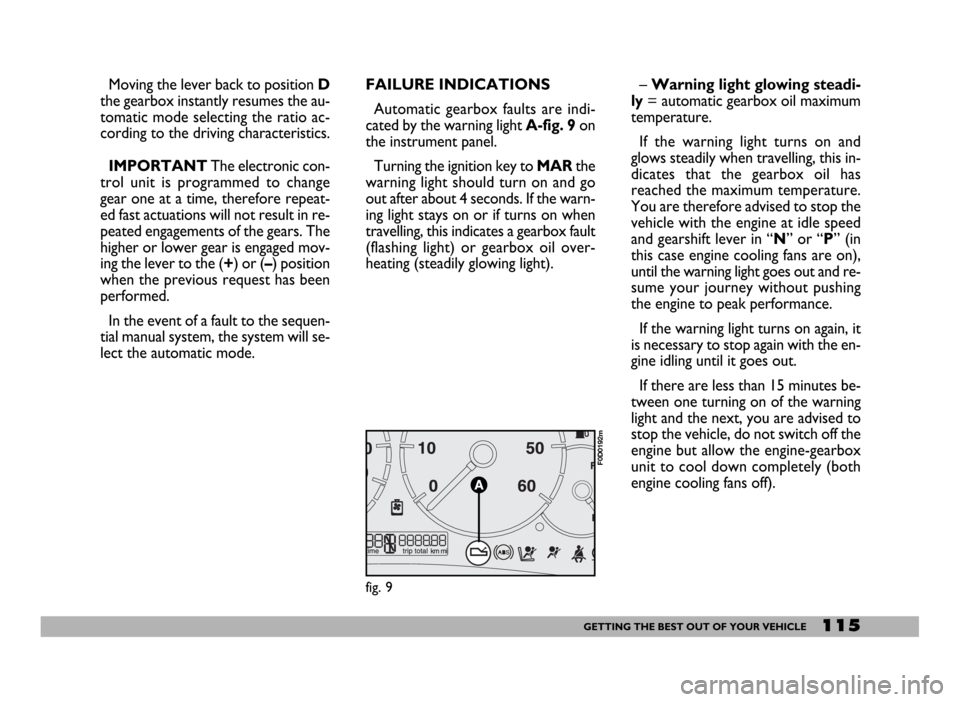
Automatic gearbox faults are indi-
cated by the warning light A-fig. 9 on
the instrument panel.
Turning the ignition key to MARthe
warning light should turn on and go
out after about 4 seconds. If the warn-
ing light stays on or if turns on when
travelling, this indicates a gearbox fault
(flashing light) or gearbox oil over-
heating (steadily glowing light).– Warning light glowing steadi-
ly= automatic gearbox oil maximum
temperature.
If the warning light turns on and
glows steadily when travelling, this in-
dicates that the gearbox oil has
reached the maximum temperature.
You are therefore advised to stop the
vehicle with the engine at idle speed
and gearshift lever in “N” or “P” (in
this case engine cooling fans are on),
until the warning light goes out and re-
sume your journey without pushing
the engine to peak performance.
If the warning light turns on again, it
is necessary to stop again with the en-
gine idling until it goes out.
If there are less than 15 minutes be-
tween one turning on of the warning
light and the next, you are advised to
stop the vehicle, do not switch off the
engine but allow the engine-gearbox
unit to cool down completely (both
engine cooling fans off).
fig. 9
F0D0192m