check engine FIAT DUCATO BASE CAMPER 2014 Owner handbook (in English)
[x] Cancel search | Manufacturer: FIAT, Model Year: 2014, Model line: DUCATO BASE CAMPER, Model: FIAT DUCATO BASE CAMPER 2014Pages: 367, PDF Size: 20.39 MB
Page 113 of 367
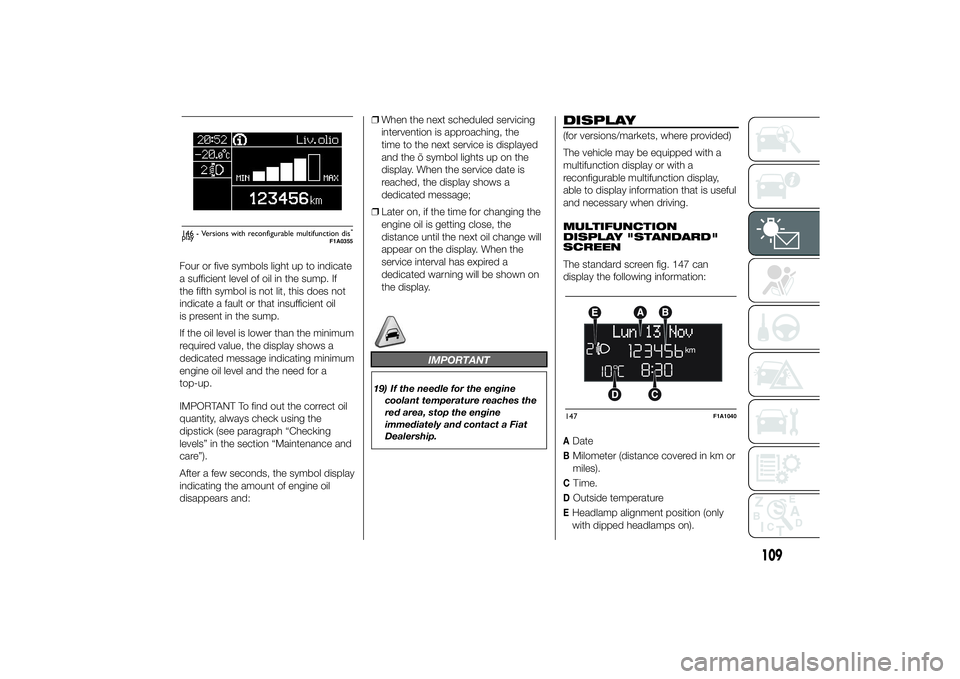
Four or five symbols light up to indicate
a sufficient level of oil in the sump. If
the fifth symbol is not lit, this does not
indicate a fault or that insufficient oil
is present in the sump.
If the oil level is lower than the minimum
required value, the display shows a
dedicated message indicating minimum
engine oil level and the need for a
top-up.
IMPORTANT To find out the correct oil
quantity, always check using the
dipstick (see paragraph “Checking
levels” in the section “Maintenance and
care”).
After a few seconds, the symbol display
indicating the amount of engine oil
disappears and:❒When the next scheduled servicing
intervention is approaching, the
time to the next service is displayed
and the õ symbol lights up on the
display. When the service date is
reached, the display shows a
dedicated message;
❒Later on, if the time for changing the
engine oil is getting close, the
distance until the next oil change will
appear on the display. When the
service interval has expired a
dedicated warning will be shown on
the display.
IMPORTANT
19) If the needle for the engine
coolant temperature reaches the
red area, stop the engine
immediately and contact a Fiat
Dealership.
DISPLAY(for versions/markets, where provided)
The vehicle may be equipped with a
multifunction display or with a
reconfigurable multifunction display,
able to display information that is useful
and necessary when driving.
MULTIFUNCTION
DISPLAY "STANDARD"
SCREEN
The standard screen fig. 147 can
display the following information:ADateBMilometer (distance covered in km or
miles).CTime.DOutside temperatureEHeadlamp alignment position (only
with dipped headlamps on).
Liv.olio
MAX MIN
146 - Versions with reconfigurable multifunction dis-
play
F1A0355
147
F1A1040
109
Page 128 of 367
Warning lights on
displayWhat it means What to do
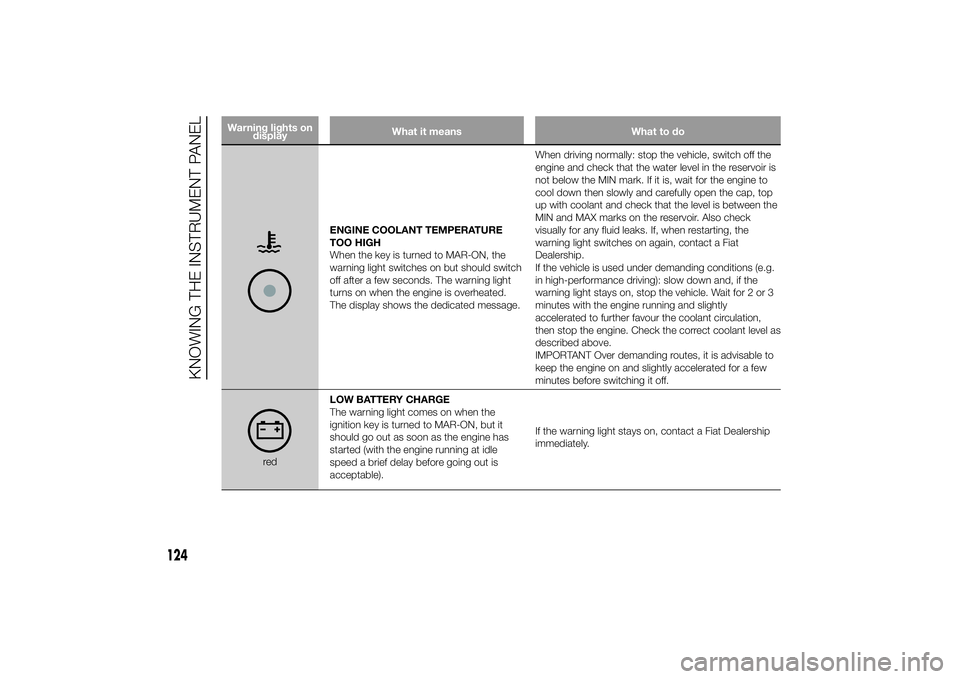
ENGINE COOLANT TEMPERATURE
TOO HIGH
When the key is turned to MAR-ON, the
warning light switches on but should switch
off after a few seconds. The warning light
turns on when the engine is overheated.
The display shows the dedicated message.When driving normally: stop the vehicle, switch off the
engine and check that the water level in the reservoir is
not below the MIN mark. If it is, wait for the engine to
cool down then slowly and carefully open the cap, top
up with coolant and check that the level is between the
MIN and MAX marks on the reservoir. Also check
visually for any fluid leaks. If, when restarting, the
warning light switches on again, contact a Fiat
Dealership.
If the vehicle is used under demanding conditions (e.g.
in high-performance driving): slow down and, if the
warning light stays on, stop the vehicle. Wait for 2 or 3
minutes with the engine running and slightly
accelerated to further favour the coolant circulation,
then stop the engine. Check the correct coolant level as
described above.
IMPORTANT Over demanding routes, it is advisable to
keep the engine on and slightly accelerated for a few
minutes before switching it off.
redLOW BATTERY CHARGE
The warning light comes on when the
ignition key is turned to MAR-ON, but it
should go out as soon as the engine has
started (with the engine running at idle
speed a brief delay before going out is
acceptable).If the warning light stays on, contact a Fiat Dealership
immediately.
124
KNOWING THE INSTRUMENT PANEL
Page 131 of 367
WARNING
90) If the
warning light does not switch on when the key is turned to MAR-ON or if it stays on when driving (together
with the message on the display), there may be a fault in the restraint systems; in this case, the airbags or
pretensioners may not deploy in the event of an accident or, in a lower number of cases, they could deploy
erroneously. Before continuing, contact a Fiat Dealership immediately to have the system checked.
91) The failure of the
warning light is indicated by the
warning light flashing or, depending on the version, by the
symbol constantly on in the display. In this case, the
warning light may not indicate a fault in the restraint
systems. Before continuing, contact a Fiat Dealership immediately to have the system checked.
92) Deteriorated engine oil must be replaced as soon as possible after the
warning light comes on, and never
more than 500 km after it first switches on. Failure to observe the above indications may result in severe damage
to the engine and invalidate the warranty. Remember that when the warning light comes on, it does not mean that
the level of engine oil is low, so if it flashes you do not need to top up the engine oil.
93) If the
warning light flashes when driving, contact a Fiat Dealership.
127
Page 132 of 367
IMPORTANT
21) If the
warning light switches on when driving, stop the engine immediately and contact an Fiat Dealership.
Warning lights on
panelWhat it means What to do
amberINJECTION/EOBD SYSTEM FAILURE
In normal conditions, when the ignition key is turned to
MAR-ON the warning light switches on, but it should
switch off as soon as the engine is started.
The operation of warning light
may be checked by
the traffic police using specific devices. Comply with the
laws and regulations of the country where you are
driving.
22)
If the warning light stays on or switches on when driving,
it means that the injection system is not working
properly; in particular, if the warning light comes on
constantly, this indicates a malfunction in the supply/
ignition system that could cause excessive exhaust
emissions, a possible loss of performance, poor
driveability and high fuel consumption.
On some versions, the display shows the dedicated
message.
The warning light switches off if the malfunction
disappears, but it is still stored by the system.Under these conditions, you may continue
travelling at a moderate speed without
demanding excessive effort from the
engine. Prolonged use of the car with the
warning light on constantly may cause
damage.
Contact a Fiat Dealership as soon as
possible.
128
KNOWING THE INSTRUMENT PANEL
Page 136 of 367
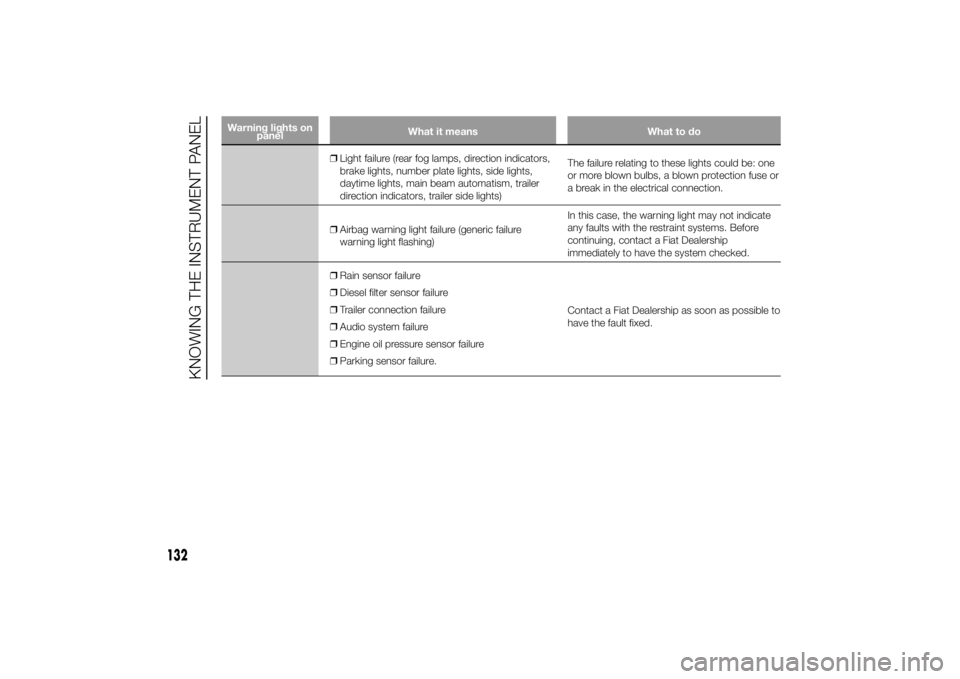
Warning lights on
panelWhat it means What to do
❒Light failure (rear fog lamps, direction indicators,
brake lights, number plate lights, side lights,
daytime lights, main beam automatism, trailer
direction indicators, trailer side lights)The failure relating to these lights could be: one
or more blown bulbs, a blown protection fuse or
a break in the electrical connection.
❒Airbag warning light failure (generic failure
warning light flashing)In this case, the warning light may not indicate
any faults with the restraint systems. Before
continuing, contact a Fiat Dealership
immediately to have the system checked.
❒Rain sensor failure
❒Diesel filter sensor failure
❒Trailer connection failure
❒Audio system failure
❒Engine oil pressure sensor failure
❒Parking sensor failure.Contact a Fiat Dealership as soon as possible to
have the fault fixed.
132
KNOWING THE INSTRUMENT PANEL
Page 151 of 367
97) After the adjustment, always
check that the cursor to which the
ring is fastened is locked in one
of the preset positions. Release
the grip and push downwards
to enable the locking device to
click if the grip has not been
released in one of the possible
positions.
SBR SYSTEM
IN BRIEF
The vehicle is fitted with a Seat Belt
Reminder system (SBR), consisting of
a buzzer and a flashing warning light
on the instrument panel which
warns the driver that the seat belt
must be fastened.
The buzzer can be deactivated (until the
next engine stop) as follows:
❒fasten the driver's seat belt;
❒turn the ignition key to the MAR-ON
position;
❒wait for over 20 seconds and then
release one of the seat belts.
For permanent deactivation, contact a
Fiat Dealership.
With digital display, the SBR system
can only be reactivated at a Fiat
Dealership.
With multifunction display, the SBR
system can also be reactivated through
the set-up menu.
PRETENSIONERSTo increase the protective efficiency of
the front seat belts, the vehicle is fitted
with pretensioners. These devices, in
the event of a head-on crash or side
impact, rewind the seat belts a few
centimetres. In this way, they ensure
that the belts fit tightly to the wearer
before the restraining action begins.
The retractor locks to indicate that the
pretensioner has intervened; the seat
belt cannot be drawn back up even
when guiding it manually.
IMPORTANT To obtain the highest
degree of protection from the action of
the pretensioner, wear the seat belt
tight to the chest and pelvis.
A slight discharge of smoke may be
produced during the activation of the
pretensioner which is not harmful and
does not involve any fire hazard.
The pretensioner does not require any
maintenance or lubrication. Any
changes to its original conditions will
invalidate its efficiency. If, due to
unusual natural events (floods, sea
storms, etc.), the device has been
affected by water and mud, it must
absolutely be replaced.
98)25)
147
Page 171 of 367
118) If the key is inserted and turned
to MAR-ON, airbags may be
deployed if another vehicle
crashes into the vehicle even if
the engine is not running and the
vehicle is stationary. Therefore,
even if the car is stationary, when
an active front passenger airbag
is fitted, DO NOT install rear
facing child restraint systems on
the front passenger seat.
Deployment of the airbag
following an impact could cause
fatal injuries to the child.
Therefore, always deactivate the
passenger airbag when a rear
facing child restraint system is
installed on the front passenger
seat. The front passenger seat
must also be positioned back as
far as possible in order to prevent
the child restraint system from
coming into contact with the
dashboard. Immediately
reactivate the passenger airbag
as soon as the child restraint
system has been removed. Also
remember that, if the key is
turned to STOP, none of the
safety devices (airbags or
pretensioners) will be deployed in
the event of collision. Non-
deployment in such cases does
not indicate a system malfunction.119) If the vehicle has been subject
to theft, attempted theft,
vandalism, or flooding, have the
airbag system inspected at a Fiat
Dealership.
120) When the ignition key is turned
to MAR-ON, the LED on button
on the dashboard blinks for a
few seconds (the number of
seconds may depend on the
market) to check the correct
operation of the LED on the
button.
121) Do not wash the seats with
water or pressurised steam (by
hand or at automatic car seat
washing stations).
122) The front airbag deploys in the
event of more severe collisions
than those required for deploying
the pretensioners. For impacts
whose intensity falls between the
two levels, normally, only the
pretensioners will be activated.
123) Do not affix rigid objects to the
coat hooks or support handles.124) The airbag does not replace
seat belts but increases their
efficiency. Furthermore, since
front airbags are not deployed in
low-speed frontal impacts, side
impacts, rear shunts or roll-overs,
the passengers are protected
only by the seat belts which must
therefore be fastened at all
times.
167
Page 192 of 367
❒cover the vehicle with a piece of
fabric or perforated plastic sheet. Do
not use compact plastic tarpaulins,
which prevent humidity from
evaporating from the surface of the
vehicle;
❒inflate tyres to +0.5 bar above the
standard specified pressure and
check it at intervals;
❒do not drain the engine cooling
system.
IMPORTANT If the vehicle is equipped
with an alarm system, switch off the
vehicle alarm with the remote control.
IMPORTANT After turning the ignition
key to STOP and having closed the
driver side door, wait at least one
minute before disconnecting the
electrical supply from the battery. When
reconnecting the electrical supply to
the battery, make sure that the ignition
key is in the STOP position and the
driver side door is closed.
188
STARTING AND DRIVING
Page 194 of 367
STARTING THE
ENGINEGo to a Fiat Dealership immediately if
warning light
stays on constantly on
the instrument panel.
JUMP STARTING
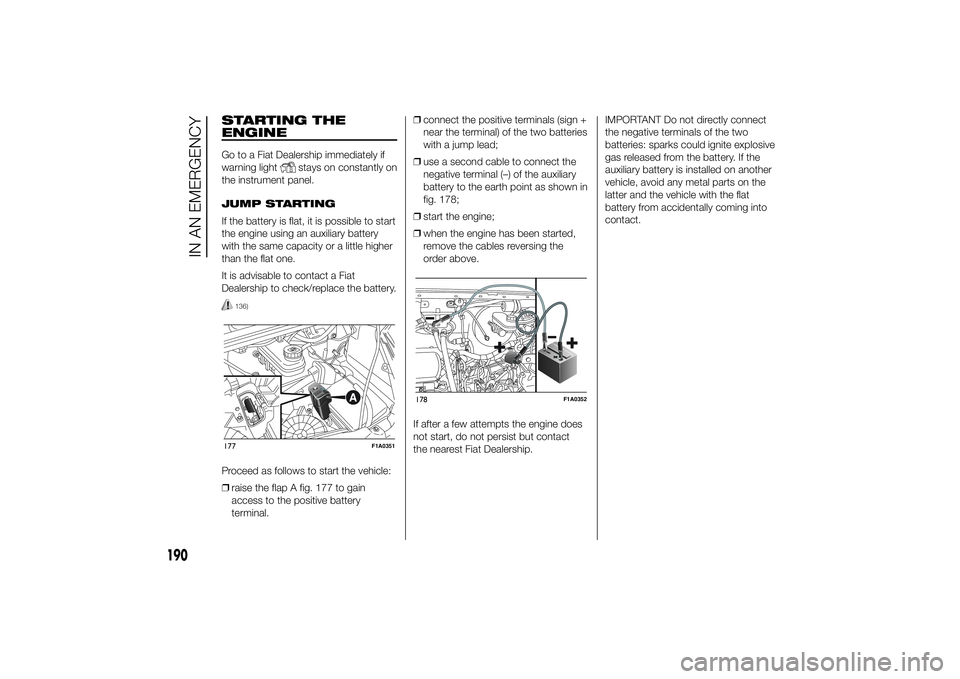
If the battery is flat, it is possible to start
the engine using an auxiliary battery
with the same capacity or a little higher
than the flat one.
It is advisable to contact a Fiat
Dealership to check/replace the battery.
136)
Proceed as follows to start the vehicle:
❒raise the flap A fig. 177 to gain
access to the positive battery
terminal.❒connect the positive terminals (sign +
near the terminal) of the two batteries
with a jump lead;
❒use a second cable to connect the
negative terminal (–) of the auxiliary
battery to the earth point as shown in
fig. 178;
❒start the engine;
❒when the engine has been started,
remove the cables reversing the
order above.
If after a few attempts the engine does
not start, do not persist but contact
the nearest Fiat Dealership.IMPORTANT Do not directly connect
the negative terminals of the two
batteries: sparks could ignite explosive
gas released from the battery. If the
auxiliary battery is installed on another
vehicle, avoid any metal parts on the
latter and the vehicle with the flat
battery from accidentally coming into
contact.177
F1A0351
178
F1A0352
190
IN AN EMERGENCY
Page 200 of 367
FIX&GO
AUTOMATIC QUICK
TYRE REPAIR KIT(for versions/markets, where provided)
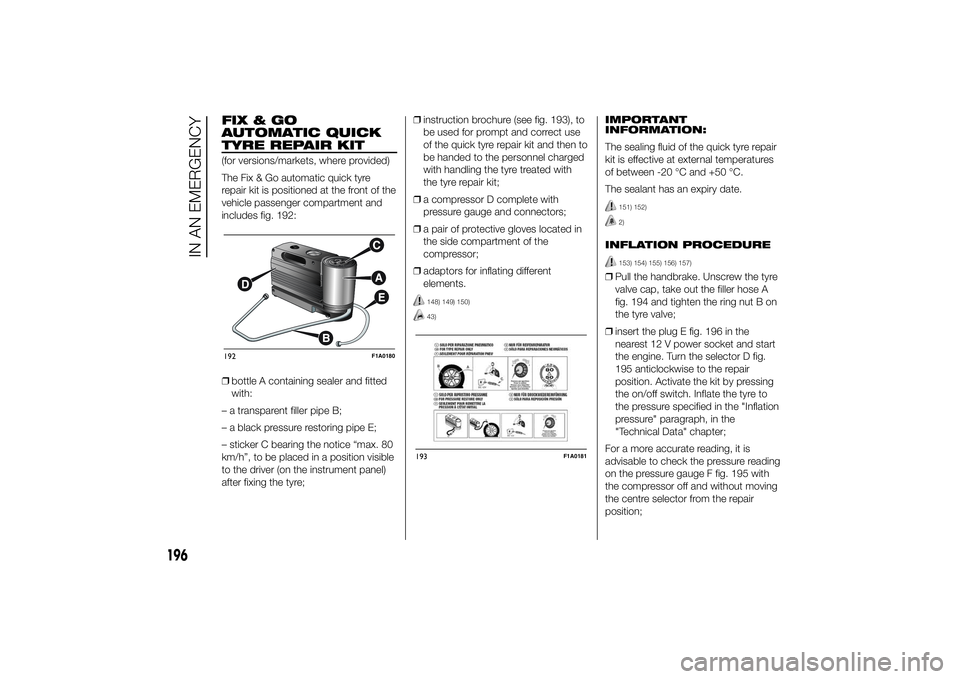
The Fix & Go automatic quick tyre
repair kit is positioned at the front of the
vehicle passenger compartment and
includes fig. 192:
❒bottle A containing sealer and fitted
with:
– a transparent filler pipe B;
– a black pressure restoring pipe E;
– sticker C bearing the notice “max. 80
km/h”, to be placed in a position visible
to the driver (on the instrument panel)
after fixing the tyre;❒instruction brochure (see fig. 193), to
be used for prompt and correct use
of the quick tyre repair kit and then to
be handed to the personnel charged
with handling the tyre treated with
the tyre repair kit;
❒a compressor D complete with
pressure gauge and connectors;
❒a pair of protective gloves located in
the side compartment of the
compressor;
❒adaptors for inflating different
elements.
148) 149) 150)43)
IMPORTANT
INFORMATION:
The sealing fluid of the quick tyre repair
kit is effective at external temperatures
of between -20 °C and +50 °C.
The sealant has an expiry date.
151) 152)2)
INFLATION PROCEDURE
153) 154) 155) 156) 157)
❒Pull the handbrake. Unscrew the tyre
valve cap, take out the filler hose A
fig. 194 and tighten the ring nut B on
the tyre valve;
❒insert the plug E fig. 196 in the
nearest 12 V power socket and start
the engine. Turn the selector D fig.
195 anticlockwise to the repair
position. Activate the kit by pressing
the on/off switch. Inflate the tyre to
the pressure specified in the "Inflation
pressure" paragraph, in the
"Technical Data" chapter;
For a more accurate reading, it is
advisable to check the pressure reading
on the pressure gauge F fig. 195 with
the compressor off and without moving
the centre selector from the repair
position;
192
F1A0180
193
F1A0181
196
IN AN EMERGENCY