sensor FIAT DUCATO BASE CAMPER 2017 Owner handbook (in English)
[x] Cancel search | Manufacturer: FIAT, Model Year: 2017, Model line: DUCATO BASE CAMPER, Model: FIAT DUCATO BASE CAMPER 2017Pages: 296, PDF Size: 14.44 MB
Page 89 of 296
The TPMS does not replace the
correct tyre maintenance. It is up to the
driver to maintain the correct tyre
pressure level measuring it with
a suitable pressure switch. This is
necessary even if the decrease in the
inflation pressure value does not cause
the tyre pressure control warning light
to switch on.
The TPMS warns the driver of any
condition of insufficient tyre pressure
If this drops below the insufficient
pressure limit for any reason including
low temperature and normal pressure
loss of the tyre.
The seasonal temperature changes
affect tyre pressure.
The TPMS uses wireless devices with
electronic sensors mounted on the
wheel rims to constantly monitor the
value of tyre pressure. The sensors
mounted on each wheel as part of the
valve stem transmit various information
of the tyres to the receiver module, in
order to calculate the pressure.
IMPORTANT Monitoring and
maintaining the correct pressure in all
four tyres are particularly important.Tyre pressure monitoring system
low pressure warnings
The system warns the driver if one or
more tyres are flat by turning on the
warning light on the instrument
panel (together with a warning message
and an acoustic signal).
In this case, stop the vehicle as soon as
possible, check the inflation pressure
of each tyre and inflate to the cold tyre
pressure value prescribed for the
vehicle. The system will automatically
update and after receiving the tyre
pressure update the tyre pressure
control warning light switches off. You
may need to drive the vehicle for about
20 minutes at a speed higher than 20
km/h to allow the system to receive this
information.
TPMS operation faults
The system fault is indicated by the
corresponding warning light
, which
first flashes for 75 seconds and then
stays on continuously. This can occur in
any of the following situations:
interference caused by electronic
devices or radio frequency emissions
similar to those of the TPM sensors.
Application of tinted films which
interfere with the signals of the radio
waves.
Presence of snow or ice on the
wheels or the wheel arches.
Use of snow chains.
Use of wheels/tyres not equipped
with TPM sensors.
The space-saver wheel is not
equipped with the tyre pressure control
sensor. Therefore, the tyre pressure is
not controlled by the system.
If the space-saver wheel replaces a
tyre with a pressure lower than the
insufficient pressure limit, an acoustic
signal will be emitted and the
warning light will turn on at the next
start-up.
When the original tyre is repaired or
replaced and it is mounted back on
the vehicle to replace the space-saver
wheel, the TPMS will update
automatically and the warning light will
switch off, provided that the pressure of
none of the four tyres is below the
insufficient pressure limit. You may need
to drive the vehicle for about 20
minutes at a speed higher than 20
km/h to allow the TPMS to receive this
information.
87
Page 90 of 296
WARNING
68)The TPMS is optimised for the original
tyres and wheels provided. TPMS
pressures and alerts have been defined
according to the size of the tyres mounted
on the vehicle. Using equipment with
different size, type or kind may cause
irregular system operation or sensor
damage. Non-original spare wheels can
damage the sensor. Do not use tyre
sealant or balancing weights if the vehicle
is equipped with TPMS as these may
damage the sensors.
69)If the system signals a pressure
decrease on a specific tyre, it is
recommended to check the pressure on all
four tyres.
70)The TPMS does not relieve the driver
from the obligation to check the tyre
pressure every month; it is not even to be
considered a replacing system for
maintenance or a safety system.
71)Tyre pressure must be checked with
tyres cold. Should it become necessary for
whatever reason to check pressure with
warm tyres, do not reduce pressure even
though it is higher than the prescribed
value, but repeat the check when tyres are
cold.
72)The TPMS cannot indicate sudden tyre
pressure drops (for example when a tyre
bursts). In this case, stop the vehicle,
braking with caution and avoiding abrupt
steering.73)The system only warns that the tyre
pressure is low: it is not able to inflate
them.
74)Insufficient tyre inflation increases fuel
consumption, reduces the tread duration
and may affect your ability to drive the
vehicle safely.
75)Always refit the valve stem cap after
inspecting or adjusting tyre pressure. This
prevents dampness or dirt from entering
the valve stem and thus the pressure
control sensor from being damaged.
76)The tyre repair kit (Fix&Go) provided
with the vehicle (for versions/markets,
where provided) is compatible with the
TPMS sensors; using sealants not
equivalent with that in the original kit may
adversely affect its operation. If sealants
not equivalent with the original one are
used, it is recommended to have the
TPMS sensors checked by a qualified
repair centre.
88
SAFETY
Page 91 of 296
DRIVING ADVISOR
(lane crossing warning)
(for versions/markets, where provided)
77) 78) 79)The Driving Advisor is a warning system
that notifies the driver if he/she crosses
the lane because he/she has been
distracted.
A video sensor, fitted on the windscreen
near the interior rear view mirror,
detects the lane demarcation lines and
the position of the vehicle in relation
to them.
IMPORTANT On cars with Driving
Advisor, it is advisable to contact a Fiat
Dealership should the windscreen
need to be replaced. If the repair is
carried out at a specialist window
replacement centre, it is still necessary
to go to a Fiat Dealership to have the
camera calibrated.
OPERATION
The system is always active when the
vehicle is started. It can be deactivated
or re-activated by pressing the button
A fig. 85 on the dashboard (see
following description).
The LED on the button switches on to
confirm that the system has been
activated and a dedicated message
appears on the display.When the system is activated, the LED
on the dedicated button is off. If the
user deactivates the system, the LED
on the button switches on constantly
and a dedicated message appears
on the display to confirm that the
system has been switched off.
The system is enabled each time the
vehicle key is cycled and starts
recognition of the operating conditions
(condition signalled to the driver when
the 2 direction warning lights
and
on the instrument panel turn on).
When the system recognises the
operating conditions, it becomes active,
i.e. it can assist the driver with visual
and acoustic warnings. Therefore, the
two direction warning lights
and
on the instrument panel turn off to
prevent excessively frequent warnings
while driving in towns or on winding
roads at low speeds.IMPORTANT If the operating conditions
are no longer present, the system
remains activated but inactive.
Therefore, the driver is warned by the 2
direction warning lights
andon
the instrument panel turning on
continuously.
OPERATING CONDITIONS
FOR ACTIVATION
Once switched on, the system
becomes active only if the following
conditions are met:
front driving direction (reverse not
engaged);
the system does not detect any
error;
calibration in progress;
vehicle speed between 60 km/h and
the max. vehicle speed;
presence of lane demarcation lines
not deteriorated and visible on both
sides;
suitable visibility conditions;
straight line or wide radius bends;
sufficient field of vision condition
(safety distance from vehicle in front);
direction indicators not activated
in the lane exiting direction (e.g. right
lane exiting direction, right direction
indicator activated);
85F1A0322
89
Page 116 of 296
STARTING AND DRIVING
Let’s get to the "heart" of the vehicle:
seeing how you can exploit all of its
potential to the full.
We’ll look at how to drive it safely in any
situation, so that it can be a welcome
companion, with our comfort and
our wallets in mind.STARTING THE ENGINE .................115
WHEN PARKED ..............................116
MANUAL TRANSMISSION ..............117
COMFORT-MATIC GEARBOX .........117
START&STOP SYSTEM ..................119
CRUISE CONTROL (CONSTANT
SPEED REGULATOR) .....................119
SPEED BLOCK ...............................121
PARKING SENSORS.......................122
REAR CAMERA (PARKVIEW®
REAR BACK UP CAMERA) .............123
TRAFFIC SIGN RECOGNITION .......124
REFUELLING THE VEHICLE ...........125
ADDITIVE FOR DIESEL EMISSIONS
ADBLUE (UREA)..............................130
VERSION WITH METHANE
SYSTEM (NATURAL POWER) .........131
LOADING ADVICE...........................133
SAVING FUEL .................................134
TOWING TRAILERS ........................135
PROLONGED VEHICLE
INACTIVITY .....................................141
114
STARTING AND DRIVING
Page 124 of 296
PARKING SENSORS
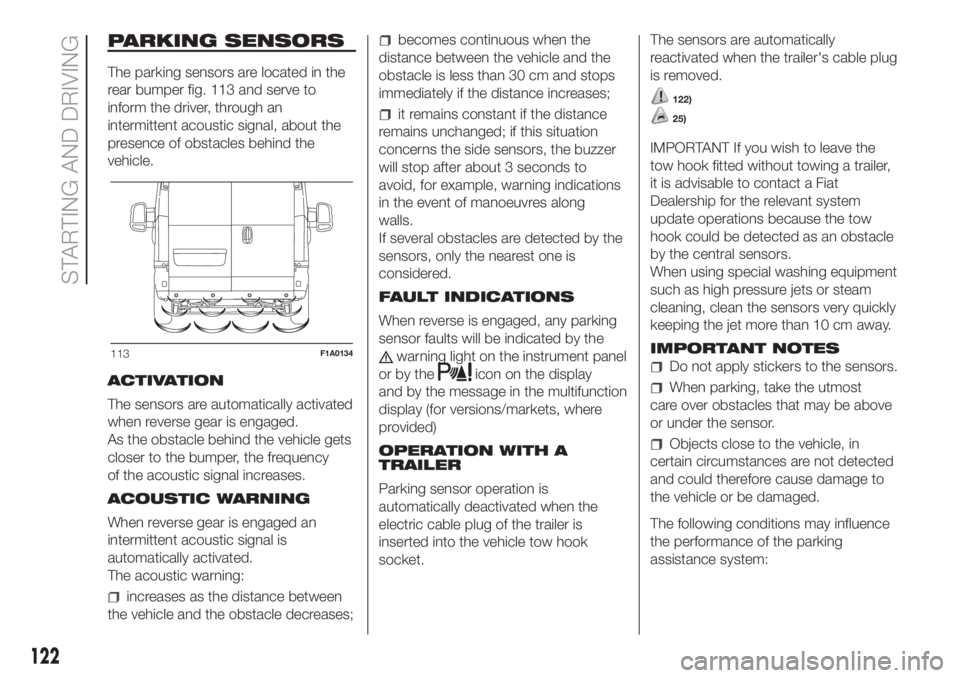
The parking sensors are located in the
rear bumper fig. 113 and serve to
inform the driver, through an
intermittent acoustic signal, about the
presence of obstacles behind the
vehicle.
ACTIVATION
The sensors are automatically activated
when reverse gear is engaged.
As the obstacle behind the vehicle gets
closer to the bumper, the frequency
of the acoustic signal increases.
ACOUSTIC WARNING
When reverse gear is engaged an
intermittent acoustic signal is
automatically activated.
The acoustic warning:
increases as the distance between
the vehicle and the obstacle decreases;
becomes continuous when the
distance between the vehicle and the
obstacle is less than 30 cm and stops
immediately if the distance increases;
it remains constant if the distance
remains unchanged; if this situation
concerns the side sensors, the buzzer
will stop after about 3 seconds to
avoid, for example, warning indications
in the event of manoeuvres along
walls.
If several obstacles are detected by the
sensors, only the nearest one is
considered.
FAULT INDICATIONS
When reverse is engaged, any parking
sensor faults will be indicated by the
warning light on the instrument panel
or by the
icon on the display
and by the message in the multifunction
display (for versions/markets, where
provided)
OPERATION WITH A
TRAILER
Parking sensor operation is
automatically deactivated when the
electric cable plug of the trailer is
inserted into the vehicle tow hook
socket.The sensors are automatically
reactivated when the trailer's cable plug
is removed.
122)
25)
IMPORTANT If you wish to leave the
tow hook fitted without towing a trailer,
it is advisable to contact a Fiat
Dealership for the relevant system
update operations because the tow
hook could be detected as an obstacle
by the central sensors.
When using special washing equipment
such as high pressure jets or steam
cleaning, clean the sensors very quickly
keeping the jet more than 10 cm away.
IMPORTANT NOTES
Do not apply stickers to the sensors.
When parking, take the utmost
care over obstacles that may be above
or under the sensor.
Objects close to the vehicle, in
certain circumstances are not detected
and could therefore cause damage to
the vehicle or be damaged.
The following conditions may influence
the performance of the parking
assistance system:
113F1A0134
122
STARTING AND DRIVING
Page 125 of 296
Reduced sensor sensitivity and a
reduction in the parking assistance
system performance could be due to
the presence on the surface of the
sensor of: ice, snow, mud, thick paint.
The sensor may detect a non-
existent obstacle (echo noise) due to
mechanical noises, for example when
washing the vehicle, in case of rain,
strong wind, hail.
The warnings sent by the sensor
can also be altered by the presence of
ultrasonic systems (e.g. pneumatic
brakes of trucks or pneumatic drills)
near the car.
The performance of the parking
assistance system may also be affected
by the position of the sensors. For
example by a change in the ride setting
(caused by the wear of the shock
absorbers, suspension), changing the
tyres, overloading the vehicle and
carrying out specific tuning operations
that require the vehicle to be lowered.
Detection of obstacles in the upper
part of the vehicle (particularly in the
case of vans or chassis cabs) may not
be guaranteed because the system
detects obstacles that could strike the
lower part of the vehicle.
WARNING
122)The driver is always responsible for
parking and other dangerous manoeuvres.
While carrying out these manoeuvres,
always make sure that no people
(especially children) or animals are in the
area concerned. The parking sensors
are used to assist the driver, who must
never allow his attention to lapse during
potentially dangerous manoeuvres, even
those executed at low speeds.
WARNING
25)For correct operation of the system,
sensors must always be clean from mud,
dirt, snow or ice. Be careful not to scratch
or damage the sensors while cleaning
them. Avoid using dry, rough or hard
cloths. The sensors must be washed using
clean water, with the addition of vehicle
shampoo if necessary.
REAR CAMERA
(PARKVIEW® REAR
BACK UP CAMERA)
(for versions/markets, where provided)
123)
26)
The vehicle may be equipped with a
ParkView® Rear Back Up Camera,
which allows the driver to see the
surrounding area behind the vehicle on
the display when reverse is engaged
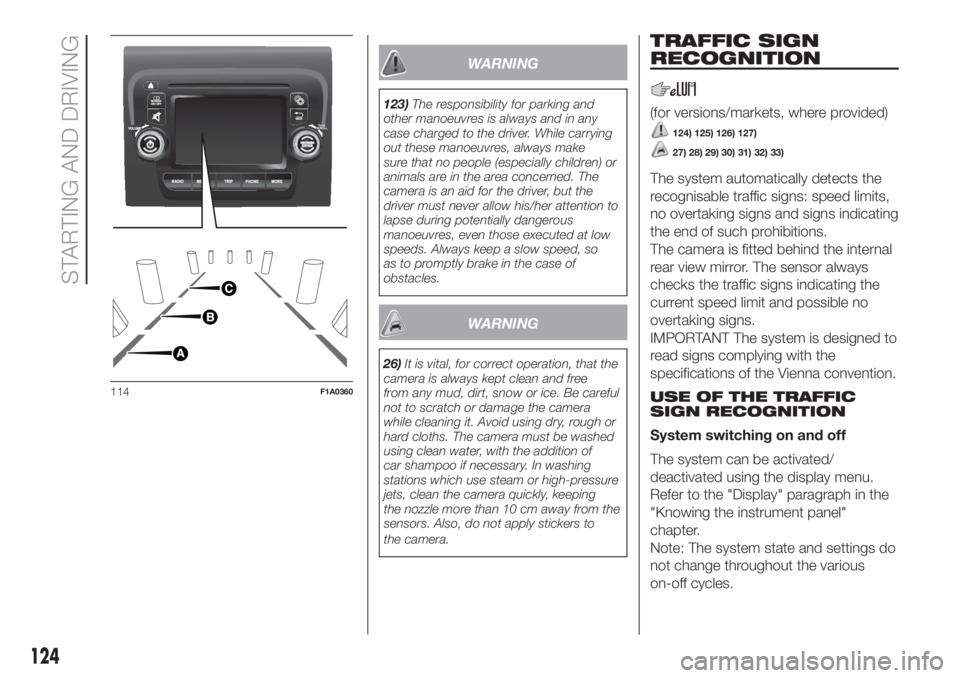
or the tailgate is opened fig. 114.
SYMBOLS AND
MESSAGES ON THE
DISPLAY
When displayed, the static line grid
shows the width of the vehicle.
The grid shows separate areas,
allowing you to see the distance from
the rear of the vehicle.
The table below shows the
approximate distances for each area:
Area (reference
fig. 114)Distance from the
rear of the vehicle
Red (A) 0–30 cm
Yellow (B) 30–100 cm
Green (C) 1 m or more
123
Page 126 of 296
WARNING
123)The responsibility for parking and
other manoeuvres is always and in any
case charged to the driver. While carrying
out these manoeuvres, always make
sure that no people (especially children) or
animals are in the area concerned. The
camera is an aid for the driver, but the
driver must never allow his/her attention to
lapse during potentially dangerous
manoeuvres, even those executed at low
speeds. Always keep a slow speed, so
as to promptly brake in the case of
obstacles.
WARNING
26)It is vital, for correct operation, that the
camera is always kept clean and free
from any mud, dirt, snow or ice. Be careful
not to scratch or damage the camera
while cleaning it. Avoid using dry, rough or
hard cloths. The camera must be washed
using clean water, with the addition of
car shampoo if necessary. In washing
stations which use steam or high-pressure
jets, clean the camera quickly, keeping
the nozzle more than 10 cm away from the
sensors. Also, do not apply stickers to
the camera.
TRAFFIC SIGN
RECOGNITION
(for versions/markets, where provided)
124) 125) 126) 127)
27) 28) 29) 30) 31) 32) 33)
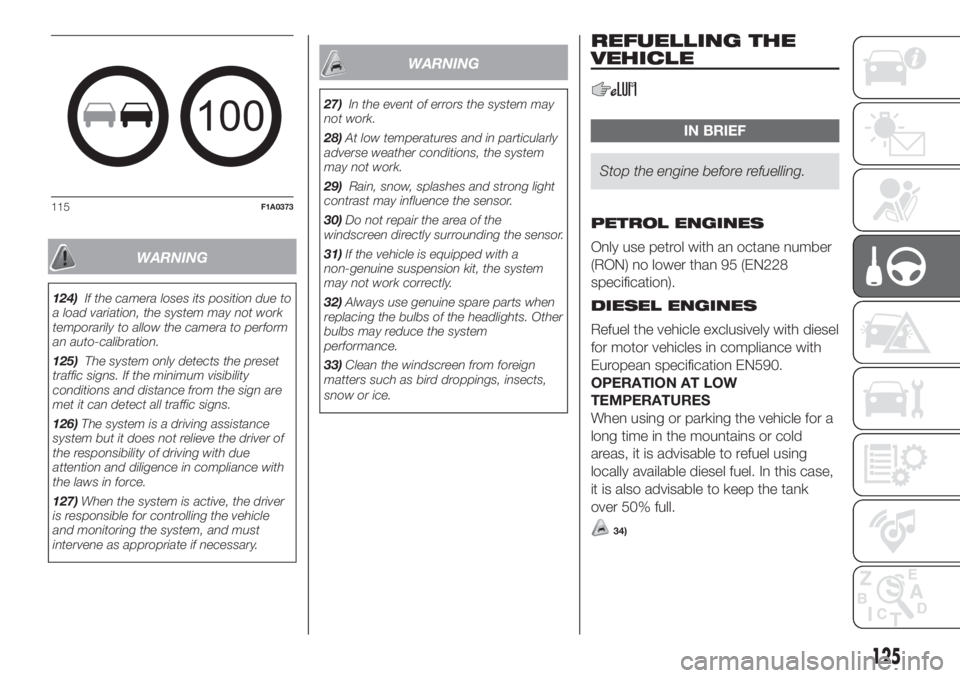
The system automatically detects the
recognisable traffic signs: speed limits,
no overtaking signs and signs indicating
the end of such prohibitions.
The camera is fitted behind the internal
rear view mirror. The sensor always
checks the traffic signs indicating the
current speed limit and possible no
overtaking signs.
IMPORTANT The system is designed to
read signs complying with the
specifications of the Vienna convention.
USE OF THE TRAFFIC
SIGN RECOGNITION
System switching on and off
The system can be activated/
deactivated using the display menu.
Refer to the "Display" paragraph in the
"Knowing the instrument panel"
chapter.
Note: The system state and settings do
not change throughout the various
on-off cycles.
114F1A0360
124
STARTING AND DRIVING
Page 127 of 296
WARNING
124)If the camera loses its position due to
a load variation, the system may not work
temporarily to allow the camera to perform
an auto-calibration.
125)The system only detects the preset
traffic signs. If the minimum visibility
conditions and distance from the sign are
met it can detect all traffic signs.
126)The system is a driving assistance
system but it does not relieve the driver of
the responsibility of driving with due
attention and diligence in compliance with
the laws in force.
127)When the system is active, the driver
is responsible for controlling the vehicle
and monitoring the system, and must
intervene as appropriate if necessary.
WARNING
27)In the event of errors the system may
not work.
28)At low temperatures and in particularly
adverse weather conditions, the system
may not work.
29)Rain, snow, splashes and strong light
contrast may influence the sensor.
30)Do not repair the area of the
windscreen directly surrounding the sensor.
31)If the vehicle is equipped with a
non-genuine suspension kit, the system
may not work correctly.
32)Always use genuine spare parts when
replacing the bulbs of the headlights. Other
bulbs may reduce the system
performance.
33)Clean the windscreen from foreign
matters such as bird droppings, insects,
snow or ice.
REFUELLING THE
VEHICLE
IN BRIEF
Stop the engine before refuelling.
PETROL ENGINES
Only use petrol with an octane number
(RON) no lower than 95 (EN228
specification).
DIESEL ENGINES
Refuel the vehicle exclusively with diesel
for motor vehicles in compliance with
European specification EN590.
OPERATION AT LOW
TEMPERATURES
When using or parking the vehicle for a
long time in the mountains or cold
areas, it is advisable to refuel using
locally available diesel fuel. In this case,
it is also advisable to keep the tank
over 50% full.
34)
100
115F1A0373
125
Page 137 of 296
TOWING TRAILERS
IMPORTANT NOTES
The vehicle must be provided with a
type-approved tow hook and adequate
electrical system to tow caravans or
trailers. Installation should be carried
out by specialised personnel who
will issue the required papers for
travelling on roads.
Install any specific and/or additional
door mirrors as specified by the
Highway Code.
Remember that when towing a trailer,
steep hills are harder to climb, the
braking spaces increase and overtaking
takes longer depending on the overall
weight.
Engage a low gear when driving
downhill, rather than constantly using
the brake.
The weight of the trailer on the vehicle
tow hook will reduce the loading
capacity of the vehicle by the same
amount. Consider the weight of the
trailer fully laden, including accessories
and luggage, to make sure you do
not exceed the maximum towable
weight (shown on the vehicle
registration document).Do not exceed the speed limits specific
to each country you are driving in, in
the case of vehicles towing trailers.
In any case, the top speed must not
exceed 100 km/h.
You are advised to fit a suitable
stabiliser to the trailer drawbar.
In the vehicles equipped with parking
sensors, after fitting the tow hook
malfunctioning warnings may be
displayed, as some parts (tow bar, ball
tow hook) may be within the sensor
detection range. In this case the
detection range must be adjusted or
the parking assistance function must be
deactivated.
In vehicles equipped with "Comfort-
matic" transmission, make sure that the
gearbox is in neutral (N) (checking that
the vehicle moves when pushed) and
proceed in the same way as for towing
a normal vehicle with manual
transmission. If the gearbox cannot be
put in neutral, do not tow the vehicle
and contact a Fiat Dealership.
136) 137)
INSTALLING THE TOW
HOOK
The towing device should be fastened
to the body by specialised technicians
according to any additional and/or
integrative information supplied by the
Manufacturer of the device.
The towing device must meet current
regulations with reference to Directive
94/20/EC and subsequent
amendments.
For any version the towing device used
must match the towable weight of the
vehicle on which it is to be installed.
For the electric connection a standard
connector should be used which is
generally placed on a special bracket
normally fastened to the towing device,
and a special ECU for external trailer
light control must be installed on the
vehicle. For the electrical connection, 7
or 13 pin 12 V DC connections are to
be used (CUNA/UNI and ISO/DIN
Standards). Follow the instructions
provided by the vehicle manufacturer
and/or the tow hitch manufacturer.
Any electric brake (or electric winch,
etc.) should be supplied directly by the
battery through a cable with a section
of at least 2.5 mm
2.
IMPORTANT Electric brakes or other
devices must be used with engine
running.
135
Page 138 of 296
In addition to the electrical branches,
the vehicle's electric system can only
be connected to the supply cable for an
electric brake and to the cable for an
internal light, though not above 15
W. For connections use the preset
control unit with battery cable no less
than 2.5 mm
2.
IMPORTANT The trailer tow hook
contributes to the length of the vehicle.
When installing on long wheelbase
versions, it is only possible to install
removable tow hooks because the total
vehicle length limit of 6 metres is
exceeded.
If no trailer is fitted, the hook must be
removed from the attachment base and
it must not exceed the vehicle's
original length.
IMPORTANT If you wish to leave the
tow hook fitted without towing a trailer,
it is advisable to contact a Fiat
Dealership for the relevant system
update operations because the tow
hook could be detected as an obstacle
by the central sensors.Installation diagram for Van
versions fig. 121
The tow hook structure must be
fastened in the points shown by the
symbol Ø using a total of 6 M10x1.25
screws and 4 M12 screws.
The internal back plates must be at
least 5 mm thick. MAX LOAD ON
BALL: 100/120 kg depending on the
payload (see the “Weights” table in the
“Technical Data” chapter).
138)
To install a tow hook, the bumpers
must be trimmed as described in the
supplier's installation kit.
Installation diagram for Truck and
Chassis Cab versions fig. 122
Another tow hook specific to Truck and
Chassis Cab versions is shown in fig.
122.
The structure Ø must be fixed in the
points indicated using a total of 6
M10x1.25 screws and 4 M12 screws.MAX LOAD ON BALL: 100/120 kg
depending on the payload (see the
“Weights” table in the “Technical Data”
chapter).
WARNING
136)The ABS with which the vehicle may
be equipped will not control the braking
system of the trailer. Particular caution
is required on slippery roads.
137)Never modify the braking system of
the vehicle to control the trailer brake. The
trailer braking system must be fully
independent from the hydraulic system of
the vehicle.
138)After fitting, screw holes must be
sealed to prevent a exhaust gas inlet.
.
136
STARTING AND DRIVING