dashboard FIAT FIORINO 2018 Owner handbook (in English)
[x] Cancel search | Manufacturer: FIAT, Model Year: 2018, Model line: FIORINO, Model: FIAT FIORINO 2018Pages: 196, PDF Size: 4.99 MB
Page 9 of 196
KNOWING YOUR VEHICLE
In-depth knowledge of your new vehicle
starts here.
The handbook that you are reading
simply and directly explains how it
is made and how it works.
That’s why we advise you to read it
seated comfortably on board, so that
you can see what is described here for
yourself.DASHBOARD ................................. 8
KEYS .............................................. 9
IGNITION DEVICE ........................... 11
THE FIAT CODE SYSTEM ............... 11
ALARM ........................................... 12
DOORS ........................................... 13
SEATS ............................................ 16
HEADRESTS ................................... 18
STEERING WHEEL ......................... 19
REAR VIEW MIRRORS .................... 20
EXTERIOR LIGHTS ......................... 21
INTERIOR LIGHTS .......................... 23
WINDOW WASHING ....................... 24
HEATING AND VENTILATION.......... 26
MANUAL CLIMATE CONTROL
SYSTEM ......................................... 26
ELECTRIC WINDOWS .................... 27
BONNET ......................................... 28
PARTITIONS .................................. 29
LUGGAGE COMPARTMENT ........... 31
VERSION WITH METHANE
SYSTEM (NATURAL POWER) ......... 33
7
Page 10 of 196
Dashboard
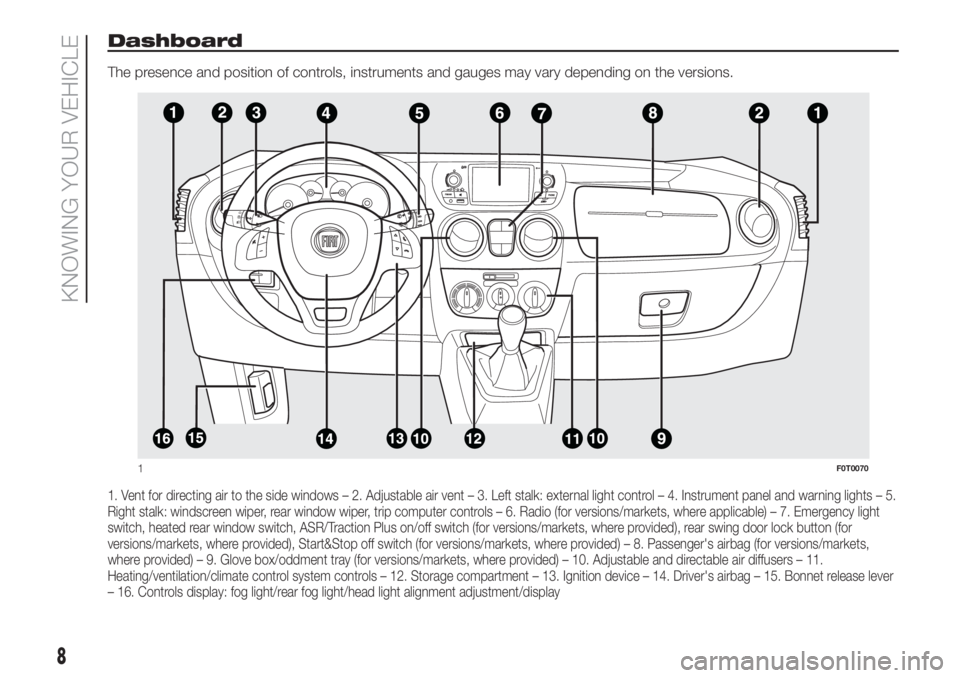
The presence and position of controls, instruments and gauges may vary depending on the versions.
1. Vent for directing air to the side windows – 2. Adjustable air vent – 3. Left stalk: external light control – 4. Instrument panel and warning lights – 5.
Right stalk: windscreen wiper, rear window wiper, trip computer controls – 6. Radio (for versions/markets, where applicable) – 7. Emergency light
switch, heated rear window switch, ASR/Traction Plus on/off switch (for versions/markets, where provided), rear swing door lock button (for
versions/markets, where provided), Start&Stop off switch (for versions/markets, where provided) – 8. Passenger's airbag (for versions/markets,
where provided) – 9. Glove box/oddment tray (for versions/markets, where provided) – 10. Adjustable and directable air diffusers – 11.
Heating/ventilation/climate control system controls – 12. Storage compartment – 13. Ignition device – 14. Driver's airbag – 15. Bonnet release lever
– 16. Controls display: fog light/rear fog light/head light alignment adjustment/display
1F0T0070
8
KNOWING YOUR VEHICLE
Page 14 of 196
Activation of thewarning light while
driving
If thewarning light (or symbol in
the display) comes on, this means
that the system is running a self-
diagnosis test (caused, for example, by
a voltage drop). When you stop for
the first time, turn the key to STOP and
then to MAR: the warning light
will
not light up if no faults are detected.
If the warning light(or symbol on
the display) stays on, repeat the
procedure described above leaving the
key at STOP for longer than 30
seconds. If the problem persists,
contact the Fiat Dealership.
The code is not recognised if the
warning light
(or symbol on the
display) stays on. In this case, turn the
key to STOP and then to MAR; if it is
still locked, try again with the other keys
that come with the vehicle. If you still
cannot start the engine, perform the
emergency start procedure (see
chapter “In an emergency”) and then
contact the Fiat Dealership.
1)
WARNING
1)The electronic components inside the
key may be damaged if the key is
subjected to strong shocks.
ALARM
(for versions/markets, where provided)
The alarm, in addition to all the
previously described remote control
functions, is controlled by the receiver
located under the dashboard near
the fuse box.
IMPORTANT The engine stop function
is guaranteed by the Fiat CODE, which
is automatically activated when the
ignition key is extracted from the
ignition switch.
TURNING THE ALARM ON
With the doors and bonnet closed and
the ignition key either turned to STOP
or removed, point the key with the
remote control towards the vehicle and
press and release button
.
With the exception of some markets,
the system emits an acoustic signal
("beep") and activates door locking.
A self-diagnostic stage precedes the
turning on of the alarm: if a fault is
detected, the system produces another
acoustic signal after approximately 4
seconds from switch-on.
In this case switch off the alarm by
pressing
, check that all the doors,
bonnet and tailgate are closed
correctly; then switch the alarm back
on by pressing
.If a door or the bonnet is not properly
shut, it will be excluded from the testing
by the alarm system.
A fault has occurred in system
operation if the alarm produces an
acoustic signal even when the doors,
bonnet and boot are correctly closed.
Contact a Fiat Dealership.
IMPORTANT The alarm does not come
on when the central locking is activated
using the metal insert in the key.
IMPORTANT The alarm is adapted to
meet requirements in various countries.
TURNING THE ALARM
OFF
Press button
on the key with the
remote control.
IMPORTANT The alarm is not turned off
using the door are opened using the
metal insert in the key.
VOLUMETRIC/ANTI-LIFT
PROTECTION
The side windows must be completely
closed for correct operation of the
protection.
If necessary, the function can be turned
off (if, for example, you are leaving a
pet in the car) by pressing button A fig.
6 on the front courtesy light before
activating turning the alarm on.
12
KNOWING YOUR VEHICLE
Page 23 of 196
EXTERIOR LIGHTS
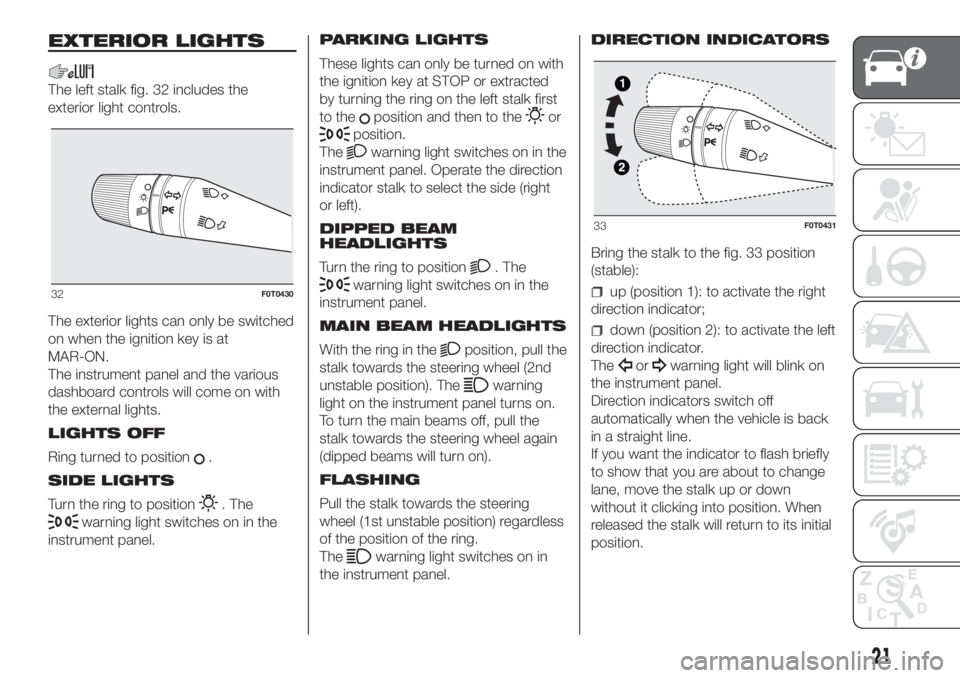
The left stalk fig. 32 includes the
exterior light controls.
The exterior lights can only be switched
on when the ignition key is at
MAR-ON.
The instrument panel and the various
dashboard controls will come on with
the external lights.
LIGHTS OFF
Ring turned to position
.
SIDE LIGHTS
Turn the ring to position
. The
warning light switches on in the
instrument panel.PARKING LIGHTS
These lights can only be turned on with
the ignition key at STOP or extracted
by turning the ring on the left stalk first
to the
position and then to theor
position.
The
warning light switches on in the
instrument panel. Operate the direction
indicator stalk to select the side (right
or left).
DIPPED BEAM
HEADLIGHTS
Turn the ring to position
. The
warning light switches on in the
instrument panel.
MAIN BEAM HEADLIGHTS
With the ring in the
position, pull the
stalk towards the steering wheel (2nd
unstable position). The
warning
light on the instrument panel turns on.
To turn the main beams off, pull the
stalk towards the steering wheel again
(dipped beams will turn on).
FLASHING
Pull the stalk towards the steering
wheel (1st unstable position) regardless
of the position of the ring.
The
warning light switches on in
the instrument panel.DIRECTION INDICATORS
Bring the stalk to the fig. 33 position
(stable):
up (position 1): to activate the right
direction indicator;
down (position 2): to activate the left
direction indicator.
The
orwarning light will blink on
the instrument panel.
Direction indicators switch off
automatically when the vehicle is back
in a straight line.
If you want the indicator to flash briefly
to show that you are about to change
lane, move the stalk up or down
without it clicking into position. When
released the stalk will return to its initial
position.
32F0T0430
33F0T0431
21
Page 27 of 196
With the twist switch at, the
windscreen wiper will automatically
adapt to the speed of the vehicle.
With the windscreen wipers
operational, if reverse gear is engaged,
the rear window wiper is automatically
activated.
3)
“Smart washing” function
Pull the stalk towards the steering
wheel (unstable position) to operate the
windscreen washer.
Keeping the stalk pulled for more than
half a second, with just one movement
it is possible to operate the washer
jet and the wiper at the same time.
The windscreen wiper stops working
three strokes after the stalk is released.
A further stroke after approx. 6 seconds
completes the wiping cycle.
REAR WINDOW
WIPER/WASHER
(for versions/markets, where provided)
This operates only with the ignition
key turned to MAR.
Activation
Turn the ring nut to
to operate the
rear window wiper:
in intermittent mode when the
windscreen wiper is not operating;
in synchronous mode (at half the
speed of the windscreen wiper) when
the windscreen wiper is operating;
in continuous mode with reverse
gear engaged and the control active.
With the windscreen wiper on and
reverse gear engaged, rear window
wiping will be continuous.
Pushing the stalk towards the
dashboard (rocking position) will
activate the rear window washer jet.
Keep the stalk pushed for more than
half a second to activate the rear
window wiper as well. Releasing the
stalk will activate the smart washing
function, as described for the
windscreen wiper.
Deactivation
The function stops when the stalk is
released.
4)
WARNING
3)Do not use the windscreen wiper to
remove layers of snow or ice from the
windscreen. In such conditions, the
windscreen wiper may be subjected to
excessive stress and the motor cut-out
switch, which prevents operation for a few
seconds, may intervene. If operation is
not restored, contact a Fiat Dealership.4)Do not use the rear window wiper to
remove layers of snow or ice. In such
conditions, the screen wiper may be
subjected to excessive stress and the
motor cut-out switch, which prevents
operation for a few seconds, may
intervene. If operation is not restored,
contact a Fiat Dealership.
25
Page 36 of 196
For this reason there must always
be petrol in the tank.
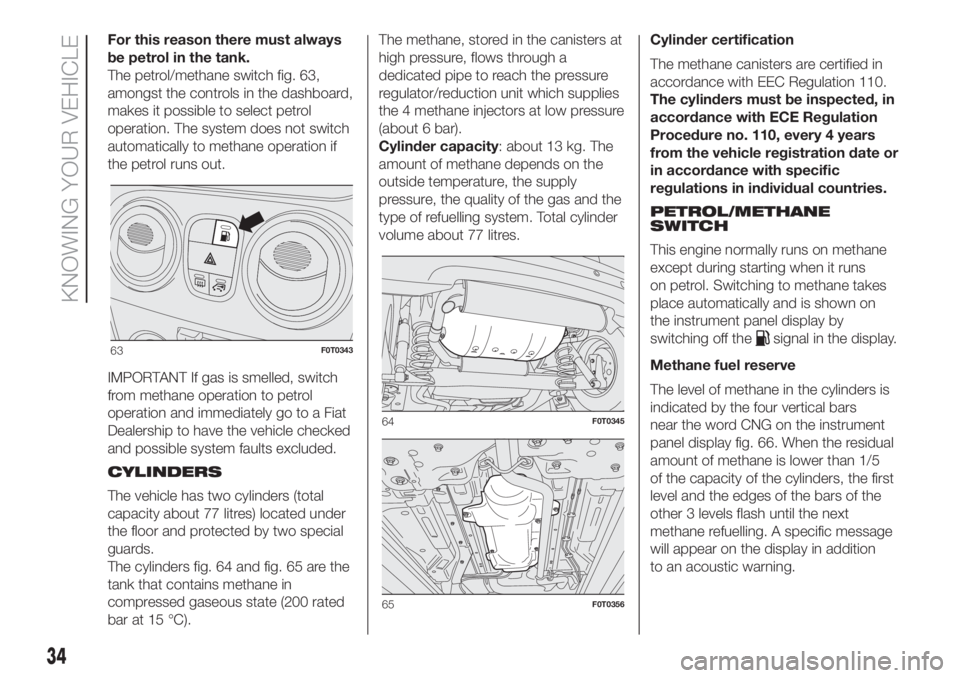
The petrol/methane switch fig. 63,
amongst the controls in the dashboard,
makes it possible to select petrol
operation. The system does not switch
automatically to methane operation if
the petrol runs out.
IMPORTANT If gas is smelled, switch
from methane operation to petrol
operation and immediately go to a Fiat
Dealership to have the vehicle checked
and possible system faults excluded.
CYLINDERS
The vehicle has two cylinders (total
capacity about 77 litres) located under
the floor and protected by two special
guards.
The cylinders fig. 64 and fig. 65 are the
tank that contains methane in
compressed gaseous state (200 rated
bar at 15 °C).The methane, stored in the canisters at
high pressure, flows through a
dedicated pipe to reach the pressure
regulator/reduction unit which supplies
the 4 methane injectors at low pressure
(about 6 bar).
Cylinder capacity: about 13 kg. The
amount of methane depends on the
outside temperature, the supply
pressure, the quality of the gas and the
type of refuelling system. Total cylinder
volume about 77 litres.Cylinder certification
The methane canisters are certified in
accordance with EEC Regulation 110.
The cylinders must be inspected, in
accordance with ECE Regulation
Procedure no. 110, every 4 years
from the vehicle registration date or
in accordance with specific
regulations in individual countries.
PETROL/METHANE
SWITCH
This engine normally runs on methane
except during starting when it runs
on petrol. Switching to methane takes
place automatically and is shown on
the instrument panel display by
switching off the
signal in the display.
Methane fuel reserve
The level of methane in the cylinders is
indicated by the four vertical bars
near the word CNG on the instrument
panel display fig. 66. When the residual
amount of methane is lower than 1/5
of the capacity of the cylinders, the first
level and the edges of the bars of the
other 3 levels flash until the next
methane refuelling. A specific message
will appear on the display in addition
to an acoustic warning.63F0T0343
64F0T0345
65F0T0356
34
KNOWING YOUR VEHICLE
Page 37 of 196
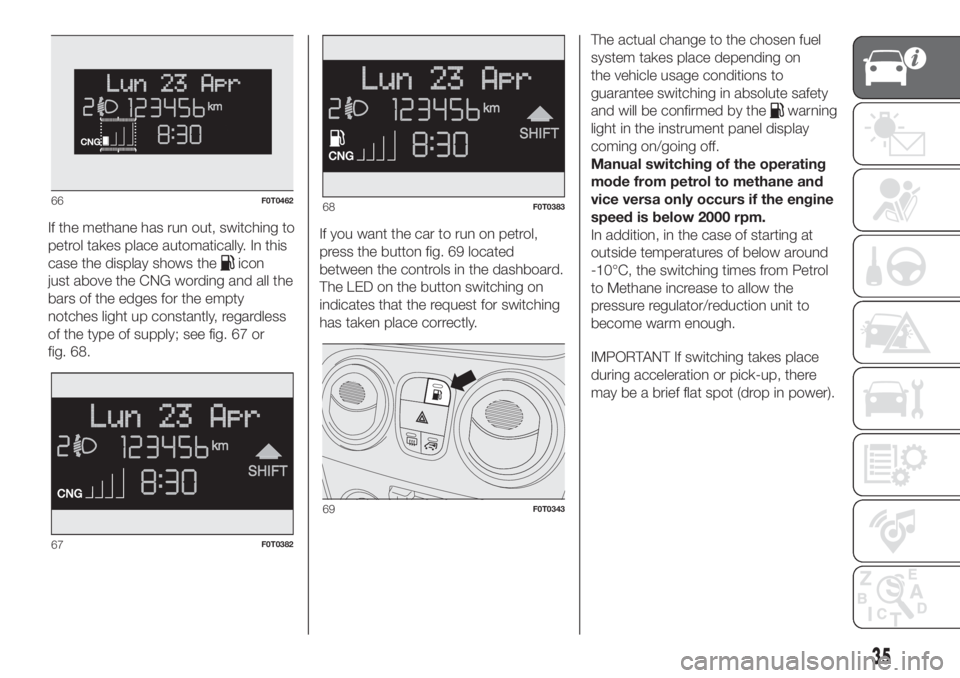
If the methane has run out, switching to
petrol takes place automatically. In this
case the display shows the
icon
just above the CNG wording and all the
bars of the edges for the empty
notches light up constantly, regardless
of the type of supply; see fig. 67 or
fig. 68.If you want the car to run on petrol,
press the button fig. 69 located
between the controls in the dashboard.
The LED on the button switching on
indicates that the request for switching
has taken place correctly.The actual change to the chosen fuel
system takes place depending on
the vehicle usage conditions to
guarantee switching in absolute safety
and will be confirmed by the
warning
light in the instrument panel display
coming on/going off.
Manual switching of the operating
mode from petrol to methane and
vice versa only occurs if the engine
speed is below 2000 rpm.
In addition, in the case of starting at
outside temperatures of below around
-10°C, the switching times from Petrol
to Methane increase to allow the
pressure regulator/reduction unit to
become warm enough.
IMPORTANT If switching takes place
during acceleration or pick-up, there
may be a brief flat spot (drop in power).
66F0T0462
67F0T0382
68F0T0383
69F0T0343
35
Page 63 of 196
What it means What to do
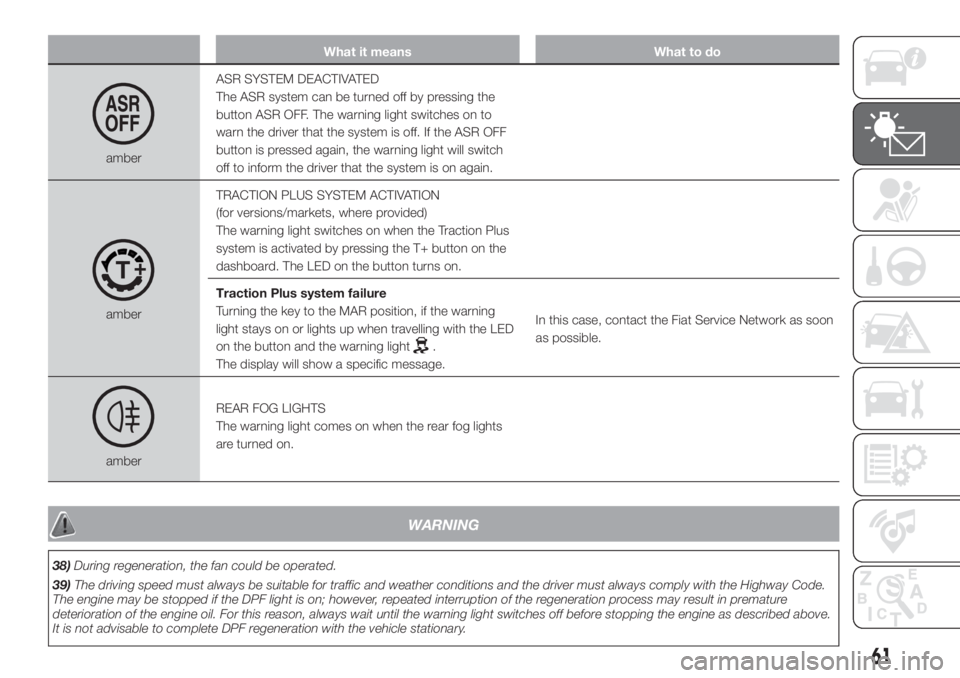
amberASR SYSTEM DEACTIVATED
The ASR system can be turned off by pressing the
button ASR OFF. The warning light switches on to
warn the driver that the system is off. If the ASR OFF
button is pressed again, the warning light will switch
off to inform the driver that the system is on again.
amberTRACTION PLUS SYSTEM ACTIVATION
(for versions/markets, where provided)
The warning light switches on when the Traction Plus
system is activated by pressing the T+ button on the
dashboard. The LED on the button turns on.
Traction Plus system failure
Turning the key to the MAR position, if the warning
light stays on or lights up when travelling with the LED
on the button and the warning light
.
The display will show a specific message.In this case, contact the Fiat Service Network as soon
as possible.
amberREAR FOG LIGHTS
The warning light comes on when the rear fog lights
are turned on.
WARNING
38)During regeneration, the fan could be operated.
39)The driving speed must always be suitable for traffic and weather conditions and the driver must always comply with the Highway Code.
The engine may be stopped if the DPF light is on; however, repeated interruption of the regeneration process may result in premature
deterioration of the engine oil. For this reason, always wait until the warning light switches off before stopping the engine as described above.
It is not advisable to complete DPF regeneration with the vehicle stationary.
61
Page 81 of 196
SUITABILITY OF PASSENGER SEATS FOR THE USE OF CHILD RESTRAINT
SYSTEMS
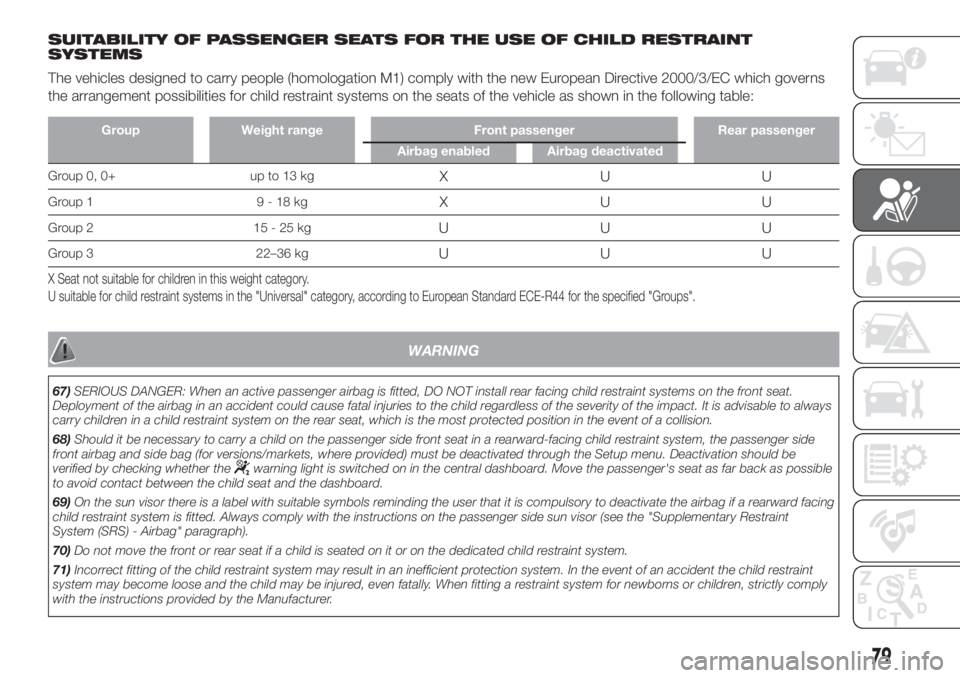
The vehicles designed to carry people (homologation M1) comply with the new European Directive 2000/3/EC which governs
the arrangement possibilities for child restraint systems on the seats of the vehicle as shown in the following table:
Group Weight range Front passenger Rear passenger
Airbag enabled Airbag deactivated
Group 0, 0+ up to 13 kgXUU
Group 1 9 - 18 kgXUU
Group 2 15 - 25 kgUUU
Group 3 22–36 kgUUU
X Seat not suitable for children in this weight category.
U suitable for child restraint systems in the "Universal" category, according to European Standard ECE-R44 for the specified "Groups".
WARNING
67)SERIOUS DANGER: When an active passenger airbag is fitted, DO NOT install rear facing child restraint systems on the front seat.
Deployment of the airbag in an accident could cause fatal injuries to the child regardless of the severity of the impact. It is advisable to always
carry children in a child restraint system on the rear seat, which is the most protected position in the event of a collision.
68)Should it be necessary to carry a child on the passenger side front seat in a rearward-facing child restraint system, the passenger side
front airbag and side bag (for versions/markets, where provided) must be deactivated through the Setup menu. Deactivation should be
verified by checking whether the
warning light is switched on in the central dashboard. Move the passenger's seat as far back as possible
to avoid contact between the child seat and the dashboard.
69)On the sun visor there is a label with suitable symbols reminding the user that it is compulsory to deactivate the airbag if a rearward facing
child restraint system is fitted. Always comply with the instructions on the passenger side sun visor (see the "Supplementary Restraint
System (SRS) - Airbag" paragraph).
70)Do not move the front or rear seat if a child is seated on it or on the dedicated child restraint system.
71)Incorrect fitting of the child restraint system may result in an inefficient protection system. In the event of an accident the child restraint
system may become loose and the child may be injured, even fatally. When fitting a restraint system for newborns or children, strictly comply
with the instructions provided by the Manufacturer.
79
Page 85 of 196
Below is a summary of
the main safety rules to
be followed when
carrying children
Main recommendations to carry
children safely:
Install the child restraint systems on
the rear seat, which is the most
protected position in the event of an
impact.
Keep children in rearward facing
child restraint systems for as long as
possible, until 3–4 years old if possible.
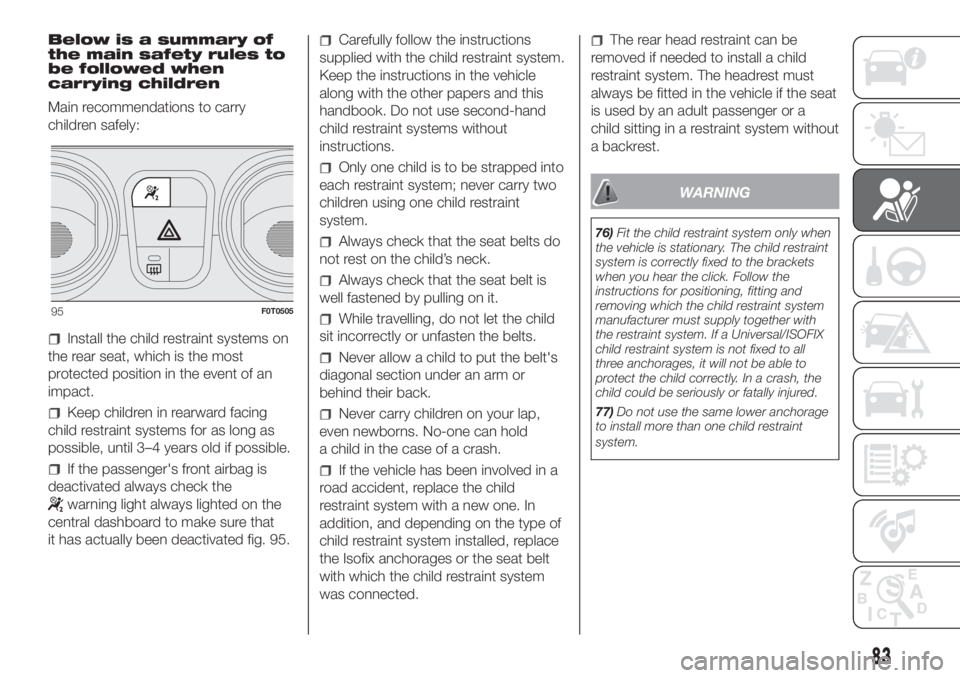
If the passenger's front airbag is
deactivated always check the
warning light always lighted on the
central dashboard to make sure that
it has actually been deactivated fig. 95.
Carefully follow the instructions
supplied with the child restraint system.
Keep the instructions in the vehicle
along with the other papers and this
handbook. Do not use second-hand
child restraint systems without
instructions.
Only one child is to be strapped into
each restraint system; never carry two
children using one child restraint
system.
Always check that the seat belts do
not rest on the child’s neck.
Always check that the seat belt is
well fastened by pulling on it.
While travelling, do not let the child
sit incorrectly or unfasten the belts.
Never allow a child to put the belt's
diagonal section under an arm or
behind their back.
Never carry children on your lap,
even newborns. No-one can hold
a child in the case of a crash.
If the vehicle has been involved in a
road accident, replace the child
restraint system with a new one. In
addition, and depending on the type of
child restraint system installed, replace
the Isofix anchorages or the seat belt
with which the child restraint system
was connected.
The rear head restraint can be
removed if needed to install a child
restraint system. The headrest must
always be fitted in the vehicle if the seat
is used by an adult passenger or a
child sitting in a restraint system without
a backrest.
WARNING
76)Fit the child restraint system only when
the vehicle is stationary. The child restraint
system is correctly fixed to the brackets
when you hear the click. Follow the
instructions for positioning, fitting and
removing which the child restraint system
manufacturer must supply together with
the restraint system. If a Universal/ISOFIX
child restraint system is not fixed to all
three anchorages, it will not be able to
protect the child correctly. In a crash, the
child could be seriously or fatally injured.
77)Do not use the same lower anchorage
to install more than one child restraint
system.
95F0T0505
83