technical specifications FIAT FREEMONT 2011 Owner handbook (in English)
[x] Cancel search | Manufacturer: FIAT, Model Year: 2011, Model line: FREEMONT, Model: FIAT FREEMONT 2011Pages: 267, PDF Size: 5.16 MB
Page 28 of 267

the charging system light remains on, it means that the
vehicle is experiencing a problem with the charging
system. Obtain SERVICE IMMEDIATELY. See an autho-
rized dealer.
If jump starting is required, refer to “Jump Starting
Procedures” in “In An Emergency”.
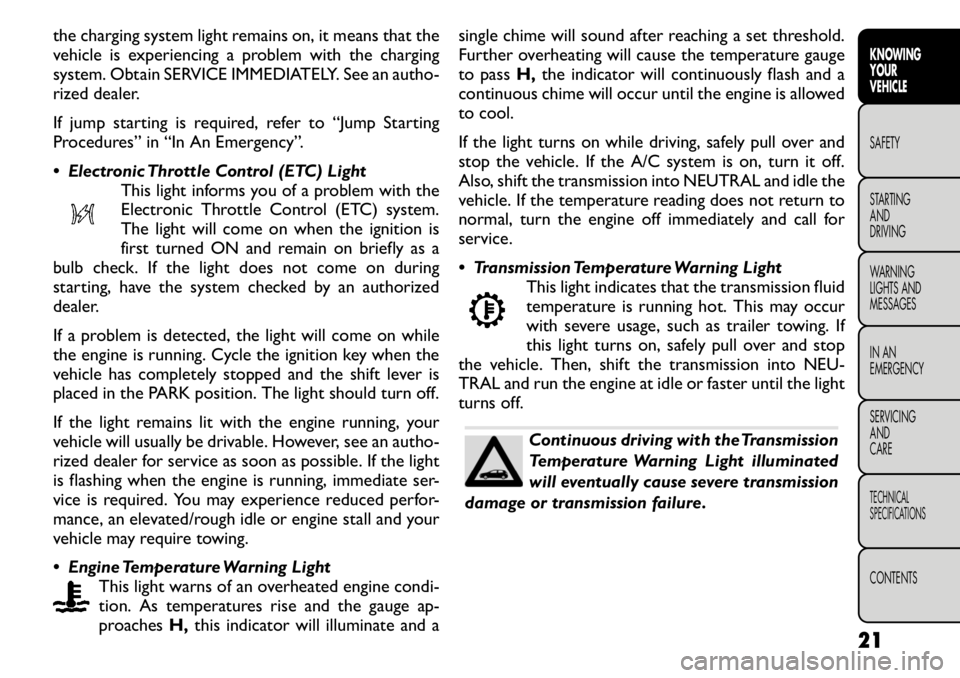
Electronic Throttle Control (ETC) LightThis light informs you of a problem with the
Electronic Throttle Control (ETC) system.
The light will come on when the ignition is
first turned ON and remain on briefly as a
bulb check. If the light does not come on during
starting, have the system checked by an authorized
dealer.
If a problem is detected, the light will come on while
the engine is running. Cycle the ignition key when the
vehicle has completely stopped and the shift lever is
placed in the PARK position. The light should turn off.
If the light remains lit with the engine running, your
vehicle will usually be drivable. However, see an autho-
rized dealer for service as soon as possible. If the light
is flashing when the engine is running, immediate ser-
vice is required. You may experience reduced perfor-
mance, an elevated/rough idle or engine stall and your
vehicle may require towing.
Engine Temperature Warning Light This light warns of an overheated engine condi-
tion. As temperatures rise and the gauge ap-
proaches H,this indicator will illuminate and a single chime will sound after reaching a set threshold.
Further overheating will cause the temperature gauge
to pass
H,the indicator will continuously flash and a
continuous chime will occur until the engine is allowed
to cool.
If the light turns on while driving, safely pull over and
stop the vehicle. If the A/C system is on, turn it off.
Also, shift the transmission into NEUTRAL and idle the
vehicle. If the temperature reading does not return to
normal, turn the engine off immediately and call for
service.
Transmission Temperature Warning Light This light indicates that the transmission fluid
temperature is running hot. This may occur
with severe usage, such as trailer towing. If
this light turns on, safely pull over and stop
the vehicle. Then, shift the transmission into NEU-
TRAL and run the engine at idle or faster until the light
turns off.
Continuous driving with the Transmission
Temperature Warning Light illuminated
will eventually cause severe transmission
damage or transmission failure.
21KNOWING
YOURVEHICLESAFETY
STARTING ANDDRIVING
WARNING
LIGHTS AND
MESSAGES
IN AN
EMERGENCY
SERVICING AND
CARETECHNICAL
SPECIFICATIONSCONTENTS
Page 29 of 267

WARNING!
If the Transmission Temperature Warning
Light is illuminated and you continue
operating the vehicle, in some circumstances you
could cause the fluid to boil over, come in contact
with hot engine or exhaust components and
cause a fire.
OIL CHANGE REQUIRED
Your vehicle is equipped with an engine oil change
indicator system. The “Oil Change Required” message
will flash in the EVIC display for approximately 10 sec-
onds after a single chime has sounded to indicate the
next scheduled oil change interval. The engine oil
change indicator system is duty cycle based, which
means the engine oil change interval may fluctuate
dependent upon your personal driving style.
Unless reset, this message will continue to display each
time you cycle the ignition to the ON/RUN position.
To turn off the message temporarily, press and release
the MENU button. To reset the oil change indicator
system (after performing the scheduled maintenance),
perform the following procedure:
1. Without pressing the brake pedal, push the EN- GINE START/STOP button and cycle the ignition to
the ON/RUN position (Do not start the engine.)
2. Fully depress the accelerator pedal, slowly, three times within 10 seconds. 3. Without pressing the brake pedal, push the EN-
GINE START/STOP button once to return the igni-
tion to the OFF/LOCK position.
NOTE: If the indicator message illuminates when you
start the vehicle, the oil change indicator system did
not reset. If necessary, repeat this procedure.
FUEL ECONOMY
Press and release the UP or DOWN button until “Fuel
Economy” displays highlighted in the EVIC and press
the SELECT button. The following Fuel Economy func-
tions will display in the EVIC:
• Average Fuel Economy/Fuel Saver Mode
• Distance To Empty (DTE)
• Miles Per Gallon (MPG)
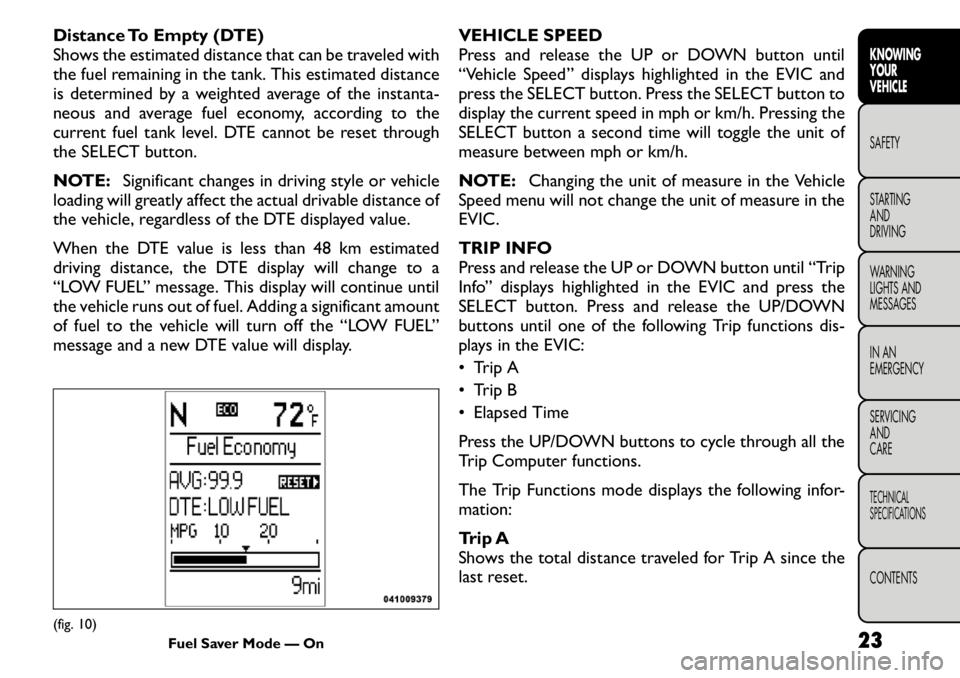
Average Fuel Economy / ECO Fuel Saver
Mode — If Equipped
Shows the average fuel economy since the last reset.
When the fuel economy is reset, the display will read
“RESET” or show dashes for two seconds. Then, the
history information will be erased, and the averaging
will continue from the last fuel average reading before
the reset.
The ECO indicator will illuminate in the EVIC display.
This ECO indicator will appear when you are driving in
a fuel efficient manner and can be used to modify
driving habits in order to increase fuel economy.
(fig. 10)
22
KNOWING YOUR
VEHICLE
SAFETY
STARTING AND
DRIVING
WARNING
LIGHTS AND
MESSAGES
IN AN
EMERGENCY
SERVICING AND
CARETECHNICAL
SPECIFICATIONSCONTENTS
Page 30 of 267

Distance To Empty (DTE)
Shows the estimated distance that can be traveled with
the fuel remaining in the tank. This estimated distance
is determined by a weighted average of the instanta-
neous and average fuel economy, according to the
current fuel tank level. DTE cannot be reset through
the SELECT button.
NOTE:Significant changes in driving style or vehicle
loading will greatly affect the actual drivable distance of
the vehicle, regardless of the DTE displayed value.
When the DTE value is less than 48 km estimated
driving distance, the DTE display will change to a
“LOW FUEL” message. This display will continue until
the vehicle runs out of fuel. Adding a significant amount
of fuel to the vehicle will turn off the “LOW FUEL”
message and a new DTE value will display. VEHICLE SPEED
Press and release the UP or DOWN button until
“Vehicle Speed” displays highlighted in the EVIC and
press the SELECT button. Press the SELECT button to
display the current speed in mph or km/h. Pressing the
SELECT button a second time will toggle the unit of
measure between mph or km/h.
NOTE:
Changing the unit of measure in the Vehicle
Speed menu will not change the unit of measure in the
EVIC.
TRIP INFO
Press and release the UP or DOWN button until “Trip
Info” displays highlighted in the EVIC and press the
SELECT button. Press and release the UP/DOWN
buttons until one of the following Trip functions dis-
plays in the EVIC:
• Trip A
• Trip B
• Elapsed Time
Press the UP/DOWN buttons to cycle through all the
Trip Computer functions.
The Trip Functions mode displays the following infor- mation:
Trip A
Shows the total distance traveled for Trip A since the
last reset.(fig. 10) Fuel Saver Mode — On 23
KNOWING
YOURVEHICLESAFETY
STARTING ANDDRIVING
WARNING
LIGHTS AND
MESSAGES
IN AN
EMERGENCY
SERVICING AND
CARETECHNICAL
SPECIFICATIONSCONTENTS
Page 31 of 267

Trip B
Shows the total distance traveled for Trip B since the
last reset.
Elapsed Time
Shows the total elapsed time of travel since the last
reset when the ignition is in the ACC position. Elapsed
time will increment when the ignition is in the ON/
RUN position.
To Reset The Display
Reset will only occur while a resettable function is
being displayed. Press and release the SELECT button
once to clear the resettable function being displayed.
To reset all resettable functions, press and hold the
SELECT button for two seconds. The current display
will reset along with other functions.VEHICLE INFO (CUSTOMER
INFORMATION FEATURES)
Press and release the UP or DOWN button until
“Vehicle Info” displays in the EVIC and press the SE-
LECT button. Press the UP and DOWN button to
scroll through the available information displays.
Coolant Temp
Displays the actual coolant temperature.
Oil Temperature
Displays the actual oil temperature.
Oil Pressure
Displays the actual oil pressure.
Trans Temperature
Displays the actual transmission temperature.
Engine Hours
Displays the number of hours of engine operation.
24
KNOWING YOUR
VEHICLE
SAFETY
STARTING AND
DRIVING
WARNING
LIGHTS AND
MESSAGES
IN AN
EMERGENCY
SERVICING AND
CARETECHNICAL
SPECIFICATIONSCONTENTS
Page 32 of 267

Uconnect TOUCH™ SETTINGS
HARD-KEYS
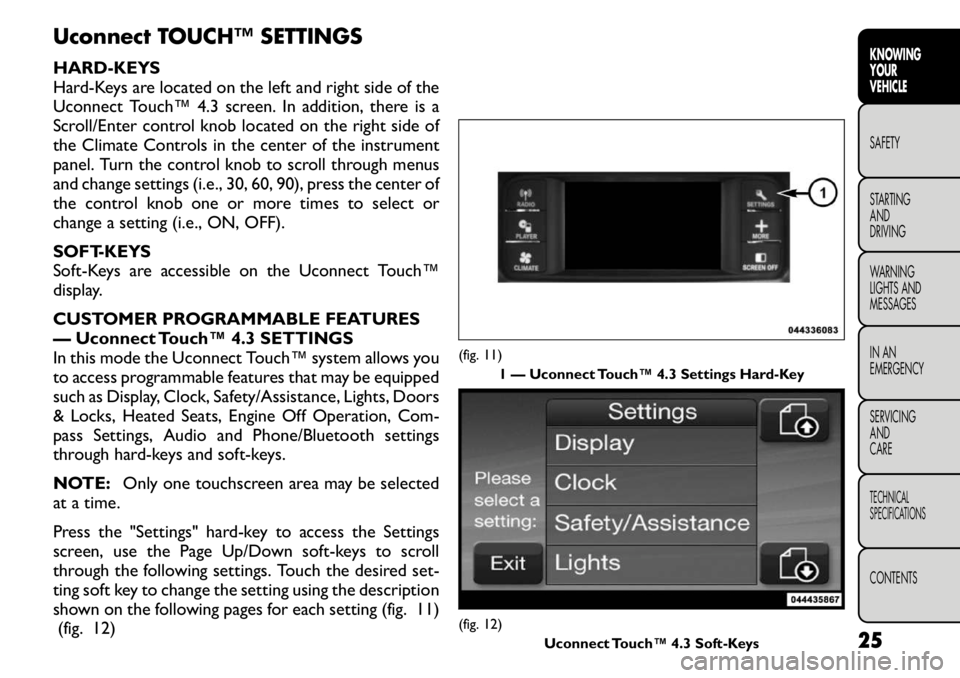
Hard-Keys are located on the left and right side of the
Uconnect Touch™ 4.3 screen. In addition, there is a
Scroll/Enter control knob located on the right side of
the Climate Controls in the center of the instrument
panel. Turn the control knob to scroll through menus
and change settings (i.e., 30, 60, 90), press the center of
the control knob one or more times to select or
change a setting (i.e., ON, OFF).
SOFT-KEYS
Soft-Keys are accessible on the Uconnect Touch™
display.
CUSTOMER PROGRAMMABLE FEATURES
— Uconnect Touch™ 4.3 SETTINGS
In this mode the Uconnect Touch™ system allows you
to access programmable features that may be equipped
such as Display, Clock, Safety/Assistance, Lights, Doors
& Locks, Heated Seats, Engine Off Operation, Com-
pass Settings, Audio and Phone/Bluetooth settings
through hard-keys and soft-keys.
NOTE:Only one touchscreen area may be selected
at a time.
Press the "Settings" hard-key to access the Settings
screen, use the Page Up/Down soft-keys to scroll
through the following settings. Touch the desired set-
ting soft key to change the setting using the description
shown on the following pages for each setting (fig. 11) (fig. 12)
(fig. 11)
1 — Uconnect Touch™ 4.3 Settings Hard-Key(fig. 12) Uconnect Touch™ 4.3 Soft-Keys 25
KNOWING
YOURVEHICLESAFETY
STARTING ANDDRIVING
WARNING
LIGHTS AND
MESSAGES
IN AN
EMERGENCY
SERVICING AND
CARETECHNICAL
SPECIFICATIONSCONTENTS
Page 33 of 267

Display
Brightness
Press the Brightness soft-key to change this display.
When in this display you may select display brightness
with the headlights on and the headlights off. Adjust the
brightness with the + and – setting soft-keys or by
selecting any point on the scale in between the + and –
soft-keys followed by pressing the arrow back soft-key.
Mode
Press the Mode soft-key to change this display. When in
this display you may select one of the auto display
settings. To change Mode status press and release the
Day, Night or Auto soft-key followed by pressing the
arrow back soft-key.
Language
Press the Language soft-key to change this display.
When in this display you may select one of three
languages for all display nomenclature, including the
trip functions and the navigation system (if equipped).
Press the English, French (Français), Spanish (Español)
button to select the language preferred followed by
pressing the arrow back soft-key. Then, as you con-
tinue, the information will display in the selected lan-
guage.
Units
Press the Units soft-key to change this display. When in
this display you may select to have the EVIC, odometer,
and navigation system (if equipped) changed between
US and Metric units of measure. Press US or Metric
followed by pressing the arrow back soft-key. Then, asyou continue, the information will display in the se-
lected units of measure.
Voice Response
Press the Voice Response soft-key to change this dis-
play. When in this display you may change the Voice
Response Length settings. To change the Voice Re-
sponse Length press and release the Brief or Long
soft-key followed by pressing the arrow back soft-key.
Touch Screen Beep
Press the Touch Screen Beep soft-key to change this
display. When in this display you may turn on or shut off
the sound heard when a touch screen button (soft-key)
is pressed. To change the Touch Screen Beep setting
press and release the On or Off soft-key followed by
pressing the arrow back soft-key.
Fuel Saver Display
Press the Fuel Saver Display soft-key to change this
display. The “ECO” message is located in the instru-
ment cluster display, this message can be turned on or
off. To make your selection, press the Fuel Saver
Display soft-key, select On or Off followed by pressing
the arrow back soft-key. Clock
Set Time
Press the Set Time soft-key to change this display.
When in this display you may select the time display
settings. To make your selection, press the Set Time
soft-key, adjust the hours and minutes using the up and
down soft-keys, select AM or PM, select 12 hr or 24 hr
26
KNOWING YOUR
VEHICLE
SAFETY
STARTING AND
DRIVING
WARNING
LIGHTS AND
MESSAGES
IN AN
EMERGENCY
SERVICING AND
CARETECHNICAL
SPECIFICATIONSCONTENTS
Page 34 of 267

followed by pressing the arrow back soft-key when all
selections are complete.
Show Time Status
Press the Show Time Status soft-key to change this
display. When in this display you may turn on or shut off
the digital clock in the status bar. To change the Show
Time Status setting press and release the On or Off
soft-key followed by pressing the arrow back soft-key.
Sync Time
Press the Sync Time soft-key to change this display.
When in this display you may automatically have the
radio set the time. To change the Sync Time setting
press and release the On or Off soft-key followed by
pressing the arrow back soft-key.
Safety / Assistance
Park Assist
Press the Park Assist soft-key to change this display.
The Rear Park Assist system will scan for objects
behind the vehicle when the transmission shift lever is
in REVERSE and the vehicle speed is less than 11 mph
(18 km/h). The system can be enabled with Sound Only,
Sound and Display, or turned OFF. To change the Park
Assist status press and release the Off, Sound Only or
Sounds and Display button followed by pressing the
arrow back soft-key.
Hill Start Assist
Press the Hill Start Assist soft-key to change this
display. When this feature is selected, the Hill Start
Assist (HSA) system is active. Refer to “ElectronicBrake Control System” in “Starting And Driving” for
system function and operating information. To make
your selection, press the Hill Start Assist soft-key,
select On or Off followed by pressing the arrow back
soft-key.
Lights
Headlight Off Delay
Press the Headlight Off Delay soft-key to change this
display. When this feature is selected, the driver can
choose to have the headlights remain on for 0, 30, 60,
or 90 seconds when exiting the vehicle. To change the
Headlight Off Delay status press the 0, 30, 60 or 90
soft-key followed by pressing the arrow back soft-key.
Illuminated Approach
Press the Illuminated Approach soft-key to change this
display. When this feature is selected, the headlights
will activate and remain on for 0, 30, 60, or 90 seconds
when the doors are unlocked with the RKE transmit-
ter. To change the Illuminated Approach status press
the 0, 30, 60 or 90 soft-key followed by pressing the
arrow back soft-key.
Headlights with Wipers
Press the Headlights with Wipers soft-key to change
this display. When this feature is selected, and the
headlight switch is in the AUTO position, the head-
lights will turn on approximately 10 seconds after the
wipers are turned on. The headlights will also turn off
when the wipers are turned off if they were turned on
by this feature. To make your selection, press the
27
KNOWING
YOURVEHICLESAFETY
STARTING ANDDRIVING
WARNING
LIGHTS AND
MESSAGES
IN AN
EMERGENCY
SERVICING AND
CARETECHNICAL
SPECIFICATIONSCONTENTS
Page 35 of 267

Headlights with Wipers soft-key, select On or Off
followed by pressing the arrow back soft-key.
Auto High Beams
Press the Auto High Beams soft-key to change this
display. When this feature is selected, the high beam
headlights will deactivate automatically under certain
conditions. To make your selection, press the Auto
High Beams soft-key, select ON or OFF followed by
pressing the arrow back soft-key. Refer to “Lights/
SmartBeam™ — If Equipped” in “Knowing Your Ve-
hicle” for further information.
Daytime Running Lights
Press the Daytime Running Lights soft-key to change
this display. When this feature is selected, the head-
lights will turn on whenever the engine is running. To
make your selection, press the Daytime Running Lights
soft-key, select ON or OFF followed by pressing the
arrow back soft-key.
Flash Headlights with Lock
Press the Flash Headlights with Lock soft-key to change
this display. When this feature is selected, the front and
rear turn signals will flash when the doors are locked or
unlocked with the RKE transmitter. To make your
selection, press the Flash Headlights with Lock soft-
key, select On or Off followed by pressing the arrow
back soft-key.Doors & Locks
Auto Unlock on Exit
Press the Auto Unlock on Exit soft-key to change this
display. When this feature is selected, all doors will
unlock when the vehicle is stopped and the transmis-
sion is in the PARK or NEUTRAL position and the
driver's door is opened. To make your selection, press
the Auto Unlock on Exit soft-key, select On or Off
followed by pressing the arrow back soft-key.
Flash Lights with Lock
Press the Flash Lights with Lock soft-key to change this
display. When this feature is selected, the front and
rear turn signals will flash when the doors are locked or
unlocked with the RKE transmitter. To make your
selection, press the Flash Lights with Lock soft-key,
select On or Off followed by pressing the arrow back
soft-key.
Remote Door Unlock Order
Press the Remote Door Unlock Order soft-key to
change this display. When
Unlock Driver Door Only
On 1st Press is selected, only the driver's door will
unlock on the first press of the RKE transmitter UN-
LOCK button. When Driver Door 1st Press is se-
lected, you must press the RKE transmitter UNLOCK
button twice to unlock the passenger's doors. When
Unlock All Doors On 1st Press is selected, all of the
doors will unlock on the first press of the RKE trans-
mitter UNLOCK button.
28
KNOWING YOUR
VEHICLE
SAFETY
STARTING AND
DRIVING
WARNING
LIGHTS AND
MESSAGES
IN AN
EMERGENCY
SERVICING AND
CARETECHNICAL
SPECIFICATIONSCONTENTS
Page 36 of 267

NOTE:If the vehicle is equipped with Keyless Enter-
N-Go (Passive Entry) and the EVIC is programmed to
Unlock All Doors 1st Press, all doors will unlock no
matter which Passive Entry equipped door handle is
grasped. If Driver Door 1st Press is programmed, only
the driver’s door will unlock when the driver’s door is
grasped. With Passive Entry, if Driver Door 1st Press is
programmed touching the handle more than once will
only result in the driver’s door opening. If driver door
first is selected, once the driver door is opened, the
interior door lock/unlock switch can be used to unlock
all doors (or use RKE transmitter).
Passive Entry (Keyless Enter-N-Go)
Press the Passive Entry soft-key to change this display.
This feature allows you to lock and unlock the vehicle’s
door(s) without having to press the RKE transmitter
lock or unlock buttons. To make your selection, press
the Passive Entry soft-key, select ON or OFF followed
by pressing the arrow back soft-key. Refer to “Keyless
Enter-N-Go” in “Knowing Your Vehicle”.
Heated Seats
Auto Heated Seats
Press the Auto Heated Seats soft-key to change this
display. When this feature is selected the driver's
heated seat will automatically turn on when tempera-
tures are below 4.4° C. To make your selection, press
the Auto Heated Seats soft-key, select On or Off
followed by pressing the arrow back soft-key. Engine Off Options
Easy Exit Seats
Press the Easy Exit Seats soft-key to change this display.
This feature provides automatic driver seat positioning
to enhance driver mobility when entering and exiting
the vehicle. To make your selection, press the Easy Exit
Seats soft-key, select On or Off followed by pressing
the arrow back soft-key.
NOTE:
The seat will return to the memorized seat
location (if Recall Memory with Remote Key Unlock is
set to ON) when the RKE transmitter is used to unlock
the door.
Headlight Off Delay
Press the Headlight Off Delay soft-key to change this
display. When this feature is selected, the driver can
choose to have the headlights remain on for 0, 30, 60,
or 90 seconds when exiting the vehicle. To change the
Headlight Off Delay status press the 0, 30, 60 or 90
soft-key followed by pressing the arrow back soft-key.
Engine Off Power Delay
Press the Engine Off Power Delay soft-key to change
this display. When this feature is selected, the power
window switches, radio, Uconnect™ phone system (if
equipped), DVD video system (if equipped), power
sunroof (if equipped), and power outlets will remain
active for up to 10 minutes after the ignition is cycled to
OFF. Opening either front vehicle door will cancel this
feature. To change the Engine Off Power Delay status
29
KNOWING
YOURVEHICLESAFETY
STARTING ANDDRIVING
WARNING
LIGHTS AND
MESSAGES
IN AN
EMERGENCY
SERVICING AND
CARETECHNICAL
SPECIFICATIONSCONTENTS
Page 37 of 267

press the 0 seconds, 45 seconds, 5 minutes or 10 min-
utes soft-key followed by pressing the arrow back
soft-key.
Compass Settings
Variance
Press the Variance soft-key to change this display.
Compass Variance is the difference between Magnetic
North and Geographic North. To compensate for the
differences the variance should be set for the zone
where the vehicle is driven, per the zone map. Once
properly set, the compass will automatically compen-sate for the differences, and provide the most accurate
compass heading.
NOTE:
Keep magnetic materials away from the top
of the instrument panel, such as iPod's, Mobile Phones,
Laptops and Radar Detectors. This is where the com-
pass module is located, and it can cause interference
with the compass sensor, and it may give false readings.
(fig. 13)(fig. 13) Compass Variance Map
30
KNOWING
YOUR
VEHICLE
SAFETY
STARTING AND
DRIVING
WARNING
LIGHTS AND
MESSAGES
IN AN
EMERGENCY
SERVICING AND
CARETECHNICAL
SPECIFICATIONSCONTENTS