navigation system FIAT FREEMONT 2012 Owner handbook (in English)
[x] Cancel search | Manufacturer: FIAT, Model Year: 2012, Model line: FREEMONT, Model: FIAT FREEMONT 2012Pages: 332, PDF Size: 5.61 MB
Page 33 of 332
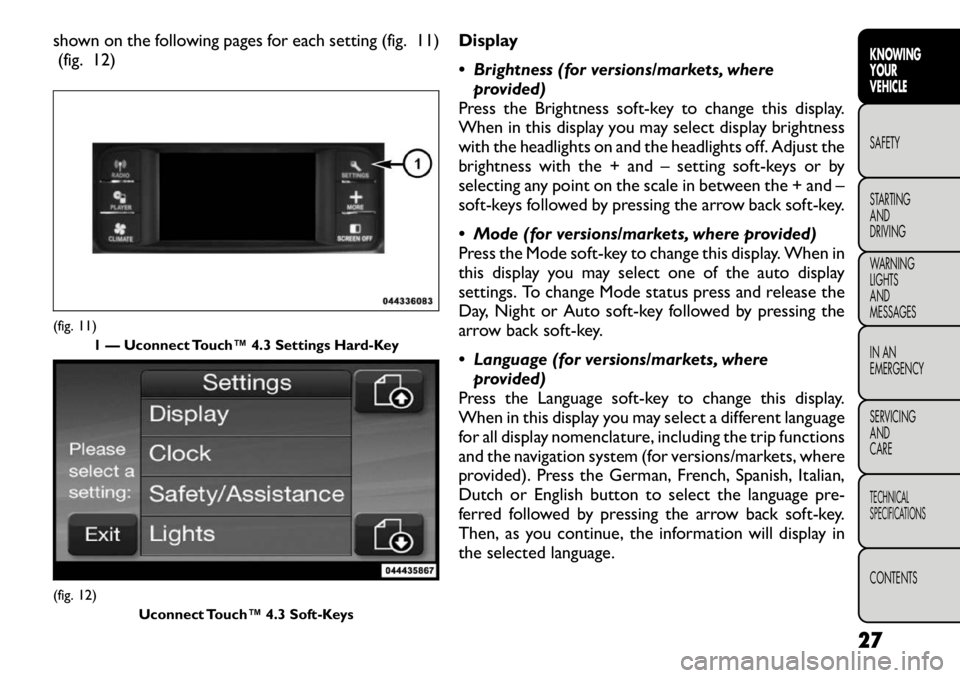
shown on the following pages for each setting (fig. 11)(fig. 12) Display
Brightness (for versions/markets, where
provided)
Press the Brightness soft-key to change this display.
When in this display you may select display brightness
with the headlights on and the headlights off. Adjust the
brightness with the + and – setting soft-keys or by
selecting any point on the scale in between the + and –
soft-keys followed by pressing the arrow back soft-key.
Mode (for versions/markets, where provided)
Press the Mode soft-key to change this display. When in
this display you may select one of the auto display
settings. To change Mode status press and release the
Day, Night or Auto soft-key followed by pressing the
arrow back soft-key.
Language (for versions/markets, where provided)
Press the Language soft-key to change this display.
When in this display you may select a different language
for all display nomenclature, including the trip functions
and the navigation system (for versions/markets, where
provided). Press the German, French, Spanish, Italian,
Dutch or English button to select the language pre-
ferred followed by pressing the arrow back soft-key.
Then, as you continue, the information will display in
the selected language.(fig. 11) 1 — Uconnect Touch™ 4.3 Settings Hard-Key(fig. 12)
Uconnect Touch™ 4.3 Soft-Keys
27
KNOWING
YOURVEHICLESAFETY
STARTING ANDDRIVING
WARNING LIGHTSAND
MESSAGES
IN AN
EMERGENCY
SERVICING AND
CARETECHNICAL
SPECIFICATIONSCONTENTS
Page 34 of 332
Units (for versions/markets, where provided)
Press the Units soft-key to change this display. When in
this display you may select to have the EVIC, odometer,
and navigation system (for versions/markets, where
provided) changed between US and Metric units of
measure. Press US or Metric followed by pressing the
arrow back soft-key. Then, as you continue, the infor-
mation will display in the selected units of measure.
Voice Response (for versions/markets, whereprovided)
Press the Voice Response soft-key to change this dis-
play. When in this display you may change the Voice
Response Length settings. To change the Voice Re-
sponse Length press and release the Brief or Long
soft-key followed by pressing the arrow back soft-key.
Touch Screen Beep (for versions/markets, where provided)
Press the Touch Screen Beep soft-key to change this
display. When in this display you may turn on or shut off
the sound heard when a touch screen button (soft-key)
is pressed. To change the Touch Screen Beep setting
press and release the On or Off soft-key followed by
pressing the arrow back soft-key. Clock
Set Time (for versions/markets, where provided)
Press the Set Time soft-key to change this display.
When in this display you may select the time display
settings. To make your selection, press the Set Time soft-key, adjust the hours and minutes using the up and
down soft-keys, select AM or PM, select 12 hr or 24 hr
followed by pressing the arrow back soft-key when all
selections are complete.
Show Time Status (for versions/markets, where
provided)
Press the Show Time Status soft-key to change this
display. When in this display you may turn on or shut off
the digital clock in the status bar. To change the Show
Time Status setting press and release the On or Off
soft-key followed by pressing the arrow back soft-key.
Sync Time (for versions/markets, where provided)
Press the Sync Time soft-key to change this display.
When in this display you may automatically have the
radio set the time. To change the Sync Time setting
press and release the On or Off soft-key followed by
pressing the arrow back soft-key.
Safety / Assistance
Park Assist (for versions/markets, where provided)
Press the Park Assist soft-key to change this display.
The Rear Park Assist system will scan for objects
behind the vehicle when the transmission shift lever is
in REVERSE and the vehicle speed is less than 18 km/h.
The system can be enabled with Sound Only, Sound
and Display, or turned OFF. To change the Park Assist
status press and release the Off, Sound Only or Sounds
28
KNOWING YOUR
VEHICLE
SAFETY
STARTING AND
DRIVING
WARNING LIGHTSAND
MESSAGES
IN AN
EMERGENCY
SERVICING AND
CARETECHNICAL
SPECIFICATIONSCONTENTS
Page 40 of 332
release the Day, Night or Auto soft-key followed by
pressing the arrow back soft-key.
Display Brightness with Headlights ON (forversions/markets, where provided)
When in this display you may select display brightness
with the headlights on and the headlights off. Adjust the
brightness with the + and – setting soft-keys or by
selecting any point on the scale in between the + and –
soft-keys followed by pressing the arrow back soft-key.
Display Brightness with Headlights OFF (for versions/markets, where provided)
When in this display you may select display brightness
with the headlights on and the headlights off. Adjust the
brightness with the + and – setting soft-keys or by selecting any point on the scale in between the + and –
soft-keys followed by pressing the arrow back soft-key.
Set Language (for versions/markets, where
provided)
When in this display you may select a different language
for all display nomenclature, including the trip functions
and the navigation system (for versions/markets, where
provided). Press the German, French, Spanish, Italian,
Dutch or English button to select the language pre-
ferred followed by pressing the arrow back soft-key.
Then, as you continue, the information will display in
the selected language.
Units (for versions/markets, where provided)
When in this display you may select to have the EVIC,
odometer, and navigation system (for versions/
markets, where provided) changed between US and
Metric units of measure. Press US or Metric followed
by pressing the arrow back soft-key. Then, as you
continue, the information will display in the selected
units of measure.
Voice Response Length (for versions/markets, where provided)
When in this display you may change the Voice Re-
sponse Length settings. To change the Voice Response
Length press and release the Brief or Detailed soft-key
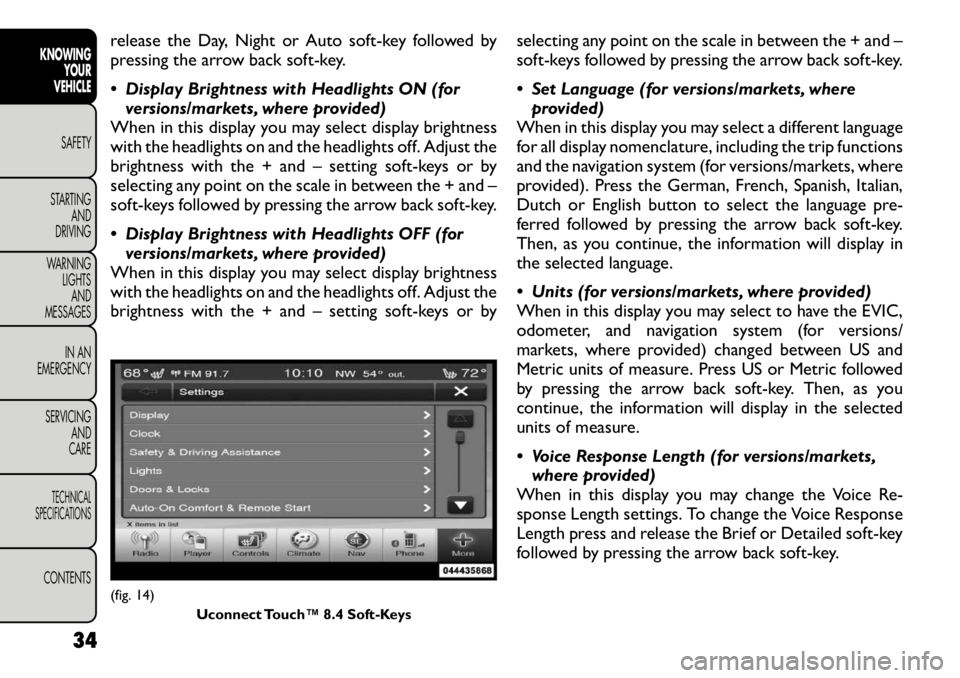
followed by pressing the arrow back soft-key.(fig. 14)
Uconnect Touch™ 8.4 Soft-Keys
34
KNOWING YOUR
VEHICLE
SAFETY
STARTING AND
DRIVING
WARNING LIGHTSAND
MESSAGES
IN AN
EMERGENCY
SERVICING AND
CARETECHNICAL
SPECIFICATIONSCONTENTS
Page 41 of 332
Touchscreen Beep (for versions/markets, whereprovided)
When in this display you may turn on or shut off the
sound heard when a touch screen button (soft-key) is
pressed. To change the Touch Screen Beep setting
press and release the On or Off soft-key followed by
pressing the arrow back soft-key.
Navigation Turn-By-Turn in Cluster (for
versions/markets, where provided)
When this feature is selected, the turn-by-turn direc-
tions will appear in the display as the vehicle ap-
proaches a designated turn within a programmed
route. To make your selection, press the Navigation
Turn-By-Turn in Cluster soft-key, select On or Off
followed by pressing the arrow back soft-key. Clock
Sync Time with GPS (for versions/markets, where provided)
When in this display you may automatically have the
radio set the time. To change the Sync Time setting
press and release the On or Off soft-key followed by
pressing the arrow back soft-key.
Set Time Hours (for versions/markets, where provided)
When in this display you may select the time display
settings. To make your selection, press the Set Time
soft-key, adjust the hours using the up and down soft-keys, followed by pressing the arrow back soft-key
when all selections are complete.
Set Time Minutes (for versions/markets, where
provided)
When in this display you may select the time display
settings. To make your selection, press the Set Time
soft-key, adjust the minutes using the up and down
soft-keys, followed by pressing the arrow back soft-key
when all selections are complete.
Time Format (for versions/markets, where provided)
When in this display you may select the time display
settings. To make your selection, press the Set Time
soft-key, select 12 hr or 24 hr followed by pressing the
arrow back soft-key when all selections are complete.
Show Time in Status Bar (for versions/markets, where provided)
When in this display you may turn on or shut off the
digital clock in the status bar. To change the Show Time
Status setting press and release the On or Off soft-key
followed by pressing the arrow back soft-key.
Safety / Assistance
Park Assist (for versions/markets, where provided)
The Rear Park Assist system will scan for objects
behind the vehicle when the transmission shift lever is
in REVERSE and the vehicle speed is less than 18 km/h.
The system can be enabled with Sound Only, Sound
35
KNOWING
YOURVEHICLESAFETY
STARTING ANDDRIVING
WARNING LIGHTSAND
MESSAGES
IN AN
EMERGENCY
SERVICING AND
CARETECHNICAL
SPECIFICATIONSCONTENTS
Page 46 of 332
Equalizer (for versions/markets, where provided)
When in this display you may adjust the Bass, Mid and
Treble settings. Adjust the settings with the + and –
setting soft-keys or by selecting any point on the scale
in between the + and – soft-keys followed by pressing
the arrow back soft-key.
NOTE:Bass/mid/treble allow the you to simply slide
your finger up/down to change the setting as well as
press directly on the desired setting.
Speed Adjusted Volume (for versions/markets, where provided)
Decreases volume relative to vehicle speed. To change
the Speed Adjusted Volume press the Off, 1, 2 or 3
soft-key followed by pressing the arrow back soft-key.
Music Info Cleanup (for versions/markets, where provided)
This feature helps organize music files for optimized
music navigation. To make your selection, press the
Music Info Cleanup soft-key, select On or Off followed
by pressing the arrow back soft-key.
Phone/Bluetooth
Paired Devices (for versions/markets, where provided)
This feature shows which phones are paired to the
Phone/Bluetooth system. For further information, re-
fer to the Uconnect Touch™ Supplement. SEATS
Seats are a part of the Occupant Restraint System of
the vehicle.
WARNING!
It is dangerous to ride in a cargo area,
inside or outside of a vehicle. In a colli-
sion, people riding in these areas are more likely
to be seriously injured or killed.
Do not allow people to ride in any area of your
vehicle that is not equipped with seats and seat
belts. In a collision, people riding in these areas
are more likely to be seriously injured or killed.
Be sure everyone in your vehicle is in a seat and
using a seat belt properly.
DRIVER'S POWER SEAT (for versions/
markets, where provided)
The power seat switch is on the outboard side of the
seat near the floor. Use this switch to move the seat up,
down, forward, rearward or to tilt the seat. (fig. 16)
Adjusting The Seat Forward Or Rearward
The seat can be adjusted both forward and rearward.
Push the seat switch forward or rearward; the seat will
move in the direction of the switch. Release the switch
when the desired position is reached.
40
KNOWING YOUR
VEHICLE
SAFETY
STARTING AND
DRIVING
WARNING LIGHTSAND
MESSAGES
IN AN
EMERGENCY
SERVICING AND
CARETECHNICAL
SPECIFICATIONSCONTENTS
Page 140 of 332
(Continued)
Before using the ParkSense
®Rear Park Assist
system, it is strongly recommended that the ball
mount and hitch ball assembly is disconnected
from the vehicle when the vehicle is not used for
towing. Failure to do so can result in injury or
damage to vehicles or obstacles because the
hitch ball will be much closer to the obstacle than
the rear fascia when the warning display turns on
the single flashing arc and sounds the continuous
tone. Also, the sensors could detect the ball
mount and hitch ball assembly, depending on its
size and shape, giving a false indication that an
obstacle is behind the vehicle. PARKVIEW® REAR BACK UP
CAMERA (for versions/markets,
where provided)
Your vehicle may be equipped with the ParkView
®
Rear Back Up Camera that allows you to see an
on-screen image of the rear surroundings of your
vehicle whenever the shift lever is put into REVERSE.
The image will be displayed on the radio touchscreen
display along with a caution note to “check entire
surroundings” across the top of the screen. After five
seconds this note will disappear. The ParkView
®cam-
era is located on the rear of the vehicle above the rear
License plate.
When the vehicle is shifted out of REVERSE, the rear
camera mode is exited and the navigation or audio
screen appears again.
When displayed, static grid lines will illustrate the
width of the vehicle while a dashed center-line will
indicate the center of the vehicle to assist with parking
or aligning to a hitch/receiver. The static grid lines will
show separate zones that will help indicate the dis-
tance to the rear of the vehicle. The following table
shows the approximate distances for each zone:
Zone Distance to the rear of the vehicle
Red 0 - 30 cm
Yellow 30 cm - 1 m
Green 1 m or greater
134
KNOWING YOUR
VEHICLE
SAFETY
STARTING AND
DRIVING
WARNING LIGHTSAND
MESSAGES
IN AN
EMERGENCY
SERVICING AND
CARETECHNICAL
SPECIFICATIONSCONTENTS
Page 142 of 332
SOUND SYSTEMS
Refer to your Uconnect Touch™ User Manual.NAVIGATION SYSTEM (for
versions/markets, where
provided)
Refer to your Uconnect Touch™ User Manual.
136
KNOWING YOUR
VEHICLE
SAFETY
STARTING AND
DRIVING
WARNING LIGHTSAND
MESSAGES
IN AN
EMERGENCY
SERVICING AND
CARETECHNICAL
SPECIFICATIONSCONTENTS
Page 157 of 332
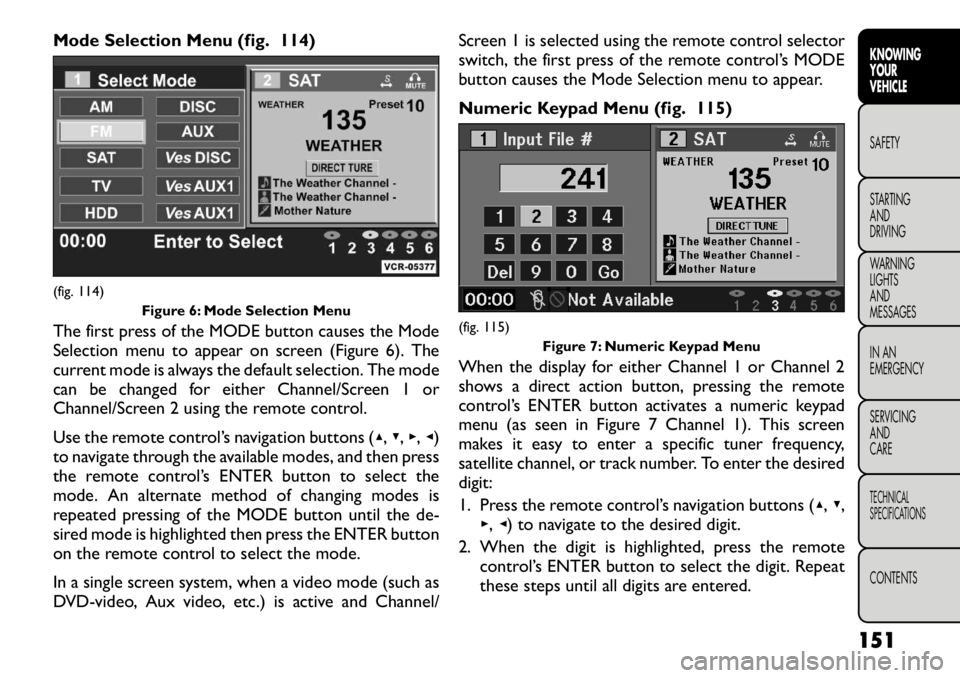
Mode Selection Menu (fig. 114)
The first press of the MODE button causes the Mode
Selection menu to appear on screen (Figure 6). The
current mode is always the default selection. The mode
can be changed for either Channel/Screen 1 or
Channel/Screen 2 using the remote control.
Use the remote control’s navigation buttons (▴,▾ ,▸ ,◂ )
to navigate through the available modes, and then press
the remote control’s ENTER button to select the
mode. An alternate method of changing modes is
repeated pressing of the MODE button until the de-
sired mode is highlighted then press the ENTER button
on the remote control to select the mode.
In a single screen system, when a video mode (such as
DVD-video, Aux video, etc.) is active and Channel/ Screen 1 is selected using the remote control selector
switch, the first press of the remote control’s MODE
button causes the Mode Selection menu to appear.
Numeric Keypad Menu (fig. 115)
When the display for either Channel 1 or Channel 2
shows a direct action button, pressing the remote
control’s ENTER button activates a numeric keypad
menu (as seen in Figure 7 Channel 1). This screen
makes it easy to enter a specific tuner frequency,
satellite channel, or track number. To enter the desireddigit:
1. Press the remote control’s navigation buttons (
▴,▾ ,
▸ ,◂ ) to navigate to the desired digit.
2. When the digit is highlighted, press the remote control’s ENTER button to select the digit. Repeat
these steps until all digits are entered.(fig. 114)
Figure 6: Mode Selection Menu
(fig. 115)Figure 7: Numeric Keypad Menu
151
KNOWING
YOURVEHICLESAFETY
STARTING ANDDRIVING
WARNING LIGHTSAND
MESSAGES
IN AN
EMERGENCY
SERVICING AND
CARETECHNICAL
SPECIFICATIONSCONTENTS
Page 320 of 332
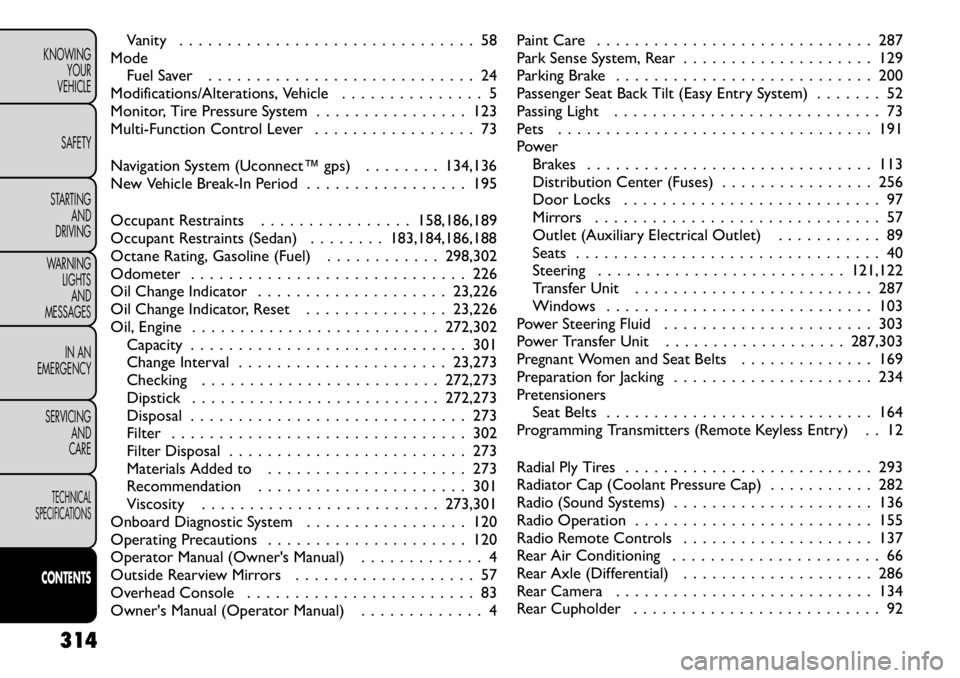
Vanity . . . . . . . . . . . . . . . . . . . . . . . . . . . . . . . 58
Mode Fuel Saver . . . . . . . . . . . . . . . . . . . . . . . . . . . . 24
Modifications/Alterations, Vehicle . . . . . . . . . . . . . . . 5
Monitor, Tire Pressure System . . . . . . . . . . . . . . . . 123
Multi-Function Control Lever . . . . . . . . . . . . . . . . . 73
Navigation System (Uconnect™ gps) . . . . . . . . 134,136
New Vehicle Break-In Period . . . . . . . . . . . . . . . . . 195
Occupant Restraints . . . . . . . . . . . . . . . . 158,186,189
Occupant Restraints (Sedan) . . . . . . . . 183,184,186,188
Octane Rating, Gasoline (Fuel) . . . . . . . . . . . . 298,302
Odometer . . . . . . . . . . . . . . . . . . . . . . . . . . . . . 226
Oil Change Indicator . . . . . . . . . . . . . . . . . . . . 23,226
Oil Change Indicator, Reset . . . . . . . . . . . . . . . 23,226
Oil, Engine . . . . . . . . . . . . . . . . . . . . . . . . . . 272,302 Capacity . . . . . . . . . . . . . . . . . . . . . . . . . . . . . 301
Change Interval . . . . . . . . . . . . . . . . . . . . . . 23,273
Checking . . . . . . . . . . . . . . . . . . . . . . . . . 272,273
Dipstick . . . . . . . . . . . . . . . . . . . . . . . . . . 272,273
Disposal . . . . . . . . . . . . . . . . . . . . . . . . . . . . . 273
Filter . . . . . . . . . . . . . . . . . . . . . . . . . . . . . . . 302
Filter Disposal . . . . . . . . . . . . . . . . . . . . . . . . . 273
Materials Added to . . . . . . . . . . . . . . . . . . . . . 273
Recommendation . . . . . . . . . . . . . . . . . . . . . . 301
Viscosity . . . . . . . . . . . . . . . . . . . . . . . . . 273,301
Onboard Diagnostic System . . . . . . . . . . . . . . . . . 120
Operating Precautions . . . . . . . . . . . . . . . . . . . . . 120
Operator Manual (Owner's Manual) . . . . . . . . . . . . . 4
Outside Rearview Mirrors . . . . . . . . . . . . . . . . . . . 57
Overhead Console . . . . . . . . . . . . . . . . . . . . . . . . 83
Owner's Manual (Operator Manual) . . . . . . . . . . . . . 4 Paint Care . . . . . . . . . . . . . . . . . . . . . . . . . . . . . 287
Park Sense System, Rear . . . . . . . . . . . . . . . . . . . . 129
Parking Brake . . . . . . . . . . . . . . . . . . . . . . . . . . . 200
Passenger Seat Back Tilt (Easy Entry System) . . . . . . . 52
Passing Light . . . . . . . . . . . . . . . . . . . . . . . . . . . . 73
Pets . . . . . . . . . . . . . . . . . . . . . . . . . . . . . . . . . 191
Power
Brakes . . . . . . . . . . . . . . . . . . . . . . . . . . . . . . 113
Distribution Center (Fuses) . . . . . . . . . . . . . . . . 256
Door Locks . . . . . . . . . . . . . . . . . . . . . . . . . . . 97
Mirrors . . . . . . . . . . . . . . . . . . . . . . . . . . . . . . 57
Outlet (Auxiliary Electrical Outlet) . . . . . . . . . . . 89
Seats . . . . . . . . . . . . . . . . . . . . . . . . . . . . . . . . 40
Steering . . . . . . . . . . . . . . . . . . . . . . . . . . 121,122
Transfer Unit . . . . . . . . . . . . . . . . . . . . . . . . . 287
Windows . . . . . . . . . . . . . . . . . . . . . . . . . . . . 103
Power Steering Fluid . . . . . . . . . . . . . . . . . . . . . . 303
Power Transfer Unit . . . . . . . . . . . . . . . . . . . 287,303
Pregnant Women and Seat Belts . . . . . . . . . . . . . . 169
Preparation for Jacking . . . . . . . . . . . . . . . . . . . . . 234
Pretensioners Seat Belts . . . . . . . . . . . . . . . . . . . . . . . . . . . . 164
Programming Transmitters (Remote Keyless Entry) . . 12
Radial Ply Tires . . . . . . . . . . . . . . . . . . . . . . . . . . 293
Radiator Cap (Coolant Pressure Cap) . . . . . . . . . . . 282
Radio (Sound Systems) . . . . . . . . . . . . . . . . . . . . . 136
Radio Operation . . . . . . . . . . . . . . . . . . . . . . . . . 155
Radio Remote Controls . . . . . . . . . . . . . . . . . . . . 137
Rear Air Conditioning . . . . . . . . . . . . . . . . . . . . . . 66
Rear Axle (Differential) . . . . . . . . . . . . . . . . . . . . 286
Rear Camera . . . . . . . . . . . . . . . . . . . . . . . . . . . 134
Rear Cupholder . . . . . . . . . . . . . . . . . . . . . . . . . . 92
314
KNOWING YOUR
VEHICLE
SAFETY
STARTING AND
DRIVING
WARNING LIGHTSAND
MESSAGES
IN AN
EMERGENCY
SERVICING AND
CARETECHNICAL
SPECIFICATIONSCONTENTS
Page 322 of 332
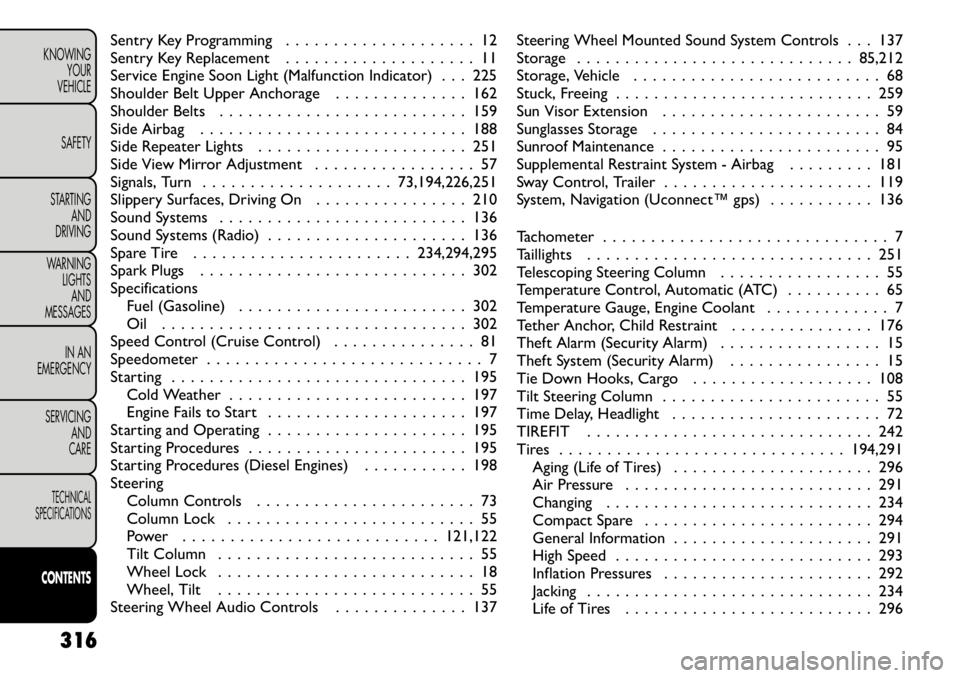
Sentry Key Programming . . . . . . . . . . . . . . . . . . . . 12
Sentry Key Replacement . . . . . . . . . . . . . . . . . . . . 11
Service Engine Soon Light (Malfunction Indicator) . . . 225
Shoulder Belt Upper Anchorage . . . . . . . . . . . . . . 162
Shoulder Belts . . . . . . . . . . . . . . . . . . . . . . . . . . 159
Side Airbag . . . . . . . . . . . . . . . . . . . . . . . . . . . . 188
Side Repeater Lights . . . . . . . . . . . . . . . . . . . . . . 251
Side View Mirror Adjustment . . . . . . . . . . . . . . . . . 57
Signals, Turn . . . . . . . . . . . . . . . . . . . . 73,194,226,251
Slippery Surfaces, Driving On . . . . . . . . . . . . . . . . 210
Sound Systems . . . . . . . . . . . . . . . . . . . . . . . . . . 136
Sound Systems (Radio) . . . . . . . . . . . . . . . . . . . . . 136
Spare Tire . . . . . . . . . . . . . . . . . . . . . . . 234,294,295
Spark Plugs . . . . . . . . . . . . . . . . . . . . . . . . . . . . 302
SpecificationsFuel (Gasoline) . . . . . . . . . . . . . . . . . . . . . . . . 302
Oil . . . . . . . . . . . . . . . . . . . . . . . . . . . . . . . . 302
Speed Control (Cruise Control) . . . . . . . . . . . . . . . 81
Speedometer . . . . . . . . . . . . . . . . . . . . . . . . . . . . . 7
Starting . . . . . . . . . . . . . . . . . . . . . . . . . . . . . . . 195 Cold Weather . . . . . . . . . . . . . . . . . . . . . . . . . 197
Engine Fails to Start . . . . . . . . . . . . . . . . . . . . . 197
Starting and Operating . . . . . . . . . . . . . . . . . . . . . 195
Starting Procedures . . . . . . . . . . . . . . . . . . . . . . . 195
Starting Procedures (Diesel Engines) . . . . . . . . . . . 198
Steering Column Controls . . . . . . . . . . . . . . . . . . . . . . . 73
Column Lock . . . . . . . . . . . . . . . . . . . . . . . . . . 55
Power . . . . . . . . . . . . . . . . . . . . . . . . . . . 121,122
Tilt Column . . . . . . . . . . . . . . . . . . . . . . . . . . . 55
Wheel Lock . . . . . . . . . . . . . . . . . . . . . . . . . . . 18
Wheel, Tilt . . . . . . . . . . . . . . . . . . . . . . . . . . . 55
Steering Wheel Audio Controls . . . . . . . . . . . . . . 137 Steering Wheel Mounted Sound System Controls . . . 137
Storage . . . . . . . . . . . . . . . . . . . . . . . . . . . . . 85,212
Storage, Vehicle . . . . . . . . . . . . . . . . . . . . . . . . . . 68
Stuck, Freeing . . . . . . . . . . . . . . . . . . . . . . . . . . . 259
Sun Visor Extension . . . . . . . . . . . . . . . . . . . . . . . 59
Sunglasses Storage . . . . . . . . . . . . . . . . . . . . . . . . 84
Sunroof Maintenance . . . . . . . . . . . . . . . . . . . . . . . 95
Supplemental Restraint System - Airbag . . . . . . . . . 181
Sway Control, Trailer . . . . . . . . . . . . . . . . . . . . . . 119
System, Navigation (Uconnect™ gps) . . . . . . . . . . . 136
Tachometer . . . . . . . . . . . . . . . . . . . . . . . . . . . . . . 7
Taillights . . . . . . . . . . . . . . . . . . . . . . . . . . . . . . 251
Telescoping Steering Column . . . . . . . . . . . . . . . . . 55
Temperature Control, Automatic (ATC) . . . . . . . . . . 65
Temperature Gauge, Engine Coolant . . . . . . . . . . . . . 7
Tether Anchor, Child Restraint . . . . . . . . . . . . . . . 176
Theft Alarm (Security Alarm) . . . . . . . . . . . . . . . . . 15
Theft System (Security Alarm) . . . . . . . . . . . . . . . . 15
Tie Down Hooks, Cargo . . . . . . . . . . . . . . . . . . . 108
Tilt Steering Column . . . . . . . . . . . . . . . . . . . . . . . 55
Time Delay, Headlight . . . . . . . . . . . . . . . . . . . . . . 72
TIREFIT . . . . . . . . . . . . . . . . . . . . . . . . . . . . . . 242
Tires . . . . . . . . . . . . . . . . . . . . . . . . . . . . . . 194,291
Aging (Life of Tires) . . . . . . . . . . . . . . . . . . . . . 296
Air Pressure . . . . . . . . . . . . . . . . . . . . . . . . . . 291
Changing . . . . . . . . . . . . . . . . . . . . . . . . . . . . 234
Compact Spare . . . . . . . . . . . . . . . . . . . . . . . . 294
General Information . . . . . . . . . . . . . . . . . . . . . 291
High Speed . . . . . . . . . . . . . . . . . . . . . . . . . . . 293
Inflation Pressures . . . . . . . . . . . . . . . . . . . . . . 292
Jacking . . . . . . . . . . . . . . . . . . . . . . . . . . . . . . 234
Life of Tires . . . . . . . . . . . . . . . . . . . . . . . . . . 296
316
KNOWING YOUR
VEHICLE
SAFETY
STARTING AND
DRIVING
WARNING LIGHTSAND
MESSAGES
IN AN
EMERGENCY
SERVICING AND
CARETECHNICAL
SPECIFICATIONSCONTENTS