stop start FIAT FREEMONT 2014 1.G Repair Manual
[x] Cancel search | Manufacturer: FIAT, Model Year: 2014, Model line: FREEMONT, Model: FIAT FREEMONT 2014 1.GPages: 388, PDF Size: 4.13 MB
Page 297 of 388
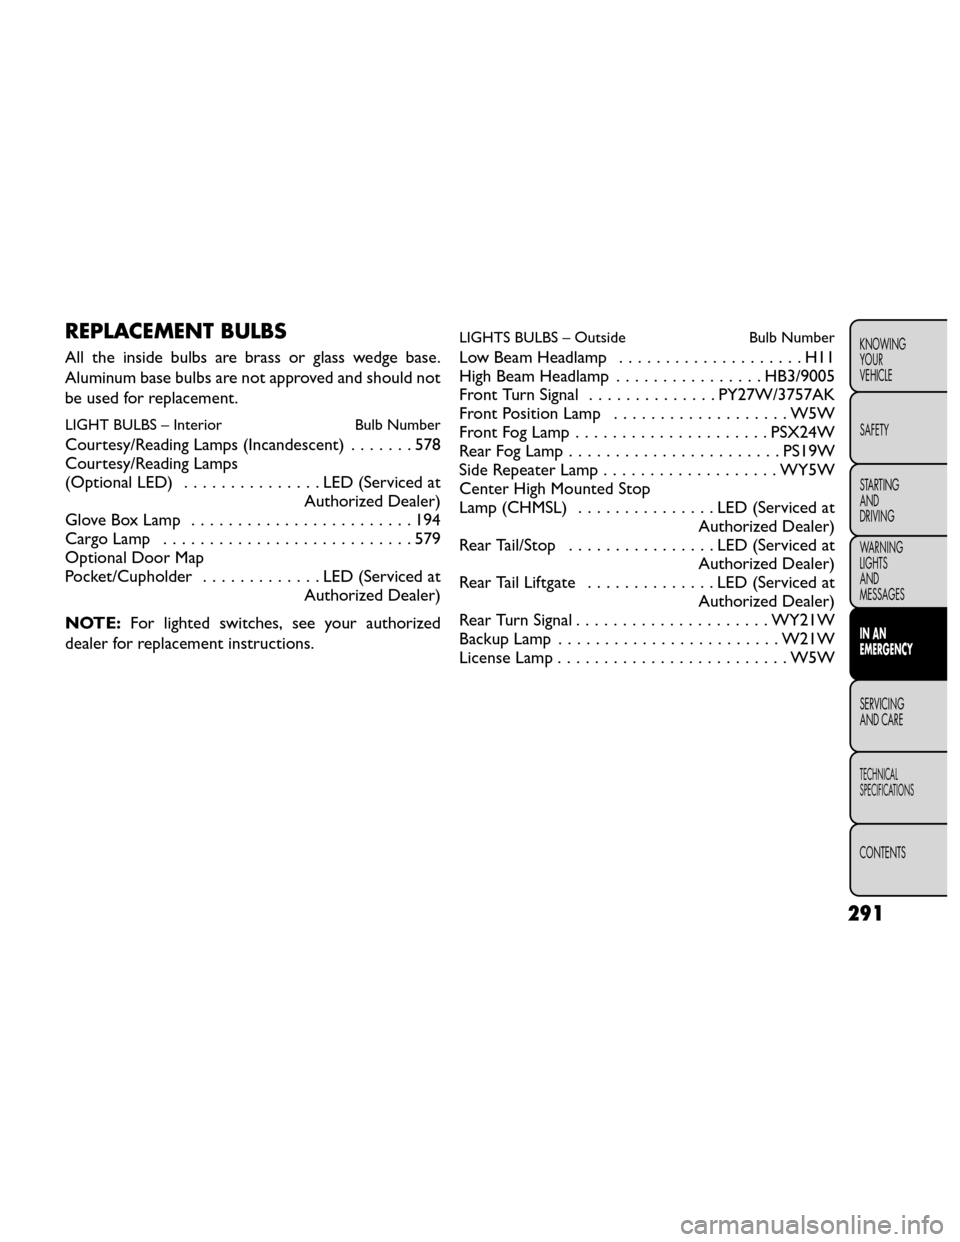
REPLACEMENT BULBS
All the inside bulbs are brass or glass wedge base.
Aluminum base bulbs are not approved and should not
be used for replacement.
LIGHT BULBS – InteriorBulb Number
Courtesy/Reading Lamps (Incandescent).......578
Courtesy/Reading Lamps
(Optional LED) ...............LED (Serviced at
Authorized Dealer)
GloveBoxLamp ........................194
CargoLamp ...........................579
Optional Door Map
Pocket/Cupholder .............LED (Serviced at
Authorized Dealer)
NOTE: For lighted switches, see your authorized
dealer for replacement instructions.
LIGHTS BULBS – Outside Bulb Number
LowBeamHeadlamp ....................H11
HighBeamHeadlamp ................HB 3/9005
Front Turn Signal ..............PY27W /3757AK
Front Position Lamp ...................W5W
FrontFogLamp.....................PSX24W
RearFogLamp.......................P S19W
Side Repeater Lamp ...................WY5W
Center High Mounted Stop
Lamp(CHMSL) ...............LED (Serviced at
Authorized Dealer)
Rear Tail/Stop ................LED (Serviced at
Authorized Dealer)
RearTailLiftgate ..............LED (Serviced at
Authorized Dealer)
Rear Turn Signal .....................WY21W
Backup Lamp ........................W21W
License Lamp .........................W5W
291
KNOWING
YOUR
VEHICLE
SAFETY
STARTING
AND
DRIVING
WARNING
LIGHTS
AND
MESSAGES
IN AN
EMERGENCY
SERVICING
AND CARE
TECHNICAL
SPECIFICATIONS
CONTENTS
Page 301 of 388
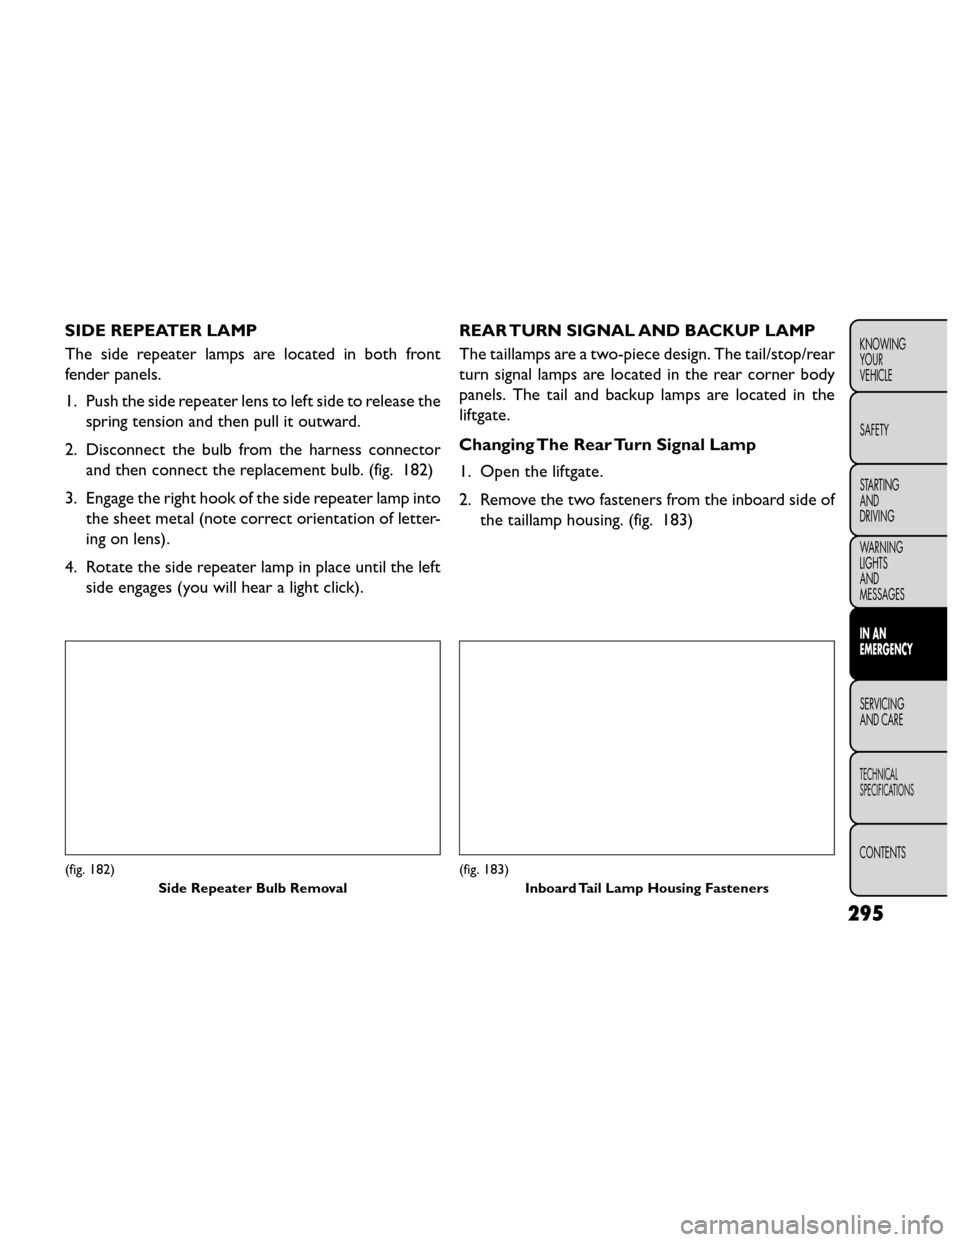
SIDE REPEATER LAMP
The side repeater lamps are located in both front
fender panels.
1. Push the side repeater lens to left side to release thespring tension and then pull it outward.
2. Disconnect the bulb from the harness connector and then connect the replacement bulb. (fig. 182)
3. Engage the right hook of the side repeater lamp into the sheet metal (note correct orientation of letter-
ing on lens).
4. Rotate the side repeater lamp in place until the left side engages (you will hear a light click). REAR TURN SIGNAL AND BACKUP LAMP
The taillamps are a two-piece design. The tail/stop/rear
turn signal lamps are located in the rear corner body
panels. The tail and backup lamps are located in the
liftgate.
Changing The Rear Turn Signal Lamp
1. Open the liftgate.
2. Remove the two fasteners from the inboard side of
the taillamp housing. (fig. 183)
(fig. 182)
Side Repeater Bulb Removal(fig. 183)Inboard Tail Lamp Housing Fasteners
295
KNOWING
YOUR
VEHICLE
SAFETY
STARTING
AND
DRIVING
WARNING
LIGHTS
AND
MESSAGES
IN AN
EMERGENCY
SERVICING
AND CARE
TECHNICAL
SPECIFICATIONS
CONTENTS
Page 311 of 388
•Racing the engine or spinning the
wheels may lead to transmission over-
heating and failure. Allow the engine to
idle with the shift lever in NEUTRAL for at least
one minute after every five rocking-motion
cycles.This will minimize overheating and reduce
the risk of transmission failure during prolonged
efforts to free a stuck vehicle.
• When “rocking” a stuck vehicle by shifting be-
tween DRIVE/2nd gear and REVERSE, do not spin
the wheels faster than 24 km/h, or drivetrain
damage may result .
• Revving the engine or spinning the wheels too
fast may lead to transmission overheating and
failure. It can also damage the tires. Do not spin
the wheels above 48 km/h while in gear (no trans-
mission shifting occurring).WARNING!
Fast spinning tires can be dangerous.
Forces gen
erated by excessive wheel
speeds may cause damage, or even failure, of the
axle and tires. A tire could explode and injure
someone. Do not spin your vehicle's wheels faster
than 48 km/h or for longer than 30 seconds
continuously without stopping when you are
stuck and do not let anyone near a spinning
wheel, no matter what the speed.
305
KNOWING
YOUR
VEHICLE
SAFETY
STARTING
AND
DRIVING
WARNING
LIGHTS
AND
MESSAGES
IN AN
EMERGENCY
SERVICING
AND CARE
TECHNICAL
SPECIFICATIONS
CONTENTS
Page 330 of 388
ENGINE OIL
Checking Oil Level – Gasoline Engine
To assure proper engine lubrication, the engine oil
must be maintained at the correct level. Check the oil
level at regular intervals, such as every fuel stop.
The best time to check the engine oil level is about five
minutes after a fully warmed engine is shut off. Do not
check oil level before starting the engine after it has sat
overnight. Checking engine oil level when the engine is
cold will give you an incorrect reading.
Checking the oil while the vehicle is on level ground
and only when the engine is hot, will improve the
accuracy of the oil level readings. Maintain the oil level
between the range markings on the dipstick. Either the
range markings consist of a crosshatch zone marked
SAFE or a crosshatch zone marked with MIN at the low
end of the range and MAX at the high end of the range.
Adding 1 Quart or 1 Liter of oil when the reading is at
the low end of the range marking will raise the oil level
to the high end of the range marking.Do not overfill the engine. Overfilling the
engine will cause oil aeration, which can
lead to loss of oil pressure and an in-
crease in oil temperature.This could damage your
engine.Also, be sure the oil fill cap is replaced and
tightened after adding oil.
Checking Oil Level – Diesel Engine
To assure proper engine lubrication, the engine oil
must be maintained at the correct level. Check the oil
level at regular intervals, such as every fuel stop.
The best time to check the engine oil level is about five
minutes after a fully warmed engine is shut off or
before starting the engine after it has sat overnight.
Checking the oil while the vehicle is on level ground will
improve the accuracy of the oil level readings. Maintain
the oil level between the MIN and MAX markings on
the dipstick. Adding 1 Quart or 1 Liter of oil when the
reading is at the MIN mark will result in a MAX reading
on these engines.
324
KNOWING YOUR
VEHICLE
SAFETY
STARTING AND
DRIVING
WARNING LIGHTSAND
MESSAGES
IN AN
EMERGENCY
SERVICING AND CARE
TECHNICAL
SPECIFICATIONS
CONTENTS
Page 339 of 388
WARNING!
A hot exhaust system can start a fire if
you par k
over materials that can burn.
Such materials might be grass or leaves coming
into contact with your exhaust system. Do not
park or operate your vehicle in areas where your
exhaust system can contact anything that can
burn.
In unusual situations involving grossly malfunctioning
engine operation, a scorching odor may indicate severe
and abnormal catalyst overheating. If this occurs, safely
bring the vehicle to a complete stop, shut the engine
OFF, and allow the vehicle to cool. Thereafter, obtain
service, including a tune-up to manufacturer’s specifi-
cations immediately.
To minimize the possibility of catalyst damage:
• Do not shut OFF the engine or interrupt the ignition when the transmission is in gear and the vehicle is in
motion.
• Do not try to start the engine by pushing or towing the vehicle.
• Do not idle the engine with any ignition coil connec- tors disconnected for prolonged periods. COOLING SYSTEMWARNING!
•
When working near the radiator cool-
ing fan, disconnect the fan motor lead or
turn the ignition switch to the LOCK position.
The fan is temperature controlled and can start at
any time the ignition switch is in the ON position.
• You or others can be badly burned by hot
engine coolant (antifreeze) or steam from your
radiator. If you see or hear steam coming from
under the hood, do not open the hood until the
radiator has had time to cool. Never tr y to open a
cooling system pressure cap when the radiator is
hot .
Car maintenance should be done at a
FIAT Dealership. For routine and minor
maintenance operations you wish to
carry out yourself, we do recommend you have
the proper equipment , genuine FIAT spare parts
and the necessary fluids; do not however carry out
these operations if you have no experience.
333
KNOWING
YOUR
VEHICLE
SAFETY
STARTING
AND
DRIVING
WARNING
LIGHTS
AND
MESSAGES
IN AN
EMERGENCY
SERVICING
AND CARE
TECHNICAL
SPECIFICATIONS
CONTENTS
Page 343 of 388
Points To Remember
NOTE:When the vehicle is stopped after a few
kilometers of operation, you may observe vapor com-
ing from the front of the engine compartment. This is
normally a result of moisture from rain, snow, or high
humidity accumulating on the radiator and being vapor-
ized when the thermostat opens, allowing hot coolant
to enter the radiator.
If an examination of your engine compartment shows
no evidence of radiator or hose leaks, the vehicle may
be safely driven. The vapor will soon dissipate.
• Do not overfill the coolant recovery bottle.
• Check coolant freeze point in the radiator and in the coolant recovery bottle. If antifreeze needs to be
added, contents of coolant recovery bottle must also
be protected against freezing.
• If frequent coolant additions are required, or if the level in the coolant recovery bottle does not drop
when the engine cools, the cooling system should be
pressure tested for leaks.
• Make sure that the radiator and coolant recovery bottle overflow hoses are not kinked or obstructed.
• Keep the front of the radiator clean. If your vehicle is equipped with air conditioning, keep the front of the
condenser clean. • Do not change the thermostat for Summer or Win-
ter operation. If replacement is ever necessary, install
ONLY the correct type thermostat. Other designs
may result in unsatisfactory coolant performance,
poor gas mileage, and increased emissions.
BRAKE SYSTEM
In order to assure brake system performance, all brake
system components should be inspected periodically.
Refer to the “Maintenance Schedule” for the proper
maintenance intervals.
WARNING!
Riding the brakes can lead to brake fail-
ure and possibly
an accident . Driving
with your foot resting or riding on the brake
pedal can result in abnormally high brake tem-
peratures, excessive lining wear, and possible
brake damage.You would not have your full brak-
ing capacity in an emergency.
Car maintenance should be done at a
FIAT Dealership. For routine and minor
maintenance operations you wish to
carry out yourself, we do recommend you have
the proper equipment , genuine FIAT spare parts
and the necessary fluids; do not however carry out
these operations if you have no experience.
337
KNOWING
YOUR
VEHICLE
SAFETY
STARTING
AND
DRIVING
WARNING
LIGHTS
AND
MESSAGES
IN AN
EMERGENCY
SERVICING
AND CARE
TECHNICAL
SPECIFICATIONS
CONTENTS
Page 360 of 388

Limited-Use Spare (for versions/markets,
where provided)
The limited-use spare tire is for temporary emergency
use only. This tire is identified by a label located on the
limited-use spare wheel. This label contains the driving
limitations for this spare. This tire may look like the
original equipped tire on the front or rear axle of your
vehicle, but it is not. Installation of this limited-use
spare tire affects vehicle handling. Since it is not the
same as your original equipment tire, replace (or re-
pair) the original equipment tire and reinstall on the
vehicle at the first opportunity.
WARNING!
Limited-use spares are for emergency
use only. Ins
tallation of this limited-use
spare tire affects vehicle handling.With this tire,
do not drive more than the speed listed on the
limit-use spare wheel. Keep inflated to the cold
tire inflation pressures listed on your Tire and
Loading Information Placard located on the driv-
er ’s side B-Pillar or the rear edge of the driver ’s
side door. Replace (or repair) the original equip-
ment tire at the first opportunity and reinstall it
on your vehicle. Failure to do so could result in
loss of vehicle control. Tire Spinning
When stuck in mud, sand, snow, or ice conditions, do
not spin your vehicle's wheels above 48 km/h or for
longer than 30 seconds continuously without stopping.
Refer to “Freeing A Stuck Vehicle” in “In an emer-
gency” for further information.
WARNING!
Fast spinning tires can be dangerous.
Forces gen
erated by excessive wheel
speeds may cause tire damage or failure. A tire
could explode and injure someone. Do not spin
your vehicle's wheels faster than 48 km/h for
more than 30 seconds continuously when you are
stuck, and do not let anyone near a spinning
wheel, no matter what the speed.
354
KNOWING YOUR
VEHICLE
SAFETY
STARTING AND
DRIVING
WARNING LIGHTSAND
MESSAGES
IN AN
EMERGENCY
SERVICING AND CARE
TECHNICAL
SPECIFICATIONS
CONTENTS
Page 363 of 388
TIRE CHAINS (TRACTION DEVICES)
Use of traction devices require sufficient tire-to-body
clearance. Follow these recommendations to guard
against damage.
• Traction device must be of proper size for the tire, asrecommended by the traction device manufacturer.
• Install on Front Tires Only.
• Due to limited clearance, on a 225/65R17 102h tire, use reduced size snow chains or traction devices
with a maximum projection of 6 mm beyond the tire
profile.
WARNING!
Using tires of different size and type
(M+S, Sn o
w) between front and rear
axles can cause unpredictable handling.You could
lose control and have a collision.
To avoid damage to your vehicle or tires,
observe the following precautions:
•Because of restricted traction device
clearance between tires and other suspension
components, it is important that only traction
devices in good condition are used. Broken devices
can cause serious damage. Stop the vehicle imme-
diately if noise occurs that could indicate device
breakage. Remove the damaged parts of the de-
vice before further use.
• Install device as tightly as possible and then
retighten after driving about 0.8 km.
• Do not exceed 48 km/h.
• Drive cautiously and avoid severe turns and
large bumps, especially with a loaded vehicle.
• Do not drive for prolonged period on dry pave-
ment .
• Observe the traction device manufacturer ’s in-
structions on the method of installation, operat-
ing speed, and conditions for use. Always use the
suggested operating speed of the device manufac-
turer ’s if it is less than 48 km/h.
• Do not use traction devices on a compact spare
tire.
357
KNOWING
YOUR
VEHICLE
SAFETY
STARTING
AND
DRIVING
WARNING
LIGHTS
AND
MESSAGES
IN AN
EMERGENCY
SERVICING
AND CARE
TECHNICAL
SPECIFICATIONS
CONTENTS
Page 366 of 388
Indiscriminate use of fuel system cleaning agents should
be avoided. Many of these materials intended for gum
and varnish removal may contain active solvents or
similar ingredients. These can harm fuel system gasket
and diaphragm materials.
WARNING!
Carbon monoxide (CO) in exhaust gases
is deadly. F
ollow the precautions below
to prevent carbon monoxide poisoning:
•Do not inhale exhaust gases.They contain car-
bon monoxide, a colorless and odorless gas which
can kill. Never run the engine in a closed area,
such as a garage, and never sit in a parked vehicle
with the engine running for an extended period.
If the vehicle is stopped in an open area with the
engine running for more than a short period,
adjust the ventilation system to force fresh, out-
side air into the vehicle.
• Guard against carbon monoxide with proper
maintenance. Have the exhaust system inspected
every time the vehicle is raised. Have any abnor-
mal conditions repaired promptly. Until re-
paired, drive with all side windows fully open.
• Keep the liftgate closed when driving your ve-
hicle to prevent carbon monoxide and other poi-
sonous exhaust gases from entering the vehicle.
FUEL REQUIREMENTS — DIESEL
ENGINE
Use Premium Quality Diesel fuels with a Cetane rating
of 50 or higher, and meeting the EN590 standard are
highly recommended. See your authorized dealer for
further information regarding fuels available in your
area.
360
KNOWING YOUR
VEHICLE
SAFETY
STARTING AND
DRIVING
WARNING LIGHTSAND
MESSAGES
IN AN
EMERGENCY
SERVICING AND CARE
TECHNICAL
SPECIFICATIONS
CONTENTS