fuel consumption FIAT FULLBACK 2018 Owner handbook (in English)
[x] Cancel search | Manufacturer: FIAT, Model Year: 2018, Model line: FULLBACK, Model: FIAT FULLBACK 2018Pages: 316, PDF Size: 10.52 MB
Page 80 of 316
WARNING
83)If the vehicle is parked on a very steep
slope or side gradient, opening the rear
flap of the flatbed or a side door may
cause any objects or luggage which is not
fixed to spill out.
84)If you wish to carry a reserve of petrol
in a can, observe the legal restrictions and
only use a can that is type-approved and
properly secured to the load anchorage
eyebolts. Anyway, by doing so, you
increase the risk of fire in the event of an
accident with your vehicle.
85)Respect the maximum permitted
vehicle loads also shown on the
registration certificate. The user is
responsible for arranging goods in the
luggage compartment and/or on the load
platform within the maximum permitted
loads.
86)Do not carry unnecessary objects on
the flatbed. Particularly if the vehicle is
driven in cities, where frequent stopping
and starting is necessary, supplementary
loads on the vehicle may have major
repercussions on fuel consumption.
Furthermore, do not travel with
unnecessary luggage, loads etc. on the
roof: the increased air resistance will
increase fuel consumption.
87)Using a lower gear when travelling with
heavy loads will improve vehicle
performance and extend the life of the
gearbox, limiting gear shifts and
overheating. This action ensures better
exhaust braking.88)All precautions must be adopted to
prevent danger to other road users if the
load protrudes beyond the contour of the
vehicle. The rear and side protrusion must
be indicated according to the laws in force
in the country. The load must not
compromise stability of the vehicle or cover
lights, visual indicators or identifying plates.
Poles, bars and similar loads which are
difficult to see arranged horizontally must
not protrude beyond the contour of the
vehicle.
IMPORTANT
32)Use a roof carrier that properly fits your
vehicle. Do not load luggage directly onto
the roof. For installation, refer to the
instruction manual accompanying the roof
carrier.
33)Make sure that the weight of the
luggage does not exceed the allowable roof
load. If the allowable roof load is exceeded,
this may cause damage to the vehicle. The
roof load is the total allowable load on the
roof (the weight of the roof carrier plus the
weight of luggage placed on the roof
carrier). For the specific value, refer to
“Maximum roof load”.34)When luggage is loaded onto the
vehicle, please make sure to drive slowly
and avoid excessive maneuvers such as
sudden braking or quick turning. In
addition, place the luggage on the carrier
so that its weight is distributed evenly with
the heaviest items on the bottom. Do not
load items that are wider than the roof
carrier. The additional weight on the roof
could raise the vehicle’s centre of gravity
and affect vehicle handling characteristics.
As a result, driving errors or emergency
maneuvers could lead to a loss of control
and result in an accident.
35)Before driving and after travelling a
short distance, always check the load to
make sure it is securely fastened to the roof
carrier. Check periodically during your travel
that the load remains secure.
78
GETTING TO KNOW YOUR VEHICLE
Page 82 of 316
NOTE The values under item 9 are
applicable to unladen vehicles. The
value can also be varied depending on
the tyre size, optional equipment and
suspension conditions.
Operating hints
Have your vehicle serviced prior to
towing a heavy trailer, taking particular
care of the state of engine tune, the
condition of brakes, steering and tyres.
Adjust tyre pressures to those
specifications at trailer towing (refer to
“tyre inflation pressure”). Check the
tyres, wiring and brakes (if fitted) on the
trailer.
Leave plenty of room between the
front of your vehicle and the preceding
vehicle. If the trailer begins to sway or
becomes difficult to handle, gently slow
down or apply the independent trailer
brakes (if fitted) NOT the vehicle brakes.
Stop the vehicle and trailer in a safe
location. One cause of swaying is poor
trailer balance and until this has been
overcome the swaying will recur.
Relocated the load in your trailer and
re-assess the problem.
Be sure that the driving speed does
not exceed 100 km/h for trailer
operation.
It is also recommended that you
obey the local regulations in case
driving speed with a trailer is limited to
less than 100 km/h.
To prevent the clutch from slipping
(vehicle with a M/T only), do not rev the
engine more than is required when
starting off.
To prevent shocks from the overrun
brake, depress the brake pedal lightly at
first and then more strongly.
To make full use of engine braking,
change to a lower gear before
descending a slope.
The body, brakes, clutch, and
chassis will be under additional strain
when towing a trailer.
The heavier weight and higher rolling
and air resistance will increase fuel
consumption.
Additional precautions for vehicles
equipped with an automatic
transmission
It is recommended a lower gear in
sports mode on slopes or at low speed,
taking care to keep the engine speed
below the red zone.
WARNING
89)Danger of Accident! A towing bar
should be fitted according to Fiat
Dealership guidelines.
INTERIOR FEATURES
SUN VISORS
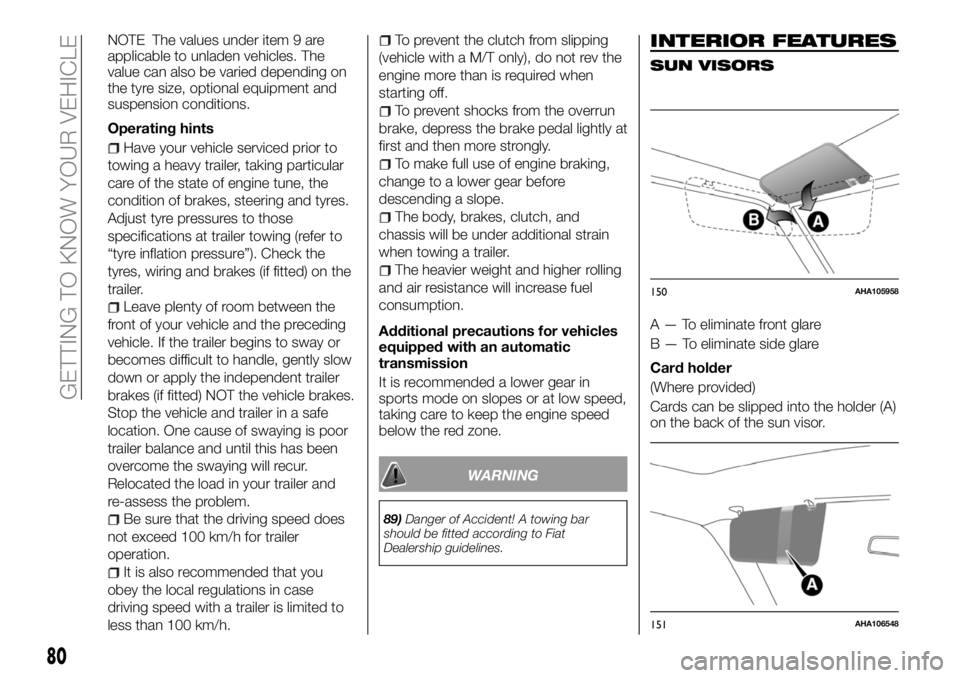
A — To eliminate front glare
B — To eliminate side glare
Card holder
(Where provided)
Cards can be slipped into the holder (A)
on the back of the sun visor.
150AHA105958
151AHA106548
80
GETTING TO KNOW YOUR VEHICLE
Page 94 of 316
INSTRUMENTS
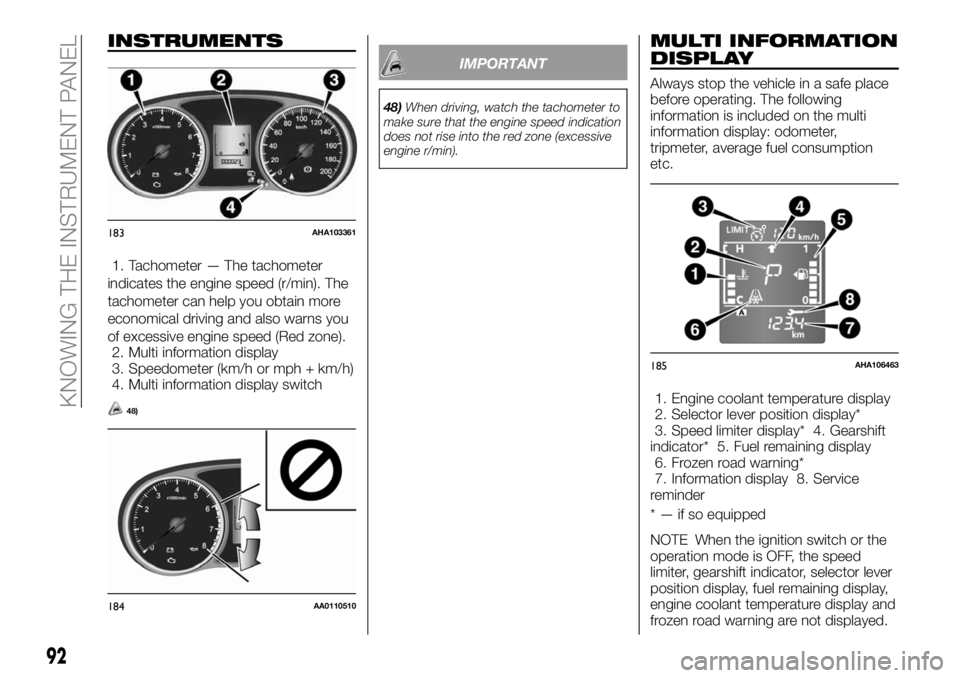
1. Tachometer — The tachometer
indicates the engine speed (r/min). The
tachometer can help you obtain more
economical driving and also warns you
of excessive engine speed (Red zone).
2. Multi information display
3. Speedometer (km/h or mph + km/h)
4. Multi information display switch
48)
IMPORTANT
48)When driving, watch the tachometer to
make sure that the engine speed indication
does not rise into the red zone (excessive
engine r/min).
MULTI INFORMATION
DISPLAY
Always stop the vehicle in a safe place
before operating. The following
information is included on the multi
information display: odometer,
tripmeter, average fuel consumption
etc.
1. Engine coolant temperature display
2. Selector lever position display*
3. Speed limiter display* 4. Gearshift
indicator* 5. Fuel remaining display
6. Frozen road warning*
7. Information display 8. Service
reminder
* — if so equipped
NOTE When the ignition switch or the
operation mode is OFF, the speed
limiter, gearshift indicator, selector lever
position display, fuel remaining display,
engine coolant temperature display and
frozen road warning are not displayed.
183AHA103361
184AA0110510
185AHA106463
92
KNOWING THE INSTRUMENT PANEL
Page 95 of 316
INFORMATION DISPLAY
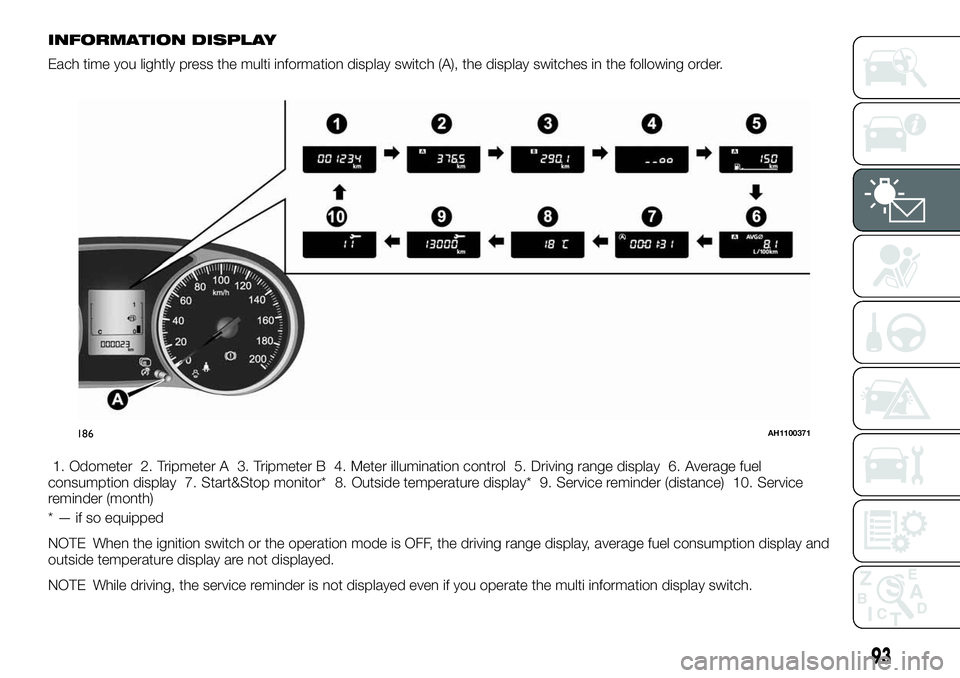
Each time you lightly press the multi information display switch (A), the display switches in the following order.
1. Odometer 2. Tripmeter A 3. Tripmeter B 4. Meter illumination control 5. Driving range display 6. Average fuel
consumption display 7. Start&Stop monitor* 8. Outside temperature display* 9. Service reminder (distance) 10. Service
reminder (month)
* — if so equipped
NOTE When the ignition switch or the operation mode is OFF, the driving range display, average fuel consumption display and
outside temperature display are not displayed.
NOTE While driving, the service reminder is not displayed even if you operate the multi information display switch.
186AH1100371
93
Page 96 of 316
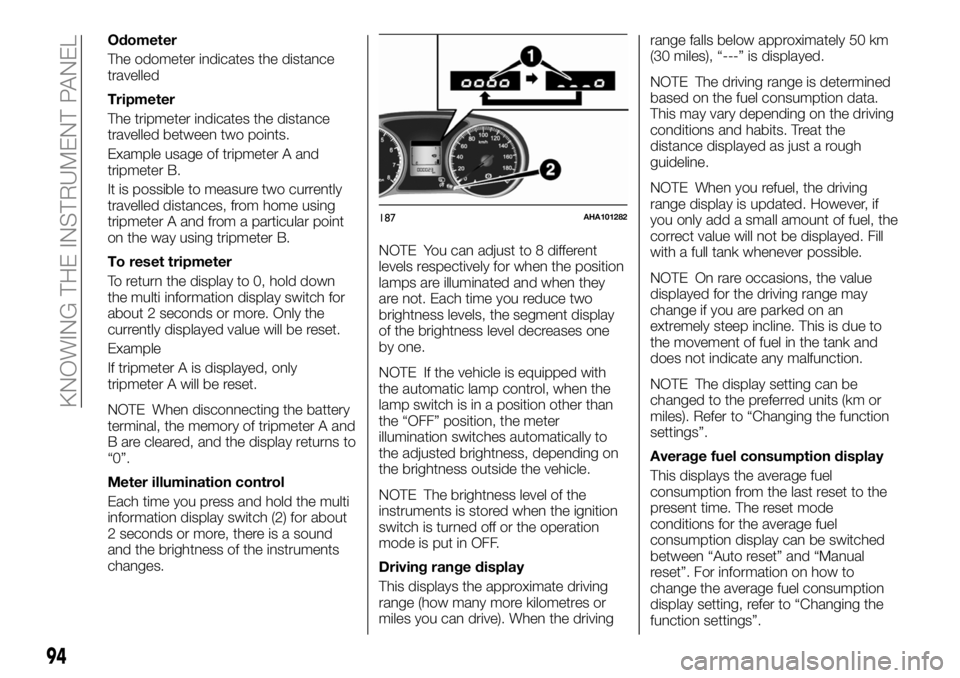
Odometer
The odometer indicates the distance
travelled
Tripmeter
The tripmeter indicates the distance
travelled between two points.
Example usage of tripmeter A and
tripmeter B.
It is possible to measure two currently
travelled distances, from home using
tripmeter A and from a particular point
on the way using tripmeter B.
To reset tripmeter
To return the display to 0, hold down
the multi information display switch for
about 2 seconds or more. Only the
currently displayed value will be reset.
Example
If tripmeter A is displayed, only
tripmeter A will be reset.
NOTE When disconnecting the battery
terminal, the memory of tripmeter A and
B are cleared, and the display returns to
“0”.
Meter illumination control
Each time you press and hold the multi
information display switch (2) for about
2 seconds or more, there is a sound
and the brightness of the instruments
changes.NOTE You can adjust to 8 different
levels respectively for when the position
lamps are illuminated and when they
are not. Each time you reduce two
brightness levels, the segment display
of the brightness level decreases one
by one.
NOTE If the vehicle is equipped with
the automatic lamp control, when the
lamp switch is in a position other than
the “OFF” position, the meter
illumination switches automatically to
the adjusted brightness, depending on
the brightness outside the vehicle.
NOTE The brightness level of the
instruments is stored when the ignition
switch is turned off or the operation
mode is put in OFF.
Driving range display
This displays the approximate driving
range (how many more kilometres or
miles you can drive). When the drivingrange falls below approximately 50 km
(30 miles), “---” is displayed.
NOTE The driving range is determined
based on the fuel consumption data.
This may vary depending on the driving
conditions and habits. Treat the
distance displayed as just a rough
guideline.
NOTE When you refuel, the driving
range display is updated. However, if
you only add a small amount of fuel, the
correct value will not be displayed. Fill
with a full tank whenever possible.
NOTE On rare occasions, the value
displayed for the driving range may
change if you are parked on an
extremely steep incline. This is due to
the movement of fuel in the tank and
does not indicate any malfunction.
NOTE The display setting can be
changed to the preferred units (km or
miles). Refer to “Changing the function
settings”.
Average fuel consumption display
This displays the average fuel
consumption from the last reset to the
present time. The reset mode
conditions for the average fuel
consumption display can be switched
between “Auto reset” and “Manual
reset”. For information on how to
change the average fuel consumption
display setting, refer to “Changing the
function settings”.
187AHA101282
94
KNOWING THE INSTRUMENT PANEL
Page 97 of 316
NOTE The average fuel consumption
display can be reset separately for the
auto reset mode and for the manual
reset mode.
NOTE “---” is displayed when the
average fuel consumption cannot be
measured.
NOTE The initial (default) setting is
“Auto reset mode”.
NOTE The average fuel consumption
will depend on the driving conditions
(road conditions, how you drive, etc.).
The displayed fuel consumption may
vary from the actual fuel consumption.
Treat the fuel consumption displayed as
just a rough guideline.
NOTE The memory of the manual reset
mode or auto reset mode for the
average fuel consumption display is
erased if the battery is disconnected.
NOTE The display setting can be
changed to the preferred units {km/L,
L/100 km, mpg}. Refer to “Changing
the function settings”.
Start&Stop monitor (where
provided)
The accumulated time the engine has
been stopped by Start&Stop system is
displayed. Refer to Start&Stop system.
NOTE When the ignition switch or the
operation mode is ON again, the
accumulated time will be reset.Outside temperature display (if so
equipped)
This displays the temperature outside
the vehicle.
NOTE The display setting can be
changed to the preferred units (°C or
°F). Refer to “Changing the function
settings”.
NOTE Depending on factors such as
the driving conditions, the displayed
temperature may vary from the actual
outside temperature.
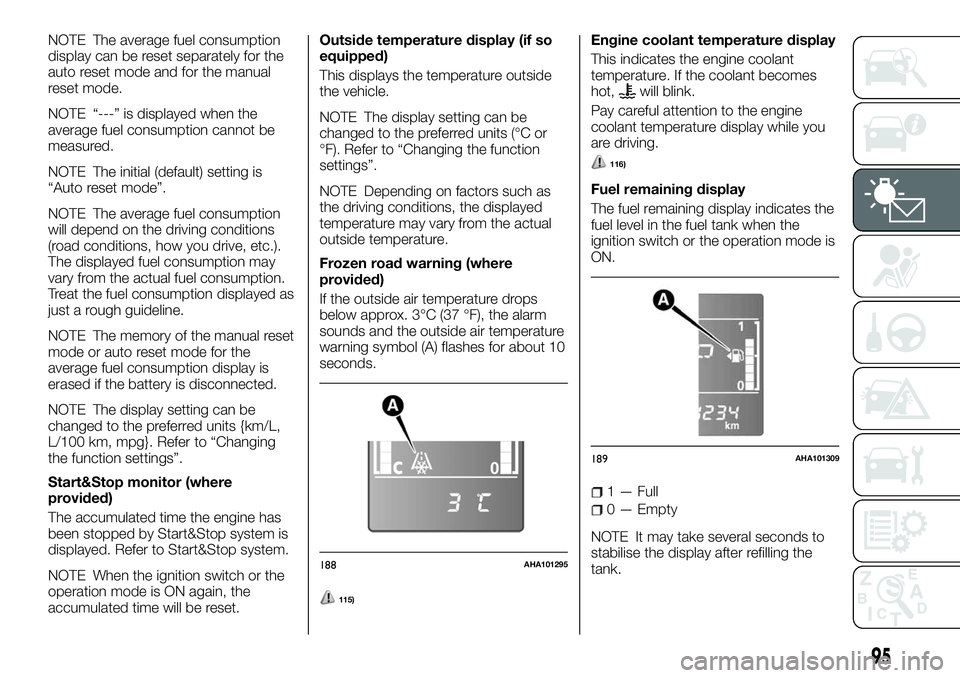
Frozen road warning (where
provided)
If the outside air temperature drops
below approx. 3°C (37 °F), the alarm
sounds and the outside air temperature
warning symbol (A) flashes for about 10
seconds.
115)
Engine coolant temperature display
This indicates the engine coolant
temperature. If the coolant becomes
hot,
will blink.
Pay careful attention to the engine
coolant temperature display while you
are driving.
116)
Fuel remaining display
The fuel remaining display indicates the
fuel level in the fuel tank when the
ignition switch or the operation mode is
ON.
1 — Full
0 — Empty
NOTE It may take several seconds to
stabilise the display after refilling the
tank.
188AHA101295
189AHA101309
95
Page 99 of 316
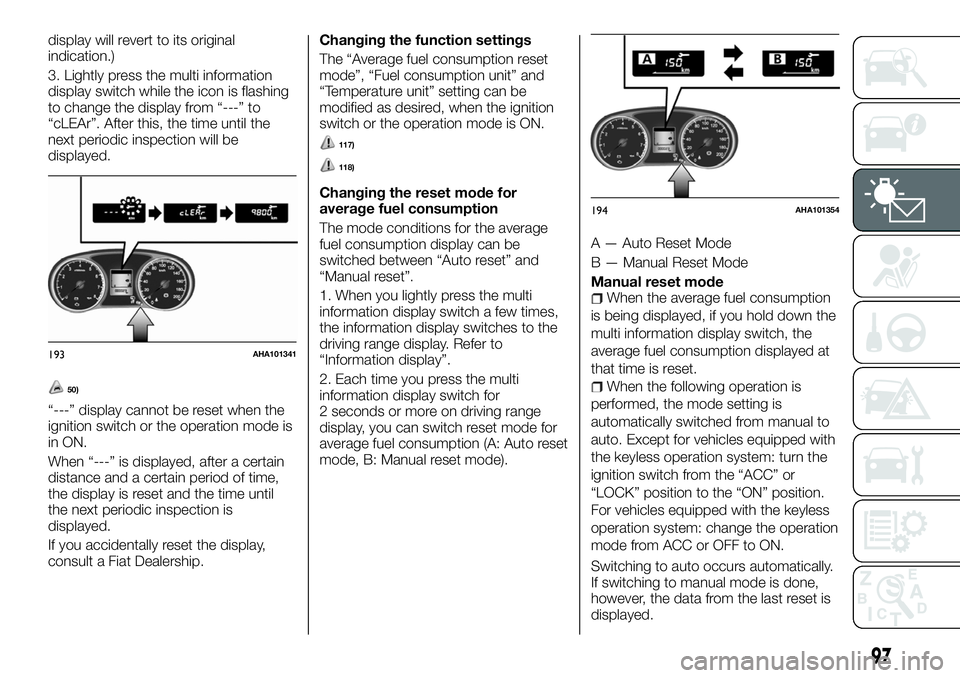
display will revert to its original
indication.)
3. Lightly press the multi information
display switch while the icon is flashing
to change the display from “---” to
“cLEAr”. After this, the time until the
next periodic inspection will be
displayed.
50)
“---” display cannot be reset when the
ignition switch or the operation mode is
in ON.
When “---” is displayed, after a certain
distance and a certain period of time,
the display is reset and the time until
the next periodic inspection is
displayed.
If you accidentally reset the display,
consult a Fiat Dealership.Changing the function settings
The “Average fuel consumption reset
mode”, “Fuel consumption unit” and
“Temperature unit” setting can be
modified as desired, when the ignition
switch or the operation mode is ON.
117)
118)
Changing the reset mode for
average fuel consumption
The mode conditions for the average
fuel consumption display can be
switched between “Auto reset” and
“Manual reset”.
1. When you lightly press the multi
information display switch a few times,
the information display switches to the
driving range display. Refer to
“Information display”.
2. Each time you press the multi
information display switch for
2 seconds or more on driving range
display, you can switch reset mode for
average fuel consumption (A: Auto reset
mode, B: Manual reset mode).A — Auto Reset Mode
B — Manual Reset Mode
Manual reset mode
When the average fuel consumption
is being displayed, if you hold down the
multi information display switch, the
average fuel consumption displayed at
that time is reset.
When the following operation is
performed, the mode setting is
automatically switched from manual to
auto. Except for vehicles equipped with
the keyless operation system: turn the
ignition switch from the “ACC” or
“LOCK” position to the “ON” position.
For vehicles equipped with the keyless
operation system: change the operation
mode from ACC or OFF to ON.
Switching to auto occurs automatically.
If switching to manual mode is done,
however, the data from the last reset is
displayed.
193AHA101341
194AHA101354
97
Page 100 of 316
Auto reset modeWhen the average fuel consumption
is being displayed, if you hold down the
multi information display switch, the
average fuel consumption displayed at
that time are reset.
When the engine switch or the
operation mode is in the following
conditions, the average fuel
consumption display is automatically
reset. Except for vehicles equipped with
the keyless operation system: the
ignition switch is in the “ACC” or
“LOCK” position for about 4 hours or
longer. For vehicles equipped with the
keyless operation system: the operation
mode is in ACC or OFF for about
4 hours or longer.
IMPORTANT The average fuel
consumption display can be reset
separately for the auto reset mode and
for the manual reset mode.
IMPORTANT The memory of the
manual reset mode or auto reset mode
for the average fuel consumption
display is erased if the battery is
disconnected.
The initial (default) setting is “Auto reset
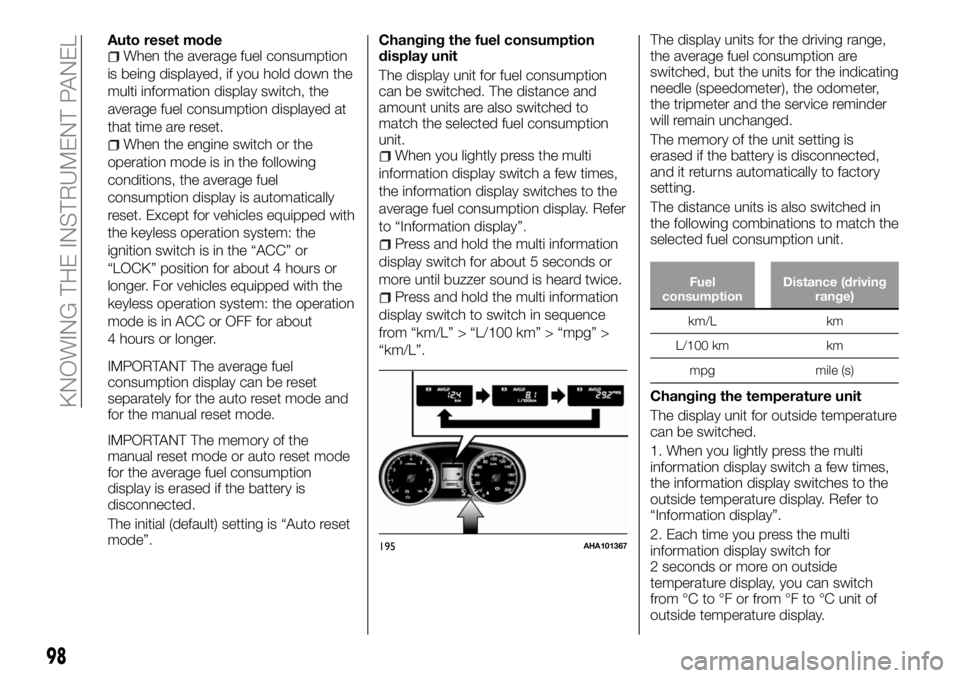
mode”.Changing the fuel consumption
display unit
The display unit for fuel consumption
can be switched. The distance and
amount units are also switched to
match the selected fuel consumption
unit.When you lightly press the multi
information display switch a few times,
the information display switches to the
average fuel consumption display. Refer
to “Information display”.
Press and hold the multi information
display switch for about 5 seconds or
more until buzzer sound is heard twice.
Press and hold the multi information
display switch to switch in sequence
from “km/L” > “L/100 km” > “mpg” >
“km/L”.The display units for the driving range,
the average fuel consumption are
switched, but the units for the indicating
needle (speedometer), the odometer,
the tripmeter and the service reminder
will remain unchanged.
The memory of the unit setting is
erased if the battery is disconnected,
and it returns automatically to factory
setting.
The distance units is also switched in
the following combinations to match the
selected fuel consumption unit.Fuel
consumptionDistance (driving
range)
km/L km
L/100 km km
mpg mile (s)
Changing the temperature unit
The display unit for outside temperature
can be switched.
1. When you lightly press the multi
information display switch a few times,
the information display switches to the
outside temperature display. Refer to
“Information display”.
2. Each time you press the multi
information display switch for
2 seconds or more on outside
temperature display, you can switch
from °C to °F or from °F to °C unit of
outside temperature display.
195AHA101367
98
KNOWING THE INSTRUMENT PANEL
Page 148 of 316
ECONOMICAL
DRIVING
For economical driving, there are some
technical requirements that have to be
met. The prerequisite for low fuel
consumption is a properly adjusted
engine. In order to achieve longer life of
the vehicle and the most economical
operation, we recommend you to have
the vehicle checked at regular intervals
in accordance with the service
standards.
Fuel economy and generation of
exhaust gas and noise are highly
influenced by personal driving habits as
well as the particular operating
conditions. The following points should
be observed in order to minimize wear
of brakes, tyres and engine as well as
to reduce environmental pollution.
Accelerating and decelerating
Drive according to traffic conditions,
and avoid sudden starts, sudden
acceleration, and sudden braking, as
they will increase fuel consumption.
Shifting
Shift only at an appropriate speed and
engine speed. Always use the highest
shift position possible.
The transfer shift lever or the drive
modeselector should be set to “2H”
when driving 4WD vehicles on normal
roads and express ways to obtain best
possible fuel economy.City traffic
Frequent starting and stopping
increases the average fuel
consumption. Use roads with smooth
traffic flow whenever possible. When
driving on congested roads, avoid use
of a low shift position at high engine
speeds.
Idling
The vehicle consumes fuel even during
idling. Avoid extended idling whenever
possible.
Speed
At higher the vehicle speed, more fuel is
consumed. Avoid driving at full speed.
Even a slight release of the accelerator
pedal will save a significant amount of
fuel.
Tyre inflation pressure
Check the tyre inflation pressures at
regular intervals. Low tyre inflation
pressure increases road resistance and
fuel consumption. In addition, low tyre
pressures adversely affect tyre wear
and driving stability.
Cargo loads
Do not drive with unnecessary articles
in the luggage compartment. Especially
during city driving where frequent
starting and stopping is necessary, the
increased weight of the vehicle will
greatly affect fuel consumption. Also
avoid driving with unnecessary luggage
or carriers, etc., on the roof; theincreased air resistance will increase
fuel consumption.
Cold engine starting
Starting of a cold engine consumes
more fuel. Unnecessary fuel
consumption is also caused by keeping
a hot engine running. After the engine is
started, commence driving as soon as
possible.
Cooler or air conditioning
The use of the air conditioner will
increase the fuel consumption.
146
STARTING AND DRIVING
Page 161 of 316
108)In the following cases, the engine will
restart automatically even if the engine was
stopped by the Start&Stop system. Pay
careful attention, otherwise an unexpected
accident might occur when the engine
restarts.1—Vehicle speed is 3 km/h or
higher when coasting down a slope. 2 —
Brake booster vacuum pressure is low
because the brake pedal is depressed
repeatedly or depressed harder than usual.
3 — Engine coolant temperature is low. 4
— When the air conditioner is operated by
pressing the air conditioning switch. 5 —
When the preset temperature of the air
conditioner is changed significantly. 6 —
When the air conditioner is operated in
AUTO mode where the temperature control
is set to the max. hot or the max. cool (for
vehicles with automatic climate air
conditioning). 7 — When the air conditioner
is ON, the passenger compartment
temperature rises and the air conditioning
compressor operates to lower the
temperature. 8 — Demister switch is
pressed. Refer to “For quick demisting”. 9
— Electric power consumption is high,
such as when the rear window demister or
other electrical components are operating
or the blower speed is set to a high setting.
10 — Battery voltage or battery
performance is low. 11 — Operate the
steering wheel. 12 — Driver’s seat belt is
unfastened. 13 — Driver’s door is opened.MANUAL
TRANSMISSION
(Where provided)
The shift pattern is shown on the
gearshift lever knob. To start off,
depress the clutch pedal all the way
down and shift into 1st or “R” (Reverse)
position. Then operate the gearshift
lever slowly. Afterwards gradually
release the clutch pedal while
depressing the accelerator pedal.
233)
109) 110) 111) 112) 113)
NOTE During cold weather, shifting
may be difficult until the transmission
lubricant has warmed up. This is normal
and not harmful to the transmission.
If it is hard to shift into 1st, depress the
clutch pedal again; the shift will then be
easier to make.
In case of hot weather condition or long
time cruising with high speed, a speed
limitation function may work to restrict
the oil temperature rising of the manual
transmission. After the oil temperature
drops to the appropriate level, the
speed limitation function is cancelled.
The gearshift indicator shows
recommended gearshift points for
fuel-efficient driving. It shows a
when
an upshift is recommended.Moving the gearshift lever to the
“R” (Reverse) position
Depress and hold the gearshift lever to
the “R” (Reverse) position.
114)
Possible driving speed
Avoid shifting down at high speed, as
this may cause excessive engine speed
(the tachometer needle into the red
zone) and damage the engine.
258AHZ101144
259AHA104339
159