lock FIAT MULTIPLA 2004 1.G Connect NavPlus Manual
[x] Cancel search | Manufacturer: FIAT, Model Year: 2004, Model line: MULTIPLA, Model: FIAT MULTIPLA 2004 1.GPages: 202, PDF Size: 2.22 MB
Page 167 of 202
166
CONNECT NAV
NAVIGATOR
SIM CARD UNLOCKING
After three unsuccessful PIN code
entries, the SIM card is locked. To un-
lock the SIM card, enter the PUK code
(Personal Unlock Key).
The eight-digit PUK code is commu-
nicated when buying the SIM card.
IMPORTANT The PUK code can-
not be changed.
When inserting a locked SIM card in-
side the GSM module, the display will
show an error message and ask you to
enter the PUK code. To enter the
PUK code press the knob/ button
(11).Entering the PUK code
Proceed as follows:
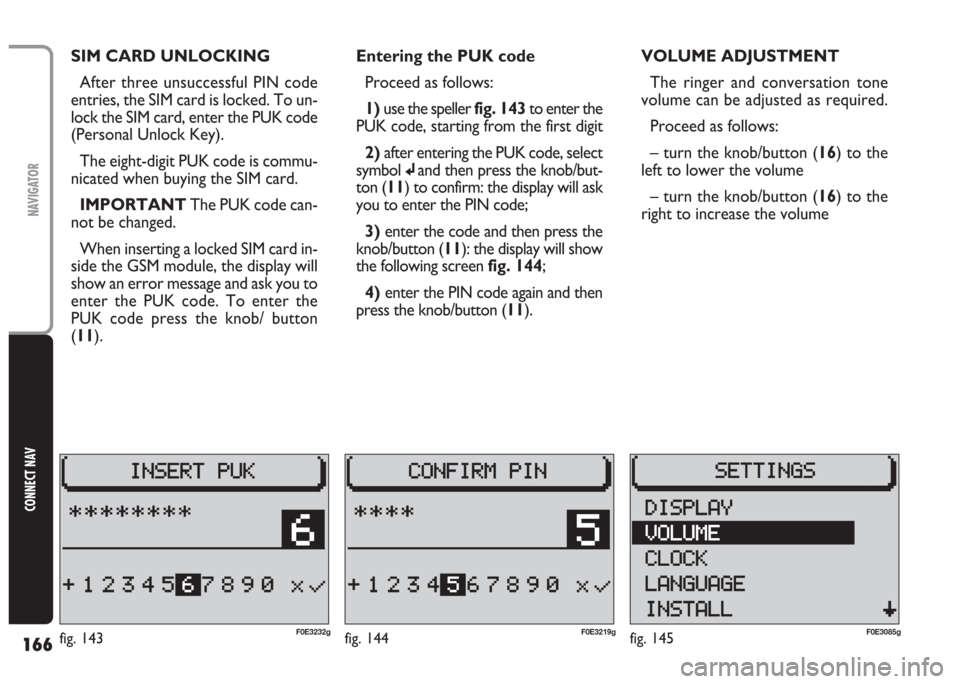
1) use the speller fig. 143to enter the
PUK code, starting from the first digit
2) after entering the PUK code, select
symbol
jand then press the knob/but-
ton (11) to confirm: the display will ask
you to enter the PIN code;
3)enter the code and then press the
knob/button (11): the display will show
the following screen fig. 144;
4) enter the PIN code again and then
press the knob/button (11).VOLUME ADJUSTMENT
The ringer and conversation tone
volume can be adjusted as required.
Proceed as follows:
– turn the knob/button (16) to the
left to lower the volume
– turn the knob/button (16) to the
right to increase the volume
fig. 144F0E3219gfig. 145F0E3085gfig. 143F0E3232g
Page 188 of 202
187
CONNECT NAV
NAVIGATOR
Selecting the time format
Proceed as follows to select the time
format (12 or 24 hour clock):
1) open the SETTINGS menu
fig. 185as described previously
2)turn the knob/button (11) to se-
lect CLOCK
3) press the knob/button (11) to
confirm
4) turn the knob/button (11) to se-
lect SETTINGS
5) turn the knob/button (11) to se-
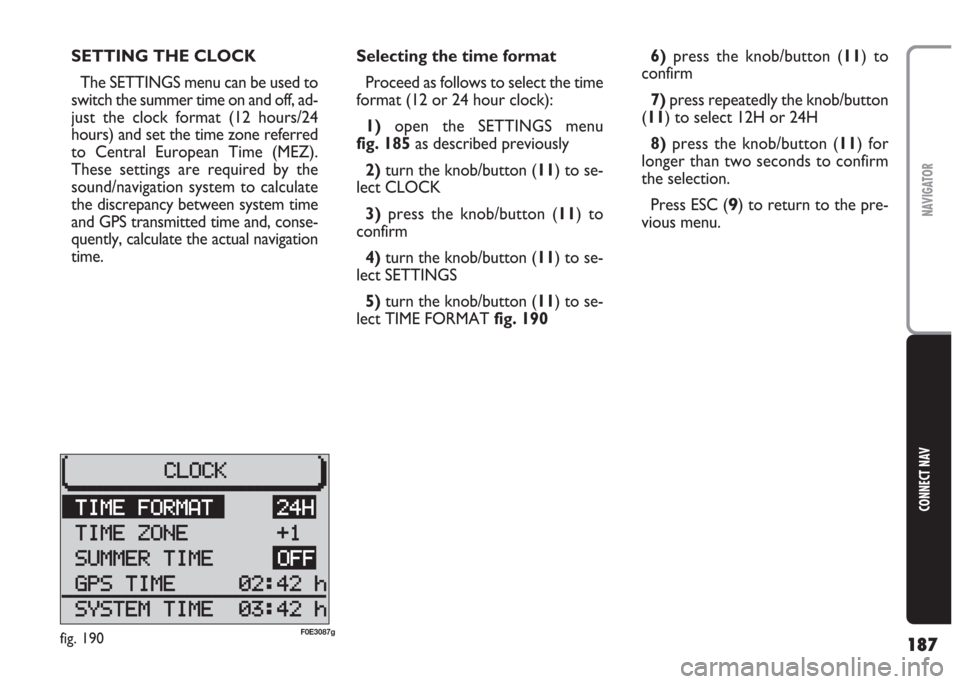
lect TIME FORMAT fig. 1906)press the knob/button (11) to
confirm
7)press repeatedly the knob/button
(11) to select 12H or 24H
8) press the knob/button (11) for
longer than two seconds to confirm
the selection.
Press ESC (
9) to return to the pre-
vious menu. SETTING THE CLOCK
The SETTINGS menu can be used to
switch the summer time on and off, ad-
just the clock format (12 hours/24
hours) and set the time zone referred
to Central European Time (MEZ).
These settings are required by the
sound/navigation system to calculate
the discrepancy between system time
and GPS transmitted time and, conse-
quently, calculate the actual navigation
time.
fig. 190F0E3087g
Page 189 of 202
188
CONNECT NAV
NAVIGATOR
Selecting the time zone
Proceed as follows to change the
time zone:
1) open the SETTINGS menu
fig. 185as described previously
2)turn the knob/button (11) to se-
lect CLOCK
3)press the knob/button (11) to
confirm
4)turn the knob/button (11) to se-
lect SETTINGS
5) turn the knob/button (11) to se-
lect TIME ZONE fig. 190
6)press the knob/button (11) to
confirm
7) turn the knob/button (11) to set
the time zone (example: –2, –1, 0, +1,
+2, etc.)
8) confirm the selection by pressing
the knob/button (11).
Press ESC (9) to return to the pre-
vious menu.Switching summer time
on and off
The system will automatically switch
to summer time when the function is
on. Proceed as follows to switch
summer time on and off:
1) open the SETTINGS menu
fig. 185as described previously
2) turn the knob/button (11) to se-
lect CLOCK
3)press the knob/button (11) to
confirm
4)turn the knob/button (11) to se-
lect SETTINGS
5) turn the knob/button (11) to se-
lect SUMMER TIME fig. 190
6) press repeatedly the knob/button
(11) to display summer time ON or
OFF.
The system time will be automatically
adjusted. The message ON or OFF ac-
cording to the selection will appear on
the display.Switching the main time
on and off
Proceed as follows to switch the
main time function on and off:
1)open the SETTINGS menu
fig. 185as described previously
2)turn the knob/button (11) to se-
lect CLOCK
3) press the knob/button (
11) to
confirm
4) turn the knob/button (11) to se-
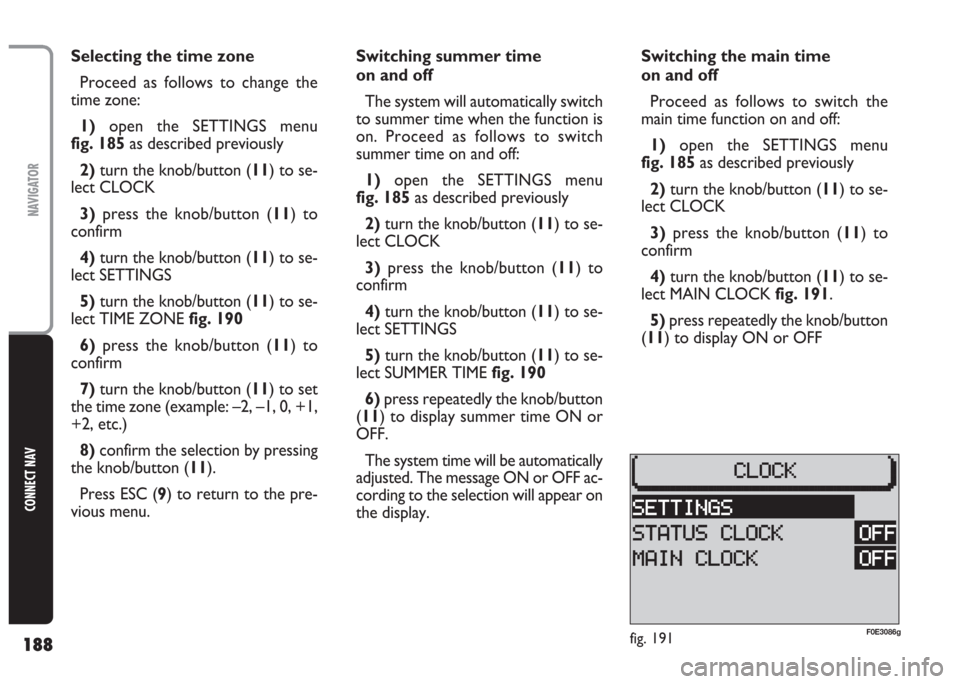
lect MAIN CLOCK fig. 191.
5)press repeatedly the knob/button
(11) to display ON or OFF
fig. 191F0E3086g
Page 190 of 202
189
CONNECT NAV
NAVIGATOR
Switching the time status
on and off
Proceed as follows to switch the
time status function on and off:
1)open the SETTINGS menu
fig. 185as described previously
2) turn the knob/button (11) to se-
lect CLOCK
3) press the knob/button (11) to
confirm
4)turn the knob/button (11) to se-
lect STATUS CLOCK
5) press the knob/button (11) to dis-
play ON or OFF
Setting the exact time
manually
Proceed as follows to set manually
the exact time (e.g.: when no GPS
satellite signal is received):
1) open the SETTINGS menu
fig. 185as described previously2) turn the knob/button (11) to se-
lect CLOCK
3)press the knob/button (11) to
confirm
4)turn the knob/button (11) to se-
lect SETTINGS
5) turn the knob/button (11) to se-
lect SYSTEM TIME
6)press the knob/button (11) to
confirm: hours will be displayed with
reverse writing
7)turn the knob/button (11) to set
hours
8) press the knob/button (11) to
confirm: minutes will be displayed with
reverse writing
9)turn the knob/button (11) to set
minutes
10)press the knob/button (11) to
confirmSELECTING THE LANGUAGE
You can select the language for mes-
sages on the display. “Metric” (dis-
tances in kilometres) and “imperial”
(distances in miles) versions are of-
fered for English
1)open the SETTINGS menu
fig. 185as described previously
2)turn the knob/button (11) to se-
lect LANGUAGE
3) press the knob/button (11) to
confirm: the display will show the list
of the available languages
4)select the required language by
turning the knob/button (
11)
5)confirm the selection by pressing
the knob/button (11).
Page 197 of 202
196
CONNECT NAV
NAVIGATOR
Proceed as follows to enter the se-
curity code:
1) select the first code digit by turn-
ing the knob/button (11)
2) confirm the first digit by pressing
the knob/button (11)
3) continue with the other three dig-
its to complete the security code.
Proceed as follows if you make a
mistake:
1) position the cursor on
¯fig. 199
by turning the knob/button (11)
2) press the knob/button (11) to
confirm.
When the code is complete, position
the cursor on symbol
jand confirm
with the knob/button (11). The device
will switch to radio mode.IMPORTANT You can repeat
code entry if you make a mistake. The
device will however lock out for one
hour after the third attempt to pre-
vent entering the code by attempts.
Keep the Navigator on for on hour
before entering the code again. The
timeout (always one hour) will start
from zero again if the battery is dis-
connected during this period of time.Deactivating/activating
the security code
The security code can be deactivat-
ed, see paragraph “Security” in section
“Basic settings”.
Page 198 of 202
197
CONNECT NAV
NAVIGATOR
T T
E E
C C
H H
N N
I I
C C
A A
L L
D D
A A
T T
A A
– PTY function: for displaying radio
station programme type (if broadcast),
e.g. POP, ROCK etc.
– SHARX function: for reducing FM
interference.
– SCAN function: for scanning all sta-
tions which can be received in the se-
lected frequency waveband.
– TIM function (Traffic Information
Memory): automatic vocal storage of
14 traffic messages having max. over-
all length equal to or lower than 4 min-
utes
– TMC function (Traffic Message
Channel): for listening to traffic mes-
sage channels
– AUTOSTORE function: automat-
ic storage of 6 stations in the devot-
ed FM band.
– Automatic Stereo/Mono selection.
– T-STORE (Travelstore): automat-
ic storage of the 6 stations with the
strongest signal in the FM bandCOMPACT DISC PLAYER
AND CD Changer
– Select track (forwards/backwards).
– Fast play (forwards/backwards).
– MIX function: random track play-
back.
– SCAN function: for playing ten sec-
onds of each track on the CD.
– REPEAT function: for repeating the
track.
– Programmable track sequence.
– CD Name function: for allocating
names to CDs. The system has a power output max
of 4x20W. The functions and specifi-
cations are illustrated in the following
paragraphs.
RADIO
– PLL tuning (Phase Locked Loop) in
the FM/MW wavebands.
– RDS (Radio Data System) with TA
(Traffic Announcement), EON (En-
hanced Other Network), Radiotext
(information on the type of pro-
gramme or broadcast piece name dis-
play), REG (Regional Programmes)
functions.
– (Radio Data System) alternative
frequency tuning.
– Automatic/manual station tuning.
– Manual storage of 30 stations: 24
in FM waveband (6 in FM1, 6 in FM2
and 6 in FMT) and 6 in MW waveband.
– Preselection scanning.For installation and re-
spective connections
contact Fiat Dealership
exclusively.