navigation system FIAT MULTIPLA 2004 1.G Connect NavPlus Manual
[x] Cancel search | Manufacturer: FIAT, Model Year: 2004, Model line: MULTIPLA, Model: FIAT MULTIPLA 2004 1.GPages: 202, PDF Size: 2.22 MB
Page 147 of 202
146
CONNECT NAV
NAVIGATOR
SWITCHING ROUTE TIME
INFORMATION ON AND OFF
This function enables to select the
time required to reach the destination
and the estimated and exact time of
arrival.
Proceed as follows to switch the
route time information on and off:
1)press MEN (10) the display will
show the navigation setup menu2) turn the knob/button (11) to se-
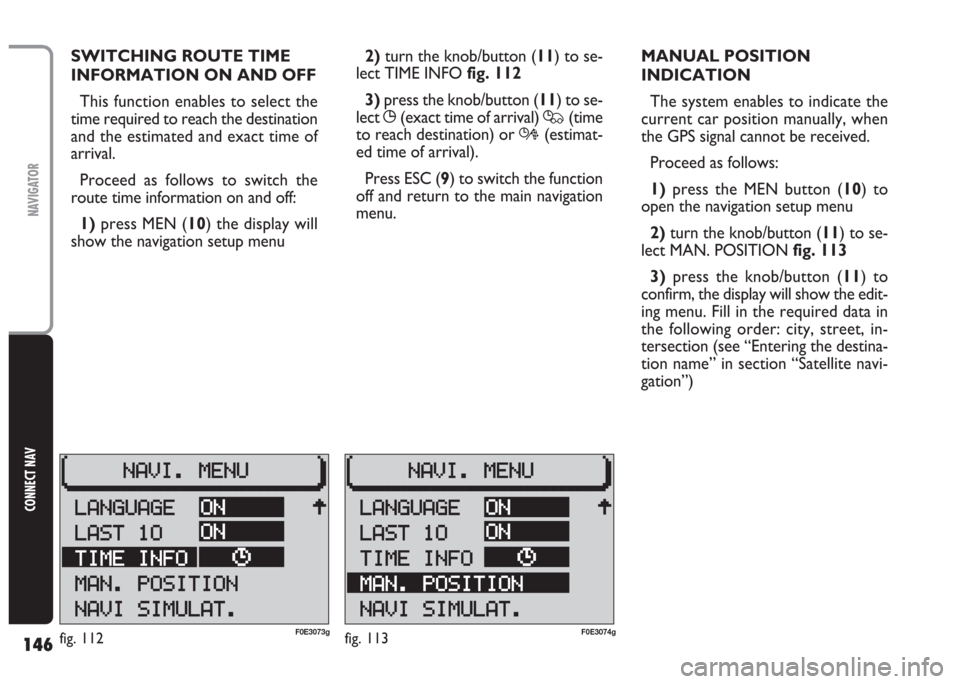
lect TIME INFO fig. 112
3)press the knob/button (11) to se-
lect
X(exact time of arrival) Q(time
to reach destination) or R(estimat-
ed time of arrival).
Press ESC (9) to switch the function
off and return to the main navigation
menu.MANUAL POSITION
INDICATION
The system enables to indicate the
current car position manually, when
the GPS signal cannot be received.
Proceed as follows:
1)press the MEN button (10) to
open the navigation setup menu
2) turn the knob/button (11) to se-
lect MAN. POSITION fig. 113
3)press the knob/button (11) to
confirm, the display will show the edit-
ing menu. Fill in the required data in
the following order: city, street, in-
tersection (see “Entering the destina-
tion name” in section “Satellite navi-
gation”)
fig. 112F0E3073gfig. 113F0E3074g
Page 148 of 202
147
CONNECT NAV
NAVIGATOR
4)after completing the above oper-
ation, press the knob/button (11) for
over 2 seconds to confirm or select
symbol (
j) and confirm: the display will
show the main navigation menu.
IMPORTANT Certain road inter-
sections (e.g. straight road intersection
with loop road) are not suitable for in-
dicating the car position. NAVIGATION SIMULATION
The system can simulate a trip. The
system simulates navigation by pro-
viding realistic visual instructions, voice
messages and acoustic signals.
Proceed as follows to start a simu-
lation:
1)press the MEN button (10) to
open the navigation setup menu
2) turn the knob/button (11) to se-
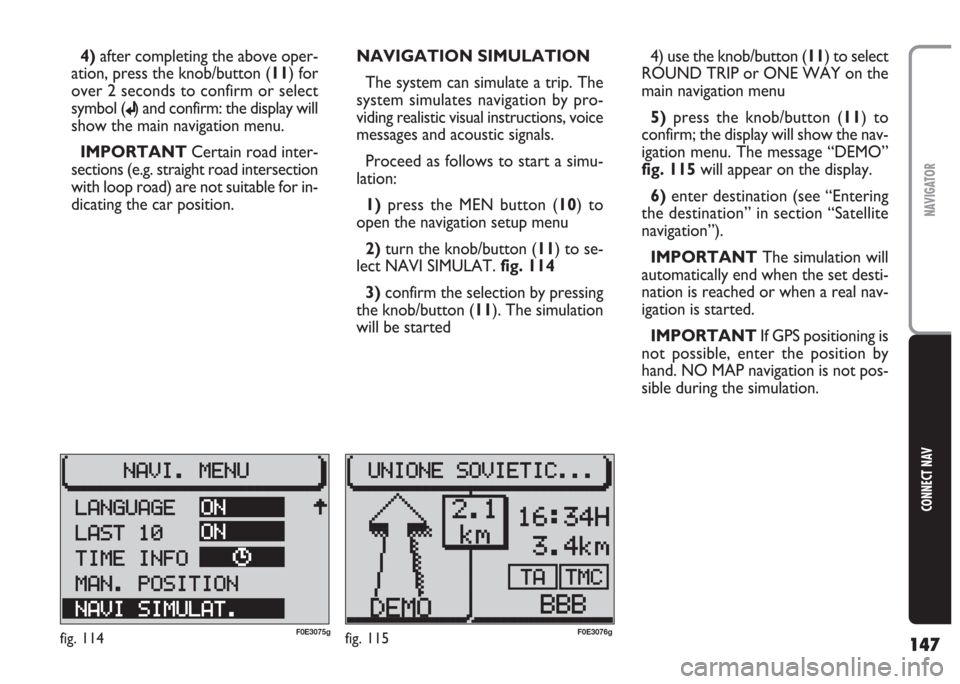
lect NAVI SIMULAT. fig. 114
3)confirm the selection by pressing
the knob/button (11). The simulation
will be started4) use the knob/button (11) to select
ROUND TRIP or ONE WAY on the
main navigation menu
5) press the knob/button (11) to
confirm; the display will show the nav-
igation menu. The message “DEMO”
fig. 115 will appear on the display.
6)enter destination (see “Entering
the destination” in section “Satellite
navigation”).
IMPORTANT The simulation will
automatically end when the set desti-
nation is reached or when a real nav-
igation is started.
IMPORTANT If GPS positioning is
not possible, enter the position by
hand. NO MAP navigation is not pos-
sible during the simulation.
fig. 114F0E3075gfig. 115F0E3076g
Page 149 of 202
148
CONNECT NAV
NAVIGATOR
GENERAL INFORMATION
The Connect Nav system provides a
set of functions enabling to receive,
from the Targa Infomobilitycon-
tact centre, useful information (e.g. ho-
tel, closest workshop) or to send a re-
quest for assistance.
With all these functions your geo-
graphical position is automatically giv-
en to the assistance centre. The nec-
essary condition to establish your ex-
act position is reception of at least 3
GPS satellites. The number of received
satellites is shown on the display.
Furthermore, with the “Follow
me”, function you can be updated on
the traffic situation along your way.
Updating intervals can be changed as
described in paragraph “Setting the in-
terval for updating the distance cov-
ered” in this section).
Targa Infomobilityservices (IN-
FOMOBILITY, MEDICAL ADVICE,
ROAD ASSIST.) shall be requested by
voice connection. IMPORTANT Access to Targa
Infomobilityè Telematic services is
linked to the terminal activation and
to the telephone operator profile ac-
tivation of the SIM card inserted in the
system. If a SIM card and a telephone
operator with no profile activated are
used, it is necessary to request Tar-
ga infomobilityfor a new activation.
The system can manage 5 different
profiles.
IMPORTANT Before requesting
this function, get familiar with the oth-
er functions, i.e.: Radio, CD-Changer
(where fitted), Navigation and Tele-
phone.
When no SIM card has been insert-
ed and you press
•(7) it will possi-
ble to call the emergency service num-
ber 112.
Instead, if a valid SIM card is insert-
ed, but there is no Targa Infomo-
bilitysubscription, pressing
•(7) will
activate the PERS. NUMBER function.
T T
A A
R R
G G
A A
I I
N N
F F
O O
M M
O O
B B
I I
L L
I I
T T
Y Y
S S
E E
R R
V V
I I
C C
E E
S S
After voice request, an message will
be sent to the Targa Infomobility
contact centre that will recall the user
immediately after. Required info will
therefore be received (also through
SMS).
If not deleted the information re-
ceived (max. 20) will be stored.
The necessary conditions to use the
telematic services are the following:
– valid SIM card for Targa Info-
mobilityContact Centre connection
– activation of pay services run by
Targa Infomobility (INFOMOBIL-
ITY, MEDICAL ADVICE, ROAD AS-
SIST.).
IMPORTANT If the user has not
yet subscribed to the pay services run
by Targa Infomobility, the associ-
ated menu functions are inactive. Dur-
ing subscription you will be given the
activation and deactivation procedures
of the Telematic Services offered by
Targa infomobility.
Page 184 of 202
183
CONNECT NAV
NAVIGATOR
The SETTINGS menu allows to ad-
just the system settings to your needs.
Furthermore, with the settings menu
of the different audio sources it is pos-
sible to set the special audio and nav-
igation functions.
OPENING THE SETTINGS
MENU
The SETTINGS menu can be opened
from the main menus of the various
functions. Use the following buttons
to open the main menus:
•press SRC (17) to select Radio, CD
or CD-Changer (where fitted) main
menus
•press NAV (12) for the main nav-
igation menu.Proceed as follows to set and select
options in the list:
1)position the cursor on the re-
quired list option turning the
knob/button (11)
2) confirm the selection by pressing
the knob/button (11).
Press ESC (9) to return to the pre-
vious menu.
ADJUSTING THE DISPLAY
In the SETTINGS menu, you can turn
on and off the automatic switchover
to night-time display and adjust bright-
ness and contrast (separately for day
and night). Furthermore, you can ad-
just the angle of vision for the route
instructions on the display.
B B
A A
S S
I I
C C
S S
E E
T T
T T
I I
N N
G G
S S
When the display shows the main
menu of one of the audio sources or
a function menu is displayed, press
twice MEN (10): the display will show
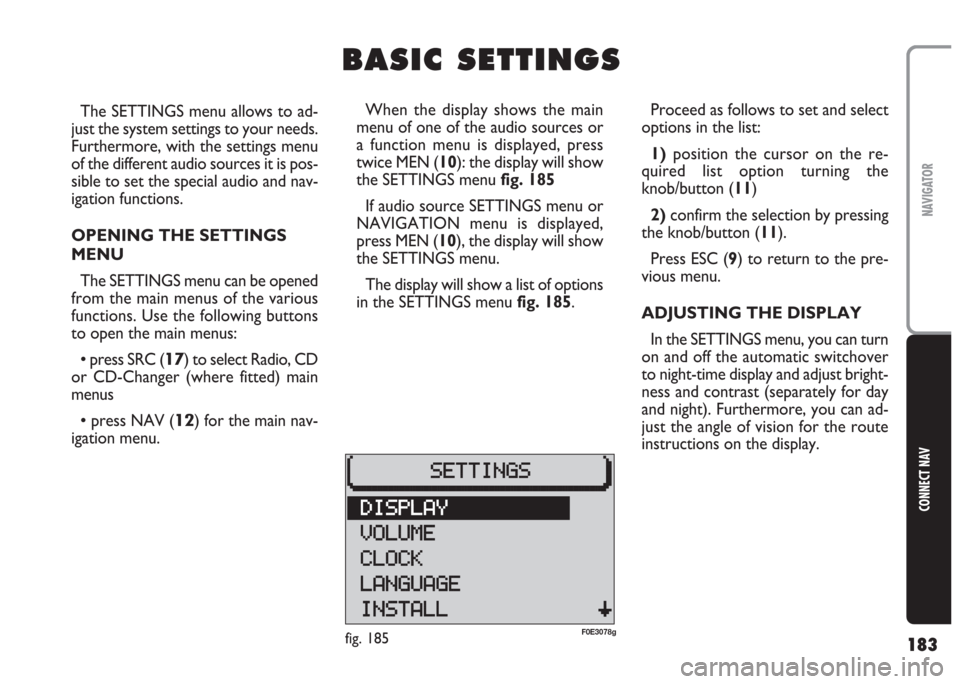
the SETTINGS menu fig. 185
If audio source SETTINGS menu or
NAVIGATION menu is displayed,
press MEN (10), the display will show
the SETTINGS menu.
The display will show a list of options
in the SETTINGS menu fig. 185.
fig. 185F0E3078g
Page 187 of 202
186
CONNECT NAV
NAVIGATOR
IMPORTANT The minimum
volume is a form of limitation. If the
volume was lower than the minimum
set volume when the system was
switched off this will override the
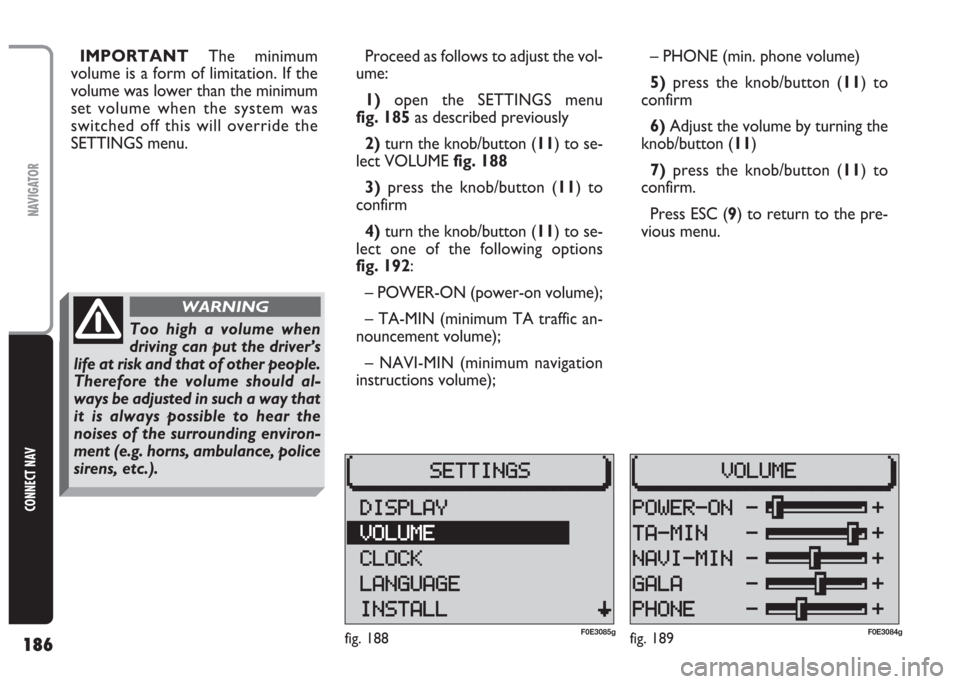
SETTINGS menu.Proceed as follows to adjust the vol-
ume:
1) open the SETTINGS menu
fig. 185as described previously
2)turn the knob/button (11) to se-
lect VOLUME fig. 188
3)press the knob/button (11) to
confirm
4) turn the knob/button (11) to se-
lect one of the following options
fig. 192:
– POWER-ON (power-on volume);
– TA-MIN (minimum TA traffic an-
nouncement volume);
– NAVI-MIN (minimum navigation
instructions volume);– PHONE (min. phone volume)
5)press the knob/button (11) to
confirm
6) Adjust the volume by turning the
knob/button (11)
7) press the knob/button (11) to
confirm.
Press ESC (9) to return to the pre-
vious menu.
fig. 188F0E3085gfig. 189F0E3084g
Too high a volume when
driving can put the driver’s
life at risk and that of other people.
Therefore the volume should al-
ways be adjusted in such a way that
it is always possible to hear the
noises of the surrounding environ-
ment (e.g. horns, ambulance, police
sirens, etc.).
WARNING
Page 188 of 202
187
CONNECT NAV
NAVIGATOR
Selecting the time format
Proceed as follows to select the time
format (12 or 24 hour clock):
1) open the SETTINGS menu
fig. 185as described previously
2)turn the knob/button (11) to se-
lect CLOCK
3) press the knob/button (11) to
confirm
4) turn the knob/button (11) to se-
lect SETTINGS
5) turn the knob/button (11) to se-
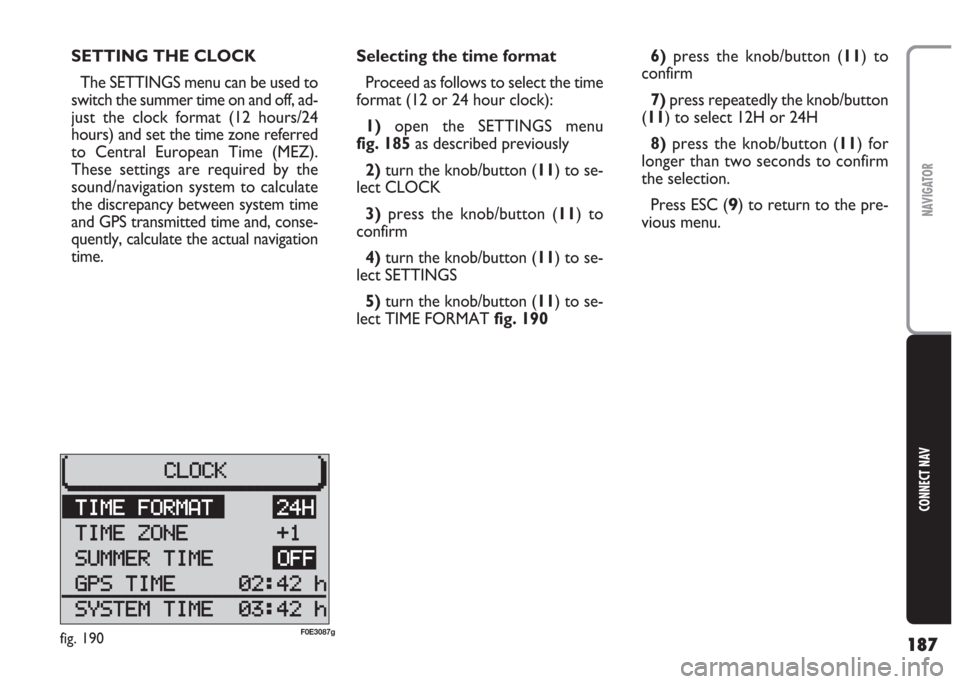
lect TIME FORMAT fig. 1906)press the knob/button (11) to
confirm
7)press repeatedly the knob/button
(11) to select 12H or 24H
8) press the knob/button (11) for
longer than two seconds to confirm
the selection.
Press ESC (
9) to return to the pre-
vious menu. SETTING THE CLOCK
The SETTINGS menu can be used to
switch the summer time on and off, ad-
just the clock format (12 hours/24
hours) and set the time zone referred
to Central European Time (MEZ).
These settings are required by the
sound/navigation system to calculate
the discrepancy between system time
and GPS transmitted time and, conse-
quently, calculate the actual navigation
time.
fig. 190F0E3087g
Page 192 of 202
191
CONNECT NAV
NAVIGATOR
Proceed as follows to activate/deac-
tivate the code:
1) press the NAV button (12) to
open the main navigation menu
2)press the MEN button (10) to
open the SETTINGS menu
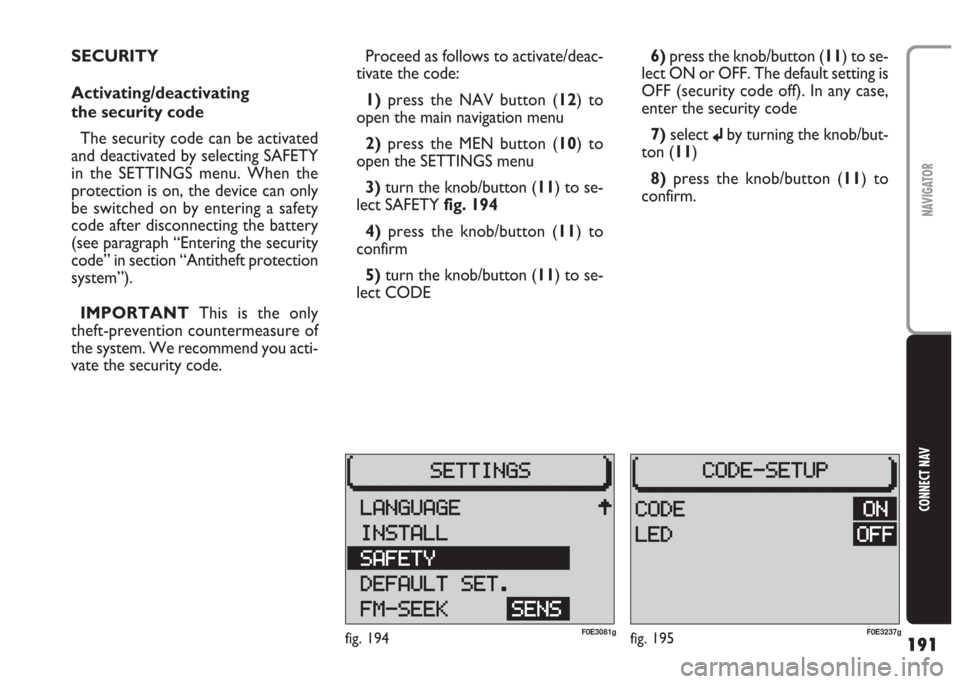
3)turn the knob/button (11) to se-
lect SAFETY fig. 194
4) press the knob/button (11) to
confirm
5)turn the knob/button (11) to se-
lect CODE6) press the knob/button (11) to se-
lect ON or OFF. The default setting is
OFF (security code off). In any case,
enter the security code
7)select
jby turning the knob/but-
ton (11)
8)press the knob/button (11) to
confirm. SECURITY
Activating/deactivating
the security code
The security code can be activated
and deactivated by selecting SAFETY
in the SETTINGS menu. When the
protection is on, the device can only
be switched on by entering a safety
code after disconnecting the battery
(see paragraph “Entering the security
code” in section “Antitheft protection
system”).
IMPORTANT This is the only
theft-prevention countermeasure of
the system. We recommend you acti-
vate the security code.
fig. 194F0E3081gfig. 195F0E3237g
Page 193 of 202
192
CONNECT NAV
NAVIGATOR
Resetting default
settings (reset)
To reset the system default settings:
1)press the NAV button (12) to
open the main navigation menu
2)press the MEN button (10) to
open the SETTINGS menu
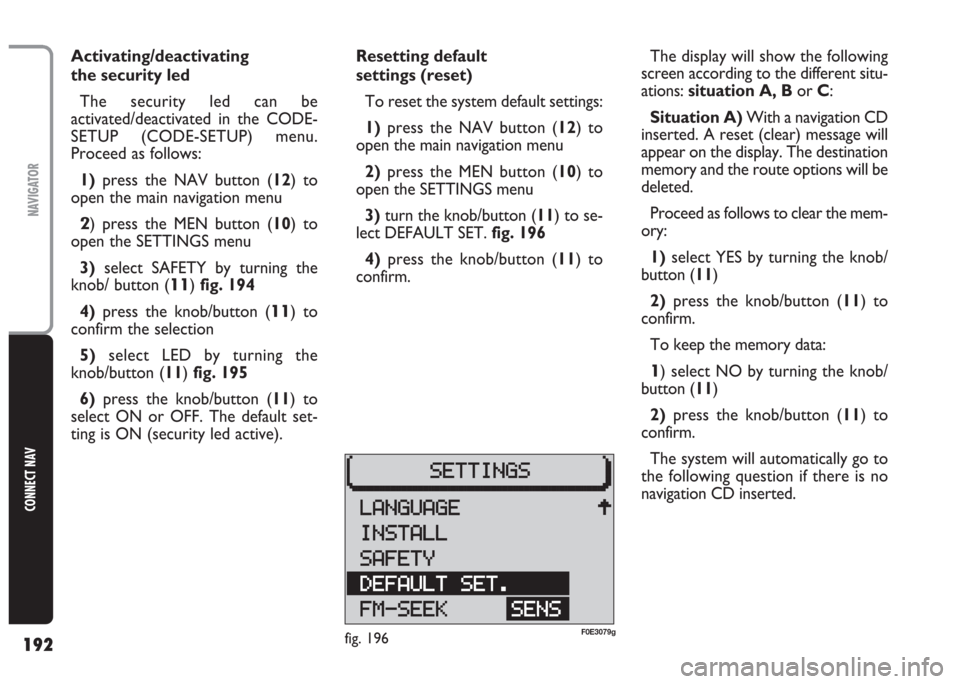
3) turn the knob/button (11) to se-
lect DEFAULT SET. fig. 196
4)press the knob/button (11) to
confirm. Activating/deactivating
the security led
The security led can be
activated/deactivated in the CODE-
SETUP (CODE-SETUP) menu.
Proceed as follows:
1)press the NAV button (12) to
open the main navigation menu
2) press the MEN button (10) to
open the SETTINGS menu
3)select SAFETY by turning the
knob/ button (
11) fig. 194
4)press the knob/button (
11) to
confirm the selection
5)select LED by turning the
knob/button (11) fig. 195
6) press the knob/button (11) to
select ON or OFF. The default set-
ting is ON (security led active).The display will show the following
screen according to the different situ-
ations: situation A, Bor C:
Situation A)With a navigation CD
inserted. A reset (clear) message will
appear on the display. The destination
memory and the route options will be
deleted.
Proceed as follows to clear the mem-
ory:
1) select YES by turning the knob/
button (11)
2)press the knob/button (11) to
confirm.
To keep the memory data:
1) select NO by turning the knob/
button (11)
2) press the knob/button (11) to
confirm.
The system will automatically go to
the following question if there is no
navigation CD inserted.
fig. 196F0E3079g