boot FIAT MULTIPLA 2006 1.G Owners Manual
[x] Cancel search | Manufacturer: FIAT, Model Year: 2006, Model line: MULTIPLA, Model: FIAT MULTIPLA 2006 1.GPages: 266, PDF Size: 4.61 MB
Page 5 of 266
4
SAFETY
DEVICES
CORRECT USE
OF THE CAR
WARNING
LIGHTS AND
MESSAGES
IN AN
EMERGENCY
CAR
MAINTENANCE
TECHNICAL
SPECIFICATIONS
INDEX
DASHBOARD
AND CONTROLSDASHBOARD ...................................................................... 5
SYMBOLS ............................................................................... 6
THE FIAT CODE SYSTEM ................................................ 6
THE KEYS .............................................................................. 8
ELECTRONIC ALARM ....................................................... 11
IGNITION SWITCH ........................................................... 15
INSTRUMENT PANEL ....................................................... 17
INSTRUMENTS .................................................................... 18
RICONFIGURABLE MULTIFUNCTION DISPLAY ..... 22
SEATS ..................................................................................... 41
HEAD RESTRAINTS ........................................................... 44
STEERING WHEEL ............................................................. 45
REARVIEW MIRRORS ........................................................ 46
HEATING/AND CLIMATE CONTROL SYSTEM ....... 48
HEATING AND VENTILATION ..................................... 50
MANUAL CLIMATE CONTROL SYSTEM ................... 52
AUTOMATIC CLIMATE CONTROL SYSTEM ............. 54
EXTERNAL LIGHTS ........................................................... 59
WINDOW CLEANING ..................................................... 61
CEILING LIGHT ................................................................... 63
CONTROLS .......................................................................... 65INTERIOR EQUIPMENT ................................................... 67
ELECTRICALLY CONTROLLED
DOUBLE SUNROOF ........................................................... 72
DOORS .................................................................................. 74
ELECTRIC WINDOWS ..................................................... 76
BOOT ..................................................................................... 78
BONNET ............................................................................... 85
ROOF RACK/SKI RACK ................................................... 87
HEADLIGHTS ....................................................................... 88
ABS SYSTEM .......................................................................... 90
ESP SYSTEM .......................................................................... 92
EOBD SYSTEM ..................................................................... 96
PARKING SENSORS ........................................................... 97
MULTIPLA VAN ................................................................... 99
SOUND SYSTEM ................................................................. 102
AT THE FILLING STATION ............................................. 107
PROTECTING THE ENVIRONMENT ........................... 109
D D
A A
S S
H H
B B
O O
A A
R R
D D
A A
N N
D D
C C
O O
N N
T T
R R
O O
L L
S S
Page 13 of 266

12
SAFETY
DEVICES
CORRECT USE
OF THE CAR
WARNING
LIGHTS AND
MESSAGES
IN AN
EMERGENCY
CAR
MAINTENANCE
TECHNICAL
SPECIFICATIONS
INDEX
DASHBOARD
AND CONTROLS
To deactivate the volumetric surveillance: the
volumetric protection function can be deactivated
before activating the electronic alarm in this way: turn
the ignition key from STOP and bring it in rapid
succession onto MAR then back to STOP, after which,
remove the key.
The led (F) on the instrument panel will light up for
about 2 seconds to confirm that the sensors have been
cut off.
To reactivate the volumetric protection (before
enabling the electronic alarm) turn the key to MAR for
more than 30 seconds.
If, however, the volumetric protection has been
deactivated and you wish to operate one of the
electronic controls managed by the ignition key in
MAR (e.g. electric windows) turn the key to MAR, use
the required electric control then bring the key back
to STOP within 30 seconds. In this way the volumetric
protection will not be reactivated.
To cut out the siren: press the remote control button
for about 4 seconds when enabling the electronic
alarm.
Five beeps will be heard which indicate that the siren
has been disabled and the alarm has been enabled.SELF-TEST
If when switching the car alarm on, you hear a “beep”
followed after about one second by a shorter “beep”,
check that the doors, bonnet and boot are all closed
properly, then try switching the alarm on again. If the
problem repeats, contact Fiat Dealership.
PROGRAMMING THE SYSTEM
When your new car is handed over to you, the
electronic alarm has already been programmed by the
Fiat Dealership. Any subsequent programming should
also be carried out by a Fiat Dealership.
IMPORTANT The electronic alarm operation is
prepared according to the laws of the specific country.
This operation is only to be carried out by a Fiat
Dealership, to avoid damaging the electronic memory
storage system.
Page 15 of 266
14
SAFETY
DEVICES
CORRECT USE
OF THE CAR
WARNING
LIGHTS AND
MESSAGES
IN AN
EMERGENCY
CAR
MAINTENANCE
TECHNICAL
SPECIFICATIONS
INDEX
DASHBOARD
AND CONTROLS
Since the electronic car alarm absorbs electricity, if you will not be using your car for more than a month,
switch the system off with the remote control.HOW TO KNOW WHETHER THE ALARM HAS GONE OFF
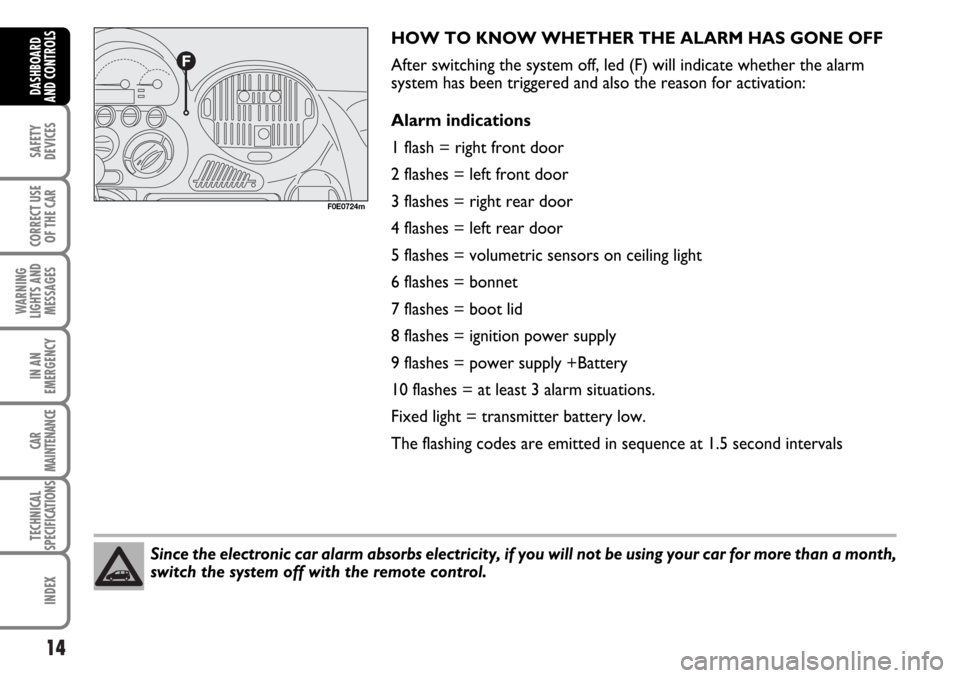
After switching the system off, led (F) will indicate whether the alarm
system has been triggered and also the reason for activation:
Alarm indications
1 flash = right front door
2 flashes = left front door
3 flashes = right rear door
4 flashes = left rear door
5 flashes = volumetric sensors on ceiling light
6 flashes = bonnet
7 flashes = boot lid
8 flashes = ignition power supply
9 flashes = power supply +Battery
10 flashes = at least 3 alarm situations.
Fixed light = transmitter battery low.
The flashing codes are emitted in sequence at 1.5 second intervals
F0E0724m
Page 44 of 266
43
SAFETY
DEVICES
CORRECT USE
OF THE CAR
WARNING
LIGHTS AND
MESSAGES
IN AN
EMERGENCY
CAR
MAINTENANCE
TECHNICAL
SPECIFICATIONS
INDEX
DASHBOARD
AND CONTROLS
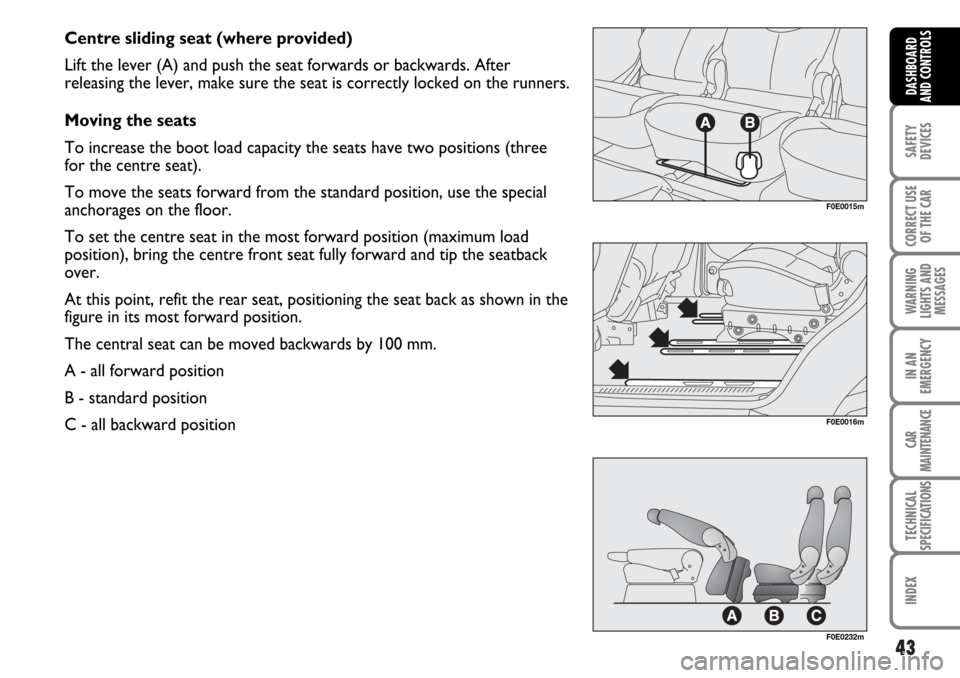
Centre sliding seat (where provided)
Lift the lever (A) and push the seat forwards or backwards. After
releasing the lever, make sure the seat is correctly locked on the runners.
Moving the seats
To increase the boot load capacity the seats have two positions (three
for the centre seat).
To move the seats forward from the standard position, use the special
anchorages on the floor.
To set the centre seat in the most forward position (maximum load
position), bring the centre front seat fully forward and tip the seatback
over.
At this point, refit the rear seat, positioning the seat back as shown in the
figure in its most forward position.
The central seat can be moved backwards by 100 mm.
A - all forward position
B - standard position
C - all backward position
F0E0016m
F0E0232m
F0E0015m
Page 71 of 266
70
SAFETY
DEVICES
CORRECT USE
OF THE CAR
WARNING
LIGHTS AND
MESSAGES
IN AN
EMERGENCY
CAR
MAINTENANCE
TECHNICAL
SPECIFICATIONS
INDEX
DASHBOARD
AND CONTROLS
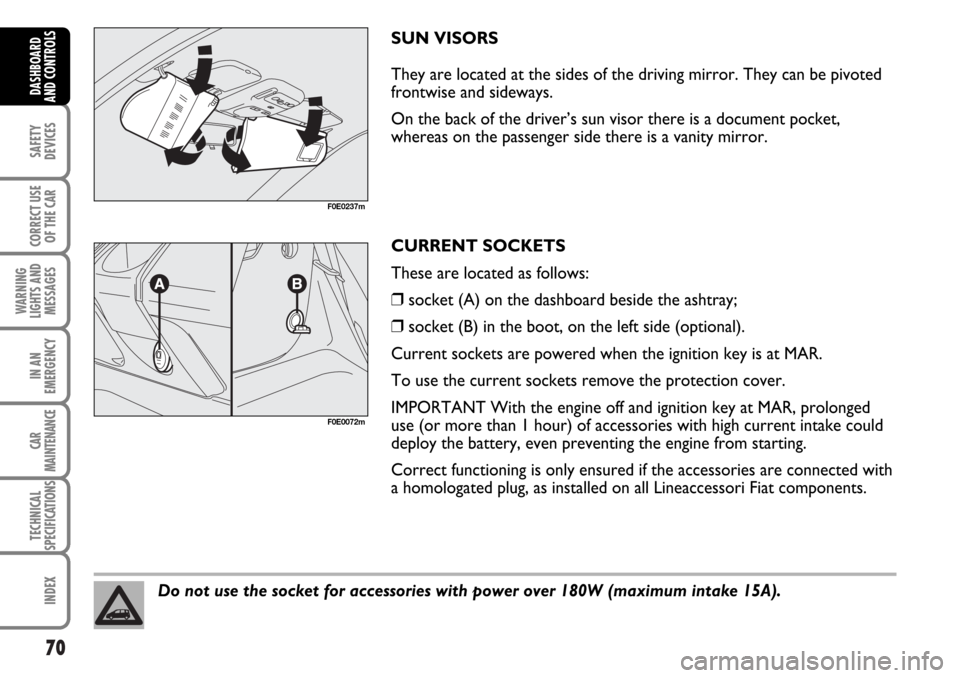
SUN VISORS
They are located at the sides of the driving mirror. They can be pivoted
frontwise and sideways.
On the back of the driver’s sun visor there is a document pocket,
whereas on the passenger side there is a vanity mirror.
CURRENT SOCKETS
These are located as follows:
❒socket (A) on the dashboard beside the ashtray;
❒socket (B) in the boot, on the left side (optional).
Current sockets are powered when the ignition key is at MAR.
To use the current sockets remove the protection cover.
IMPORTANT With the engine off and ignition key at MAR, prolonged
use (or more than 1 hour) of accessories with high current intake could
deploy the battery, even preventing the engine from starting.
Correct functioning is only ensured if the accessories are connected with
a homologated plug, as installed on all Lineaccessori Fiat components.
F0E0237m
Do not use the socket for accessories with power over 180W (maximum intake 15A).
F0E0072m
Page 72 of 266
71
SAFETY
DEVICES
CORRECT USE
OF THE CAR
WARNING
LIGHTS AND
MESSAGES
IN AN
EMERGENCY
CAR
MAINTENANCE
TECHNICAL
SPECIFICATIONS
INDEX
DASHBOARD
AND CONTROLS
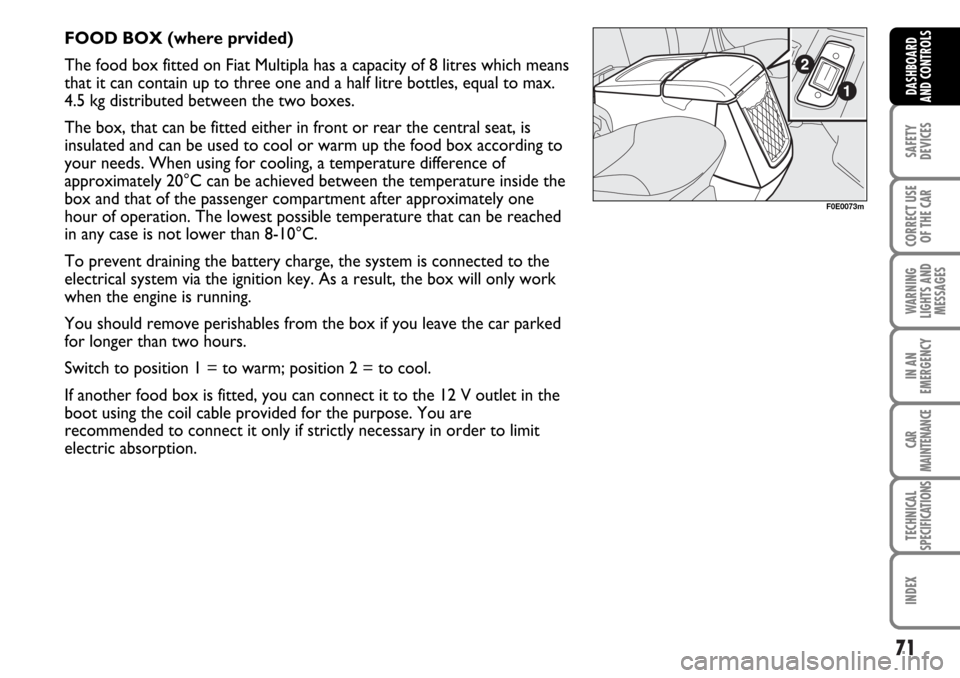
FOOD BOX (where prvided)
The food box fitted on Fiat Multipla has a capacity of 8 litres which means
that it can contain up to three one and a half litre bottles, equal to max.
4.5 kg distributed between the two boxes.
The box, that can be fitted either in front or rear the central seat, is
insulated and can be used to cool or warm up the food box according to
your needs. When using for cooling, a temperature difference of
approximately 20°C can be achieved between the temperature inside the
box and that of the passenger compartment after approximately one
hour of operation. The lowest possible temperature that can be reached
in any case is not lower than 8-10°C.
To prevent draining the battery charge, the system is connected to the
electrical system via the ignition key. As a result, the box will only work
when the engine is running.
You should remove perishables from the box if you leave the car parked
for longer than two hours.
Switch to position 1 = to warm; position 2 = to cool.
If another food box is fitted, you can connect it to the 12 V outlet in the
boot using the coil cable provided for the purpose. You are
recommended to connect it only if strictly necessary in order to limit
electric absorption.
F0E0073m
Page 79 of 266
78
SAFETY
DEVICES
CORRECT USE
OF THE CAR
WARNING
LIGHTS AND
MESSAGES
IN AN
EMERGENCY
CAR
MAINTENANCE
TECHNICAL
SPECIFICATIONS
INDEX
DASHBOARD
AND CONTROLS
BOOT
OPENING/CLOSING THE TAILGATE
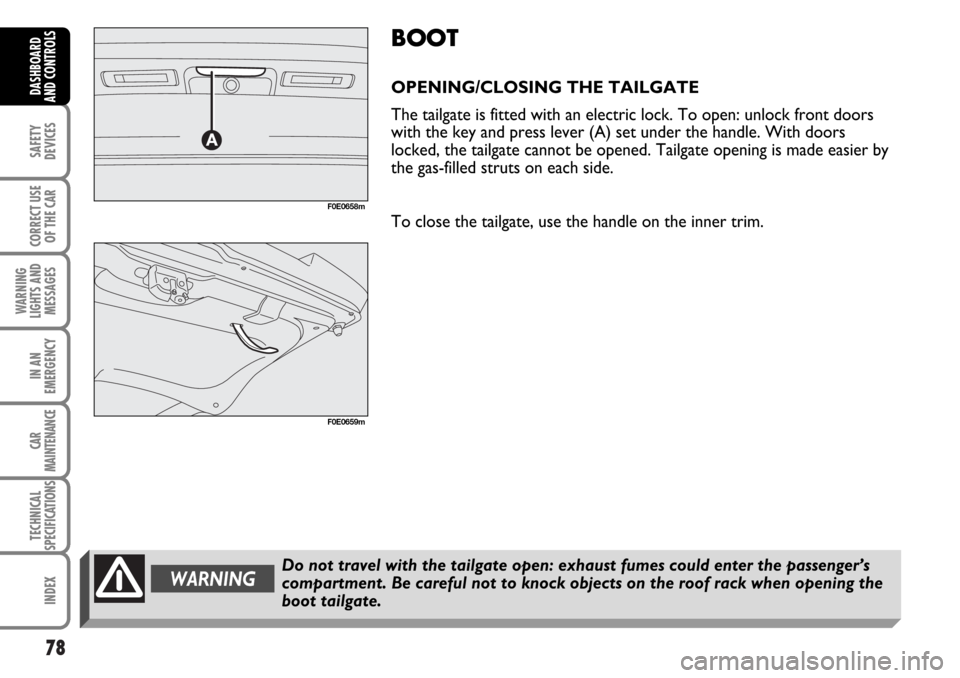
The tailgate is fitted with an electric lock. To open: unlock front doors
with the key and press lever (A) set under the handle. With doors
locked, the tailgate cannot be opened. Tailgate opening is made easier by
the gas-filled struts on each side.
To close the tailgate, use the handle on the inner trim.
F0E0658m
F0E0659m
Do not travel with the tailgate open: exhaust fumes could enter the passenger’s
compartment. Be careful not to knock objects on the roof rack when opening the
boot tailgate.WARNING
Page 80 of 266
79
SAFETY
DEVICES
CORRECT USE
OF THE CAR
WARNING
LIGHTS AND
MESSAGES
IN AN
EMERGENCY
CAR
MAINTENANCE
TECHNICAL
SPECIFICATIONS
INDEX
DASHBOARD
AND CONTROLS
WARNINGWhen using the boot, make sure the loads you are carrying do not exceed the
permitted weight (see section “Technical specifications”). Also make sure the items
in the boot are arranged properly to prevent them being thrown forwards and
injuring passengers should you brake sharply.
F0E0397m
F0E0396m
EMERGENCY OPENING
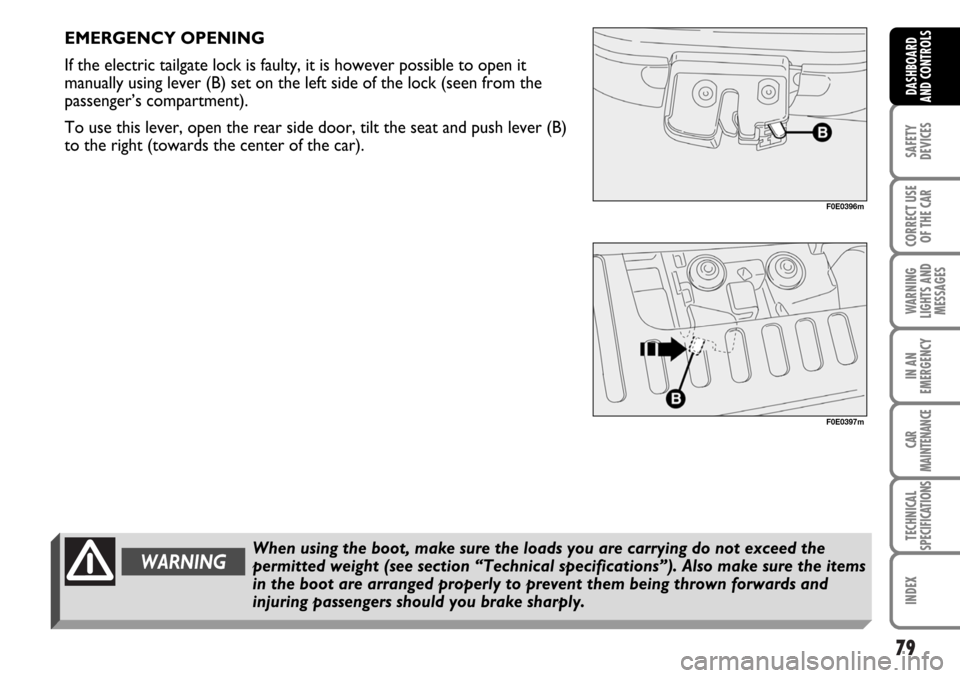
If the electric tailgate lock is faulty, it is however possible to open it
manually using lever (B) set on the left side of the lock (seen from the
passenger’s compartment).
To use this lever, open the rear side door, tilt the seat and push lever (B)
to the right (towards the center of the car).
Page 81 of 266
80
SAFETY
DEVICES
CORRECT USE
OF THE CAR
WARNING
LIGHTS AND
MESSAGES
IN AN
EMERGENCY
CAR
MAINTENANCE
TECHNICAL
SPECIFICATIONS
INDEX
DASHBOARD
AND CONTROLS
ANCHORING THE LOAD
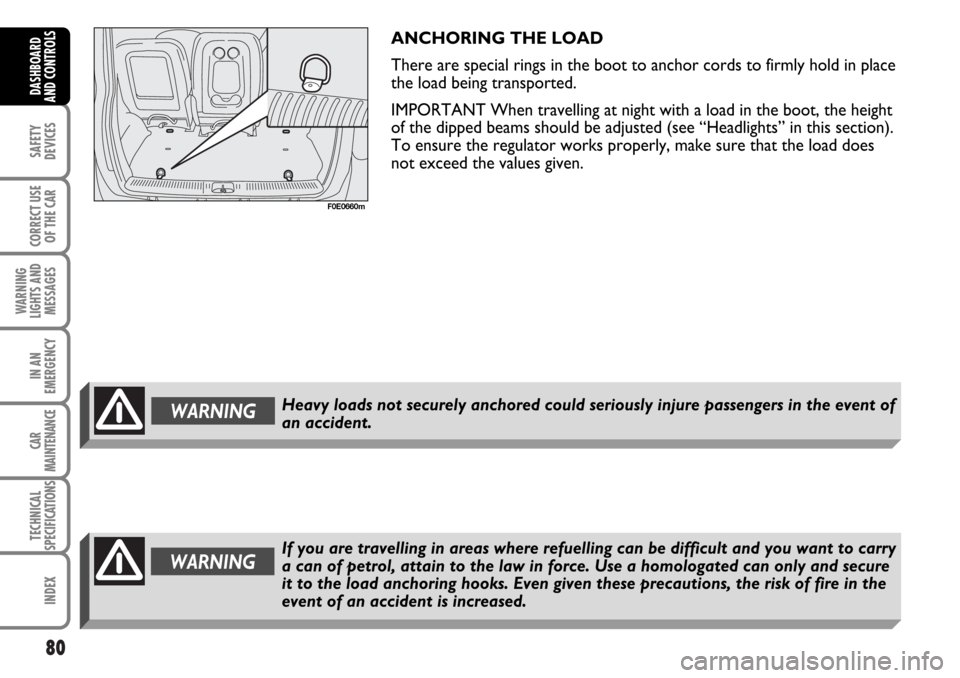
There are special rings in the boot to anchor cords to firmly hold in place
the load being transported.
IMPORTANT When travelling at night with a load in the boot, the height
of the dipped beams should be adjusted (see “Headlights” in this section).
To ensure the regulator works properly, make sure that the load does
not exceed the values given.
WARNINGHeavy loads not securely anchored could seriously injure passengers in the event of
an accident.
F0E0660m
WARNINGIf you are travelling in areas where refuelling can be difficult and you want to carry
a can of petrol, attain to the law in force. Use a homologated can only and secure
it to the load anchoring hooks. Even given these precautions, the risk of fire in the
event of an accident is increased.
Page 82 of 266
81
SAFETY
DEVICES
CORRECT USE
OF THE CAR
WARNING
LIGHTS AND
MESSAGES
IN AN
EMERGENCY
CAR
MAINTENANCE
TECHNICAL
SPECIFICATIONS
INDEX
DASHBOARD
AND CONTROLS
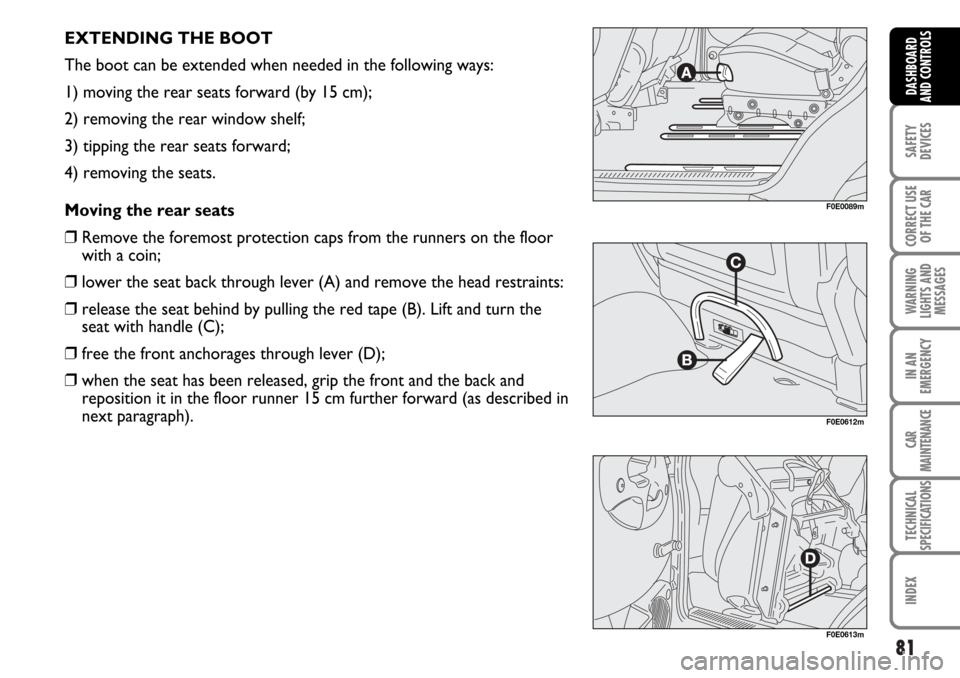
EXTENDING THE BOOT
The boot can be extended when needed in the following ways:
1) moving the rear seats forward (by 15 cm);
2) removing the rear window shelf;
3) tipping the rear seats forward;
4) removing the seats.
Moving the rear seats
❒Remove the foremost protection caps from the runners on the floor
with a coin;
❒lower the seat back through lever (A) and remove the head restraints:
❒release the seat behind by pulling the red tape (B). Lift and turn the
seat with handle (C);
❒free the front anchorages through lever (D);
❒when the seat has been released, grip the front and the back and
reposition it in the floor runner 15 cm further forward (as described in
next paragraph).
F0E0089m
F0E0612m
F0E0613m