power steering fluid FIAT PUNTO 1998 176 / 1.G Owner's Manual
[x] Cancel search | Manufacturer: FIAT, Model Year: 1998, Model line: PUNTO, Model: FIAT PUNTO 1998 176 / 1.GPages: 225, PDF Size: 18.54 MB
Page 193 of 225

Suspension and steering 10*5
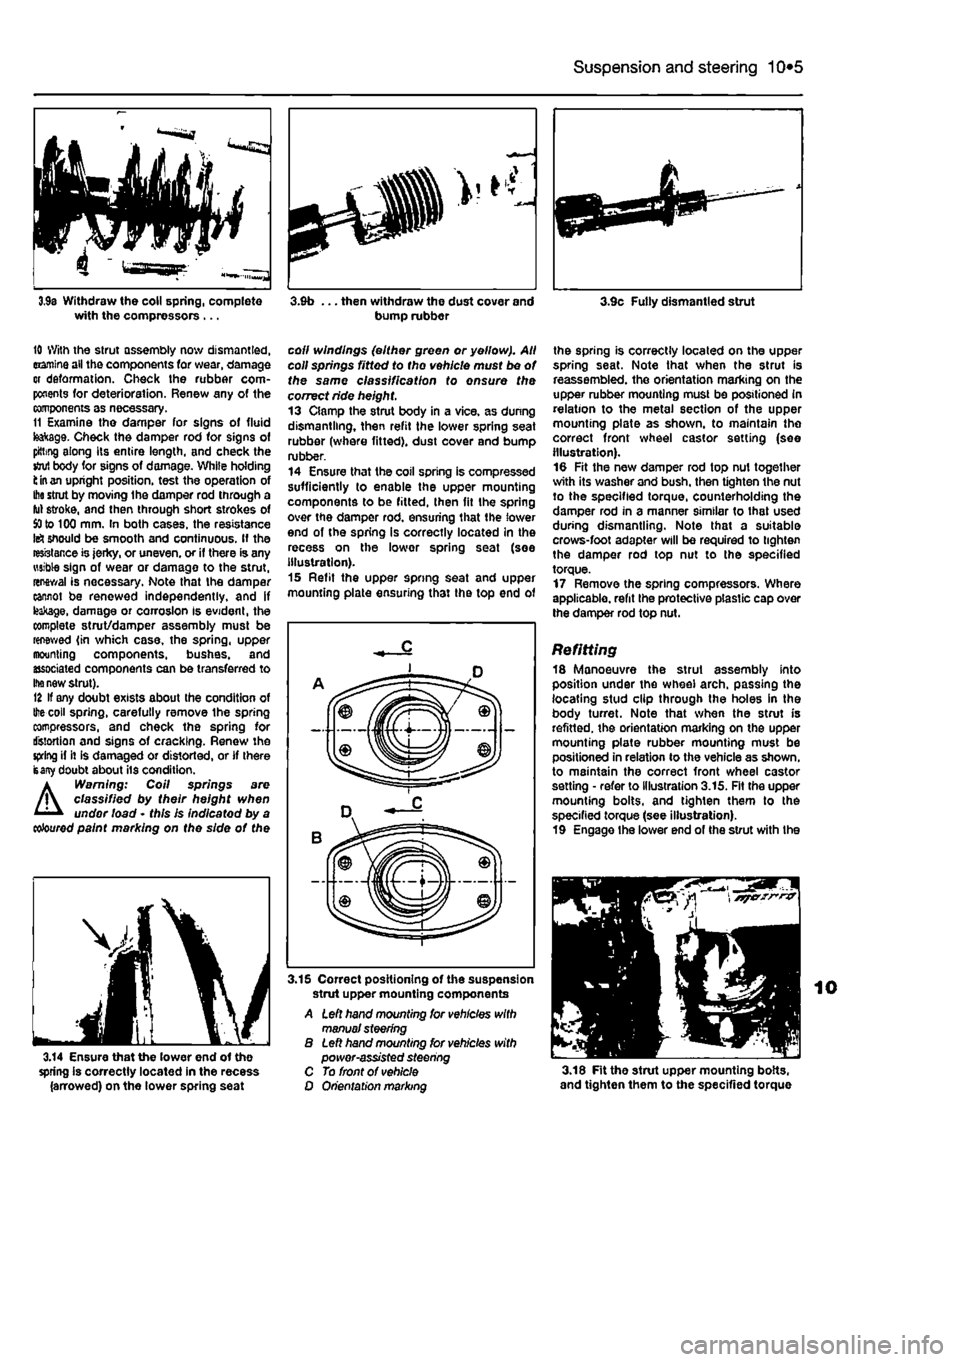
3,9s Withdraw the coll spring, complete with the compressors ... 3.9b ... then withdraw the dust cover and bump rubber 3.9c Fully dismantled strut
10 With the strut assembly now dismantled, examine all the components tor wear, damage or deformation. Check the rubber com-ponents for deterioration. Renew any of the components as necessary. 11 Examine tho damper for signs of fluid teakage. Check the damper rod for signs of pitting along its entire length, and check the stjul body for signs of damage. White holding fc
in an
upright position, test the operation of
Ihe
stmt by moving Ihe damper rod through a fut stroke, and then through short strokes of
SO
to 100 mm. In both cases, the resistance Id should be smooth and continuous. If the resistance is jerky, or uneven, or if there is any wsible sign of wear or damage to the strut, renewal is necessary. Note that the damper cannot be renewed independently, and if leakage, damage or corrosion Is evident, the complete strut/damper assembly must be renewed {in which case, the spring, upper mounting components, bushes, and associated components can be transferred to
Ihe
new strut). 12 If any doubt exists about the condition of
Ihe
coil spring, carefully remove the spring compressors, and check the spring for distortion and signs of cracking. Renew the spring if it is damaged or distorted, or if there isany doubt about its condition. a Warning: Coil springs are /j\ classified by their height when '
11
• undor load • this Is indicatod by a
coloured
paint marking on the side of the
coll windings (either green or yellow). All coll springs fitted to tho vehicle must be of the same classification to ensure the correct ride height. 13 Clamp the strut body in a vice, as dunng dismantling, then refit the lower spring seat rubber (where fitted), dust cover and bump rubber. 14 Ensure that the coil spring is compressed sufficiently to enable the upper mounting components to be fitted, then fit the spring over the damper rod. ensuring that the lower end of the spring is correctly located In the recess on the lower spring seat (soe illustration). 15 Refit the upper spring seat and upper mounting plate ensuring that the top end of
the spring is correctly located on the upper spring seat. Note that when the strut is reassembled, the orientation marking on the upper rubber mounting must be positioned in relation to the metal section of the upper mounting plate as shown, to maintain the correct front wheel castor setting (see illustration). 10 Fit the new damper rod top nut together with its washer and bush, then tighten the nut to the specified torque, counterholding the damper rod in a manner similar to that used during dismantling. Note that a suitable crows-foot adapter will be required to tighten the damper rod top nut to the specified torque. 17 Remove the spring compressors. Where applicable, refit the protective plastic cap over the damper rod top nut.
Refitting 18 Manoeuvre the strut assembly into position under the wheel arch, passing the locating stud clip through the holes in the body turret. Note that when the strut is refitted, the orientation marking on the upper mounting plate rubber mounting must be positioned in relation to the vehicle as shown, to maintain the correct front wheel castor setting • refer to illustration 3.15. Fit the upper mounting bolts, and tighten them to the specified torque (see illustration). 19 Engage Ihe lower end of the strut with the
3.14 Ensure that the lower end of the spring is correctly located in the recess (arrowed) on the lower spring seat
3.15 Correct positioning of the suspension strut upper mounting components A Left hand mounting for vehicles with manual steering B Left hand mounting tor vehicles with power-assisted steering C To front of vehicle O Orientation marking 3.18 Fit the strut upper mounting bolts, and tighten them to the specified torque
Page 198 of 225

10*10 Suspension and steering
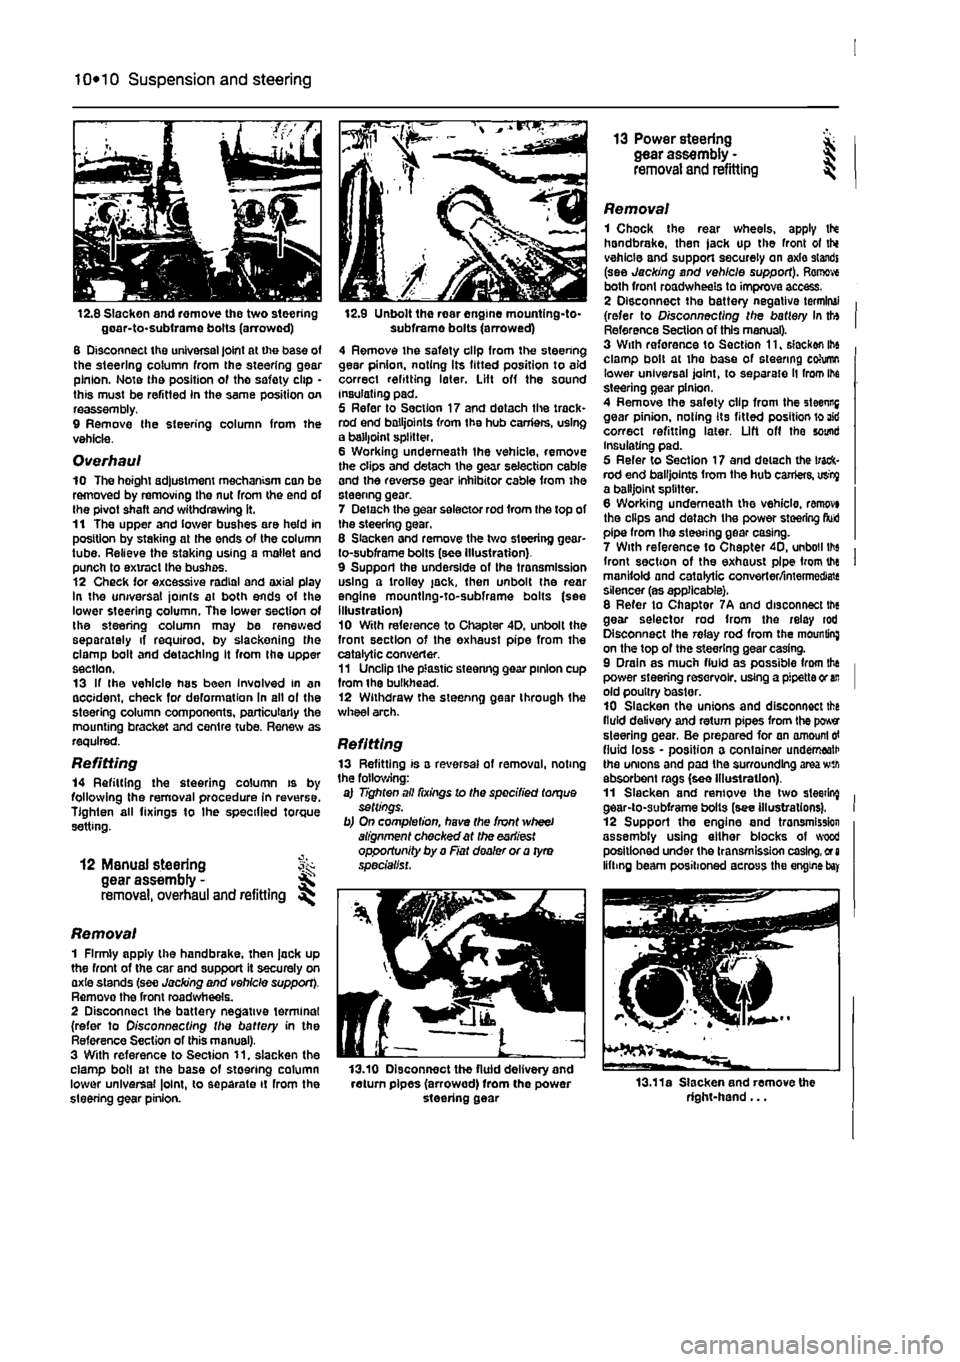
12.8 Slacken and remove the two steering goar-to-subirame bolts (arrowed) 8 Disconnect the universal joint at the base of the steering column from the steering gear pinion. Note the position of tho safety clip • this must be refitted In the same position on reassembly. 9 Remove Ihe steering column from the vehicle.
Overhaul 10 The hoight adjustment mechanism can be removed by removing the nut from the end of the pivot shaft and withdrawing it. 11 The upper and lower bushes are held in position by staking at the ends of the column tube. Relieve the staking using a mallet and punch to extract the bushes. 12 Check for excessive radial and axial play In the universal joints at both ends of the lower steering column. The lower section of the steering column may be renewed separately if required, by slackening the clamp bolt and detaching It from the upper section. 13 If the vehicle has been Involved in an accident, check for deformation In all ol the steering column components, particularly the mounting bracket and centre tube. Renew as required.
Refitting 14 Refitting the steering column is by following the removal procedure in reverse. Tighten all fixings to Ihe specified torque setting.
12 ManuaJ steering fk gear assembly -removal, overhaul and refitting
Removal 1 Firmly apply the handbrake, then jack up the front of the car and support it securely on axie stands (see Jacking and vehicle support). Remove the front road wheels. 2 Disconnect the battery negative terminal (refer to Disconnecting the battery in the Reference Section of this manual). 3 With reference to Section 11. slacken the clamp boil at the base of steering column lower universal |o!nt, to separate it rrom the steering gear pinion.
12.9 Unbolt the rear engine mountlng-to-subframe bolts (arrowed) 4 Remove the safety clip from the steering gear pinion, noting Its fitted position to aid correct refitting later. Lift off the sound insulating pad. 5 Refer to Section 17 and dotach the track* rod end bailjoints from the hub carriers, using a balljoint splitter. 6 Working underneath the vehicle, remove the clips and detach the gear selection cable and the reverse gear inhibitor cable from the steenng gear. 7 Delach the gear selector rod from the top of the steering gear, 8 Slacken and remove the two steering gear-to-subframe bolts (see Illustration) 9 Support the underside of the transmission using a trolley jack, then unbolt the rear engine mountlng-to-subframe bolts (see illustration) 10 With reference to Chapter 4D. unbolt the front section of the exhaust pipe from the catalytic converter. 11 Unclip the plastic steenng gear pinion cup from ihe bulkhead. 12 Withdraw the steenng gear through the wheel arch.
Refitting 13 Refitting is a reversal of removal, noting the following: a) Tighten all fixings lo the specified torque settings. b) On completion, have the front wheel alignment checked at the earliest opportunity by a Fiat dealer or a tyro specialist.
13.10 Disconnect the fluid delivery and return pipes (arrowed) from the power steering gear
13 Power steering * gear assembly - J removal and refitting ^
Removal 1 Chock the rear wheels, apply tN handbrake, then jack up the front ot thi vehicle and support securely on axle standi (see Jacking and vehicle support). Remove both front roadwheels to improve access. 2 Disconnect the battery negative terminal (refer to Disconnecting the battery In tto Reference Section of this manual). 3 With reforence to Section 11, slacken ihe clamp bolt at the base of steering cohimn lower universal joint, to separate ll from Ihe steering gear pinion. 4 Remove the safety clip from the steenng gear pinion, noting its fitted position lo aid correct refitting later. Lift off the sound Insulating pad. 5 Refer to Section 17 and detach the track-rod end bailjoints from the hub carriers, usty a balljoint splitter. 6 Working underneath the vehicle, ranwvi the clips and detach the power steering fluid pipe from the steering gear casing. 7 With reference to Chapter 40, unboil lbs front section of the exhaust pipe from the manifold and catalytic converter/intermediate silencer (as applicable). 8 Refer to Chaptor 7A and disconnect the gear selector rod from the relay rod Disconnect the relay rod from the mounting on the top of the steering gear casing. 9 Drain as much fluid as possible from the power steering reservoir, using a pipette or
an
old poultry baster. 10 Slacken the unions and disconnect the fluid delivery and return pipes from the power steering gear. Be prepared for an amount
erf
fluid loss - position a container underneath the unions and pad the surrounding area wth absorbent rags (see Illustration). 11 Slacken and remove the two sleeting gear-to-subframe bolts (see illustrations). 12 Support the engine and tronsmission assembly using either blocks of wood positioned under the transmission casing,
or a
lifting beam positioned across the engine
bay
13.11a Slacken and remove the right-hand...
Page 199 of 225

Suspension and steering 10*11
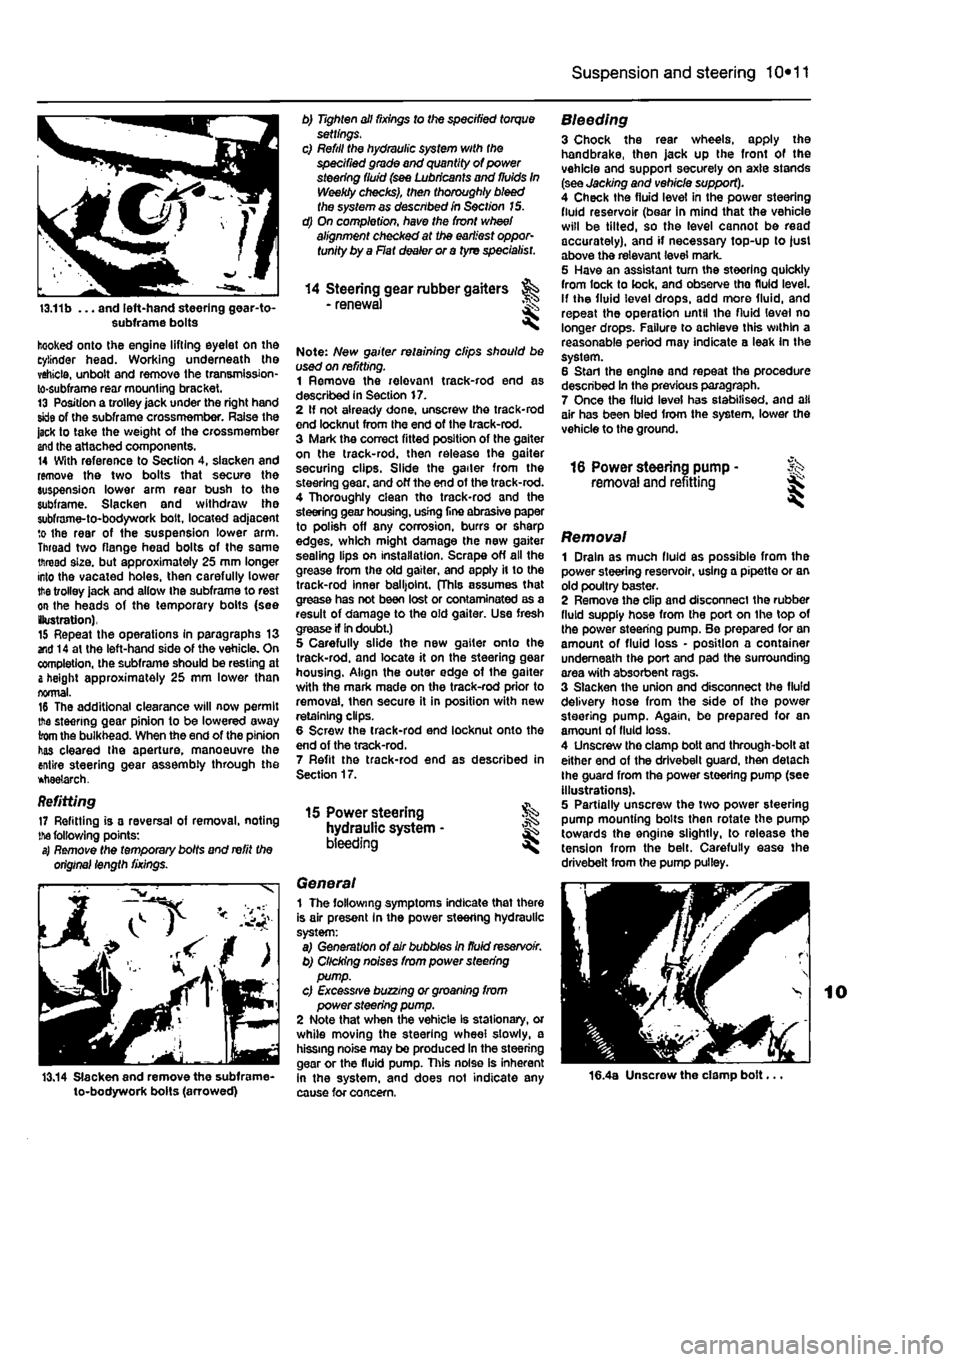
13.11b ... and left-hand steering gear-to-subframe bolts
hooked onto the engine lifting eyelet on the cylinder head. Working underneath the vehicle, unbolt and remove the transmission-lo-subframe rear mounting bracket. 13 Position a trolley jack under the right hand skle of the subframe crossmember. Raise the jack to take the weight of the crossmember
and
the attached components. 14 With reference to Section 4, slacken and remove the two bolts that secure the suspension lower arm rear bush to the subframe. Slacken and withdraw the subframe-to-bodywork bolt, located adjacent to the rear of the suspension lower arm. Throad two flange head bolts of the same thread size, but approximately 25 mm longer into the vacated holes, then carefully lower
the
trolley jack and allow ihe subframe to rest on the heads of the temporary bolts (see (lustration), 15 Repeat the operations in paragraphs 13 end 14 at the left-hand side of the vehicle. On completion, the subframe should be resting at
&
height approximately 25 mm lower than normal. 16 The additional clearance will now permit the steering gear pinion to be lowered away from the bulkhead. When the end of the pinion has cleared Ihe aperture, manoeuvre the entire steering gear assembly through the *tiae?arch.
Refitting 17 Refitting is a reversal of removal, noting
the
following points: s) Remote the temporary bolts and refit the original length fixings.
13.14 Slacken and remove the subframe-to-bodywork bolts (arrowed)
b) Tighten all fixings to the specified torque settings. c) Refill the hydraulic system with the specified grade and quantity of power steering fluid (see Lubricants and fluids In Weekly checks), then thoroughly bleed the system as described in Section 15. d) On completion, have the front wheel alignment checked at the earliest oppor-tunity by a Flat dealer or a tyre specialist.
14 Steering gear rubber gaiters - renewal <
Note: New gaiter retaining clips should be used on refitting. 1 Remove the relevant track-rod end as described in Section 17. 2 If not already done, unscresv the track-rod end locknut from Ihe end of the track-rod. 3 Mark the correct fitted position of the gaiter on the track-rod, then release the gaiter securing clips. Slide the gailer from the steering gear, and off the end of the track-rod. 4 Thoroughly clean tho track-rod and the steering gear housing, usrng fine abrasive paper to polish off any corrosion, burrs or sharp edges, which might damage the new gaiter sealing lips on installation. Scrape off all the grease from the old gaiter, and apply it to the track-rod inner balljoint. (This assumes that grease has not been lost or contaminated as a result of damage to the old gaiter. Use fresh crease if In doubt.) 5 Carefully slide the new gaiter onto the track-rod. and locate it on the steering gear housing. Align the outer edge of the gaiter with the mark made on the track-rod prior to removal, then secure it in position with new retaining clips. 6 Screw the track-rod end locknut onto the end of the track-rod. 7 Refit the track-rod end as described in Section 17.
15 Power steering hydraulic system • bleeding ^
General 1 The following symptoms indicate that there is air present In the power steering hydraulic system: a) Generation of air bubbles in fluid reservoir. b) Clicking noises from power steering pump. c) Excessive buzzing or groaning from power steering pump. 2 Note that when the vehicle Is stationary, or while moving the steering wheel slowly, a hissing noise may be produced In the steering gear or the fluid pump. This noise is inherent in the system, and does not indicate any cause for concern.
Bleeding 3 Chock the rear wheels, apply the handbrake, then jack up the front of the vehicle and support securely on axle stands (see Jacking and vehicle support). 4 Check the fluid level in the power steering fluid reservoir (bear in mind that the vehicle will be tilted, so the level cannot be read accurately), and if necessary top-up to just above the relevant level mark. 5 Have an assistant tum the steering quickly from lock to lock, and observe tho fluid level, if the fluid level drops, add more fluid, and repeat the operation until the fluid level no longer drops. Failure to achieve this within a reasonable period may indicate a leak in the system. 6 Stan the engine and repeat the procedure described In the previous paragraph. 7 Once the fluid level has stabilised, and all air has been bled from the system, lower the vehicle to the ground.
16 Power steering pump - Sk removal and refitting ^
Removal 1 Drain as much fluid as possible from the power steering reservoir, using a pipette or an old poultry baster. 2 Remove the clip and disconnect the rubber fluid supply hose from the port on the top of the power steering pump. Be prepared for an amount of fluid loss • position a container underneath the port and pad the surrounding area with absorbent rags. 3 Slacken the union and disconnect the fluid delivery hose from the side of the power steering pump. Again, be prepared for an amount of fluid loss. 4 Unscrew tho clamp bolt and through-bolt at either end of the drivebelt guard, then detach Ihe guard from the power steering pump (see illustrations). 5 Partially unscresv the two power steering pump mounting bolts then rotate the pump towards the engine slightly, to release the tension from the belt. Carefully ease the drivebelt from the pump pulley.
16.4a Unscrew the clamp bolt...
Page 200 of 225

10*12 Suspension and steering
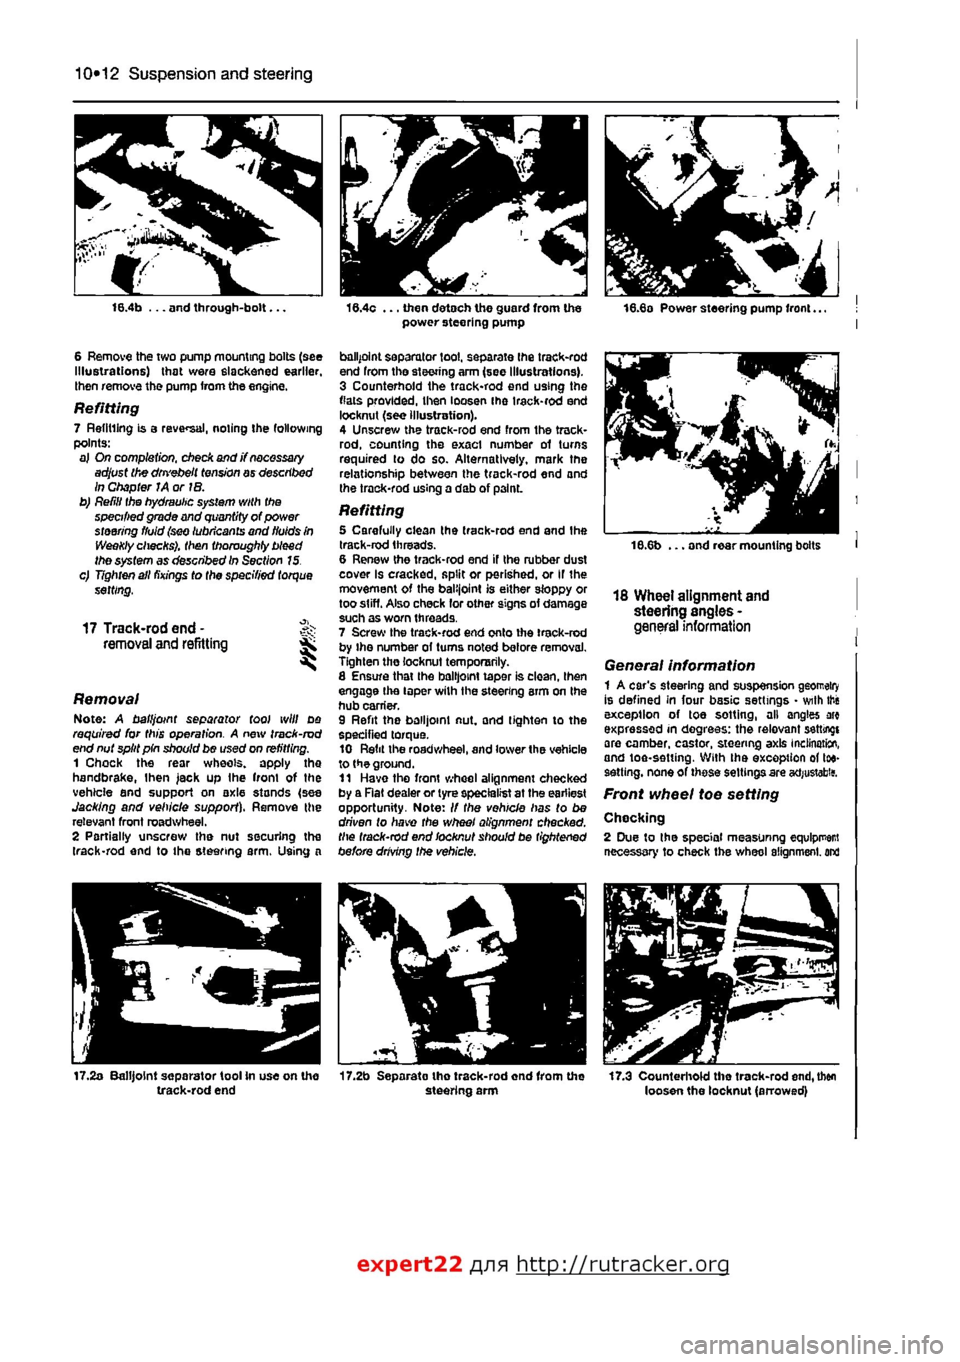
16.4b ... and through-bolt...
6 Remove the two pump mounting bolts (see Illustrations) that were slackened earlier, then remove the pump from the engine.
Refitting 7 Refilling is a reversal, noting the following points: a) On completion, check and j? necessary adjust the dm'ebelt tension ay described In Chapter JA or IB. b) Refill the hydraulic system with the specified grade and quantity of power steering fluid (sw lubricants and fluids in Weekly checks), then thoroughly bleed the system as described In Section 15. c) Tighten all fixings to the specified torque setting,
17 Track-rod end -removal and refitting ^ S
Removal Note: A ball joint separator tool will do required for this operation. A new track-rod end nut split pin should be used on refitting. 1 Chock the rear wheels, apply the handbrake,
I
hen jack up Ihe front of the vehicle and support on axle stands (see Jacking and vehicle support). Remove the relevant front roadwheel. 2 Partially unscrew the nut securing the (rack-rod end to the steering arm. Using a
17.2a Balljoint separator tool In use on the track-rod end
16.4c ... then detach the guard from the power steering pump
ballpoint separator tool, separate Ihe track-rod end from tho steering arm (see Illustrations). 3 Counterhold the track-rod end using the flats provided, then loosen ihe irack-rod end locknut (see illustration). 4 Unscrew the track-rod end from the track-rod, counting the exact number of turns required to do so. Alternatively, mark the relationship between the track-rod end and the trock-rod using a dab of p3lnL
Refitting 5 Carefully clean the track-rod end and the track-rod threads. 6 Renew the track-rod end if the rubber dust cover Is cracked, split or perished, or If the movement of the balijoint is either sloppy or too stiff. Also check lor other signs of damage such as worn threads. 7 Screw the track-rod end onto ihe track-rod by ihe number ol turns noted before removal. Tighten the locknut temporarily. 8 Ensure that Ihe balljoint taper is clean, then engage the taper wilh the steering arm on the hub carrier. 9 Refit the balljoint nut, and tighten to the specified torque. 10 Refit the roadwheel, and lower the vehicle to the ground. 11 Have tho front wheel alignment checked by a Rat dealer or tyre specialist at the earliest opportunity. Note: // the vehicle has to be driven to have the wheel alignment checked, the track-rod end locknut should be tightened before drMng the vehicle.
17.2b Separato tho track-rod end from the steering arm
18.6b ... and rear mounting bolts
18 Wheel alignment and steering angles -general information
General information 1 A car's steering and suspension geomeiry Is defined in four basic settings • with this exception of toe sotting, all angles arc expressed in degrees: the relevant setting! are camber, castor, steering axis inclination, and toe-setting. With ihe exception of toe-sett ing, none of these settings are acfjustabitf.
Front wheel toe setting
Chocking 2 Due to the special measuring equlpr
expert22 fl/m http://rutracker.org