Front control FIAT PUNTO 1998 176 / 1.G Workshop Manual
[x] Cancel search | Manufacturer: FIAT, Model Year: 1998, Model line: PUNTO, Model: FIAT PUNTO 1998 176 / 1.GPages: 225, PDF Size: 18.54 MB
Page 22 of 225
Maintenance schedule - petrol models 1A.3
The maintenance Intervals in this manual are provided with the assumption that you, not the dealer, will be carrying out the work. These axe the minimum maintenance intervals recommended by us for vehicles driven daily.
if you wish to keep your vehicle in peak condition at all times, you may wish to perform some of these procedures more often. We encourage frequent maintenance, because it enhances the efficiency.
performance and resale value of your vehicle. When the vehicle Is new, it should be serviced by a factory-authorised dealer service department, In order to preserve the factory warranty.
Every 250 miles (400 km) or weekly Q Refer to Weekly checks
Every 5000 miles (7500 km) or
6 months - whichever comes first • Renew the engine oil and filter (Section 3)
Note: Frequent oil and fitter changes am good tor the engine. We recommend changing the oil at the mileage specified here, or at least
twice
a year if the mileage covered Is a less.
Every 10 000 miles (15 000 km) or
12 months - whichever comes first
In
addition to the items listed above, cany out the following: Q Check the operation of the brake warning lamp (Section 4) • Check the front brake pads for wear (Section 5) • Check the underbody and sealant for damage (Section 6) • Hose and fluid leak check (Section 7) • Check the condition of the exhaust system and its mountings (Section 8) • Check the condition of the driveshaft gaiters (Section 9) • Renew pollen filter (Section 10) • Check exhaust gas content and idle speed (Section 11) • Check the steering and suspension components for condition and security (Section 12)
Every 20 000 miles (30 000 km) or
2 years - whichever comes first
In
addition to the Items listed above, carry out the following: • Check and if necessary adjust the tension of the auxiliary drlvebelt(s) (Section 13) • Check the freeplay and height of the clutch pedal (Section 14) • Check and if necessary adjust the valve clearances (Section 15) HI Check and if necessary tighten inlet and exhaust manifold mountings (Section 16) • Renew the fuel filter (Section 17) D Renew the air filter element (Section 18) O Renew the spark plugs (Section 19) • Check the condition of the HT cables (Section 20) • Check the engine management system (Section 21) Q Lubricate all hinges and locks (Section 22) O Check the headlight beam adjustment (Section 23) • Carry out a road test (Section 24)
Every 30 000 miles (45 000 km) or
3 years - whichever comes first In addition to the items listed above, cany out the following: • Check the operation of the Lambda sensor (Section 25) • Check and if necessary top-up the manual transmission oil level (Section 26) • Check the operation of the evaporative loss system (Section 27) • Automatic transmission inner filter and fluid renewal (Section 28)
Every 40 000 miles (60 000 km) or
4 years - whichever comes first In addition to the items fisted above, carry out the following: • Check the rear brake shoes for wear (Section 29) • Renew the timing belt (Section 30)"
*Noto: Although the normal interval for timing belt renewal is 70 000 miles (105 000 km), It is strongly recommended that the belt Is renewed at 40 000 miles (60 000 km) on vehicles which are subjected to Intensive use, ie. malniy short Journeys or a let of stop-start driving. The actual belt renewal Interval Is therefore very much up to the individual owner, but bear in mind that severe engine damage will result if the belt breaks.
Every 60 000 miles (90 000 km) or
6 years - whichever comes first in addition to the items listed above, cany out the following: • Check the condition and operation of the crankcase emission control system (Section 31)
Every 80 000 miles (120 000 km) • Renew the manual transmission oil (Section 32)
Every 2 years
(regardless of mileage) • Renew the engine coolant (Section 33) • Renew the brake fluid (Section 34)
Page 28 of 225
Every 10 000 miles - petrol models ia.q
10 Pollen filter renewal
1 The pollen filter (where fitted) is located under the engine bulkhead cover panel. 2 Refer to Chapter 12 and remove both svindscreen wiper arms. 3 Unclip the rubber
seal
from the relevant end of
the
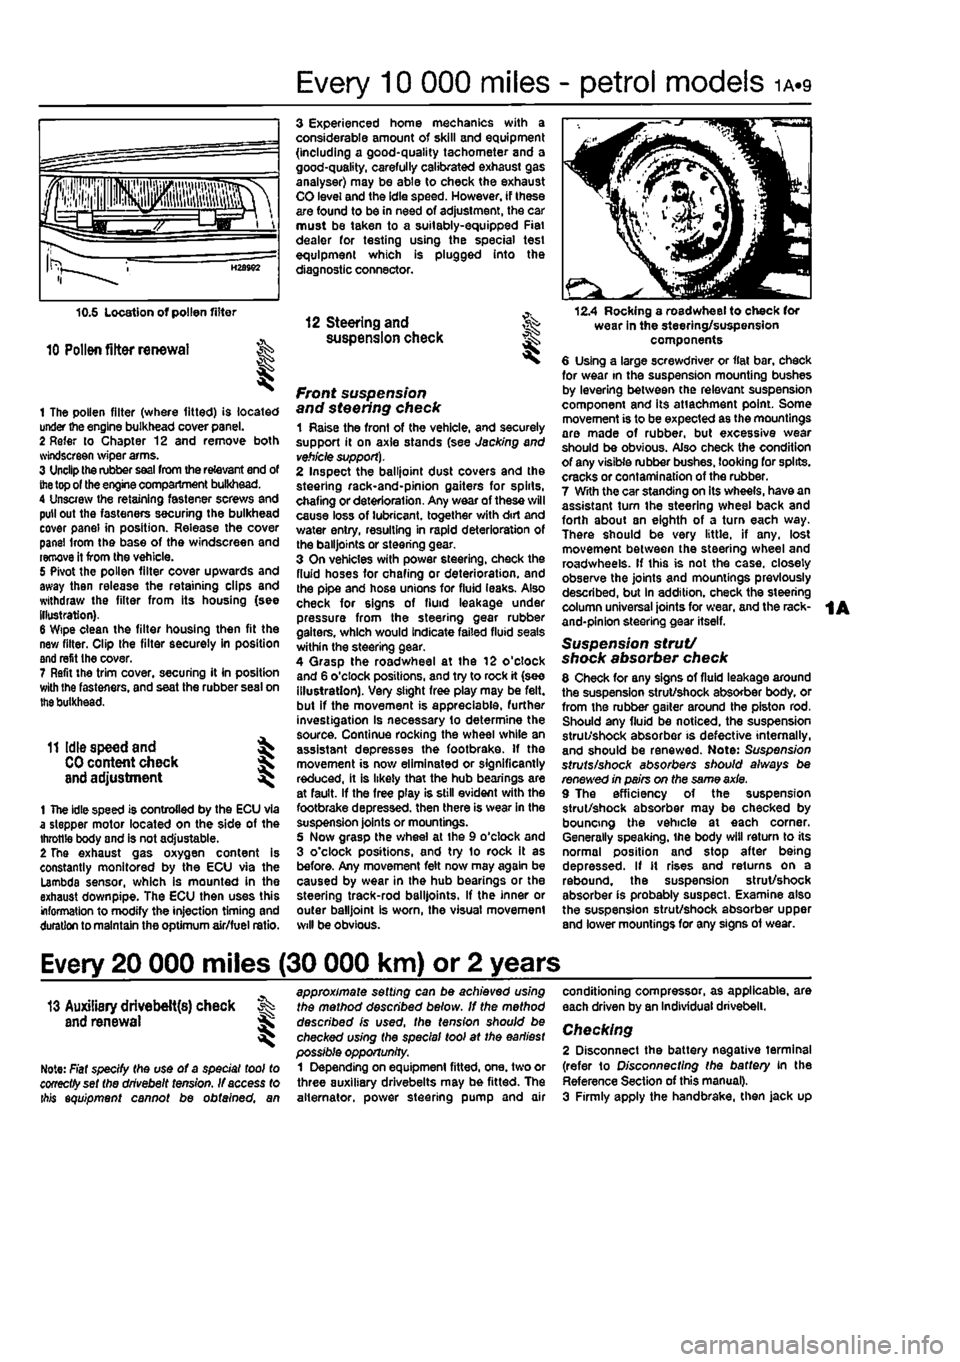
top of the engine compartment bulkhead. 4 Unscrew the retaining fastener screws and pull out the fasteners securing the bulkhead cover panel in position. Release the cover panel Irom the base of the windscreen and remove it from the vehicle. 5 Pivot the pollen filter cover upwards and away then release the retaining clips and withdraw the filter from its housing (see illustration). 6 Wipe clean the filter housing then fit the new filter. Clip the filter securely in position and refit the cover. 7 Refit the trim cover, securing it in position with Ihe fasteners, and seat the rubber seal on
the
bulkhead.
11 Idle speed and ^
CO
content check J and adjustment ^
1 The idle speed is controlled by the ECU via a stepper motor located on the side of the throttle body and is not adjustable. 2 The exhaust gas oxygen content is constantly monitored by the ECU via the Lambda sensor, which is mounted in the exhaust down pipe. The ECU then uses this information to modify the injection timing and duration to maintain the optimum air/fuel ratio.
3 Experienced home mechanics with a considerable amount of skill and equipment (including a good-quality tachometer and a good-quality, carefully calibrated exhaust gas analyser) may be able to check the exhaust CO level and the idle speed. However, if these are found to be in need of adjustment, the car must be taken to a suitably-equipped Fiat dealer for testing using the special test equipment which is plugged into the diagnostic connector.
12 Steering and ^ suspension check
front suspension and steering check 1 Raise the front of the vehicle, and securely support it on axle stands (see Jacking and
vehicle support).
2 Inspect the balljoint dust covers and the steehng rack-and-pinion gaiters for spirts, chafing or deterioration. Any wear of these will cause loss of lubricant, together with dirt and water entry, resulting in rapid deterioration of the balljoints or steering gear. 3 On vehicles with power steering, check the fluid hoses for chafing or deterioration, and the pipe and hose unions for fluid leaks. Also check for signs of fluid leakage under pressure from the steering gear rubber gaiters, which would indicate failed fluid seals within the steering gear. 4 Qrasp the roadwheel at the 12 o'clock and 6 o'clock positions, and try to rock it (see illustration). Very slight free play may be felt, but if the movement is appreciable, further investigation Is necessary to determine the source. Continue rocking the wheel while an assistant depresses the footbrake. If the movement is now eliminated or significantly reduced, it is likely that the hub bearings are at fault. If the free play is still evident with the footbrake depressed, then there is wear in the suspension joints or mountings. 5 Now grasp the wheel at the 9 o'clock and 3 o'clock positions, and try to rock it as before. Any movement felt now may again be caused by wear in the hub bearings or the steering track-rod balljoints. If the inner or outer balljoint is worn, the visual movement will be obvious.
12.4 Rocking a roadwheel to check for wear in the steering/suspension components 6 Using a large screwdriver or flat bar, check for wear in the suspension mounting bushes by levering between the relevant suspension component and its attachment point. Some movement is to be expected as the mountings are made of rubber, but excessive wear should be obvious. Also check the condition of any visible rubber bushes, looking for splits, cracks or contamination of the rubber. 7 With the car standing on its wheels, have an assistant tum the steering wheel back and forth about sn eighth of a turn each way. There should be very little, if any. lost movement between the steering wheel and roadwheels. If this is not the case, closely observe the joints and mountings previously described, but in addition, check the steering column universal joints for wear, and the rack-and-pinion steering gear itself.
Suspension strut/ shock absorber check 8 Check for any signs of fluid leakage around the suspension strut/shock absorber body, or from the rubber gaiter around the piston rod. Should any fluid be noticed, the suspension strut/shock absorber is defective internally, and should be renewed. Note: Suspension struts/shock absorbers should always be renewed in pairs on the same axle. 9 The efficiency of the suspension strut/shock absorber may be checked by bouncing the vehicle at each corner. Generally speaking, ihe body will return to its normal position and stop after being depressed. If it rises and returns on a rebound, the suspension strut/shock absorber is probably suspect. Examine also the suspension strut/shock absorber upper and lower mountings for any signs of wear.
Every 20 000 miles (30 000 km) or 2 years
13 Auxiliary drivebelt{s) check % and renewal ^
Note: Fiat specify the use of a special tool to cooectfyset the drivebelt tension. If access to ibis equipment cannot be obtained, an
approximate setting can be achieved using the method described below. If the method described is used, the tension should be checked using the special tool at the earliest possible opportunity. 1 Depending on equipment fitted, one. two or three auxiliary drivebelts may be fitted. The alternator, power steering pump and air
conditioning compressor, as applicable, are each driven by an Individual drivebelt.
Checking 2 Disconnect the battery negative terminal (refer to Disconnecting the battery in the Reference Section of this manual). 3 Firmly apply the handbrake, then jack up
Page 32 of 225
Every 20 000 miles - petrol models 1A.13
20 Ignition system check
81
21 Engine management system check
A
Warning: Voltages produced by an electronic ignition system are considerably higher than those produced by conventional ignition systems. Extreme care must be taken when working on the system with the Ignition switched on. Persons with surgically-Implanted cardiac pacemaker devices should keep well clear of the ignition circuits, components and test oquipment. 1 The ignition system components should be checked for damage or deterioration as follows.
General component check 2 The spark plug (HT) leads should be checked whenever new spark plugs are fitted. 3 Pull the leads from the plugs by gripping
the end
fitting, not the lead, otherwise the lead connection may be fractured.
Ensure that the leads are i numbered before removing i them, to avoid confusion when refitting
4 Check Inside the end fitting for signs of corrosion, which will look like a white crusty powder. Push the end fitting back onto the spark plug, ensuring that it is a tight fit on the plug. if not, remove the lead again and use pliers to carefully crimp the metal connector inside the end fitting until it fits securely on the
end
of the spark plug. 5 Using a clean rag, wipe Ihe emlre length of the lead to remove any built-up dirt and grease. Once the lead is clean, check for bums, cracks and other damage. Do not bend the lead excessively, nor pull the lead lengthways - the conductor inside might break. 6 Disconnect the other end of the lead from the ignition coll. Again, pull only on the end fitting. Check for corrosion and a tight fit in the
same
manner as the spark plug end. Refit the bad securely on completion. 7 Check the remaining leads one at a time, in
ihe same
way. 8 if new spark plug (HT) leads are required, purchase a set for your specific car and engine. 9 Even with the ignition system In first-class condition, some engines may still occasionally experience poor starting attributable to damp ignition components. To disperse moisture, a water-dispersant aerosol should be liberally
Ignition timing -
check
and adjustment 10 Check the ignition timing as described In Chapter 58.
1 This check is part of the manufacturer's maintenance schedule, and Involves testing Ihe engine management system using special dedicated test equipment. Such testing will allow the test equipment to read any fault codes stored in the electronic control unit memory. 2 Unless a fault is suspected, this test te not essential, although it should be noted that it is recommended by the manufacturers. 3 If access to suitable test equipment is not possible, make a thorough check of all ignition, fuel and emission control system components, hoses, and wiring, for security and obvious signs of damage. Further details of the fuet system, emission control system and ignition system can be .found In the relevant parts of Chapters 4 and 5.
22 Hinge and lock lubrication %
1
1 Lubricate the hinges of the bonnet, doors and tailgate with a light general-purpose oil. Similarly, lubricate ail latches, locks and lock strikers. At the same time, check the security and operation of all the locks, adjusting them If necessary (see Chapter 11). 2 Lightly lubricate the bonnet release mechanism and cable with a suitable grease.
23 Headlight beam adjustment % & ^
1 Accurate adjustment of the headlight beam is only possible using optical beem-setting equipment, and this work should therefore be carried out by a Fiat dealer or service station with the necessary facilities. In an emergency, however, the following procedure will provide an acceptable light pattern. 2 Position the car on a level surface with tyres correctly inflated, approximately 10 metres in front of. and at right-angles to, a wall or garage door, 3 Draw a horizontal line on the wall or door at headlamp centre height. Draw a vertical line corresponding to the centre line of the car, then measure off a point either side of this, on the horizontal line, corresponding with the headlamp centres. 4 Switch on the main beam and check that the areas of maximum illumination coincide with the headlamp centre marfcs on Ihe wall, if not. turn the adjustment screw located on the upper inside edge of the headlight unit to adjust the beam laterally, and the adjustment screw located on the upper outside edge of the headlight unit to adjust the beam
vertically. On models with electric headlight adjustment, make sure that it is set at its basic setting before making the adjustment.
24 Road test
Instruments and electrical equipment 1 Check the operation of all Instruments and electrical equipment. 2 Make sure that all instruments read correctly, and switch on all electrical equipment in turn, to check that it functions properly.
Steering and suspension 3 Check for any abnormalities in the steering, suspension, handling or road feel. 4 Drive the vehicle, and check that there are no unusual vibrations or noises. 5 Check that the steering feels positive, with no excessive sloppiness, or roughness, and check for any suspension noises when cornering and driving over bumps.
Drivetrain 6 Check the performance of the engine, clutch (where applicable), transmission and driveshafts. 7 Listen for any unusual noises from the engine, clutch and gearbox/transmission. 8 Make sure that the engine runs smoothly when Idling, and that there Is no hesitation when accelerating. 9 Check that, where applicable, the clutch action Is smooth and progressive, that the drive is taken up smoothly, and that the pedal travel is not excessive. Also listen for any noises when the clutch pedal is depressed. 10 On manual gearbox models, check that all gears can be engaged smoothly without noise, and that the gear lever action is not abnormally vsgue or notchy. 11 On automatic transmission models, check that all Ihe gear positions can be selected with the vehicle at rest, if any problems are found, they should be referred to a Flat dealer. 12 Listen for a metallic clicking sound from the front of the vehicle, as the vehicle is driven slowly in a circle with the steering on full-lock. Carry out this check in both directions. If a clicking noise is heard, this Indicates wear in a drtveshaft joint, In which case renew the joint if necessary.
Check the braking system 13 Make sure that the vehicle does not pull to one side when braking, and that the wheels do not lock prematurely when braking hard. 14 Check that there is no vibration through the steering when braking. 15 Check that the handbrake operates correctly without excessive movement of the lever, and that It holds the vehicle stationary on a slope.
Page 34 of 225
Maintenance procedures - petrol models 1A.15
Every 40 000 miles (60 000 km) or 4 years
29 Rear brake shoe check
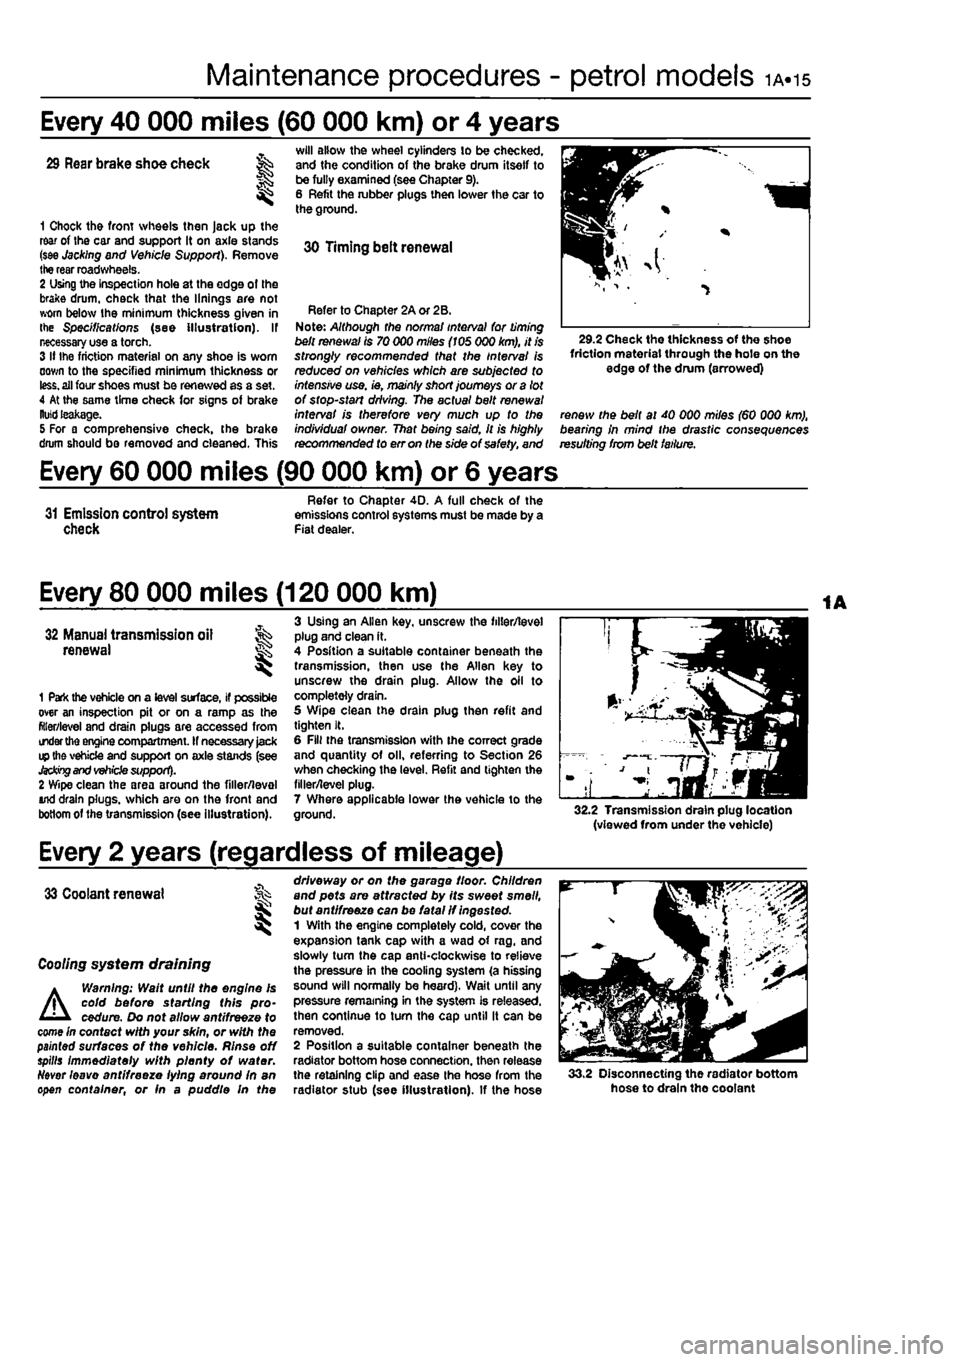
1 Chock the front wheels then Jack up the rear of Ihe car and support it on axle stands (see Jacking and Vehicle Support). Remove the rear roadwheels. 2 Using the inspection hole at the edge of the brake drum, check that the linings are not worn below Ihe minimum thickness given in the Specifications (see illustration). If necessary use a torch. 3 If the friction material on any shoe is worn down to the specified minimum thickness or
less,
all four shoes must be renewed as a set. 4 At the same time check for signs of brake
Kutti
leakage. 5 For a comprehensive check, the brake drum should be removed and cleaned. This
will allow the wheel cylinders to be checked, and the condition of the brake drum itself to be fully examined (see Chapter 9). 6 Refit the lubber plugs then lower the car to the ground.
30 Timing belt renewal
Refer to Chapter 2A or 2B. Note: Although the norma/ interval for timing belt renewal is 70 000 miles (105 000 km), it is strongly recommended that the interval Is reduced on vehicles which are subjected to intensive use. ie, mainly short journeys or a lot of stop-start driving. The actual belt renewal interval is therefore very much up to the individuaf owner. That being said, it is highly recommended to err on the side of safety, and
29.2 Check the thickness of the shoe friction material through the hole on the edge of the drum (arrowed)
renew the belt at 40 000 miles (60 000 km), bearing in mind the drastic consequences resulting from belt failure.
Every 60 000 miles (90 000 km) or 6 years
31 Emission control system check
Refer to Chapter 4D. A full check of the emissions control systems must be made by a Fiat dealer.
Every 80 000 miles (120 000 km)
32 Manual transmission all renewal S
1 Park the vehicle on a level surface, if possible over an inspection pit or on a ramp as the filler/level and drain plugs are accessed from order
the
engine compartment. If necessary
Jack
ip the vehicle and support on axle stands (see
Jacking and vehicle
support). 2 Wipe clean the area around the filler/leval And drain plugs, which are on the front and bottom of the transmission (see illustration).
3 Using an Allen key. unscrew the filler/level plug and clean it. 4 Position a suitable container beneath the transmission, then use the Allen key to unscrew the drain plug. Allow the oil to completely drain. 5 Wipe clean the drain plug then refit and tighten It. 6 Fill the transmission with ihe correct grade and quantity of oil, referring to Section 26 when checking the level. Refit and lighten the filler/level plug. 7 Where applicable lower the vehicle to the ground. 32.2 Transmission drain plug location (viewed from under the vehicle)
Every 2 years (regardless of mileage)
33 Coolant renewal
I
Cooling system draining
A
Warning: Walt until the engine Is cold before starting this pro-cedure. Do not allow antifreeze to come In contact with your skin, or with the painted surfaces of the vehicle. Rinse off spills immediately with plenty of water.
Ndver
leave antifreeze lying around In an open container, or fn a puddle In the
driveway or on the garage floor. Children and pets are attracted by its sweet smell, but ant/freeze can be fatal if ingested. 1 With the engine completely cold, cover the expansion tank cap with a wad of rag. and slowly turn the cap anticlockwise to relieve the pressure in the cooling system (a hissing sound will normally be heard). Wait until any pressure remaining in the system is released, then continue to tum the cap until it can be removed. 2 Position a suitable container beneath the radiator bottom hose connection, then release the retaining clip and ease the hose from the radiator stub (see illustration). If the hose 33.2 Disconnecting the radiator bottom hose to drain tho coolant
Page 37 of 225
1B»1
Chapter
1
Part B:
Routine maintenance & servicing - diesel models
Contents
Air filter renewal 13 Auxiliary drivebelt(s) check and renewal 16 Brake fluid renewal 2d Brake warning lamp operation check 5 Clutch adjustment check 17 Coolant renewal 27 Drtv«shaft gaiter check 10 Emissions control systems check 25
Engage
oil and filter renewal 3 Exhaust system check 9 Front brake pad check 6
Fuel
fitter renewal 12 Fuel Filter water draining 4 Headlight beam adjustment 20
Hinge and lock lubrication 19 Hose and fluid leak check 6 Idle speed check and adjustmenl 11 Introduction ... 1 Manual transmission oil level check 22 Manual transmission oil renewal - 26 Pollen filter renewal 14 Rear brake shoe check 23 Regular maintenance 2 Road test 21 Steering and suspension check 15 Timing belt renewal 24 Underbody sealant check 7 Valve clearance check and adjustment 16
^m
Degrees of difficulty
Easy, sutable for % Fairly easy, suitable FaHycifficult, i'. Difficult, suitable fa Very difficult, novice with irttte % for beginner with suitable for competent experienced DIY
1
suitable for expert DIY * or professional jQ experience some experience DIY mechanic mechanic 1
suitable for expert DIY * or professional jQ
Page 39 of 225
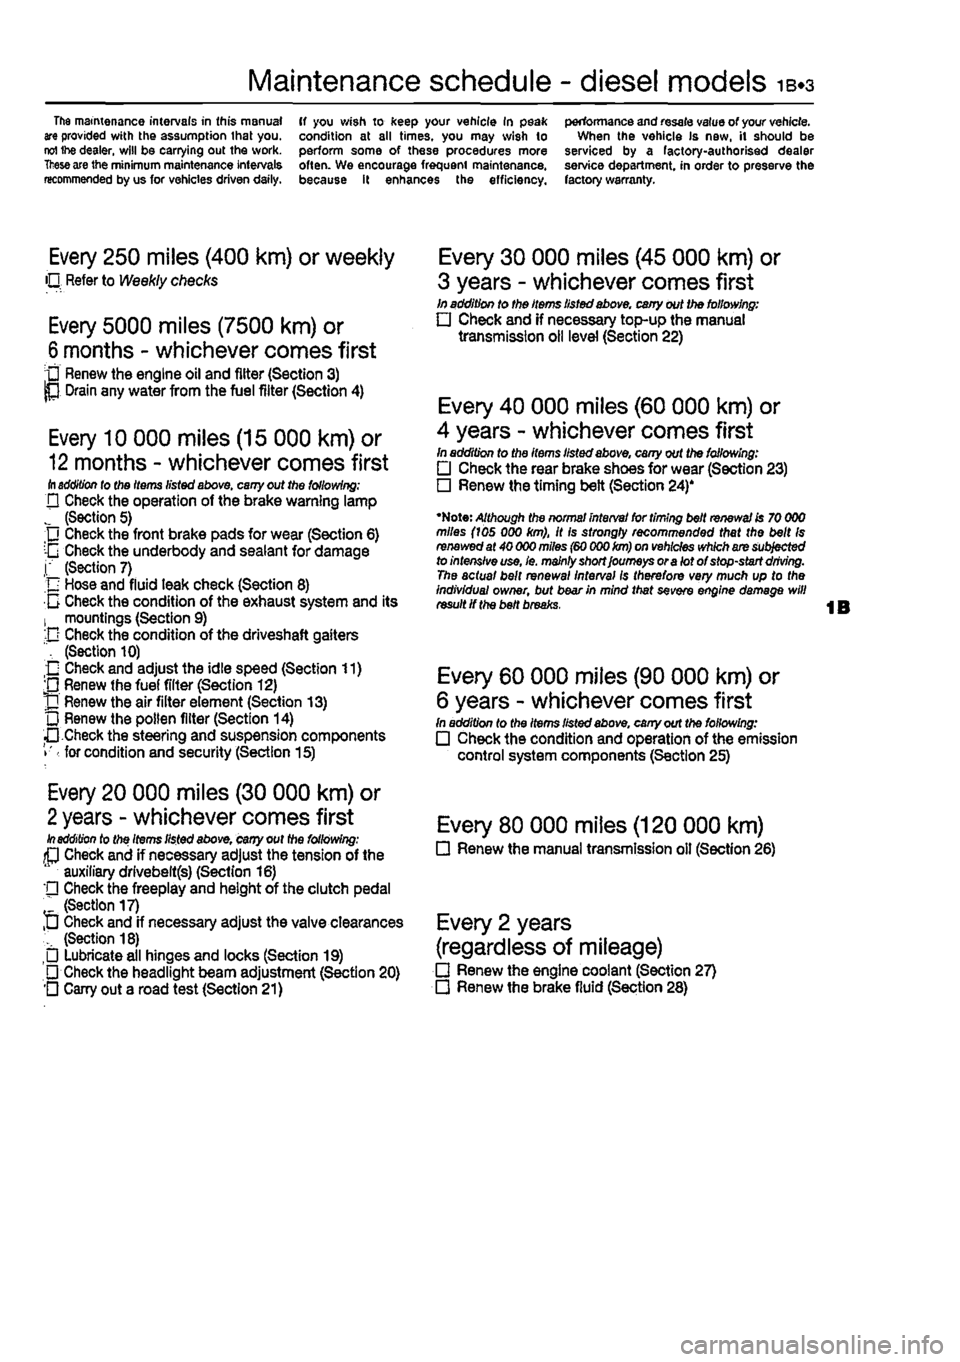
Maintenance schedule - diesel models 1B.3
The mamtenance intervals in this manual are provided with the assumption that you. reI ihe dealer, will be carrying out the work.
These
are the minimum maintenance intervals recommended by us for vehicles driven daily.
ff you wish to keep your vehicle In peak condition at all times, you may wish to perform some of these procedures more often. We encourage frequent maintenance, because it enhances the efficiency.
performance and resale value of your vehicle. When the vehicle Is new, it should be serviced by a factory-authorised dealer service department, in order to preserve the factory warranty.
Every 250 miles (400 km) or weekly O Refer to Weekly checks
Every 5000 miles (7500 km) or
6
months - whichever comes first • Renew the engine oil and filter (Section 3) P Drain any water from the fuel filter (Section 4)
Every 10 000 miles (15 000 km) or
12
months - whichever comes first ill addition lo tho Items listed above, cany out the following; D Check the operation of the brake warning lamp J (Section 5) Check the front brake pads for wear (Section 6) :-G Check the underbody and sealant for damage j" (Section 7) n Hose and fluid leak check (Section 8) 0 Check the condition of the exhaust system and its 1 mountings (Section 9) -D Check the condition of the driveshaft gaiters ", (Section 10) O Check and adjust the idle speed (Section 11) ;0 Renew (he fuel filter (Section 12) J] Renew the air filter element (Section 13) L) Renew the pollen filter (Section 14) •• Check the steering and suspension components • for condition and security (Section 15)
Every 20 000 miles (30 000 km) or
2
years - whichever comes first In addition to the Items listed above, cany out the following: (P Check and if necessary adjust the tension of the auxiliary drlvebeltfs) (Section 16) '• Check the freeplay and height of the clutch pedal " (Section 17) D Check and if necessary adjust the valve clearances (Section 18) Lubricate all hinges and locks (Section 19) • Check the headlight beam adjustment (Section 20) O Cany out a road test (Section 21)
Every 30 000 miles (45 000 km) or
3 years - whichever comes first In addition to the Items listed above, cany out the following: • Check and if necessary top-up the manual transmission oil level (Section 22)
Every 40 000 miles (60 000 km) or
4 years - whichever comes first In addition to the items listed above, cany out the following: • Check the rear brake shoes for wear (Section 23) • Renew the timing belt (Section 24)'
•Note: Although the normal interval for timing belt renewal is 70 000 miles (ids 000 km), it is strongly recommended that the belt Is renewed at 40 000 miles (60 000 km) on vehicles which are subjected to intensive use, le. mainly short Journeys or a lot of stop-start driving. The actual bait renewal interval Is therefore very much up to the Individual owner, but bear in mind that sevefe engine damage will result if the belt breaks.
Every 60 000 miles (90 000 km) or
6 years - whichever comes first In addition to the Items listed above, cany out the following: • Check the condition and operation of the emission control system components (Section 25)
Every 80 000 miles (120 000 km) • Renew the manual transmission oil (Section 26)
Every 2 years
(regardless of mileage) • Renew the engine coolant (Section 27) • Renew the brake fluid (Section 28)
Page 49 of 225
Maintenance procedures - diesel models 1B.13
Every 60 000 miles (90 000 km) or 6 years
Refer to Chapter 40. A full chock of the 26 Emissions control systems emissions control systems must be made by a check Fiat dealer.
Every 80 000 miles (120 000 km)
26 Manual transmission ,v->> oil renewal K
1 Pak the vehicle on a level surface, if possible over an inspection pit or on a ramp as the filer/level and drain plugs are accessed from
under the
engine compartment, ff necessary tack up Ihe vehicle and support on axle stands (see Jacking and
vehicle
support). 2
Wipe
clean the area around the filler/! a vol and vain plugs, which are situated on the front and bottom of the transmission (see Illustration}.
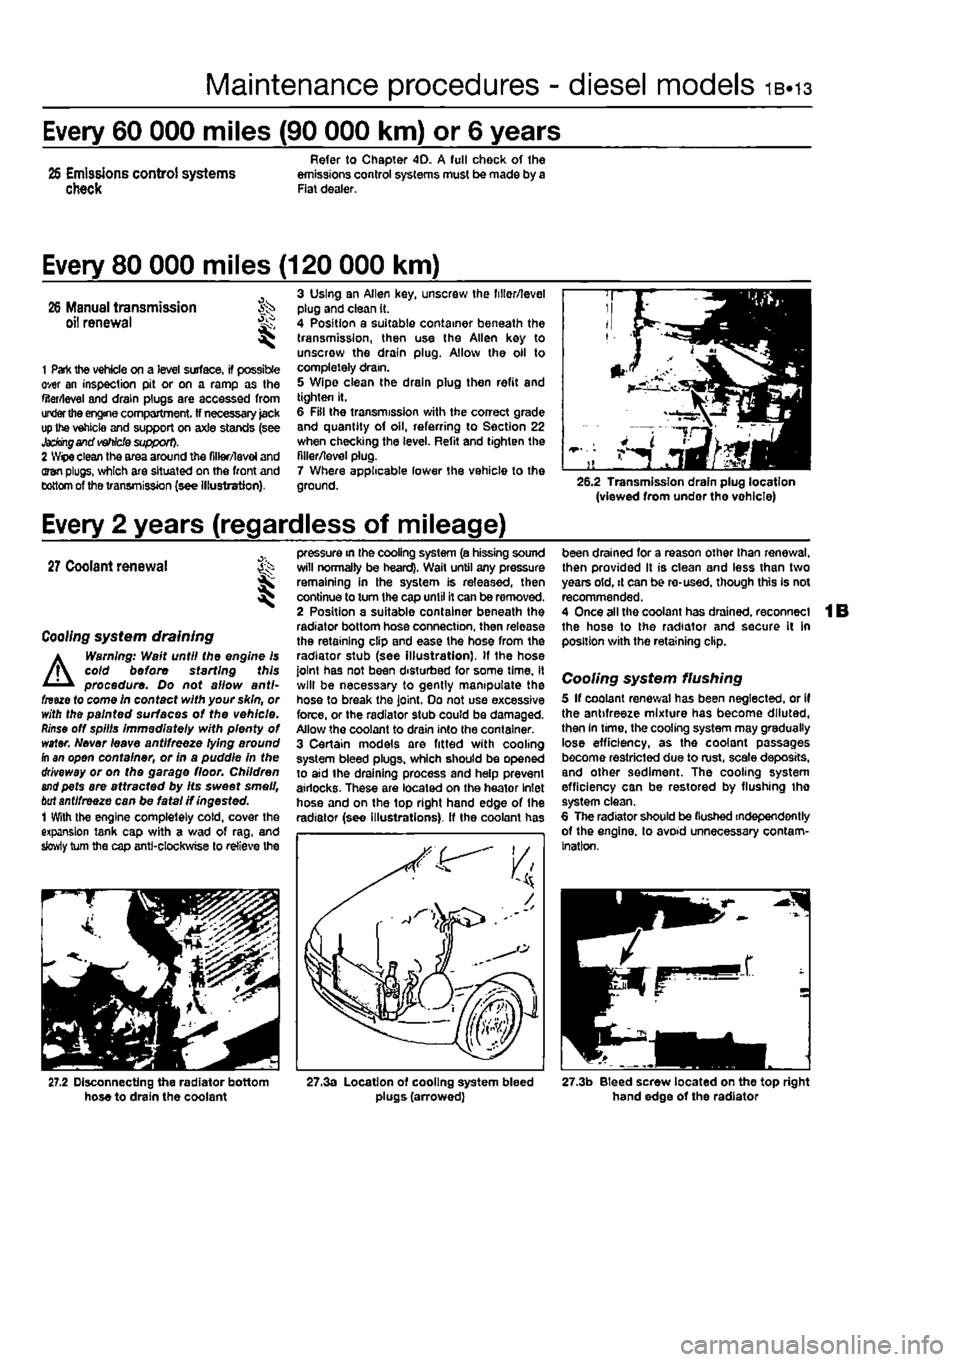
3 Using an Allen key, unscrew the fillor/level plug and clean it. 4 Position a suitable container beneath the transmission, then use the Allen key to unscrew the drain plug. Allow the oil to completely dram. 5 Wipe clean the drain plug then refit and tighten It. 6 Fill the transmission with the correct grade and quantity of oil, referring to Section 22 when checking the level. Refit and tighten the filler/level plug. 7 Where applicable lower the vehicle to the ground. 26.2 Transmission drain plug location (viewed from undor tho vohlcle)
Every 2 years (regardless of mileage)
27
Coolant renewal St I
Coo//ng system draining
A
Warning: Wait until the engine is coid before starting this procedure. Do not allow anti-fnue to come in contact with your skin, or with the painted surfaces of the vehicle.
Rinse
off spills immediately with plenty of water. Never leave antifreeze lying around fh an open container, or in a puddle in the driveway or on the garage floor. Children
and
pets are attracted by Its sweet smell,
bat
antifreeze can be fatal if ingested. 1 With the engine completely cold, cover the expansion tank cap with a wad of rag, and slowly turn the cap anti-clockwise to relieve the
pressure in the cooling system (a hissing sound will normally be heard). Wail until any pressure remaining in the system is released, then continue to turn the cap until it can be removed. 2 Position a suitable container beneath the radiator bottom hose connection, then release the retaining clip and ease the hose from the radiator stub (see Illustration), If the hose joint has not been disturbed for some time, it will be necessary to gently manipulate the hose to break the joint. Do not use excessive force, or the radiator stub could be damaged. Allow the coolant to drain into the container. 3 Certain models are fitted with cooling system bleed plugs, which should be opened to aid the draining process and help prevent airlocks. These are located on the heator Inlet hose and on the top right hand edge of the radiator (see Illustrations), ff the coolant has
been drained for a reason other than renewal, then provided It is clean and less than two years old, it can be re-used, though this is not recommended. 4 Once all the coolant has drained, reconnect the hose to the radiator and secure it in position with the retaining clip.
Cooling system flushing 5 If coolant renewal has been neglected, or if the antifreeze mixture has become diluted, then In time, the cooling system may gradually lose efficiency, as the coolant passages become restricted due to rust, scale deposits, and other sediment. The cooling system efficiency can be restored by flushing tho system clean. 6 The radiator should be (lushed independently of the engine, to avoid unnecessary contam-ination.
27.2 Disconnecting the radiator bottom hose to drain the coolant 27.3a Location of cooling system bleed plugs (arrowed) 27.3b Bleed screw located on the top right hand edge of the radiator
Page 52 of 225
2A*10 SOHC (8-valve) petrol engine in-car repair procedures
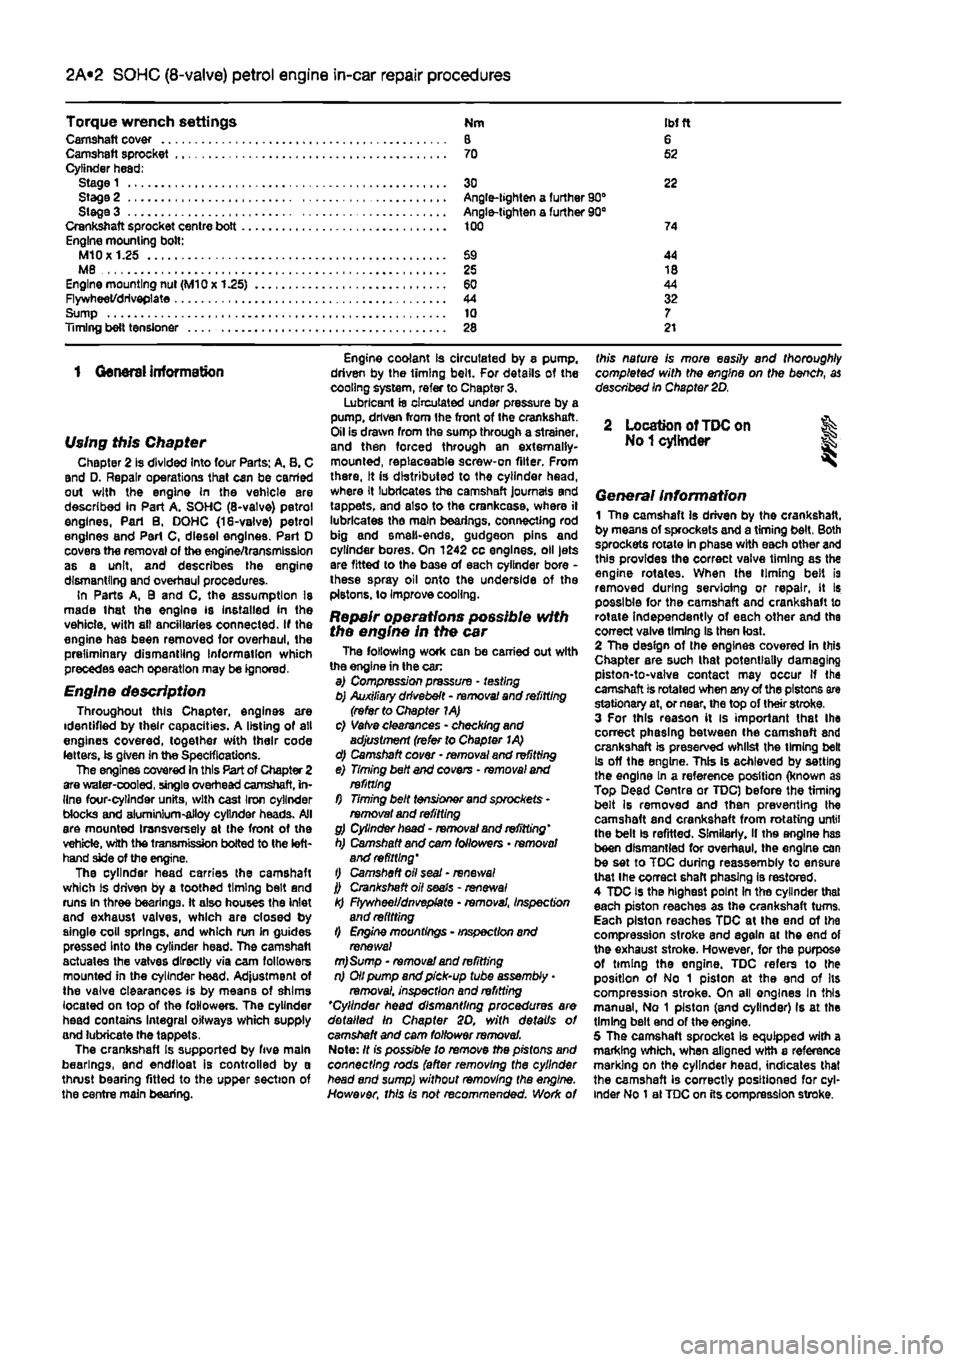
Torque wrench settings Nm
IM
ft Camshaft cover 8 6 Camshaft sprocket 70 52 Cylinder head; Stage 1 30 22 Stage 2 Angle-lighten a further 90° Siege 3 Angle-tighten a further 90B Crankshaft sprocket centre bott 100 74 Engine mounting bolt: M10X1.25 69 44 MB 25 18 Engine mounting nut (M10x 1.25) 60 44 Flywheet/driveplate 44 32 Sump 10 7 Timing belt tensJoner 28 21
1 General information
Using this Chapter Chapter 2 is divided Into four Parts: A. 8. C and D. Repair operations that can be carried out with the engine in the vehicle are described in Part A. SOHC (8-valve) petrol engines, Part B. DOHC (18-valve) petrol engines and Part C, diesel engines. Part 0 covers the removal of the engine/transmission as a unit, and describes the engine dismantling and overhaul procedures. In Parts A, 9 and C, the assumption Is made lhat the engine is Installed in the vehicle, with sll ancillaries connected. If the engine has been removed for overhaul, the preliminary dismantling Information which precedes each operation may be ignored.
Engine description Throughout this Chapter, engines are identified by their capacities. A listing of all engines covered, together with their code letters, is given in the Specifications. The engines covered In this Part of Chapter 2 are water-cooled, single overhead camshaft, in-line four-cylinder units, with cast Iron cylinder Mocks and aluminium-alloy cylinder heads. All are mounted transversely at the front ot the vehicle, with the transmission bolted to the left-hand side of the engine, The cylinder head carries the camshaft which is driven by a toothed timing belt and runs In three bearings. It also houses the inlet and exhaust valves, which are closed by single coil springs, and which run in guides pressed Into the cylinder head. The camshaft actuates the vatves directly via cam followers mounted in the cylinder head. Adjustment of the valve clearances is by means of shims located on top of the followers. The cylinder head contains Integral oitways which supply and lubricate the tappets. The crankshafl Is supported by five main bearings, and endftoat is controlled by a thrust bearing fitted to the upper section of the centre main bearing.
Engine coolant is circulated by 8 pump, driven by the timing belt. For details of the cooling system, refer to Chapter 3. Lubricant is circulated under pressure by a pump, driven from ihe front of the crankshaft. Oil Is drawn from the sump through a strainer, and then forced through an externally-mounted, replaceable screw-on filter. From there, It is distributed to the cylinder head, where It lubricates the camshaft journals and tappets, and also to the crankcase, where il lubricates the main bearings, connecting rod big and smell-ends, gudgeon pins and cylinder bores. On 1242 cc engines, oil jets are fitted lo the base of each cylinder bore -these spray oil onto the underside of the pistons, to Improve cooling.
Repair operations possible with the engine in the car The following work can be carried out with the engine in the car a) Compression pressure - testing b) Auxiliary drivebelt - removal and refitting (refer to Chapter 1A) c) Vatve clearances - checking and adjustment (refer to Chapter I A) d) Camshaft cover - removal and refitting e) Timing belt and covens - removal and refitting f) Timing belt tensioner and sprockets -removal and refitting g) Cylinder head - removal and refitting' h) Camshaft and cam followers • removal and refitting' t) Camshaft oil seal - renews/ j) Crankshaft oil seals - renewal k) Flywheel/dnvepfate • removal, inspection and refitting l) Engine mountings - inspection and renewal m)Sump - removal and refitting n) Oil pump and pick-up tube assembly
•
removai. inspection and refitting *Cylinder head dismantling procedures are detailed In Chapter SO, with details of camshaft and cam follower removal. Note: It is possible to remove the pistons and connecting rods (after removing the cylinder head and sump) without removing the engine. However, this is not recommended. Work of
this nature is more easily and thoroughly completed with the engine on the bench, as described In Chapter 2D.
2 Location of
TDC
on % No
1
cylinder
General Information 1 The camshaft Is driven by the crankshaft, by means of sprockets and a timing belt. Both sprockets rotate In phase with each other and this provides the correct valve timing as the engine rotates. When (he liming belt is removed during servioing or repair, it Is possible for the camshaft and crankshaft to rotate Independently of each other and the correct valve timing Is then lost. 2 The design of the engines covered In this Chapter are such lhat potentially damaging piston-to-valve contact may occur if the camshaft is rotated when any of the pistons are stationary at, or near, the top of their stroke. 3 For this reason it is important lhat Ihe correct phasing between the camshaft and crankshaft is preserved whilst the timing belt Is off the engine. This is achieved by setting the engine In a reference position (known as Top Dead Centre or TDC) before the timing belt Is removed and then preventing the camshaft and crankshaft from rotating until the belt is refitted. Similarly, if ths engine has been dismantled for overhaul, the engine can be set to TOC during reassembly to ensure that Ihe correct shaft phasing is restored. 4 TDC is the highest point In the cylinder that each piston reaches as the crankshaft turns. Each piston reaches TDC at Ihe end of the compression stroke and again at the end of the exhaust stroke. However, for the purpose of timing the ongine. TDC refers to the position of No 1 piston at the end of Its compression stroke. On ail engines In this manual, No 1 piston (and cylinder) Is at the timing belt end of the engine. 5 The camshaft sprocket Is equipped with a marking which, when aligned with a reference marking on the cylinder head, indicates that the camshaft is correctly positioned for cyl-inder No 1 al TDC on its compression stroke.
Page 56 of 225
2A*10 SOHC (8-valve) petrol engine in-car repair procedures
6.3 Camshaft cover gasket
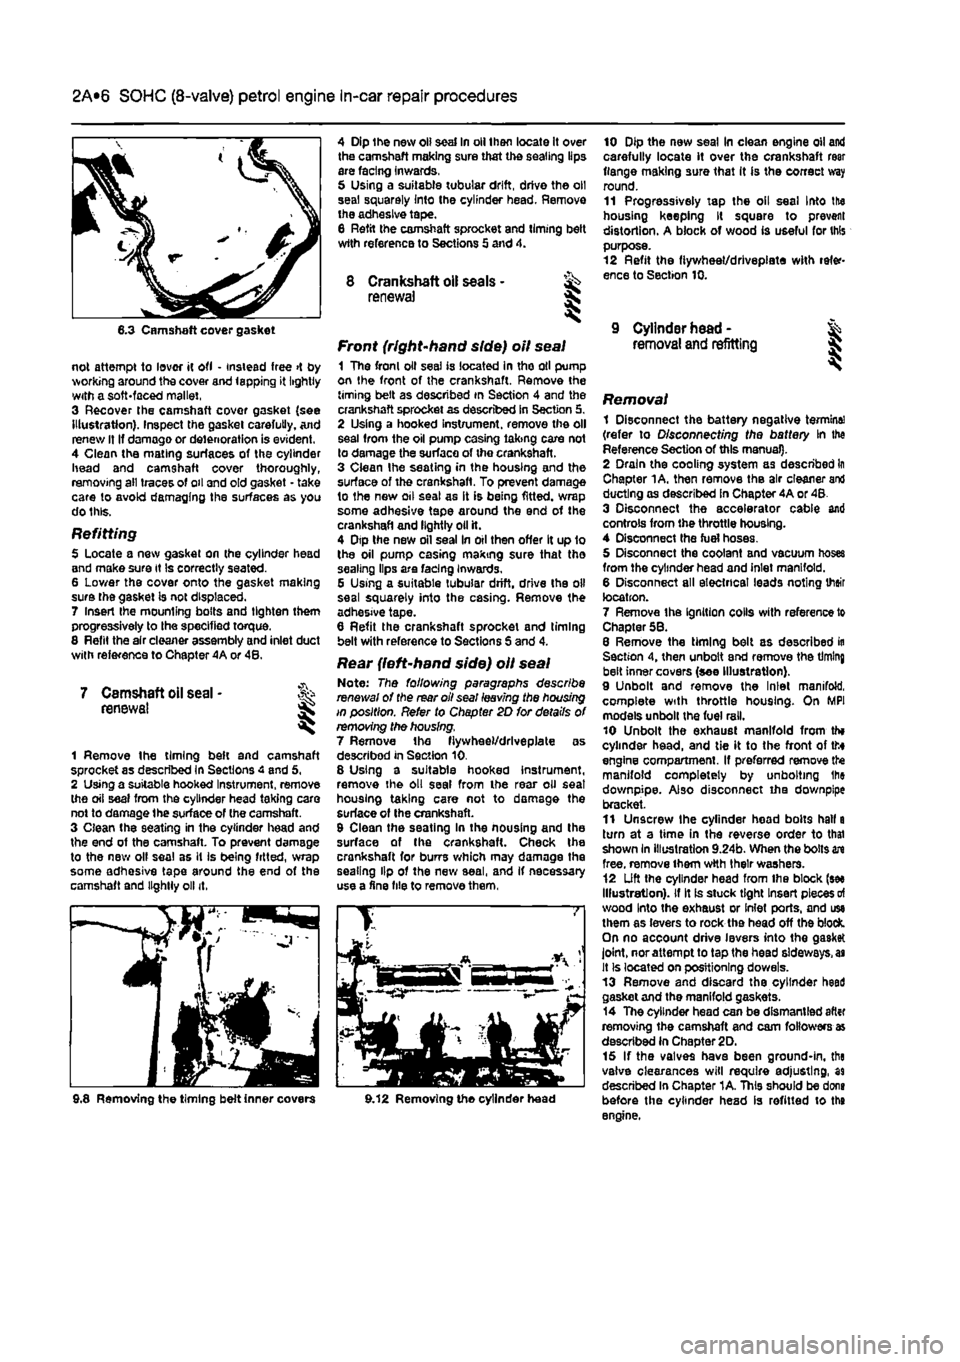
not attempt to lover it ofl • instead free >t by working around the cover and lapping it lightly with a soft-faced mallet, 3 Recover the camshaft covor gasket {see Illustration). Inspect the gasket carefully. And renew It If damage or deterioration is evident. 4 Clean the mating surfaces of the cylinder head and camshaft cover thoroughly, removing all traces of oil and old gasket - take care to avoid damaging the surfaces as you do this.
Refitting 5 Locate a new gasket on the cylinder head and make sure it Is correctly seated. 6 Lower the cover onto the gasket making sure the gasket is not displaced. 7 Insert Ihe mounting bolts and tighten them progressively to the specified torque. 8 Refit the air cleaner assembly and inlet duct with reference to Chapter 4A or 48.
7 Camshaft oil seal • renewal I
1 Remove the timing beft and camshaft sprocket as described in Sections 4 and 5, 2 Using a suitable hooked Instrument, remove the oil seal from the cylinder head taking care not to damage the surface of (he camshaft. 3 Clean the seating in the cylinder head and the end of the camshaft. To prevent damage to the new olf seal as it is being fitted, wrap some adhesive tape around the end of the camshaft and lightly oil it.
4 Dip the new oil seal In oil then locate it over the camshaft making sure that the sealing lips are facing inwards, 5 Using a suitable tubular drift, drive the oil seal squarely Into the cylinder head. Remove the adhesive tape. 8 Refit the camshaft sprocket and liming belt wtth reference to Sections 5 and 4.
8 Crankshaft oil seals - ^ renewal S
Front (right-hand side) oil seal 1 The fronl oil seal is located in tho oil pump on the front of the crankshaft. Remove the timing belt as described in Section 4 and the crankshaft sprocket as described in Section 5. 2 Using a hooked instrument, remove the oil seal from the oil pump casing taking care not to damage the surface of the crankshaft. 3 Clean Ihe seating in the housing and the surface of the crankshaft. To prevent damage to the new oil seal as it is being fitted, wrap some adhesive tape around the end of the crankshaft and lightly oil it. 4 Dtp the new oil seal In oil then offer It up 1o the oil pump casing making sure that tho sealing lips are facing Inwards. G Using a suitable tubular drift, drive the oil seal squarely into the casing. Remove the adhesive tape. 6 Refit the crankshaft sprocket and timing belt with reference to Sections S and 4.
Rear {left-hand side) oil seal Note: The following paragraphs describe renewal of the rear oil seal leaving the housing in position. Refer to Chapter 2D for details of removing the housing. 7 Remove the fiywheel/drlveplate as described in Section 10. 8 Using a suitable hooked instrument, remove the oil seal from the rear oil seat housing taking care not to damage the surface of Ihe crankshaft. 9 Clean the seating In the nousing and the surface of the crankshaft. Check the crankshaft for burrs which may damage the sealing lip of the new seal, and If necessary use a fine file to remove them,
10 Dip the new seal In clean engine oil and carefully locate it over the crankshaft rear flange making sure that It is the correct way round. 11 Progressively tap the oil seal Into the housing keeping It square to prevent distortion. A block of wood is useful for this purpose. 12 Refit the fiywheet/drlvepiate with refer-ence to Section 10.
9 Cylinder head -removal and refitting I
i Removing the timing belt inner covers 9.12 Removing the cylinder head
Removal 1 Disconnect the battery negative termine! (refer to Disconnecting the battery In the Reference Section of this manual). 2 Drain the cooling system as described In Chapter 1A. then remove the air cleaner and ducting as described in Chapter 4A or 48. 3 Disconnect the accelerator cable and controls from the throttle housing. 4 Disconnect the fuel hoses. 5 Disconnect the coolant and vacuum hoses from the cylinder head and inlet manifold. 6 Disconnect all electrical leads noting their location. 7 Remove the Ignition colls with reference to Chapter 58. 8 Remove the timing belt as described in Section 4, then unbolt end remove the timing belt inner covers (see Illustration). 9 Unbolt and remove the Inlet manifold, complete with throttle housing. On MPI models unbolt the fuel rail. 10 Unbolt the exhaust manifold from th» cylinder head, and tie it to the front of tto engine compartment. If preferred remove the manifold completely by unbolting Ihe downpipe. Also disconnect iha downpipe bracket. 11 Unscrew the cylinder head bolts hall a turn at a time in the reverse order to thai shown In illustration 9.24b. When the bolts in free, remove them wtth their washers. 12 Lift the cylinder head from Ihe block (see Illustration), if It is stuck tight Insert pieces
of
wood Into the exhaust or Inlet ports, and use them as levers to rock the head off the block. On no account drive levers into the gasket joint, nor attempt to tap the head sideways,
as
It Is located on positioning dowels. 13 Remove and discard the cylinder heed gasket and the manifold gaskets. 14 The cylinder head can be dismantled after removing the camshaft and cam followers as described in Chapter 2D. 15 If the valves have been ground-in, the valve clearances will require adjusting, as described In Chapter 1A. This should be dons before the cylinder head is refitted to the engine.
Page 62 of 225
2A*10 SOHC (8-valve) petrol engine in-car repair procedures
Lubrication system Oil pump type By-rotor driven from front of crankshaft Outer rotor-io-houslng clearance 0.100 to 0.210 mm Axial clearance 0.025 to 0.070 mm
Torque wrench settings Nm itrf ft Camshaft driven gears 120 89 Camshaft sprocket 120 89 Crankshaft sprocket centre bolt: Stage
1
20 15 Stage 2 Angle-tighten a further 90® Cylinder head: Stage
1
30 22 Stage 2 Angle-tighten a further 90" Stage 3 Angle-tighten a further 90° Cylinder head extension to cylinder head 15 11 Engine mounting bolt: M10
x
1.25 59 44 M8 25 18 Engine mounting nut (MlOx 1.25) 60 44 Flywheel 44 32 Timing belt tensioner 25 18 Sump 10 7
1 General information
Using this Chapter Chapter 2 is divided into four Parts; A, B. C and O. Repair operations that can be carried out with the engine hi the vehicle are described in Part A. SOHC (8-valve) petrol engines. Part B, DOHC (16-valve) petrol engines and Pari C, dlesei engines. Part D covers the removal of the engine/transmission as a unit, and describes the engine dismantling and overhaul procedures. In Parts A, B and C, the assumption Is made that the engine is Installed In the vehicle, with all ancillaries connected. If the engine has been removed for overhaul, the preliminary dismantling information which precedes each operation may be ignored.
Engine description Throughout this Chapter, engines are identified by their capacities. A listing of all engines covered, together with their code letters, Is given in the Specifications. The engine covered in this Part of Chapter 2 is a water-cooled, double overhead camshaft, in-line four-cylinder unit, with cast iron cylinder block and aluminium-alloy cylinder head. The unit is mounted transversely at the front of the vehicle, with the transmission bolted to the left-hand side of the engine. The cylinder head houses the eight inlet and eight exhaust valves, which are closed by single coil springs, and which run in guides pressed Into the cylinder head. The two camshafts are housed in 8 cylinder head extension which is bolted to the top of the cylinder head. The exhaust camshaft is driven by a toothed timing belt and In turn drives the inlet camshaft via a pair of gears located at the left-hand end of the cylinder head extension.
The camshafts actuate the valves directly via self-adjusting hydraulic cam followers mounted in the cylinder head extension. The crankshaft is supported by five main bearings, and endfioat is controlled by a thrust bearing fitted to (he upper section of the centre main bearing. Engine coolanl is circulated by a pump, driven by the timing belt. For details of the cooling system, refer to Chapter 3. Lubricant is circulated under pressure by a pump, driven from the front of the crankshaft. Oil is drawn from Ihe sump through a strainer, and then forced through an externally-mounted, replaceable screw-on filter. From there, It is distributed to the cylinder head and cylinder head extension, where it lubricates the camshaft journals and cam followers, and also to the crankcase, where it lubricates the main bearings, connecting rod big and small-ends. gudgeon pins and cylinder bores. Oil Jets are fitted to the base of each cylinder bore - these spray oil onto the underside of the pistons, to improve cooling.
Repair operations possible with the engine in the car The following work can be carried out with the engine in the car: a) Auxiliary drivebett - removal and refitting (refer to Chapter 1A) b) Oil pump and pick-up tube assembly -removal, Inspection and refitting c) Timing belt and covers • removal and refitting d) Timing belt tensioner and sprockets -removal and refitting e) Cylinder head - removal and refitting' f) Cylinder hoad extension - removal and refitting g) Camshaft and cam followers - removal and refitting h) Camshaft oil seal - renewal i) Crankshaft oil seals • renewal
f) Flywheel - removal, inspection and
refitting
k) Engine mountings - Inspection and
renews'
f) Sump • removal and refitting 'Cylinder head dismantling procedures are detailed In Chapter 2D. Note 1: It is possible to remove the
pistons
and connecting rods (after removing (to cylinder head and sump) without removing
tt*»
engine. However, this Is not recommended. Work of this nature is more easily and thoroughly completed with the engine on fix bench, as described in Chapter 20. Note
2x
Many of the procedures in this Ctopfer entail the use of numerous special tools. Whet possible, suitable alternatives are descnbei with details of their fabrication. Before starring any operations on the engine, read through
tto
entire procedure first to familiarise yourself
wft
the work involved, tools to be obtained mi new parts that may be necessary.
2 Engine assembly/ valve timing holes -genera! information
and
usage
Note: Do not attempt to rotate the angint whilst the camshafts are locked In position,
il
the engine is to be left in this state foratofi$ period of time. It Is a good idea to plect suitable warning notices inside the vehicle, and in the engine compartment. This wfl reduce the possibility of the engine being accidentally cranked on the starter motor, which is likely to cause damage with the locking tools In place. 1 To accurately set the valve timing for ell operations requiring removal and refitting of
the
timing belt, liming holes are drilled in ihe camshafts and cylinder head extension. Ihe holes are used In conjunction with camshaft locking tools and crankshaft positioning
rods w
lock the camshafts when all the pistons me positioned at the mid-point of their stroke. Ths