key FIAT SCUDO 2009 2.G Radio CD MP3 Manual
[x] Cancel search | Manufacturer: FIAT, Model Year: 2009, Model line: SCUDO, Model: FIAT SCUDO 2009 2.GPages: 26, PDF Size: 0.34 MB
Page 10 of 26

9
RADIO
H ESCButton for cancella-
tion of operation in
progress (return to
previous display)
I TA/PTYButton for selecting
TA function (traffic in-
formation) and PTY
(Program Type)
L÷˜Buttons for automat-
ic lower/higher fre-
quency search and CD
or MP3 (for versions/
markets, where pro-
vided) and USB player.
MNOButtons for automatic
lower/higher frequency
search and CD or MP3
(for versions/ markets,
where provided) and
USB playerNOKFunction selected con-
firmation button
(Pressing for a long
time confirms choice
but it does not save it)
OMENUButton for access to
general menu
P1----6Memory keys for ra-
dio stations, selection
of stored radio sta-
tions, select CD in CD
Changer (for ver-
sions/market, where
provided). Holding
down: updates sta-
tions received Q DARKWith successive impulses:
display darkening until it be-
come completely dark.
From complete dark, an ad-
ditional impulse reactivates
standard light
R
Radio lighting/power off but-
ton/knob (hold down) and
volume control (turn)
603_97_184 SCUDO RADIO GB 1E:Radio Scudo G9 EN 1-07-2009 15:18 Pagina 9
Page 12 of 26

11
RADIO
FUNCTIONS AND
ADJUSTMENTS
DEVICE LIGHTING/POWER OFF
Turn the ignition key to M to light the
device and press the button/knob (
R).
Press the button/knob (
R) to switch off
the device.
With the engine switched off, the radio
switches off after 30 minutes.
VOLUME AND SOUND
CONTROL
Volume adjustment
Turn the button/knob (R).
WARNINGSIf the vehicle is equipped
with a telephone with “mute” signal out-
put connected to the radio or a telephone
with a Bluetooth
®connection, when the
telephone is in use the radio will auto-
matically activate the MUTE function.Audio adjustment
It is possible to control settings of
bass/treble, balance, fader and loudness.
The balance and fader controls are used
to emphasize the sound from the left/right
and front/rear speakers. The loudness
control is used to emphasize bass and tre-
ble tones when the playing volume is low.
Repeatedly press the +button (F) to
control the audio to set bass, treble, loud-
ness, fader and balance.
The radio deactivates the audio setting
procedure after a few seconds if no action
is carried out or when +(F) is pressed af-
ter finishing the settings
WARNINGSThe bass and treble ad-
justment is specific to each source; this
means that they can be adjusted differently
in RADIO, CD or CD changer modes.Bass adjustment
When “BASS“ appears on display, press
Nor Obuttons to adjust to within the
following audio levels:
– “BASS −9” to adjust the bass to a min-
imum level;
– “BASS 0” to adjust to an average level;
– “BASS +9” to adjust the bass to the
maximum level.
Treble adjustment
When “TREB“ appears on display, press
buttons Nor Oto adjust to within the
following audio levels:
– “TREB −9” to adjust the treble to a
minimum level;
– “TREB 0” to adjust to an average level;
– “TREB +9” to adjust the treble to the
maximum level.
603_97_184 SCUDO RADIO GB 1E:Radio Scudo G9 EN 1-07-2009 15:18 Pagina 11
Page 13 of 26

12
RADIO
Loudness function
This function can be used to automati-
cally emphasise bass and treble when the
volume is low.
Press the buttons Nor Oto activate or
deactivate the function.
Front/rear sound adjustment
When display shows “FAD”, press the
buttons Nor Oto change adjustment.
Press the button Nto emphasize the
sound from the front speakers or the but-
ton Oto emphasize the sound from rear
speakers.Left/right sound adjustment
When display shows “BAL”, press but-
tons Nor Oto change adjustment.
Press the button Nto emphasize the
sound from the right speakers or the but-
ton Oto emphasize the sound from left
speakers.
Automatic volume correction
This function is used to adjust the device
volume automatically on the basis of ve-
hicle speed. Press the buttons Nor O
to activate or deactivate the function.RADIO MODE
Listening to the radio
Repeatedly press the SOURCE(C)
button and select radio mode.
Selecting a frequency band
Press the BAND/ALT(D) button to
select frequency bands FM1, FM2, FMAST
or AM respectively.
Automatic search for stations
To activate an automatic search for sta-
tions, briefly press one of the keys ÷
or ˜to select the previous or next
station respectively.
Hold the key pressed down in the se-
lected direction to scroll through the fre-
quencies.
When one of the keys is released,
the scrolling stops on the first receivable
station.
603_97_184 SCUDO RADIO GB 1E:Radio Scudo G9 EN 1-07-2009 15:18 Pagina 12
Page 14 of 26

13
RADIO
If the TA function is active, only stations
that broadcast traffic information are
stored.
The station search is carried out initial-
ly with low sensitivity (selecting the most
powerful stations) and then with “high”
sensitivity (selecting the weakest stations).
To carry out a direct search with “DX”
sensitivity, press ÷key or ˜twice.
Manual search for stations
Press button Nor Obriefly to select
the next or previous station respectively.
Hold the button pressed down in the se-
lected direction to scroll through the fre-
quencies. Scrolling stops as soon as the
key is released.
Manual station storage
To store the stations manually:
1)select the required station using the
buttons ÷or ˜;
2)press one of the buttons from 1to 6
(P) and hold it down for longer than
2 seconds.Automatic storage of FM stations
(Autostore)
The radio can store automatically the six
most powerful FM stations on the stor-
ing band FMast.
Press the BAND/ALT(D) button and
hold it down for more than 2 seconds.
WARNINGSThe six stations previ-
ously sorted in FM will be replaced by
storing with Autostore; when less than
6 stations are receivable, memory posi-
tions are not deleted, but remain the
same.
Memorized station tuning
Proceed as follows to tune to a stored
station:
1)Press the BAND/ALT(D) button to
select frequency bands FM1, FM2, FMAST
or AM respectively.
2)Press one of the buttons from 1to
6(P) and the radio will tune on the cor-
respondent station.Display the list of local stations
It is possible to display in alphabetical
number the list of the most powerful re-
ceivable stations (mx. 30 stations) by
pressing LIST/REFRESH (G). Press the
button for at least 2 seconds to update
this list.
Select the desired station through the
buttons Nor Oand confirm by pressing
the OK(N) button.
RDS FUNCTIONS
RDS (Radio Data System)
The RDS function can receive the same
station on any frequency used in the re-
gion you are driving through.
Press the MENU(O) button to acti-
vate/deactivate the RDS function, then
with ÷or ˜buttons:
1) select “AUDIO FUNCTIONS” on the
radio display and confirm by pressing the
OK (N) button;
2) select “FM BAND PREFERENCES”
and confirm with the OK (N) button;
3) select the “ACTIVATE SEARCH FRE-
QUENCIES (RDS)” mode and confirm
with the OK (N) button.
603_97_184 SCUDO RADIO GB 1E:Radio Scudo G9 EN 1-07-2009 15:18 Pagina 13
Page 18 of 26
17
RADIO
CD-CHANGER MODE (not compatible with MP3)
(for versions/markets, where provided)
Fast track play (forward/back)
Proceed as follows to play rapidly
a track:
To play a track quickly, press ˜or
÷and hold down to play CD tracks
forward or backward at a fast speed; re-
lease to go back to normal playing speed.Random track reproduction
(RDM)
Proceed as follows to play tracks in ran-
dom order.
1)select CD Changer mode with the
I
(D) button;
2)press
I(D) again and hold it down
for two seconds. CD tracks will be played
in random order.
Press the
I(D) button again and hold
it down for two seconds to return to stan-
dard play.
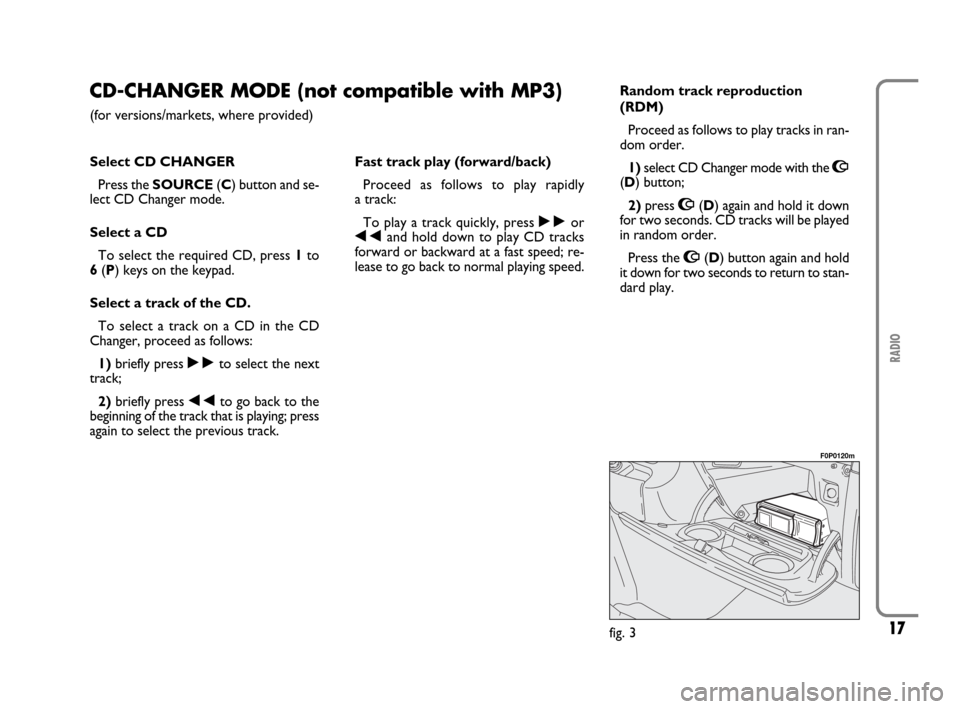
fig. 3
F0P0120m
Select CD CHANGER
Press the SOURCE(C) button and se-
lect CD Changer mode.
Select a CD
To select the required CD, press 1to
6(P) keys on the keypad.
Select a track of the CD.
To select a track on a CD in the CD
Changer, proceed as follows:
1)briefly press ˜to select the next
track;
2)briefly press ÷to go back to the
beginning of the track that is playing; press
again to select the previous track.
603_97_184 SCUDO RADIO GB 1E:Radio Scudo G9 EN 1-07-2009 15:18 Pagina 17
Page 20 of 26
19
RADIO
USB-WIP PLUG PLAYER
MODE
(for versions/markets, where provided)
Recognised file formats
Recognised file formats are mp3 (mpeg
1 layer 3 only), .wma (9 standard only),
.wav and .ogg.
USB connection
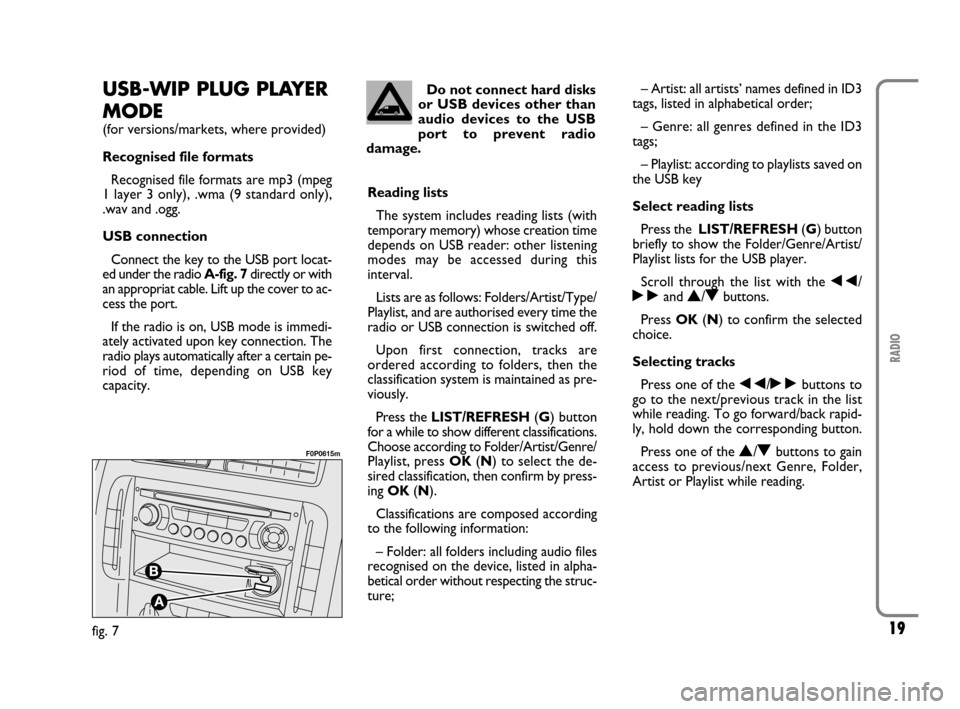
Connect the key to the USB port locat-
ed under the radio A-fig. 7directly or with
an appropriat cable. Lift up the cover to ac-
cess the port.
If the radio is on, USB mode is immedi-
ately activated upon key connection. The
radio plays automatically after a certain pe-
riod of time, depending on USB key
capacity.Reading lists
The system includes reading lists (with
temporary memory) whose creation time
depends on USB reader: other listening
modes may be accessed during this
interval.
Lists are as follows: Folders/Artist/Type/
Playlist, and are authorised every time the
radio or USB connection is switched off.
Upon first connection, tracks are
ordered according to folders, then the
classification system is maintained as pre-
viously.
Press the LIST/REFRESH(G) button
for a while to show different classifications.
Choose according to Folder/Artist/Genre/
Playlist, press OK(N) to select the de-
sired classification, then confirm by press-
ing OK(N).
Classifications are composed according
to the following information:
– Folder: all folders including audio files
recognised on the device, listed in alpha-
betical order without respecting the struc-
ture;– Artist: all artists’ names defined in ID3
tags, listed in alphabetical order;
– Genre: all genres defined in the ID3
tags;
– Playlist: according to playlists saved on
the USB key
Select reading lists
Press the LIST/REFRESH(G) button
briefly to show the Folder/Genre/Artist/
Playlist lists for the USB player.
Scroll through the list with the ÷/
˜and
N/Obuttons.
Press OK(N) to confirm the selected
choice.
Selecting tracks
Press one of the ÷/˜buttons to
go to the next/previous track in the list
while reading. To go forward/back rapid-
ly, hold down the corresponding button.
Press one of the
N/Obuttons to gain
access to previous/next Genre, Folder,
Artist or Playlist while reading.
fig. 7
F0P0615m
Do not connect hard disks
or USB devices other than
audio devices to the USB
port to prevent radio
damage.
603_97_184 SCUDO RADIO GB 1E:Radio Scudo G9 EN 1-07-2009 15:18 Pagina 19
Page 21 of 26
20
RADIO
iPOD®CONNECTION
(for versions/markets, where provided)
iPod
®connection
The iPod
®must be connected to the
port B-fig. 7 placed under the radio, close
to the USB port. Lift up the cover to gain
access to the port.
To prevent damage to the
radio system, do not con-
nect to iPod
®port devices
other than audio devices.
Reading lists/Select tracks
Available lists are Artist, Genre and
Playlist (as defined in the iPod
®).
Selection and Navigation are described
in previous phases, from 1 to 5.
Selection of classification and tracks lists
is as described for the USB reader.
WIP Bluetooth ®MODE - Bluetooth®TELEPHONE
Bluetooth®technology allows wireless
communication without any electrical con-
nections (wireless) between your mobile
phone and the hands-free set on the ve-
hicle.
The Bluetooth
®services offered de-
pend on your phone provider, your
SIM card and compatibility between
the devices used; check the available
services in your mobile phone user
handbook and with your service
provider.First mobile phone connection
In order to make the initial connection
between a mobile phone and the hands-
free system, the Bluetooth
®function on the
phone must be activated according to the
instructions (consult the phone instruction
manual). When the function is active, the
icon appears on the display and the tele-
phone researches for Bluetooth
®acces-
sories near the phone.
Press the MENU(O) button to activate
the Bluetooth
®function, then use the ÷
/˜buttons to select, in order:
– Bluetooth telephony - Audio
– Bluetooth configuration.
– Perform a Bluetooth search
“Search in progress..” is shown on the dis-
play followed by the list of the first 4 recog-
nised telephones.
Use the ÷/˜buttons to select the
telephone to connect to in the list and
confirm with OK(N).
WARNINGIt is possible to connect to
only one telephone at a time.
For safety reasons, the Blue-
tooth®connection procedure
between the mobile phone and the
hands-free system must be carried out
only with the vehicle parked and the
ignition key turned to M.
WARNING
603_97_184 SCUDO RADIO GB 1E:Radio Scudo G9 EN 1-07-2009 15:18 Pagina 20
Page 22 of 26
21
RADIO
A keyboard appears on the display
through which you have to dial a code of
at least 4 letters. Confirm the code with
the OK(N) button.
Now, a message of connection accep-
tance will appear on the selected tele-
phone. Dial the previous radio code to
accept and confirm.
If the operation fails, repeat it: the num-
ber of tests is unlimited.
If the operation is successfully completed,
“Connection Telephone_Name Succeeded”
appears on the radio display.
WARNINGSThe authorised auto-
matic connection is activated only after
having configured the telephone. The
phone book and the list of calls are ac-
cessible after timed synchronisation. De-
pending on mobile telephone compatibil-
ity, the “TELEPHONE” menu allows you
to access the “Phone book” function (in
the case of total compatibility only) and
the “List of calls” and “Connection set-
tings” functions.
WARNINGThe initial connection may
also be done by the mobile phone.Receiving a call
A phone called is indicated by an acoustic
warning and a message on the multi-func-
tion display.
Use the ˜or ÷(L) button to se-
lect SI mode on the radio display and con-
firm with OK(N).
The phone call can also be accepted by
holding down(5) button at the end of ra-
dio controls lever on the steering-wheel
for at least two seconds.
Making a call
Press the MENU(Obutton, then
through the ˜/÷buttons select in
sequence:
– Bluetooth telephony - Audio
– Manage the phone call
– Call
– List of calls
or
– Contact list
Use the ˜/÷buttons to select the
number to call in the list and then press
OK(N). Bluetooth
®AUDIO STREAMING
MODE
(for versions/markets, where provided)
This mode allows wireless broadcasting
of music files stored on the mobile phone
through the radio device.
To use this mode, the telephone must
manage the right Bluetooth
® profiles
(A2DP/AVRCP profiles).
The telephone number must
be dialled on the mobile
phone when the vehicle is completely
stationary.
WARNING
Hold down the (5) button at the end of
the radio controls lever on the steering-
wheel for at least two seconds to show
the contact list of the mobile telephone di-
rectly on the radio display.
Use the mobile phone keypad to dial
a telephone number.
603_97_184 SCUDO RADIO GB 1E:Radio Scudo G9 EN 1-07-2009 15:18 Pagina 21
Page 23 of 26

22
RADIO
Mobile phone connection
Make the initial connection to the mo-
bile phone following the instructions
shown in the paragraph “WIP Blue-
toothth
® MODE – Bluetooth®TELE-
PHONE” or, in case of one or more con-
nected mobile phones, press the button
MENU (O) and select the telephone to
connect.
During the initial connection, the audio
system connects automatically.
Streaming mode activation.
Repeatedly press the button SOURCE
(C) and select Streaming mode.
WARNINGSIn some cases, track
reading must be activated with the key-
pad.
Selecting tracks
If the telephone supports the function,
it is possible to select tracks through the
controls on the radio front or through the
controls on the steering-wheel. Contex-
tual information can be shown on the
display
603_97_184 SCUDO RADIO GB 1E:Radio Scudo G9 EN 1-07-2009 15:18 Pagina 22