engine FIAT SCUDO 2012 Owner handbook (in English)
[x] Cancel search | Manufacturer: FIAT, Model Year: 2012, Model line: SCUDO, Model: FIAT SCUDO 2012Pages: 219, PDF Size: 4.13 MB
Page 62 of 219
58
SAFETY
DEVICES
CORRECT USE
OF THE
VEHICLE
WARNING
LIGHTS AND
MESSAGES
IN AN
EMERGENCY
VEHICLE
MAINTENANCE
TECHNICAL
SPECIFICATIONS
INDEX
DASHBOARD
AND
CONTROLS
F0P0343m F0P0338mF0P0330m
F0P0332mF0P0344m F0P0351m
F0P0334m
F0P0334mF0P0339m F0P0340m
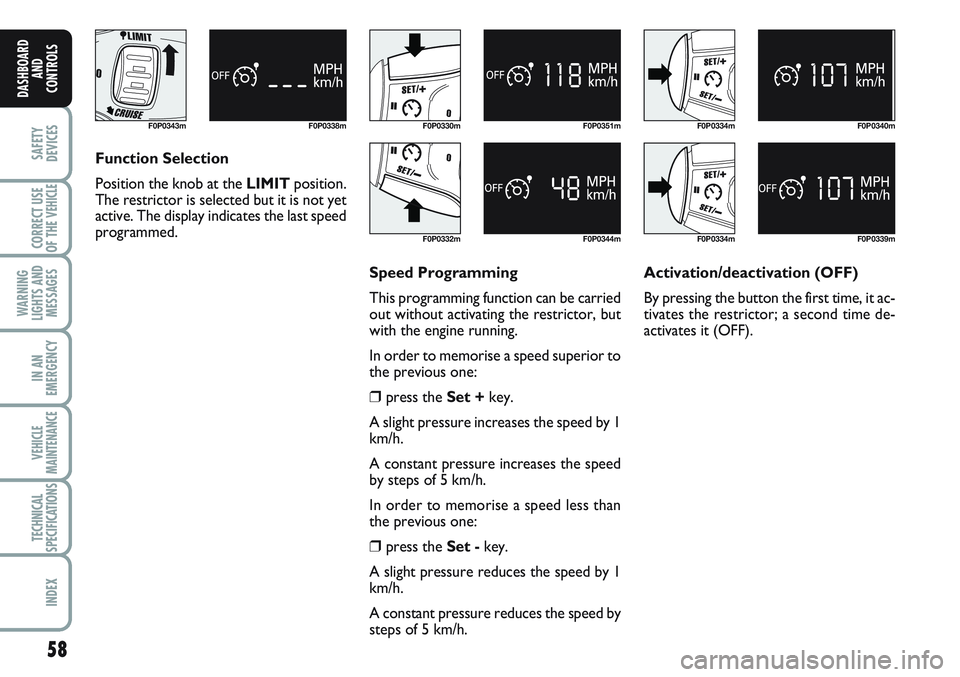
Function Selection
Position the knob at the LIMITposition.
The restrictor is selected but it is not yet
active. The display indicates the last speed
programmed.
Speed Programming
This programming function can be carried
out without activating the restrictor, but
with the engine running.
In order to memorise a speed superior to
the previous one:
❒press the Set +key.
A slight pressure increases the speed by 1
km/h.
A constant pressure increases the speed
by steps of 5 km/h.
In order to memorise a speed less than
the previous one:
❒press the Set -key.
A slight pressure reduces the speed by 1
km/h.
A constant pressure reduces the speed by
steps of 5 km/h. Activation/deactivation (OFF)
By pressing the button the first time, it ac-
tivates the restrictor; a second time de-
activates it (OFF).
Page 64 of 219
60
SAFETY
DEVICES
CORRECT USE
OF THE
VEHICLE
WARNING
LIGHTS AND
MESSAGES
IN AN
EMERGENCY
VEHICLE
MAINTENANCE
TECHNICAL
SPECIFICATIONS
INDEX
DASHBOARD
AND
CONTROLS
CEILING LIGHTS
FRONT CEILING LIGHT
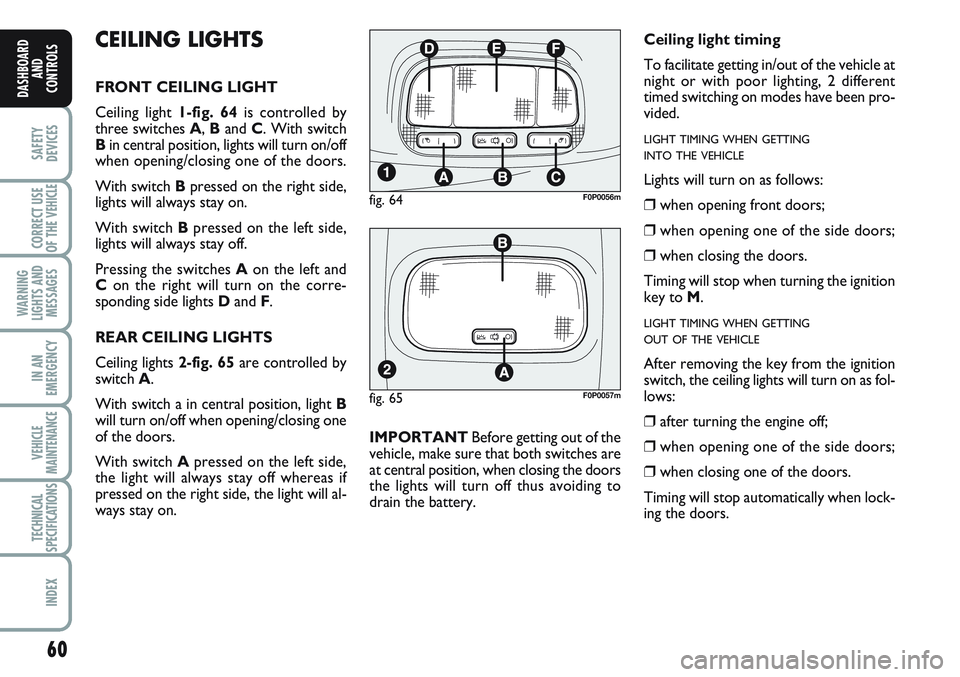
Ceiling light 1-fig. 64is controlled by
three switches A, Band C. With switch
Bin central position, lights will turn on/off
when opening/closing one of the doors.
With switch Bpressed on the right side,
lights will always stay on.
With switch Bpressed on the left side,
lights will always stay off.
Pressing the switches Aon the left and
Con the right will turn on the corre-
sponding side lights Dand F.
REAR CEILING LIGHTS
Ceiling lights 2-fig. 65are controlled by
switch A.
With switch a in central position, light B
will turn on/off when opening/closing one
of the doors.
With switch Apressed on the left side,
the light will always stay off whereas if
pressed on the right side, the light will al-
ways stay on.IMPORTANTBefore getting out of the
vehicle, make sure that both switches are
at central position, when closing the doors
the lights will turn off thus avoiding to
drain the battery.
fig. 65F0P0057m
Ceiling light timing
To facilitate getting in/out of the vehicle at
night or with poor lighting, 2 different
timed switching on modes have been pro-
vided.
LIGHT TIMING WHEN GETTING
INTO THE VEHICLE
Lights will turn on as follows:
❒when opening front doors;
❒when opening one of the side doors;
❒when closing the doors.
Timing will stop when turning the ignition
key to M.
LIGHT TIMING WHEN GETTING
OUT OF THE VEHICLE
After removing the key from the ignition
switch, the ceiling lights will turn on as fol-
lows:
❒after turning the engine off;
❒when opening one of the side doors;
❒when closing one of the doors.
Timing will stop automatically when lock-
ing the doors.
fig. 64F0P0056m
Page 67 of 219
63
SAFETY
DEVICES
CORRECT USE
OF THE
VEHICLE
WARNING
LIGHTS AND
MESSAGES
IN AN
EMERGENCY
VEHICLE
MAINTENANCE
TECHNICAL
SPECIFICATIONS
INDEX
DASHBOARD
AND CONTROLS
DEACTIVATION OF THE
VOLUMETRIC ALARM
(for versions/markets, where provided)
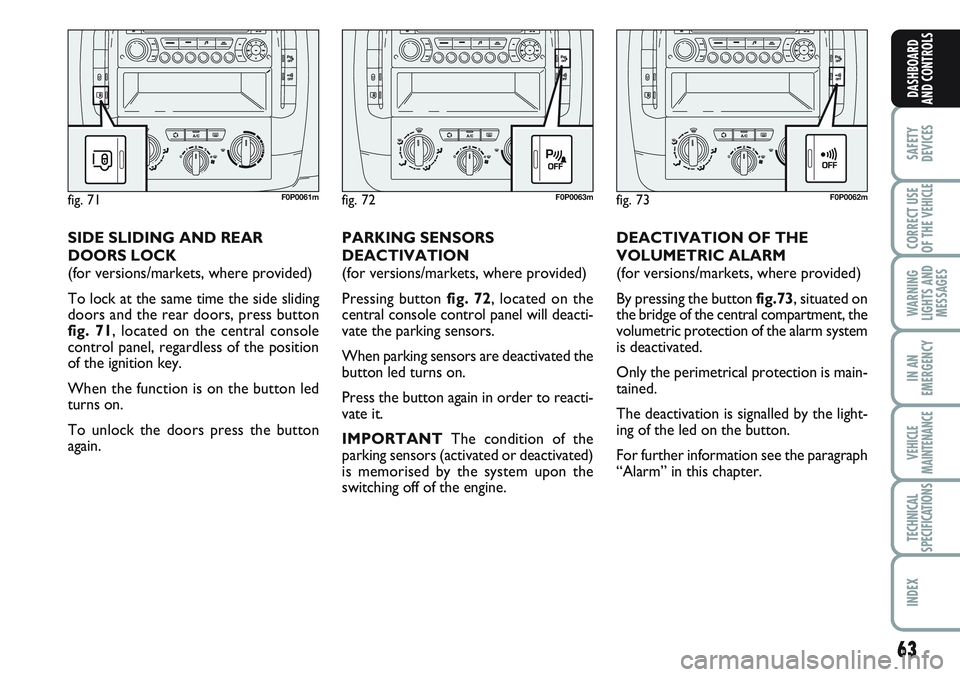
By pressing the button fig.73, situated on
the bridge of the central compartment, the
volumetric protection of the alarm system
is deactivated.
Only the perimetrical protection is main-
tained.
The deactivation is signalled by the light-
ing of the led on the button.
For further information see the paragraph
“Alarm” in this chapter.
fig. 72F0P0063m
PARKING SENSORS
DEACTIVATION
(for versions/markets, where provided)
Pressing button fig. 72, located on the
central console control panel will deacti-
vate the parking sensors.
When parking sensors are deactivated the
button led turns on.
Press the button again in order to reacti-
vate it.
IMPORTANTThe condition of the
parking sensors (activated or deactivated)
is memorised by the system upon the
switching off of the engine.
fig. 73F0P0062m
SIDE SLIDING AND REAR
DOORS LOCK
(for versions/markets, where provided)
To lock at the same time the side sliding
doors and the rear doors, press button
fig. 71, located on the central console
control panel, regardless of the position
of the ignition key.
When the function is on the button led
turns on.
To unlock the doors press the button
again.
fig. 71F0P0061m
Page 68 of 219
If, after a crash no fuel leaks are found and
the vehicle can be started again, reset the
fuel cut-off switch as follows:
❒turn the key to S;
❒remove the ignition key; refit the key
into the ignition switch and then start
the engine.
FUEL CUT-OFF SWITCH
It is a safety switch controlled by air bag
electronic control unit that in the event of
a serious crash (in any direction) comes
into operation by cutting off fuel and turn-
ing off the engine as a consequence.
Fuel cut-off switch activation is indicated
by a dedicated message on the reconfig-
urable multifunction display.If, after a crash, you smell fu-
el or see leaks from the fuel
system, do not reset the switch to
avoid fire risk.
WARNING
64
SAFETY
DEVICES
CORRECT USE
OF THE
VEHICLE
WARNING
LIGHTS AND
MESSAGES
IN AN
EMERGENCY
VEHICLE
MAINTENANCE
TECHNICAL
SPECIFICATIONS
INDEX
DASHBOARD
AND
CONTROLS
Page 80 of 219
76
SAFETY
DEVICES
CORRECT USE
OF THE
VEHICLE
WARNING
LIGHTS AND
MESSAGES
IN AN
EMERGENCY
VEHICLE
MAINTENANCE
TECHNICAL
SPECIFICATIONS
INDEX
DASHBOARD
AND
CONTROLS
BONNET
IMPORTANT Before opening the bonnet,
check that windscreen wiper arms are not
lifted from the windscreen.
To open the bonnet:
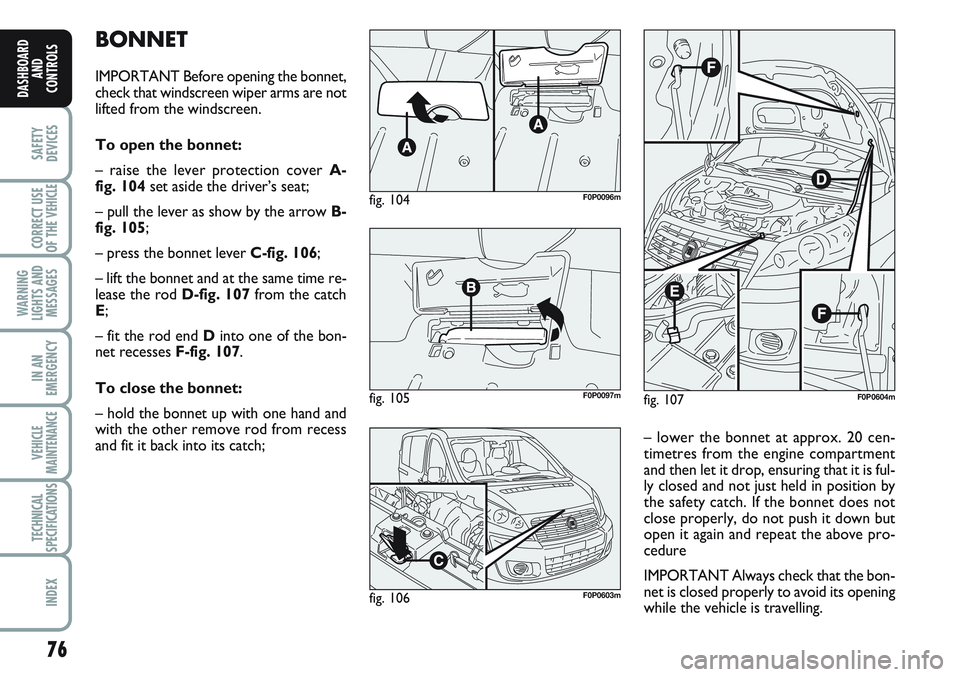
– raise the lever protection cover A-
fig. 104set aside the driver’s seat;
– pull the lever as show by the arrow B-
fig. 105;
– press the bonnet lever C-fig. 106;
– lift the bonnet and at the same time re-
lease the rod D-fig. 107from the catch
E;
– fit the rod end Dinto one of the bon-
net recesses F-fig. 107.
To close the bonnet:
– hold the bonnet up with one hand and
with the other remove rod from recess
and fit it back into its catch;
fig. 107F0P0604m
– lower the bonnet at approx. 20 cen-
timetres from the engine compartment
and then let it drop, ensuring that it is ful-
ly closed and not just held in position by
the safety catch. If the bonnet does not
close properly, do not push it down but
open it again and repeat the above pro-
cedure
IMPORTANT Always check that the bon-
net is closed properly to avoid its opening
while the vehicle is travelling.
fig. 104F0P0096m
fig. 105F0P0097m
fig. 106F0P0603m
Page 82 of 219
78
SAFETY
DEVICES
CORRECT USE
OF THE
VEHICLE
WARNING
LIGHTS AND
MESSAGES
IN AN
EMERGENCY
VEHICLE
MAINTENANCE
TECHNICAL
SPECIFICATIONS
INDEX
DASHBOARD
AND
CONTROLS
PNEUMATIC
SUSPENSIONS
In some versions the tires rear suspen-
sions self-leveling may be included as an
optional.
According to versions suspensions can be
adjusted manually or automatically.
MANUAL ADJUSTMENT
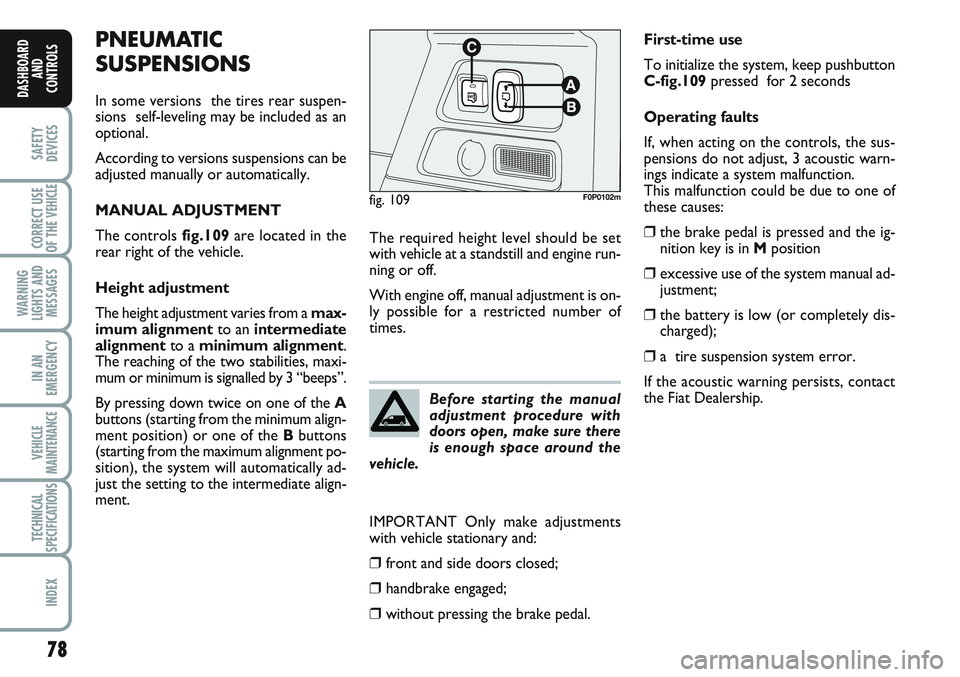
The controls fig.109are located in the
rear right of the vehicle.
Height adjustment
The height adjustment varies from a max-
imum alignmentto an intermediate
alignmentto a minimum alignment.
The reaching of the two stabilities, maxi-
mum or minimum is signalled by 3 “beeps”.
By pressing down twice on one of the A
buttons (starting from the minimum align-
ment position) or one of the Bbuttons
(starting from the maximum alignment po-
sition), the system will automatically ad-
just the setting to the intermediate align-
ment.
fig. 109F0P0102m
Before starting the manual
adjustment procedure with
doors open, make sure there
is enough space around the
vehicle.
First-time use
To initialize the system, keep pushbutton
C-fig.109pressed for 2 seconds
Operating faults
If, when acting on the controls, the sus-
pensions do not adjust, 3 acoustic warn-
ings indicate a system malfunction.
This malfunction could be due to one of
these causes:
❒the brake pedal is pressed and the ig-
nition key is in Mposition
❒excessive use of the system manual ad-
justment;
❒the battery is low (or completely dis-
charged);
❒a tire suspension system error.
If the acoustic warning persists, contact
the Fiat Dealership. The required height level should be set
with vehicle at a standstill and engine run-
ning or off.
With engine off, manual adjustment is on-
ly possible for a restricted number of
times.
IMPORTANT Only make adjustments
with vehicle stationary and:
❒front and side doors closed;
❒handbrake engaged;
❒without pressing the brake pedal.
Page 83 of 219
79
SAFETY
DEVICES
CORRECT USE
OF THE
VEHICLE
WARNING
LIGHTS AND
MESSAGES
IN AN
EMERGENCY
VEHICLE
MAINTENANCE
TECHNICAL
SPECIFICATIONS
INDEX
DASHBOARD
AND CONTROLS
AUTOMATIC ADJUSTMENT
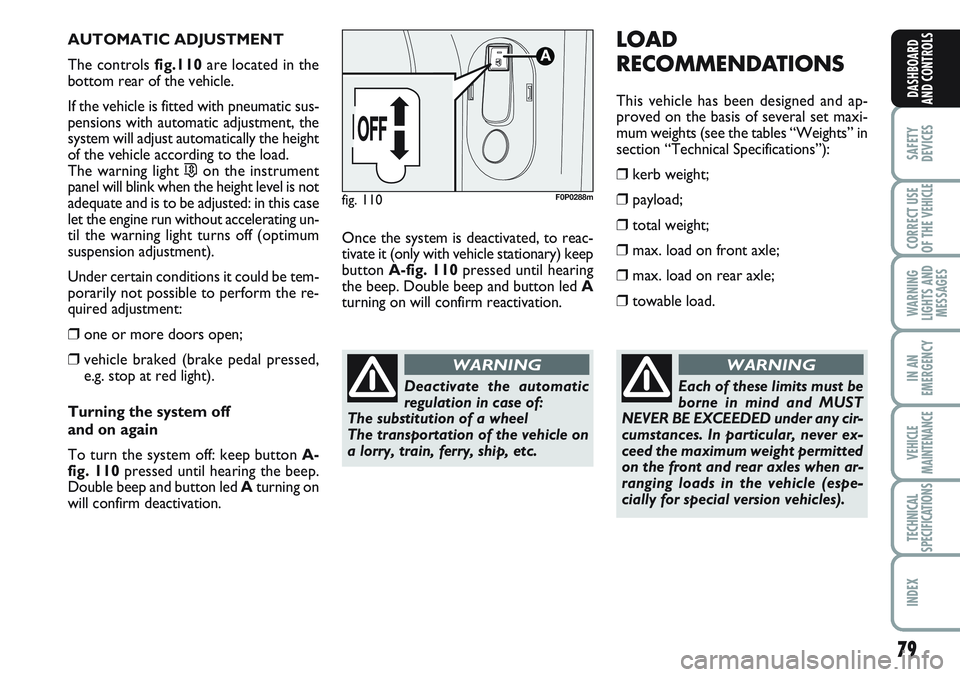
The controls fig.110are located in the
bottom rear of the vehicle.
If the vehicle is fitted with pneumatic sus-
pensions with automatic adjustment, the
system will adjust automatically the height
of the vehicle according to the load.
The warning light
…on the instrument
panel will blink when the height level is not
adequate and is to be adjusted: in this case
let the engine run without accelerating un-
til the warning light turns off (optimum
suspension adjustment).
Under certain conditions it could be tem-
porarily not possible to perform the re-
quired adjustment:
❒one or more doors open;
❒vehicle braked (brake pedal pressed,
e.g. stop at red light).
Turning the system off
and on again
To turn the system off: keep button A-
fig. 110pressed until hearing the beep.
Double beep and button led Aturning on
will confirm deactivation.Once the system is deactivated, to reac-
tivate it (only with vehicle stationary) keep
button A-fig. 110pressed until hearing
the beep. Double beep and button led A
turning on will confirm reactivation.
fig. 110F0P0288m
LOAD
RECOMMENDATIONS
This vehicle has been designed and ap-
proved on the basis of several set maxi-
mum weights (see the tables “Weights” in
section “Technical Specifications”):
❒kerb weight;
❒payload;
❒total weight;
❒max. load on front axle;
❒max. load on rear axle;
❒towable load.
Each of these limits must be
borne in mind and MUST
NEVER BE EXCEEDED under any cir-
cumstances. In particular, never ex-
ceed the maximum weight permitted
on the front and rear axles when ar-
ranging loads in the vehicle (espe-
cially for special version vehicles).
WARNING
Deactivate the automatic
regulation in case of:
The substitution of a wheel
The transportation of the vehicle on
a lorry, train, ferry, ship, etc.
WARNING
Page 88 of 219
84
SAFETY
DEVICES
CORRECT USE
OF THE
VEHICLE
WARNING
LIGHTS AND
MESSAGES
IN AN
EMERGENCY
VEHICLE
MAINTENANCE
TECHNICAL
SPECIFICATIONS
INDEX
DASHBOARD
AND CONTROLS
fig. 113F0F0104m
ESP SYSTEM
(Electronic Stability
Program)
(for versions/markets, where provided)
The ESP system is an electronic system
controlling the vehicle stability in the event
of tyre grip loss.
The ESP system is therefore particularly
useful when grip conditions of the road sur-
faces changes.
In addition to the ESP system and ASR sys-
tem, also the MSR system (adjusting the
engine braking torque) and the HBA sys-
tem (improving the braking force during
emergency braking) are provided.ESP SYSTEM INTERVENTION
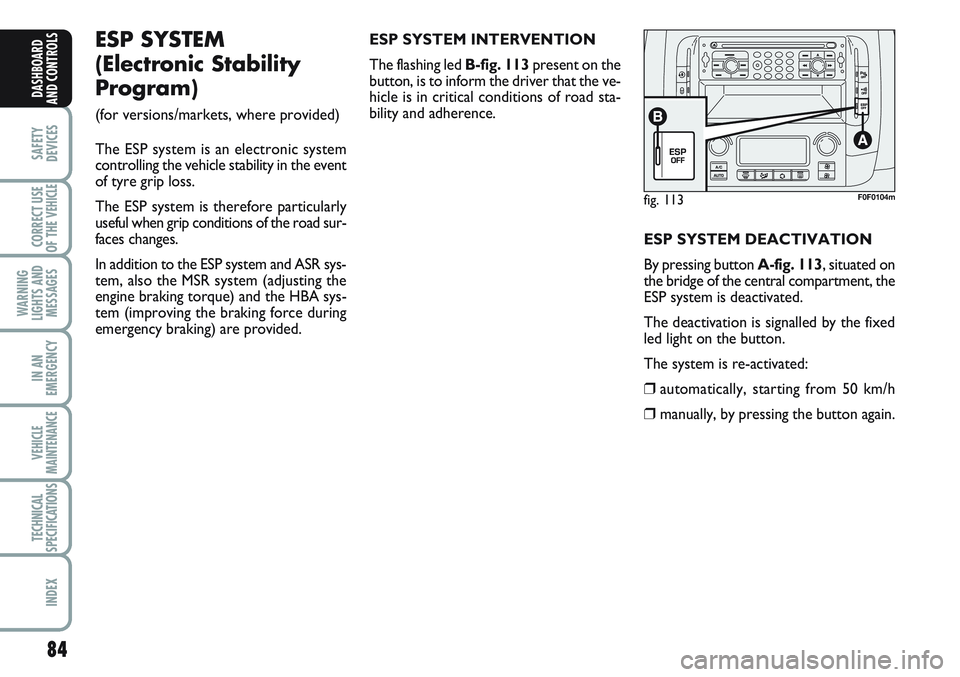
The flashing led B-fig. 113present on the
button, is to inform the driver that the ve-
hicle is in critical conditions of road sta-
bility and adherence.
ESP SYSTEM DEACTIVATION
By pressing button A-fig. 113, situated on
the bridge of the central compartment, the
ESP system is deactivated.
The deactivation is signalled by the fixed
led light on the button.
The system is re-activated:
❒automatically, starting from 50 km/h
❒manually, by pressing the button again.
Page 89 of 219
85
SAFETY
DEVICES
CORRECT USE
OF THE
VEHICLE
WARNING
LIGHTS AND
MESSAGES
IN AN
EMERGENCY
VEHICLE
MAINTENANCE
TECHNICAL
SPECIFICATIONS
INDEX
DASHBOARD
AND CONTROLS
FAILURE INDICATIONS
In case of an eventual anomaly, the ESP
system automatically disconnects itself and
on the instrument panel the warning light
™is fixed, accompanied by a beeper and
a dedicated message on the display (see
chapter “Warning lights and messages”).
In which case please seek advice, as soon
as possible, from the Fiat Dealership.
Performance of the ESP sys-
tem, in terms of active safe-
ty should not induce the driver to take
pointless and unnecessary risks. The
style of driving must in any case al-
ways be adapted to the conditions of
the road surface, visibility and traffic.
Road safety is always the driver’s re-
sponsibility.
WARNING
ASR SYSTEM (Antislip Regulator)
The ASR system controls the vehicle
drive and cuts in automatically every
time one or both driving wheels slip.
In slipping conditions, two different con-
trol systems are activated:
❒ if slipping involves both driving wheels,
the ASR function intervenes reducing
the power transmitted by the engine;
❒if the slipping involves only one driving
wheel, the ASR system cuts in auto-
matically braking the wheel that is slip-
ping. The action of the ASR system is particu-
larly helpful in the following circumstances:
❒ slipping of the inner wheel due to the
effect of dynamic load changes or ex-
cessive acceleration;
❒ too much power transmitted to the
wheels also in relation to the conditions
of the road surface;
❒ acceleration on slippery, snowy or
frozen surfaces;
❒in the case of loss of grip on a wet sur-
face (aquaplaning).
For correct operation of the
ESP and ASR systems, the
tyres must absolutely be of the same
brand and type on all wheels, in per-
fect conditions and, above all, of
type, brand and size specified.
WARNING
Page 90 of 219
86
SAFETY
DEVICES
CORRECT USE
OF THE
VEHICLE
WARNING
LIGHTS AND
MESSAGES
IN AN
EMERGENCY
VEHICLE
MAINTENANCE
TECHNICAL
SPECIFICATIONS
INDEX
DASHBOARD
AND CONTROLS
MSR system
(engine braking torque control)
It is an integral part of the ASR system that
in case of sudden gear shifting, cuts in pro-
viding torque to the engine thus prevent-
ing excessive driving wheel drive that, spe-
cially in poor grip conditions, can lead to
loss of stability.Switching the system on/off
The ASR system switches on automatically
each time the engine is started.
Switching the ESP system off will auto-
matically switch off the ASR system too.
When travelling, the ASR can be switched
off and on again by pressing switch Alo-
cated on the dashboard fig. 119.
When the ASR is switched off this is
shown by the lighting up of the led
B-fig. 119on the switch and by relevant
message on the multifunction display, for
versions/markets, where provided.
If the ASR is switched off when travelling,
it will turn on again automatically the next
time the engine is started.
When travelling on snowy roads with
snow chains, it may be helpful to turn the
ASR off: in fact, in these conditions, slip-
ping of the driving wheels when moving off
makes it possible to obtain better drive.
The performance of the sys-
tem, in terms of active safe-
ty should not induce the driver to take
pointless and unnecessary risks.
The style of driving must in any case
always be adapted to the conditions
of the road surface, visibility and traf-
fic. Road safety is always the driver’s
responsibility.
WARNING
For correct operation of the ASR system,
the tyres must absolutely be of the same
brand and type on all wheels, in perfect
conditions and, above all, of type, brand
and size specified.
FAILURE INDICATIONS
In the event of malfunctioning, the ASR
system is automatically disconnected and
the warning light
™will come with fixed
light on the instrument panel, (see section
“Warning lights and messages”).
In this case contact Fiat Dealership as soon
as possible.