display FIAT SEICENTO 2001 1.G Clarion PU2312 Manual
[x] Cancel search | Manufacturer: FIAT, Model Year: 2001, Model line: SEICENTO, Model: FIAT SEICENTO 2001 1.GPages: 157, PDF Size: 6.44 MB
Page 3 of 157
3
English
Thank you for purchasing the Clarion PU2312.
*Please read this owner’s manual in its entirety before operating this equipment.
*After reading this manual, be sure to keep it in a handy place (e.g., glove compartment).
*Check the contents of the enclosed warranty card and keep it carefully with this manual.
*This manual includes the operating procedures of the CD/MD
CHANGERthat is connected via the C-
BUS cable. Refer to the CD/MDCHANGERhandbook. The handbook does not contain explanations on
the functions.
Contents
1. PRECAUTIONS ....................................................................................................................... 3
2. HANDLING COMPACT DISCS ............................................................................................... 4
3. CONTROLS ............................................................................................................................. 5
4. DCP......................................................................................................................................... 6
5. NOMENCLATURE................................................................................................................... 7
Names of Buttons .................................................................................................................... 7
Display Items ........................................................................................................................... 7
6. OPERATION ............................................................................................................................ 8
Basic Operations ...................................................................................................................... 8
Radio Operations ...................................................................................................................... 10
RDS Operations ....................................................................................................................... 12
CD Operations ......................................................................................................................... 16
CD
CHANGEROperations ........................................................................................................... 18
7. IN CASE OF DIFFICULTY....................................................................................................... 20
8. ERROR DISPLAYS .................................................................................................................. 21
9. SPECIFICATIONS ................................................................................................................... 148
1. PRECAUTIONS
1. When the inside of the car is very cold and
the player is used soon after switching on the
heater, dew may form on the disc or the opti-
cal parts of the player and proper playback
may not be possible. If dew forms on the disc,
wipe it with a soft cloth. If dew forms on the
optical parts of the player, do not use the
player for about one hour and the condensa-
tion will disappear naturally to allow normal
operation.2. Driving on bumpy roads which cause severe
vibration may cause the sound skip.
PU2312 003-006 GB 14-01-2008 14:57 Pagina 3
Page 5 of 157
5
3.CONTROLS /LES COMMANDES / REGLER /CONTROLLI
REGELAARS /CONTROLES / KONTROLLER /CONTROLOS
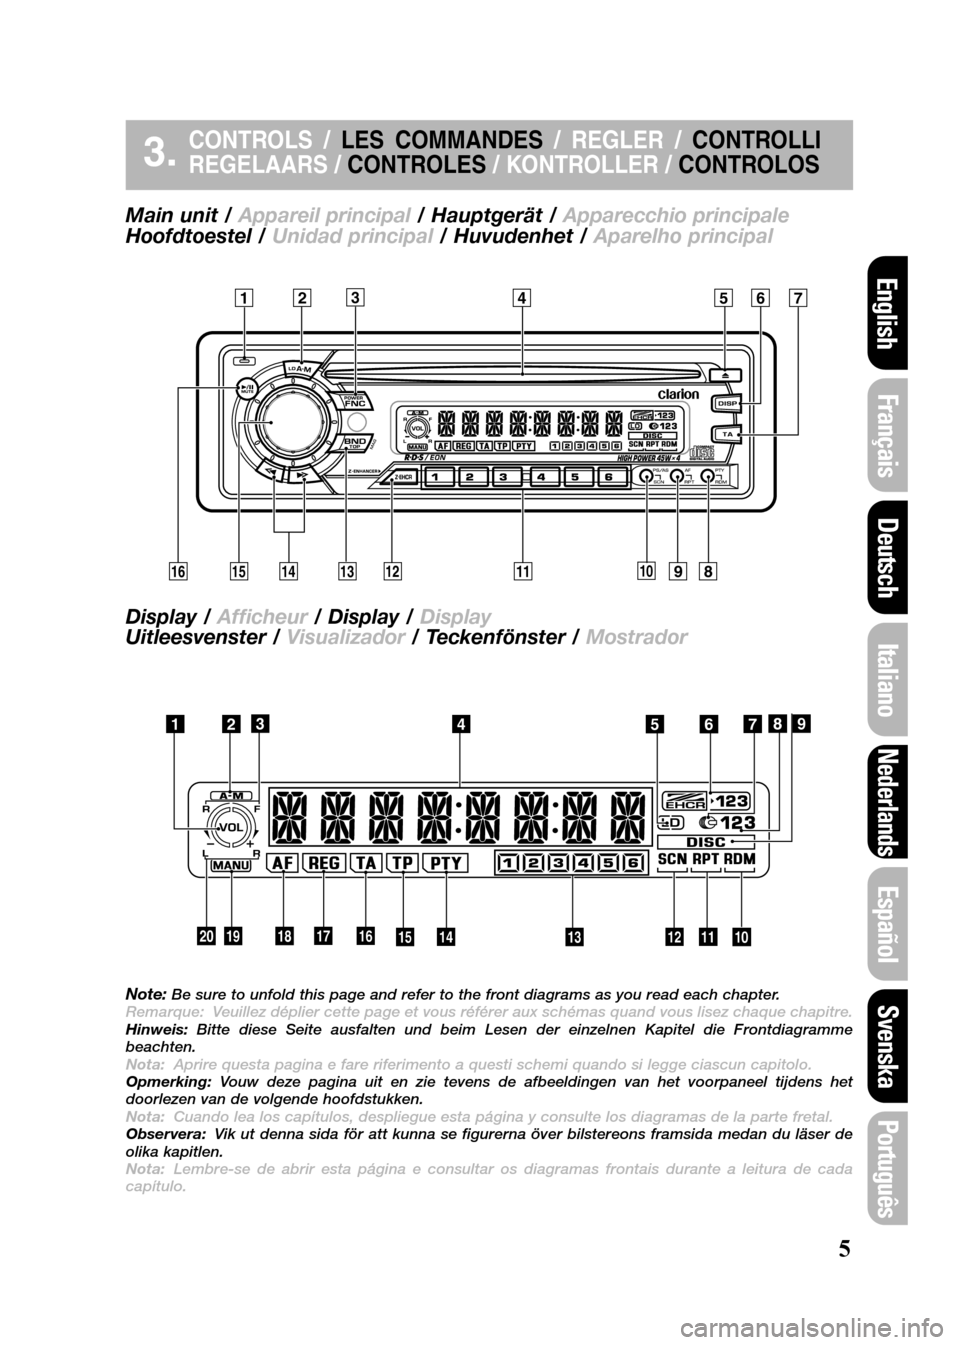
Main unit / Appareil principal/ Hauptgerät / Apparecchio principale
Hoofdtoestel / Unidad principal / Huvudenhet / Aparelho principal
Display / Afficheur/ Display / Display
Uitleesvenster /Visualizador/ Teckenfönster / Mostrador
Note:Be sure to unfold this page and refer to the front diagrams as you read each chapter.
Remarque: Veuillez déplier cette page et vous référer aux schémas quand vous lisez chaque chapitre.
Hinweis:Bitte diese Seite ausfalten und beim Lesen der einzelnen Kapitel die Frontdiagramme
beachten.
Nota:Aprire questa pagina e fare riferimento a questi schemi quando si legge ciascun capitolo.
Opmerking:Vouw deze pagina uit en zie tevens de afbeeldingen van het voorpaneel tijdens het
doorlezen van de volgende hoofdstukken.
Nota:Cuando lea los capítulos, despliegue esta página y consulte los diagramas de la parte fretal.
Observera:Vik ut denna sida för att kunna se figurerna över bilstereons framsida medan du läser de
olika kapitlen.
Nota:Lembre-se de abrir esta página e consultar os diagramas frontais durante a leitura de cada
capítulo.
Português
Svenska
Español
Nederlands
Italiano
Deutsch
Français
English
PU2312 003-006 GB 14-01-2008 14:57 Pagina 5¥23
4567 1
0
! @ # $ %98 ¥ & * ( )23
4567 1
0 ! @
# $ %89
Page 7 of 157
7
English
5. NOMENCLATURE
Note: Be sure to read this chapter referring to the front diagrams of chapter “3. CONTROLS” on page
5 (unfold).
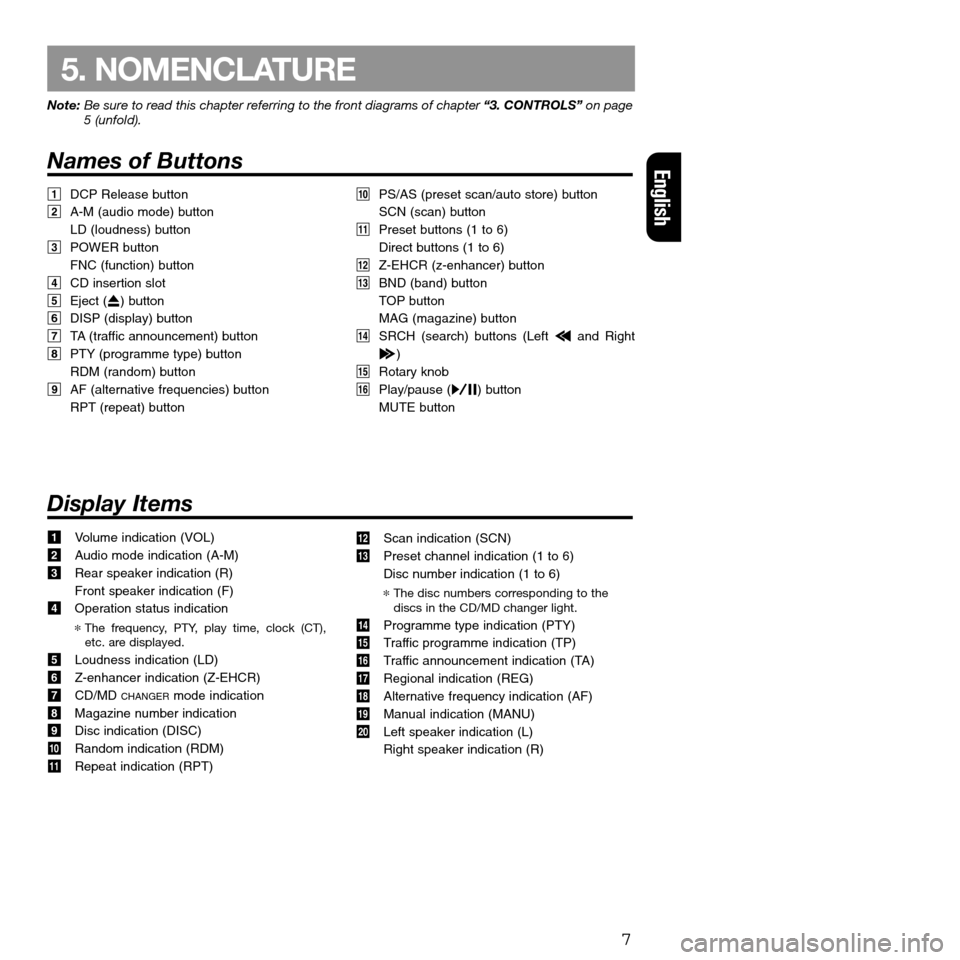
Names of Buttons
1DCP Release button
2A-M (audio mode) button
LD (loudness) button
3POWER button
FNC (function) button
4CD insertion slot
5Eject (Q) button
6DISP (display) button
7TA (traffic announcement) button
8PTY (programme type) button
RDM (random) button
9AF (alternative frequencies) button
RPT (repeat) button
Display Items
1Volume indication (VOL)
2Audio mode indication (A-M)
3Rear speaker indication (R)
Front speaker indication (F)
4Operation status indication
*The frequency, PTY, play time, clock (CT),
etc. are displayed.
5Loudness indication (LD)
6Z-enhancer indication (Z-EHCR)
7CD/MD
CHANGERmode indication
8Magazine number indication
9Disc indication (DISC)
0Random indication (RDM)
!Repeat indication (RPT)0PS/AS (preset scan/auto store) button
SCN (scan) button
!Preset buttons (1 to 6)
Direct buttons (1 to 6)
@Z-EHCR (z-enhancer) button
#BND (band) button
TOP button
MAG (magazine) button
$SRCH (search) buttons (Left aand Right
d)
%Rotary knob
¥Play/pause (s) button
MUTE button
@Scan indication (SCN)
#Preset channel indication (1 to 6)
Disc number indication (1 to 6)
*The disc numbers corresponding to the
discs in the CD/MD changer light.
$Programme type indication (PTY)
%Traffic programme indication (TP)
¥Traffic announcement indication (TA)
&Regional indication (REG)
*Alternative frequency indication (AF)
(Manual indication (MANU)
)Left speaker indication (L)
Right speaker indication (R)
Page 8 of 157
Be sure to set the volume to the minimum level
before turning off the power to the unit.
Loud sounds when turning on the power may
impair your hearings or cause damage to the
unit.
Turning on/off the power
Note:
•Do not use the sound system for a long time when
the engine is off. You may have problems in start-
ing the engine or shorten the life of the battery.
1. Press POWER button 3.
2. The illumination and display on the unit light up.
The unit automatically remembers its last oper-
ation mode and will automatically switch to dis-
play that mode.
3. Press and hold POWER button 3for 1 second
or longer to turn off the power for the unit.
Selecting a mode
1. Press FNC button 3to select a function mode.
2. The function mode changes in the following
order:
Radio ➜CD ➜CD/MD
CHANGER➜Radio …
*If the CD/MD CHANGERis not connected, the CD/
MD CHANGERmode cannot be selected.
Adjusting the volume
Turning the rotary knob %clockwise increases
the volume; turning it counterclockwise decreases
the volume.
*The volume level is from 0 (minimum) to 33
(maximum).
Setting the Z-enhancer
This unit comes with 3 types of sound tone effects
stored in memory. Select the one you prefer.
*The factory default setting is “OFF”.
Each time you press Z-EHCR button @, the tone
effect changes in the following order:
“Z-ENHANCER 1” ➜“Z-ENHANCER 2” ➜
“Z-ENHANCER 3” ➜“OFF” ➜“Z-ENHANCER 1”...
•Z-ENHANCER 1 : bass emphasized
•Z-ENHANCER 2 : treble emphasized
•Z-ENHANCER 3 : bass and treble emphasized
•OFF : no sound effect
Adjusting the tone
Press A-M button 2and select the item to adjust.
Each time you press A-M button 2, the item
changes in the following order:
“BASS” ➜“TREB” ➜“BAL” ➜“FAD” ➜
Function mode...
Adjusting the bass
1. Press A-M button2and select “BASS”.
2. Turning the Rotary knob %clockwise empha-
sizes the bass; turning it counterclockwise
attenuates the bass.
*The factory default setting is “0”.
(Adjustment range: –6 to +6)
3. When the adjustment is complete, press A-M
button 2several times until the function mode
is reached.
Adjusting the treble
1. Press A-M button 2and select“TREB”.
2. Turning the rotary knob%clockwise empha-
sizes the treble; turning it counterclockwise
attenuates the treble.
*The factory default setting is “0”
(Adjustment range: –6 to +6)
3. When the adjustment is complete, press A-M
button 2several times until the function mode
is reached.
8
Note: Be sure to read this chapter referring to the front diagrams of chapter “3. CONTROLS” on page
5 (unfold).
Basic OperationEnglish
6. OPERATION
éCAUTION
Page 9 of 157
Adjusting the balance
1. Press A-M button 2and select “BAL”.
2. Turning the Rotary knob %clockwise empha-
sizes the sound from the right speaker; turning it
counterclockwise emphasizes the sound from the
left speaker.
*The factory default setting is “0”
(Adjustment range: L9 to R9)
3. When the adjustment is complete, press A-M
button 2several times until the function mode
is reached.
Adjusting the fader
1. Press A-M button 2and select “FAD”.
2. Turning the Rotary knob %clockwise empha-
sizes the sound from the front speakers; turn-
ing it counterclockwise emphasizes the sound
from the rear speakers.
*The factory default setting is “0”.
(Adjustment range: F9 to R9)
3. When the adjustment is complete, press A-M
button 2several times until the function mode
is reached.
Loudness
The loudness effect emphasizes the bass and tre-
ble to create a natural sound tone.
When you are listening to music at a low volume,
it is recommended to use the loudness effect.
●Turning on and off the Loudness Effect
Pressing and holding LD button 2for 2 seconds
or longer turns the loudness effect on and off.
When the loudness effect is turned on, “LD”
appears in the display.
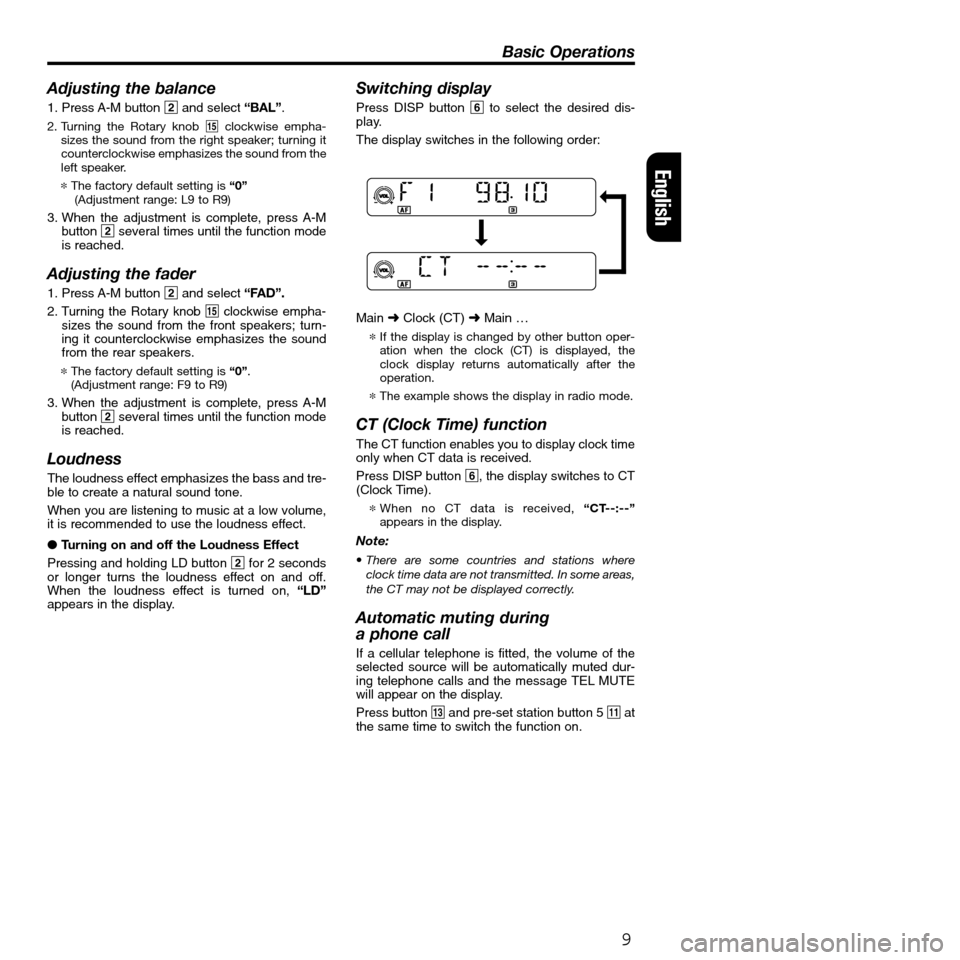
Switching display
Press DISP button 6to select the desired dis-
play.
The display switches in the following order:
Main ➜Clock (CT) ➜Main …
*If the display is changed by other button oper-
ation when the clock (CT) is displayed, the
clock display returns automatically after the
operation.
*The example shows the display in radio mode.
CT (Clock Time) function
The CT function enables you to display clock time
only when CT data is received.
Press DISP button 6, the display switches to CT
(Clock Time).
*When no CT data is received, “CT--:--”
appears in the display.
Note:
•There are some countries and stations where
clock time data are not transmitted. In some areas,
the CT may not be displayed correctly.
Automatic muting during
a phone call
If a cellular telephone is fitted, the volume of the
selected source will be automatically muted dur-
ing telephone calls and the message TEL MUTE
will appear on the display.
Press button #and pre-set station button 5 !at
the same time to switch the function on.
9
Basic Operations
English
Page 10 of 157
10
English
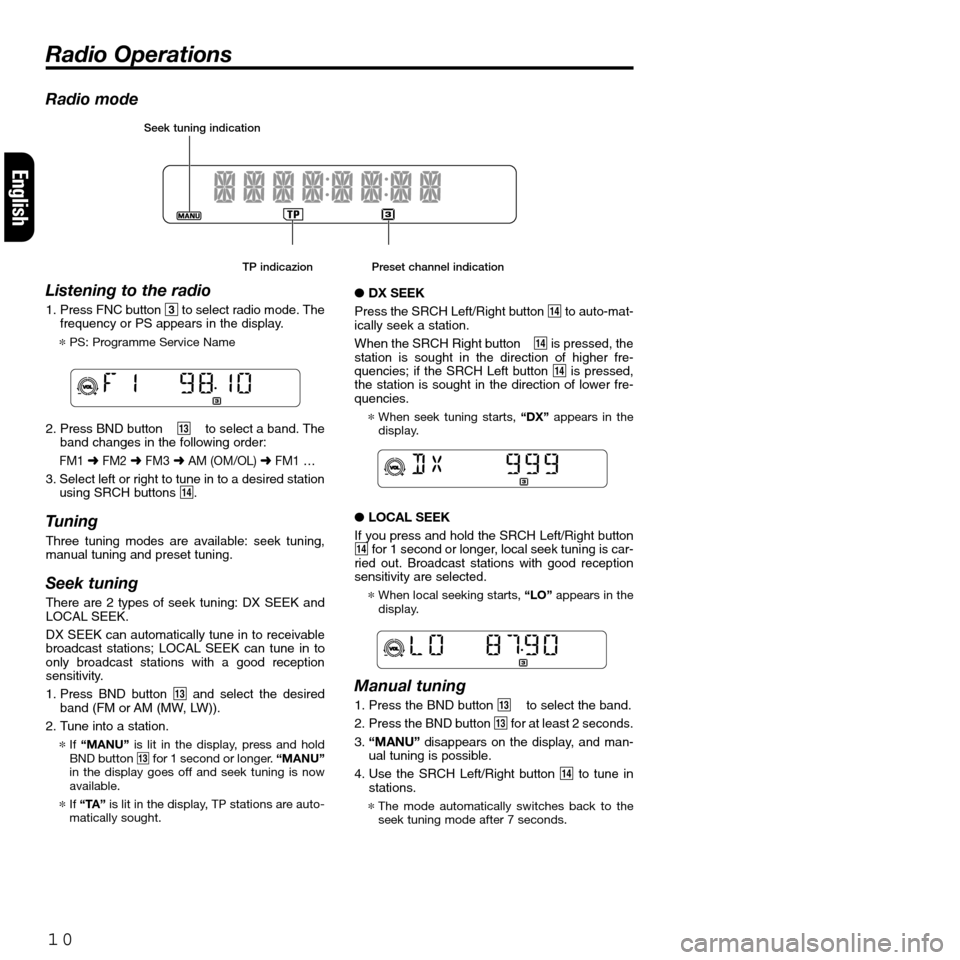
TP indicazion Preset channel indication
Radio mode
Listening to the radio
1. Press FNC button 3to select radio mode. The
frequency or PS appears in the display.
*PS: Programme Service Name
2. Press BND button# to select a band. The
band changes in the following order:
FM1➜FM2➜FM3➜AM (OM/OL) ➜FM1 …
3. Select left or right to tune in to a desired station
using SRCH buttons $.
Tuning
Three tuning modes are available: seek tuning,
manual tuning and preset tuning.
Seek tuning
There are 2 types of seek tuning: DX SEEK and
LOCAL SEEK.
DX SEEK can automatically tune in to receivable
broadcast stations; LOCAL SEEK can tune in to
only broadcast stations with a good reception
sensitivity.
1. Press BND button #and select the desired
band (FM or AM (MW, LW)).
2. Tune into a station.
*If “MANU”is lit in the display, press and hold
BND button #for 1 second or longer. “MANU”
in the display goes off and seek tuning is now
available.
*If “TA”is lit in the display, TP stations are auto-
matically sought.
●DX SEEK
Press the SRCH Left/Right button $to auto-mat-
ically seek a station.
When the SRCH Right button$is pressed, the
station is sought in the direction of higher fre-
quencies; if the SRCH Left button $is pressed,
the station is sought in the direction of lower fre-
quencies.
*When seek tuning starts,“DX”appears in the
display.
●LOCAL SEEK
If you press and hold the SRCH Left/Right button
$for 1 second or longer, local seek tuning is car-
ried out. Broadcast stations with good reception
sensitivity are selected.
*When local seeking starts, “LO” appears in the
display.
Manual tuning
1. Press the BND button # to select the band.
2. Press the BND button #for at least 2 seconds.
3. “MANU”disappears on the display, and man-
ual tuning is possible.
4. Use the SRCH Left/Right button $to tune in
stations.
*The mode automatically switches back to the
seek tuning mode after 7 seconds.
Radio Operations
Seek tuning indication
Page 11 of 157
Recalling a preset station
Up to 24 stations (6 each for the FM1, FM2, FM3
and AM (MW/LW) stations) can be preset in the
Preset buttons.
Preset tuning is a function for storing stations to
Preset buttons (1 to 6) which enables you to
select a station by pressing the corresponding
preset button.
1. Press BND button#to select a band.
2. Press one of Preset buttons
!to select a
stored station.
Note:
•Press and hold Preset button !for 2 seconds or
longer to store the station currently being received
(preset memory).
Manual memory
1. Press BND button #to select a band.
2. Select left or right to tune in to a desired station
using SRCH buttons $.
3. Press and hold one of Preset buttons !for 2
seconds or longer to store the station currently
being received.
Auto store
Auto store is a function for storing up to 6 stations
that are automatically tuned in sequentially.
Notes:
•The only FM band that can store stations is FM3.
If you try to store stations in FM1 or FM2, the sta-
tions will automatically be stored in FM3.
•When the auto store is performed, the station pre-
viously stored in the memory at that position is
overwritten.
•If there are fewer than 6 stations with good recep-
tion, the stations previously stored at the remain-
ing Preset buttons are not overwritten.
•A station already stored in one of Preset buttons
cannot be stored in another Preset buttons.
1. Press BND button#to select a band (FM3 or
AM) of the desired station.
2. Press and hold AS button 0for 2 seconds or
longer. The stations with good reception are
stored automatically to Preset buttons !.
Preset scan
This function scans through each preset station
for 7 seconds sequentially.
This is useful when you want to search for a
desired station.
Note:
•Take note that if you press and hold PS button 0
for 2 seconds or longer, the auto store function
goes into effect and the unit starts storing stations.
1. Press PS button 0
2. When a station that you want to listen to is
tuned in, press PS button 0again or the cor-
responding Preset button !to stop preset
scan.
*A station that cannot be tuned in to is skipped
and the next preset station is tuned in.
Mute
Use this function to turn off the sound immediate-
ly.
Press the MUTE button ¥. The sound turns off
and “MUTE”appears on the display. Press the
MUTE button again to cancel the mute mode.
11
Radio Operations
English
Page 12 of 157
●Turning AF function off
When “AF”is lit or flashing in the display, press
AF button 9. “AF”in the display goes off and AF
turns off.
●Turning AF function on
When “AF”is not lit in the display, press AF but-
ton 9again. “AF”lights in the display and AF
turns on.
If the receiving condition of a station being tuned
is getting worse, “AF”starts flashing and the unit
tries to switch to an alternative frequency. If
switching cannot be performed, the display
switches to “SEARCH”and the unit searches for
the same programme.
REG (Regional Programme) function
When REG function is on, regional station recep-
tion is optimized.
If this function is off, the unit switches in to the
regional station in the next local area when you
enter the next area while receiving the regional
station in the previous local area.
*The factory setting is “off”.
Notes:
• This function is ineffective when a national station
such as BBC 2 FM is being received.
• The on/off setting of REG is effective when AF is
on.
●Turning REG function on
When “REG”is not lit in the display, pressing and
holding AF button 9for 2 seconds or longer.
“REG”lights in the display.
●Turning REG function off
Pressing and holding AF button 9for 2 seconds
or longer again,“REG”in the display goes off.
12
RDS Operations
English
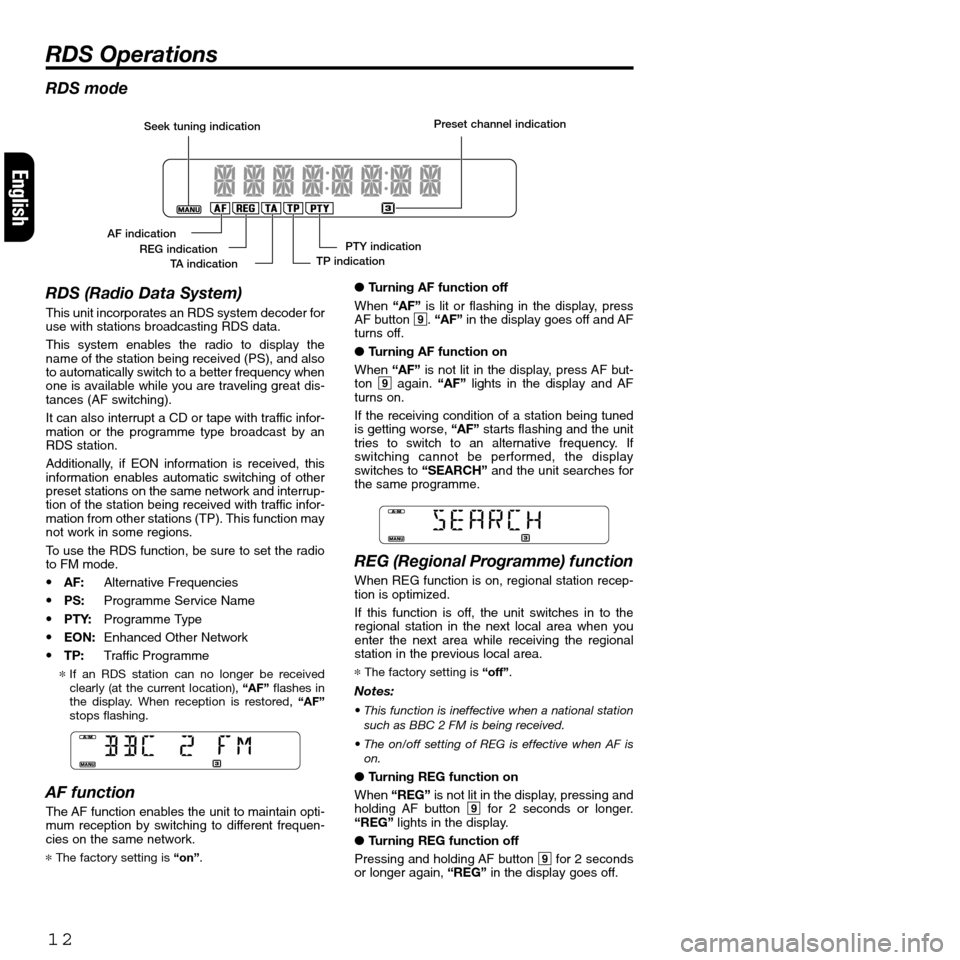
RDS mode
RDS (Radio Data System)
This unit incorporates an RDS system decoder for
use with stations broadcasting RDS data.
This system enables the radio to display the
name of the station being received (PS), and also
to automatically switch to a better frequency when
one is available while you are traveling great dis-
tances (AF switching).
It can also interrupt a CD or tape with traffic infor-
mation or the programme type broadcast by an
RDS station.
Additionally, if EON information is received, this
information enables automatic switching of other
preset stations on the same network and interrup-
tion of the station being received with traffic infor-
mation from other stations (TP). This function may
not work in some regions.
To use the RDS function, be sure to set the radio
to FM mode.
•AF:Alternative Frequencies
•PS:Programme Service Name
•PTY:Programme Type
• EON:Enhanced Other Network
•TP:Traffic Programme
*If an RDS station can no longer be received
clearly (at the current location), “AF”flashes in
the display. When reception is restored, “AF”
stops flashing.
AF function
The AF function enables the unit to maintain opti-
mum reception by switching to different frequen-
cies on the same network.
*The factory setting is“on”.
Seek tuning indication
AF indication
PTY indication
TP indication REG indication
TA indicationPreset channel indication
Page 13 of 157
Manual tuning of related regional
stations
1. This function works when AF is on and REG is
off.
Note:
•This function is effective when related regional
stations are received.
2. Press one of Preset buttons !to recall a
regional station.
3. If the receiving condition of a recalled station is
bad, press the same Preset button !. The unit
switches to a related regional station.
TA (Traffic Announcement)
When the unit is in the TA standby mode, you can
listen to traffic announcements preferentially
when they start, irrespective of the function mode.
You can also tune in to TP (traffic programme)
stations automatically.
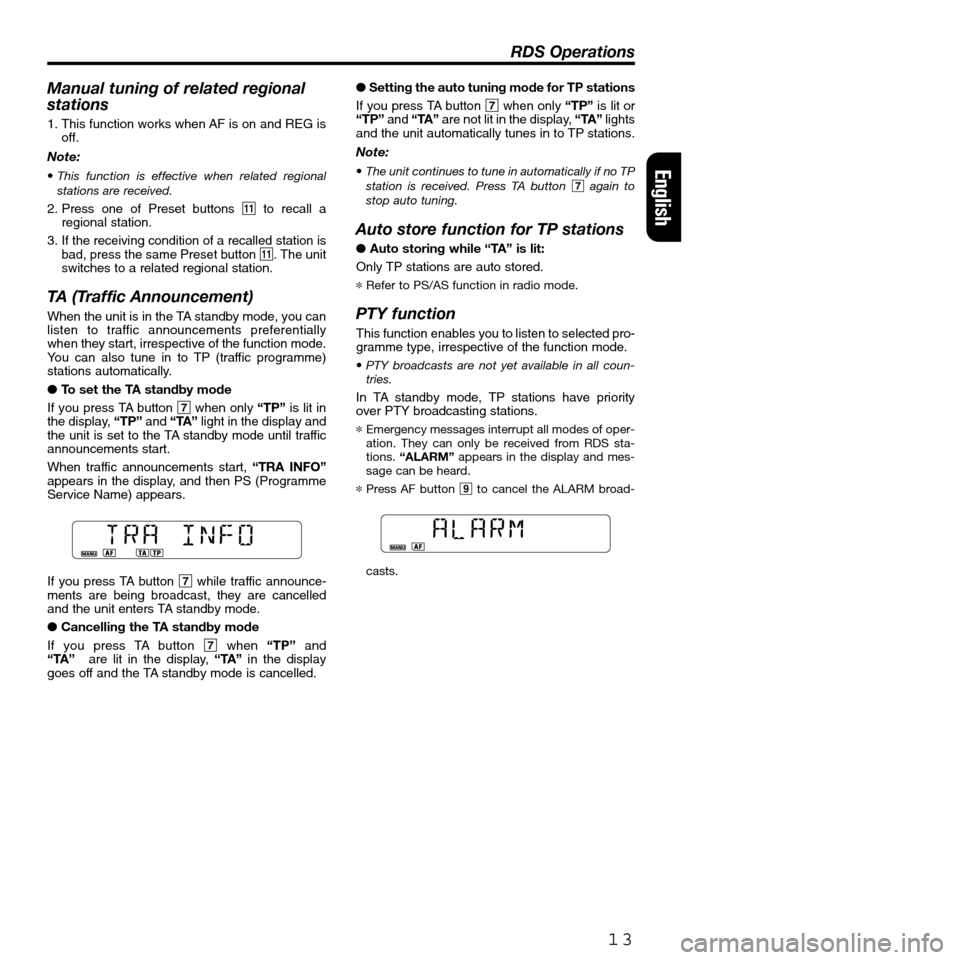
●To set the TA standby mode
If you press TA button 7when only “TP”is lit in
the display, “TP”and “TA”light in the display and
the unit is set to the TA standby mode until traffic
announcements start.
When traffic announcements start, “TRA INFO”
appears in the display, and then PS (Programme
Service Name) appears.
If you press TA button 7while traffic announce-
ments are being broadcast, they are cancelled
and the unit enters TA standby mode.
●Cancelling the TA standby mode
If you press TA button 7when“TP”and
“TA””are lit in the display, “TA”in the display
goes off and the TA standby mode is cancelled.●Setting the auto tuning mode for TP stations
If you press TA button 7when only “TP”is lit or
“TP”and “TA”are not lit in the display,“TA”lights
and the unit automatically tunes in to TP stations.
Note:
•The unit continues to tune in automatically if no TP
station is received. Press TA button 7again to
stop auto tuning.
Auto store function for TP stations
● Auto storing while “TA” is lit:
Only TP stations are auto stored.
*Refer to PS/AS function in radio mode.
PTY function
This function enables you to listen to selected pro-
gramme type, irrespective of the function mode.
•PTY broadcasts are not yet available in all coun-
tries.
In TA standby mode, TP stations have priority
over PTY broadcasting stations.
*Emergency messages interrupt all modes of oper-
ation. They can only be received from RDS sta-
tions. “ALARM”appears in the display and mes-
sage can be heard.
*Press AF button 9to cancel the ALARM broad-
casts.
13
RDS Operations
English
Page 14 of 157
Selecting PTY
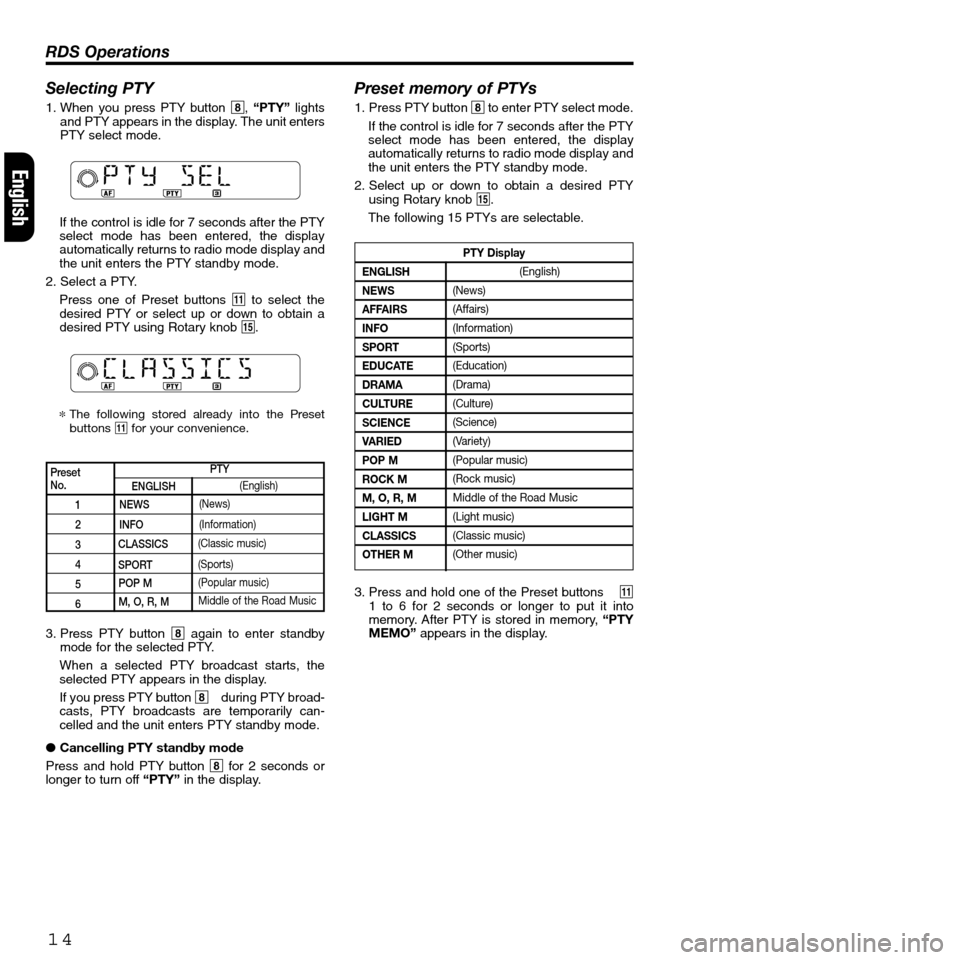
1. When you press PTY button 8,“PTY”lights
and PTY appears in the display. The unit enters
PTY select mode.
If the control is idle for 7 seconds after the PTY
select mode has been entered, the display
automatically returns to radio mode display and
the unit enters the PTY standby mode.
2. Select a PTY.
Press one of Preset buttons !to select the
desired PTY or select up or down to obtain a
desired PTY using Rotary knob %.
*The following stored already into the Preset
buttons !for your convenience.
Preset memory of PTYs
1. Press PTY button 8to enter PTY select mode.
If the control is idle for 7 seconds after the PTY
select mode has been entered, the display
automatically returns to radio mode display and
the unit enters the PTY standby mode.
2. Select up or down to obtain a desired PTY
using Rotary knob %.
The following 15 PTYs are selectable.
14
RDS Operations
English
PresetNo.
1
2
3
4
5
6
PTY
ENGLISH
NEWS
INFO
CLASSICS
SPORT
POP M
M, O, R, M(English)
(News)
(Information)
(Classic music)
(Sports)
(Popular music)
Middle of the Road Music
PTY Display
ENGLISH
NEWS
AFFAIRS
INFO
SPORT
EDUCATE
DRAMA
CULTURE
SCIENCE
VARIED
POP M
ROCK M
M, O, R, M
LIGHT M
CLASSICS
OTHER M
(English)
(News)
(Affairs)
(Information)
(Sports)
(Education)
(Drama)
(Culture)
(Science)
(Variety)
(Popular music)
(Rock music)
Middle of the Road Music
(Light music)
(Classic music)
(Other music)
3. Press PTY button 8again to enter standby
mode for the selected PTY.
When a selected PTY broadcast starts, the
selected PTY appears in the display.
If you press PTY button 8 during PTY broad-
casts, PTY broadcasts are temporarily can-
celled and the unit enters PTY standby mode.
●Cancelling PTY standby mode
Press and hold PTY button 8for 2 seconds or
longer to turn off“PTY”in the display.3. Press and hold one of the Preset buttons!
1 to 6 for 2 seconds or longer to put it into
memory. After PTY is stored in memory, “PTY
MEMO”appears in the display.