key FIAT STILO 2006 1.G User Guide
[x] Cancel search | Manufacturer: FIAT, Model Year: 2006, Model line: STILO, Model: FIAT STILO 2006 1.GPages: 274, PDF Size: 4.76 MB
Page 16 of 274
15
SAFETY
DEVICES
CORRECT USE
OF THE CAR
WARNING
LIGHTS AND
MESSAGES
IN AN
EMERGENCY
CAR
MAINTENANCE
TECHNICAL
SPECIFICATIONS
INDEX
DASHBOARD
AND CONTROLS
Device activation
The device is automatically activated on
every door in the following cases:
❒turning twice the key without remote
control (where provided) in closing di-
rection;
❒pressing twice button Áof the key with
remote control.
Device activation is signalled by three
flashings of the direction indicators and
flashing of the led on the driver door pan-
el (see the table on next page).
If one of the doors is not perfectly closed,
the dead lock device will not activate, thus
preventing that a person getting into the
car from the open door remains blocked
inside the passenger’s compartment when
she/he closes the door.Device deactivation
The device is deactivated automatically on
every door in the following cases:
❒when unlocking the doors;
❒when unlocking only the driver’s door;
❒when turning the ignition key to MAR.
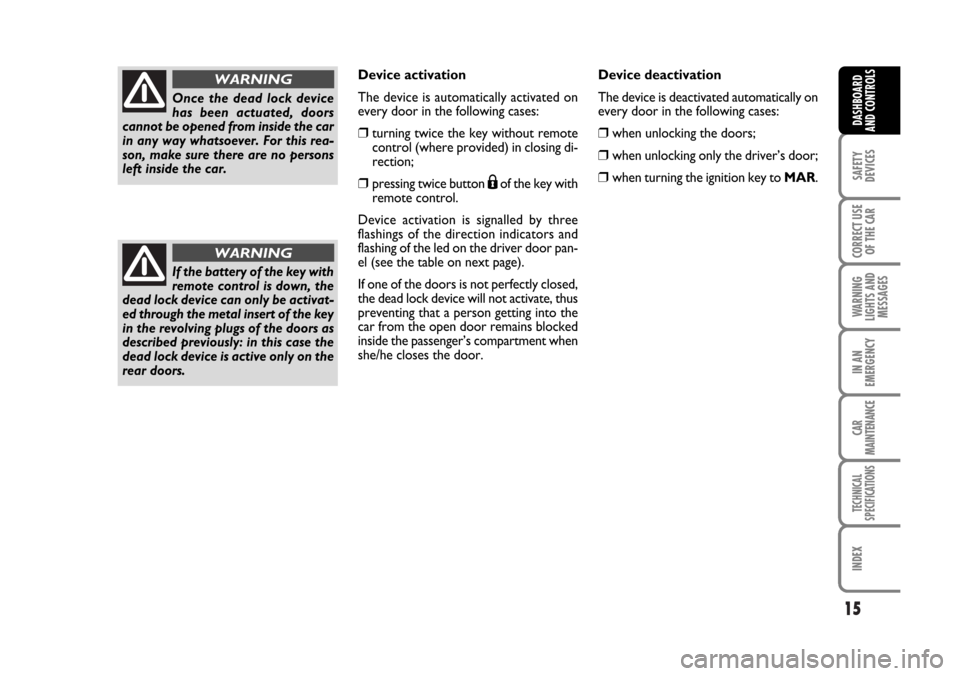
Once the dead lock device
has been actuated, doors
cannot be opened from inside the car
in any way whatsoever. For this rea-
son, make sure there are no persons
left inside the car.
WARNING
If the battery of the key with
remote control is down, the
dead lock device can only be activat-
ed through the metal insert of the key
in the revolving plugs of the doors as
described previously: in this case the
dead lock device is active only on the
rear doors.
WARNING
Page 17 of 274
16
SAFETY
DEVICES
CORRECT USE
OF THE CAR
WARNING
LIGHTS AND
MESSAGES
IN AN
EMERGENCY
CAR
MAINTENANCE
TECHNICAL
SPECIFICATIONS
INDEX
DASHBOARD
AND CONTROLS
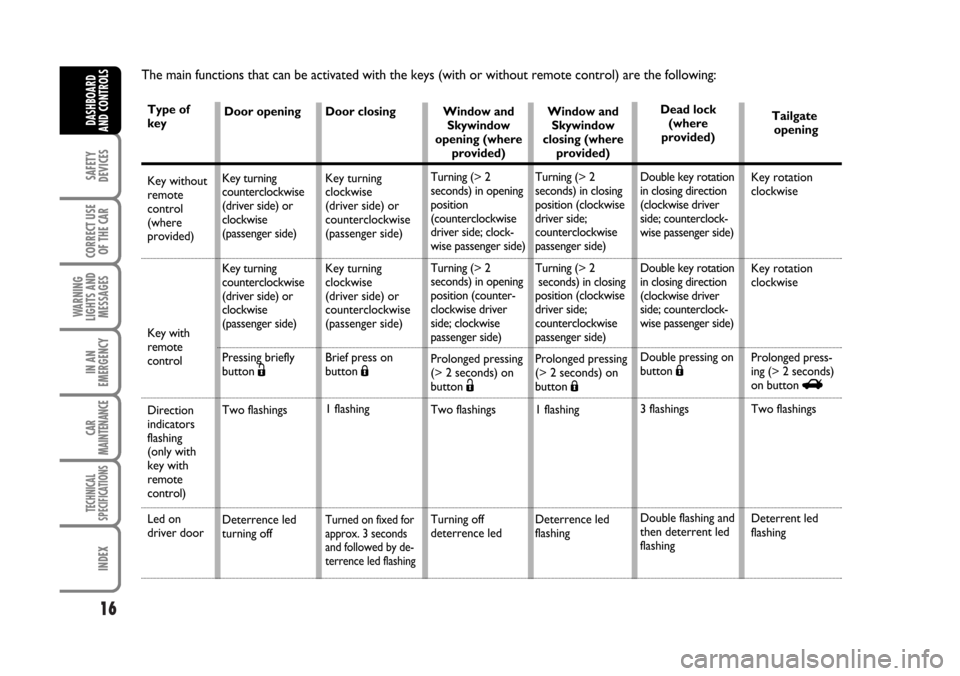
The main functions that can be activated with the keys (with or without remote control) are the following:
Door opening
Key turning
counterclockwise
(driver side) or
clockwise
(passenger side)
Key turning
counterclockwise
(driver side) or
clockwise
(passenger side)
Pressing briefly
button Ë
Two flashings
Deterrence led
turning offDoor closing
Key turning
clockwise
(driver side) or
counterclockwise
(passenger side)
Key turning
clockwise
(driver side) or
counterclockwise
(passenger side)
Brief press on
button Á
1 flashing
Turned on fixed for
approx. 3 seconds
and followed by de-
terrence led flashing
Window and
Skywindow
opening (where
provided)
Turning (> 2
seconds) in opening
position
(counterclockwise
driver side; clock-
wise passenger side)
Turning (> 2
seconds) in opening
position (counter-
clockwise driver
side; clockwise
passenger side)
Prolonged pressing
(> 2 seconds) on
button Ë
Two flashings
Turning off
deterrence ledWindow and
Skywindow
closing (where
provided)
Turning (> 2
seconds) in closing
position (clockwise
driver side;
counterclockwise
passenger side)
Turning (> 2
seconds) in closing
position (clockwise
driver side;
counterclockwise
passenger side)
Prolonged pressing
(> 2 seconds) on
button Á
1 flashing
Deterrence led
flashingDead lock
(where
provided)
Double key rotation
in closing direction
(clockwise driver
side; counterclock-
wise passenger side)
Double key rotation
in closing direction
(clockwise driver
side; counterclock-
wise passenger side)
Double pressing on
button Á
3 flashings
Double flashing and
then deterrent led
flashingTailgate
opening
Key rotation
clockwise
Key rotation
clockwise
Prolonged press-
ing (> 2 seconds)
on button R
Two flashings
Deterrent led
flashingType of
key
Key without
remote
control
(where
provided)
Key with
remote
control
Direction
indicators
flashing
(only with
key with
remote
control)
Led on
driver door
Page 18 of 274

17
SAFETY
DEVICES
CORRECT USE
OF THE CAR
WARNING
LIGHTS AND
MESSAGES
IN AN
EMERGENCY
CAR
MAINTENANCE
TECHNICAL
SPECIFICATIONS
INDEX
DASHBOARD
AND CONTROLS
ALARM
(where provided)
The alarm function is provided in addition
to all remote control functions previous-
ly described and it is controlled by the re-
ceiver located under the dashboard, next
to the fuse box.
WHEN THE ALARM IS
TRIGGERED
The alarm comes into action in the fol-
lowing cases:
❒ unlawful opening of one of the doors,
bonnet or boot (perimetral protec-
tion);
❒attempt to start the engine (turning the
ignition key to MAR);
❒ battery cable cutting;
❒ presence of moving bodies in the pas-
senger’s compartment (volumetric pro-
tection);
❒ abnormal raising/sloping of the car. Depending on the markets, the cutting in
of the alarm causes operation of the siren
and direction indicators (for about 26 sec-
onds). The ways of operating and the num-
ber of cycles may vary depending on the
markets.
A maximum number of sound/sight cycles
is however envisaged.
Volumetric and anti-raising protections
can be cut off by operating the front ceil-
ing light controls (see paragraphs “Volu-
metric protection sensors” and “Anti-rais-
ing sensor” on the following pages).
IMPORTANT The engine immobiliser
function is guaranteed by the Fiat CODE
system, which is automatically activated
when the ignition key is removed.HOW TO ACTIVATE THE
ALARM
With the doors, bonnet and boot shut and
the ignition key in the STOPposition or
with the key removed, point the key with
remote control in the direction of the car,
then press and release the button
Á.
With the exception of certain markets,
the system sounds a “beep” and the doors
are locked.
Engagement of the alarm is preceded by
a self-diagnostic test. If a fault is detected
the system sounds a further warning
“beep” and the display shows the relevant
message (see section “Warning lights and
messages”).
In this case, switch the alarm system off by
pressing button
Ë, check that the doors,
bonnet and tailgate are properly shut, then
switch the alarm on again by pressing but-
ton
Á.
Otherwise, the door, bonnet or tailgate
that is not shut properly will be excluded
from the alarm system control.
Page 19 of 274
18
SAFETY
DEVICES
CORRECT USE
OF THE CAR
WARNING
LIGHTS AND
MESSAGES
IN AN
EMERGENCY
CAR
MAINTENANCE
TECHNICAL
SPECIFICATIONS
INDEX
DASHBOARD
AND CONTROLS
If the doors, bonnet and boot are shut
correctly and the control signal is repeat-
ed, the system self-diagnostics has de-
tected a system operating fault. It is there-
fore necessary to contact Fiat Dealership.
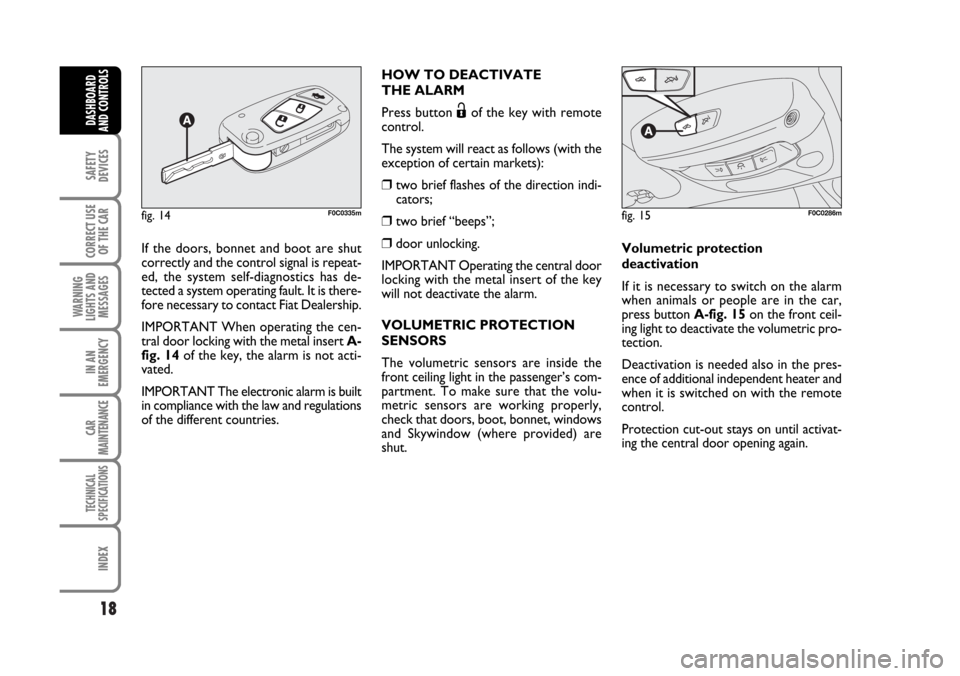
IMPORTANT When operating the cen-
tral door locking with the metal insert A-
fig. 14of the key, the alarm is not acti-
vated.
IMPORTANT The electronic alarm is built
in compliance with the law and regulations
of the different countries.HOW TO DEACTIVATE
THE ALARM
Press button
Ëof the key with remote
control.
The system will react as follows (with the
exception of certain markets):
❒ two brief flashes of the direction indi-
cators;
❒ two brief “beeps”;
❒door unlocking.
IMPORTANT Operating the central door
locking with the metal insert of the key
will not deactivate the alarm.
VOLUMETRIC PROTECTION
SENSORS
The volumetric sensors are inside the
front ceiling light in the passenger’s com-
partment. To make sure that the volu-
metric sensors are working properly,
check that doors, boot, bonnet, windows
and Skywindow (where provided) are
shut.Volumetric protection
deactivation
If it is necessary to switch on the alarm
when animals or people are in the car,
press button A-fig. 15 on the front ceil-
ing light to deactivate the volumetric pro-
tection.
Deactivation is needed also in the pres-
ence of additional independent heater and
when it is switched on with the remote
control.
Protection cut-out stays on until activat-
ing the central door opening again.
fig. 14F0C0335mfig. 15F0C0286m
Page 20 of 274
19
SAFETY
DEVICES
CORRECT USE
OF THE CAR
WARNING
LIGHTS AND
MESSAGES
IN AN
EMERGENCY
CAR
MAINTENANCE
TECHNICAL
SPECIFICATIONS
INDEX
DASHBOARD
AND CONTROLS
ANTI-RAISING SENSOR
The anti-raising sensor detects any ab-
normal car raising/sloping, even partial
(e.g.: attempt to remove a wheel).
This sensor can detect the smallest car
sideslip angle changes, both longitudinally
and transversally.
Sideslip angle changes lower than 0.5°/min.
(e.g.: slow tyre flattening) are not consid-
ered.
Anti-raising protection
deactivation
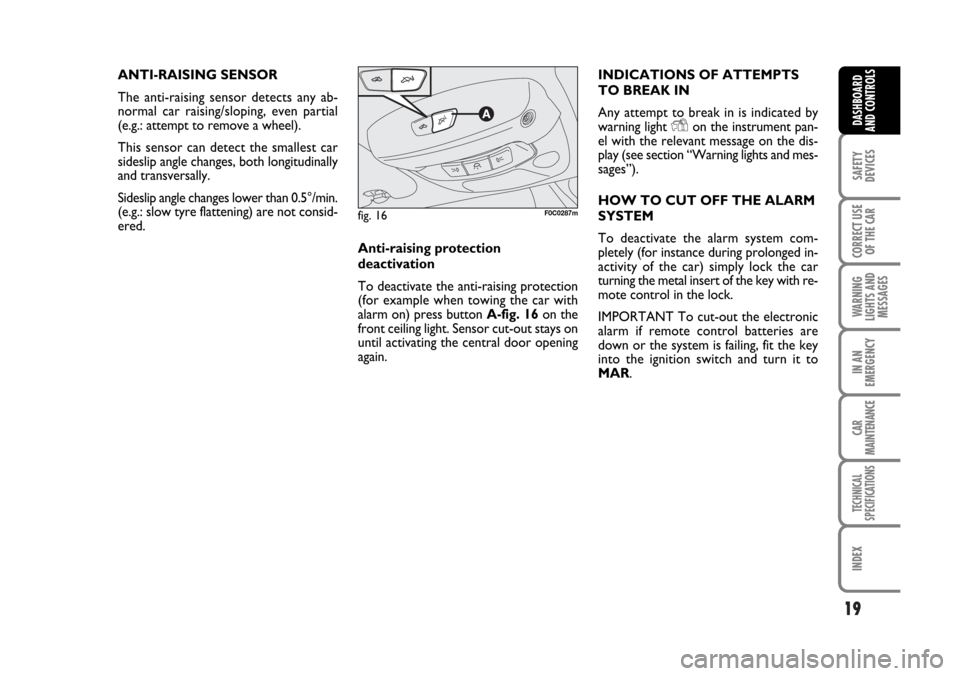
To deactivate the anti-raising protection
(for example when towing the car with
alarm on) press button A-fig. 16 on the
front ceiling light. Sensor cut-out stays on
until activating the central door opening
again.INDICATIONS OF ATTEMPTS
TO BREAK IN
Any attempt to break in is indicated by
warning light
Yon the instrument pan-
el with the relevant message on the dis-
play (see section “Warning lights and mes-
sages”).
HOW TO CUT OFF THE ALARM
SYSTEM
To deactivate the alarm system com-
pletely (for instance during prolonged in-
activity of the car) simply lock the car
turning the metal insert of the key with re-
mote control in the lock.
IMPORTANT To cut-out the electronic
alarm if remote control batteries are
down or the system is failing, fit the key
into the ignition switch and turn it to
MAR.
fig. 16F0C0287m
Page 21 of 274
20
SAFETY
DEVICES
CORRECT USE
OF THE CAR
WARNING
LIGHTS AND
MESSAGES
IN AN
EMERGENCY
CAR
MAINTENANCE
TECHNICAL
SPECIFICATIONS
INDEX
DASHBOARD
AND CONTROLS
IGNITION SWITCH
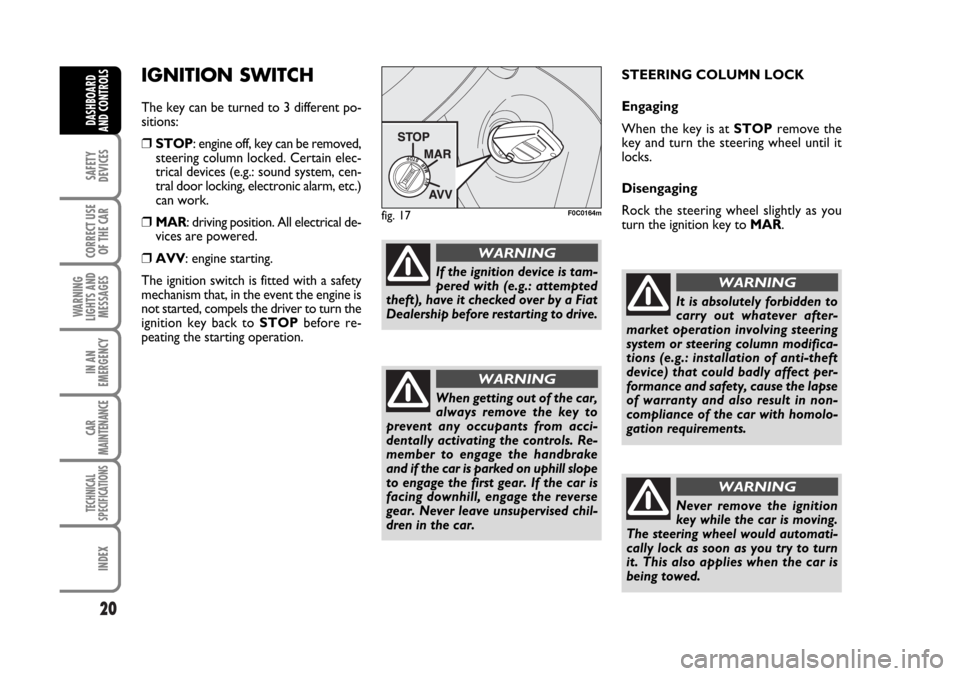
The key can be turned to 3 different po-
sitions:
❒STOP: engine off, key can be removed,
steering column locked. Certain elec-
trical devices (e.g.: sound system, cen-
tral door locking, electronic alarm, etc.)
can work.
❒MAR: driving position. All electrical de-
vices are powered.
❒AVV: engine starting.
The ignition switch is fitted with a safety
mechanism that, in the event the engine is
not started, compels the driver to turn the
ignition key back to STOPbefore re-
peating the starting operation.STEERING COLUMN LOCK
Engaging
When the key is at STOPremove the
key and turn the steering wheel until it
locks.
Disengaging
Rock the steering wheel slightly as you
turn the ignition key to MAR.
fig. 17F0C0164m
If the ignition device is tam-
pered with (e.g.: attempted
theft), have it checked over by a Fiat
Dealership before restarting to drive.
WARNING
When getting out of the car,
always remove the key to
prevent any occupants from acci-
dentally activating the controls. Re-
member to engage the handbrake
and if the car is parked on uphill slope
to engage the first gear. If the car is
facing downhill, engage the reverse
gear. Never leave unsupervised chil-
dren in the car.
WARNING
It is absolutely forbidden to
carry out whatever after-
market operation involving steering
system or steering column modifica-
tions (e.g.: installation of anti-theft
device) that could badly affect per-
formance and safety, cause the lapse
of warranty and also result in non-
compliance of the car with homolo-
gation requirements.
WARNING
Never remove the ignition
key while the car is moving.
The steering wheel would automati-
cally lock as soon as you try to turn
it. This also applies when the car is
being towed.
WARNING
Page 27 of 274
26
SAFETY
DEVICES
CORRECT USE
OF THE CAR
WARNING
LIGHTS AND
MESSAGES
IN AN
EMERGENCY
CAR
MAINTENANCE
TECHNICAL
SPECIFICATIONS
INDEX
DASHBOARD
AND CONTROLS
Day
YearMonth
Español
English
Portuges
Deutsch
Français
Italiano
EXIT MENUTRIP B DATASET TIME
SET DATE
SEE RADIO
KEY
AUTOCLOSE
UNITS
LANGUAGE
BUZZER VOLUME BUTTON VOL. BELT BUZZER SERVICESPEED BEEP
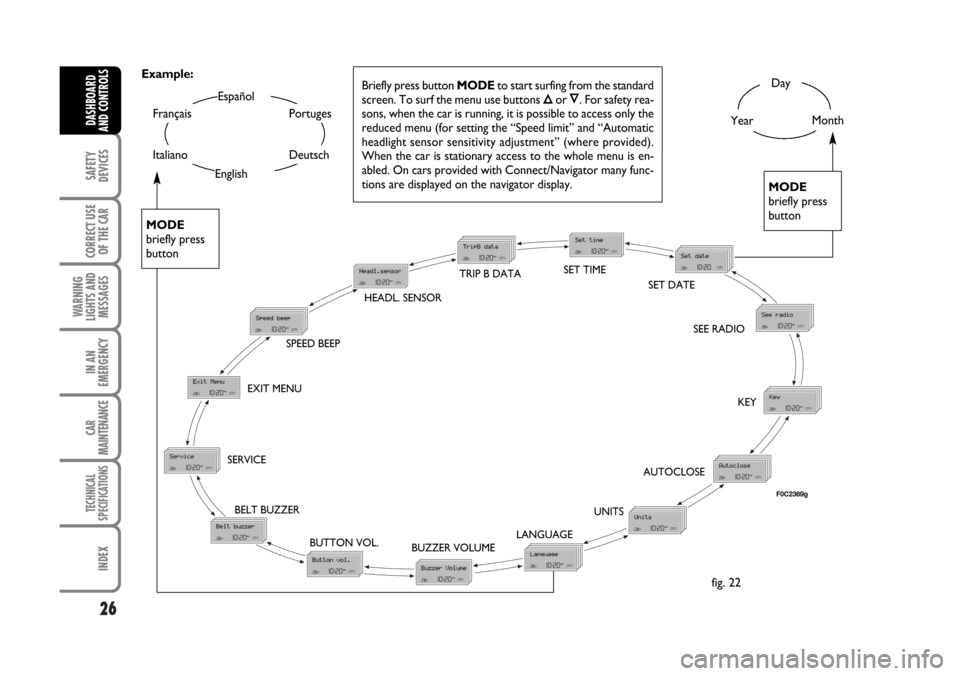
Briefly press button MODEto start surfing from the standard
screen. To surf the menu use buttons Õor Ô. For safety rea-
sons, when the car is running, it is possible to access only the
reduced menu (for setting the “Speed limit” and “Automatic
headlight sensor sensitivity adjustment” (where provided).
When the car is stationary access to the whole menu is en-
abled. On cars provided with Connect/Navigator many func-
tions are displayed on the navigator display.
MODE
briefly press
button
MODE
briefly press
button
Example:
fig. 22
HEADL. SENSOR
F0C2369g
Page 30 of 274

29
SAFETY
DEVICES
CORRECT USE
OF THE CAR
WARNING
LIGHTS AND
MESSAGES
IN AN
EMERGENCY
CAR
MAINTENANCE
TECHNICAL
SPECIFICATIONS
INDEX
DASHBOARD
AND CONTROLS
Setting the date (Set date)
This function enables to update the date
(day – month – year).
To correct the date proceed as follows:
– briefly press button MODE: “year” will
flash on the display;
– press button
Õor Ôfor setting;
– briefly press button MODE: “month”
will flash on the display;
– press button
Õor Ôfor setting;
– briefly press button MODE: “day” will
flash on the display;
– press button
Õor Ôfor setting.
NoteEvery press on button
Õor Ôin-
creases/decreases by 1 unit. Keeping the
button pressed obtains automatic fast in-
crease or decrease. When you are near
the required setting complete adjustment
by single presses.
– briefly press button MODEto go back
to the menu screen or press the button
for long to go back to the standard screen
without storing settings.Audio info repetition (See radio)
With this function the display repeats in-
formation relevant to the sound system.
– Radio: selected radio station frequency
or RDS message;
– Audio CD/MP3 CD: CD and/or track
number;
To activate (On) or to deactivate (Off)
sound system info displaying proceed as
follows:
– briefly press button MODE: (On) or
(Off) will flash on the display (according to
previous setting);
– press button
Õor Ôfor setting;
– briefly press button MODEto go back
to the menu screen or press the button
for long to go back to the standard screen
without storing settings.Door opening mode (Key)
This function enables to select the re-
quired door opening mode:
– briefly press button MODE, the display
will show the wording “Key”;
– press button
Õor Ôto select option
“Open doors” or “Open all”;
– briefly press button MODEto go back
to the menu screen or press the button
for long to go back to the standard screen
without storing settings.
– “Open doors”: press button
Ëto open
the doors (excluding the tailgate);
– “Open all”: press button
Ëto open the
doors and the tailgate.
Page 34 of 274
33
SAFETY
DEVICES
CORRECT USE
OF THE CAR
WARNING
LIGHTS AND
MESSAGES
IN AN
EMERGENCY
CAR
MAINTENANCE
TECHNICAL
SPECIFICATIONS
INDEX
DASHBOARD
AND CONTROLS
NoteThe “Service Schedule” includes car
maintenance every 30,000 km (or equiv-
alent value in miles) or every year; this is
shown automatically, with the ignition key
at MAR, starting from 2,000 km (or equiv-
alent value in miles) or 30 days from this
deadline and it is shown again every 200
km (or equivalent value in miles) or every
3 days. Below 200 km servicing indications
are displayed more frequently. Servicing
indication will be displayed in km or mi ac-
cording to previous setting. When a pro-
grammed maintenance interval (coupon)
is near to come, turning the ignition key
to MAR, the display will show the mes-
sage “Service” followed by the number of
km/mi or days to go before car servicing.
“Scheduled servicing” message is displayed
in km/mi or days according to the ap-
proaching service interval. Contact a Fiat
Dealership to carry out any service op-
eration provided by the “Service sched-
ule” or “Annual inspection plan”, and to
reset the display.Exit Menu
This is the last function that closes the cir-
cular setting cycle listed in the initial menu
screen.
Briefly press button MODEto go back to
the standard screen without storing set-
tings.
Press button
Ôto return to the first menu
option (Speed Beep).
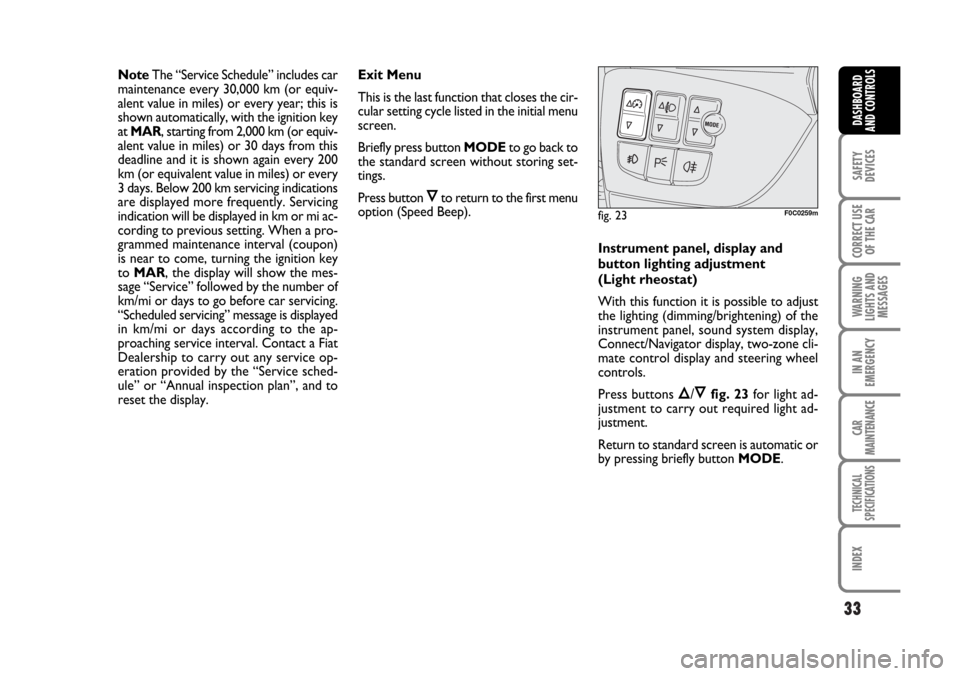
Instrument panel, display and
button lighting adjustment
(Light rheostat)
With this function it is possible to adjust
the lighting (dimming/brightening) of the
instrument panel, sound system display,
Connect/Navigator display, two-zone cli-
mate control display and steering wheel
controls.
Press buttons
Õ/Ôfig. 23for light ad-
justment to carry out required light ad-
justment.
Return to standard screen is automatic or
by pressing briefly button MODE.
fig. 23F0C0259m
Page 35 of 274

34
SAFETY
DEVICES
CORRECT USE
OF THE CAR
WARNING
LIGHTS AND
MESSAGES
IN AN
EMERGENCY
CAR
MAINTENANCE
TECHNICAL
SPECIFICATIONS
INDEX
DASHBOARD
AND CONTROLS
TRIP COMPUTER
GENERAL
The “Trip computer” displays information
(with ignition key at MAR), relating to the
operating status of the car.
This function comprises the “General trip”
concerning the “complete mission” of the
car (journey) and “Trip B”, concerning the
partial mission of the car; this latter func-
tion is “contained” (as shown in fig. 25)
within the complete mission. Both func-
tions are resettable (reset - start of new
mission).“General Trip” displays the figures relat-
ing to:
– Range
– Trip distance
– Average consumption
– Instant consumption
– Average speed
– Trip time (driving time).
“Trip B” displays the figures relating to:
– Trip distance B
– Average consumption B
– Average speed B
– Trip time B (driving time).
Note“Trip B” function can be excluded
(see paragraph “Trip B On/Off”). “Range”
and “Instant consumption” cannot be re-
set.Values displayed
Range
This value shows the distance in km (or
mi) that the car can still cover before
needing fuel, assuming that driving condi-
tions are kept unvaried. The display will
show “----” if the range value is below 50
km (or 30 mi).
Trip distance
This value shows the distance covered
from the start of the new mission.
Average consumption
This value shows the average consump-
tion from the start of the new mission.
Instant consumption
This value shows instant fuel consumption
(this value is updated second by second). If
parking the car with engine on, the display
will show “----”.
Average speed
This value shows the car average speed as
a function of the overall time elapsed since
the start of the new mission.