key FIAT STILO 2006 1.G Owner's Manual
[x] Cancel search | Manufacturer: FIAT, Model Year: 2006, Model line: STILO, Model: FIAT STILO 2006 1.GPages: 274, PDF Size: 4.76 MB
Page 36 of 274
35
SAFETY
DEVICES
CORRECT USE
OF THE CAR
WARNING
LIGHTS AND
MESSAGES
IN AN
EMERGENCY
CAR
MAINTENANCE
TECHNICAL
SPECIFICATIONS
INDEX
DASHBOARD
AND CONTROLS
fig. 24F0C0023m
Trip time
This value shows the time elapsed since
the start of the new mission.
IMPORTANT Lacking information, Trip
computer values are displayed with “----”.
When normal operating condition is re-
set, calculation of different units will
restart regularly. Values displayed before
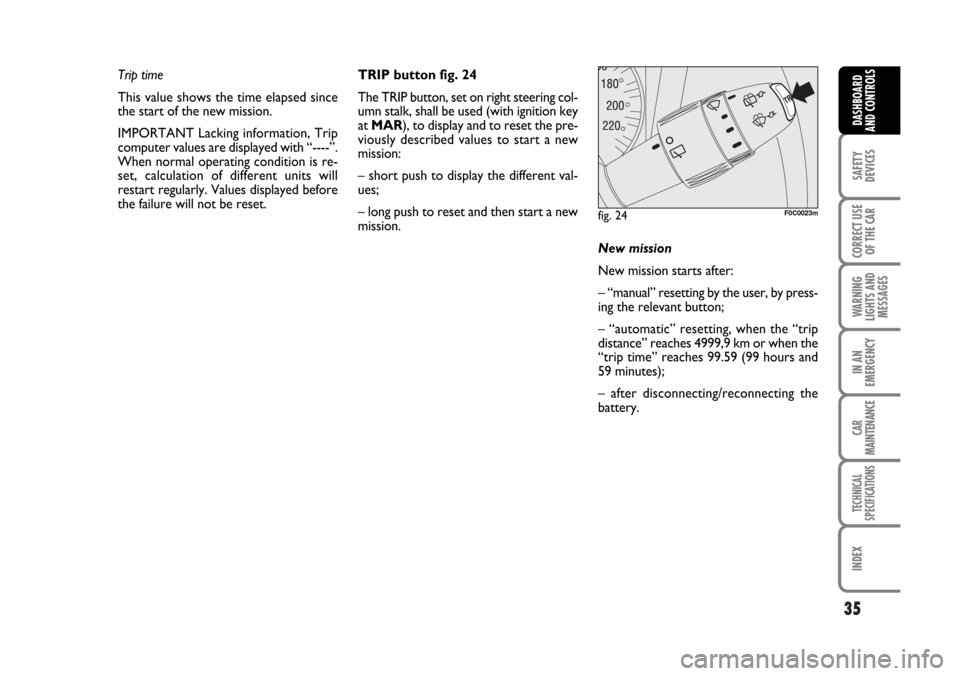
the failure will not be reset.TRIP button fig. 24
The TRIP button, set on right steering col-
umn stalk, shall be used (with ignition key
at MAR), to display and to reset the pre-
viously described values to start a new
mission:
– short push to display the different val-
ues;
– long push to reset and then start a new
mission.
New mission
New mission starts after:
– “manual” resetting by the user, by press-
ing the relevant button;
– “automatic” resetting, when the “trip
distance” reaches 4999,9 km or when the
“trip time” reaches 99.59 (99 hours and
59 minutes);
– after disconnecting/reconnecting the
battery.
Page 37 of 274

36
SAFETY
DEVICES
CORRECT USE
OF THE CAR
WARNING
LIGHTS AND
MESSAGES
IN AN
EMERGENCY
CAR
MAINTENANCE
TECHNICAL
SPECIFICATIONS
INDEX
DASHBOARD
AND CONTROLS
IMPORTANT The reset operation in the
presence of the screens concerning the
“General Trip” makes it possible to reset
also the “Trip B”. The reset operation in
the presence of the screens concerning
only the “Trip B” makes it possible to re-
set only the information associated with
this function.Start of journey procedure
With ignition key at MAR, press and keep
TRIP button pressed for over 2 seconds
to reset.
Reset TRIP B
End of partial mission
Start of new partial mission
End of partial mission
Start of new
partial mission
Reset TRIP B
End of partial mission
Start of new
partial mission Reset GENERAL TRIP
End of complete mission
Start of new missionReset GENERAL TRIP
End of complete mission
Start of new mission
End of partial mission
Start of new
partial mission Reset TRIP B
Reset TRIP B
TRIP B
TRIP B
TRIP B GENERAL TRIP
˙
˙
˙
˙
˙
˙
˙
˙
fig. 25
Page 39 of 274
38
SAFETY
DEVICES
CORRECT USE
OF THE CAR
WARNING
LIGHTS AND
MESSAGES
IN AN
EMERGENCY
CAR
MAINTENANCE
TECHNICAL
SPECIFICATIONS
INDEX
DASHBOARD
AND CONTROLS
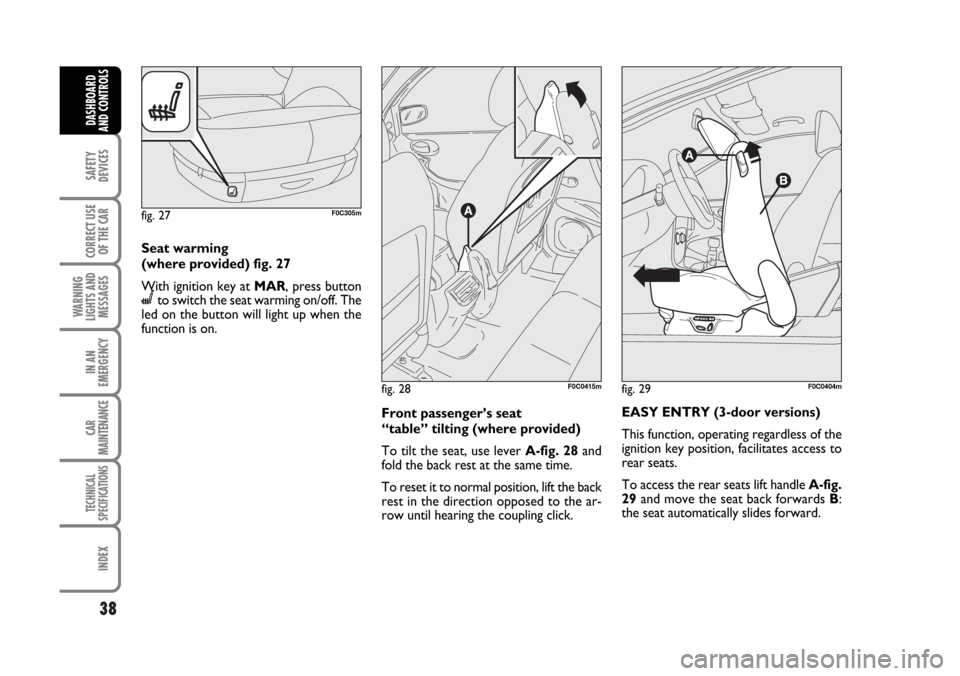
Seat warming
(where provided) fig. 27
With ignition key at MAR, press button
Cto switch the seat warming on/off. The
led on the button will light up when the
function is on.
Front passenger’s seat
“table” tilting (where provided)
To tilt the seat, use lever A-fig. 28and
fold the back rest at the same time.
To reset it to normal position, lift the back
rest in the direction opposed to the ar-
row until hearing the coupling click.EASY ENTRY (3-door versions)
This function, operating regardless of the
ignition key position, facilitates access to
rear seats.
To access the rear seats lift handle A-fig.
29and move the seat back forwards B:
the seat automatically slides forward.
fig. 27F0C305m
fig. 28F0C0415mfig. 29F0C0404m
Page 58 of 274
57
SAFETY
DEVICES
CORRECT USE
OF THE CAR
WARNING
LIGHTS AND
MESSAGES
IN AN
EMERGENCY
CAR
MAINTENANCE
TECHNICAL
SPECIFICATIONS
INDEX
DASHBOARD
AND CONTROLS
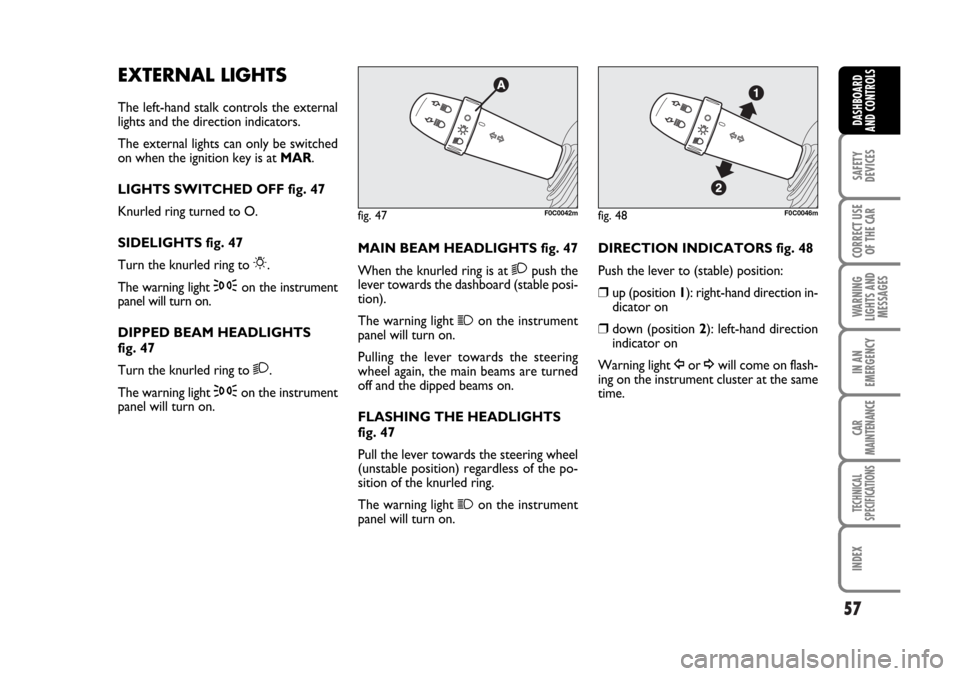
EXTERNAL LIGHTS
The left-hand stalk controls the external
lights and the direction indicators.
The external lights can only be switched
on when the ignition key is at MAR.
LIGHTS SWITCHED OFF fig. 47
Knurled ring turned to O.
SIDELIGHTS fig. 47
Turn the knurled ring to
6.
The warning light
3on the instrument
panel will turn on.
DIPPED BEAM HEADLIGHTS
fig. 47
Turn the knurled ring to
2.
The warning light
3on the instrument
panel will turn on.MAIN BEAM HEADLIGHTS fig. 47
When the knurled ring is at
2push the
lever towards the dashboard (stable posi-
tion).
The warning light
1on the instrument
panel will turn on.
Pulling the lever towards the steering
wheel again, the main beams are turned
off and the dipped beams on.
FLASHING THE HEADLIGHTS
fig. 47
Pull the lever towards the steering wheel
(unstable position) regardless of the po-
sition of the knurled ring.
The warning light
1on the instrument
panel will turn on.
fig. 47F0C0042mfig. 48F0C0046m
DIRECTION INDICATORS fig. 48
Push the lever to (stable) position:
❒up (position 1): right-hand direction in-
dicator on
❒down (position 2): left-hand direction
indicator on
Warning light
Îor ¥will come on flash-
ing on the instrument cluster at the same
time.
Page 59 of 274
58
SAFETY
DEVICES
CORRECT USE
OF THE CAR
WARNING
LIGHTS AND
MESSAGES
IN AN
EMERGENCY
CAR
MAINTENANCE
TECHNICAL
SPECIFICATIONS
INDEX
DASHBOARD
AND CONTROLS
Direction indicators are switched off au-
tomatically when the steering wheel is
straightened.
If you want the indicator to flash briefly to
show that you are about to change lane,
move the stalk up or down without click-
ing into position (unstable position). When
released the stalk will return to its home
position.
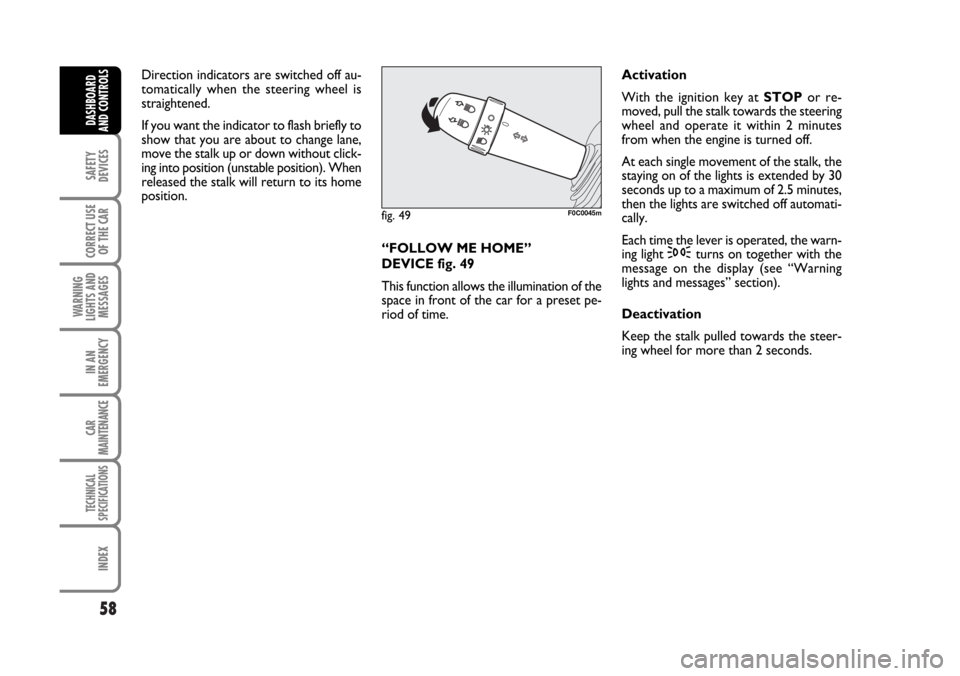
“FOLLOW ME HOME”
DEVICE fig. 49
This function allows the illumination of the
space in front of the car for a preset pe-
riod of time.Activation
With the ignition key at STOPor re-
moved, pull the stalk towards the steering
wheel and operate it within 2 minutes
from when the engine is turned off.
At each single movement of the stalk, the
staying on of the lights is extended by 30
seconds up to a maximum of 2.5 minutes,
then the lights are switched off automati-
cally.
Each time the lever is operated, the warn-
ing light
3turns on together with the
message on the display (see “Warning
lights and messages” section).
Deactivation
Keep the stalk pulled towards the steer-
ing wheel for more than 2 seconds.
fig. 49F0C0045m
Page 61 of 274
60
SAFETY
DEVICES
CORRECT USE
OF THE CAR
WARNING
LIGHTS AND
MESSAGES
IN AN
EMERGENCY
CAR
MAINTENANCE
TECHNICAL
SPECIFICATIONS
INDEX
DASHBOARD
AND CONTROLS
WINDOW WASHING
WINDSCREEN WASHER/
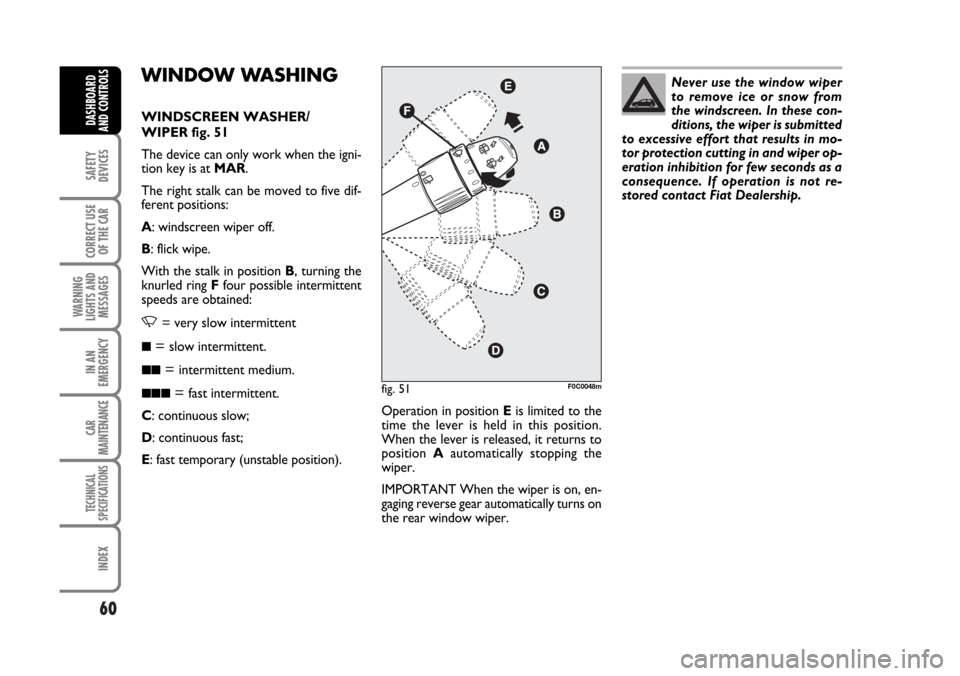
WIPER fig. 51
The device can only work when the igni-
tion key is at MAR.
The right stalk can be moved to five dif-
ferent positions:
A: windscreen wiper off.
B: flick wipe.
With the stalk in position B, turning the
knurled ring Ffour possible intermittent
speeds are obtained:
,= very slow intermittent
■= slow intermittent.
■■= intermittent medium.
■■■= fast intermittent.
C: continuous slow;
D: continuous fast;
E: fast temporary (unstable position).Operation in position Eis limited to the
time the lever is held in this position.
When the lever is released, it returns to
position Aautomatically stopping the
wiper.
IMPORTANT When the wiper is on, en-
gaging reverse gear automatically turns on
the rear window wiper.fig. 51F0C0048m
Never use the window wiper
to remove ice or snow from
the windscreen. In these con-
ditions, the wiper is submitted
to excessive effort that results in mo-
tor protection cutting in and wiper op-
eration inhibition for few seconds as a
consequence. If operation is not re-
stored contact Fiat Dealership.
Page 63 of 274
62
SAFETY
DEVICES
CORRECT USE
OF THE CAR
WARNING
LIGHTS AND
MESSAGES
IN AN
EMERGENCY
CAR
MAINTENANCE
TECHNICAL
SPECIFICATIONS
INDEX
DASHBOARD
AND CONTROLS
Deactivation
Turn the ignition key to STOP.
To the following starting operation (key
at MAR), the sensor will not be reacti-
vated even is the stalk is on B-
fig. 51. In this event, to activate the rain
sensor, you have to move the stalk to A
or Cand then again to B.
When the rain sensor is again activated
in this way, at least one windscreen wiper
stroke occurs, even if the windscreen is
dry.
Do not activate the rain sen-
sor when washing the car in
an automatic washing station.In the event of ice on the
windscreen, make sure to have
disconnected the device.
Make sure to have discon-
nected the device when
cleaning the windscreen.
WARNING
The rain sensor is able to recognize and
automatically adjust itself in the presence
of the following particular conditions:
❒impurities on the controlled surface
(salt, dirt, etc.);
❒streaks of water caused by worn wiper
blades;
❒difference between day and night.
Page 64 of 274

63
SAFETY
DEVICES
CORRECT USE
OF THE CAR
WARNING
LIGHTS AND
MESSAGES
IN AN
EMERGENCY
CAR
MAINTENANCE
TECHNICAL
SPECIFICATIONS
INDEX
DASHBOARD
AND CONTROLS
REAR WINDOW WASHER/
WIPER fig. 54
The device can only work when the igni-
tion key is at MAR.
Pushing the stalk towards the dashboard
(unstable position), the rear window
washer jet and the continuous rear win-
dow wiper operation are activated.
Operation ends when the stalk is released.
Turning the knurled ring Afrom
Oto 'the rear window wiper with intermittent
operation is activated.
fig. 54F0C0047m
HEADLIGHT WASHER fig. 55
Fiat Stilo headlight washers are “re-
tractable”, i.e.: they are located inside the
front bumpers and they are activated (with
dipped beam headlights and/or main beam
headlights on) when the windscreen wash-
er is operated.
IMPORTANT Check at regular intervals
correct operation and cleanness of noz-
zles.
fig. 55F0C0270m
Never use the rear window
wiper to remove ice or snow
from the rear window. In these
conditions, the wiper is sub-
mitted to excessive effort that results
in motor protection cutting in and
wiper operation inhibition for few sec-
onds as a consequence. If operation is
not restored contact Fiat Dealership.
Page 67 of 274
66
SAFETY
DEVICES
CORRECT USE
OF THE CAR
WARNING
LIGHTS AND
MESSAGES
IN AN
EMERGENCY
CAR
MAINTENANCE
TECHNICAL
SPECIFICATIONS
INDEX
DASHBOARD
AND CONTROLS
DEVICE DISENGAGEMENT
Turn the knurled ring A-fig. 56to OFF
or the ignition key to STOP. The device
is automatically deactivated also in one of
the following cases:
❒pressing the brake or clutch pedal;
❒ASR or ESP cut-in (where provided);
❒gearshifting in versions with Selespeed
automatic transmission (where provid-
ed);
❒involuntarily moving the Selespeed
lever (where provided) toN.
When travelling with the de-
vice on, never set the
gearshift lever to neutral and do not
move the Selespeed lever to N.
WARNING
In the event of device mal-
function or failure, turn the
knurled ring A-fig. 56to OFF and
contact a Fiat Dealership after check-
ing the protection fuse integrity.
WARNING
Page 68 of 274
67
SAFETY
DEVICES
CORRECT USE
OF THE CAR
WARNING
LIGHTS AND
MESSAGES
IN AN
EMERGENCY
CAR
MAINTENANCE
TECHNICAL
SPECIFICATIONS
INDEX
DASHBOARD
AND CONTROLS
CEILING LIGHTS
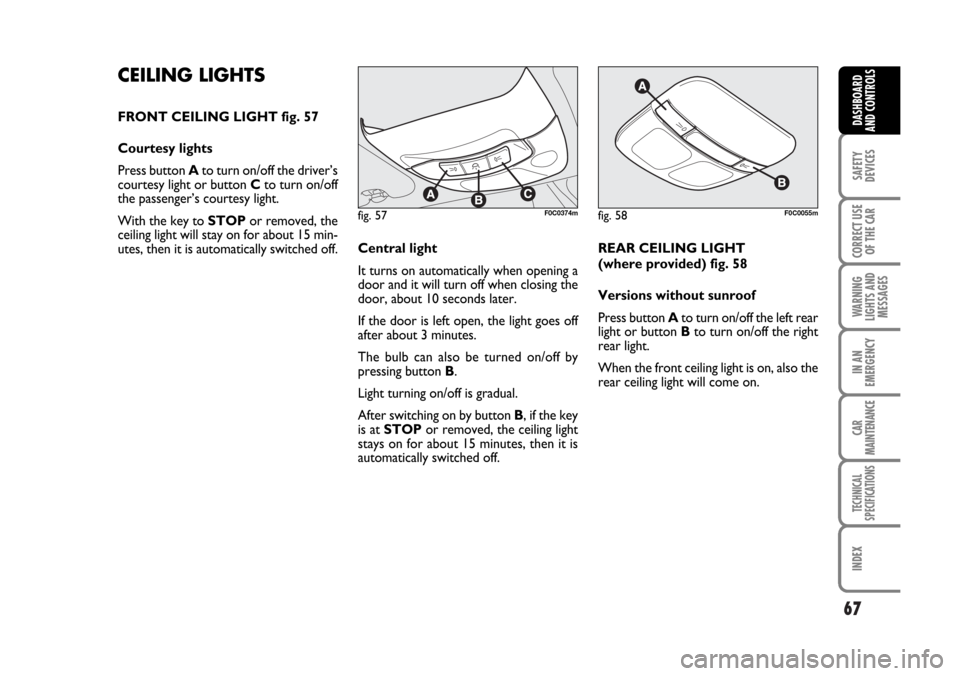
FRONT CEILING LIGHT fig. 57
Courtesy lights
Press button Ato turn on/off the driver’s
courtesy light or button Cto turn on/off
the passenger’s courtesy light.
With the key to STOPor removed, the
ceiling light will stay on for about 15 min-
utes, then it is automatically switched off.Central light
It turns on automatically when opening a
door and it will turn off when closing the
door, about 10 seconds later.
If the door is left open, the light goes off
after about 3 minutes.
The bulb can also be turned on/off by
pressing button B.
Light turning on/off is gradual.
After switching on by button B, if the key
is at STOPor removed, the ceiling light
stays on for about 15 minutes, then it is
automatically switched off.REAR CEILING LIGHT
(where provided) fig. 58
Versions without sunroof
Press button Ato turn on/off the left rear
light or button Bto turn on/off the right
rear light.
When the front ceiling light is on, also the
rear ceiling light will come on.
fig. 57F0C0374mfig. 58F0C0055m