P button FIAT STILO 2006 1.G Service Manual
[x] Cancel search | Manufacturer: FIAT, Model Year: 2006, Model line: STILO, Model: FIAT STILO 2006 1.GPages: 274, PDF Size: 4.76 MB
Page 73 of 274
72
SAFETY
DEVICES
CORRECT USE
OF THE CAR
WARNING
LIGHTS AND
MESSAGES
IN AN
EMERGENCY
CAR
MAINTENANCE
TECHNICAL
SPECIFICATIONS
INDEX
DASHBOARD
AND CONTROLS
CURRENT OUTLET (12V)
The current outlet is located on the cen-
tral console and it only works with igni-
tion key at MAR. If the smokers’ kit is re-
quested, the current outlet will be re-
placed by the cigar lighter (see next para-
graph).
CIGAR LIGHTER
(where provided)
It is located on the central console, at the
side of the handbrake lever.
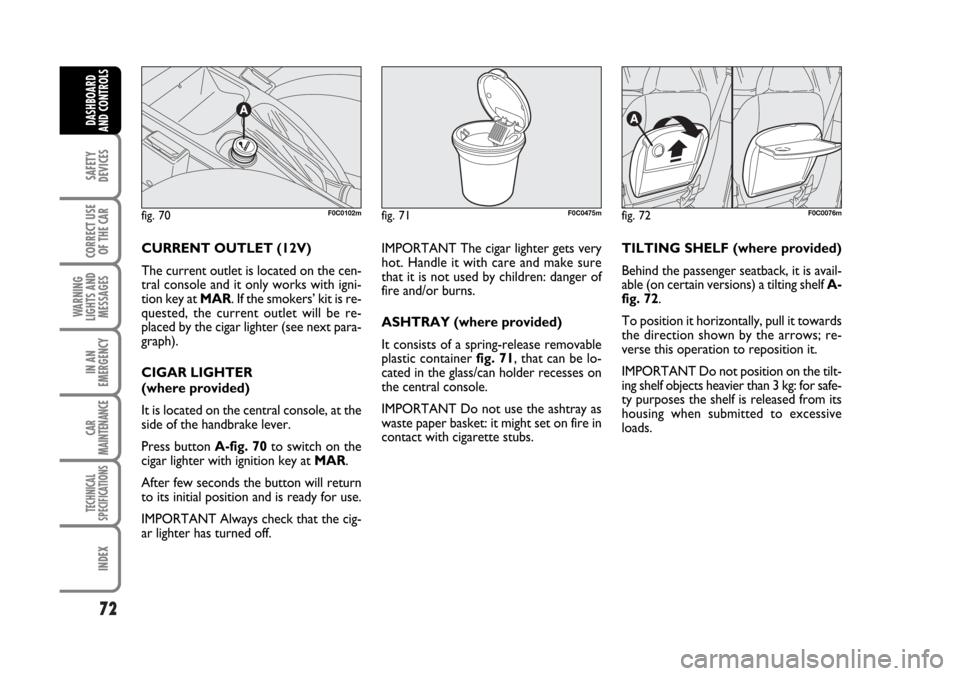
Press button A-fig. 70to switch on the
cigar lighter with ignition key at MAR.
After few seconds the button will return
to its initial position and is ready for use.
IMPORTANT Always check that the cig-
ar lighter has turned off.IMPORTANT The cigar lighter gets very
hot. Handle it with care and make sure
that it is not used by children: danger of
fire and/or burns.
ASHTRAY (where provided)
It consists of a spring-release removable
plastic container fig. 71, that can be lo-
cated in the glass/can holder recesses on
the central console.
IMPORTANT Do not use the ashtray as
waste paper basket: it might set on fire in
contact with cigarette stubs.TILTING SHELF (where provided)
Behind the passenger seatback, it is avail-
able (on certain versions) a tilting shelf A-
fig. 72.
To position it horizontally, pull it towards
the direction shown by the arrows; re-
verse this operation to reposition it.
IMPORTANT Do not position on the tilt-
ing shelf objects heavier than 3 kg: for safe-
ty purposes the shelf is released from its
housing when submitted to excessive
loads.
fig. 70F0C0102mfig. 71F0C0475mfig. 72F0C0076m
Page 77 of 274
76
SAFETY
DEVICES
CORRECT USE
OF THE CAR
WARNING
LIGHTS AND
MESSAGES
IN AN
EMERGENCY
CAR
MAINTENANCE
TECHNICAL
SPECIFICATIONS
INDEX
DASHBOARD
AND CONTROLS
SUNROOF CLOSING
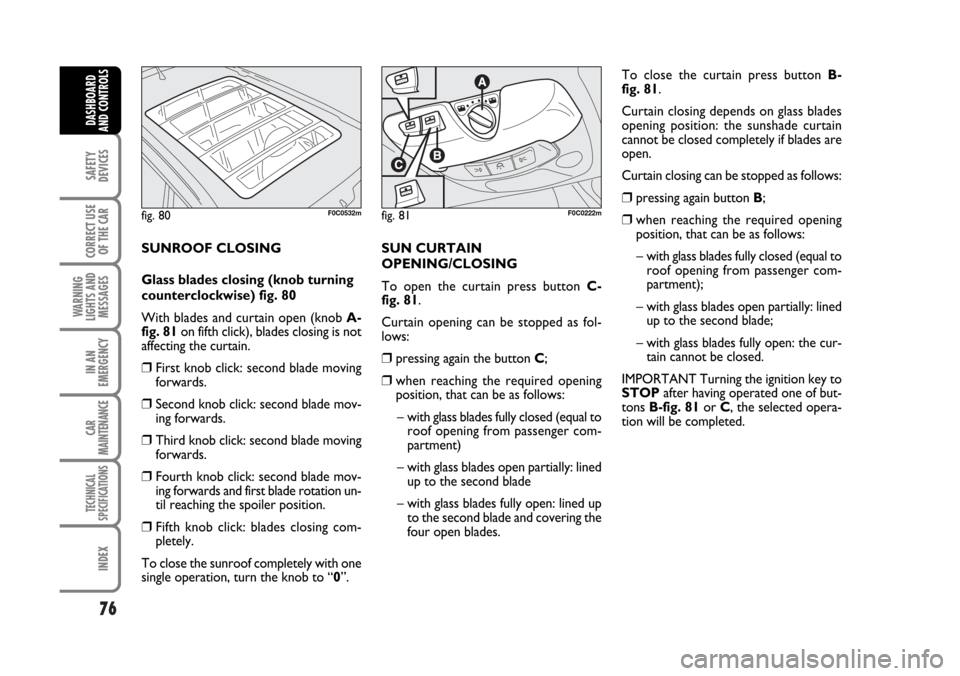
Glass blades closing (knob turning
counterclockwise) fig. 80
With blades and curtain open (knob A-
fig. 81on fifth click), blades closing is not
affecting the curtain.
❒First knob click: second blade moving
forwards.
❒Second knob click: second blade mov-
ing forwards.
❒Third knob click: second blade moving
forwards.
❒Fourth knob click: second blade mov-
ing forwards and first blade rotation un-
til reaching the spoiler position.
❒Fifth knob click: blades closing com-
pletely.
To close the sunroof completely with one
single operation, turn the knob to “0”.SUN CURTAIN
OPENING/CLOSING
To open the curtain press button C-
fig. 81.
Curtain opening can be stopped as fol-
lows:
❒pressing again the button C;
❒when reaching the required opening
position, that can be as follows:
– with glass blades fully closed (equal to
roof opening from passenger com-
partment)
– with glass blades open partially: lined
up to the second blade
– with glass blades fully open: lined up
to the second blade and covering the
four open blades.To close the curtain press button B-
fig. 81.
Curtain closing depends on glass blades
opening position: the sunshade curtain
cannot be closed completely if blades are
open.
Curtain closing can be stopped as follows:
❒pressing again button B;
❒when reaching the required opening
position, that can be as follows:
– with glass blades fully closed (equal to
roof opening from passenger com-
partment);
– with glass blades open partially: lined
up to the second blade;
– with glass blades fully open: the cur-
tain cannot be closed.
IMPORTANT Turning the ignition key to
STOPafter having operated one of but-
tons B-fig. 81or C, the selected opera-
tion will be completed.fig. 80F0C0532mfig. 81F0C0222m
Page 78 of 274

77
SAFETY
DEVICES
CORRECT USE
OF THE CAR
WARNING
LIGHTS AND
MESSAGES
IN AN
EMERGENCY
CAR
MAINTENANCE
TECHNICAL
SPECIFICATIONS
INDEX
DASHBOARD
AND CONTROLS
SUNROOF OPENING/CLOSING
With key without remote control
(where provided)
Opening: turn the key clockwise in the
door revolving plug.
Closing: turn the key counterclockwise in
the door revolving plug.
With key with remote control
Opening: prolonged pressing (for more
than 2 seconds) on button
Ë.
Closing: prolonged pressing (for more
than 2 seconds) on button
Á.
When buttons
Á/Ë, are released, the
above functions are cut-off.
When opening, blades and curtain open at
the same time.
When closing, the curtain closes first and
then are closed the blades.ANTI-CRUSHING SAFETY
SYSTEM
The anti-crushing safety system fitted on
the front curtain outline is active along the
whole closing range of the curtain and cuts
into operation when an obstacle (e.g.: fin-
ger, hand, etc...) is met. This safety device
guarantees the reversal for a short sec-
tion.
In addition, the anti-crushing safety system
is active on the rear border of the first
blade and on the front outline of the sec-
ond blade: in this case it is active on the
whole closing range of the curtain and cuts
into operation when an obstacle (e.g.: fin-
ger, hand, etc...) is met. This safety device
guarantees the reversal for a short sec-
tion.
As concerns the first blade it is active on
the whole rotation range and guarantees
the reversal of the whole stroke.
After anti-crushing system activation, re-
setting can be carried out with the fol-
lowing 2 procedures:
❒pushing knob A-fig. 83upwards (reset
previously stopped movement);
❒turning knob Ato another position.INITIALISATION PROCEDURE
Sunroof shall be re-initialised after dis-
connecting the battery or if the relevant
protection fuse is blown:
❒turn knob A-fig. 81to “0” (fully
closed);
❒keep the knob pressed for over 5 sec-
onds: the sunroof will close jerkily;
❒keep the knob pressed and wait for
complete closing of the sunroof, until
the sun curtain clicks twice.
Sunroof is now initialised and it shall work
regularly. Otherwise, contact Fiat Deal-
ership.
IMPORTANT Carry out the initialisation
procedure with the engine running. If stop-
ping the initialisation procedure before
ending it, repeat it from the beginning.
Page 80 of 274
79
SAFETY
DEVICES
CORRECT USE
OF THE CAR
WARNING
LIGHTS AND
MESSAGES
IN AN
EMERGENCY
CAR
MAINTENANCE
TECHNICAL
SPECIFICATIONS
INDEX
DASHBOARD
AND CONTROLS
DOORS
CENTRAL DOOR LOCKING
SYSTEM
From the outside
With the doors closed, fit and turn the key
in one of the front door locks.
From the inside
From inside the car (with doors closed)
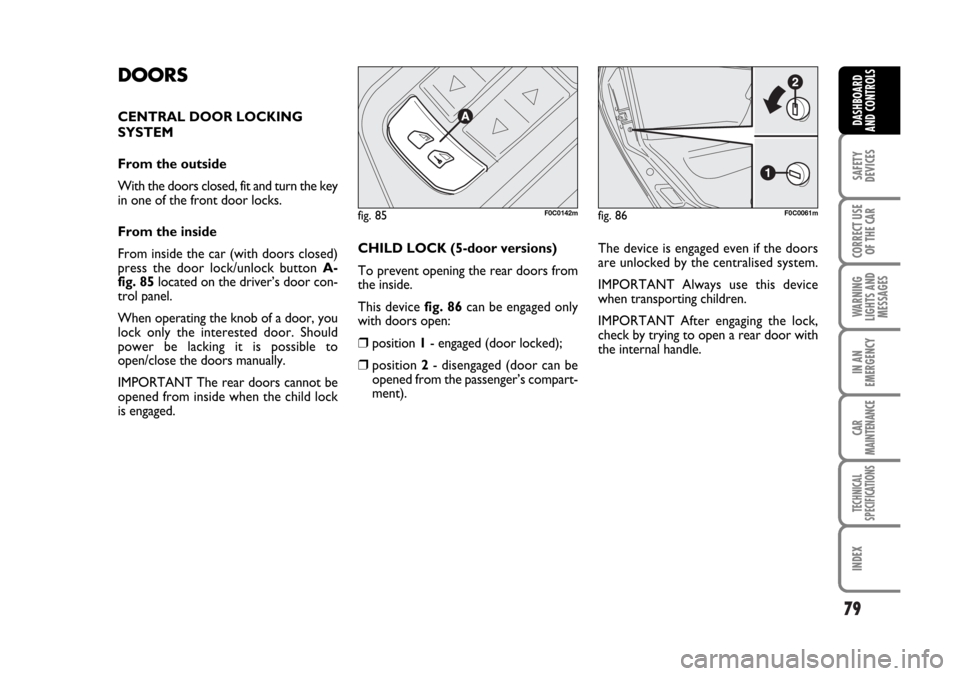
press the door lock/unlock button A-
fig. 85located on the driver’s door con-
trol panel.
When operating the knob of a door, you
lock only the interested door. Should
power be lacking it is possible to
open/close the doors manually.
IMPORTANT The rear doors cannot be
opened from inside when the child lock
is engaged.CHILD LOCK (5-door versions)
To prevent opening the rear doors from
the inside.
This device fig. 86can be engaged only
with doors open:
❒position 1- engaged (door locked);
❒position 2- disengaged (door can be
opened from the passenger’s compart-
ment).The device is engaged even if the doors
are unlocked by the centralised system.
IMPORTANT Always use this device
when transporting children.
IMPORTANT After engaging the lock,
check by trying to open a rear door with
the internal handle.
fig. 85F0C0142mfig. 86F0C0061m
Page 82 of 274
81
SAFETY
DEVICES
CORRECT USE
OF THE CAR
WARNING
LIGHTS AND
MESSAGES
IN AN
EMERGENCY
CAR
MAINTENANCE
TECHNICAL
SPECIFICATIONS
INDEX
DASHBOARD
AND CONTROLS
Press buttons Aor Bto open/close the
required window.
Pressing briefly one of the two buttons,
the window “jerks” , whereas a prolonged
pressing makes the window opening or
closing in “automatic continuous” mode.
When pressing again button Aor Bthe
window stops in the required position.BOOT
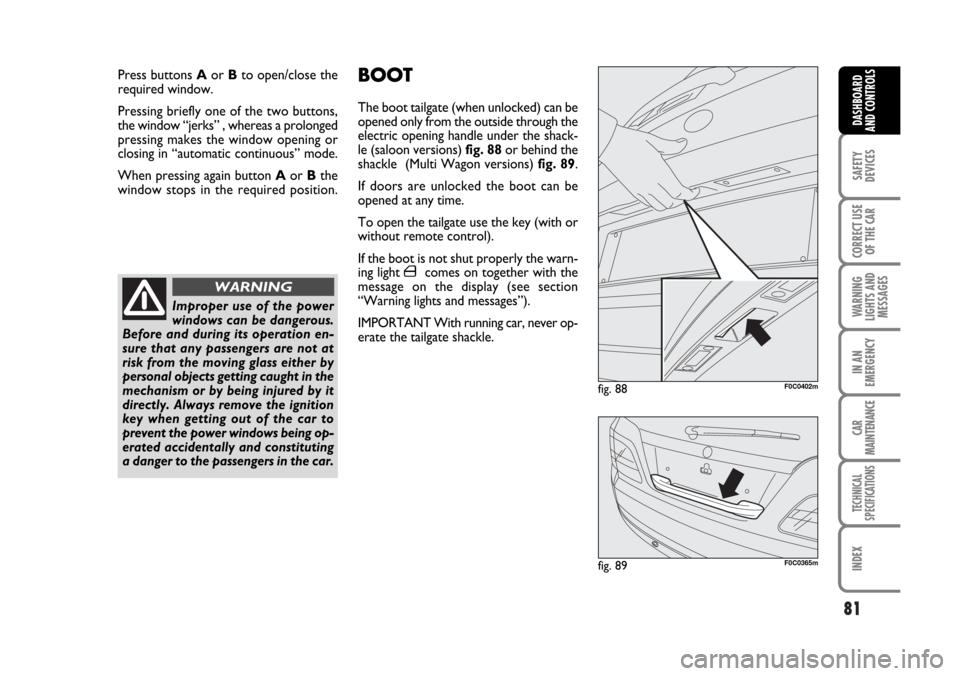
The boot tailgate (when unlocked) can be
opened only from the outside through the
electric opening handle under the shack-
le (saloon versions) fig. 88or behind the
shackle (Multi Wagon versions) fig. 89.
If doors are unlocked the boot can be
opened at any time.
To open the tailgate use the key (with or
without remote control).
If the boot is not shut properly the warn-
ing light
´comes on together with the
message on the display (see section
“Warning lights and messages”).
IMPORTANT With running car, never op-
erate the tailgate shackle.
Improper use of the power
windows can be dangerous.
Before and during its operation en-
sure that any passengers are not at
risk from the moving glass either by
personal objects getting caught in the
mechanism or by being injured by it
directly. Always remove the ignition
key when getting out of the car to
prevent the power windows being op-
erated accidentally and constituting
a danger to the passengers in the car.
WARNING
fig. 88F0C0402m
fig. 89F0C0365m
Page 83 of 274
82
SAFETY
DEVICES
CORRECT USE
OF THE CAR
WARNING
LIGHTS AND
MESSAGES
IN AN
EMERGENCY
CAR
MAINTENANCE
TECHNICAL
SPECIFICATIONS
INDEX
DASHBOARD
AND CONTROLS
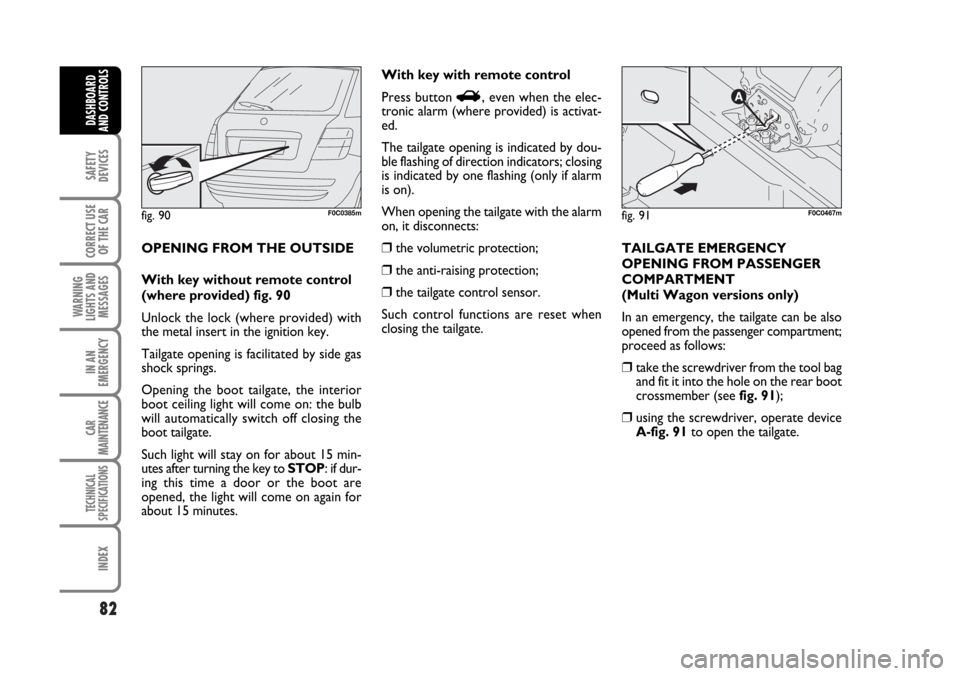
OPENING FROM THE OUTSIDE
With key without remote control
(where provided) fig. 90
Unlock the lock (where provided) with
the metal insert in the ignition key.
Tailgate opening is facilitated by side gas
shock springs.
Opening the boot tailgate, the interior
boot ceiling light will come on: the bulb
will automatically switch off closing the
boot tailgate.
Such light will stay on for about 15 min-
utes after turning the key to STOP: if dur-
ing this time a door or the boot are
opened, the light will come on again for
about 15 minutes.With key with remote control
Press button
R, even when the elec-
tronic alarm (where provided) is activat-
ed.
The tailgate opening is indicated by dou-
ble flashing of direction indicators; closing
is indicated by one flashing (only if alarm
is on).
When opening the tailgate with the alarm
on, it disconnects:
❒the volumetric protection;
❒the anti-raising protection;
❒the tailgate control sensor.
Such control functions are reset when
closing the tailgate.TAILGATE EMERGENCY
OPENING FROM PASSENGER
COMPARTMENT
(Multi Wagon versions only)
In an emergency, the tailgate can be also
opened from the passenger compartment;
proceed as follows:
❒take the screwdriver from the tool bag
and fit it into the hole on the rear boot
crossmember (see fig. 91);
❒using the screwdriver, operate device
A-fig. 91to open the tailgate.
fig. 90F0C0385mfig. 91F0C0467m
Page 84 of 274
83
SAFETY
DEVICES
CORRECT USE
OF THE CAR
WARNING
LIGHTS AND
MESSAGES
IN AN
EMERGENCY
CAR
MAINTENANCE
TECHNICAL
SPECIFICATIONS
INDEX
DASHBOARD
AND CONTROLS
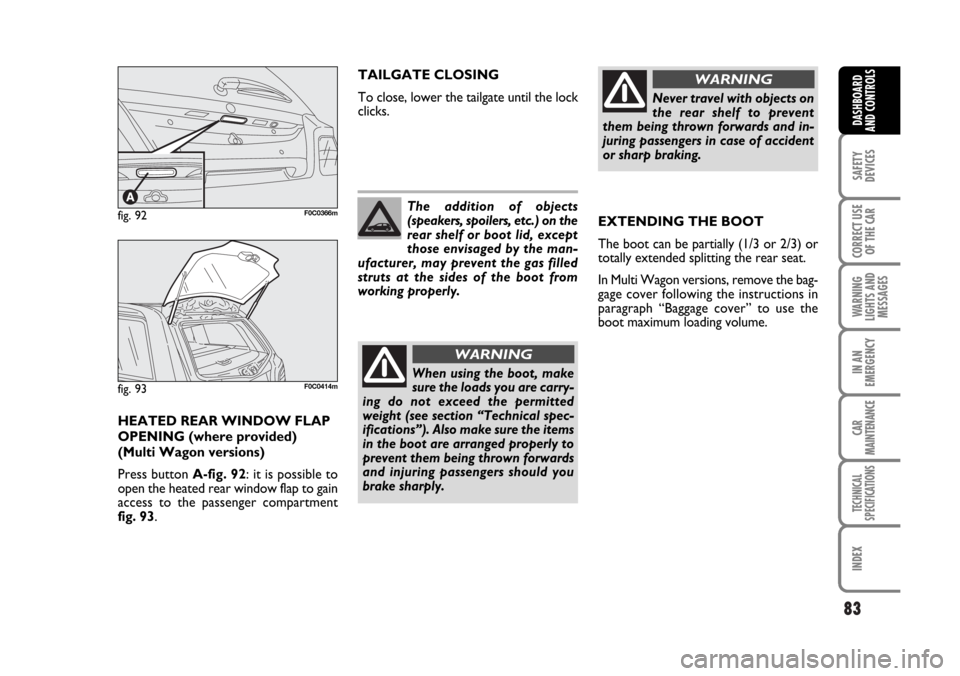
HEATED REAR WINDOW FLAP
OPENING (where provided)
(Multi Wagon versions)
Press button A-fig. 92: it is possible to
open the heated rear window flap to gain
access to the passenger compartment
fig. 93.TAILGATE CLOSING
To close, lower the tailgate until the lock
clicks.
EXTENDING THE BOOT
The boot can be partially (1/3 or 2/3) or
totally extended splitting the rear seat.
In Multi Wagon versions, remove the bag-
gage cover following the instructions in
paragraph “Baggage cover” to use the
boot maximum loading volume.
fig. 92F0C0366m
fig. 93F0C0414m
The addition of objects
(speakers, spoilers, etc.) on the
rear shelf or boot lid, except
those envisaged by the man-
ufacturer, may prevent the gas filled
struts at the sides of the boot from
working properly.
When using the boot, make
sure the loads you are carry-
ing do not exceed the permitted
weight (see section “Technical spec-
ifications”). Also make sure the items
in the boot are arranged properly to
prevent them being thrown forwards
and injuring passengers should you
brake sharply.
WARNING
Never travel with objects on
the rear shelf to prevent
them being thrown forwards and in-
juring passengers in case of accident
or sharp braking.
WARNING
Page 95 of 274
94
SAFETY
DEVICES
CORRECT USE
OF THE CAR
WARNING
LIGHTS AND
MESSAGES
IN AN
EMERGENCY
CAR
MAINTENANCE
TECHNICAL
SPECIFICATIONS
INDEX
DASHBOARD
AND CONTROLS
HEADLIGHTS
ADJUSTING THE HEADLIGHT
BEAM
Proper adjustment of the headlight beams
is of vital importance for your safety and
comfort and also for the other road users.
To ensure you and other drivers have the
best visibility conditions when travelling
with the headlights on, the headlights must
be set properly. Contact Fiat Dealership
to have the headlights properly adjusted.
IMPORTANT When turning on gas dis-
charge headlight lamps (where provided),
it is normal that there should be a vertical
movement of lenses, and consequently the
same will also happen to the light beam,
for the time required to achieve the cor-
rect headlight trim stabilisation, equal to
approx. 2 seconds.HEADLIGHT AIMING DEVICE
This device can be operated with the ig-
nition key at MARand dipped beams on.
When the car is loaded, it slopes back-
wards. This means that the headlight beam
rises. In this case, it is necessary to return
it to the correct position.
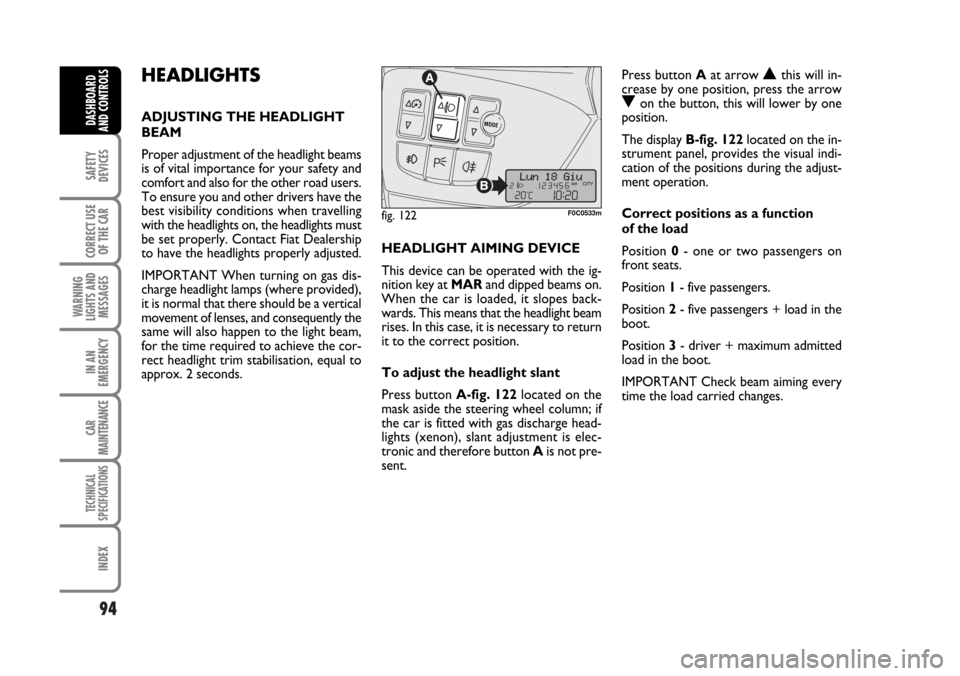
To adjust the headlight slant
Press button A-fig. 122located on the
mask aside the steering wheel column; if
the car is fitted with gas discharge head-
lights (xenon), slant adjustment is elec-
tronic and therefore button Ais not pre-
sent.Press button Aat arrow
Nthis will in-
crease by one position, press the arrow
Oon the button, this will lower by one
position.
The display B-fig. 122located on the in-
strument panel, provides the visual indi-
cation of the positions during the adjust-
ment operation.
Correct positions as a function
of the load
Position 0- one or two passengers on
front seats.
Position 1- five passengers.
Position 2- five passengers + load in the
boot.
Position 3- driver + maximum admitted
load in the boot.
IMPORTANT Check beam aiming every
time the load carried changes.
fig. 122F0C0533m
Page 103 of 274
102
SAFETY
DEVICES
CORRECT USE
OF THE CAR
WARNING
LIGHTS AND
MESSAGES
IN AN
EMERGENCY
CAR
MAINTENANCE
TECHNICAL
SPECIFICATIONS
INDEX
DASHBOARD
AND CONTROLS
“DUALDRIVE” ELECTRIC
POWER STEERING
SYSTEM
The car is provided with the electrically
controlled power steering system called
“Dualdrive” working only with ignition key
at MARand engine running, that can be
customised by the driver according to the
driving conditions.
IMPORTANT When turning quickly the
ignition key, power steering full operation
is obtained after 1-2 seconds.ACTIVATION/DEACTIVATION
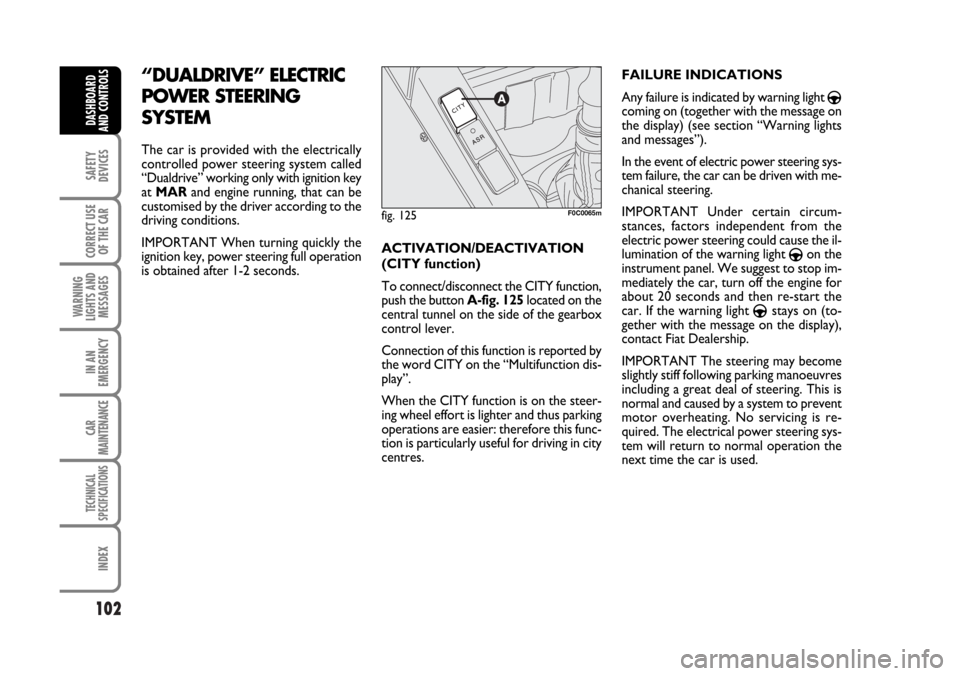
(CITY function)
To connect/disconnect the CITY function,
push the button A-fig. 125located on the
central tunnel on the side of the gearbox
control lever.
Connection of this function is reported by
the word CITY on the “Multifunction dis-
play”.
When the CITY function is on the steer-
ing wheel effort is lighter and thus parking
operations are easier: therefore this func-
tion is particularly useful for driving in city
centres.FAILURE INDICATIONS
Any failure is indicated by warning light
gcoming on (together with the message on
the display) (see section “Warning lights
and messages”).
In the event of electric power steering sys-
tem failure, the car can be driven with me-
chanical steering.
IMPORTANT Under certain circum-
stances, factors independent from the
electric power steering could cause the il-
lumination of the warning light
gon the
instrument panel. We suggest to stop im-
mediately the car, turn off the engine for
about 20 seconds and then re-start the
car. If the warning light
gstays on (to-
gether with the message on the display),
contact Fiat Dealership.
IMPORTANT The steering may become
slightly stiff following parking manoeuvres
including a great deal of steering. This is
normal and caused by a system to prevent
motor overheating. No servicing is re-
quired. The electrical power steering sys-
tem will return to normal operation the
next time the car is used.
fig. 125F0C0065m
Page 111 of 274
110
CORRECT USE
OF THE CAR
WARNING
LIGHTS AND
MESSAGES
IN AN
EMERGENCY
CAR
MAINTENANCE
TECHNICAL
SPECIFICATIONS
IINDEX
DASHBOARD
AND CONTROLS
SAFETY
DEVICES
When the car is parked on a steep slope
the reel mechanism may block; this is nor-
mal. The reel mechanism prevents the
webbing coming out when it is jerked or
if the car brakes sharply, in a collision or
when cornering at high speed.
The rear seat is fitted with inertial seat
belts with three anchor points and reel for
the side and centre seats.
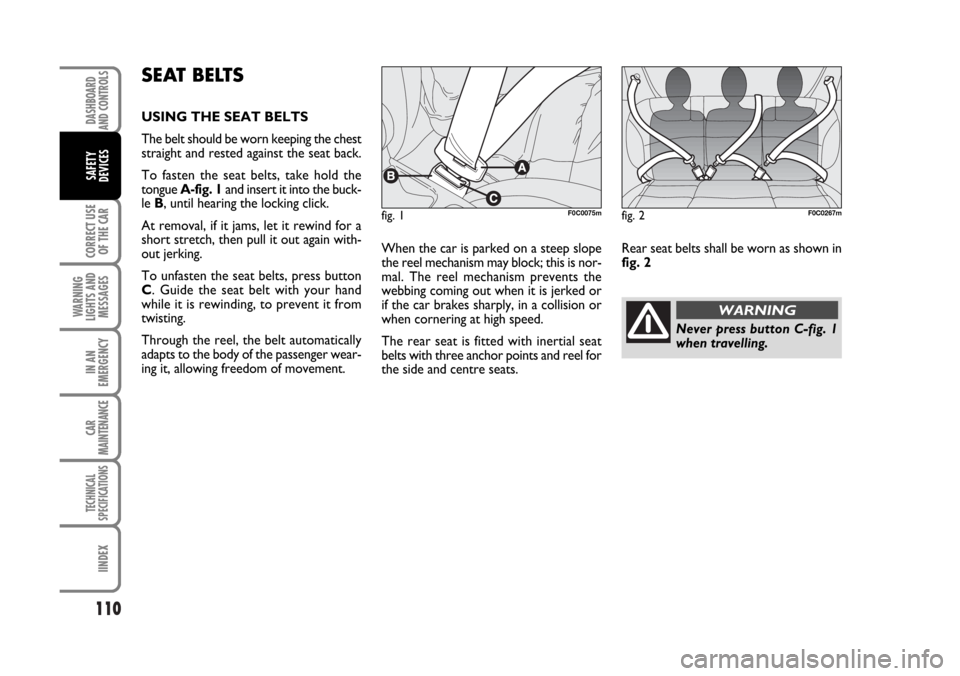
SEAT BELTS
USING THE SEAT BELTS
The belt should be worn keeping the chest
straight and rested against the seat back.
To fasten the seat belts, take hold the
tongue A-fig. 1and insert it into the buck-
le B, until hearing the locking click.
At removal, if it jams, let it rewind for a
short stretch, then pull it out again with-
out jerking.
To unfasten the seat belts, press button
C. Guide the seat belt with your hand
while it is rewinding, to prevent it from
twisting.
Through the reel, the belt automatically
adapts to the body of the passenger wear-
ing it, allowing freedom of movement.
Never press button C-fig. 1
when travelling.
WARNING
Rear seat belts shall be worn as shown in
fig. 2
fig. 1F0C0075mfig. 2F0C0267m