technical specifications FIAT STILO 2006 1.G Workshop Manual
[x] Cancel search | Manufacturer: FIAT, Model Year: 2006, Model line: STILO, Model: FIAT STILO 2006 1.GPages: 274, PDF Size: 4.76 MB
Page 55 of 274

54
SAFETY
DEVICES
CORRECT USE
OF THE CAR
WARNING
LIGHTS AND
MESSAGES
IN AN
EMERGENCY
CAR
MAINTENANCE
TECHNICAL
SPECIFICATIONS
INDEX
DASHBOARD
AND CONTROLS
AQS (Air Quality System)
function activation
The AQS function, (message AQS on the
display), turns on air recirculation auto-
matically when it detects the presence of
outside polluted air (for example when
driving in the city, queues and tunnels).
IMPORTANT When the AQS function is
active, after 15 minutes of consecutive in-
ternal air recirculation, the climate con-
trol system enables outside air inlet (re-
gardless of air pollution level) for approx.
1 minute to change air inside the passen-
ger compartment. INSIDE AIR RECIRCULATION
ON/OFF AND AQS FUNCTION
(Air Quality System)
Press button
T.
Inside air recirculation is controlled by
three operating logics:
❒automatic control, indicated by message
AQS on the display and button led
Toff;
❒forced switching off (inside air recircu-
lation always off with air inlet from out-
side), button led
Toff;
❒forced switching on (inside air recircu-
lation always on with air inlet from out-
side), button led
Ton.Pressing button OFF, the climate control
system turns on automatically the inside
air recirculation function (button led
Ton). In these conditions it is how-
ever possible to take air from the outside
(and vice versa) pressing button
T(button led off).
With button OFF pressed (button led on),
the AQS (Air Quality System) function
cannot be activated.
IMPORTANT The inside air recirculation
system makes it possible to reach the re-
quired “heating” or “cooling” conditions
faster. It is however inadvisable to use it
on rainy/cold days as it would consider-
ably increase the possibility of the win-
dows misting inside, especially if the cli-
mate control system is off. It is advisable
to turn on the inside air recirculation sys-
tem in queues or tunnels to avoid admit-
ting polluted air from outside. The pro-
longed use of this function should how-
ever be avoided, especially with several
persons on board, to avoid the possibili-
ty of the windows misting inside.
Page 56 of 274

55
SAFETY
DEVICES
CORRECT USE
OF THE CAR
WARNING
LIGHTS AND
MESSAGES
IN AN
EMERGENCY
CAR
MAINTENANCE
TECHNICAL
SPECIFICATIONS
INDEX
DASHBOARD
AND CONTROLS
ALIGNMENT OF SET
TEMPERATURES
(MONO function)
Pressing button MONO automatically
aligns the temperature on the passenger’s
side with that on the driver’s side.
Turn the knob AUTO or MONO to
raise/reduce the temperature between the
two zones by the same value.
Press again button MONO to disable the
function.CLIMATE CONTROL
COMPRESSOR ON/OFF
Press button
❄to switch on the climate
control compressor.
Compressor on
❒button led ❄on;
❒symbol ❄on the display, lit.
Compressor off
❒button led ❄off;
❒symbol ❄on the display, off;
❒inside air recirculation off;
❒AQS function disabled.
With the climate control compressor off,
it is not possible to admit air to the pas-
senger compartment with a temperature
below the outside temperature; in this
case symbol ò flashes on the display.
The switching off of the climate control
compressor remains in storage even when
the engine has been stopped. To restore
automatic control for switching on the cli-
mate control compressor, press button
❄or AUTO, in which case, the other man-
ual settings set will be cancelled.AIR DISTRIBUTION SELECTION
Pressing one or more buttons
Q/E/Zit is possible to choose manually 7 of the
possible air distributions to the passenger
compartment:
QAir flow to the windscreen and
front side window vents to demist
or defrost them.
ZAir flow towards the front and
rear lower parts of the passenger
compartment. This type of distri-
bution allows heating of the pas-
senger compartment in the short-
est time.
Q
ZESplitting of the air flow between
front and rear vents, centre and
side dashboard outlets, rear out-
let, windscreen and front side win-
dow demisting vents.
EAir flow to the dashboard centre
and side outlets (passenger’s
body).
Page 57 of 274

56
SAFETY
DEVICES
CORRECT USE
OF THE CAR
WARNING
LIGHTS AND
MESSAGES
IN AN
EMERGENCY
CAR
MAINTENANCE
TECHNICAL
SPECIFICATIONS
INDEX
DASHBOARD
AND CONTROLS
QSplitting of the air flow between
Zfeet vents and windscreen and
front side window demisting/de-
frosting vents. This type of air
distribution allows satisfactory
heating of the passenger com-
partment while preventing pos-
sible misting of the windows.
ZE
Splitting of the air flow between
feet vents (warmest air) and the
dashboard centre and side outlets
and the rear outlet (coolest air).
E QSplitting of the air flow between
centre and side dashboard outlets,
rear outlet and windscreen and
side window demisting/defrosting
vents. This type of air distribution
allows satisfactory ventilation of
the passenger compartment while
preventing possible misting of the
windows.IMPORTANT For operation of the cli-
mate control system, at least one of but-
tons
Q/E/Zshall be activated. Deacti-
vation of all buttons
Q/E/Zis therefore
not enabled by the system.
IMPORTANT To switch the system on
again, press button OFF; this operation re-
sets all operating conditions stored before
switching off.
To restore automatic air distribution con-
trol after a manual selection, press button
AUTO.SWITCHING THE CLIMATE
CONTROL SYSTEM OFF
Press button OFF.
The following information is displayed:
❒writing OFF;
❒outside temperature;
❒inside air recirculation on (button led
Ton).
Page 58 of 274
57
SAFETY
DEVICES
CORRECT USE
OF THE CAR
WARNING
LIGHTS AND
MESSAGES
IN AN
EMERGENCY
CAR
MAINTENANCE
TECHNICAL
SPECIFICATIONS
INDEX
DASHBOARD
AND CONTROLS
EXTERNAL LIGHTS
The left-hand stalk controls the external
lights and the direction indicators.
The external lights can only be switched
on when the ignition key is at MAR.
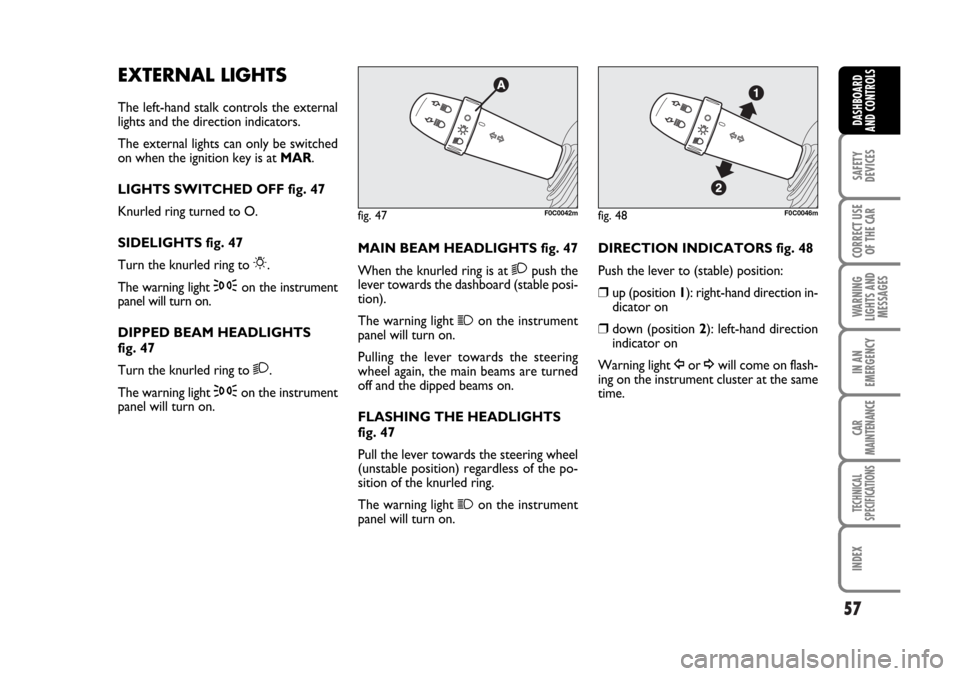
LIGHTS SWITCHED OFF fig. 47
Knurled ring turned to O.
SIDELIGHTS fig. 47
Turn the knurled ring to
6.
The warning light
3on the instrument
panel will turn on.
DIPPED BEAM HEADLIGHTS
fig. 47
Turn the knurled ring to
2.
The warning light
3on the instrument
panel will turn on.MAIN BEAM HEADLIGHTS fig. 47
When the knurled ring is at
2push the
lever towards the dashboard (stable posi-
tion).
The warning light
1on the instrument
panel will turn on.
Pulling the lever towards the steering
wheel again, the main beams are turned
off and the dipped beams on.
FLASHING THE HEADLIGHTS
fig. 47
Pull the lever towards the steering wheel
(unstable position) regardless of the po-
sition of the knurled ring.
The warning light
1on the instrument
panel will turn on.
fig. 47F0C0042mfig. 48F0C0046m
DIRECTION INDICATORS fig. 48
Push the lever to (stable) position:
❒up (position 1): right-hand direction in-
dicator on
❒down (position 2): left-hand direction
indicator on
Warning light
Îor ¥will come on flash-
ing on the instrument cluster at the same
time.
Page 59 of 274
58
SAFETY
DEVICES
CORRECT USE
OF THE CAR
WARNING
LIGHTS AND
MESSAGES
IN AN
EMERGENCY
CAR
MAINTENANCE
TECHNICAL
SPECIFICATIONS
INDEX
DASHBOARD
AND CONTROLS
Direction indicators are switched off au-
tomatically when the steering wheel is
straightened.
If you want the indicator to flash briefly to
show that you are about to change lane,
move the stalk up or down without click-
ing into position (unstable position). When
released the stalk will return to its home
position.
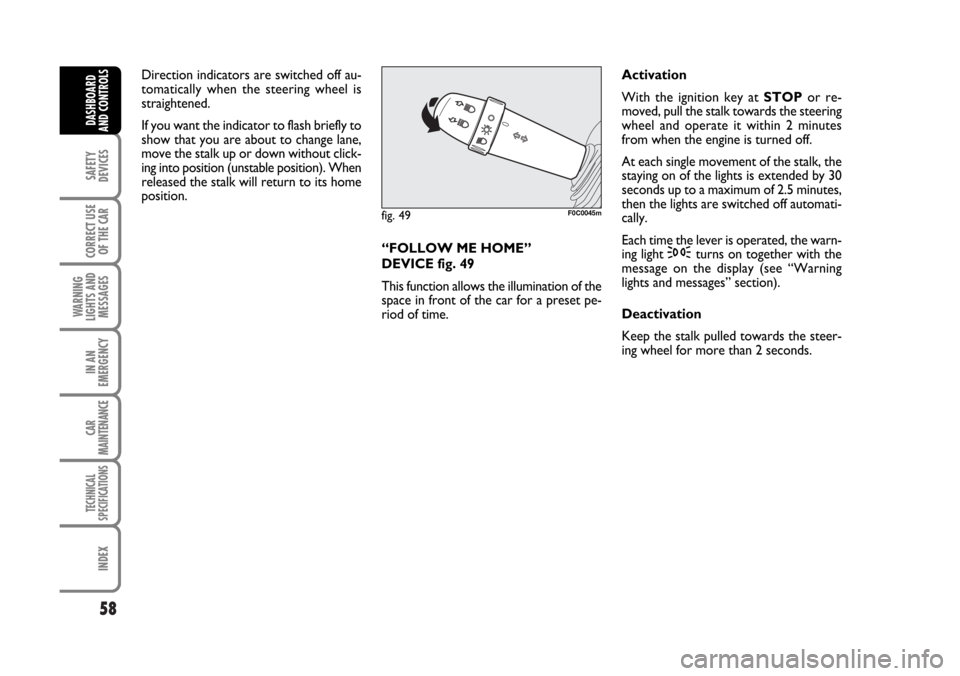
“FOLLOW ME HOME”
DEVICE fig. 49
This function allows the illumination of the
space in front of the car for a preset pe-
riod of time.Activation
With the ignition key at STOPor re-
moved, pull the stalk towards the steering
wheel and operate it within 2 minutes
from when the engine is turned off.
At each single movement of the stalk, the
staying on of the lights is extended by 30
seconds up to a maximum of 2.5 minutes,
then the lights are switched off automati-
cally.
Each time the lever is operated, the warn-
ing light
3turns on together with the
message on the display (see “Warning
lights and messages” section).
Deactivation
Keep the stalk pulled towards the steer-
ing wheel for more than 2 seconds.
fig. 49F0C0045m
Page 60 of 274
59
SAFETY
DEVICES
CORRECT USE
OF THE CAR
WARNING
LIGHTS AND
MESSAGES
IN AN
EMERGENCY
CAR
MAINTENANCE
TECHNICAL
SPECIFICATIONS
INDEX
DASHBOARD
AND CONTROLS
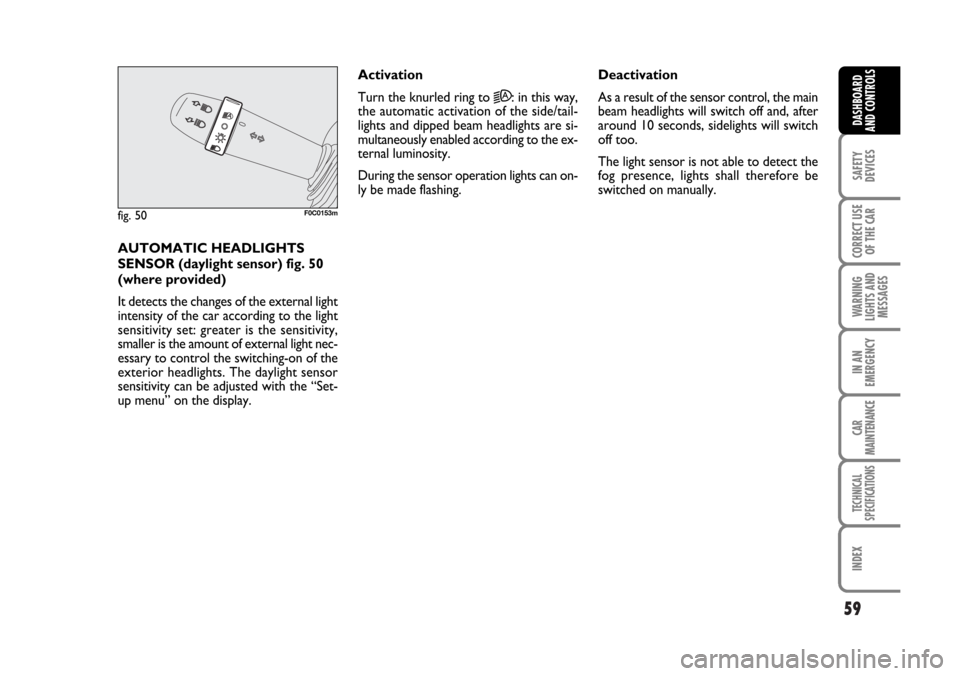
AUTOMATIC HEADLIGHTS
SENSOR (daylight sensor) fig. 50
(where provided)
It detects the changes of the external light
intensity of the car according to the light
sensitivity set: greater is the sensitivity,
smaller is the amount of external light nec-
essary to control the switching-on of the
exterior headlights. The daylight sensor
sensitivity can be adjusted with the “Set-
up menu” on the display.Activation
Turn the knurled ring to
2A: in this way,
the automatic activation of the side/tail-
lights and dipped beam headlights are si-
multaneously enabled according to the ex-
ternal luminosity.
During the sensor operation lights can on-
ly be made flashing. Deactivation
As a result of the sensor control, the main
beam headlights will switch off and, after
around 10 seconds, sidelights will switch
off too.
The light sensor is not able to detect the
fog presence, lights shall therefore be
switched on manually.
fig. 50F0C0153m
Page 61 of 274
60
SAFETY
DEVICES
CORRECT USE
OF THE CAR
WARNING
LIGHTS AND
MESSAGES
IN AN
EMERGENCY
CAR
MAINTENANCE
TECHNICAL
SPECIFICATIONS
INDEX
DASHBOARD
AND CONTROLS
WINDOW WASHING
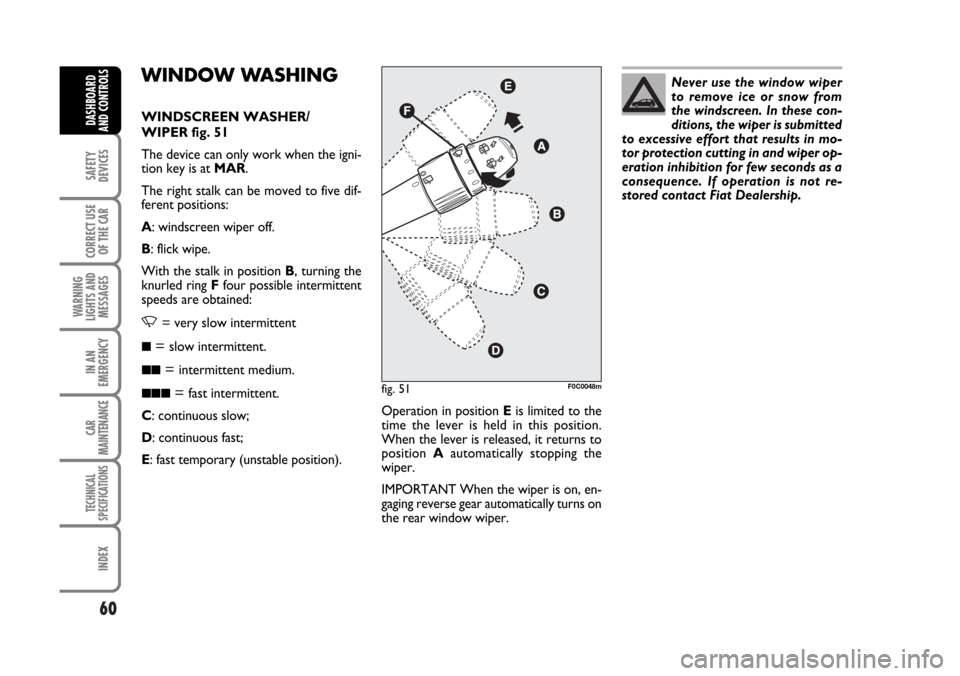
WINDSCREEN WASHER/
WIPER fig. 51
The device can only work when the igni-
tion key is at MAR.
The right stalk can be moved to five dif-
ferent positions:
A: windscreen wiper off.
B: flick wipe.
With the stalk in position B, turning the
knurled ring Ffour possible intermittent
speeds are obtained:
,= very slow intermittent
■= slow intermittent.
■■= intermittent medium.
■■■= fast intermittent.
C: continuous slow;
D: continuous fast;
E: fast temporary (unstable position).Operation in position Eis limited to the
time the lever is held in this position.
When the lever is released, it returns to
position Aautomatically stopping the
wiper.
IMPORTANT When the wiper is on, en-
gaging reverse gear automatically turns on
the rear window wiper.fig. 51F0C0048m
Never use the window wiper
to remove ice or snow from
the windscreen. In these con-
ditions, the wiper is submitted
to excessive effort that results in mo-
tor protection cutting in and wiper op-
eration inhibition for few seconds as a
consequence. If operation is not re-
stored contact Fiat Dealership.
Page 62 of 274
61
SAFETY
DEVICES
CORRECT USE
OF THE CAR
WARNING
LIGHTS AND
MESSAGES
IN AN
EMERGENCY
CAR
MAINTENANCE
TECHNICAL
SPECIFICATIONS
INDEX
DASHBOARD
AND CONTROLS
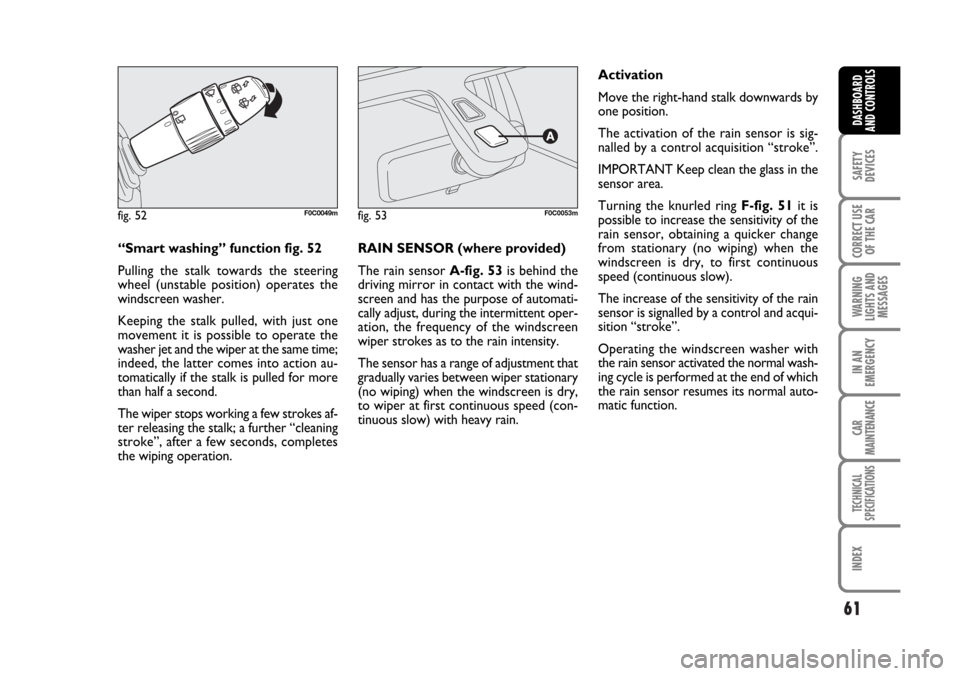
“Smart washing” function fig. 52
Pulling the stalk towards the steering
wheel (unstable position) operates the
windscreen washer.
Keeping the stalk pulled, with just one
movement it is possible to operate the
washer jet and the wiper at the same time;
indeed, the latter comes into action au-
tomatically if the stalk is pulled for more
than half a second.
The wiper stops working a few strokes af-
ter releasing the stalk; a further “cleaning
stroke”, after a few seconds, completes
the wiping operation.RAIN SENSOR (where provided)
The rain sensor A-fig. 53is behind the
driving mirror in contact with the wind-
screen and has the purpose of automati-
cally adjust, during the intermittent oper-
ation, the frequency of the windscreen
wiper strokes as to the rain intensity.
The sensor has a range of adjustment that
gradually varies between wiper stationary
(no wiping) when the windscreen is dry,
to wiper at first continuous speed (con-
tinuous slow) with heavy rain.Activation
Move the right-hand stalk downwards by
one position.
The activation of the rain sensor is sig-
nalled by a control acquisition “stroke”.
IMPORTANT Keep clean the glass in the
sensor area.
Turning the knurled ring F-fig. 51it is
possible to increase the sensitivity of the
rain sensor, obtaining a quicker change
from stationary (no wiping) when the
windscreen is dry, to first continuous
speed (continuous slow).
The increase of the sensitivity of the rain
sensor is signalled by a control and acqui-
sition “stroke”.
Operating the windscreen washer with
the rain sensor activated the normal wash-
ing cycle is performed at the end of which
the rain sensor resumes its normal auto-
matic function.
fig. 52F0C0049mfig. 53F0C0053m
Page 63 of 274
62
SAFETY
DEVICES
CORRECT USE
OF THE CAR
WARNING
LIGHTS AND
MESSAGES
IN AN
EMERGENCY
CAR
MAINTENANCE
TECHNICAL
SPECIFICATIONS
INDEX
DASHBOARD
AND CONTROLS
Deactivation
Turn the ignition key to STOP.
To the following starting operation (key
at MAR), the sensor will not be reacti-
vated even is the stalk is on B-
fig. 51. In this event, to activate the rain
sensor, you have to move the stalk to A
or Cand then again to B.
When the rain sensor is again activated
in this way, at least one windscreen wiper
stroke occurs, even if the windscreen is
dry.
Do not activate the rain sen-
sor when washing the car in
an automatic washing station.In the event of ice on the
windscreen, make sure to have
disconnected the device.
Make sure to have discon-
nected the device when
cleaning the windscreen.
WARNING
The rain sensor is able to recognize and
automatically adjust itself in the presence
of the following particular conditions:
❒impurities on the controlled surface
(salt, dirt, etc.);
❒streaks of water caused by worn wiper
blades;
❒difference between day and night.
Page 64 of 274

63
SAFETY
DEVICES
CORRECT USE
OF THE CAR
WARNING
LIGHTS AND
MESSAGES
IN AN
EMERGENCY
CAR
MAINTENANCE
TECHNICAL
SPECIFICATIONS
INDEX
DASHBOARD
AND CONTROLS
REAR WINDOW WASHER/
WIPER fig. 54
The device can only work when the igni-
tion key is at MAR.
Pushing the stalk towards the dashboard
(unstable position), the rear window
washer jet and the continuous rear win-
dow wiper operation are activated.
Operation ends when the stalk is released.
Turning the knurled ring Afrom
Oto 'the rear window wiper with intermittent
operation is activated.
fig. 54F0C0047m
HEADLIGHT WASHER fig. 55
Fiat Stilo headlight washers are “re-
tractable”, i.e.: they are located inside the
front bumpers and they are activated (with
dipped beam headlights and/or main beam
headlights on) when the windscreen wash-
er is operated.
IMPORTANT Check at regular intervals
correct operation and cleanness of noz-
zles.
fig. 55F0C0270m
Never use the rear window
wiper to remove ice or snow
from the rear window. In these
conditions, the wiper is sub-
mitted to excessive effort that results
in motor protection cutting in and
wiper operation inhibition for few sec-
onds as a consequence. If operation is
not restored contact Fiat Dealership.